
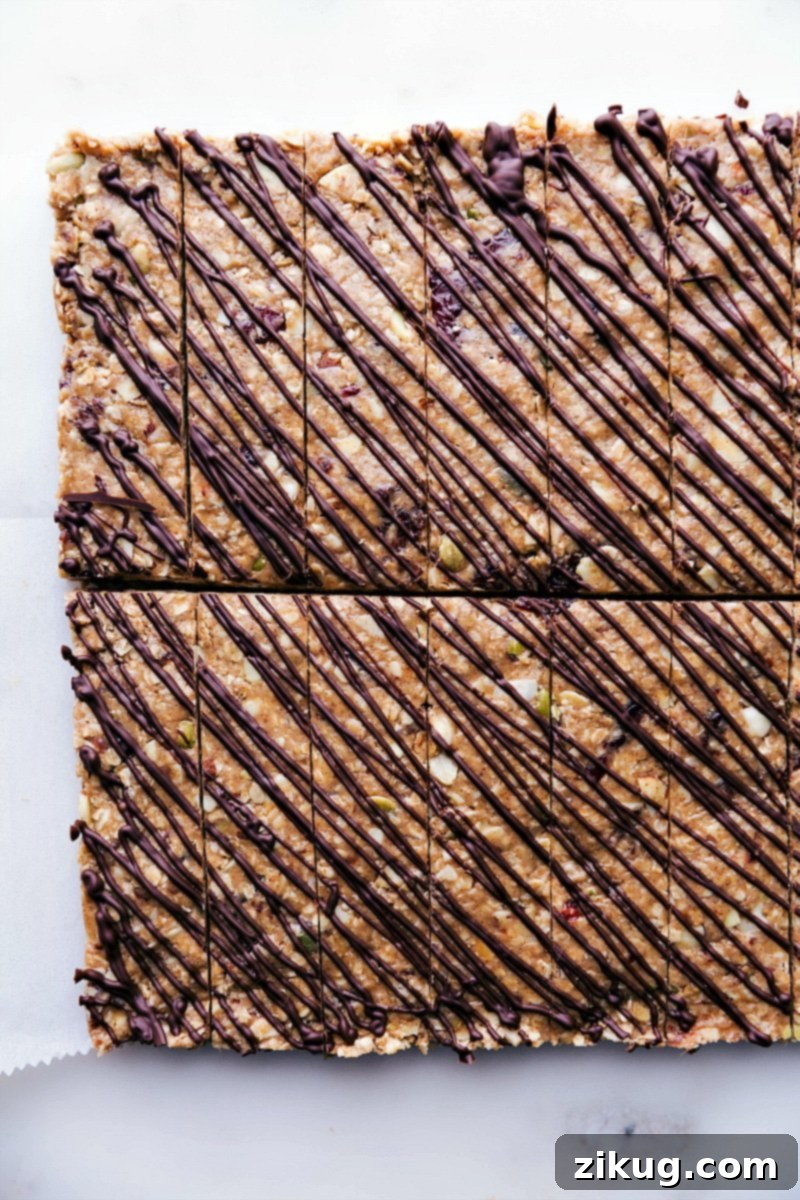
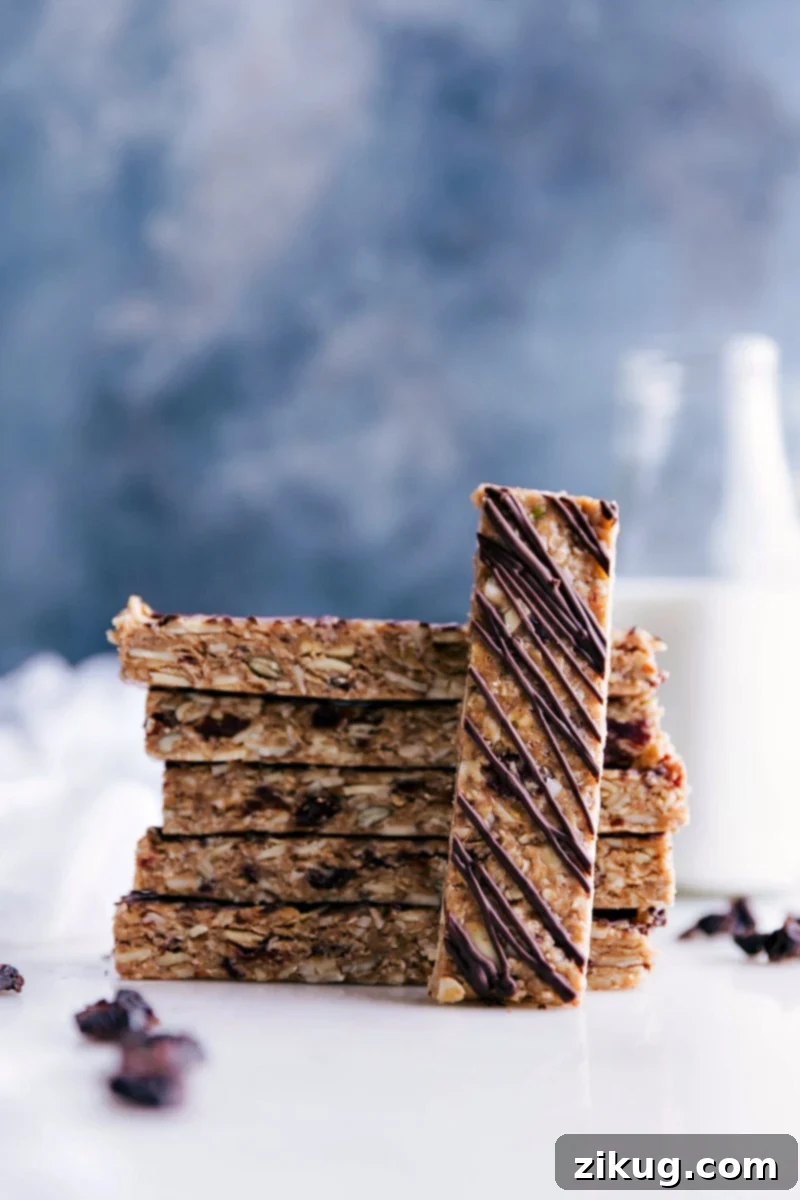
Discover the secret to wholesome, energy-boosting snacks with our incredibly delicious and easy No-Bake Granola Bars! Bursting with the tangy flavor of tart cherries and the satisfying crunch of sliced almonds, these homemade bars are a perfect breakfast solution or an ideal pick-me-up any time of day. Say goodbye to overly processed store-bought options and hello to a fresh, nutritious treat you can make right in your kitchen, faster than a trip to the grocery store. These chewy bars are packed with wholesome ingredients and the superfruit goodness of tart cherries, making them an unparalleled choice for a perfect breakfast or snack.
Got extra dried tart cherries? Don’t let them go to waste! You can use them to bake these delightful Cherry Scones for another delicious treat.
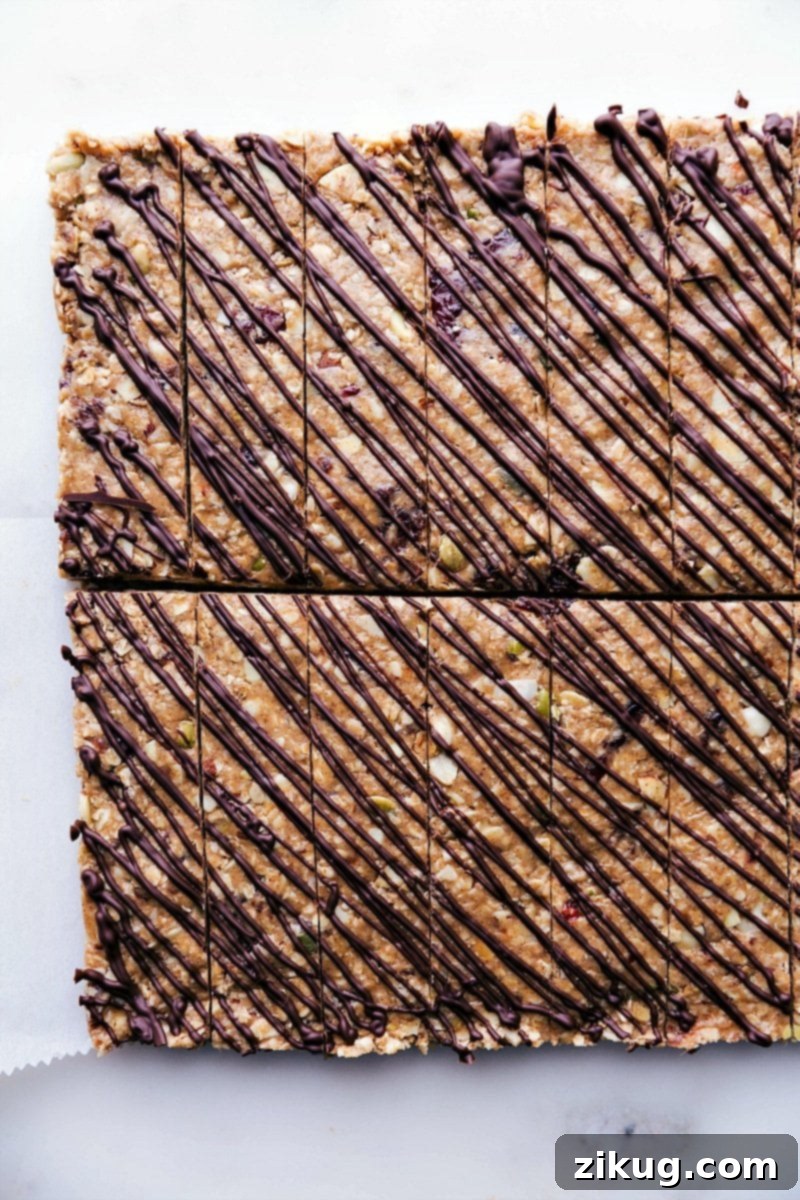
Best No-Bake Granola Bars: Your Ultimate Guide to a Healthy Homemade Snack
In an age where health-conscious choices are paramount, many of us are taking a closer look at the labels on our favorite snacks. Store-bought granola bars, while convenient, often come with a lengthy list of unfamiliar ingredients, artificial additives, and excessive sugars. The ingredient list on most commercial granola bars is simply too long, filled with preservatives and unnecessary fillers that we’d rather avoid.
Making your own No-Bake Granola Bars at home gives you complete control over what goes into your body and, more importantly, into your family’s. This recipe ensures a snack that is not only incredibly delicious but also genuinely nutritious, free from preservatives, and packed with natural goodness. It’s a simple, fast, and satisfying way to provide a healthy option that both adults and kids will adore, keeping everyone fueled and full without the sugar crash.
These No-Bake Granola Bars have become a beloved staple in my household. My kids absolutely love them, and I do too! They’re super easy to whip up and, unlike many other snacks, they actually keep you feeling full and energized for hours.
Why You’ll Love These No-Bake Granola Bars
Beyond the peace of mind that comes with homemade goodness, these No-Bake Granola Bars offer a multitude of benefits:
- Effortlessly Simple: Absolutely no oven required! Just a few straightforward steps, and you’ll have a fresh batch ready to chill and enjoy.
- Nutrient-Packed: Loaded with essential fiber from oats, healthy fats from nuts and seeds, and powerful antioxidants from tart cherries.
- Customizable: Easily adapt the ingredients to suit your specific taste preferences, dietary needs, or whatever you have available in your pantry.
- Family Favorite: This is a universally loved snack that consistently appeals to all ages, from toddlers to adults.
- Energy-Boosting: Provides sustained energy release without the typical sugar rush and subsequent crash, making them perfect for busy mornings, a pre-workout boost, or an afternoon slump.
- Cost-Effective: Significantly more economical to make at home than continually purchasing specialty granola bars from the store.
Key Ingredients for Your Homemade No-Bake Granola Bars
Crafting the perfect no-bake granola bar starts with selecting high-quality, wholesome ingredients. Here’s a closer look at what makes these bars so special:
- Nuts & Seeds: Our recipe prominently features sliced almonds and pumpkin seeds (also known as pepitas), which contribute a delightful crunch and a wealth of healthy fats, protein, and dietary fiber. For an enhanced depth of flavor, if you have a few extra minutes, consider lightly toasting the nuts and seeds before processing. This simple step can significantly deepen their nutty aroma and taste, elevating the entire bar. Don’t hesitate to experiment with other varieties of nuts like walnuts, pecans, or cashews, or additional seeds such as sunflower seeds or flax seeds for even more nutritional benefits and textural variety.
- Dried Tart Cherries: These vibrant little powerhouses deliver a wonderful balance of tangy sweetness and a satisfyingly chewy texture. Tart cherries are widely celebrated for their exceptional antioxidant properties and are often heralded as a “superfruit.” For optimal distribution and to ensure every single bite contains that delightful burst of cherry flavor, it’s crucial to chop the dried cherries into smaller pieces. This also helps them integrate much more effectively with the other dry ingredients in the mixture.
- Quick Oats: As the foundational ingredient for any great granola bar, quick oats are the preferred choice in this no-bake recipe. Their finer texture is superior for helping the bars bind together more effectively compared to coarser rolled oats, resulting in a perfectly cohesive and delightfully chewy consistency. If you are preparing these bars for individuals with gluten sensitivities or dietary restrictions, always ensure you use oats that are explicitly labeled and certified as “gluten-free” to prevent any cross-contamination.
- Honey and Almond Butter: These two ingredients are the magical binding agents that flawlessly hold everything together without the need for any baking. Creamy almond butter imparts a rich flavor and contributes healthy unsaturated fats, while honey provides natural sweetness and acts as a strong, natural adhesive. A crucial tip for effortless mixing: gently warming both the almond butter and honey in the microwave for about 30 seconds will make them significantly more fluid and much easier to mix evenly with the dry ingredients, preventing a crumbly or unevenly combined mixture.
- Vanilla Extract: A touch of high-quality vanilla extract is a secret weapon in countless recipes, and these granola bars are certainly no exception. It brilliantly enhances all the other flavors present, adding a warm, aromatic depth and complexity that makes the bars truly irresistible. Skipping this ingredient would mean missing out on that extra layer of deliciousness that truly distinguishes these homemade bars.
- Dark Chocolate: The final flourish! A delicate drizzle of melted dark chocolate not only adds a touch of visual elegance but also introduces a wonderfully bittersweet counterpoint to the tangy tart cherries. It is absolutely crucial to drizzle the chocolate over the *cooled* and *firm* bars to prevent it from melting directly into the mixture and losing its distinct texture and appealing appearance. Opting for a good-quality dark chocolate bar will make a noticeable difference here, perhaps even one with a subtle hint of sea salt for an elevated and sophisticated taste experience.
How To Make No-Bake Granola Bars: A Step-by-Step Guide
Creating these wholesome and delicious granola bars is a surprisingly straightforward process that requires minimal effort. Follow these simple steps for perfect results every single time:
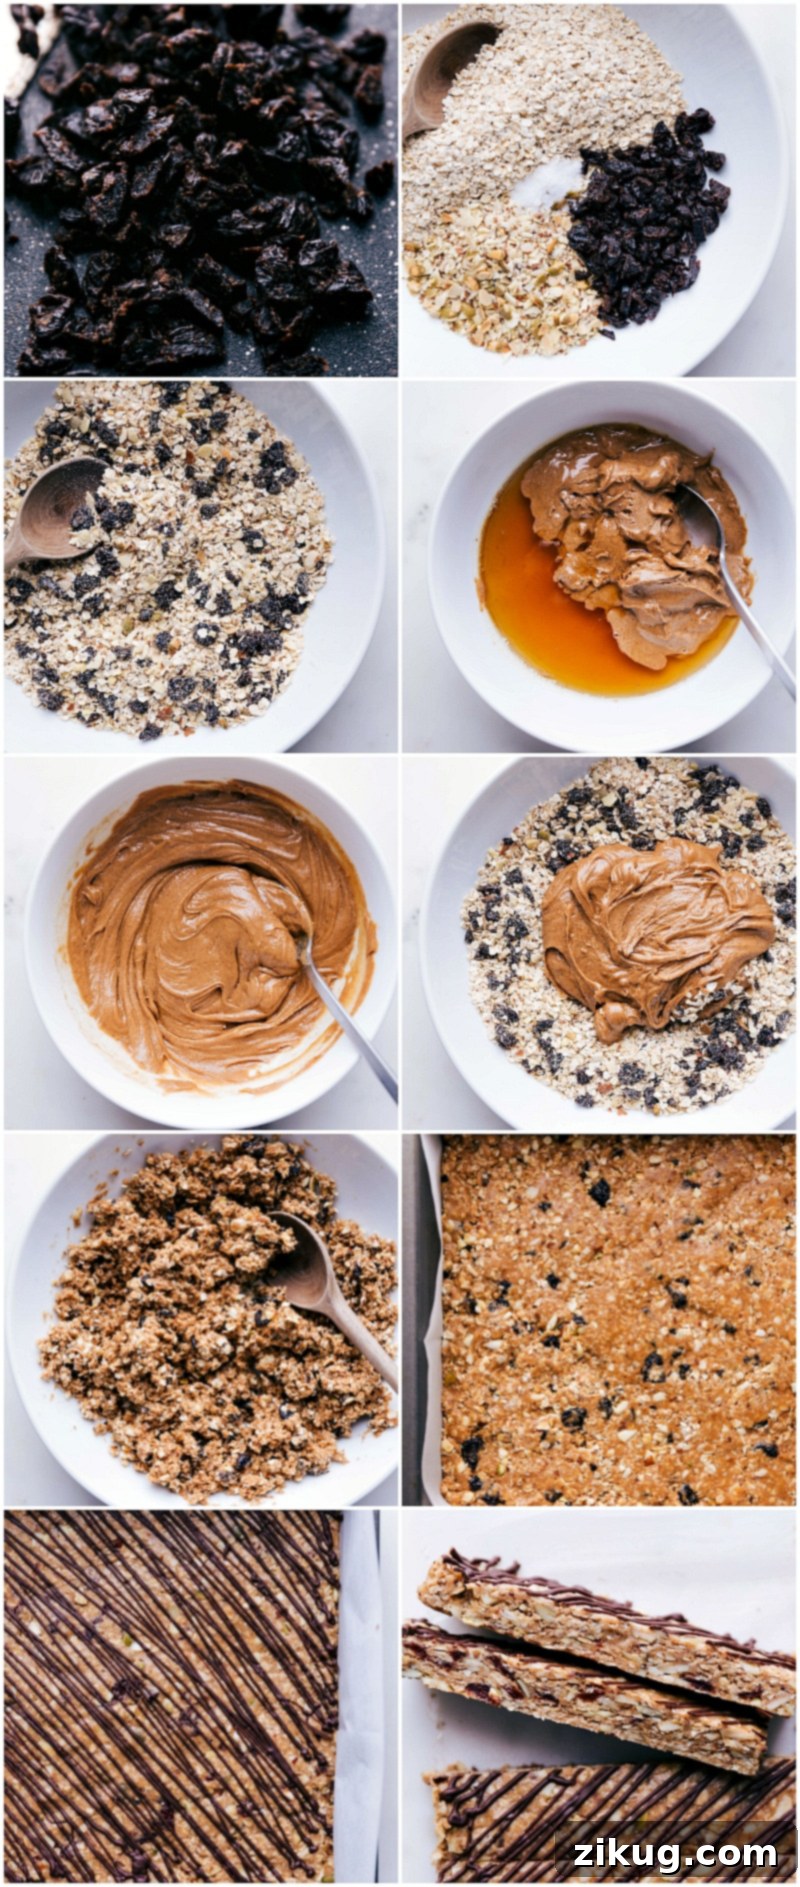
- Prepare Your Pan: Begin by lining a standard 9×9-inch baking pan with parchment paper. It’s important to leave a generous overhang of parchment paper on all sides – this creates a convenient ‘sling’ that will make it incredibly easy to lift the entire block of bars out of the pan once they’ve chilled.
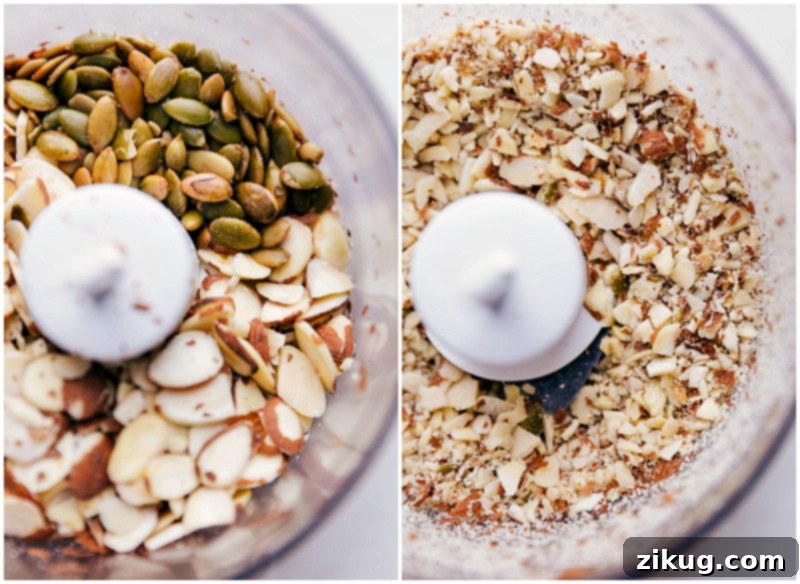
- Chop Nuts and Seeds: Add the sliced almonds and pumpkin seeds to a food processor. Pulse them for approximately 7-10 seconds, utilizing the chop setting. The objective here is to achieve small, broken-up pieces, not a fine, powdery consistency. Once chopped, transfer these ingredients to a large mixing bowl.
- Cut Cherries: Dried tart cherries tend to be quite sticky, so for the best results and to prevent them from clumping, coarsely chop them by hand using a sharp knife. Add these chopped cherries into the large bowl with your prepared nuts and seeds.
- Combine Dry Ingredients: Now, add the quick oats and salt to the bowl containing the nuts, seeds, and cherries. Stir everything together thoroughly, ensuring that all the dry ingredients are evenly mixed and distributed. This uniform distribution is absolutely key to ensuring the bars bind together properly and maintain their integrity.
- Heat Wet Ingredients: In a separate, microwave-safe bowl, combine the creamy almond butter and honey. Microwave the mixture for approximately 30 seconds. This gentle warming makes the mixture more pliable and easier to work with. Remove from the microwave, then stir in the vanilla extract. Continue stirring for about 30 seconds to 1 minute, or until the mixture is well blended and smooth.
- Combine Wet and Dry: Pour the warmed wet ingredients directly into the large bowl holding the dry mixture. This combined mixture will naturally be quite thick and sticky – don’t shy away from getting your hands in there to mix! Alternatively, a sturdy spoon or even a hand mixer on a low setting can effectively help combine everything until uniformly incorporated and thoroughly blended.
- Press into the Pan: Transfer the thoroughly combined mixture into your prepared 9×9-inch pan. Press down *very firmly* and evenly across the entire surface of the pan. You can use your hands, or for an exceptionally smooth and compact layer, use the bottom of a 1-cup measuring cup or a flat spatula. This firm pressing action is absolutely crucial to prevent the bars from crumbling once they are chilled and cut.
- Add Chocolate Drizzle: Coarsely chop a good quality dark chocolate bar and place the pieces in a small microwave-safe bowl. Microwave the chocolate in 15-second intervals, stirring thoroughly after each interval, until the chocolate is completely smooth and melted. Transfer the melted chocolate to a small ziplock bag and snip off a tiny corner, or use a piping bag fitted with a #3 tip. Artistically drizzle the chocolate over the pressed granola bars.
- Chill and Cut: Refrigerate the pan for a minimum of 30 minutes to an hour, or until the chocolate drizzle has fully hardened and the granola bars are firm to the touch. Once adequately chilled, use the parchment paper overhang to gently lift the entire block of granola bars out of the pan. Place it on a clean cutting board and use a sharp knife to cut into 16 individual bars (typically, this involves making 7 vertical cuts and 1 horizontal cut down the middle).
No-Bake Granola Bar Notes & Tips for Success
Achieving the ideal texture and ensuring the longevity of your homemade no-bake granola bars is simple with a few helpful tips and considerations:
- Patience is Key for Firming: Do not rush the chilling process! Allowing the bars to firm up completely in the refrigerator is a vital step. This not only ensures the chocolate drizzle hardens beautifully but also gives the quick oats ample time to properly absorb the almond butter and honey, resulting in a cohesive, perfectly chewy bar that will not fall apart when cut.
- Smart Storage Solutions: For short-term enjoyment, store your leftover granola bars in an airtight container at room temperature for up to one week. If you’ve made a larger batch or wish to preserve their freshness for an extended period, they can be refrigerated for up to two weeks. For even longer storage, these bars freeze exceptionally well for up to three months. When freezing, it’s recommended to wrap individual bars tightly in plastic wrap before placing them in a freezer-safe bag or container. Thaw them at room temperature for a convenient and delicious snack.
- Making Them Gluten-Free: It’s incredibly straightforward to adapt this recipe to be suitable for gluten-free diets. The only modification required is to ensure that the oats you purchase are explicitly labeled as “gluten-free,” as conventional oats can sometimes be susceptible to cross-contamination with gluten-containing grains during processing.
- Adjusting Mixture Consistency: The granola bar mixture should ideally be thick and quite sticky. If, during the mixing process, you find that your mix appears too dry and isn’t coming together well, gradually add a little more almond butter or honey, one tablespoon at a time, until it achieves the desired cohesive consistency. Conversely, if the mixture feels too wet or overly heavy, incorporate a few more quick oats or additional chopped nuts until it becomes easier to press and handle.
- The Importance of Quality Chocolate: Elevate the final presentation and taste of your granola bars by using a good-quality dark chocolate for the drizzle. A premium chocolate melts more smoothly, allowing for a more elegant drizzle, and provides a richer, more satisfying flavor profile. For an extra gourmet touch that truly tantalizes the taste buds, consider using a dark chocolate bar with a subtle hint of sea salt – the combination of sweet, salty, and tart is truly exceptional and addictive.
The Superpower of Tart Cherries
Beyond their deliciously tangy flavor and vibrant red color, tart cherries are bona fide nutritional superstars. These tiny fruits are densely packed with powerful antioxidants, particularly anthocyanins, which are responsible for their deep red hue and offer significant anti-inflammatory benefits to the body. Research suggests that consuming tart cherries can aid in muscle recovery after strenuous exercise, potentially improve sleep quality due to their natural melatonin content, and support overall joint health. They are a wonderful and versatile addition to your diet year-round, available not just in dried form, but also frozen, canned, in juice form, or as a concentrated extract. Incorporating them into these homemade granola bars is an excellent and convenient way to enjoy their extensive health benefits on a daily basis. To explore even more delicious and creative ways to integrate this incredible superfruit into your meals and snacks, we highly recommend visiting choosecherries.com.
More Yummy & Healthy Snack Ideas
If you’re looking for other wholesome and easy-to-make snacks, be sure to check out these fantastic recipes:
- No-Bake Energy Bites: Perfect for an on-the-go boost, packed with flavor and nutrients.
- No-Bake Breakfast Cookies: A delightful and healthy cookie alternative, often finished with a tempting chocolate drizzle.
- Breakfast Fruit Tarts: Light, refreshing tarts made with a wholesome base and topped with an array of fresh, vibrant fruit.
- Greek Yogurt Scones: Fluffy and flavorful scones, particularly delicious when made strawberry-flavored.
- Healthy Blueberry Muffins: Achieve bakery-style perfection with these wholesome and moist blueberry muffins.
No-Bake Granola Bar
By Chelsea Lords
Soft, chewy No-Bake Granola Bars are packed with tart cherries, sliced almonds, and wholesome ingredients—perfect for breakfast or a quick snack!
Prep Time: 20 minutes
Total Time: 20 minutes
Servings: 16 bars
Equipment
- 9 x 9-inch baking pan
- Parchment paper
- Food processor
- Hand mixer (optional)
Ingredients
- 1 cup sliced almonds
- 1/4 cup pumpkin seeds or pepitas, shelled and roasted
- 2/3 cup dried tart cherries
- 1-3/4 cups quick oats
- 1/2 teaspoon salt
- 1 cup creamy almond butter
- 1/2 cup honey
- 1 teaspoon vanilla extract
- 1/4 cup dark chocolate, coarsely chopped from a dark chocolate bar
Instructions
- Line a 9×9-inch pan with parchment paper. Leave a generous overhang for easy removal of bars.
- Add sliced almonds and pumpkin seeds to a food processor. Pulse for about 7–10 seconds (on chop setting), until the nuts are broken up. Add to a large bowl. With a sharp knife, coarsely chop the dried tart cherries (they don’t chop well in the food processor). Place in the bowl with the nuts. Add in the quick oats and salt. Stir together.
- In another bowl, add creamy almond butter and honey. Microwave for 30 seconds. Remove and pour in the vanilla extract. Stir for about 30 seconds to 1 minute or until well blended.
- Pour the wet ingredients into the dry ingredients. Use a hand mixer (or your hands) to mix/knead the mixture together until combined. This takes a little effort, but it will come together. Once the ingredients are well combined, pour into the prepared pan and press firmly into place with your hands. Use the bottom of a 1-cup measuring cup to really pack the mixture together in an even layer. Press firmly to avoid crumbling later.
- Coarsely chop a dark chocolate bar and place it in a small microwave-safe bowl. Microwave for 15 seconds, stir for 15 seconds, and if needed, return to the microwave and repeat for another heat/stir cycle until smooth and melted. Using a spatula, transfer the melted chocolate to a small bag and snip off the corner (or use a piping bag fitted with a #3 tip). Drizzle chocolate over the bars.
- Refrigerate the pan for 30 minutes to an hour or until chocolate is hardened and the bars are firm. When you’re ready to slice, lift the bars out of the pan by using the parchment overhang. Use a sharp knife to cut into 16 bars (7 vertical cuts and 1 horizontal cut down the middle).
Recipe Notes
Storage: Store leftover granola bars in an airtight container at room temperature for up to a week. For longer storage, keep them in the fridge for up to two weeks, or freeze for up to 3 months.
Nutrition
Serving: 1 serving | Calories: 249kcal | Carbohydrates: 24.8g | Protein: 6.8g | Fat: 15.5g | Sodium: 2.8mg | Fiber: 3.8g | Sugar: 16.4g
Nutrition information is automatically calculated, so should only be used as an approximation.
Like this recipe? We’d love to hear from you! Leave a comment below and share your thoughts and experiences.