
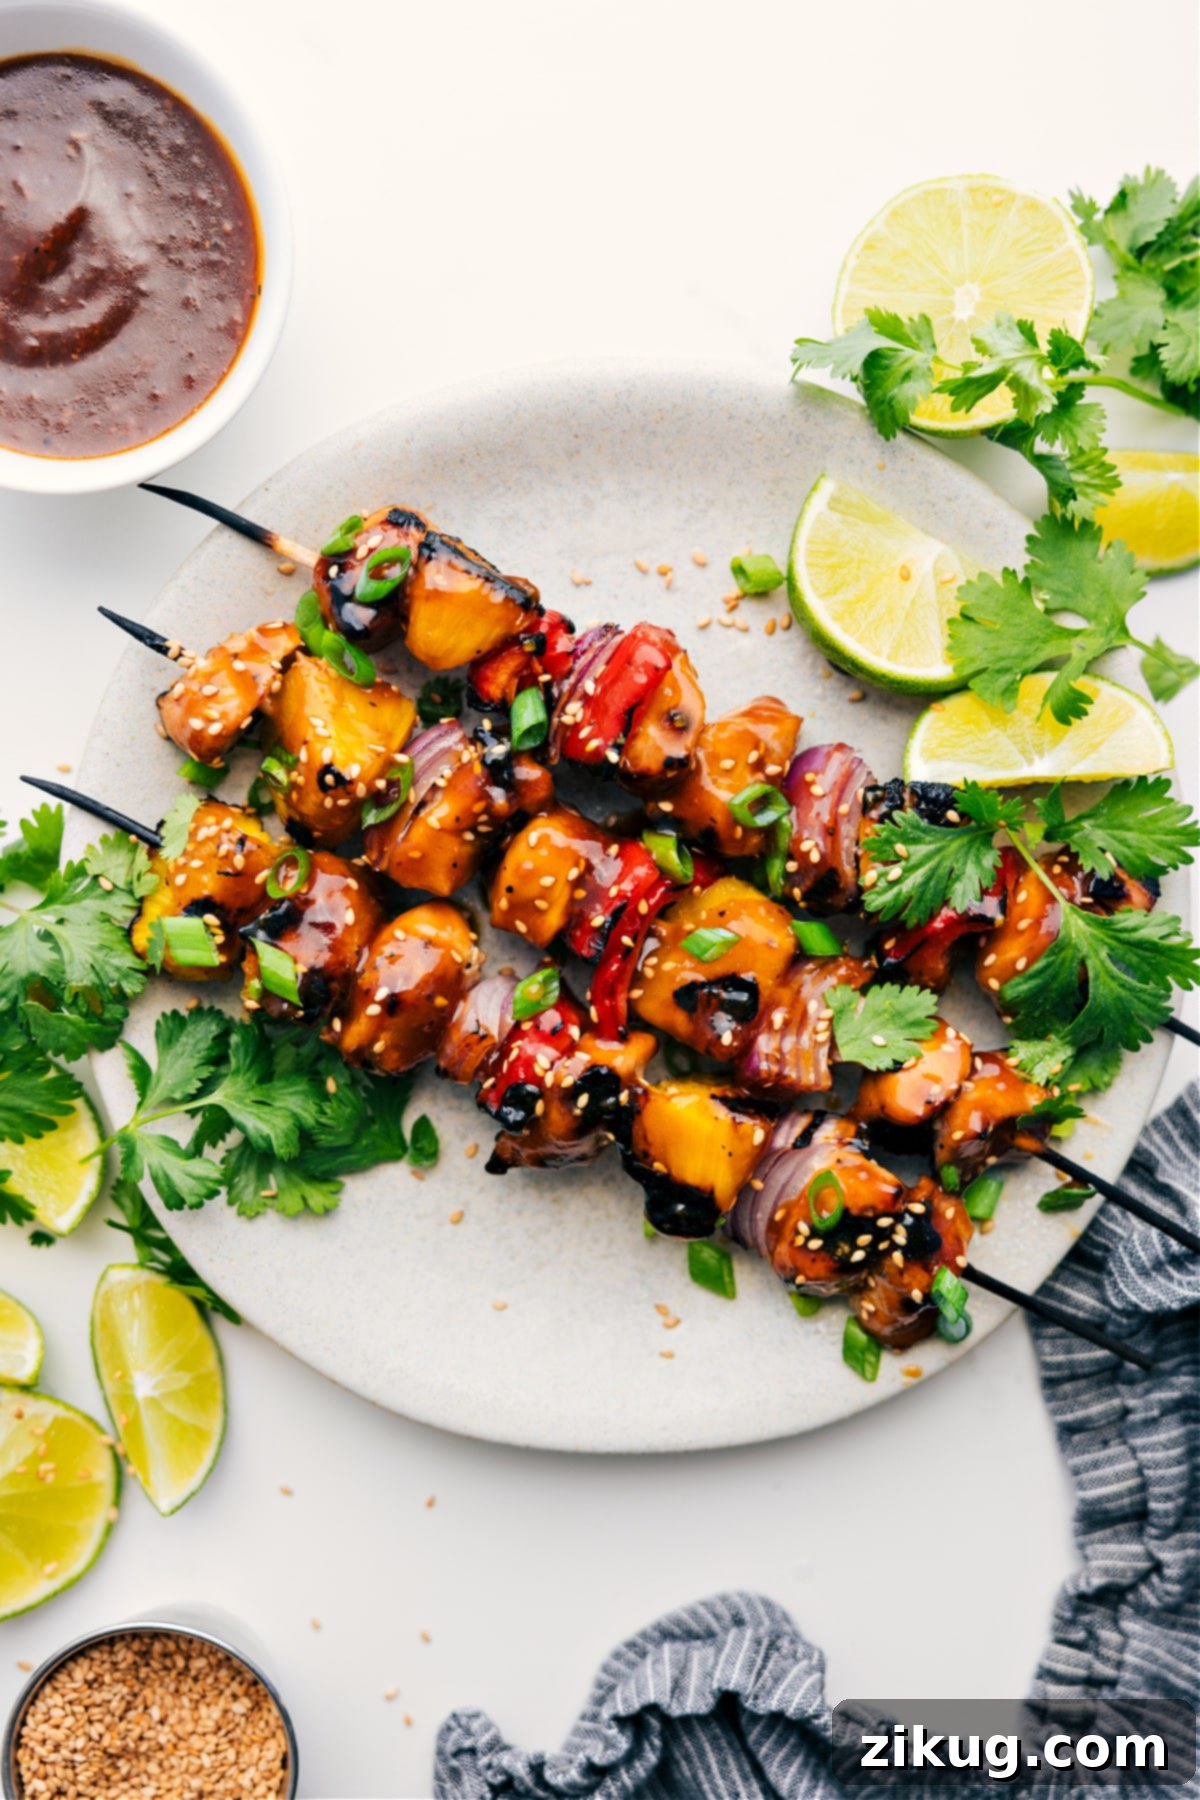
Teriyaki Chicken Skewers are a quintessential summer dish, offering a harmonious blend of tender, juicy chicken, sweetly caramelized pineapple, and crisp, fresh vegetables, all enveloped in a rich, sticky-sweet teriyaki glaze. This recipe transforms ordinary chicken into an extraordinary meal that’s perfect for a backyard barbecue, a quick weeknight dinner, or even a flavorful meal prep solution. Served best over fragrant coconut rice, these skewers promise a taste of paradise with every bite.
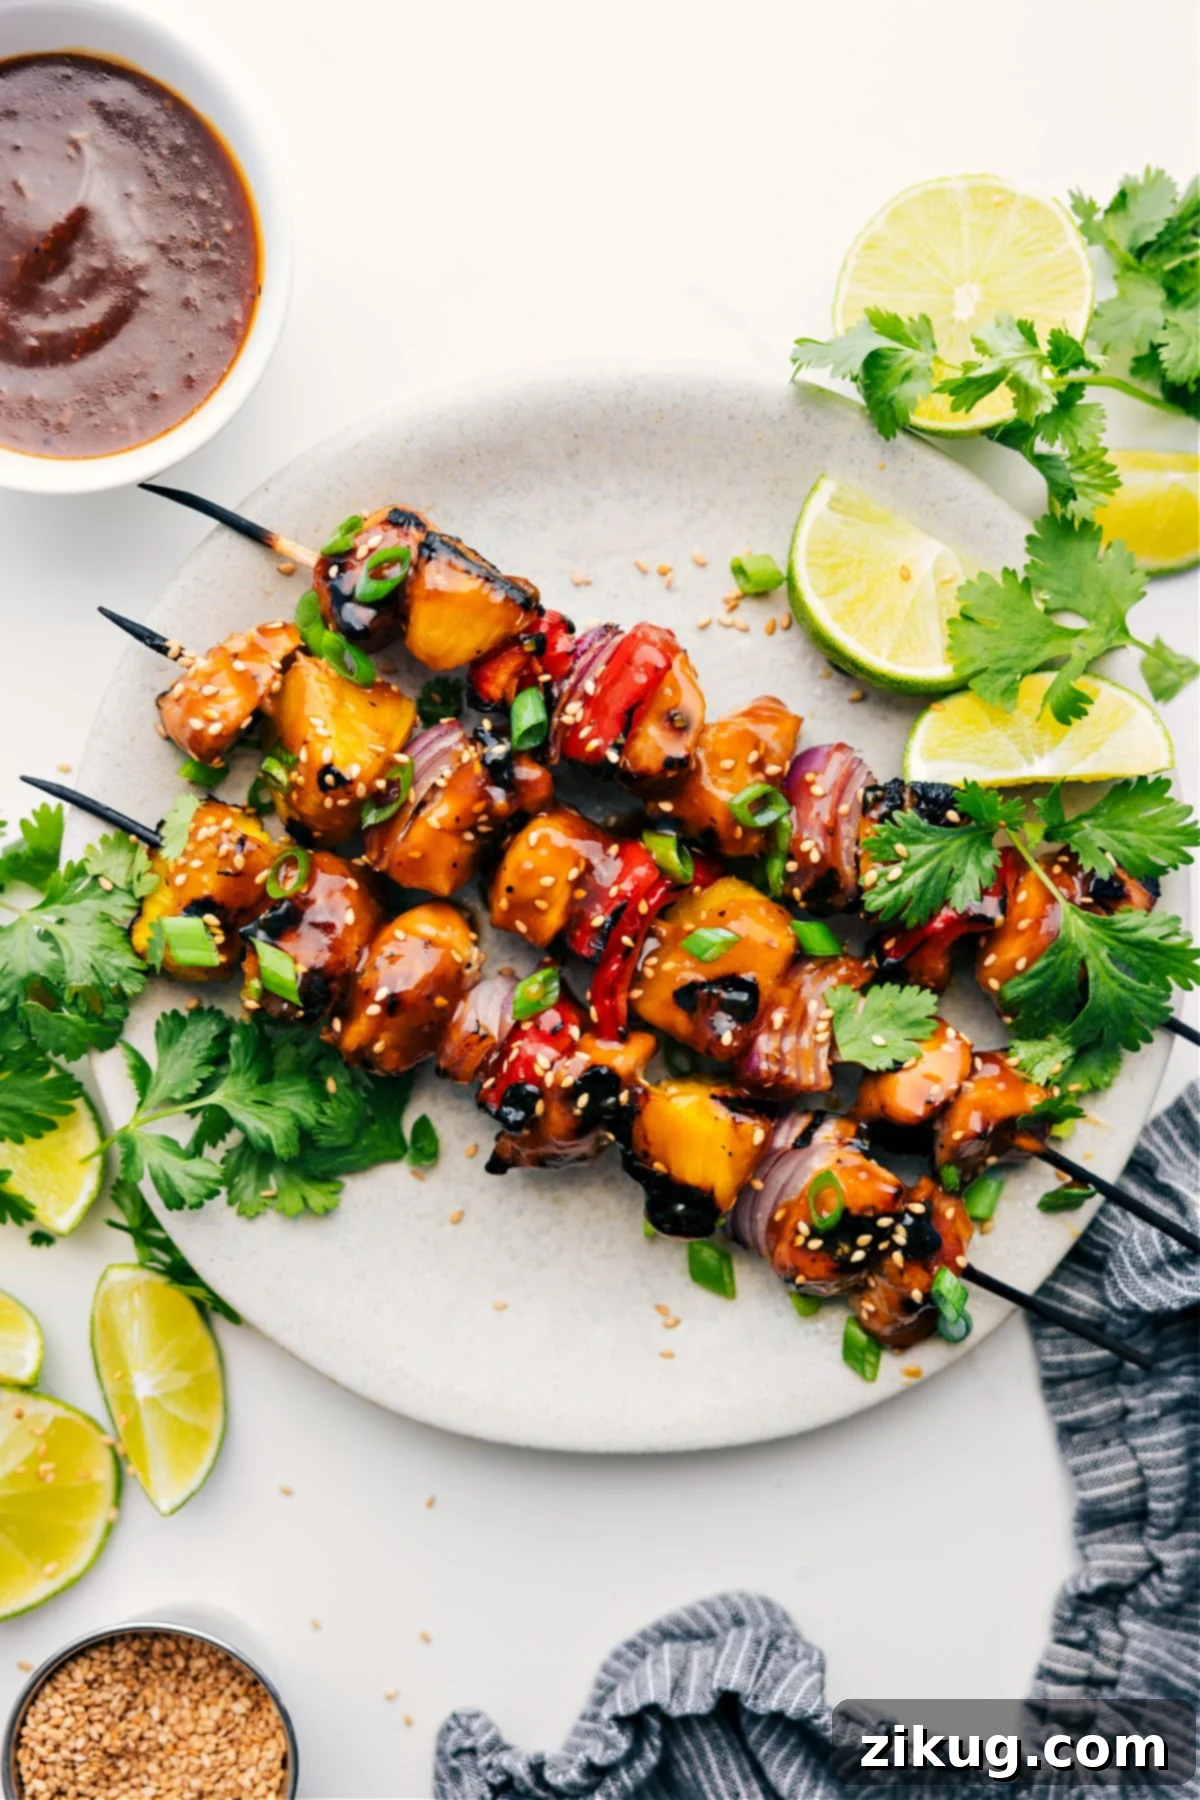

Author’s Note
Teriyaki Chicken Skewers So Good, They Should Come With a Warning!
There’s something truly magical about grilled chicken, but when you elevate it by threading it onto skewers with succulent pineapple and fresh vegetables, it becomes an instant favorite. This isn’t just a meal; it’s an experience, a delightful explosion of flavors and textures that simply can’t be beaten.
After perfecting my beloved Teriyaki Burger, I knew the sweet, savory, and sticky sauce I developed for it deserved a starring role in another dish. Grilled chicken was the obvious choice, and naturally, it had to be presented as chicken pineapple skewers. I meticulously tweaked the original sauce, enhancing its richness and ensuring it could pull double duty: acting as a deeply penetrating marinade and transforming into a luscious dipping sauce that complements the grilled elements perfectly.
The chicken generously soaks up every drop of that incredible flavor, while the pineapple achieves a beautiful caramelization on the grill, adding an irresistible sweetness and char. This recipe delivers a meal that is not only quick to prepare and incredibly fun to eat but also bursting with fresh, vibrant tastes. It’s essentially the embodiment of summer dinner goals – simple, satisfying, and utterly delicious!
Key Ingredients for Perfect Teriyaki Chicken Skewers
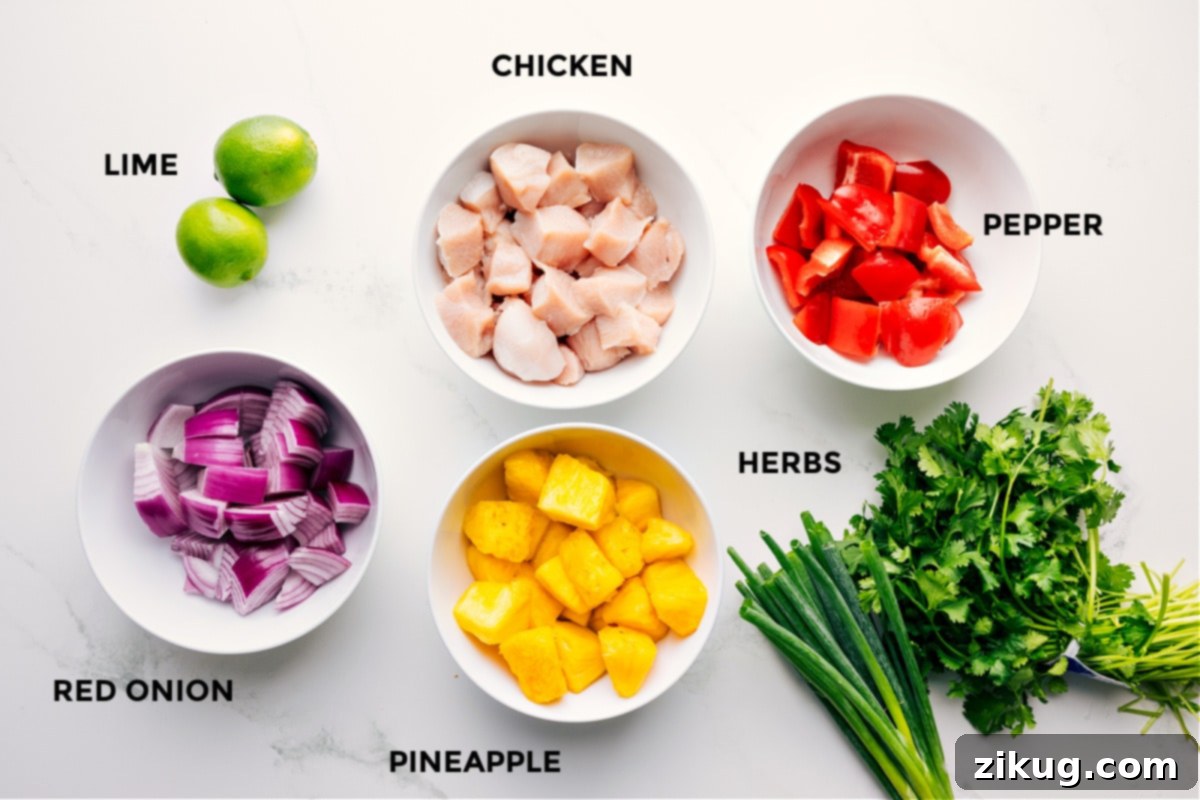
Crafting exceptional teriyaki chicken skewers starts with choosing the right ingredients. Each component plays a vital role in building the robust flavors and appealing textures that make this dish a standout. Here’s a detailed look at what you’ll need and how to make the best selections or substitutions.
Your Skewer Ingredient Cheat Sheet
| Ingredient | Why It Works & Expert Tips |
|---|---|
| Chicken | You can use either boneless, skinless chicken breasts or thighs, cut into 1 ½-inch chunks. Chicken thighs are generally more forgiving, remaining tender and juicy even if slightly overcooked, making them an excellent choice for grilling. Breasts are leaner and cook faster. |
| Fresh Pineapple | Nothing quite compares to the vibrant flavor and firm texture of fresh pineapple, which caramelizes beautifully on the grill. However, if fresh isn’t available, canned pineapple chunks can be used in a pinch. Be sure to drain them thoroughly to prevent excess moisture from diluting the teriyaki marinade. |
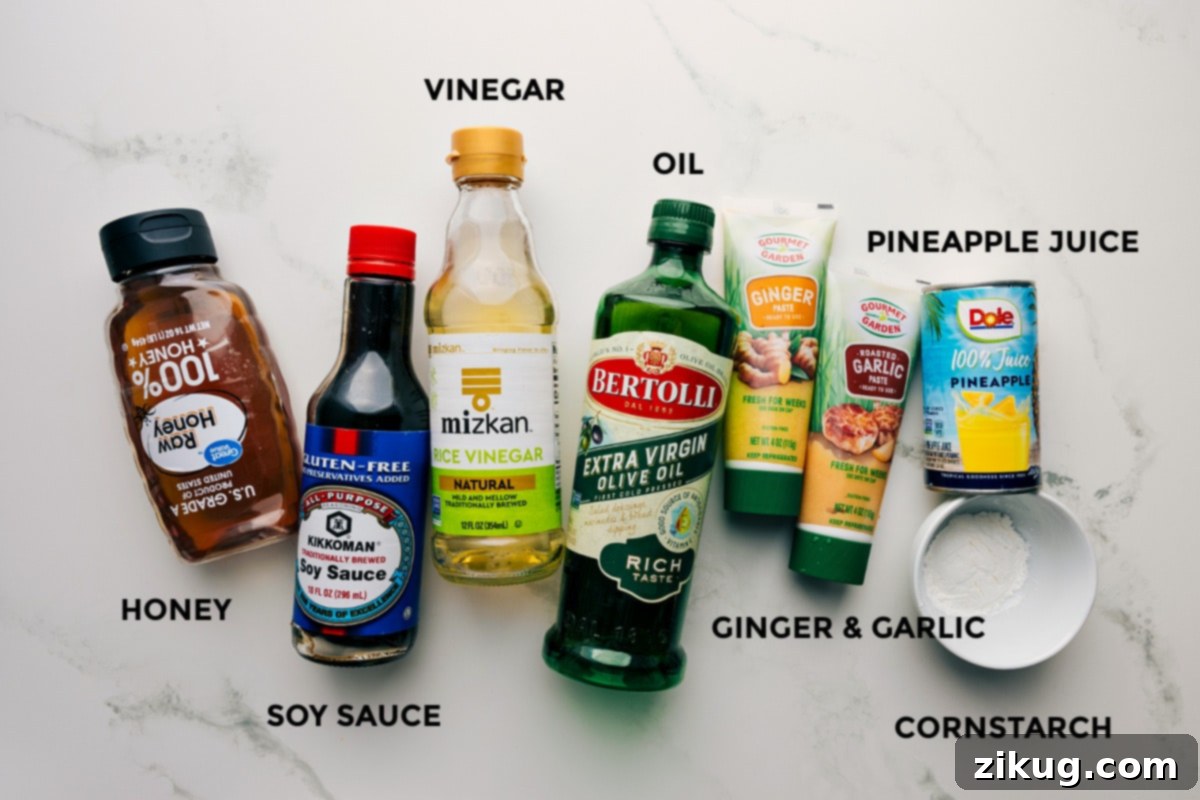
| Soy Sauce | Opt for low-sodium soy sauce to maintain control over the overall saltiness of your glaze. This allows you to season the chicken to your preference. For those avoiding gluten, Tamari is a fantastic gluten-free alternative that delivers a similar umami depth. |
| Pineapple Juice | Always use 100% pure pineapple juice. Avoid sugary drink mixes or cocktails, as they contain artificial flavors and too much added sugar that can burn on the grill and detract from the natural fruit flavor. Pure juice ensures a clean, authentic tropical sweetness. |
| Rice Vinegar | This ingredient is crucial for adding a bright tang that perfectly balances the sweetness of the teriyaki sauce, preventing it from being cloyingly sweet. If you don’t have rice vinegar, apple cider vinegar makes a good backup, offering a similar acidic profile. |
| Fresh Ginger | Freshly minced ginger provides an aromatic warmth and zesty bite that is essential to classic teriyaki flavor. For convenience, ginger paste or frozen ginger cubes are quick and easy substitutes that maintain much of the fresh flavor. |
| Cornstarch | Cornstarch is used to create a “slurry” (cornstarch mixed with water) that thickens the teriyaki sauce to a beautiful, glossy glaze. This gives it that signature sticky consistency. Arrowroot or tapioca starch are excellent gluten-free alternatives if needed. |
| Other Vegetables | Beyond the essential red bell pepper and red onion, feel free to experiment with other sturdy vegetables that hold up well on the grill. Zucchini slices, cherry tomatoes, or even mushrooms can add more variety and color to your skewers. Ensure they are cut into similar-sized pieces for even cooking. |
The combination of these carefully selected ingredients ensures that each bite of your teriyaki chicken skewers is packed with balanced sweet, savory, and tangy notes, along with delightful textures.
How To Make Chicken Teriyaki Skewers: A Step-by-Step Guide
Creating these delightful Teriyaki Chicken Skewers is straightforward, but a few key techniques will ensure they turn out perfectly every time. Below is a detailed breakdown of the process, complete with essential tips to guide you. The full recipe card is available at the end of this article for quick reference.
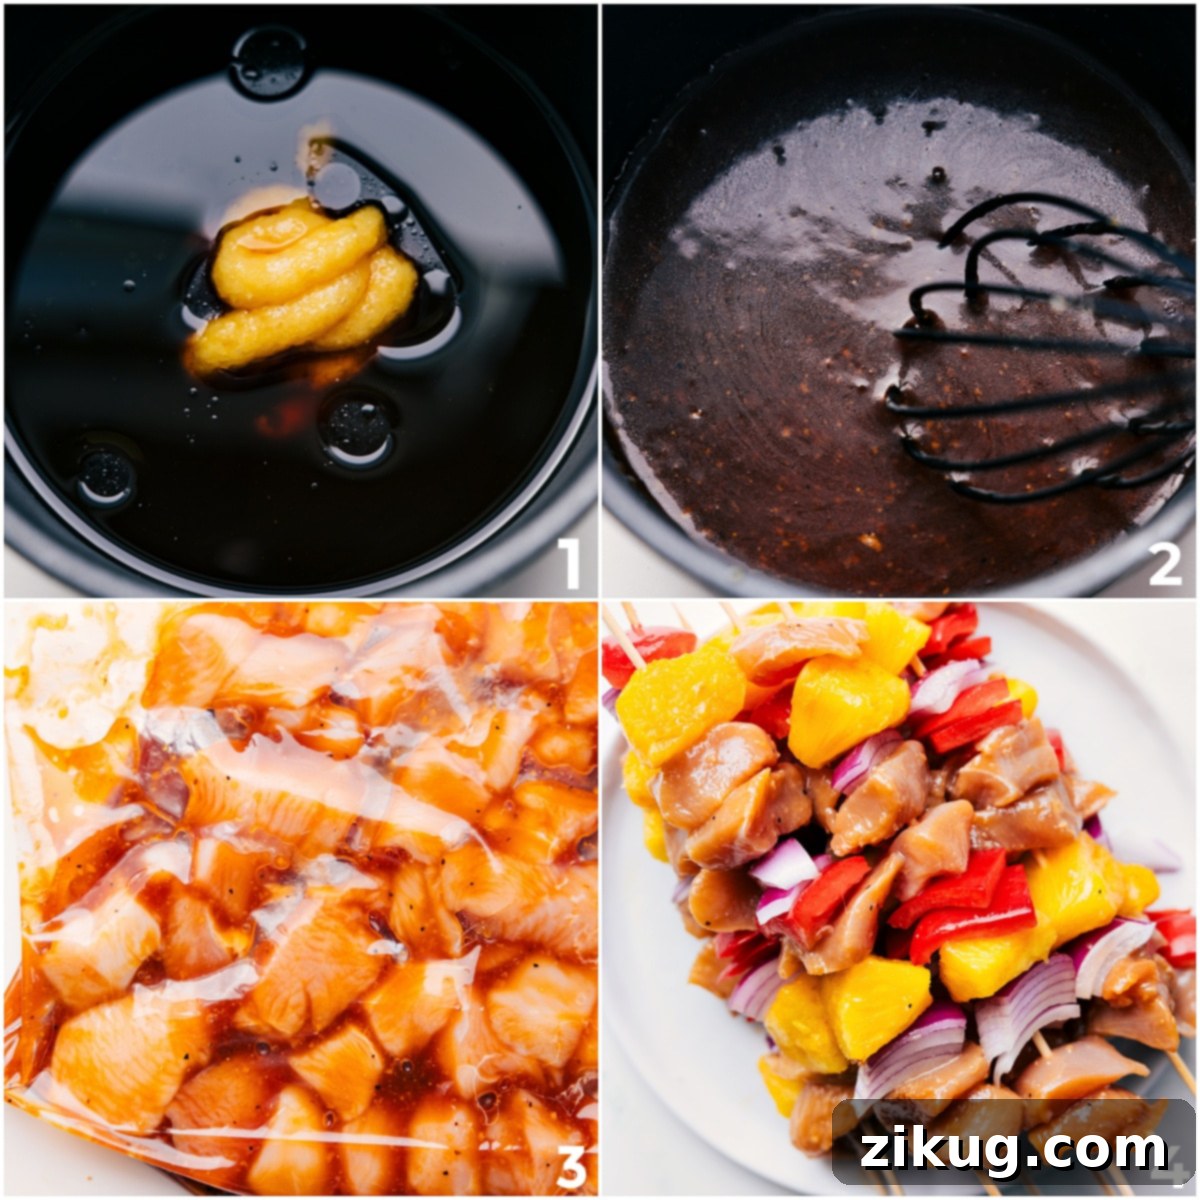
- **Crafting the Perfect Teriyaki Sauce:** In a small pot, combine soy sauce, honey, pineapple juice, olive oil, rice vinegar, minced garlic, minced ginger, and a touch of salt and pepper. Whisk these ingredients together until well combined. In a separate small bowl, prepare a cornstarch slurry by whisking 1 tablespoon of cornstarch with 1 tablespoon of water until it’s completely smooth and lump-free.
- **Thickening the Glaze:** Place the pot with the sauce mixture over medium heat. Once it starts to simmer, slowly drizzle in the cornstarch slurry while whisking constantly. This continuous whisking is crucial to prevent lumps and achieve a silky-smooth consistency. Bring the mixture to a boil and continue cooking for 1-3 minutes, or until the sauce begins to visibly thicken and coats the back of a spoon. Remove it from the heat immediately and allow it to cool completely. Cooling is vital because hot marinade can start to cook the chicken. Taste the cooled sauce and adjust salt if needed.
- **Marinating for Flavor:** Cut your boneless, skinless chicken breasts or thighs into uniform 1 ½-inch chunks. Place the chicken pieces into a large plastic bag or a shallow container. Remember to reserve about ½ cup of the cooled teriyaki sauce for brushing onto the skewers later – this will be your luscious finishing glaze. Pour the remaining sauce over the chicken, ensuring all pieces are thoroughly coated. Massage the bag or mix well to combine. Allow the chicken to marinate in the refrigerator for at least 30 minutes, but for the deepest flavor, marinate for up to 8 hours. Don’t marinate for more than 8 hours, especially with acidic marinades, as the chicken can start to break down.
- **Preparing Your Skewers:** If you’re using wooden skewers, it’s crucial to soak them in warm water for at least 30 minutes before threading. This prevents them from burning and splintering on the hot grill. Alternatively, opt for durable metal skewers, which require no pre-soaking and are reusable.
- **Assembling Your Skewers:** Preheat your grill to medium-high heat, aiming for a temperature between 400-450°F. While the grill heats, meticulously clean the grates and then generously oil them to prevent sticking. A common method is to drench a paper towel in cooking oil, hold it with tongs, and rub it over the hot grates. Begin threading your marinated chicken chunks, bell pepper pieces, red onion cubes, and fresh pineapple onto the skewers. Crucially, leave a tiny space between each ingredient. This small gap allows for even cooking and proper caramelization on all sides, ensuring everything cooks through without steaming. Alternate colors for an appealing presentation!
- **Grilling to Perfection:** Place the assembled skewers on the preheated, oiled grill grates. Grill for a total of 8-10 minutes, turning them once halfway through to ensure even cooking and beautiful grill marks. The chicken is done when it reaches an internal temperature of 160°F. It’s important to pull the chicken off the grill at this point because carryover heat will continue to cook it to the safe internal temperature of 165°F, ensuring moist and tender results.
- **The Finishing Touch:** Once removed from the grill, immediately brush the reserved ½ cup of teriyaki sauce over the hot skewers. The residual heat will help the sauce adhere, creating that signature sticky, glossy glaze. Garnish generously with chopped green onions, fresh cilantro, or toasted unsweetened coconut flakes as desired. Serve these flavorful skewers with fresh lime wedges for a burst of citrus. For the ultimate tropical meal, pair them with creamy coconut-lime rice.
Featured Comment
“These taste as good as they look. Feels like I brought Tucanos to my home. Fun to use my grill to create something other than steak.”
– Adam
Easy Make-Ahead & Storage Tips for Teriyaki Chicken Skewers
These teriyaki chicken skewers are not only delicious but also incredibly versatile when it comes to preparation and storage. Whether you’re planning a party or simply prepping meals for the week, these tips will help you stay organized and enjoy fresh, flavorful meals.
- Make Ahead: Streamline your cooking process by preparing components in advance. The homemade teriyaki sauce can be whisked together and stored in an airtight container in the refrigerator for up to five days. You can marinate the chicken in the sauce for a minimum of 30 minutes, or for enhanced flavor, up to eight hours. For ultimate convenience, thread the chicken and vegetables onto skewers, cover them tightly, and refrigerate for up to one day before you plan to grill. This allows for quick assembly and cooking on busy days.
- Keeping Leftovers Fresh: Store any leftover teriyaki chicken skewers in an airtight container in the refrigerator for 3 to 4 days. For longer storage, you can freeze the cooked skewers (remove the chicken and veggies from the skewers for easier storage) for up to 3 months. When reheating, place them on a baking sheet and warm them in an oven preheated to 375°F (190°C) until thoroughly hot, about 10-15 minutes, or gently reheat in a pan on the stovetop.
These make-ahead and storage options ensure that you can enjoy these fantastic teriyaki chicken skewers with minimal fuss, making them a perfect addition to your culinary repertoire.
Serve Teriyaki Chicken Skewers With: Perfect Pairings
Enhance your Teriyaki Chicken Skewers meal with these delicious and complementary side dishes. Each pairing is designed to complete your plate, offering a balanced and satisfying dining experience:
Side Dishes
Coconut Rice Recipe
Creamy, aromatic coconut rice is the ideal companion, offering a subtle sweetness and rich texture that perfectly contrasts the savory teriyaki glaze.
Healthy
Cucumber Salad
A crisp and cool cucumber salad provides a refreshing counterpoint to the warm, savory skewers, cleansing the palate with its light, tangy dressing.
Fruit Salads
Peach Fruit Salad
Add a burst of seasonal sweetness with a fresh peach fruit salad. Its natural juices and soft textures offer a delightful complement to the grilled components.
Pasta Salads
Easy Macaroni Salad
For a heartier side, a classic macaroni salad brings a comforting, creamy texture and a familiar, savory flavor that pairs wonderfully with grilled chicken.
Additionally, consider a simple green salad with a light vinaigrette, grilled corn on the cob, or steamed green beans to round out your meal.

Teriyaki Chicken Skewers
Chelsea Lords
20 minutes
15 minutes
35 minutes
4
servings
Equipment
-
Wooden skewers or metal skewers, see note 1
-
Small pot
-
Grill
Ingredients
For the Teriyaki Sauce:
-
1/2
cup
soy sauce (low sodium recommended) -
1/4
cup
honey -
1/4
cup
100% pineapple juice -
3
tablespoons
olive oil -
3
tablespoons
rice vinegar -
2
tablespoons
minced garlic
(about 4 to 6 cloves) -
2
tablespoons
minced ginger (fresh is best) -
Salt and pepper (to taste, approx. 1/4 tsp pepper) -
1
tablespoon
cornstarch
plus 1 tablespoon water (for slurry)
For the Skewers:
-
1
pound
boneless, skinless chicken breasts
or thighs, cut into 1-1/2 inch chunks -
1
cup
chopped red bell pepper (1-inch pieces) -
1
cup
cubed red onion (1-inch pieces) -
1-1/4
cup
cubed fresh pineapple (1-inch pieces)
For Serving (Optional):
-
Coconut-lime rice
(optional, see note 2) -
Toppings as desired
(green onions, cilantro, unsweetened coconut flakes, fresh lime wedges, see note 3)
Instructions
-
Prepare the Teriyaki Sauce: In a small pot, whisk together soy sauce, honey, pineapple juice, olive oil, rice vinegar, minced garlic, minced ginger, salt, and pepper to taste (e.g., 1/4 tsp pepper). In a separate small bowl, combine the cornstarch and 1 tablespoon of water; whisk until smooth to create a slurry. While whisking the sauce in the pot constantly, slowly drizzle in the cornstarch mixture. Bring the sauce to a boil and cook for about 1-3 minutes, stirring continuously, until it just begins to thicken to a glossy glaze. Remove from heat and let cool completely. Taste and add more salt if needed.
-
Marinate the Chicken: Cut the chicken into 1-1/2 inch pieces. Place chicken chunks in a large plastic bag or shallow container. Measure out and remove 1/2 cup of the cooled teriyaki sauce; set this portion aside for brushing later. Pour the remaining teriyaki sauce over the chicken, ensuring all pieces are well-coated. Knead the bag or mix thoroughly to distribute the marinade. Marinate the chicken in the refrigerator for a minimum of 30 minutes, or up to 8 hours for deeper flavor.
-
Assemble Skewers: Preheat your grill to medium-high heat (400–450°F). While heating, thoroughly clean the grill grates and then generously oil them (e.g., using a paper towel drenched in oil held with tongs). If using wooden skewers, remember to soak them in water for 10-30 minutes beforehand to prevent burning. Thread the marinated chicken, red bell pepper chunks, red onion cubes, and fresh pineapple pieces onto the skewers, leaving a small space between each ingredient to allow for even cooking and proper charring.
-
Grill and Serve: Place the prepared skewers on the hot, oiled grill grates. Grill for 8–10 minutes in total, turning the skewers once halfway through, until the chicken is cooked through and reaches an internal temperature of 160°F. (The chicken will continue to cook to 165°F with carryover heat once removed from the grill.) Take the skewers off the grill and immediately brush them with the reserved 1/2 cup of teriyaki sauce to enhance the glaze. Garnish with chopped green onions, fresh cilantro, and/or unsweetened toasted coconut flakes as desired. Serve immediately with fresh lime wedges. For a complete meal, serve over creamy coconut-lime rice (see note 2).
Recipe Notes
Note 2 – Coconut Lime Rice Recipe:
- 1 cup basmati rice (approx. 184g) – Basmati is recommended as other varieties may become overly mushy.
- 1 can (13.5 oz) full-fat coconut milk
- 1/2 cup water (approx. 101g)
- 1 large lime (yielding about 1 teaspoon zest and 2 tablespoons juice)
To prepare: Combine 1 cup basmati rice, 1 can full-fat coconut milk, 1/2 cup water, and 1/2 teaspoon fine sea salt (or to taste) in a medium saucepan. Stir well and bring the mixture to a boil over high heat. Once boiling, reduce the heat to low, cover the pot tightly with a lid, and allow it to simmer for 13–18 minutes, or until all the liquid has been absorbed. Remove the pot from the heat, keeping it covered, and let it stand undisturbed for 10–15 minutes. This crucial resting period prevents the rice from becoming sticky. Finally, fluff the rice with a fork, then stir in the zest and juice of 1 lime until fully incorporated.
Note 3 – Optional Topping Suggestions: Enhance your skewers and rice with additional toppings such as unsweetened coconut flakes (toasted for extra flavor), fresh lime wedges for squeezing, and fresh cilantro or chopped green onions for a burst of color and herbaceous freshness.
Nutrition Note: The provided nutrition information pertains only to the Teriyaki Chicken Skewers and does not include coconut rice or any other optional serving ingredients.
Leftover Storage: Allow any leftover skewers to cool completely to room temperature. Remove the chicken and vegetables from the skewers for easier storage. Place them in an airtight container or a freezer-safe bag. Store in the refrigerator for 3-4 days, or freeze for up to 2-3 months. Reheat at 375°F until hot.
Nutrition
Serving:
1
serving
|
Calories:
382
kcal
|
Carbohydrates:
37
g
|
Protein:
29
g
|
Fat:
14
g
|
Saturated Fat:
2
g
|
Polyunsaturated Fat:
2
g
|
Monounsaturated Fat:
9
g
|
Trans Fat:
0.01
g
|
Cholesterol:
73
mg
|
Sodium:
1758
mg
|
Potassium:
735
mg
|
Fiber:
3
g
|
Sugar:
28
g
|
Vitamin A:
1232
IU
|
Vitamin C:
80
mg
|
Calcium:
42
mg
|
Iron:
2
mg
Nutrition information is automatically calculated and should be used as an approximation only. Actual values may vary.
Enjoyed this recipe? Leave a comment below!
Versatile Cooking Methods Cheatsheet for Teriyaki Chicken Skewers
While grilling offers that unbeatable smoky flavor, these Teriyaki Chicken Skewers are incredibly adaptable and can be cooked using various methods, making them a perfect year-round meal. Here’s a cheatsheet to guide you through different cooking options:
| Method | Temp | Time | Quick Tip & Instructions |
|---|---|---|---|
| Grill Teriyaki Chicken Skewers | 400 to 450°F (Medium-High Heat) | 8 to 10 minutes | Preheat your grill to medium-high heat. Ensure grates are clean and well-oiled to prevent sticking. Place skewers on the grill, turning them once halfway through cooking. Pull the chicken off the grill when it reaches an internal temperature of 160°F; carryover heat will bring it to the safe 165°F. |
| Air Fryer Teriyaki Chicken Skewers | 400°F (200°C) | 11 to 12 minutes | For a quick and easy indoor option, air frying works wonders. Lightly oil your air fryer basket to prevent sticking. Arrange skewers in a single layer, ensuring they are not overcrowded. Cook for 11-12 minutes, flipping the skewers halfway through for even cooking and browning. Check for an internal temperature of 165°F. |
| Oven Broil Teriyaki Chicken Skewers | High Broil Setting | 10 to 12 minutes | An excellent alternative when grilling isn’t an option. Adjust an oven rack to the center of your oven. Preheat the broiler to high. Line a large sheet pan with aluminum foil and generously spray it with cooking spray to prevent sticking and make cleanup easier. Arrange skewers on the prepared sheet pan. Broil for 10-12 minutes, turning once halfway through, until chicken is cooked to 165°F internal temperature and the pineapple is caramelized. Keep a close eye on them to prevent burning due to the high heat. |
No matter which method you choose, these teriyaki chicken skewers are guaranteed to be a flavorful and satisfying meal that will become a staple in your recipe rotation.