
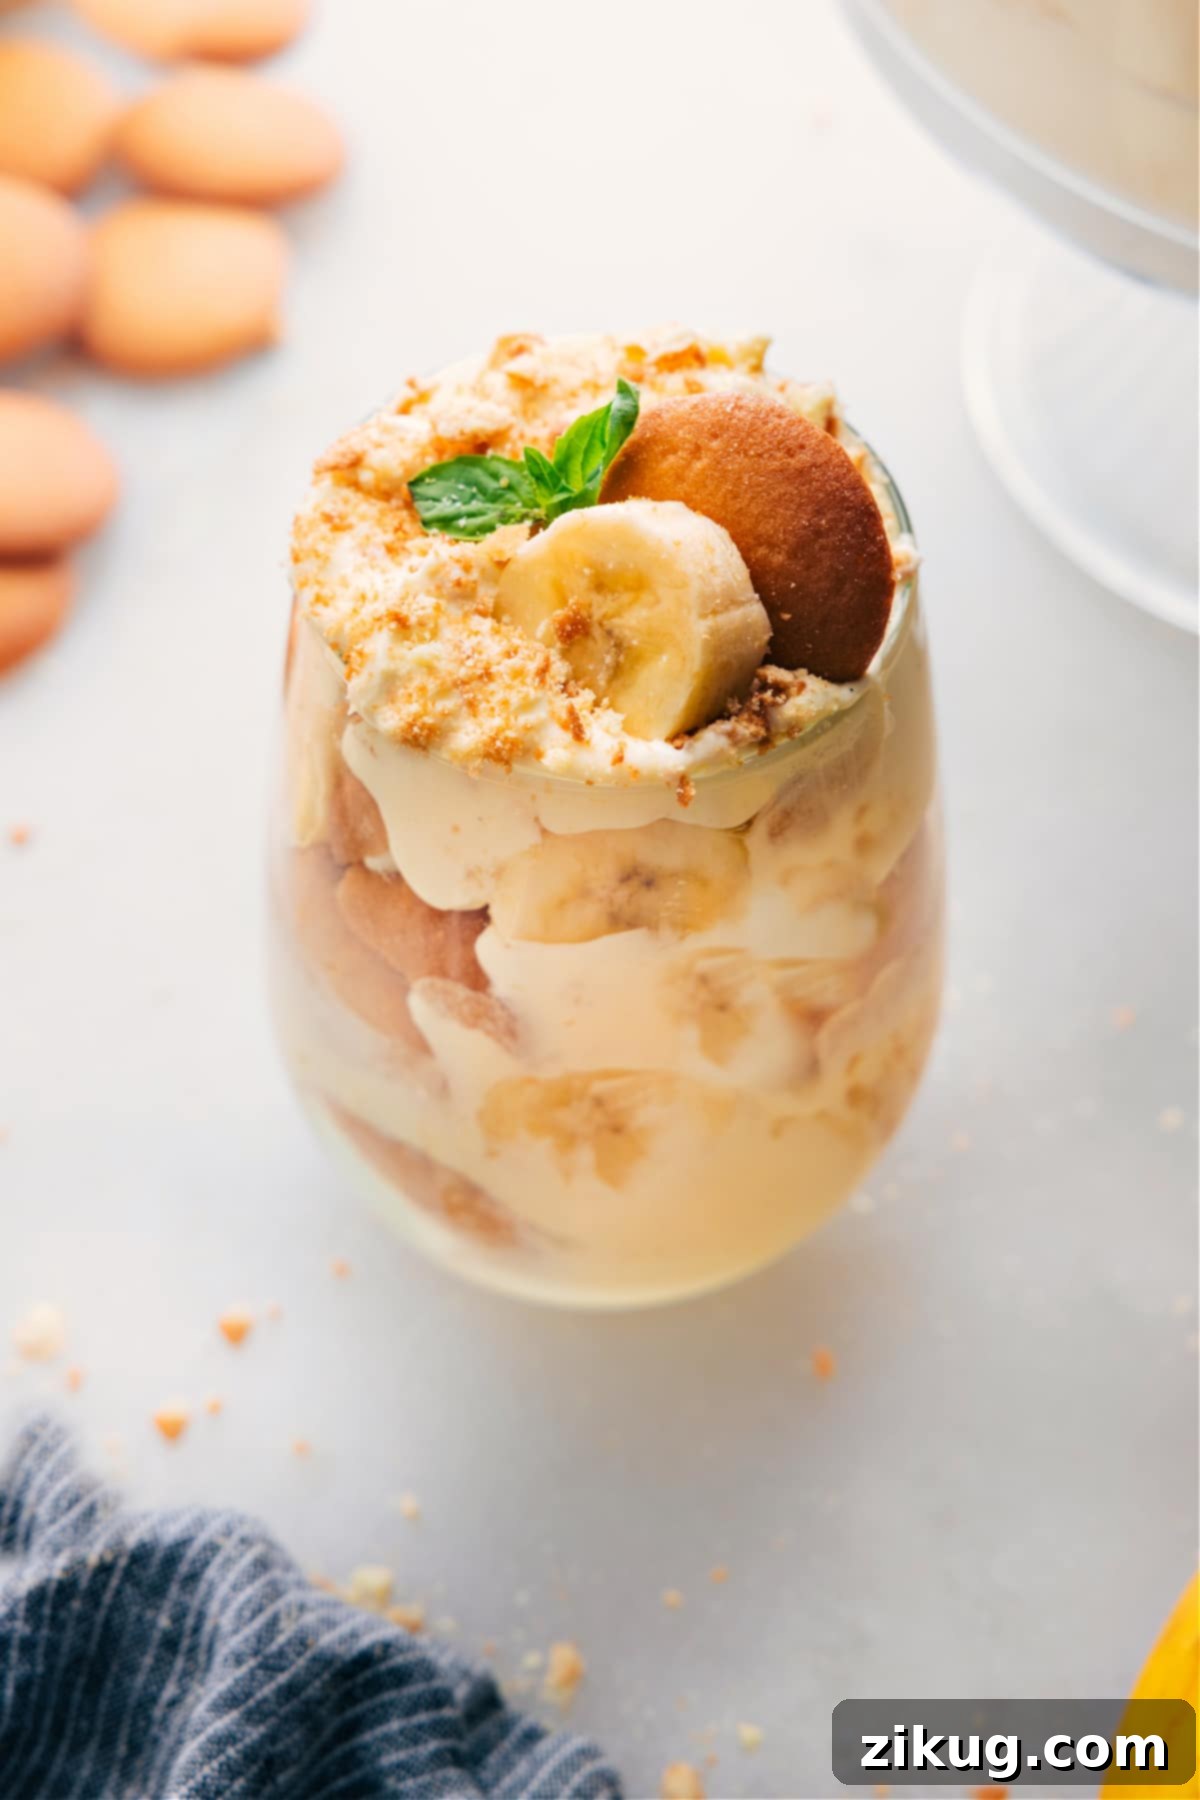
Indulge in the ultimate no-bake dessert with this incredibly easy and luscious Banana Pudding Recipe. Inspired by the legendary classic from Magnolia Bakery, this homemade version brings together layers of velvety, sweet pudding, tender vanilla wafer cookies, and perfectly ripe fresh bananas to create a truly irresistible treat that everyone will adore. It’s an ideal dessert for gatherings, potlucks, or simply satisfying a sweet craving, promising rich flavor and a wonderfully smooth texture with every spoonful.

Author’s Note
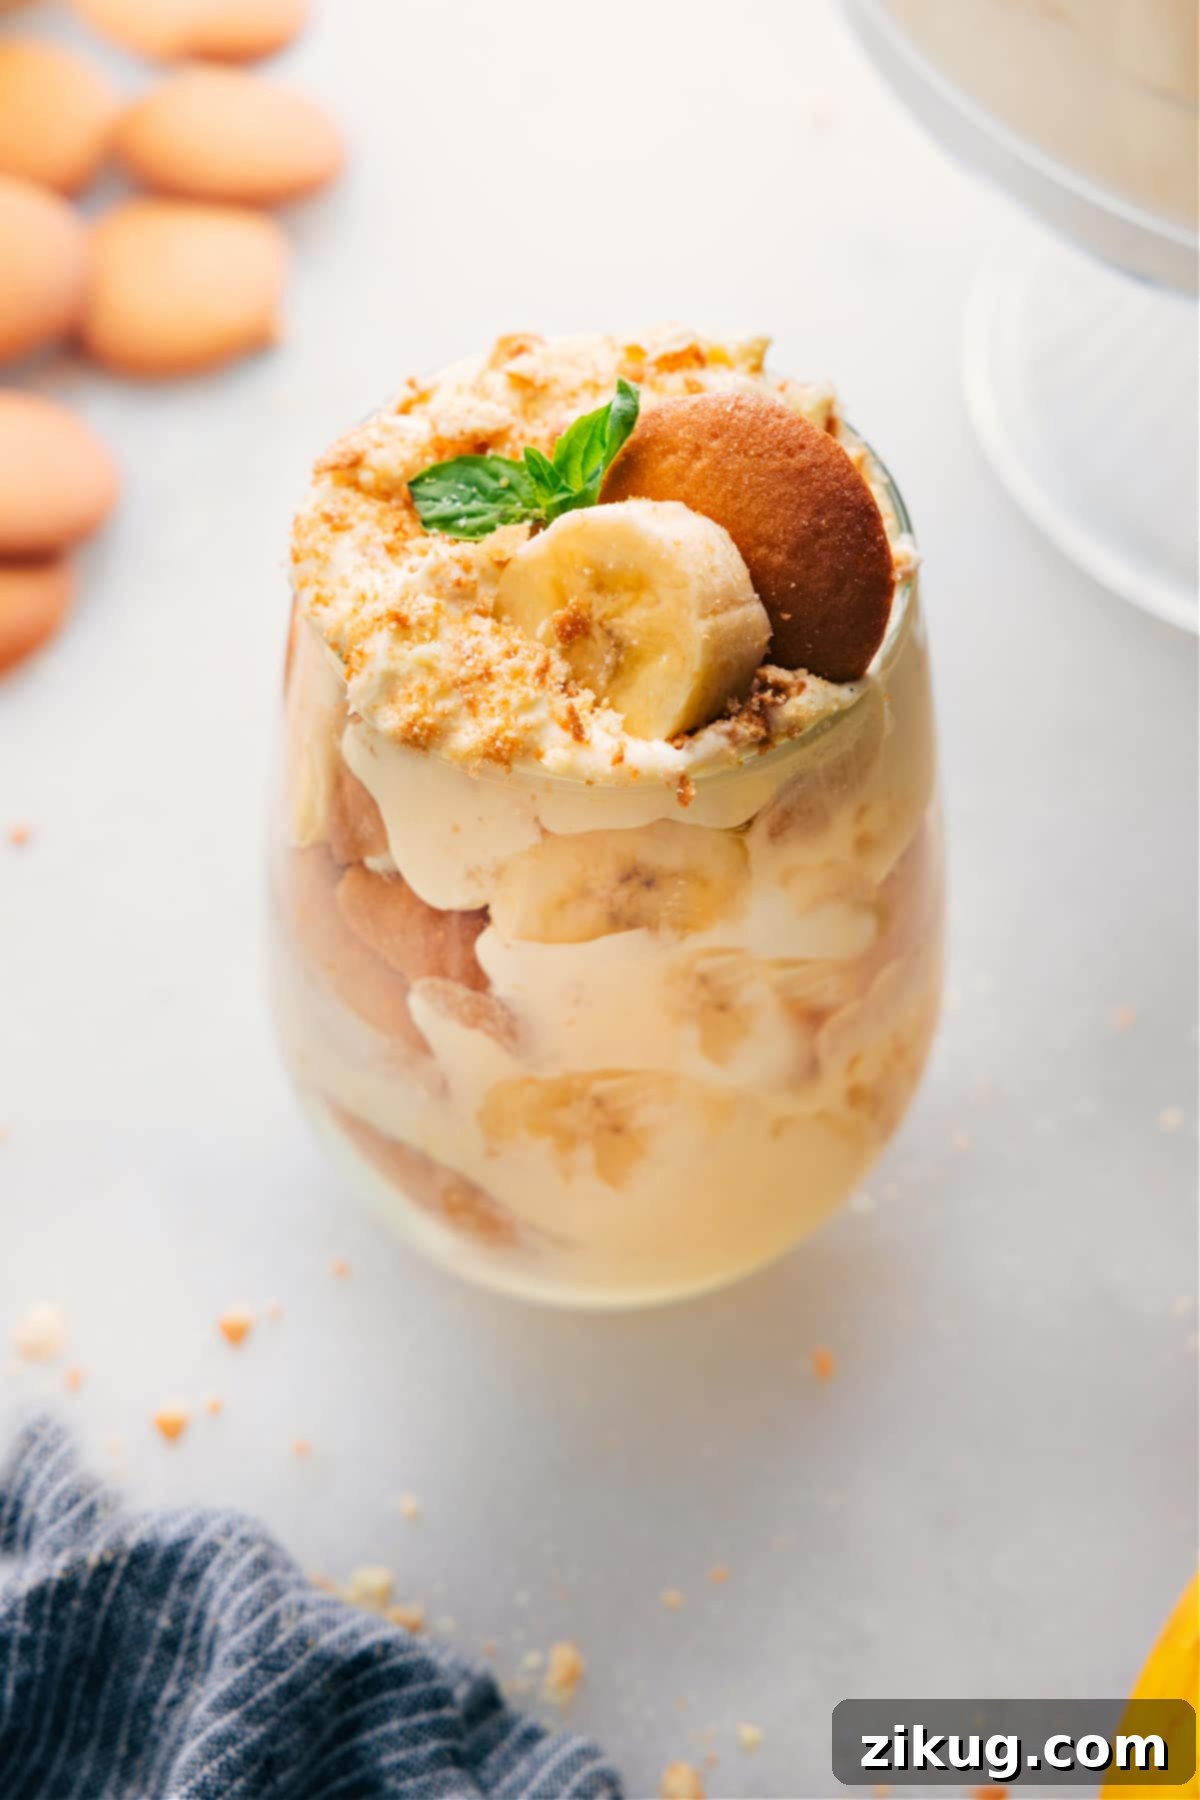
My Beloved Homemade Magnolia Bakery Banana Pudding Copycat!
For my husband and me, no trip to New York City is complete without a pilgrimage to Magnolia Bakery for their iconic banana pudding. It’s more than just a dessert; it’s a creamy, dreamy experience, a true culinary highlight we always crave. When Magnolia Bakery generously shared their original recipe online, I knew it was my chance to bring that magic home. I was eager to try it out and, of course, add my own unique touch to make it truly mine while staying faithful to its beloved essence.
The journey to perfecting this recipe involved a bit of joyful experimentation and a few thoughtful tweaks. After some dedicated testing, carefully adjusting ratios and methods, I finally achieved a pudding I was proud of. The moment of truth arrived when I presented it to my husband. The reaction I got was priceless – a genuine gasp of delight, followed by his enthusiastic declaration that it was “just as good as the iconic Magnolia version we always crave!” That moment solidified this recipe as a staple in our home.
What makes this easy banana pudding recipe truly remarkable is its simplicity. It requires only a few basic, readily available ingredients and, best of all, no baking whatsoever! You can whip up this crowd-pleasing dessert in surprisingly little time, transforming simple components into a layered masterpiece. It’s a fantastic recipe for novice bakers and seasoned dessert enthusiasts alike, promising a delicious outcome without the stress. Get ready to impress your family and friends with this homemade treat that tastes straight out of a famous bakery!
Essential Ingredients for Your Perfect Banana Pudding
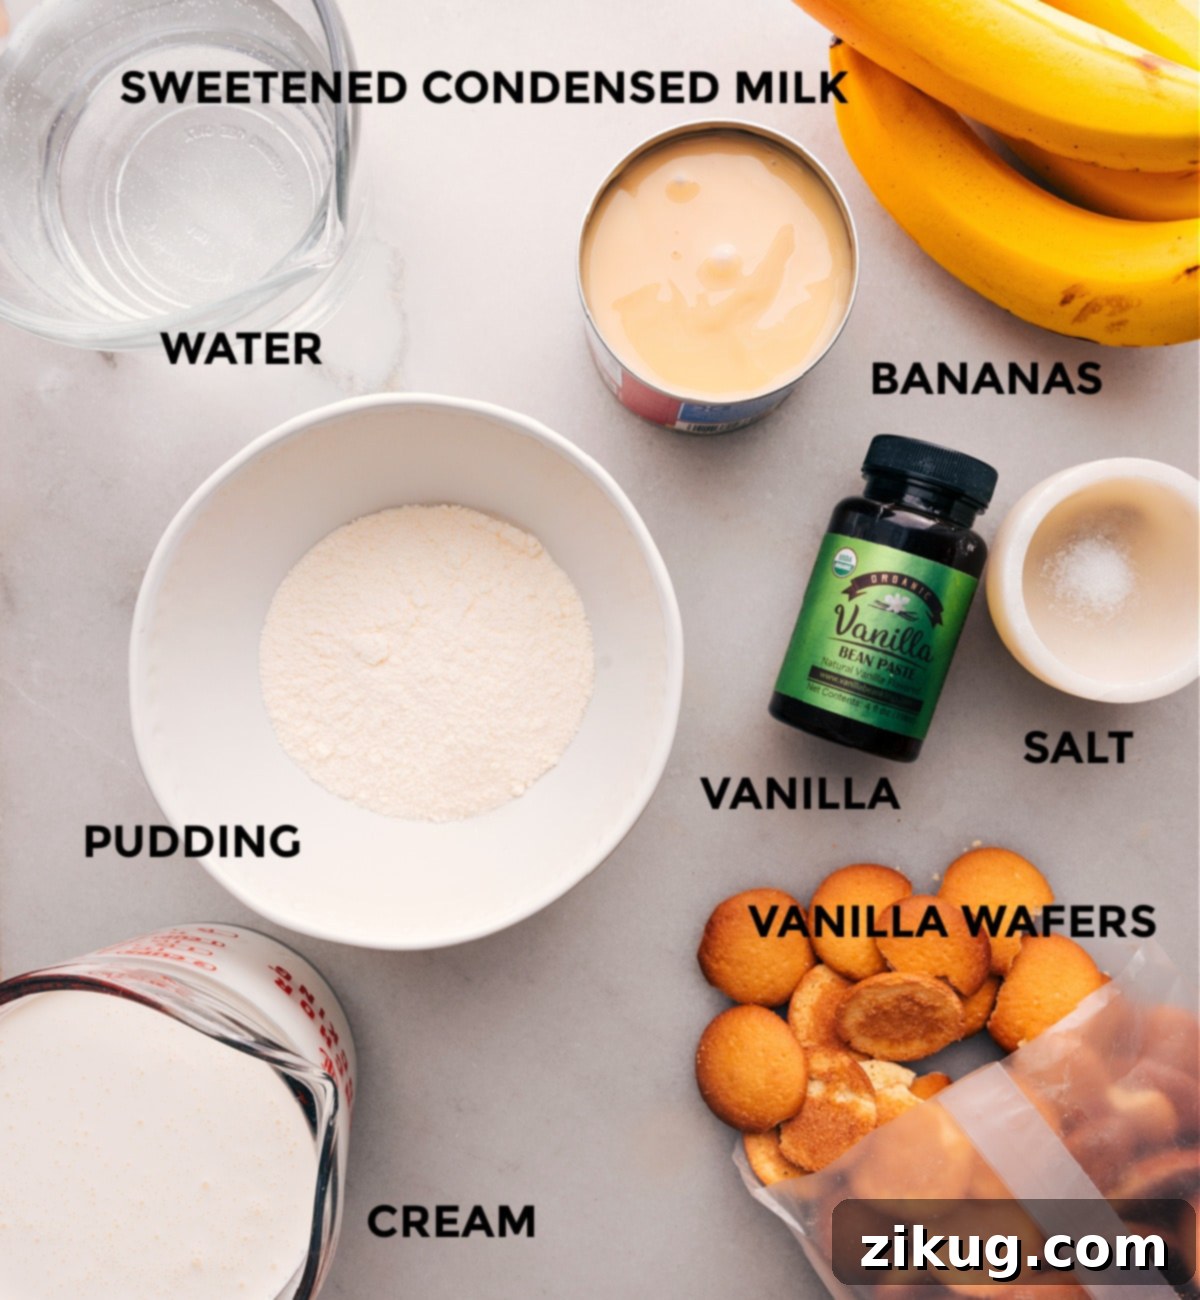
Crafting the perfect banana pudding starts with selecting the right ingredients. Each component plays a vital role in achieving that creamy, balanced flavor and irresistible texture. Here’s a closer look at what you’ll need and why specific choices make all the difference for this easy homemade banana pudding:
- Sweetened Condensed Milk: This is the cornerstone of our creamy pudding base, providing rich sweetness and a thick consistency. Ensure you use regular sweetened condensed milk, not low-fat or sugar-free versions, as these will affect both the texture and the overall sweetness of the pudding. It’s also crucial not to confuse it with evaporated milk, as they are very different products.
- Cold Water: Using cold water is a small but important detail. It helps the instant pudding mix set more quickly and efficiently, contributing to a smoother, firmer base for your dessert.
- Instant Vanilla Pudding Mix: Opt for a regular instant vanilla pudding mix (approximately 3.9 ounces or 110g). Avoid “cook-and-serve” types, sugar-free, or low-fat varieties. The specific composition of regular instant pudding is key to achieving the right firmness and flavor without any cooking. While any brand works, many find Jell-O brand delivers the most classic vanilla taste.
- Heavy Cream: Fresh, cold heavy cream is essential for creating light, airy, and stable homemade whipped cream. This provides a delightful contrast to the dense pudding layers. Make sure it’s at least 36% milk fat to whip properly and hold its shape. Half-and-half or lighter creams will not achieve the desired whipped consistency.
- Vanilla Paste or Extract: A good quality vanilla, whether paste or extract, significantly enhances the overall flavor profile of your pudding. Vanilla paste offers tiny specks of vanilla bean for a gourmet look and more intense flavor, while extract provides a classic, comforting aroma. This ingredient is technically optional but highly recommended for boosting that delicious vanilla essence.
- Salt: Just a tiny pinch of salt works wonders in balancing the sweetness of the pudding and whipped cream, bringing out the deeper flavors of the vanilla and bananas. Don’t skip this, as it elevates the entire dessert.
- Vanilla Wafer Cookies: These classic cookies are integral to the pudding’s structure and flavor. They soften beautifully in the pudding, absorbing moisture and transforming into a cake-like texture that’s pure heaven. Have extra on hand to crush and sprinkle on top for a delightful textural contrast and elegant garnish.
- Bananas (Sliced): For the best results, choose firm, just-ripe bananas. They should be yellow with very few, if any, brown spots. Overly ripe bananas will become mushy too quickly in the pudding and may brown faster. Firm bananas hold their shape well, offering a pleasant bite and fresh flavor throughout the layers.
Crafting Your Homemade Banana Pudding: Step-by-Step Guide
Creating this no-bake banana pudding is a straightforward process that yields incredibly delicious results. Follow these simple steps to assemble your perfect dessert:
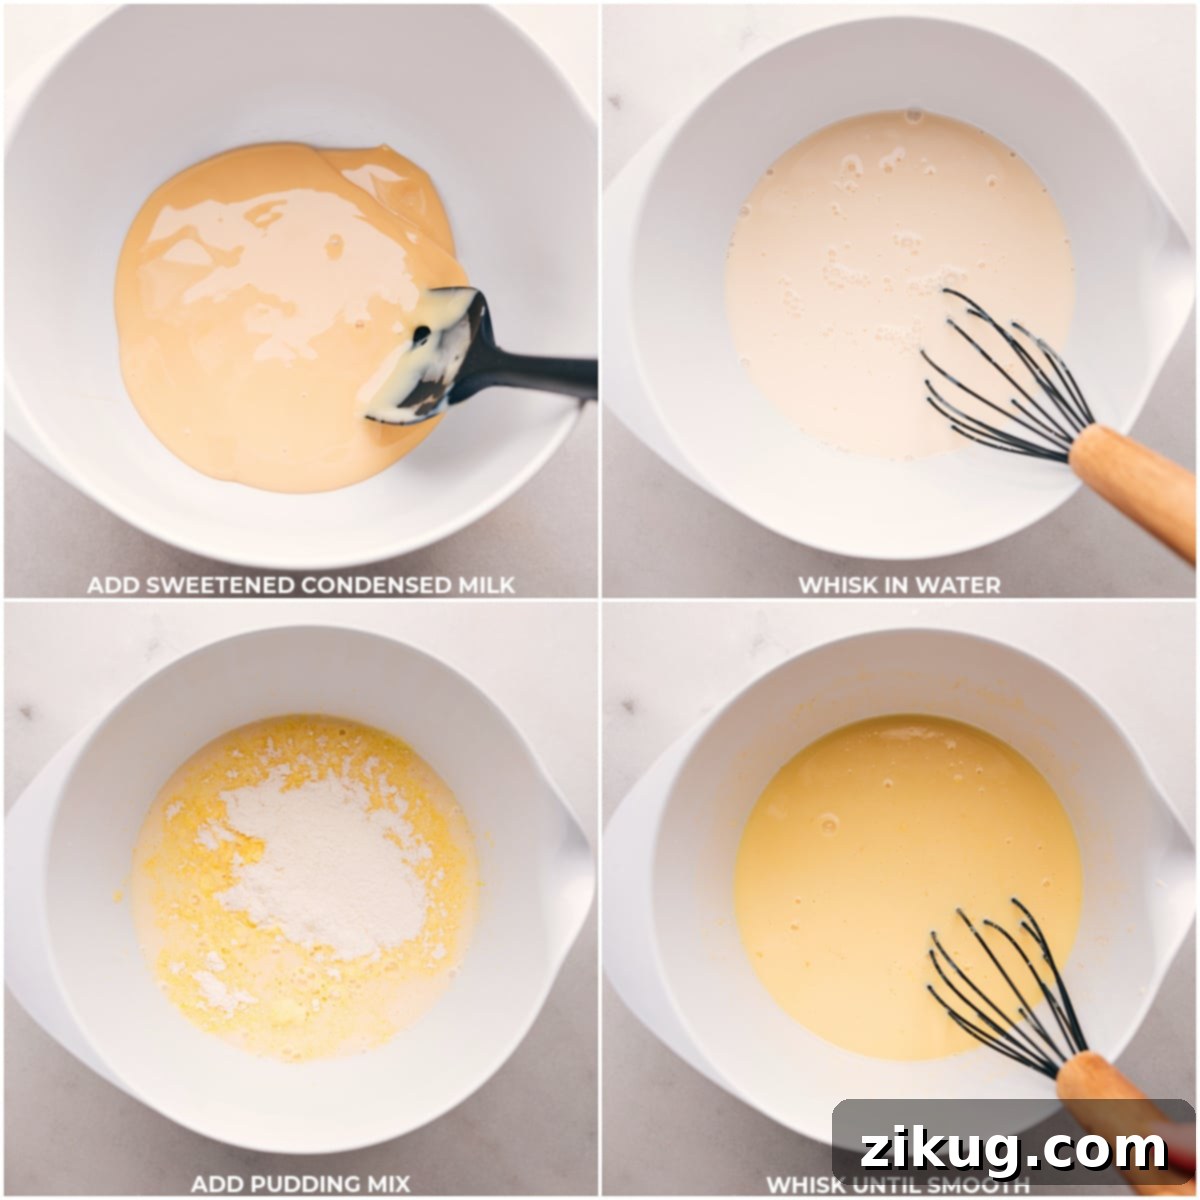
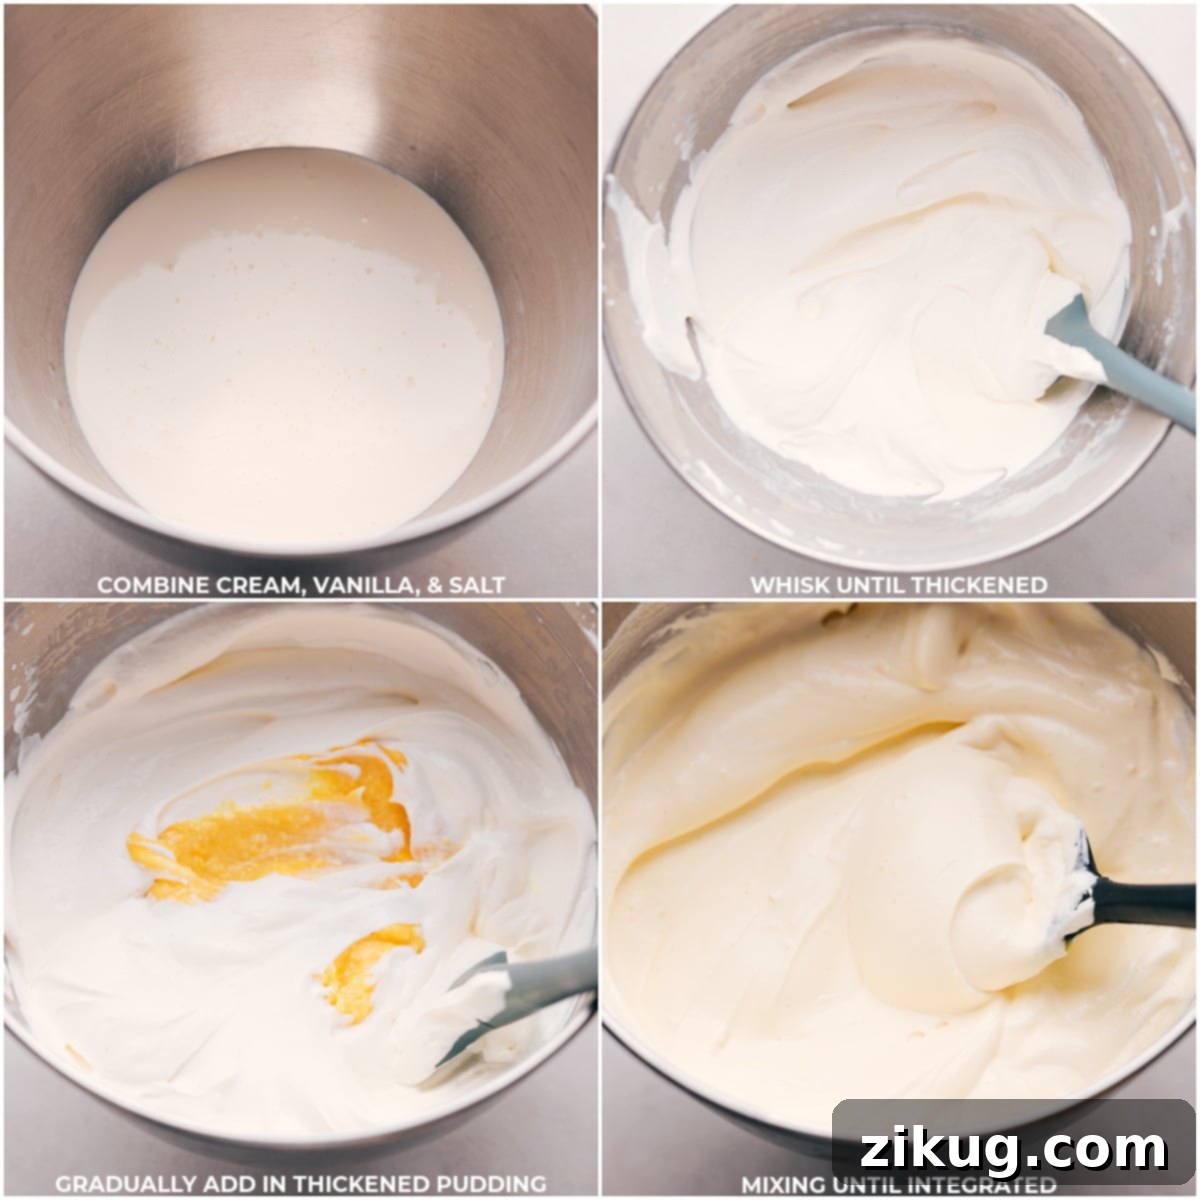
- Prepare the Velvety Pudding Base: In a spacious mixing bowl, combine the sweetened condensed milk with the cold water. Use a hand mixer with a whisk attachment to beat these two ingredients together for approximately one minute, until they are thoroughly blended and smooth. Next, gradually sprinkle in the entire packet of dry instant vanilla pudding mix. Continue beating for about two minutes, ensuring there are no lumps and the mixture is completely smooth and creamy. Once combined, transfer this pudding mixture to a separate bowl, cover it tightly, and refrigerate for 30 to 60 minutes. This crucial chilling time allows the pudding to thicken and become firm, which is essential for proper layering.
- Whip the Light and Fluffy Cream: While your pudding base is chilling, turn your attention to the whipped cream. In the bowl of a stand mixer (or using a hand mixer) fitted with a whisk attachment, pour the cold heavy cream. Add the vanilla paste or extract and a pinch of salt. Begin beating on medium speed. Within 1-3 minutes, you’ll notice the cream starting to thicken. Increase the speed to medium-high and continue whipping until soft peaks form. Soft peaks are achieved when the whisk is lifted, and the cream holds a gentle peak that slightly curls at the tip. Be vigilant not to over-whip the cream, as it can quickly turn grainy or even separate into butter.
- Gently Combine for the Perfect Texture: Once the whipped cream has formed soft peaks, reduce the mixer speed to low. Gradually add the chilled, firm pudding mixture to the whipped cream, one large spoonful at a time. Continue mixing on low speed until the pudding is fully incorporated into the whipped cream, and no streaks of pudding are visible. The resulting mixture should be beautifully thickened, smooth, and homogenous. This step creates the signature light yet rich texture of the banana pudding.
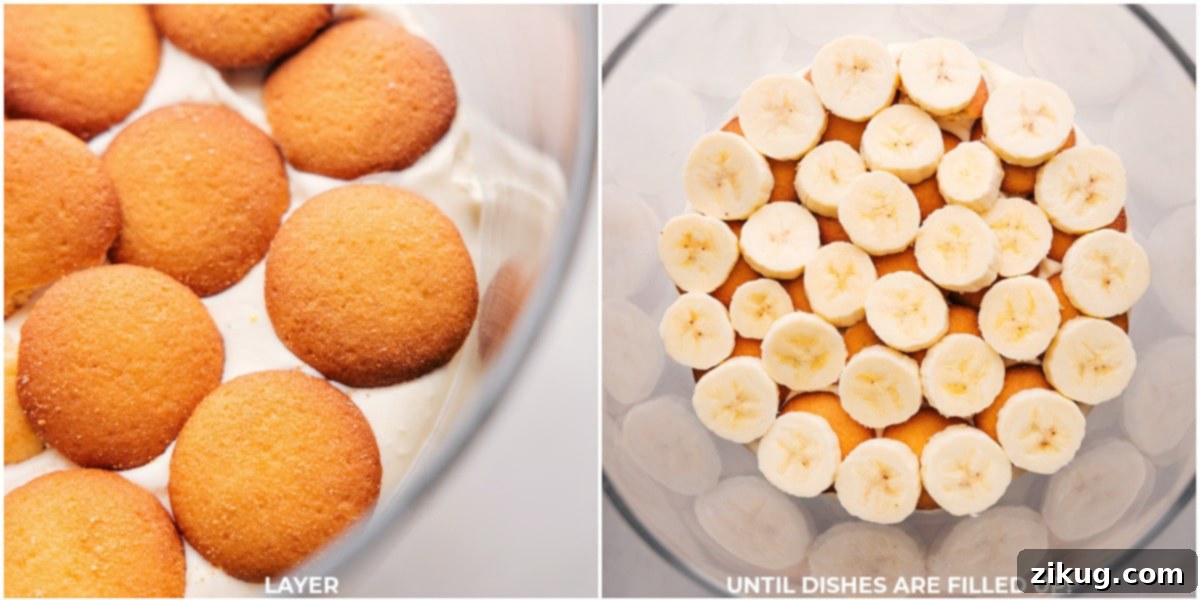
- Master the Art of Layering: Now for the fun part – assembling your masterpiece! Before you begin, set aside about four vanilla wafer cookies. These will be crushed later to garnish the top. Take your chosen serving dish (a large trifle bowl, 9×13-inch pan, or individual clear cups work well). Start by spreading approximately one-quarter of the combined pudding-cream mixture evenly across the bottom of the dish. Arrange a single layer of vanilla wafer cookies over the pudding, followed by a layer of freshly sliced bananas. Repeat these layers: pudding, cookies, bananas, pudding. Continue this pattern until all your ingredients are used up, ensuring that the final, top layer is a generous spread of the creamy pudding mixture.
- Chill and Serve for Optimal Flavor: Once your banana pudding is assembled, cover the dish tightly with plastic wrap. Refrigerate for a minimum of 3-6 hours. For the absolute best flavor and texture, chilling it overnight is highly recommended. This extended chilling time allows the vanilla wafers to fully absorb the moisture from the pudding, transforming them into a soft, cake-like consistency that is truly magical. Just before serving, take the four reserved vanilla cookies, crush them into coarse crumbs, and sprinkle them over the top for a delightful crunch and visual appeal. This dessert is at its peak deliciousness when served within 12-24 hours of assembly, though it can last a little longer in the fridge.
Quick Tip: Selecting Your Bananas
The type of bananas you choose is crucial for the success of this classic banana pudding recipe. Unlike desserts such as Banana Cream Pie or Banana Cupcakes, where very ripe, even spotty bananas are often preferred for their intense sweetness and easy mashing, this recipe works best with firm, just-ripe bananas. Look for bananas that are primarily yellow with minimal to no brown spots. This ensures they maintain their shape and a pleasant, firm texture within the pudding layers, preventing them from becoming mushy and browning too quickly. Their subtle sweetness also complements the rich pudding and cookies without overpowering the dish.
Elegant Serving Ideas for Your Banana Pudding
Once your delightful homemade banana pudding has chilled to perfection, it’s time to serve it up! How you present it can enhance the overall experience. Here are a few popular and stylish ways to serve your masterpiece:
- Effortless Family-Style in a 9×13-inch Pan: For casual gatherings, potlucks, or simply when you want easy access, layering the pudding in a standard 9×13-inch baking pan is a fantastic option. It’s convenient to transport, serves a crowd, and allows for simple scooping. This method emphasizes comfort and shared enjoyment, making it perfect for events where guests will serve themselves.
- Chic Individual Servings in Clear Cups: Elevate your presentation by serving the banana pudding in individual portions. Use elegant clear disposable cups for parties (which also make cleanup a breeze) or beautiful reusable glass parfait or trifle cups for a more refined touch. Seeing the distinct layers of creamy pudding, golden cookies, and fresh bananas through the clear sides creates a visually stunning dessert that’s perfect for dinner parties or special occasions. Each guest gets their own perfectly portioned treat.
- Grand Presentation in One Large Trifle Dish: If you’re looking to create a show-stopping centerpiece, a large trifle dish is the way to go. Its deep sides and clear glass allow the gorgeous layers of your banana pudding to truly shine, making it an impressive display for any dessert table. Guests can then scoop generous portions into individual bowls, admiring the artistry of the layers as they serve themselves. This method offers both visual grandeur and practical serving for a larger group.
Creative Variations and Substitutions
While this Magnolia Bakery-inspired banana pudding is perfect as is, it’s also wonderfully adaptable! Feel free to get creative and customize it to your preferences or what you have on hand. Here are some delightful ways to “switch things up” and make this recipe truly your own:
- Time-Saving Whipped Topping: If you’re in a rush or prefer a simpler approach, you can easily use store-bought whipped topping (like Cool Whip) instead of making homemade whipped cream. Ensure it’s thawed before gently folding it into your pudding base. This substitution significantly reduces prep time without sacrificing much on flavor.
- Boost the Banana Flavor: For those who can’t get enough banana, swap out the vanilla instant pudding mix for an instant banana pudding mix. This will intensify the banana flavor throughout the dessert, creating an even more banana-centric experience.
- Personalize Portions: Instead of assembling the pudding in one large dish, create charming single servings by layering the pudding, cookies, and bananas in small, clear glasses, mason jars, or even mini trifle dishes. This is perfect for portion control, makes for elegant individual desserts, and is ideal for grab-and-go treats at parties.
- Alternate Cookie Choices: While vanilla wafers are traditional, experimenting with other cookies can add an interesting twist. Graham crackers (plain or cinnamon) offer a different, slightly crumbly texture and a subtle honey flavor. Shortbread cookies or even ginger snaps could also be interesting choices for an unexpected spice note.
- Fruity Twists: While it’s a “banana” pudding, you can certainly experiment with other fruits! Swap bananas for sliced strawberries for a berry-infused pudding. Peaches, blueberries, or even a combination of fruits could also create a delightful seasonal dessert. Just be mindful of how quickly other fruits might release liquid.
- Add Chocolate: For chocolate lovers, consider adding a layer of mini chocolate chips, a drizzle of chocolate fudge sauce, or even swapping some vanilla wafers for chocolate wafers.
- Caramel Drizzle: A light drizzle of caramel sauce between the layers or on top just before serving can add a wonderful depth of flavor, complementing the bananas beautifully.
Storage Tips for Leftover Banana Pudding
To ensure your banana pudding remains as delicious as possible, proper storage is key. Remember, this is a fresh dessert, and certain ingredients are perishable.
This banana pudding is best enjoyed within 24-48 hours of being assembled. Beyond this timeframe, the bananas will start to brown significantly and soften too much, while the vanilla wafer cookies might become excessively soggy. To store leftovers, simply cover the dish tightly with plastic wrap or transfer individual portions to airtight containers. Keep it refrigerated at all times.
It’s important to note that this pudding does not freeze well. Freezing will significantly alter the texture of both the creamy pudding and the bananas. The pudding can become watery and grainy upon thawing, and the bananas will turn unpleasantly mushy and brown. For the best experience, plan to enjoy your banana pudding fresh!
To help prevent banana browning for a short period, you can lightly toss the sliced bananas in a tiny amount of lemon juice (about ½ teaspoon per 6 bananas) before layering. This won’t stop it completely, but can slow the process.
More Delicious Dessert Recipes to Explore:
Desserts
Decadent Banana Chocolate Chip Cake
Desserts
Refreshing Blueberry Trifle
Desserts
Irresistible Strawberry Pretzel Salad Recipe
Desserts
Scrumptious Twix Cheesecake Bars
5 out of 5 stars based on 1 vote
Magnolia Bakery Style Banana Pudding Recipe
This Banana Pudding recipe offers a divine combination of creamy pudding, sweet vanilla cookies, and fresh bananas, serving as a delectable homemade adaptation of the beloved Magnolia Bakery classic. It’s an easy, no-bake dessert perfect for any occasion.
Equipment
- Hand mixer
- Stand mixer
Ingredients
- 1 (14-ounce) can sweetened condensed milk (see note 1)
- 1-1/2 cups cold water
- 1 (3.9-ounce) package instant vanilla pudding mix (see note 2)
- 3 cups heavy cream (see note 3)
- 2 teaspoons vanilla paste or vanilla extract, optional
- 1/4 teaspoon salt
- 1 (11-ounce) box vanilla wafer cookies
- 6 bananas, sliced
Instructions
- In a large bowl, use a hand mixer with a whisk attachment to beat together sweetened condensed milk and cold water until fully combined, about 1 minute. Sprinkle in the entire (dry) instant vanilla pudding mix and beat until the mixture is completely smooth, about 2 minutes. Transfer this mixture to a separate bowl, cover, and refrigerate for 30–60 minutes or until firm.
- In a stand mixer (or using a hand mixer) fitted with a whisk attachment, add the cold heavy cream, vanilla, and salt. Beat on medium speed for about 1–3 minutes, until the cream begins to thicken. Increase the speed to medium-high and whip until soft peaks form. Be careful not to over-whip, as the cream can break. Reduce mixer speed to low.
- While the mixer is running on low, gradually add the chilled pudding mixture, one large spoonful at a time. Beat until no streaks of pudding remain and the combined mixture is nicely thickened and uniform.
- Reserve 4 vanilla wafer cookies for garnishing. Spread 1/4 of the combined pudding mixture evenly on the bottom of your trifle dish or chosen serving pan. Arrange a single layer of vanilla cookies over the pudding, followed by a layer of sliced bananas. Add another 1/4 of the pudding mixture. Repeat the layers until all bananas, cookies, and pudding are used, ensuring the top layer is pudding.
- Cover the dish tightly with plastic wrap and refrigerate for 3–6 hours, or ideally overnight, until the cookies have softened to a cake-like consistency. Crush the reserved cookies and sprinkle them on top as a garnish just before serving. This dessert is best served within 12-24 hours of assembling.
Recipe Notes
Note 1: Always use regular sweetened condensed milk, not low-fat or reduced sugar varieties, as these will alter the texture and sweetness. This is distinct from evaporated milk.
Note 2: Use a standard 3.9-ounce (110g) box of regular instant vanilla pudding mix. Avoid sugar-free, low-fat, or cook-and-serve types. Follow this recipe’s instructions, not the package directions, for best results. For optimal flavor, Jell-O brand is often preferred.
Note 3: Heavy cream is essential for whipping to the correct consistency and richness. Milk will not provide the necessary fat content to whip and thicken properly for this recipe.
Storage: Store any leftover banana pudding covered tightly with plastic wrap or in an airtight container in the refrigerator for up to 2–3 days. The cookies will continue to soften, so it’s best enjoyed sooner rather than later. This dessert does not freeze well, as the texture of both the pudding and bananas will be compromised upon thawing.
Nutrition Information (Approximate)
Serving: 1 serving | Calories: 506 kcal | Carbohydrates: 58 g | Protein: 6 g | Fat: 29 g | Saturated Fat: 17 g | Polyunsaturated Fat: 3 g | Monounsaturated Fat: 7 g | Trans Fat: 0.1 g | Cholesterol: 79 mg | Sodium: 262 mg | Potassium: 379 mg | Fiber: 2 g | Sugar: 41 g | Vitamin A: 994 IU | Vitamin C: 5 mg | Calcium: 136 mg | Iron: 0.3 mg
Nutrition information is automatically calculated and should be used only as an approximation.
Enjoyed this recipe? Share your thoughts and leave a comment below!