
The Ultimate Homemade Coconut Cream Pie: A Delightful Family Favorite Recipe
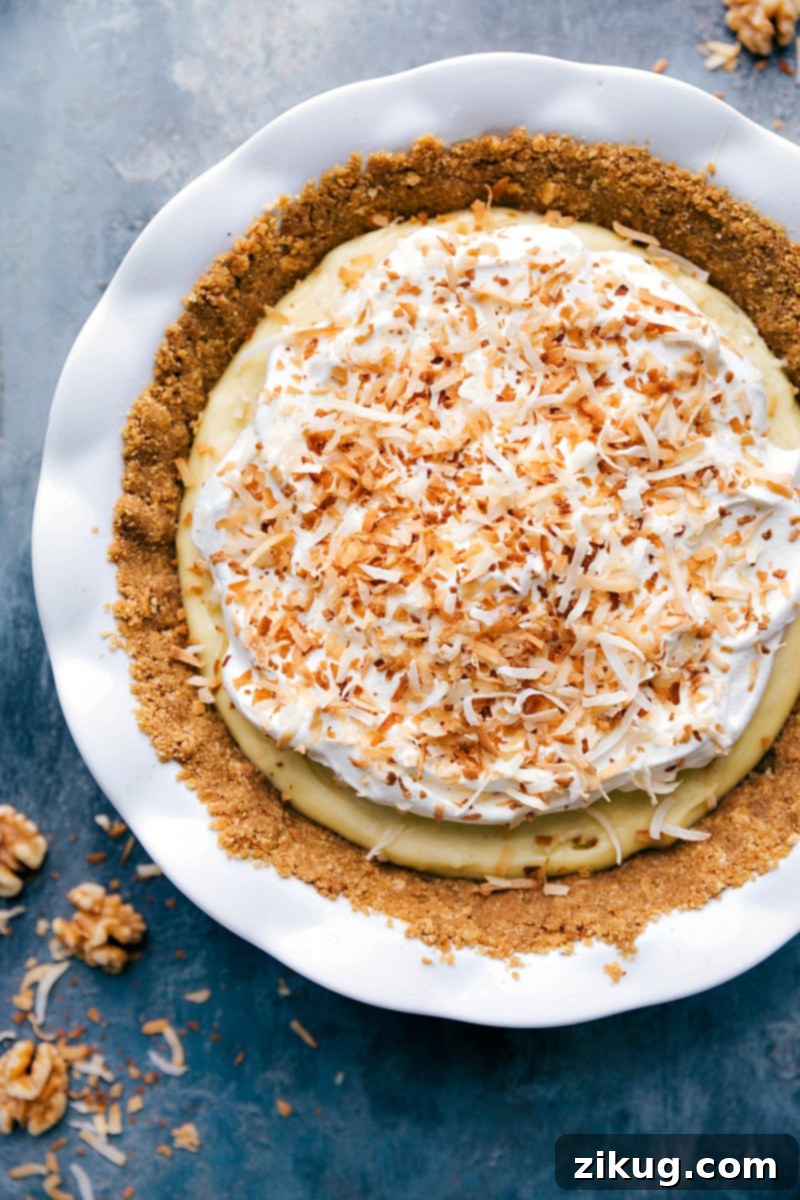
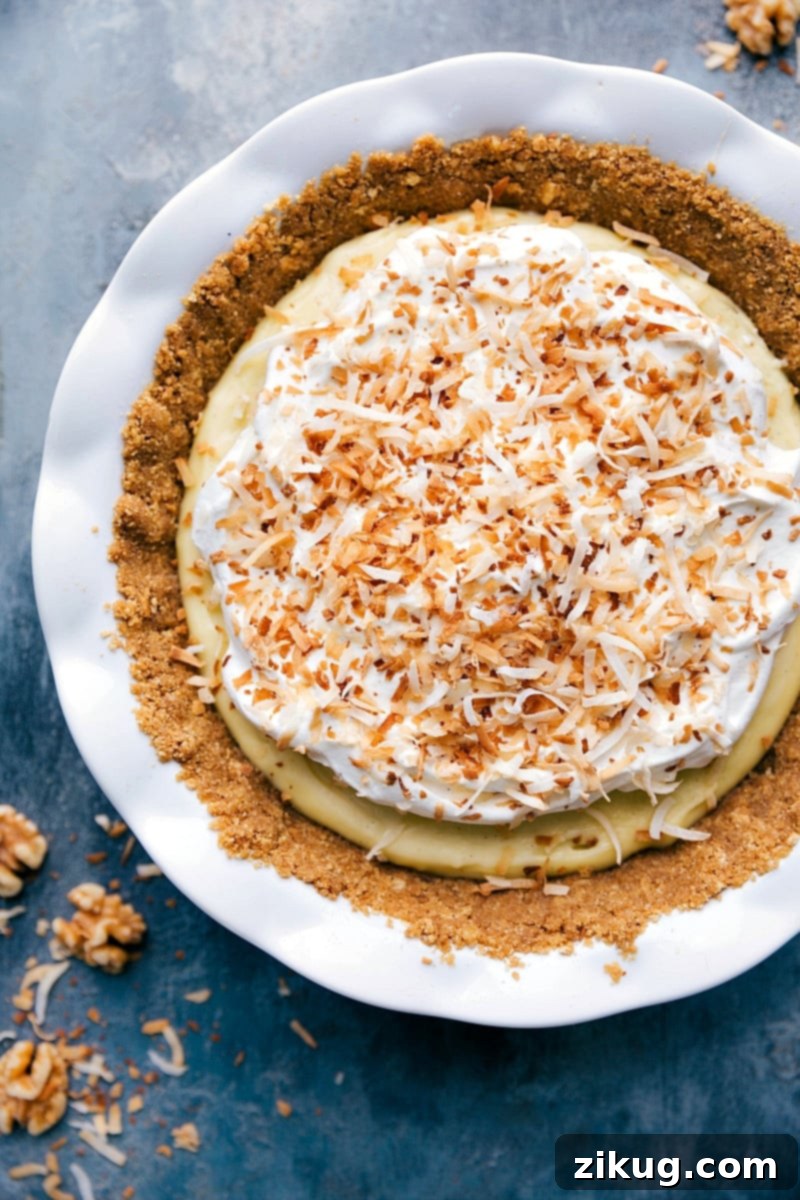
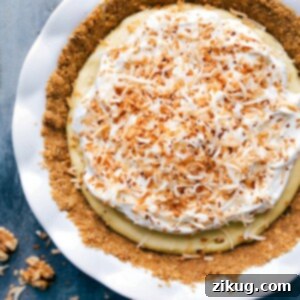
Experience pure tropical bliss with this **Coconut Cream Pie Recipe**, a true family favorite that promises to transport your taste buds to paradise. This incredible dessert boasts a perfectly sweet, buttery graham cracker crust, a velvety-smooth and intensely flavorful coconut custard filling, generously topped with airy, fluffy homemade whipped cream, and finished with a scattering of golden, toasted coconut flakes for an irresistible crunch. It’s a harmonious blend of textures and an explosion of coconut flavor that makes it impossible to resist.

author note
The Pie That Won Over the In-Laws!
A few weeks ago, my sister called me in a total panic. It was her first Thanksgiving with her in-laws, and she had been tasked with bringing the pie – a culinary responsibility she took very seriously. She confided in me that her husband and his father shared an unwavering obsession with Coconut Cream Pie. Not just any pie, mind you, but it had to be *the perfect* Coconut Cream Pie. Naturally, I accepted the mission to craft an ultimate version that would not only impress but utterly delight them, ensuring her place as a culinary hero.
After several enthusiastic testing rounds, involving copious amounts of coconut cream and meticulous taste-testing, this particular recipe emerged as the undisputed champion. I can genuinely say it might be my all-time favorite pie creation. I’m not exaggerating when I tell you this dessert is truly mind-blowing. Each spoonful offers a luxurious creaminess, a profound richness, and layers of authentic coconut flavor that are simply irresistible. This pie quickly became an instant hit, cementing its place as a beloved Thanksgiving tradition in her home, and, of course, in mine too. It’s more than just a dessert; it’s a testament to the magic that happens when simple, quality ingredients come together to create something truly extraordinary.
Why This Coconut Cream Pie Is The Best
What sets this Coconut Cream Pie apart from the rest? It’s a combination of thoughtfully selected ingredients and perfected techniques that result in a dessert that is both classic and exceptional. Every component is designed to contribute to an unforgettable eating experience:
- **Golden Graham Cracker Crust:** Unlike many pies that rely on delicate pastry, this recipe starts with a robust, sweet, and slightly salty graham cracker crust. It provides the perfect textural contrast to the creamy filling and holds up beautifully when sliced.
- **Incredibly Smooth Coconut Custard:** The heart of this pie is its rich, silky custard. Made with full-fat coconut milk and heavy cream, it’s infused with both vanilla and coconut extracts, ensuring a deep, authentic coconut flavor that isn’t artificial or overwhelming.
- **Pillowy Whipped Cream Topping:** A generous layer of freshly whipped cream adds a lightness and luxurious finish, balancing the richness of the custard. It’s subtly sweetened and perfectly fluffy.
- **Crunchy Toasted Coconut Flakes:** The final touch of toasted coconut flakes provides a delightful crunch and intensifies the nutty, sweet notes of the coconut, adding visual appeal and an extra layer of flavor.
Key Ingredients for Success
Crafting the perfect Coconut Cream Pie begins with understanding the role each ingredient plays. Here’s a closer look at what you’ll need and why specific choices matter:
| Ingredient | Swaps or Tips |
|---|---|
| Graham cracker crumbs | Vanilla wafer crumbs are an excellent alternative. For clean, neat slices, make sure to press the crust very firmly into the pie pan. |
| Unsalted butter | If you only have salted butter, it works just fine! Simply omit the small amount of added salt in the crust recipe. |
| Granulated sugar | Consider using light brown sugar in the crust for an added depth of flavor with a subtle caramel note. |
| Cornstarch | Arrowroot powder can be used as a substitute, but be aware that it might result in a slightly looser custard texture. |
| Egg yolks | Always use large egg yolks for consistency. Don’t discard the whites! They can be saved for other recipes like meringue cookies. |
| Full-fat canned coconut milk | This is crucial! Do NOT use lite or carton coconut milk, as they lack the necessary fat content and will prevent your custard from setting properly. |
| Heavy cream | Using half-and-half will yield a thinner custard. Regular milk is not recommended for this recipe as it won’t provide the desired richness or thickness. |
| Vanilla bean paste & Coconut extract | If vanilla bean paste isn’t available, vanilla extract is a perfectly acceptable substitute. For coconut extract, start with a smaller amount and add more to taste, as potency varies by brand. |
| Shredded coconut | For an extra layer of flavor and texture, toast the shredded coconut before using it as a topping. You can also fold some into the warm custard for added texture within the filling itself. |
Crafting Your Homemade Coconut Cream Pie: A Detailed Guide
This recipe breaks down into three simple, yet crucial, stages: preparing the crust, cooking the luscious custard, and finishing with a perfect topping. Each step is designed for ease and maximum flavor payoff.
The Perfect Graham Cracker Crust
- Prepare the Crust: Begin by preheating your oven to 350°F (175°C) and lightly greasing a 9-inch pie pan. Melt the unsalted butter and set it aside to cool slightly, which helps prevent a greasy crust.
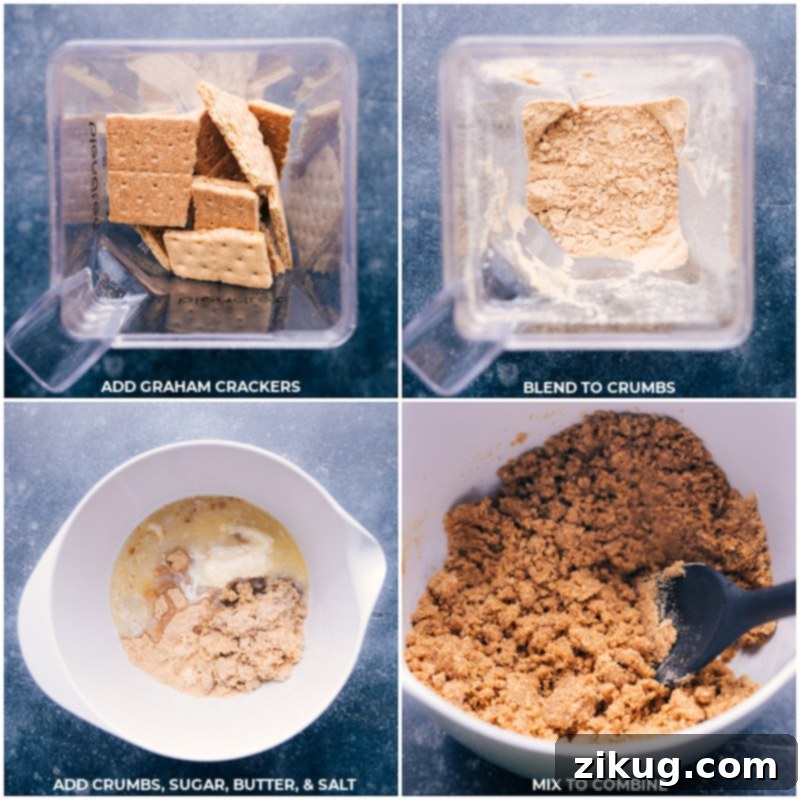
- Form the Crumbs: In a blender or food processor, pulse graham crackers into fine crumbs. Combine these crumbs in a large bowl with sugar and salt. Pour in the cooled melted butter and mix thoroughly until the mixture resembles wet sand.
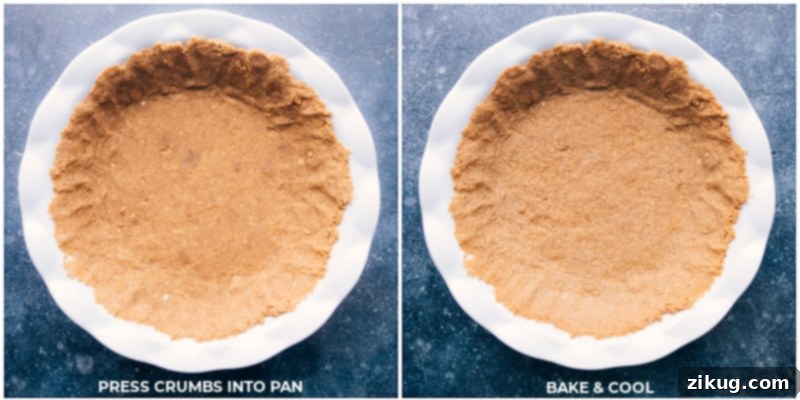
- Press and Bake: Transfer the crumb mixture into the prepared pie pan. Use your fingers to press the crumbs firmly along the bottom and up the sides. For a truly solid crust that won’t crumble, use the flat bottom of a measuring cup to compress the crumbs tightly. Bake for 10 minutes until lightly golden, then remove and let it cool completely. This can be done up to 24 hours in advance; simply cover and store at room temperature.
Creating the Velvety Coconut Custard
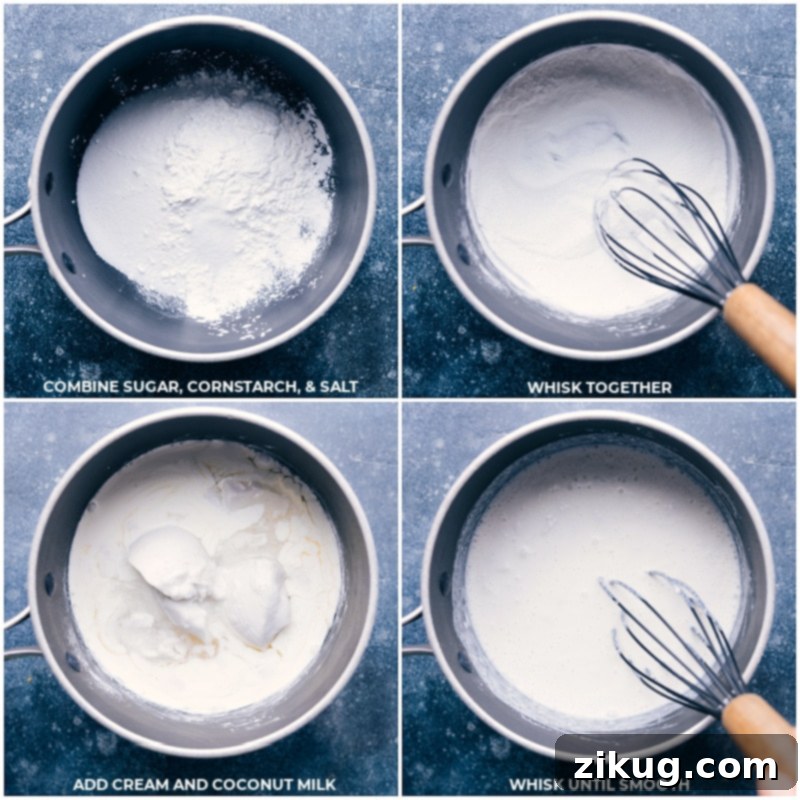
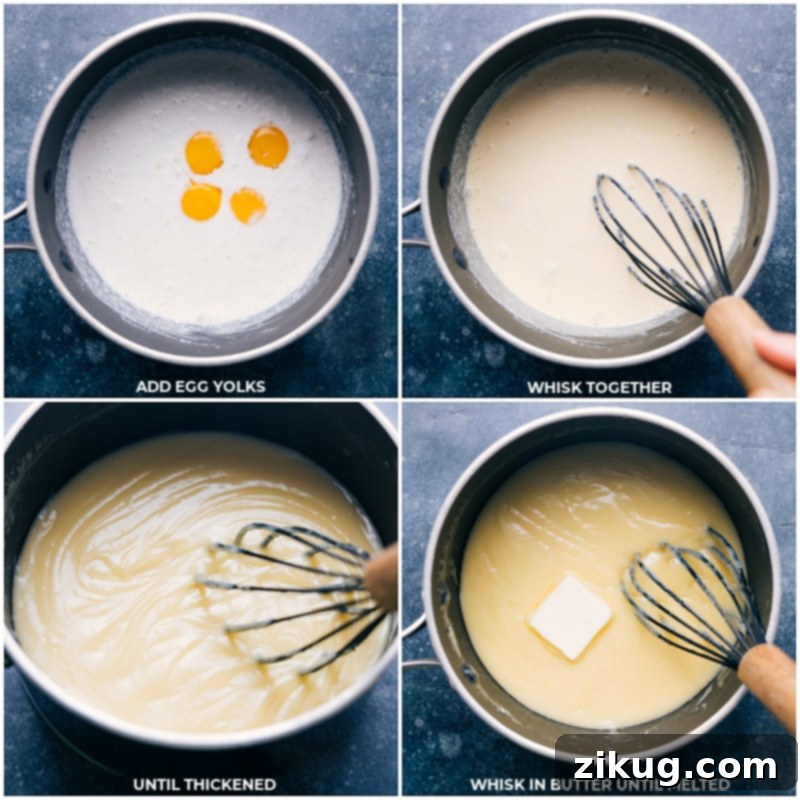
- Whisk Dry & Wet Ingredients: In a medium pot, off the heat, combine granulated sugar, salt, and cornstarch, whisking them until well blended. Add the egg yolks and whisk again until combined. While continuously whisking, slowly pour in the full-fat coconut milk, followed by the heavy cream. Whisk until all ingredients are fully integrated and smooth.
- Cook to Thicken: Place the pot over medium-low heat. Continue whisking occasionally as the mixture warms up, making sure to scrape the sides and bottom with a rubber spatula to prevent sticking. As soon as the mixture begins to visibly thicken, increase your whisking to constant. Once large bubbles appear in the center, set a timer for 1 minute and whisk vigorously. If bubbling becomes too intense, slightly reduce the heat. The custard should become very thick, resembling a pudding. Remove from heat after 1 minute.
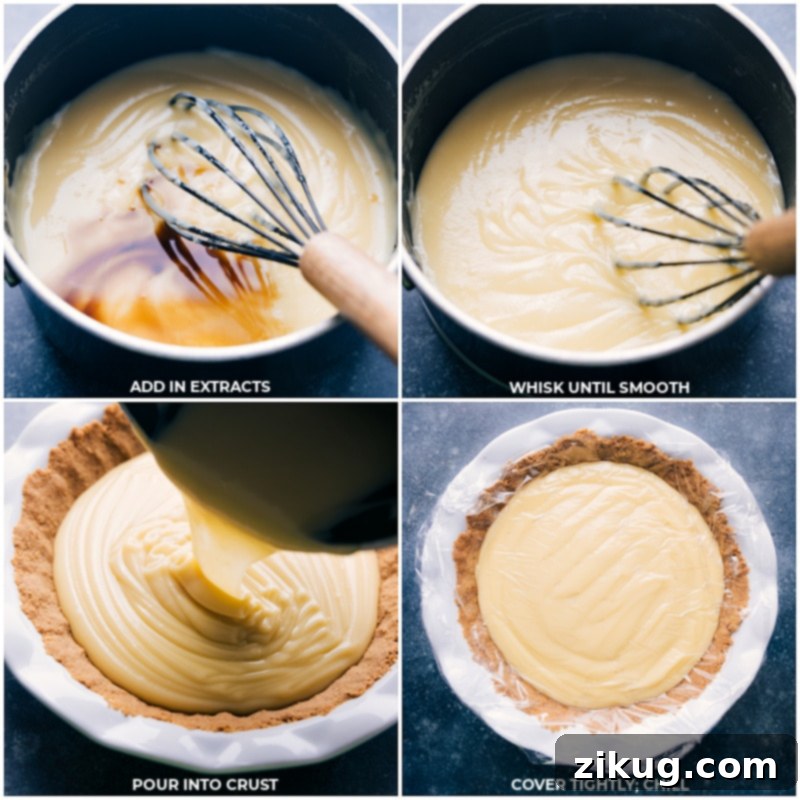
- Finish and Flavor: Continue whisking off the heat for another full minute. Add the unsalted butter and whisk until it’s completely melted and incorporated. Finally, whisk in the vanilla bean paste (or extract) and coconut extract to your preferred taste. The mixture should be wonderfully smooth and luscious.
- Fill and Chill: Carefully pour the warm custard into your completely cooled graham cracker crust, spreading the top evenly with a spatula. To prevent a “skin” from forming, gently press a piece of plastic wrap directly onto the surface of the filling, ensuring it makes full contact. Refrigerate for a minimum of 8 hours, or preferably overnight, to allow the filling to set completely and achieve its perfect firm yet creamy texture. This chilling time is absolutely essential for a pie that holds its shape beautifully.
The Fluffy Topping & Toasted Coconut
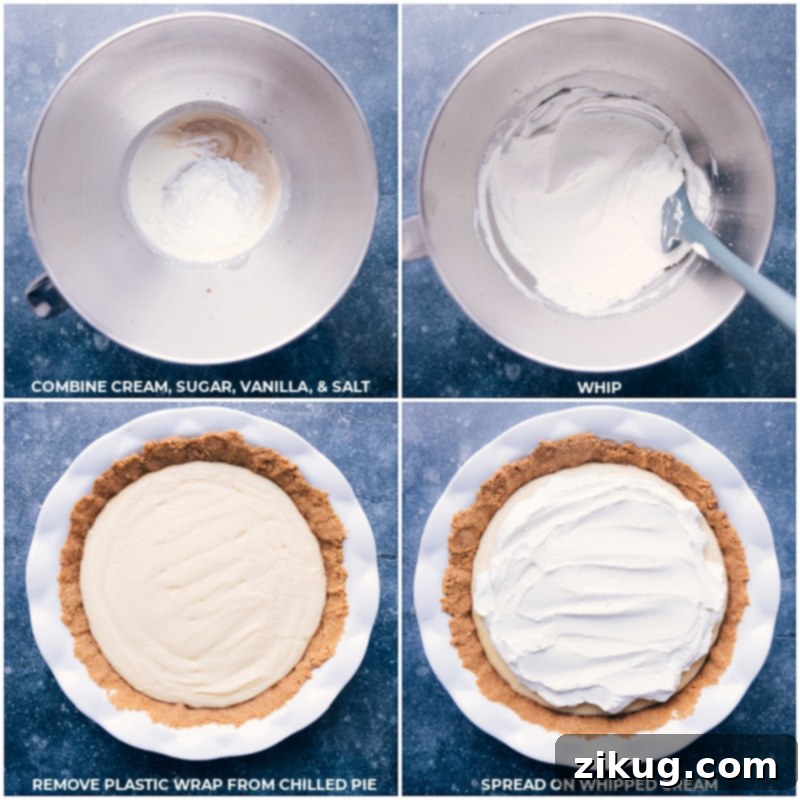
- Whip the Cream: In the bowl of a stand mixer fitted with the whisk attachment, combine the cold heavy cream, powdered sugar (start with 2 tablespoons and add up to 2 more for a sweeter topping), and vanilla. Begin whisking on low speed to combine, then gradually increase to high speed. Continue whisking until medium-to-stiff peaks form, typically 2–4 minutes. Be careful not to overbeat, as it can turn granular. Gently spread this fluffy whipped cream over the chilled pie.
- Toast Coconut and Serve: If using, toast the shredded coconut in a large skillet over low-to-medium heat, stirring frequently, until it’s mostly golden brown and fragrant (about 3–6 minutes). Immediately transfer it to a plate to cool completely. Once cooled, sprinkle the toasted coconut evenly over the whipped cream. Slice, serve, and savor every delightful bite!
Expert Tips for a Flawless Coconut Cream Pie
- Embrace Full-Fat Coconut Milk: This is non-negotiable for a properly set and incredibly rich custard. Lite or reduced-fat varieties will not yield the same firm texture.
- Master the Custard’s “Bubble Point”: Once you see large, consistent bubbles erupting in the center of the custard, continue whisking constantly for a full minute. This crucial step fully activates the cornstarch, ensuring your pie sets beautifully.
- Prevent Skin Formation: Always press plastic wrap directly onto the surface of the warm custard filling before chilling. This creates a seal that prevents an undesirable skin from forming and helps keep the layers from separating.
- Cool the Crust Completely: A warm crust and warm custard are a recipe for a soggy bottom. Ensure your graham cracker crust is fully cooled to room temperature before adding the custard.
- Add Extracts Last: Vanilla and coconut extracts have more potent flavors when added off the heat. Start with the recommended amounts, taste, and adjust as needed, as their flavors will “bloom” as the pie chills.
- Chill Time is Your Friend: Do not rush the chilling process! A minimum of 8 hours, or ideally overnight, is essential for the custard to set properly and for the flavors to meld beautifully.
Make-Ahead and Storage Solutions
This Coconut Cream Pie is an excellent candidate for making ahead, especially when entertaining. Planning ahead ensures less stress and a perfectly set dessert.
- Day 1 (Preparation): You can bake the graham cracker crust and cook the coconut custard. Fill the pie crust with the custard, cover it tightly with plastic wrap pressed directly on the surface, and chill it in the refrigerator overnight.
- Day 2 (Finishing Touches): On the day of serving, prepare the whipped cream and toast your coconut flakes. Top the chilled pie with the whipped cream and toasted coconut just before guests arrive for optimal freshness and appearance.
- Storage: Any leftover pie should be kept covered tightly in the refrigerator. While it’s best enjoyed within 2 to 3 days for peak texture, it will remain delicious for up to 5-7 days. Be aware that the crust will gradually soften over time.
- Freezing: Freezing is generally not recommended for this pie. The custard can “weep” or become watery upon thawing, and the crust tends to turn very soft.
Quick Tip: Patience is a Virtue
Give yourself ample time for this Coconut Cream Pie to properly set. It absolutely needs at least 8 hours in the refrigerator, or ideally overnight, to ensure the filling is firm and slices beautifully before serving. Rushing this step will result in a runny pie!
Serving Your Delicious Coconut Cream Pie
Once your Coconut Cream Pie is perfectly chilled and adorned with its fluffy whipped cream and toasted coconut, it’s ready to be the star of your dessert table. For the neatest slices, use a sharp, warm knife and wipe it clean between each cut. A light dusting of cocoa powder or a few fresh mint leaves can add a touch of elegance. This pie is ideal for:
- **Holiday Gatherings:** A refreshing alternative or complement to heavier holiday desserts.
- **Potlucks and Parties:** It travels well (once set) and is always a crowd-pleaser.
- **Summer Celebrations:** Its tropical flavors are perfect for warm-weather entertaining.
- **Everyday Indulgence:** Sometimes, you just need a slice of paradise!
More Delicious Pie Recipes:
Desserts
Pumpkin Pecan Pie
Desserts
Nutella Pie
Desserts
Lemon Pie Recipe
Desserts
Apple Pie
Rated 5 out of 5 stars from 5 votes
Coconut Cream Pie
Chelsea Lords
35
8
8 35
10 slices
Equipment
-
Pie pan 9-inch
-
Blender or food processor
-
Medium pot
-
Stand mixer for whipped topping
-
Large skillet for toasting coconut
Ingredients
- 1-3/4 cups graham cracker crumbs 12–13 full sheets
- 6 tablespoons unsalted butter melted
- 1/4 cup granulated sugar or light brown sugar
- 1/8 teaspoon salt
- 3/4 cup granulated sugar
- 1/2 teaspoon salt
- 1/4 cup cornstarch
- 4 large egg yolks discard the whites or save for a different recipe
- 1 (13.5-ounce) can coconut milk full-fat
- 1 cup heavy cream
- 2 tablespoons unsalted butter
- 1 teaspoon vanilla bean paste or vanilla extract
- 1/4 to 1 full teaspoon coconut extract see note 1
- 1 cup heavy cream
- 2 to 4 tablespoons powdered sugar
- 1/2 teaspoon vanilla bean paste or vanilla extract
- 1 cup sweetened shredded coconut optional
Instructions
Crust
-
Preheat oven to 350°F (175°C). Lightly grease a 9-inch pie pan with cooking spray. Melt the butter in a microwave-safe bowl. Once melted, set it aside to cool for 5 minutes to prevent a greasy crust.
-
In a blender or food processor, process graham crackers into fine crumbs, reblending any large chunks. Measure the crumbs and transfer to a large bowl. Add the sugar and salt. Pour in the melted butter and mix until well combined.
-
Pour crumb mixture into prepared pan. Press crumbs firmly along the sides and bottom of the pan using your fingers. To create a solid crust, use the bottom of a flat 1-cup measuring cup to thoroughly compress the crumbs. Bake for 10 minutes, then remove from oven and allow to cool completely. You can prepare and bake the crust up to 24 hours in advance. Cover with plastic wrap and store at room temperature.
Filling
-
In a medium pot, off heat, combine the sugar, salt, and cornstarch. Whisk together until well mixed. Add egg yolks and whisk until combined. While whisking constantly, pour in coconut milk followed by heavy cream. Continue whisking until all ingredients are fully integrated. Place pot on stove over just below medium heat. Whisk occasionally as the mixture heats up, alternating between whisking and using a rubber spatula to scrape the sides and bottom of the pot to prevent cornstarch from sticking.
-
As soon as the mixture begins to thicken, start whisking constantly. When you see large bubbles forming in the center, set a timer for 1 minute and continue whisking constantly. If bubbling becomes too intense, reduce heat slightly. The mixture should thicken significantly, reaching a pudding-like consistency. After 1 minute, remove pot from heat (see note 2).
-
Whisk off the heat for another full minute. Add the butter and whisk until fully melted. Then, add vanilla and coconut extract to taste (I add 1 tsp vanilla and 1/2 up to 1 tsp coconut extract). Whisk until the mixture is completely smooth.
-
Use a spatula to transfer mixture from the pot into the cooled crust, smoothing the top with the spatula. Gently place a piece of plastic wrap directly on the surface of the filling, pressing lightly to create a seal. This will prevent a skin from forming on the pudding. Refrigerate for at least 8 hours or until the filling is fully set.
Topping
-
Pour the heavy cream, powdered sugar (start with 2 tbsp and add up to 2 more if you prefer a sweeter taste), and vanilla into a bowl attached to a stand mixer. Whisk on low speed to combine the ingredients, then gradually increase to high speed. Whisk until medium-to-stiff peaks form, about 2–4 minutes. Be careful not to overbeat. Smooth the whipped cream over the pie.
-
Toast the unsweetened coconut in a large skillet over low-to-medium heat, stirring frequently, until mostly golden brown, about 3–6 minutes. Remove from heat and transfer to a plate to cool completely. Once cooled, sprinkle evenly over the pie.
Recipe Notes
Note 2: Custard Notes:
- When mixing the custard, look for large bubbles forming in the center of the pot. Once you see these bubbles, whisk briskly and constantly. The mixture should be very thick at this point, resembling the consistency of a thick pudding snack cup.
- Remember, the custard will thicken slightly as it cools, but it should already be very thick before adding it to the crust.
Storage: Promptly return any leftovers to the fridge, ensuring the pie is tightly covered to maintain freshness. Leftovers will last 5–7 days, though the crust will soften each day it is stored.
Nutrition
Nutrition information is automatically calculated, so should only be used as an approximation.
Like this? Leave a comment below!
Coconut Cream Pie Recipe FAQs
For the best results and a perfectly set, balanced-flavor custard, we strongly recommend using full-fat canned coconut milk. Coconut cream is much thicker and can make the custard overly rich and stiff, altering the desired texture. Cream of coconut is a sweetened product often used for drinks like piña coladas and will significantly throw off both the texture and sweetness balance of your pie.
Several factors can prevent your custard from setting. Common culprits include using lite or carton coconut milk (which lack sufficient fat), not cooking the custard long enough past its initial thickening, or inaccurately measuring the cornstarch (too little can lead to a runny custard). To ensure success, cook the custard until large bubbles are actively forming in the center, and then whisk vigorously for a full minute to properly activate the cornstarch. Remember, the custard should already be quite thick, resembling a pudding snack cup, before it even begins to chill.
Absolutely, making this pie the day before is highly recommended, as it allows ample time for the custard to set beautifully and for the flavors to fully develop. Simply prepare the crust and the filling, pour the custard into the cooled crust, cover tightly with plastic wrap pressed directly onto the surface, and refrigerate overnight. Add the homemade whipped cream and toasted coconut flakes right before you plan to serve it for the freshest presentation and best texture.
To avoid a soggy crust, ensure two key steps are followed: first, allow your melted butter for the crust to cool slightly before mixing it with the crumbs. A very hot butter can make the crust greasy. Second, and most importantly, make sure the baked crust is completely cooled to room temperature before you pour in the warm custard filling. A warm crust will absorb moisture from the custard, leading to sogginess. Pressing the crumbs very firmly into the pan also helps create a denser barrier.
Toasting the shredded coconut is optional but highly recommended! It dramatically enhances the flavor by bringing out a deeper, nuttier profile and adds a lovely textural crunch that contrasts beautifully with the creamy filling and soft whipped cream. While you can certainly use untoasted coconut, you’ll miss out on that extra layer of deliciousness and visual appeal. It only takes a few minutes in a skillet and is well worth the effort!
We hope this detailed guide helps you create the most exquisite Coconut Cream Pie, a dessert that’s sure to become a cherished tradition in your home, just as it has in ours. Happy baking (and chilling)!