
Transform your Halloween celebrations with these incredibly easy and charming DIY treat bags! Whether you’re preparing for a spooky party, gifting classmates, or simply adding a personalized touch to trick-or-treating, these 6 fun and festive Halloween treat bag ideas are perfect. Each design comes with a FREE printable topper that you can easily staple onto snack-size Ziplock bags filled with delightful candies and goodies. Get ready to impress with minimal effort and maximum Halloween spirit!
For even more creative ideas, check out our first collection of Halloween bag toppers here.
Crafting Your Perfect Halloween Treat Bags: Essential Notes & Tips
Creating these adorable Halloween treat bags is straightforward, but a few helpful tips can make the process even smoother and ensure professional-looking results. Here’s everything you need to know before you start:
- Print What You Need: Each unique bag topper design is provided on its own printable page. This clever organization allows you to selectively print only the designs you wish to use, saving ink and paper and making customization a breeze.
- Achieve Premium Quality with Glossy Cardstock: For treat bag toppers that truly stand out and have a durable, professional feel, we highly recommend printing them on glossy cardstock. This material enhances the colors and vibrancy of the designs, making your finished bags look fantastic. If you don’t have a high-quality printer at home, consider emailing the PDF files to professional printing services like Staples or Office Max for superior results.
- Tools for Precision: While regular scissors will work, a paper cutter will provide clean, crisp edges, significantly speeding up the cutting process. A scoring board is also invaluable for creating perfect, effortless folds, ensuring your toppers sit neatly over your treat bags. These tools are worth the small investment for repeated craft projects!
- Bag Choice Matters (But Not Strictly!): We personally prefer Zip-loc snack-size bags due to their consistent quality and aesthetic appeal. However, any standard snack-size resealable bag will work perfectly for these projects. Choose what’s readily available and convenient for you.
- Important Printing Instructions: To avoid any potential issues with formatting or quality, always save the printable PDF file to your computer before attempting to print. Do not print directly from your web browser. If you encounter any problems during the printing process, try using a different browser or feel free to email us for assistance.
- Need a Done-For-You Option? If you’re short on time or prefer to have your Halloween treat bags professionally prepared, printed, cut, and shipped directly to you, simply click here to shop.
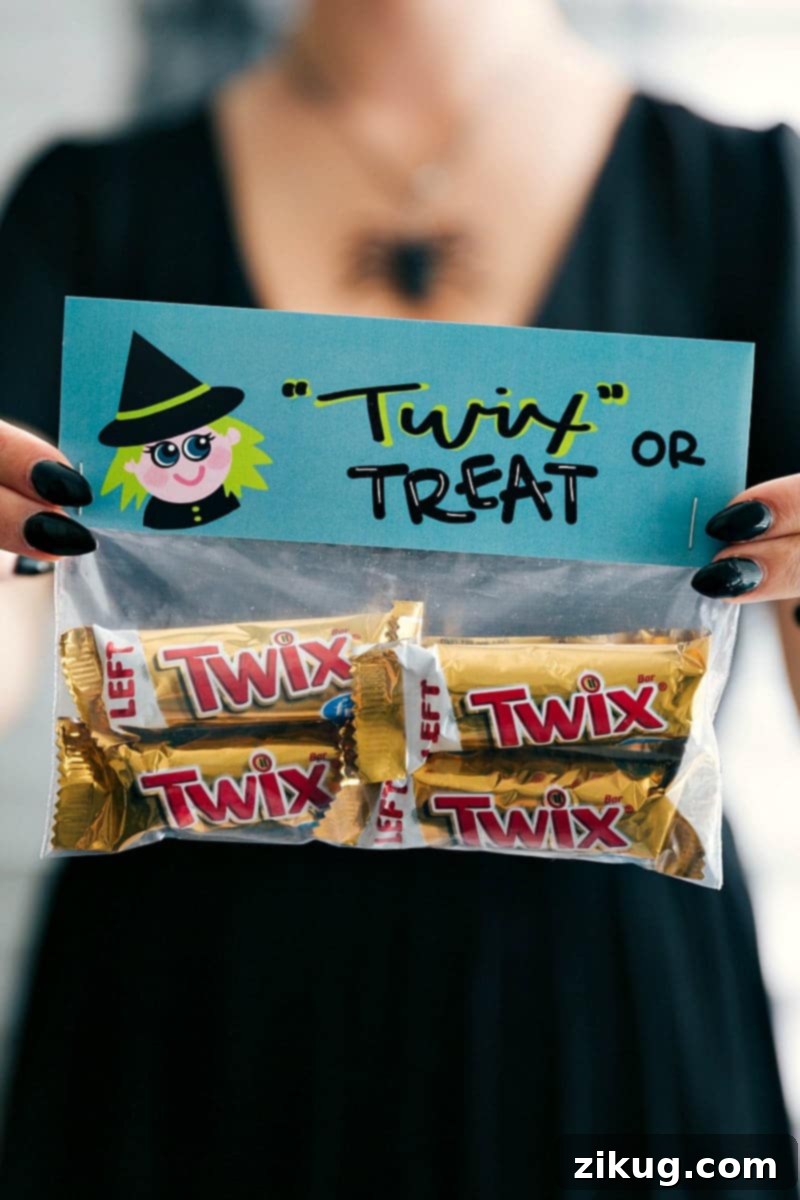
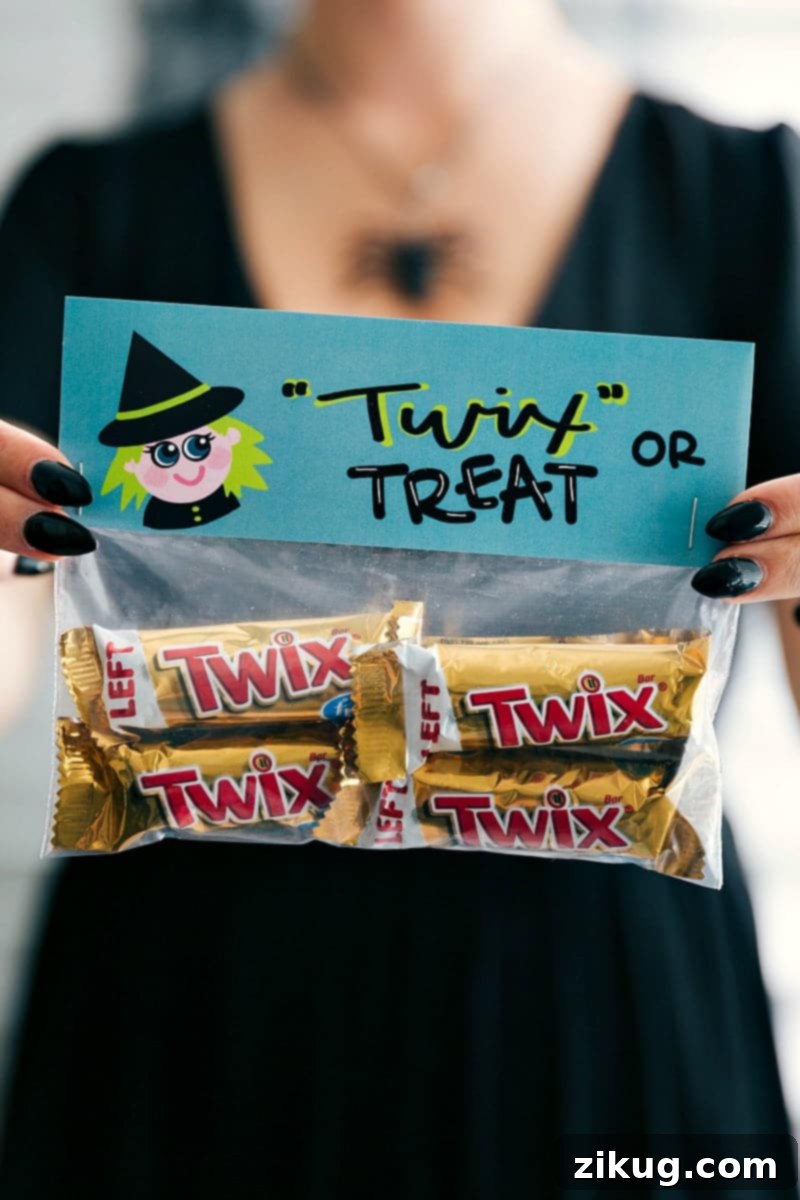
1. “Twix or Treat” Halloween Bags
Kick off your Halloween treat collection with these irresistible “Twix or Treat” bags! This clever play on words makes for a delightful and easily recognizable candy handout that kids and adults alike will adore. The vibrant printable topper adds a perfect touch of witchy charm to classic Twix bars.
Supplies for “Twix or Treat” Bags:
- Snack-Sized Ziplock Bag
- Free Printable “Twix or Treat” Topper: Click Here to Download
- Stapler
- Fun Size Twix Bars
Assembly Instructions: Begin by filling your snack-sized Ziplock bags generously with fun size Twix bars, then seal them securely. Next, carefully cut out your “Twix or Treat” printable topper. Using a scoring board (or a ruler and a blunt tool), create a neat fold line across the center of the topper. Fold the printable over the top of your candy-filled bag and secure each side with a staple. In mere moments, you’ll have a batch of these enchanting Halloween gifts ready to share!
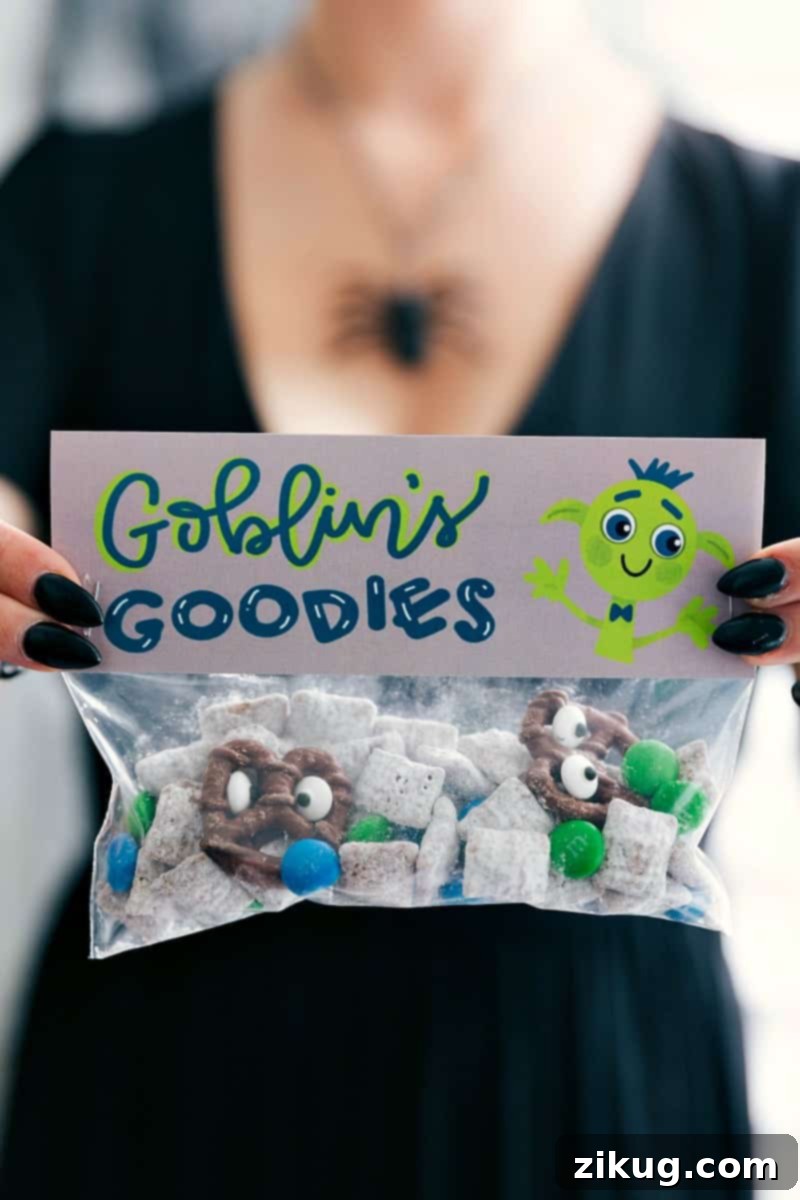
2. “Goblin Goodies” Halloween Treat Bags
These “Goblin Goodies” bags are not just treat bags; they’re an experience! Filled with a homemade, monster-themed Muddy Buddies recipe, these bags are perfect for a special touch. The customizable topper transforms a simple snack into a truly memorable Halloween delight, ideal for parties or special trick-or-treaters.
Supplies for “Goblin Goodies” Bags:
- Snack-Sized Ziplock Bag
- Free Printable “Goblin Goodies” Topper: Click Here to Download
- Stapler
- “Goblin’s Goodies” (Recipe detailed below: a fun Muddy Buddies variation with green and blue M&Ms and chocolate-covered monster pretzels!)
Assembly Instructions: Once your batch of “Goblin Goodies” is prepared and cooled, carefully fill your snack-sized Ziplock bags with the mix. Seal the bags to keep the contents fresh. Retrieve your printed “Goblin Goodies” topper, cut it out, score it, and fold it over the sealed bags. Secure the topper with a staple on each side, and these magically delicious bags are ready to enchant anyone who receives them!
Goblin’s Goodies (Halloween Muddy Buddies)
Chelsea Lords
15 minutes
15 minutes
12
goody snack bags
Video
Learn how to make these Printable Halloween Treat Bag Toppers and Goblin Goodies with our helpful video guide.
Equipment
-
Resealable plastic bag
(1 gallon-sized and 12 snack-sized)
Ingredients
-
9
cups
Rice Chex cereal -
1/2
cup
creamy peanut butter -
1
cup
milk chocolate chips
(or semisweet chocolate chips, we like Guittard or Ghirardelli) -
4
tablespoons
unsalted butter -
1
teaspoon
vanilla extract
-
1/2
teaspoon
salt
-
1-1/2
cups
powdered sugar -
1-1/2
cups
M&M’s
(we used green and blue for a spooky effect!) -
1/2
cup
chocolate-covered pretzels -
Candy eyeballs
(optional, for making pretzel monsters) -
Chocolate
(melted; optional, for attaching candy eyeballs to pretzel monsters)
Instructions
-
Add Rice Chex cereal to a large bowl; set aside.
-
In a large microwave-safe bowl, combine peanut butter, chocolate chips, and butter. Microwave in short bursts of 15 seconds, stirring well between each burst, until the mixture is completely melted and smooth. Stir in the vanilla extract and salt. Pour this delicious chocolate-peanut butter mixture over the prepared cereal and stir very well until all the cereal is evenly coated.
-
Carefully transfer the coated cereal mixture into a gallon-sized resealable plastic bag. Pour the powdered sugar over the cereal. Seal the bag tightly and shake vigorously until the cereal is thoroughly and evenly coated with the powdered sugar. This creates the classic “Muddy Buddies” texture.
-
Pour the powdered sugar-coated cereal into a large bowl and gently stir in the green and blue M&M’s. Once thoroughly mixed, separate the “Goblin Goodies” into even amounts and distribute them among your snack-sized resealable plastic bags.
-
For an extra spooky touch, if desired, create pretzel monsters! Melt a small amount of chocolate and use it as “glue” to attach candy eyeballs to individual chocolate-covered pretzels. Allow these to dry completely until the chocolate is set. Once dry, add a few of these adorable (and slightly spooky) pretzel monsters to each individual “Goblin Goodies” bag before sealing. These thoughtful additions truly elevate your Halloween treat bags!
Like this recipe? Leave a comment below!
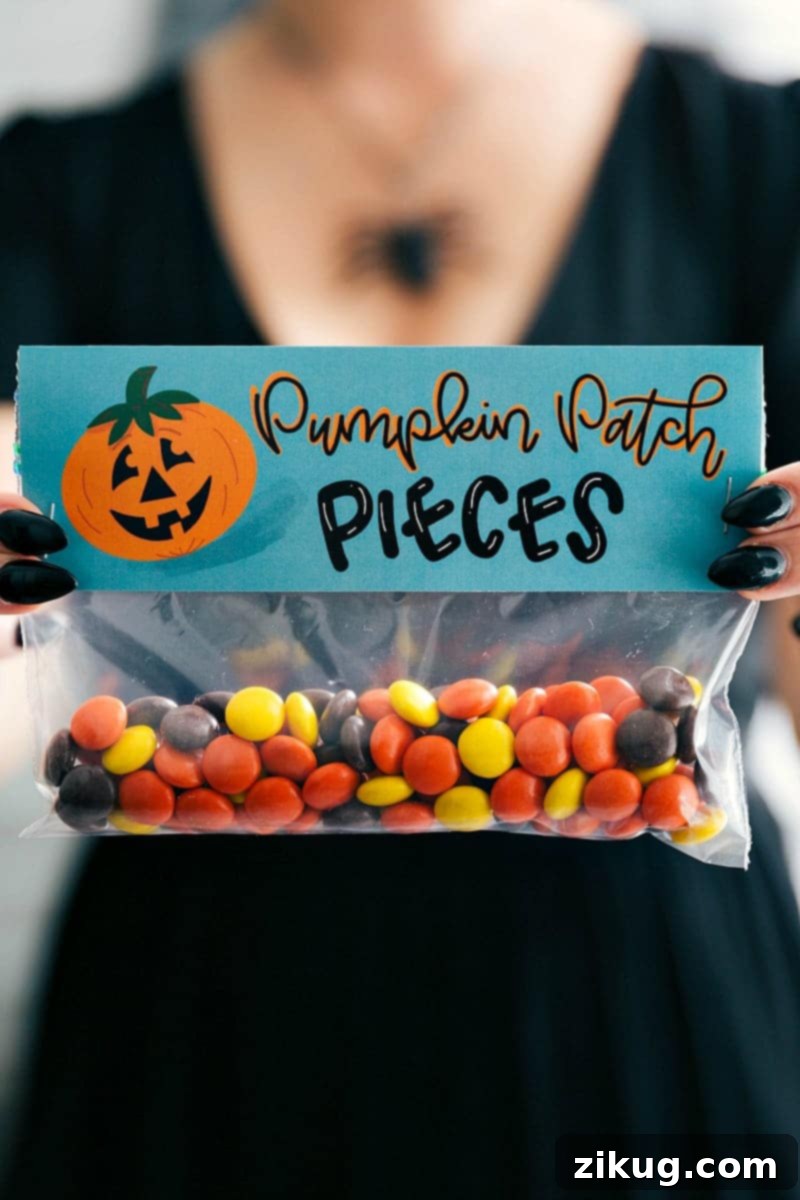
3. “Pumpkin Patch Pieces” Halloween Bags
Embrace the classic fall and Halloween flavors with these adorable “Pumpkin Patch Pieces” treat bags. Reese’s Pieces, with their iconic orange, yellow, and brown hues, are the perfect candy to complement a charming pumpkin-themed printable topper. These bags are a delightful nod to autumn and a guaranteed hit for any Halloween event.
Supplies for “Pumpkin Patch Pieces” Bags:
- Snack-Sized Ziplock Bag
- Free Printable “Pumpkin Patch Pieces” Topper: Click Here to Download
- Stapler
- Reese’s Pieces
Assembly Instructions: Start by filling your snack-sized bags with plenty of Reese’s Pieces, ensuring they are well-sealed. Next, carefully cut out your “Pumpkin Patch Pieces” printable, score it down the middle, and fold it over the top of the candy-filled bag. Secure it firmly with a staple on each side. These festive bags are now ready to be gifted! For optimal freshness and to maintain the quality of the candy, we recommend preparing these treat bags no more than 1-2 days before they are to be distributed.
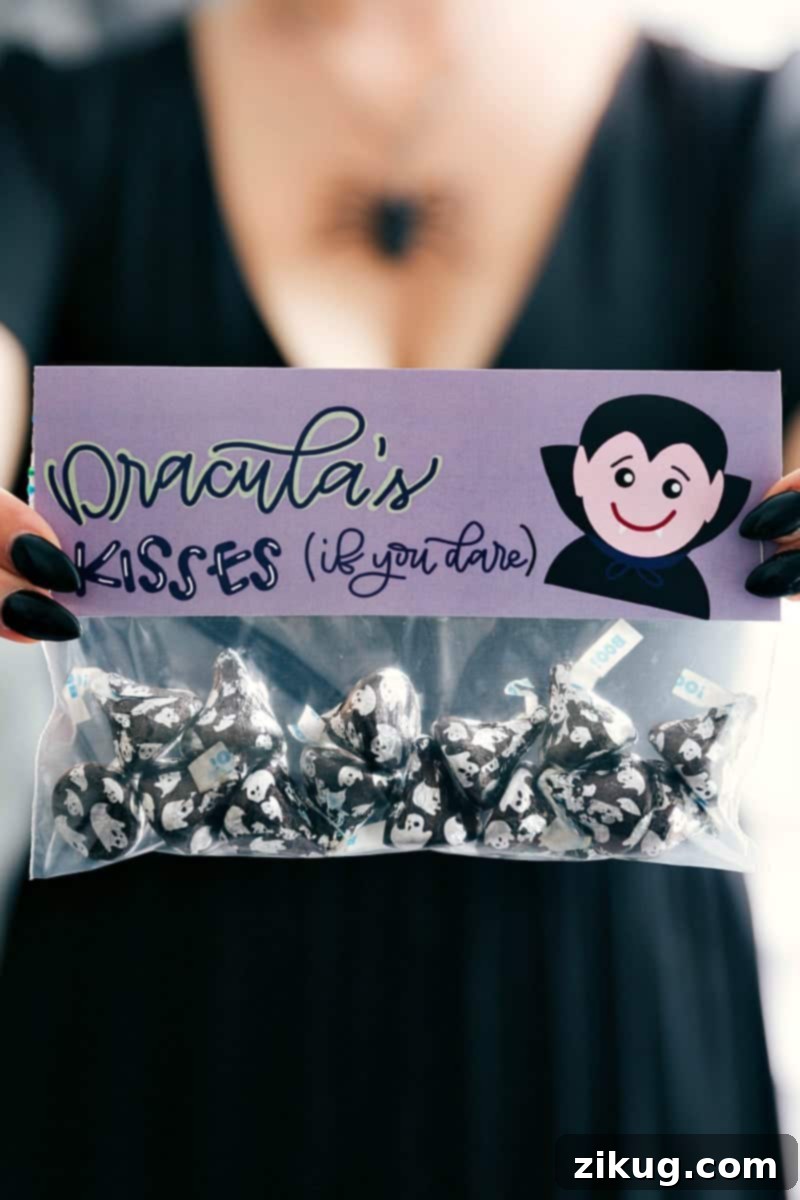
4. “Dracula Kisses” Halloween Treat Bags
Sink your teeth into these charming “Dracula Kisses” treat bags! Combining the timeless appeal of Hershey’s Kisses with a vampiric-themed printable topper, these bags are a sweet and playful way to celebrate Halloween. They’re especially festive if you can find Hershey’s Kisses wrapped in seasonal Halloween foils.
Supplies for “Dracula Kisses” Bags:
- Snack-Sized Ziplock Bag
- Free Printable “Dracula Kisses” Topper: Click Here to Download
- Stapler
- Hershey’s Kisses (consider using Halloween foil-wrapped kisses for an extra festive touch!)
Assembly Instructions: Fill your snack-sized Ziplock bags with an ample amount of Hershey’s Kisses and ensure they are sealed properly. Cut out the “Dracula Kisses” printable topper, score it across the middle, and fold it neatly over the top edge of your filled bags. Finish by stapling each side to keep the topper in place. These delightful and slightly spooky bags are now ready to bestow “kisses” upon your Halloween guests!
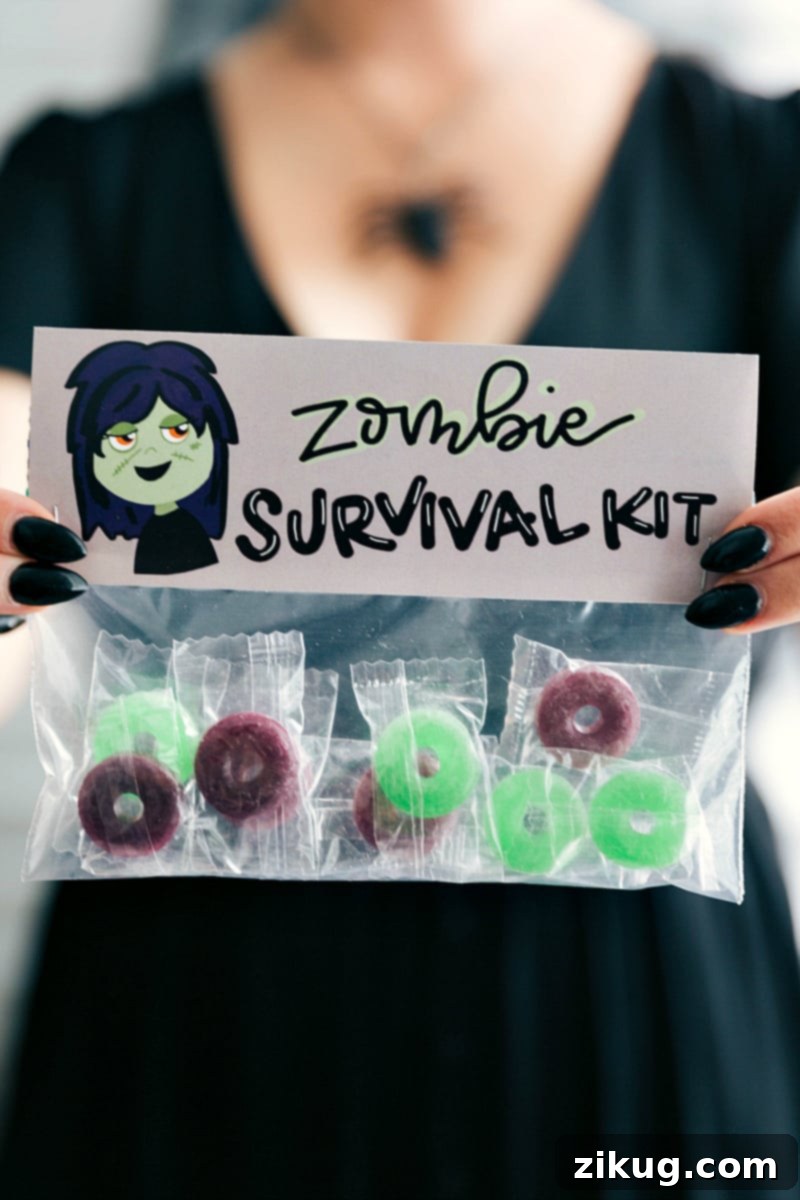
5. “Zombie Survival Kit” Halloween Bags
Prepare for the apocalypse with these fun and witty “Zombie Survival Kit” treat bags! Filled with Lifesavers, these bags offer a humorous and delicious way to “survive” any zombie encounter this Halloween. The unique printable topper adds a playful, post-apocalyptic vibe that will surely get a chuckle.
Supplies for “Zombie Survival Kit” Bags:
- Snack-Sized Ziplock Bag
- Free Printable “Zombie Survival Kit” Topper: Click Here to Download
- Stapler
- Lifesavers candy
Assembly Instructions: Begin by filling your snack-sized Ziplock bags with a good supply of Lifesavers, then seal the bags securely. Next, carefully cut out your “Zombie Survival Kit” printable topper, score it, and fold it over the top of the candy-filled bag. Secure it firmly with a staple on each side. These clever “survival kits” are now ready to be handed out, ensuring everyone is prepared for anything Halloween might throw their way!
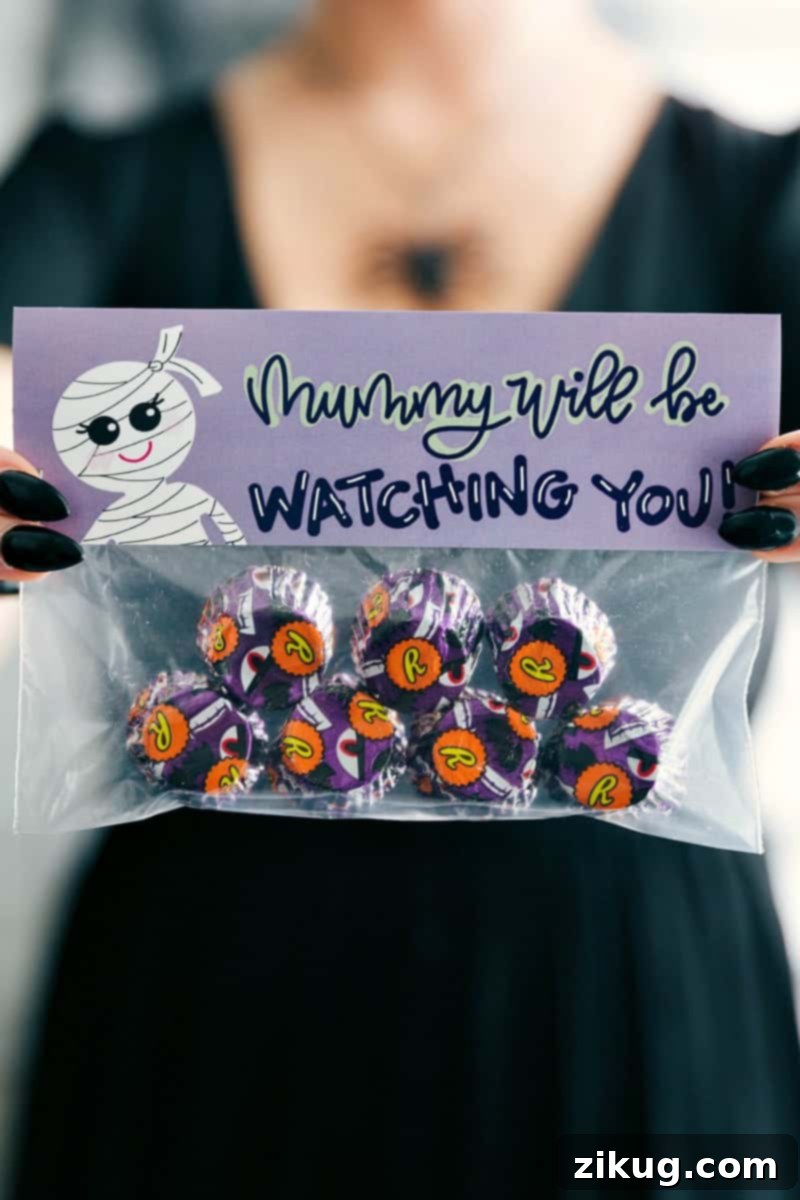
6. “Mummy Will Be Watching You” Halloween Treat Bags
Add a fun, eerie touch to your Halloween handouts with these “Mummy Will Be Watching You” treat bags! Filled with playful eyeball candies, these bags are sure to catch attention and create a delightfully spooky impression. The mummy-themed topper perfectly complements the watchful ‘eyes’ within.
Supplies for “Mummy Will Be Watching You” Bags:
- Snack-Sized Ziplock Bag
- Free Printable “Mummy Will Be Watching You” Topper: Click Here to Download
- Stapler
- Eyeball candies (we recommend eyeball-wrapped Reese’s cups for an extra thematic treat!)
Assembly Instructions: Fill your snack-sized Ziplock bags with the intriguing eyeball candies, ensuring they are securely sealed. Grab your “Mummy Will Be Watching You” printable topper, cut it out, score it, and fold it over the top of the filled bag. Use a stapler to secure each side of the topper. These uniquely spooky treat bags are now ready to keep a watchful eye on your Halloween festivities and delight all who receive them!
We hope you thoroughly enjoy creating and sharing these easy and imaginative Halloween gifts! Crafting personalized treats adds a special touch to the holiday, making it even more memorable for everyone. Happy gifting and happy Halloween!