
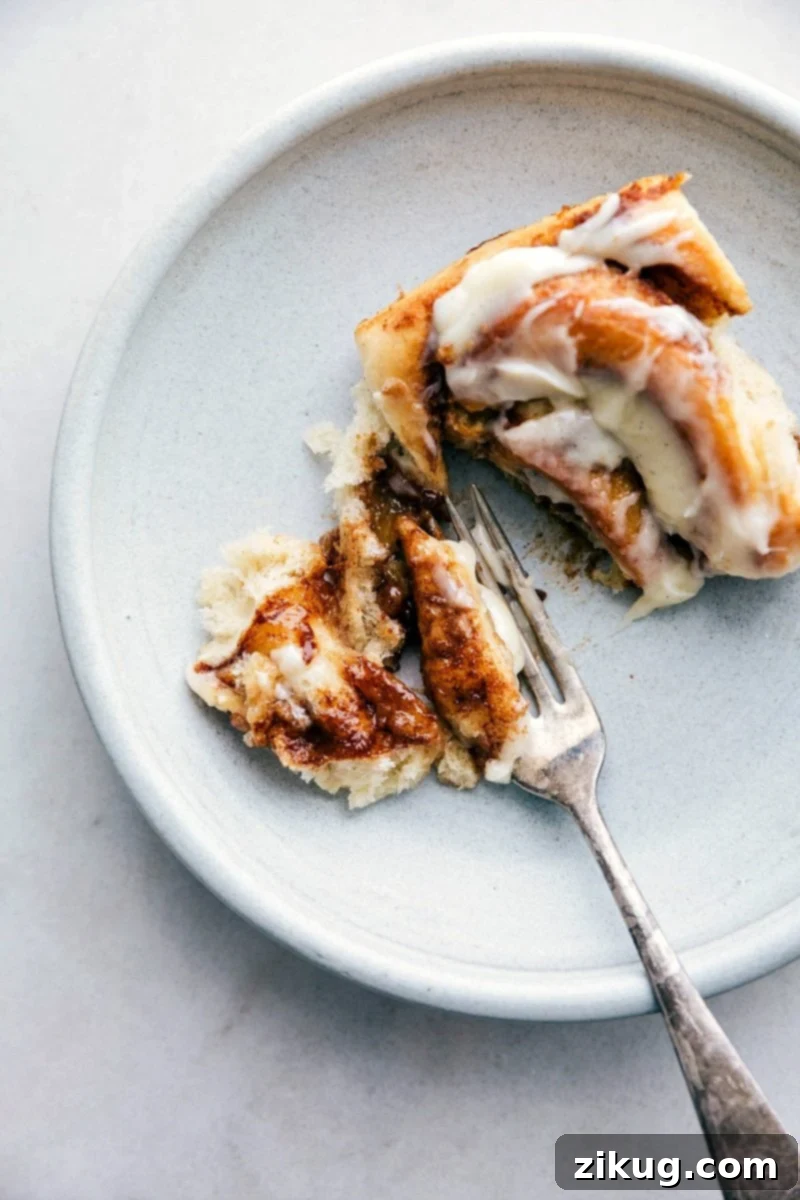
Indulge in the irresistible aroma and taste of genuinely delicious, gooey Homemade Cinnamon Rolls. This comprehensive guide, complete with inspiring photos and meticulous step-by-step instructions, will equip you with all the top tips and tricks to bake perfect rolls every single time. Prepare to impress your family and friends with a breakfast or brunch spread that includes these sweet delights, perhaps alongside savory breakfast potatoes and a refreshing strawberry smoothie for a truly memorable meal.
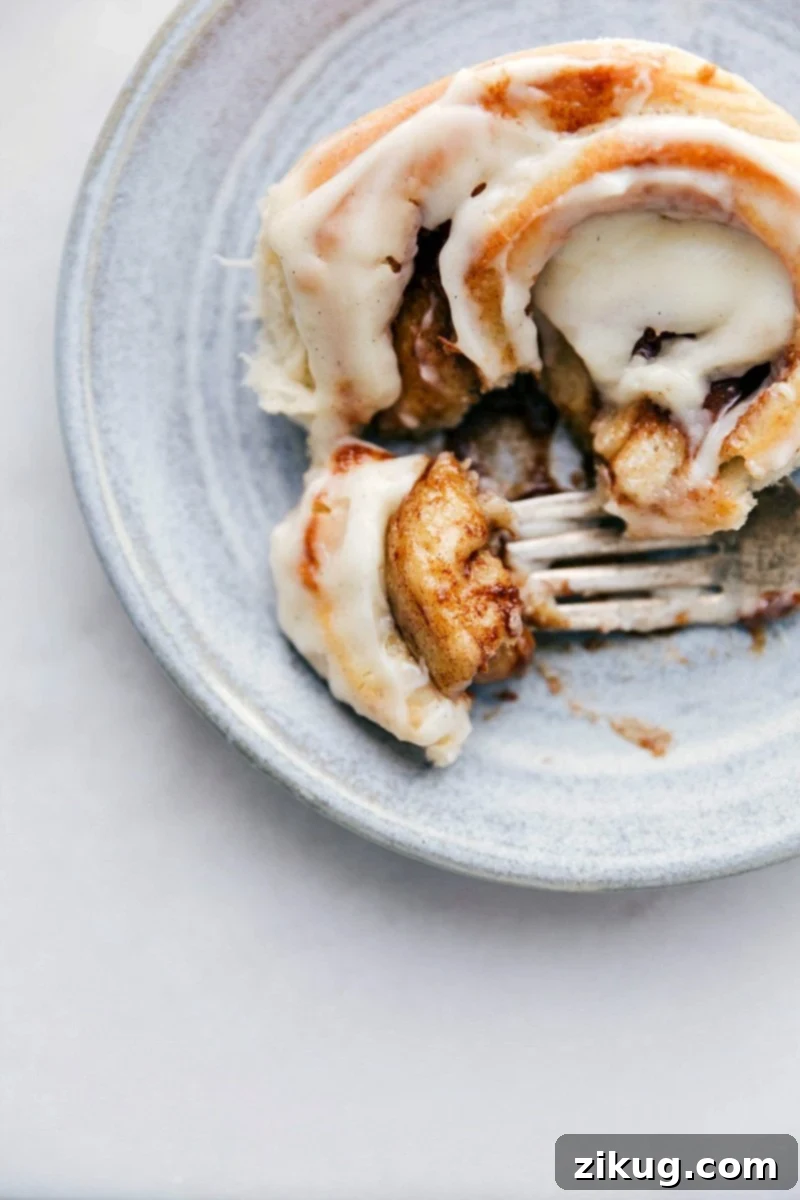
Homemade Cinnamon Rolls: Your Guide to Sweet Perfection
There’s nothing quite like the warmth and comfort of a freshly baked cinnamon roll, especially when it’s made right in your own kitchen. If you were to ask my toddler his ultimate favorite food, without a moment’s hesitation, he would exclaim, “CINNAMON ROLLS!” His passion for these sweet, swirled treats means we’re constantly baking and refining our recipe. After countless tests and tweaks, we’ve perfected this Homemade Cinnamon Roll recipe, and I’m confident it will become a cherished favorite in your household too.
Even if you’re new to baking, don’t be intimidated! I’ve broken down every step with clear, detailed instructions and accompanying photos to guide you through the process. My goal is for you to achieve bakery-quality results effortlessly. Once you’ve tried these, please share your thoughts and experiences in the comment section below!
Why Choose Homemade Over Store-Bought?
While store-bought cinnamon rolls offer convenience, homemade versions deliver an unparalleled level of freshness, flavor, and satisfaction. Crafting them yourself allows you to control the quality of ingredients, ensuring a product free from preservatives and artificial flavors. The process of kneading dough, watching it rise, and filling your home with the intoxicating scent of cinnamon and sugar is an experience in itself. Plus, the tender, fluffy texture and rich, gooey center of a homemade roll are simply superior, making every bite a delightful indulgence. It’s a culinary journey that culminates in a truly rewarding treat, perfect for special occasions or simply elevating an ordinary morning.
How to Make the Best Homemade Cinnamon Rolls
Creating these heavenly cinnamon rolls involves a few key steps, each crucial to achieving that perfect fluffy texture and irresistible gooey center. Follow these instructions carefully, and you’ll be enjoying warm, delicious rolls in no time.
One: Prepare and Proof the Yeast.
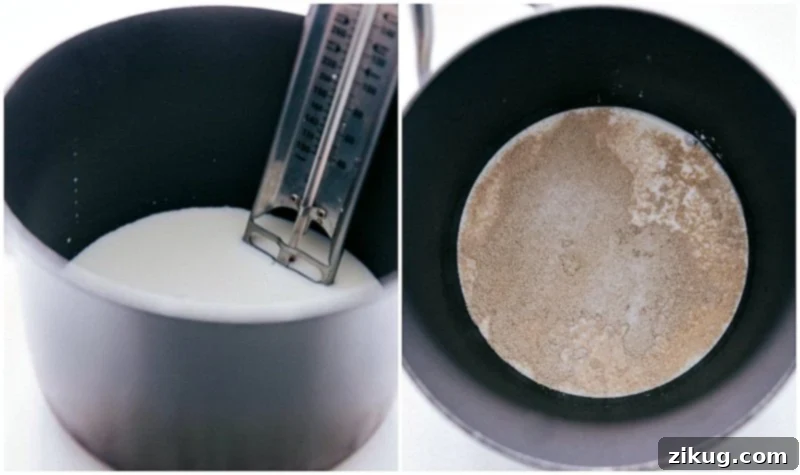
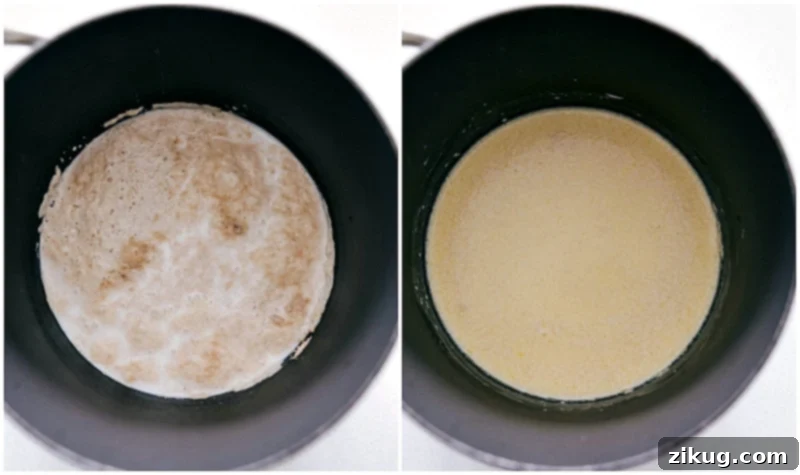
- Begin by gently warming the milk. It’s vital to get the temperature just right: precisely 100°F (38°C). Use a kitchen thermometer for accuracy; milk that’s too hot will kill the yeast, and milk that’s too cold won’t activate it. Once it reaches temperature, remove it from the stovetop.
- Next, we proof the yeast – a critical step that activates it. Sprinkle the active dry yeast and a touch of sugar over the warm milk. Do not stir this mixture. Allow it to stand undisturbed for 5-10 minutes. Properly activated yeast will form a bubbly, foamy layer on the surface, indicating it’s alive and ready to work. If you don’t see this foam, your yeast may be old, or the milk temperature was off. It’s best to start this step over to ensure your rolls rise beautifully.
Two: Prepare the Enriched Liquid Mixture.
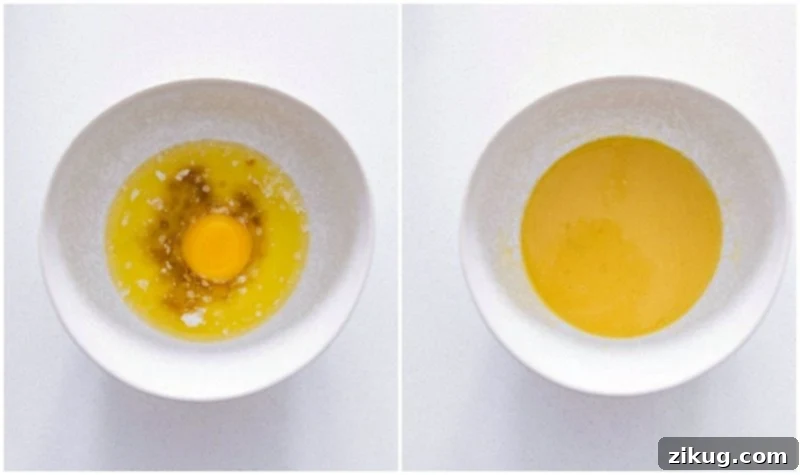
- While your yeast is proofing, melt 4 tablespoons of unsalted butter. Set it aside to cool completely to room temperature. This cooling step is crucial; adding hot butter to the egg yolk will cause the egg to cook, leading to an undesirable texture.
- Once the butter has cooled, whisk it together with one large egg yolk (you can discard the egg whites or save them for another recipe) and the vanilla extract. Whisk until the mixture is smooth and well combined.
Three: Integrate the Wet Mixtures.
- Before proceeding, re-check your yeast mixture. It must be visibly foamy and bubbly, as shown in the picture below on the left. This foam confirms the yeast is active and will give your rolls their light and airy texture. If you don’t see this crucial foam, you must start over. The most common culprits for inactive yeast are expired yeast or milk that was too hot, which can kill the yeast organisms.
- Once you’ve confirmed your yeast is active and thriving, gently whisk the yeast-milk mixture with the cooled butter, egg, and vanilla blend. Stir until thoroughly combined, creating a homogeneous wet ingredient base for your dough.
Four: Mix and Knead the Dough.
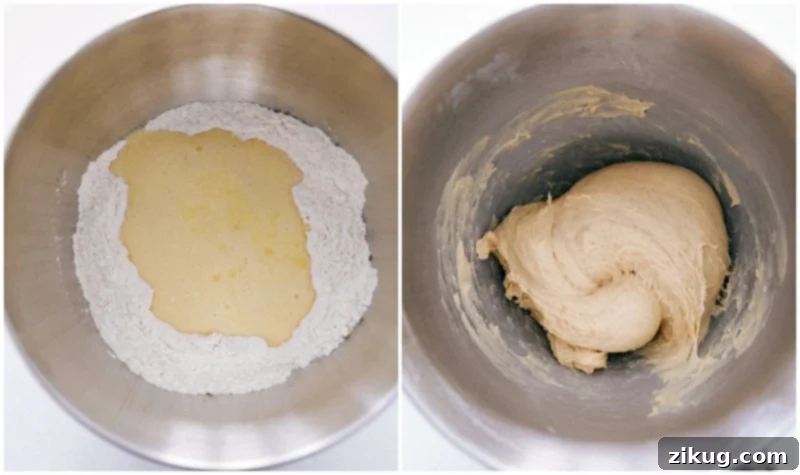
- In the bowl of a stand mixer, combine all your dry ingredients: flour, the remaining granulated sugar, salt, and cinnamon. Mix them thoroughly, then create a clear indent in the center of the dry mixture.
- Pour the combined wet ingredients from step three directly into this indent.
- Attach the dough hook to your stand mixer and mix on low speed for approximately 2 minutes, until the ingredients come together to form a thick, slightly sticky dough. Use a spatula to scrape down the sides of the bowl as needed to ensure everything is incorporated.
- Increase the speed to medium and continue kneading for about 5-6 minutes, or until the dough gathers cleanly around the dough hook and pulls away from the sides of the bowl. The dough should still be slightly sticky and tacky to the touch, but not wet or unmanageable. Resist the urge to add too much additional flour; a soft, slightly sticky dough is the secret to fluffy cinnamon rolls. If it’s too sticky to gather, add only a small amount of extra flour, a tablespoon at a time.
Five: Allow the Dough to Rise.
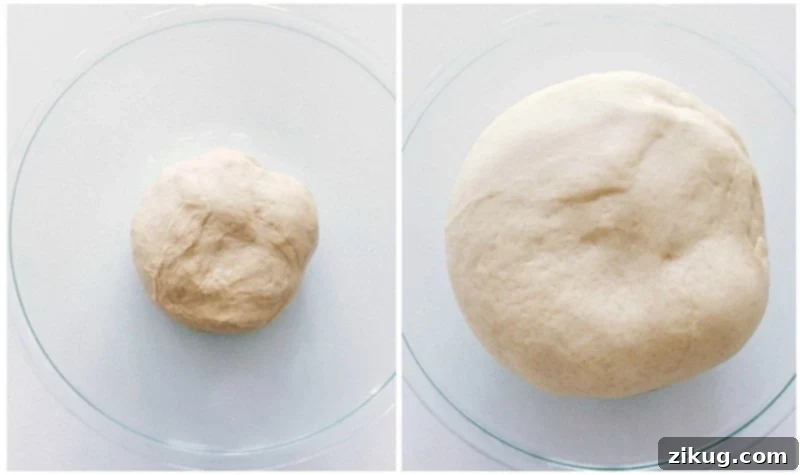
- Gently remove the dough from the mixer and form it into a smooth ball. Lightly grease a large bowl with cooking spray or butter, then place the dough ball inside, turning it once to coat all sides. Cover the bowl tightly with plastic wrap or a clean kitchen towel.
- Allow the dough to rise in a warm, draft-free environment until it has visibly doubled in size. This typically takes about 45 minutes to 1 hour, but timing can vary based on ambient temperature.
- PRO TIP for a faster rise: A warm (but not hot!) environment encourages faster yeast activity. Here are two methods we use: My husband often places the bowl near our fireplace set on low heat. I prefer to preheat my oven to its lowest setting (around 170°F or 75°C), then turn it OFF. Place the covered bowl of dough inside the slightly warm oven, leaving the oven door ajar a few inches. This creates a perfect, consistent warm environment for rising.
Six: Shape the Rolls and Apply Filling.
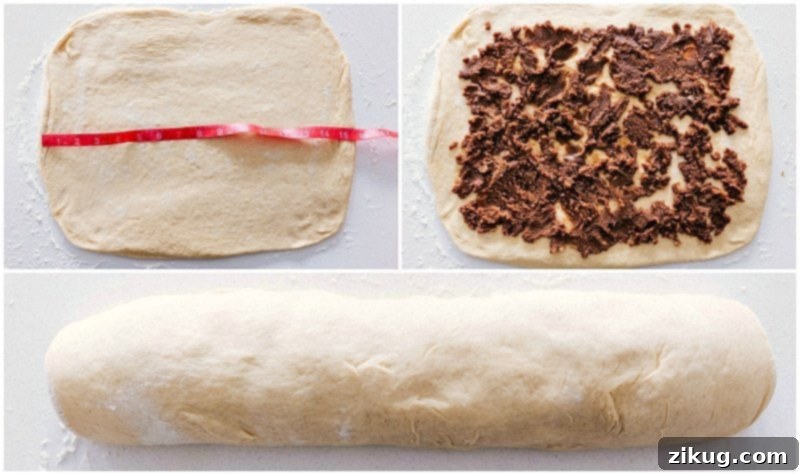
- Lightly flour a clean countertop or a large pastry mat. Transfer the risen dough to the prepared surface and, using a rolling pin, roll it out into an approximate 15 x 12-inch rectangle. Position the dough so the 15-inch side is facing you. Work gently and avoid overworking the dough, which can make the rolls tough.
- In a separate bowl, cream together the softened butter, dark brown sugar (dark brown sugar offers a richer flavor, but light brown sugar works wonderfully too), and ground cinnamon until it forms a thick, spreadable paste. Evenly spread this luscious cinnamon-sugar filling over the entire surface of the rolled-out dough, going right to the edges.
- Starting from the long edge closest to you, tightly roll the dough into a snug cylinder, much like a jelly roll. Aim for an even, consistent cylinder to ensure uniform rolls.
- Once rolled, use a sharp knife or a piece of dental floss (for a clean cut!) to slice the dough cylinder into 12 equally sized pieces. For perfect accuracy, a measuring tape can help ensure each roll is the same size.
Seven: Second Rise and the Secret to Gooey Rolls.
- Lightly grease a 9×13-inch baking pan. Ceramic or glass pans are recommended over metal for more even baking and to prevent over-browning. (This 9 x 13 Cake Pan is a personal favorite!). Arrange the sliced cinnamon rolls into the prepared pan, leaving a small space between them to allow for expansion.
- Cover the pan loosely with plastic wrap or a kitchen towel and let the rolls undergo their second rise. Again, place them in a warm environment for optimal results. They should rise for about 20-30 minutes, or until they have nearly doubled in size and look puffy.
- Once the rolls have risen, gently warm 1/3 cup of heavy cream (microwave for 15-20 seconds; it should be warm, not hot). Evenly pour this warmed heavy cream over the risen rolls in the pan. This is the ultimate secret ingredient, a game-changer! It’s a fantastic tip learned from Tastes of Lizzy T, and it’s what makes these cinnamon rolls incredibly gooey, rich in flavor, and caramelized beautifully around the edges. We never skip this step now!
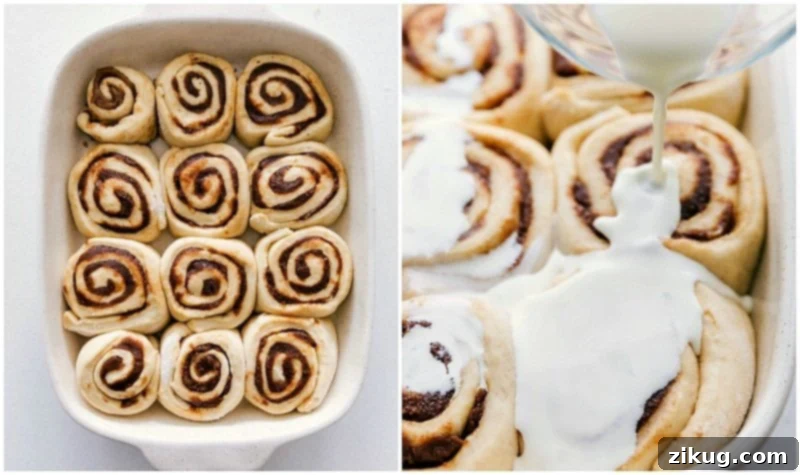
Eight: Bake to Golden Perfection and Glaze.
- Preheat your oven to 375°F (190°C). Place the pan of cinnamon rolls into the preheated oven. Bake for 17-26 minutes, or until the edges are lightly golden brown and the centers are cooked through but still soft. While the rolls are baking, you can prepare your frosting.
- Once baked, remove the cinnamon rolls from the oven. Allow them to cool in the pan for 10-15 minutes. This cooling period helps the rolls absorb the gooey cream and makes them easier to handle before frosting.
- Evenly spread the prepared cream cheese frosting over the warm, slightly cooled rolls. Serve and enjoy them while they are still warm and deliciously gooey!
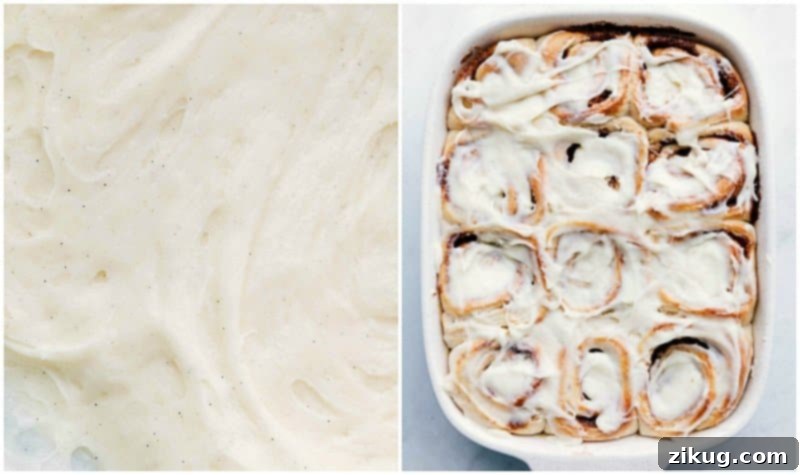
Cinnamon Roll FAQs
How do you make the best cinnamon rolls?
- Practice Makes Perfect: This might sound cliché, but the more often you bake cinnamon rolls, the more intuitive the process becomes, and the better your results will be. I speak from personal experience! While these directions are thorough, repetition builds confidence and skill.
- Avoid Too Much Flour: A common mistake is adding excessive flour, especially during the kneading stage. The dough should be slightly sticky and tacky. Too much flour will result in dense, dry rolls rather than the desired gooey and light texture. Trust the recipe and the process!
- Warm Environment for Rising: Yeast thrives in warmth. Ensure your dough has a consistently warm, draft-free spot for both rises to achieve maximum fluffiness.
Are Homemade Cinnamon Rolls healthy?
How do you make gooey cinnamon rolls?
Achieving that coveted gooey center is easier than you think, thanks to two key secrets I’ve shared! First, it’s crucial to avoid using too much flour in your dough. A slightly sticky, soft dough will yield a tender, moist roll. Second, and perhaps the most impactful tip, is to pour warmed heavy cream evenly over your rolls before baking them. This magical step infuses moisture and richness, creating an irresistibly gooey texture and slightly caramelized edges. Combine these two techniques, and prepare for the ultimate gooey, fluffy cinnamon roll experience!
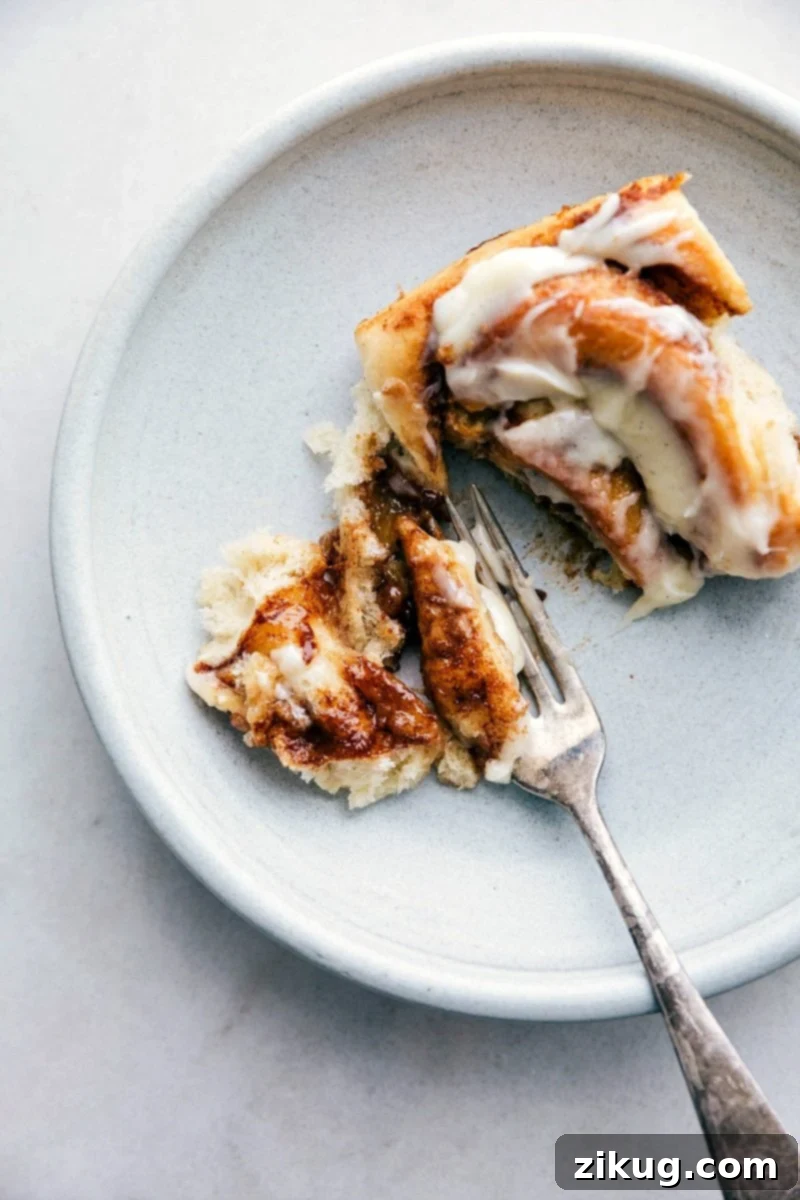
More Delicious Recipes You’ll Love
- French Toast (with a decadent four-ingredient caramel syrup!)
- Acai Bowl (featuring four incredible flavors!)
- Healthy No-Bake Cookies
- Cinnamon Roll Cheesecakes (a beloved reader favorite!)
- The absolute best homemade pancakes with a delightful blueberry syrup
Print Recipe
Homemade Cinnamon Rolls
Equipment
-
Medium pot
-
Stand mixer with dough hook
-
9 x 13-inch baking pan ceramic or glass; avoid metal if possible
Ingredients
- 1 cup whole milk I wouldn’t recommend a lower fat
- 2-1/2 teaspoons active dry yeast not instant or rapid rise
- 1/3 cup + 1/2 teaspoon granulated sugar
- 4 tablespoons unsalted butter melted and cooled to room temperature
- 1/2 tablespoon vanilla extract
- 1 large egg yolk
- 2-3/4 cups all-purpose flour plus some additional flour as needed
- 3/4 teaspoon salt
- 1/2 teaspoon ground cinnamon
- 8 tablespoons butter 1/2 cup, softened
- 1 cup dark brown sugar I like dark, but light works great too; firmly packed
- 2 tablespoons ground cinnamon
- 1/3 cup heavy cream slightly warmed
- 4 ounces cream cheese full-fat, at room temperature
- 1/4 cup unsalted butter at room temperature
- 1 cup powdered sugar
- 1/2 teaspoon vanilla bean paste or 1 teaspoon vanilla extract
- 1/8 teaspoon ground cinnamon
- 1/8 teaspoon salt
Instructions
Make the Dough
-
Preheat oven to 170°F (75°C) to create a warm environment for dough rising, then turn it off. Heat the milk in a medium pot over low heat until it reaches exactly 100°F (38°C). Remove the pot from heat and sprinkle the yeast and 1/2 teaspoon of sugar on top. Do not stir. Let it sit undisturbed for 5–10 minutes until a foamy layer appears, indicating the yeast is active. If no foam forms, the yeast may be inactive or the milk was too hot; you’ll need to start this step over.
-
While the yeast is proofing, melt 4 tablespoons of butter and allow it to cool completely to room temperature. Once cooled, whisk in the vanilla extract and egg yolk until smooth. Then, gently whisk this mixture into your activated yeast/milk mixture until well combined.
-
In the bowl of a stand mixer, combine the flour, the remaining 1/3 cup sugar, salt, and cinnamon. Mix well, then create an indent in the center. Pour the combined yeast mixture into this indent. Attach the dough hook and mix on low speed for approximately 2 minutes, until the dough is thick and slightly sticky, scraping down the sides as needed. Increase the speed to medium and knead for about 5–6 minutes, until the dough gathers around the hook. If the dough is too sticky to gather, add additional flour slowly (1/4 to 3/4 cup extra, if necessary), aiming for a soft, slightly tacky texture that doesn’t stick excessively to your fingers. Avoid adding too much flour to keep the rolls soft.
-
Remove the dough from the bowl and gently shape it into a ball (it will still be a bit sticky). Lightly grease the mixing bowl with cooking spray or butter, return the dough to the bowl, turning to coat it. Cover the bowl with plastic wrap or a clean towel and let it rise in a warm place until doubled in size. This usually takes about 45 minutes to 1.5 hours. Placing the dough in your previously warmed (and now off) oven with the door cracked open 4–5 inches is an excellent way to achieve a faster, more consistent rise.
-
Lightly flour a clean surface and transfer the risen dough. Roll it out into an approximate 15×12-inch rectangle, with the 15-inch side facing you. Be careful not to overwork the dough during this step.
For the Filling
-
In a medium bowl, combine the 8 tablespoons of softened butter with the dark brown sugar and ground cinnamon. Beat or mix well until you have a thick, spreadable mixture.
-
Using a knife or an offset spatula, evenly spread the cinnamon-sugar mixture over the entire dough rectangle, extending it to the edges. Starting from the long side closest to you, tightly roll up the dough in a jelly-roll style to form a consistent cylinder.
-
Slice the rolled dough cylinder into 12 equal pieces. Place these cut cinnamon rolls into a greased 9×13-inch ceramic or glass baking pan. Avoid metal pans if possible, as they can sometimes bake the edges too quickly.
-
Cover the rolls in the pan with plastic wrap or a towel and let them rise again until nearly doubled in size, approximately 20–30 minutes. Placing them in a warm environment (like the oven trick mentioned earlier) will speed up this second rise.
-
While the rolls are rising for the second time, preheat your oven to 375°F (190°C). Lightly warm the 1/3 cup of heavy cream in the microwave for 15–20 seconds; it should be lukewarm, not cold or hot.
-
Using a pastry brush, gently spread the warmed heavy cream evenly over the risen rolls in the pan. Allow it a few moments to soak down into and around the rolls. This is the secret to their irresistible gooeyness!
-
Bake the cinnamon rolls in the preheated oven at 375°F (190°C) for 17–26 minutes. They are done when the edges are lightly golden brown and the centers are cooked through but remain soft and tender.
For the Frosting/Glaze
-
While the baked rolls are cooling, prepare the creamy frosting. In a large bowl, combine the room-temperature cream cheese and unsalted butter. Beat with an electric mixer until the mixture is completely smooth and creamy, about 2–3 minutes. Add in the powdered sugar, vanilla (or vanilla bean paste), cinnamon, and salt. Beat again until the frosting is smooth and light.
-
Allow the cinnamon rolls to cool in their pan at room temperature for about 10–15 minutes. This brief cooling period helps the frosting melt slightly but not completely, allowing it to set beautifully. Spread the prepared glaze evenly over the warm rolls. Serve immediately and enjoy these delightful, warm homemade treats!
Recipe Notes
Nutrition
Nutrition information is automatically calculated, so should only be used as an approximation.