
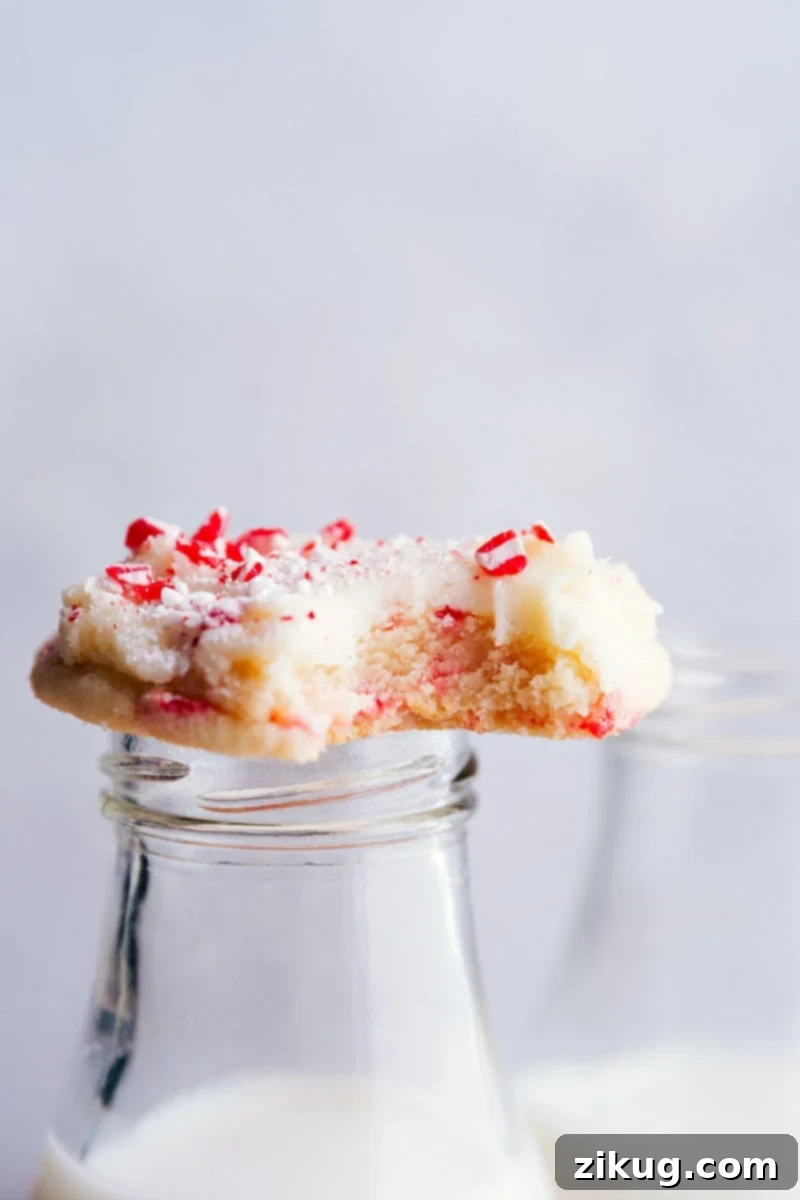
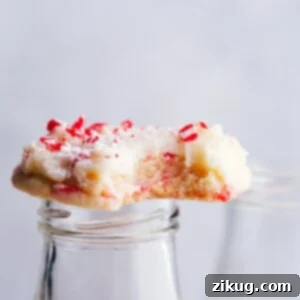
Unleash the festive spirit with our incredibly soft and delightfully chewy **Peppermint Sugar Cookies**, generously adorned with a luscious, creamy peppermint-flavored frosting and a delightful sprinkle of crushed peppermint candy. These are not just cookies; they are the quintessential Christmas treat, designed to bring joy and a burst of minty freshness to your holiday table!
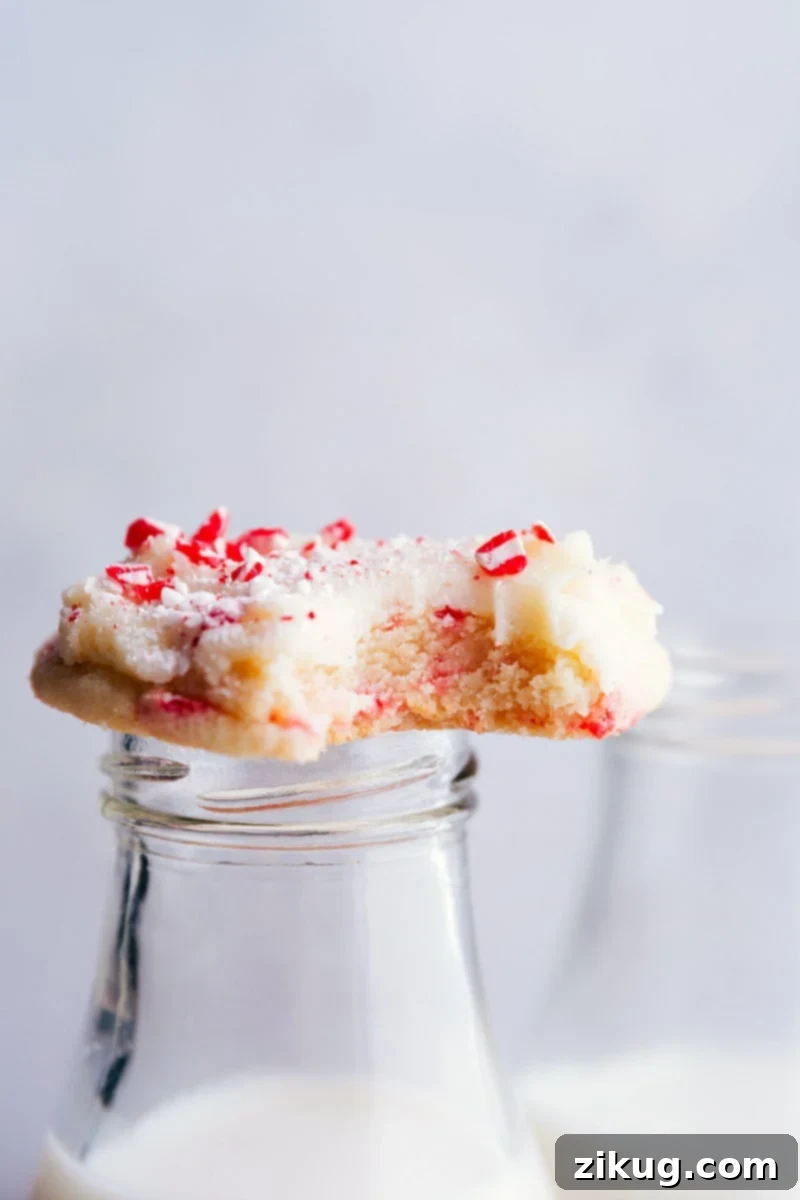
Irresistibly Soft Peppermint Sugar Cookies: The Ultimate Holiday Treat
Step into a winter wonderland with these enchanting Peppermint Sugar Cookies. Crafted for supreme holiday indulgence, these cookies are a symphony of soft textures and vibrant peppermint flavor. Each bite offers a perfect balance: ultra-chewy centers that melt in your mouth, complemented by delicately crisp edges. The magic begins with a cookie dough infused with subtle crushed peppermint, leading to a decadent, smooth cream cheese frosting, also brimming with peppermint essence. Finally, a generous scattering of additional crushed candy canes provides that signature crunch and an extra festive flourish. These cookies are an absolute dream for any peppermint enthusiast and a guaranteed crowd-pleaser for all your holiday gatherings.
Despite the triple dose of peppermint, the flavor profile is meticulously balanced, ensuring a refreshing experience without being overpowering. The rich, tangy sweetness of the cream cheese frosting harmonizes beautifully with the cool mint, creating a sophisticated yet comforting taste that embodies the festive season. They are simple to make, yet impressive enough to be the centerpiece of any cookie platter or a delightful gift for loved ones.
Mastering the Magic of Peppermint: Tips & Tricks
The secret to truly outstanding Peppermint Sugar Cookies lies in understanding and utilizing peppermint effectively. From choosing the right candy to selecting the perfect extract, these details make all the difference in achieving that bright, clean peppermint flavor.
- **Choosing Your Crushed Peppermint:** For the ideal crunch and visual appeal, we highly recommend using pre-crushed Peppermint Crunch Sprinkles® or Candy Cane Crunch®. These products offer consistent texture and vibrant color. However, don’t despair if you can’t find them!
- **Crushing Your Own Candy Canes:** If pre-crushed options aren’t available, you can easily create your own. Simply place unwrapped peppermint candies or candy canes into a sturdy, sealed double bag (to prevent tears) and use a rolling pin or meat mallet to crush them until you reach a fine, sprinkle-like consistency. Alternatively, a mini food processor or a strong blender can achieve this task efficiently. The key is to get small, even pieces that won’t be too hard to bite into.
Pro Peppermint Tip
Always use **peppermint extract**, not general mint extract or spearmint. Mint extract can often have a flavor reminiscent of toothpaste, which is definitely not what we’re aiming for in a delicious holiday cookie! Peppermint extract provides that distinct, refreshing flavor we all associate with candy canes and festive treats. Remember that extract strengths can vary significantly between brands, so always taste and adjust the amount as needed. For these cookies, McCormick’s® peppermint extract consistently delivers excellent results.
Essential Baking Tips for Perfect Peppermint Sugar Cookies
Achieving that coveted soft, chewy texture with crisp edges requires a few simple but crucial techniques. Follow these expert tips to ensure your Peppermint Sugar Cookies turn out perfectly every time, making your holiday baking efforts truly shine.
- **The Role of Melted and Cooled Butter:** For the ultimate chewy cookie, it’s essential to use melted butter that has been cooled to room temperature. If the butter is still warm when combined with sugar, it will melt the sugar, leading to a greasy cookie texture and an undesirable spread during baking. Allowing it to cool ensures proper emulsion and a superior texture.
- **Accurate Flour Measurement is Key:** Baking is a science, and measuring flour correctly is paramount. Never scoop flour directly from the bag with your measuring cup, as this compacts the flour and results in too much being used. Too much flour will lead to dense, dry, and crumbly cookies. Instead, gently spoon the flour into your measuring cup until it’s overflowing, then level it off with the straight edge of a knife. This method ensures you have the precise amount for soft, tender cookies.
- **Don’t Skip the Dough Chilling:** Chilling the cookie dough for at least an hour is a non-negotiable step for several reasons. Firstly, it allows the flavors to meld and deepen, enhancing the overall taste. Secondly, and critically, it firms up the butter in the dough, which prevents the cookies from spreading too much in the oven, ensuring they maintain their shape and thickness. A well-chilled dough is the secret to thick, chewy cookies.
- **Shape Matters: Rolling Tall and Narrow:** When rolling your dough into balls, aim for a tall and slightly narrow shape rather than perfectly round spheres. This specific shaping technique encourages the cookies to spread beautifully in the oven, creating a thick, wonderfully chewy middle while still developing those delightfully crisp edges. This subtle trick elevates the cookie’s texture profile.
- **The Post-Bake Edge Press:** For an extra layer of perfection, as soon as the cookies emerge from the oven, use the back of a spoon or a metal spatula to gently press their edges inward. This quick action helps to define the shape, creates a slightly crisper rim, and pushes the warm, soft center back, contributing to that desirable chewy consistency. It’s a small step that yields big results in texture.

A Step-by-Step Guide to Baking Peppermint Sugar Cookies
Creating these festive Peppermint Sugar Cookies is a delightful experience, perfect for sharing with family and friends during the holidays. Follow these detailed steps to bake a batch of homemade perfection.
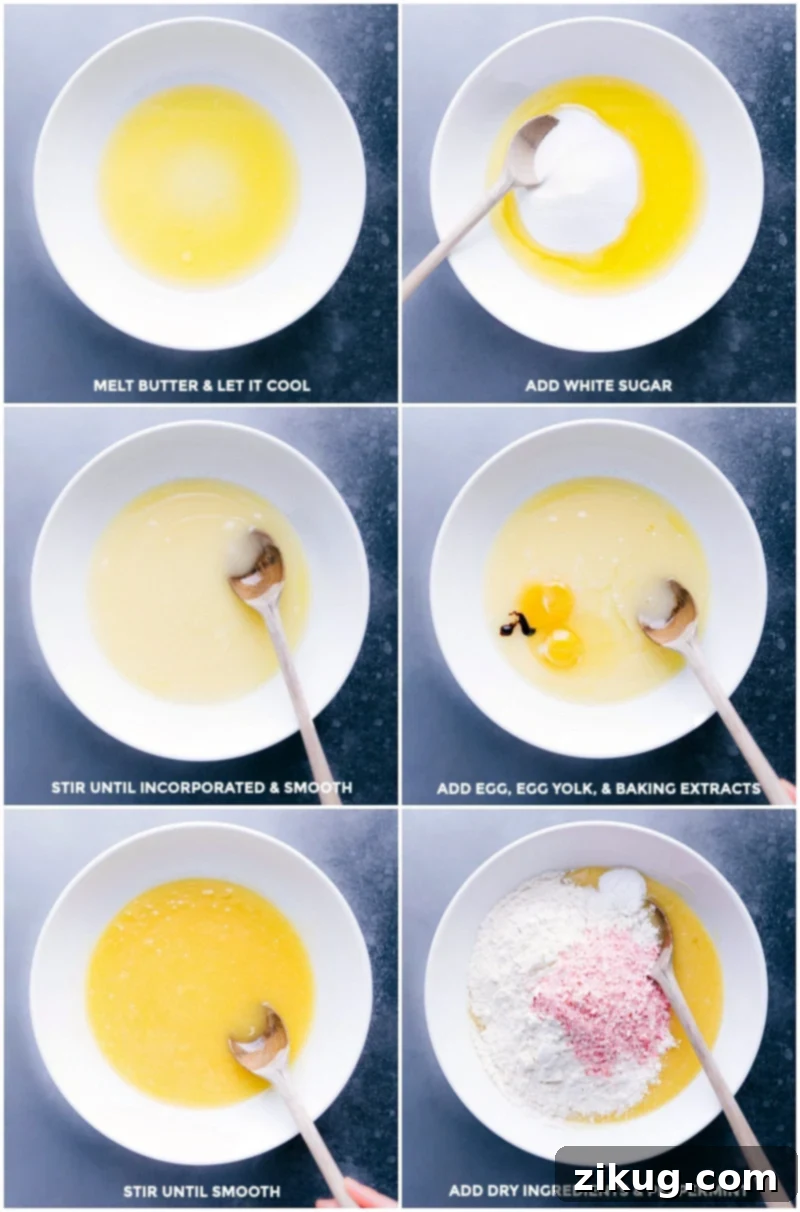
- **Prepare the Dough:** In a large mixing bowl, combine all the wet ingredients – this includes your melted and cooled butter, granulated sugar, egg, egg yolk, vanilla extract, and peppermint extract. Stir until the mixture is smooth and fully incorporated. Then, gently fold in the dry ingredients: all-purpose flour, salt, cornstarch, baking powder, baking soda, and the delightful peppermint crunch sprinkles. Mix until just combined, being careful not to overmix, which can lead to tough cookies.
- **Roll, Coat, and Chill:** Scoop out approximately 2 tablespoons (about 43 grams if using a kitchen scale) of dough for each cookie. Roll these portions into tall, somewhat narrow balls. For an added sparkle and a pleasant crunch, generously roll each dough ball in an optional mixture of granulated sugar and white sparkling sugar. Once coated, place the dough balls on a baking sheet, cover them, and refrigerate for at least 1 hour, or up to 8 hours. This chilling step is essential for flavor and texture.
- **Bake to Perfection:** Preheat your oven to 325°F (160°C). Arrange the chilled dough balls on a parchment paper or silicone-lined baking sheet, ensuring they are spread far apart, as these cookies will spread significantly. It’s best to bake only 6 cookies at a time to prevent crowding. Bake for 9-14 minutes, keeping a close eye on them. The goal is slightly underbaked cookies; the edges should be lightly browned, but the centers should remain soft. We recommend pulling them out between 11-12 minutes for optimal chewiness. Immediately after removing them from the oven, use the back of a spoon or metal spatula to gently press the edges of each cookie towards the center. This helps create those desirable crispy edges and a wonderfully chewy core. Let them cool on the baking sheet for 2 minutes before transferring them to a wire rack to cool completely.
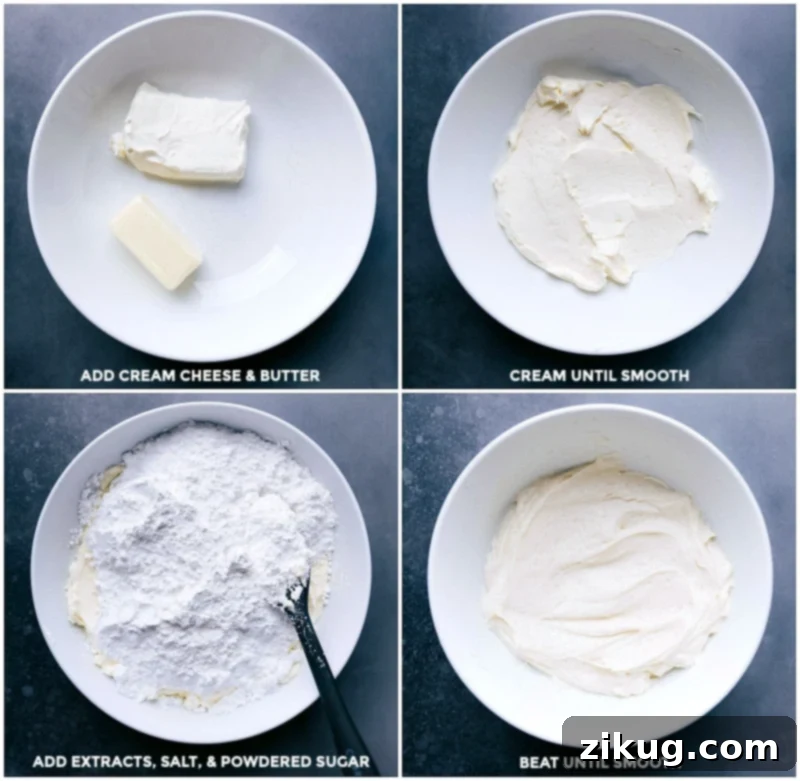
- **Whip Up the Frosting:** While your cookies are baking and cooling, prepare the rich and creamy peppermint frosting. In a large bowl, beat together softened full-fat cream cheese and softened unsalted butter until the mixture is completely smooth and fluffy. This usually takes a few minutes. Next, add the vanilla bean paste (or vanilla extract), peppermint extract, and a pinch of salt. Beat again until well combined. Gradually add the powdered sugar, beating on low speed initially to avoid a cloud of sugar, then increase the speed to medium-high. Continue beating until the frosting is incredibly smooth, creamy, and spreadable. Don’t be discouraged if it seems too thick at first; continued beating will bring it to the perfect consistency.
- **Frost and Garnish:** Once the cookies have cooled completely (this is crucial, as warm cookies will melt the frosting), spread a generous amount of the peppermint cream cheese frosting on each cookie. Finally, sprinkle generously with additional crushed peppermint candy or candy cane crunch for that irresistible holiday finish.
- **Enjoy!** Serve these delightful cookies and watch them disappear! They are the perfect treat for holiday parties, cozy evenings, or as a thoughtful homemade gift.

Storage Solutions for Peppermint Sugar Cookies
To keep your Peppermint Sugar Cookies fresh and delicious, proper storage is essential. Here are some guidelines:
Best Practices for Storing Your Peppermint Creations
For optimal results, we highly recommend **freezing the cookie dough, not the baked cookies!** This approach ensures you always have freshly baked, perfectly textured cookies on hand. To freeze the dough, roll it into balls and place them on a tray to flash freeze until solid. Once frozen, transfer the dough balls to a sealed, airtight freezer-safe container or bag. They can be stored in the freezer for up to 3 months. When you’re ready to bake, simply place the frozen dough balls on a prepared baking sheet and bake straight from frozen, adding a few extra minutes to the baking time. Look for lightly browned edges and soft centers. The frosting, however, is best made fresh as it does not freeze well.
Any leftover frosted cookies should be stored in an airtight container in the refrigerator. They are best enjoyed within 2-3 days to maintain their supreme freshness and chewy texture. Before serving, allow them to come to room temperature for about 10-15 minutes for the best flavor and texture.

Quick Tip
Enhance your cookie gifting with these delightful, FREE Sugar Cookie Kit Printables! Perfect for holiday presents or party favors.
Explore More Delicious Cookie Recipes for Every Occasion
If you’ve fallen in love with these Peppermint Sugar Cookies, you’ll surely enjoy exploring our other fantastic cookie creations. From classic comforts to unique seasonal delights, there’s a cookie recipe for every craving and celebration!
- Hearty Oatmeal Cookies (or try the decadent Oatmeal Chocolate Chip Cookies)
- Elegant Thumbprint Cookies with a sweet raspberry jam filling
- Indulgent Peppermint Bark Cookies made with a convenient brownie mix for ultimate ease!
- Nostalgic Frosted Honey Graham Cookies featuring a delightful graham cracker cookie base
- Effortless Avalanche Cookies – no baking required for these irresistible treats!
Pin
Soft Peppermint Sugar Cookies
Equipment
-
Sheet pan (15″ x 10″)
-
Parchment paper or silicone baking mat
-
Cooling rack
Ingredients
- 16 tablespoons unsalted butter 1 cup, melted and cooled
- 1-1/2 cups granulated sugar
- 1 large egg
- 1 large egg yolk discard or save the white for another use
- 1 teaspoon vanilla extract
- 1/4 teaspoon peppermint extract
- 1/2 cup peppermint crunch sprinkles see note 1, plus additional crushed peppermint for topping cookies if desired
- 3 cups all-purpose flour see note 2
- 3/4 teaspoon salt
- 2 teaspoons cornstarch
- 1/2 teaspoon baking powder
- 1/2 teaspoon baking soda
- 1/4 cup granulated sugar
- 1/4 cup white sparkling sugar or additional granulated sugar
- 1 (8-ounce) package cream cheese full-fat, softened to room temperature
- 8 tablespoons unsalted butter 1/2 cup, softened to room temperature
- 1/2 teaspoon vanilla bean paste or 1 teaspoon vanilla extract
- 1 teaspoon peppermint extract
- 1/8 teaspoon salt
- 3-1/2 cups powdered sugar
Instructions
-
Optional Sugar Coating: In a small bowl, thoroughly stir together the granulated sugar and white sparkling sugar. This step is optional but highly recommended for a beautiful, crunchy exterior and an extra touch of sweetness.
-
Prepare Wet Ingredients: Place the melted butter in a large bowl and allow it to cool completely to room temperature. This prevents the sugar from melting and ensures your cookies aren’t greasy. Add the granulated sugar and stir vigorously with a wooden spoon or spatula for 3-4 minutes until the mixture is smooth and well incorporated. Then, add the whole egg, egg yolk, vanilla extract, and peppermint extract, stirring until the mixture is uniform and smooth.
-
Combine Wet and Dry Ingredients: To the wet ingredients, add the peppermint crunch sprinkles, all-purpose flour, salt, cornstarch, baking powder, and baking soda. Mix gently until the ingredients are just combined. It is crucial not to overmix the dough, as this can develop the gluten too much, resulting in tough cookies. Stop mixing as soon as no dry streaks of flour are visible.
-
Shape and Chill Dough: Scoop out generous portions of dough, approximately 2 tablespoons (about 43 grams) each. Roll each portion into a tall, narrow ball. If using the optional sugar coating, roll the dough balls generously in the granulated/white sparkling sugar mixture until fully coated. Place the sugar-coated dough balls on a plate or baking sheet, cover them, and refrigerate for a minimum of 1 hour, and up to 8 hours. Chilling is vital for preventing spread and enhancing flavor.
-
Bake the Cookies: Preheat your oven to 325°F (160°C). Line a baking sheet with parchment paper or a silicone baking mat. Arrange the chilled dough balls on the prepared sheet, ensuring they are well-spaced, as they will spread (we recommend baking only 6 cookies at a time). Bake for 9-14 minutes, watching carefully to avoid overbaking. The goal is cookies that are slightly underbaked in the center for maximum chewiness; the edges should be lightly golden. We typically remove them from the oven between 11-12 minutes. Immediately after removing the baking sheet, use the back of a spoon or a metal spatula to gently press the edges of each cookie inward towards the center. This technique helps create perfectly round, thick cookies with crispy edges and a soft, chewy interior. Let the cookies rest on the hot baking sheet for 2 minutes before carefully transferring them to a wire rack to cool completely.
-
Prepare Peppermint Cream Cheese Frosting: While the cookies are baking and cooling, prepare your luscious frosting. In a large mixing bowl, beat together the softened full-fat cream cheese and softened unsalted butter until the mixture is completely smooth and fluffy, with no lumps of cream cheese remaining. Stir in the vanilla bean paste (or vanilla extract), peppermint extract, and salt until well combined. Gradually add the powdered sugar, beginning on a low speed to incorporate, then increasing to medium-high speed. Beat until the frosting is smooth, creamy, and spreadable. Don’t worry if it seems thick at first; continue beating, and it will come together beautifully.
-
Frost and Garnish: Once the cookies are entirely cooled, spread a generous amount of the peppermint cream cheese frosting over the top of each cookie. Finish by sprinkling each frosted cookie with extra crushed peppermint candy for a beautiful presentation and an added burst of minty crunch. Store any leftover frosted cookies in an airtight container in the refrigerator. For the best taste and texture, consume within 2-3 days.
Recipe Notes
Note 2: Accurate Flour Measurement: To ensure the correct cookie texture, avoid packing flour into your measuring cup. Instead, spoon the flour into the cup until it’s overfilled, then level it off precisely with the back of a straight-edged knife. This prevents adding too much flour, which can lead to dense, dry cookies. For a visual guide on proper flour measurement, refer here.
Storage: Store any leftover frosted cookies in an airtight container in the refrigerator for up to 2-3 days. They are best enjoyed at room temperature or slightly chilled.
Nutrition
Nutrition information is automatically calculated, so should only be used as an approximation.