
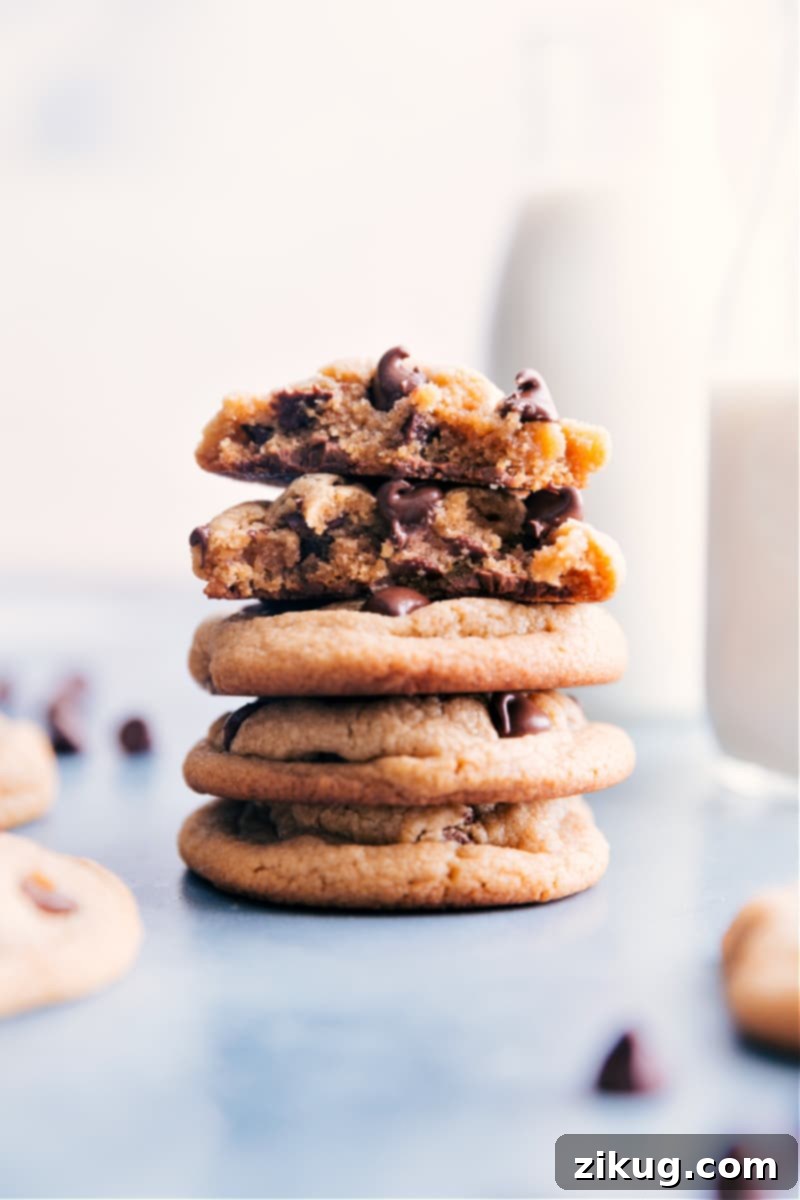
These thick, sweet, incredibly soft, and delightfully chewy Peanut Butter Chocolate Chip Cookies are a true masterpiece of texture and flavor. Each bite promises a luscious, melt-in-your-mouth center perfectly complemented by slightly crisp, golden edges, all generously loaded with rich chocolate. If you’re searching for the ultimate peanut butter and chocolate pairing, look no further – this recipe delivers pure cookie perfection!
While classic peanut butter cookies are wonderful, sometimes you crave that extra indulgence. That’s where a generous handful of chocolate chips comes in! And for those adventurous bakers, why not explore endless cookie possibilities? For instance, you could even try our Chocolate Peanut Butter Chip Cookies by simply swapping out the chocolate chips for peanut butter chips. As a passionate cookie enthusiast, I believe there are truly no limits when it comes to creative cookie combinations!
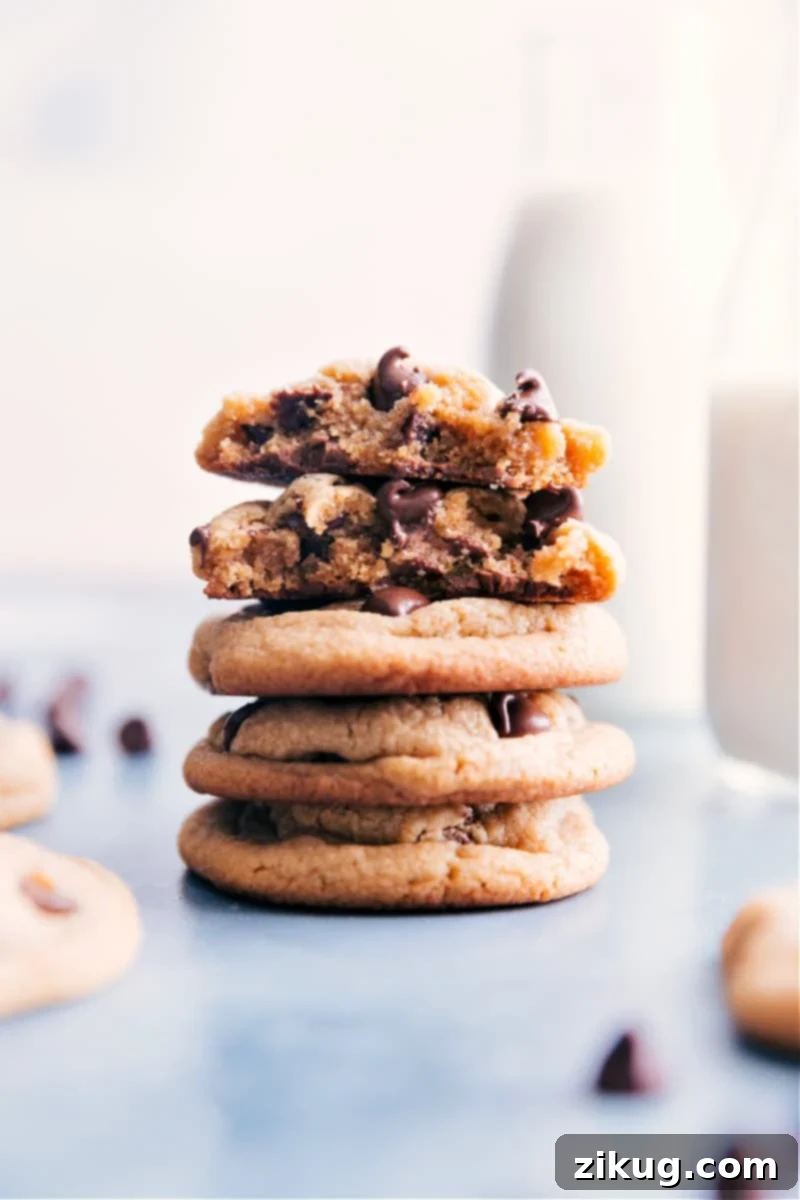
Effortlessly Delicious: Easy Peanut Butter Chocolate Chip Cookies
Yes, you read that right – these are remarkably easy cookies to make! Forget about lugging out your heavy stand mixer or even a hand mixer. This recipe is designed for simplicity, requiring only a few basic kitchen tools. All you truly need is one large mixing bowl, a sturdy whisk, or a reliable wooden spoon. This minimalist approach not only makes cleanup a breeze but also ensures that anyone, regardless of their baking experience, can whip up a batch of these incredible cookies.
The result? Cookies that are consistently thick, wonderfully soft, delightfully chewy, and boast the ideal balance of rich peanut butter and decadent chocolate. They’re a testament to the fact that you don’t need fancy equipment to achieve bakery-quality results right in your own kitchen.
Why You’ll Fall in Love with This Recipe
There are countless reasons why these Peanut Butter Chocolate Chip Cookies will quickly become your go-to recipe. First and foremost is their unparalleled texture: a thick, soft, and chewy interior that truly melts in your mouth, contrasted by a delicate crispness around the edges. This isn’t just a basic cookie; it’s an experience!
- Uncomplicated Baking: With no special equipment needed, this recipe streamlines the baking process. Less fuss, more cookies!
- Perfect Flavor Balance: The classic pairing of rich, salty peanut butter and sweet, melting chocolate chips is simply divine. Each bite offers a harmonious blend that satisfies every craving.
- Foolproof Results: We’ve fine-tuned this recipe to minimize common baking pitfalls, ensuring your cookies turn out perfectly every time, provided you follow the simple guidelines.
- Versatility: Whether you prefer milk chocolate, dark chocolate, or even a mix of different chips, this base recipe is incredibly adaptable to your preferences.
- Crowd-Pleaser: These cookies are universally loved by kids and adults alike, making them ideal for parties, potlucks, or simply a comforting treat at home.
Creative Variation Ideas for Your Peanut Butter Chocolate Chip Cookies
This recipe provides a fantastic foundation, but don’t hesitate to get creative and customize your cookies! Here are some exciting variations to inspire your next baking adventure:
- For a healthier twist, consider incorporating ingredients like honey, oats, and reducing the overall sugar content. Our Healthy Breakfast Cookies recipe offers a great starting point for this approach, showing how to achieve delicious flavor with a lighter profile.
- If you’re aiming for a vegan version of Peanut Butter Chocolate Chip Cookies, you can adapt this recipe with a few smart substitutions. Replace honey with agave nectar, use a vegan crispy rice cereal if desired, and ensure you opt for high-quality vegan chocolate chips for that luscious chocolatey goodness. For specific guidance, try this recipe.
- To bake Peanut Butter Chocolate Chip Cookies without flour, explore flourless alternatives. Our incredible flourless Monster Cookies recipe is an excellent option that delivers on flavor and texture, proving that you don’t always need traditional flour for amazing cookies.
- To make hearty Peanut Butter Oatmeal Chocolate Chip Cookies, consider adding rolled oats to your dough. Alternatively, our Trail Mix Cookies already feature a delightful combination of peanuts and peanut butter chips, giving you a chewy, satisfying oatmeal-infused treat.
- Want to invert the classic? Make rich Chocolate Cookies with peanut butter chips instead! The deep chocolate base perfectly complements the creamy, sweet burst of peanut butter chips, creating a whole new level of flavor.
What Makes Cookies Soft and Moist? The Science Behind Perfect Texture
Achieving a truly soft and moist cookie texture isn’t just about luck; it’s about understanding the role of moisture in your dough. The higher the moisture content in a cookie recipe, the chewier and softer the final product will be. For these exceptional Peanut Butter Chocolate Chip Cookies, we’ve carefully engineered the recipe to ensure maximum moisture retention.
Here’s how we achieve that signature soft and moist quality:
- Increased Egg Content: Unlike many cookie recipes that call for just one egg, this recipe utilizes two large eggs. Eggs contribute significant moisture and also act as a leavening agent, helping to create a tender crumb structure.
- Brown Sugar Power: We use an entire cup of brown sugar in this recipe. Brown sugar is key because its molasses content contains approximately 10% water. This molasses not only adds moisture but also imparts a rich, caramel-like flavor and helps keep the cookies soft long after they’ve cooled.
- Balanced Flour Ratio: A common mistake in cookie baking is using too much flour, which can lead to dry, crumbly cookies. By using a slightly reduced amount of flour compared to typical recipes, we ensure the perfect balance, allowing the moisture from the other ingredients to shine through.
Beyond ingredients, a critical factor for wonderfully chewy, soft, and perfectly moist cookies is to ever-so-slightly underbake them. This might feel counter-intuitive, but it’s essential. Cookies continue to bake and firm up slightly as they cool on the hot baking sheet after being removed from the oven. If you overbake these cookies, even by a minute or two, they will lose their luscious chewiness and become harder and crisper as they cool, compromising that desirable texture we’re striving for.
Why Are My Peanut Butter Cookies Gritty? Troubleshooting Common Issues
A gritty texture in your peanut butter cookies can be quite disappointing, but it’s a common issue with identifiable causes. Understanding these culprits can help you achieve perfectly smooth and delicious cookies every time:
- Old or Hard Brown Sugar: This is a very likely suspect. If your brown sugar has dried out, hardened, or formed clumps, it won’t dissolve properly during the mixing process or while baking. These undissolved sugar crystals are what create that unpleasant gritty mouthfeel. Always ensure your brown sugar is fresh and soft; if it’s clumpy, you can press it through a fine-mesh sieve or soften it before use.
- Insufficient Dough Chilling: While these cookies are designed to be relatively easy, proper chilling is crucial. If the dough isn’t chilled long enough, the fats (butter and peanut butter) won’t re-solidify sufficiently. This can lead to the sugar dissolving inconsistently and contributing to grittiness.
- Adding Sugars to Hot Melted Butter: This is another critical mistake. If you add your sugars directly into hot melted butter, the heat will begin to dissolve the sugar crystals prematurely and unevenly. The butter needs to cool completely to room temperature before you incorporate the sugars. This allows the butter and sugars to cream properly when mixed, leading to a smooth, uniform dough.
While this recipe is intended to be simple, adhering closely to the mixing instructions and ensuring your ingredients are at the correct temperature will yield the best, most consistent results – perfectly smooth, never gritty, Peanut Butter Chocolate Chip Cookies.
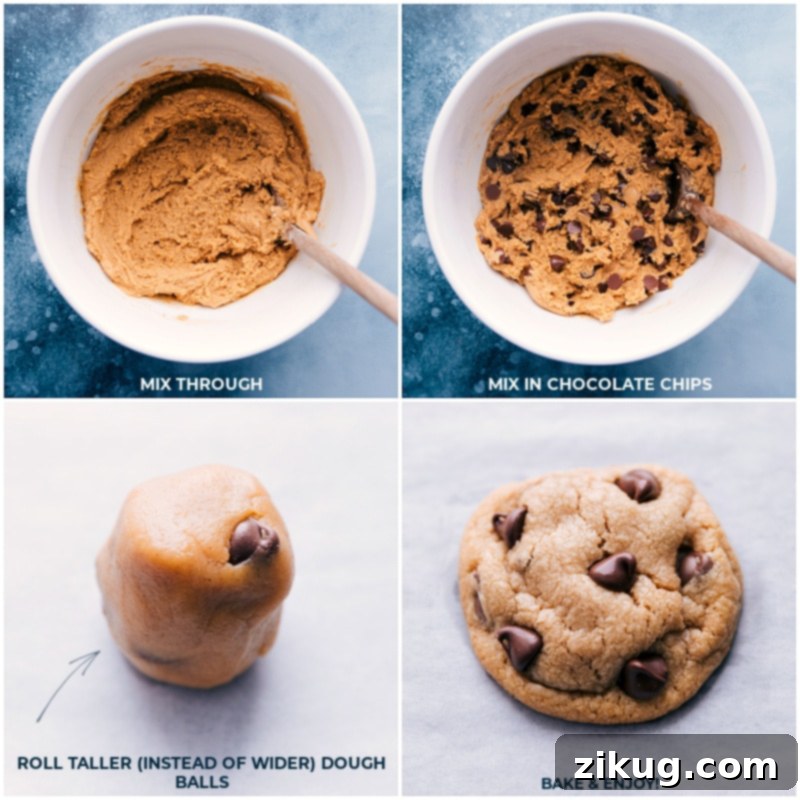
Expert Tips for Making the Best Peanut Butter Chocolate Chip Cookies
To ensure your cookies turn out perfectly thick, soft, and chewy every single time, pay close attention to these key steps and baking techniques:
- Utilize Room Temperature Eggs: This seemingly small detail makes a significant difference. Room temperature eggs disperse more evenly throughout the batter, creating a lighter, more uniform texture. They also trap more air when mixed, contributing to the cookies’ lift and tenderness.
- Incorporate Eggs One at a Time: Don’t rush this step. Add each egg individually, mixing thoroughly until it is fully incorporated before adding the next. This method allows the eggs to emulsify effectively with the fats (butter and peanut butter) in the recipe, leading to a smoother, more cohesive dough.
- Crucial Dough Chilling: Since this recipe starts with melted butter, chilling the dough is absolutely essential. This allows the butter to re-solidify, which prevents the cookies from spreading too much in the oven and helps achieve that desired thick, chewy texture. A minimum of 30 minutes in the fridge is vital for the right cookie consistency.
Mastering the Bake: How To Bake Peanut Butter Chocolate Chip Cookies to Perfection
The baking process is just as important as ingredient preparation for these cookies. Follow these guidelines for optimal results:
- Bake on a Silpat Liner: For consistently superior results, bake your cookies on a silicone baking mat (like a Silpat). These liners promote even baking, prevent sticking, and ensure the bottoms of your cookies develop a beautiful golden hue without becoming overly crispy. If a Silpat isn’t available, parchment paper is the next best alternative.
- Employ a Food Scale for Accuracy: Precision matters in baking, especially when it comes to flour. Measuring flour with cups can vary significantly from person to person, often leading to inconsistent cookie results. If you own a food scale, use it to measure your flour for pinpoint accuracy (around 310-385 grams, depending on desired chewiness, as stated in the recipe notes). A food scale also helps create perfectly uniform cookie dough balls, which in turn leads to evenly baked cookies. Eyeballing portions can result in some cookies being overbaked while others are undercooked due to size variations.
- Precise Baking Temperature of 325°F (162°C): This is a critical detail often overlooked. While many cookie recipes bake at 350°F (176°C), these particular cookies thrive at a slightly lower temperature of 325°F (162°C). This lower heat allows the cookies to bake more slowly and evenly, promoting that soft, tender interior without quickly crisping the edges. Missing this temperature adjustment can significantly impact the desired softness and chewiness of your final product.
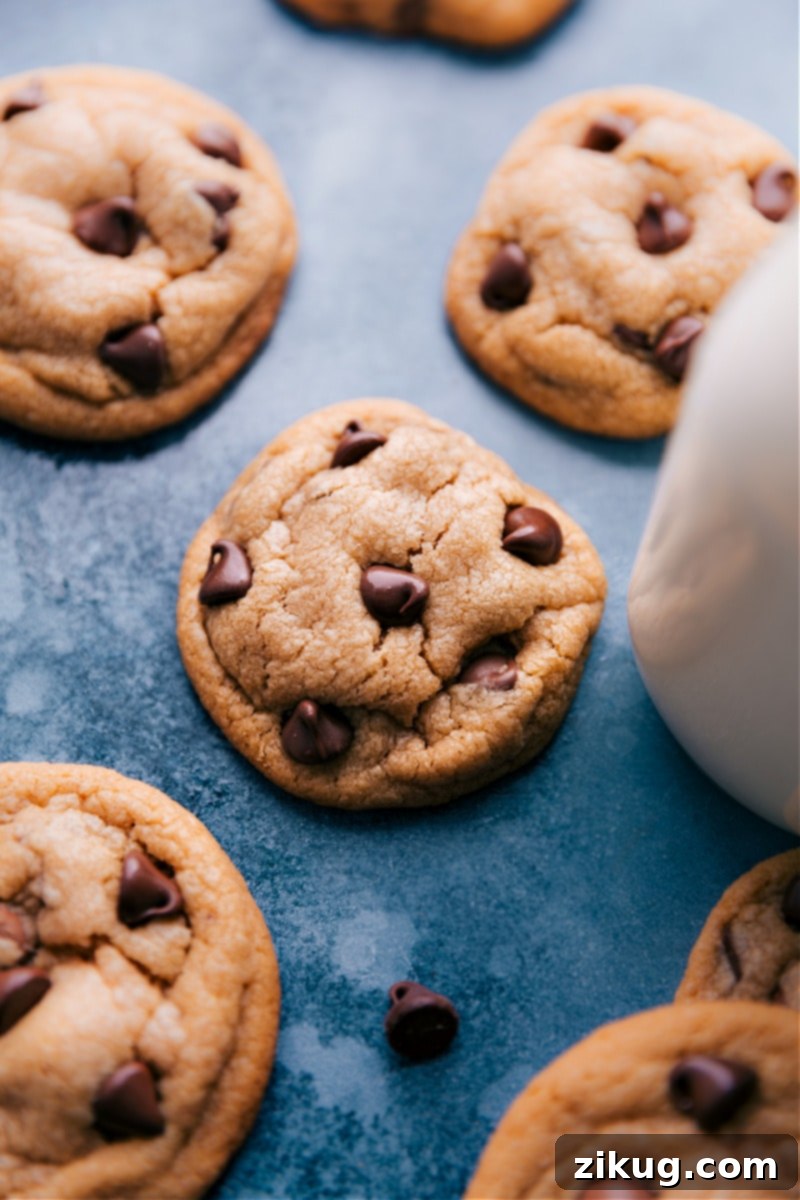
Storage Solutions & Freezing Tips for Freshness
Storage and Freezing
Proper storage is key to enjoying your Peanut Butter Chocolate Chip Cookies at their best for longer periods. Here’s how to keep them fresh, whether short-term or for future cravings:
- Room Temperature Storage: These delicious cookies maintain their optimal freshness and texture for 3-4 days when stored in an airtight container at room temperature. Ensure they are completely cooled before storing to prevent condensation, which can make them soggy.
- Freezing Baked Cookies: If you want to extend their life, you can freeze baked cookies. Once completely cooled, place them in a single layer on a baking sheet and freeze until solid. Then, transfer the frozen cookies to a freezer-safe airtight container or heavy-duty freezer bag. They will keep well for up to 3 months. Thaw at room temperature or gently warm in the microwave for a fresh-from-the-oven experience.
- Freezing Cookie Dough: For ultimate convenience, freeze the cookie dough! Simply scoop the dough into individual balls (as if you were going to bake them) and place them on a parchment-lined baking sheet. Freeze until the dough balls are solid. Once frozen, transfer them to an airtight container or freezer bag. The dough can be stored in the freezer for up to 3 months. When you’re ready to bake, there’s no need to thaw; just place the frozen dough balls on a baking sheet and bake according to the recipe, adding a few extra minutes to the baking time until the edges are set and the center is soft.
Don’t Waste a Drop: Use Leftover Peanut Butter in These Tasty Recipes!
Finished baking your cookies and have some peanut butter left? Don’t let it go to waste! Peanut butter is a versatile ingredient that shines in many other desserts and snacks. Here are some fantastic recipes to help you use up any remaining peanut butter:
- Peanut Butter Rice Krispie Treats — An irresistible no-bake classic elevated with a rich chocolate topping.
- Chocolate Peanut Butter Pie — A decadent pie featuring a luscious chocolate peanut butter filling nestled in a crunchy Oreo cookie crust.
- Chocolate Peanut Butter Breakfast Cookies — The perfect grab-and-go breakfast or snack, requiring absolutely no baking!
- Peanut Butter Cookie Dough — A safe-to-eat cookie dough made with heat-treated flour, ideal for snacking straight from the bowl.
- Peanut Butter Granola — Homemade granola packed with peanut butter flavor and studded with chocolate chips, perfect for yogurt or snacking.
Rating: 5 out of 5 stars (from 1 vote)
Peanut Butter Chocolate Chip Cookies
Chelsea Lords
20 minutes
10 minutes
30 minutes
1 hour
40 cookies
Equipment
-
Large sheet pan (15″ x 21″)
-
Silicone baking mat or parchment paper
-
Cooling rack
Ingredients
- 16 tablespoons unsalted butter melted (1 cup or 2 sticks)
- 1 cup brown sugar light or dark, lightly packed (see Note 1)
- 1 cup granulated sugar
- 1 cup creamy peanut butter (see Note 2)
- 1 teaspoon vanilla extract
- 2 large eggs
- 1 teaspoon baking soda (see Note 3)
- 1/2 teaspoon salt
- 2-1/3 cups all-purpose flour (see Note 4)
- 2 cups chocolate chips milk or semi-sweet—whichever you prefer
Instructions
-
Prepare your baking sheet: Line a large sheet pan with a silicone baking mat or parchment paper and set it aside. This will prevent sticking and promote even baking.
-
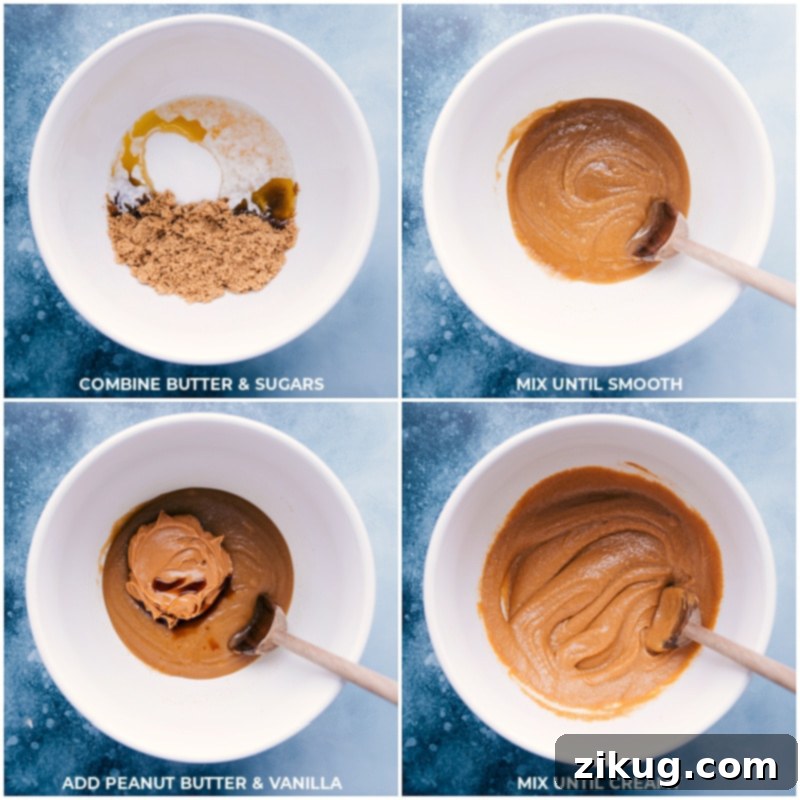
Melt butter and combine with sugars: In a microwave-safe bowl, gently heat the unsalted butter until it’s fully melted. Crucially, set the melted butter aside and allow it to cool completely back to room temperature. Hot butter will prematurely melt the sugars and can lead to greasy cookies. Once cooled, use a spatula to scrape every bit of the butter into a large mixing bowl. Add both the brown sugar and granulated sugar to the bowl. Mix vigorously with a large whisk or wooden spoon until the mixture is smooth, creamy, and well combined, which should take approximately 1 minute.
-
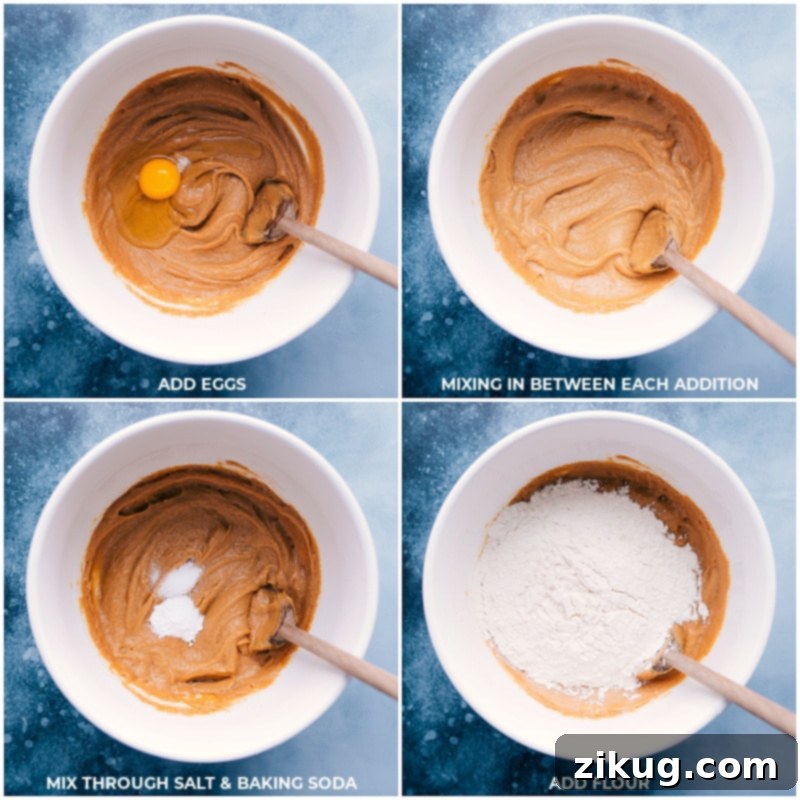
Incorporate wet ingredients: Add the creamy peanut butter and vanilla extract to the butter and sugar mixture. Mix until these ingredients are fully combined and no streaks remain. Next, add the first large egg, mixing until it is completely incorporated into the dough. Then, add the second egg, mixing again until all ingredients are thoroughly blended. Avoid overmixing at this stage. Add the baking soda and salt, mixing just until they are incorporated.
-
Add dry ingredients and chocolate chips: Gently add the all-purpose flour to the mixture. Mix only until the flour is just incorporated and no dry spots remain. Be very careful not to overmix the dough, as this can develop the gluten and lead to tough cookies. Finally, fold in your chosen chocolate chips using a spatula, distributing them evenly throughout the dough.
-
Chill and form cookies: Cover the cookie dough tightly with plastic wrap and chill it in the refrigerator for a minimum of 30 minutes, and up to 1 hour (see Note 5 for longer chilling tips). While the dough chills, preheat your oven to 325°F (162°C). Once chilled, scoop the dough and roll it into large, uniform balls. Each cookie dough ball should be about 2 packed tablespoons in size, weighing approximately 40 grams (see Note 6). Aim to roll balls that are taller rather than wider to encourage a thicker cookie. Place the dough balls on your lined sheet pan, leaving ample room (about 2 inches) between each cookie. If the dough has become too warm from handling, you can pop the tray of formed cookies into the freezer for 10 minutes before baking.
-
Bake to perfection: Bake the cookies for 8–14 minutes. The key to soft and chewy cookies is to ever-so-slightly underbake them. The edges should appear set and lightly golden, but the centers should still look slightly soft and gooey. Remember, cookies continue to bake slightly on the hot sheet pan after they are removed from the oven. It is crucial not to overbake these cookies, as this will lead to a dry, crumbly texture (see Note 7 for troubleshooting tips).
-
Cool and enjoy: Once removed from the oven, if desired, gently press a few extra chocolate chips onto the tops of the warm cookies for that appealing bakery-style finish. Allow the cookies to cool on the baking sheet for 5 minutes before carefully transferring them to a wire cooling rack to cool completely. This resting period helps them set without breaking apart.
Recipe Notes
Note 1: Brown Sugar Quality: Always ensure your brown sugar is fresh, soft, and moist. Hard, clumpy brown sugar will not mix or bake properly, which can affect the final texture of your cookies.
Note 2: Peanut Butter Choice: For the best results in these cookies, I highly recommend using a creamy, no-stir peanut butter like Skippy® Creamy Peanut Butter (this is not a sponsored recommendation, just a personal preference for optimal texture). Natural peanut butter that requires stirring often has a different fat content and can lead to a greasier or drier cookie.
Note 3: Check Your Baking Soda: Baking soda is a key leavening agent. To ensure it’s still fresh and active, perform this quick test. If your baking soda is clumpy, press it through a fine-mesh sieve before adding it to your dough to avoid pockets of unmixed leavening.
Note 4: Accurate Flour Measurement: Inconsistent flour measurement is a common culprit for cookies that don’t turn out right. Measuring flour by volume (cups) can vary greatly depending on how it’s scooped and leveled. For precision, if you have a food scale, use it! 310 grams of all-purpose flour is the ideal amount for this recipe to achieve the perfect texture. For an even thicker, chewier cookie, you can go up to 385 grams, but start with 310g for the base recipe.
Note 5: Chilling the Dough: The cookie dough is at its best when chilled for 30 minutes to 1 hour. Beyond this timeframe, it can begin to dry out and become crumbly, making it difficult to roll into balls. If you need to chill the dough for a longer period (up to 24 hours), roll out all the cookie dough balls first and place them on a parchment paper-covered plate or tray. Cover them tightly with plastic wrap before refrigerating.
Note 6: Cookie Dough Ball Size: These cookies are designed to work best when formed into balls approximately 2 tablespoons (40 grams) in size. While you might be tempted to make smaller or larger cookies, be aware that altering the size will change the baking time and may significantly impact the final texture. This specific size yields the optimal thick, soft, and chewy result.
Note 7: Troubleshooting Common Baking Issues:
- Cookies not spreading: This usually indicates too much flour was added, or the dough was overchilled. If you notice this happening during baking, quickly pull the tray out of the oven and gently bang it on the counter a few times to encourage the cookies to spread slightly.
- Cookies spreading too much: This can be due to too little flour, old or inactive leavening agents (baking soda), or insufficient chilling of the dough. If cookies are spreading excessively, immediately after removing them from the oven, work quickly to gently press the edges inwards with a metal spatula to reshape them into a rounder, thicker form.
Nutrition
Serving: 1 serving | Calories: 169 kcal | Carbohydrates: 22.2g | Protein: 2.8g | Fat: 10.6g | Cholesterol: 11.6mg | Sodium: 28.3mg | Fiber: 1.2g | Sugar: 16.1g
Nutrition information is automatically calculated, so should only be used as an approximation.
Love this recipe? Leave a comment below!