
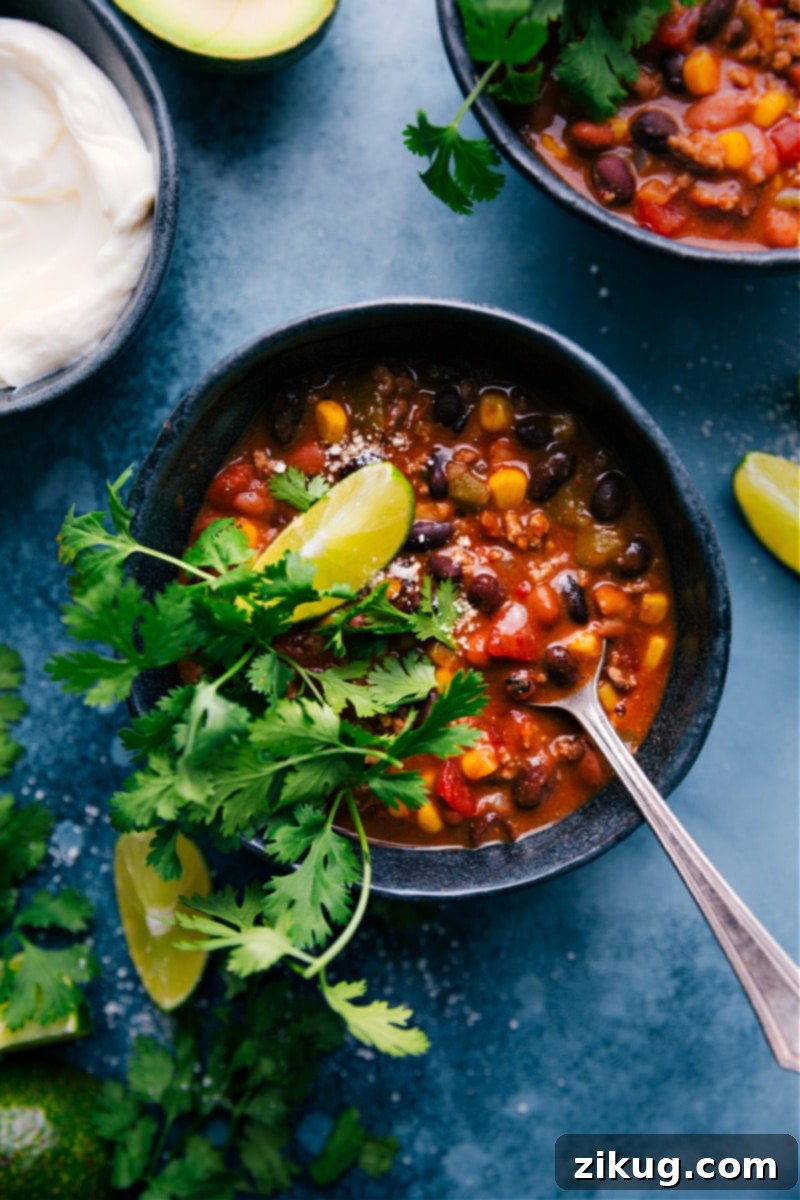
Welcome to your new favorite chili recipe! This Taco Chili is incredibly flavorful, satisfying, and so easy to prepare, it will quickly become a weeknight staple. Forget bland, watery chili; this recipe combines robust taco seasonings with a surprising secret ingredient for a depth of flavor that rivals any restaurant. Whether you prefer the classic stovetop method, the speedy Instant Pot, or the convenient slow cooker, we’ve got you covered. Get ready to mix a few cans, simmer to perfection, and load up your bowl with all your favorite toppings for a truly unforgettable meal that brings joy to your dinner table.
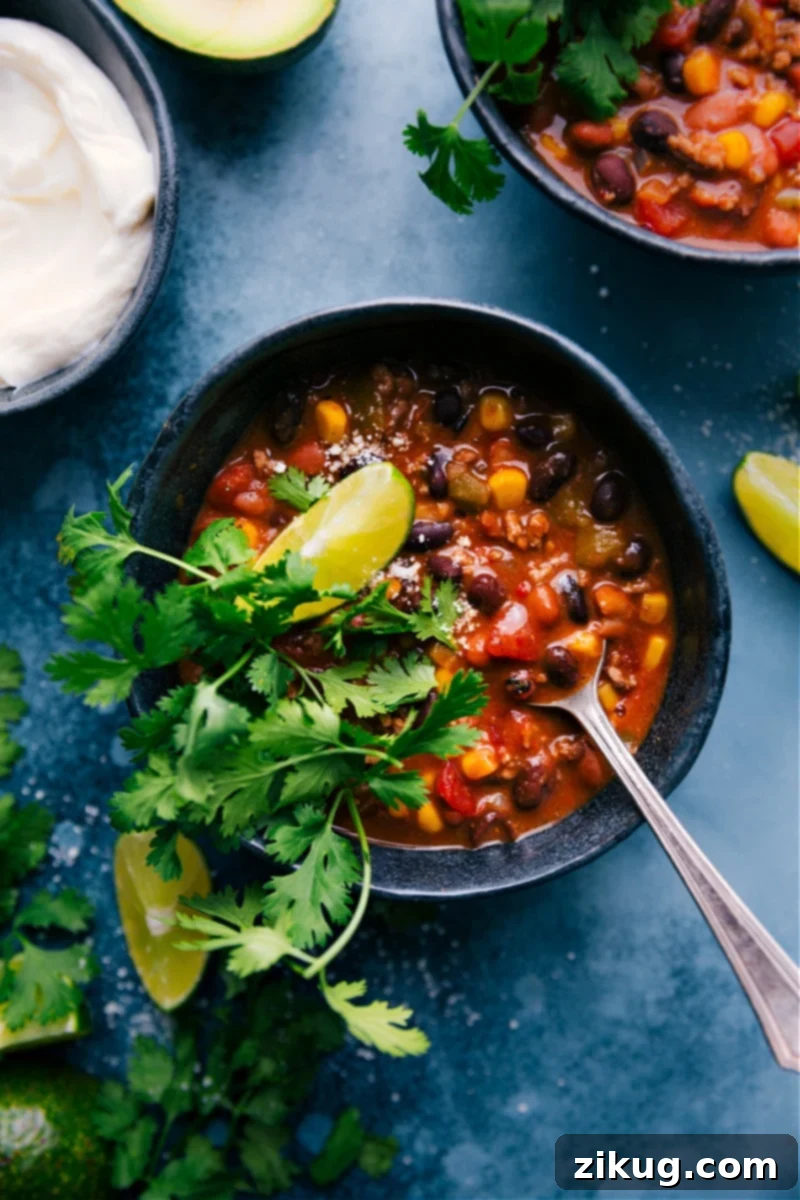
Discover the Magic of Homemade Taco Chili
Chili holds a special place in the hearts of many — it’s the ultimate comfort food, perfect for chilly evenings, game days, or simply a hearty family dinner. What makes this Taco Chili truly stand out is its effortless preparation paired with an explosion of flavor. Unlike traditional chili recipes that can require hours of simmering and a long list of complex ingredients, our version simplifies the process without compromising on taste. Once you’ve sautéed your aromatic onions and browned your savory ground beef, it’s mostly a matter of opening a few pantry staples – canned beans, corn, and tomatoes – and letting them meld into a rich, robust chili. The beauty of this recipe lies in its simplicity, transforming everyday ingredients into something extraordinary in under an hour. It’s the kind of dish that warms you from the inside out, offering a satisfying depth of flavor with minimal fuss.
The Secret to Unbeatable Flavor: Taco Meets Ranch
You might be wondering what gives this chili its unique edge, distinguishing it from countless other recipes. The secret isn’t a complex, hard-to-find spice blend or an obscure ingredient, but rather a clever and delightful combination of familiar flavors: classic taco seasoning blended with a touch of savory ranch seasoning. This dynamic duo creates an incredibly balanced and addictive flavor profile that’s both zesty and creamy, hearty and herbaceous. The taco seasoning provides the expected savory, slightly spicy base with notes of cumin and chili, while the ranch seasoning introduces an unexpected tang and an additional layer of garlic, onion, and herb goodness. It might sound unconventional, but the ranch seasoning adds a subtle creaminess and an underlying depth that truly elevates the chili, making it incredibly craveable and unique. This innovative twist is what transforms a good chili into a truly great, restaurant-quality dish you’ll be proud to serve to family and friends, receiving compliments every time.
Why This Taco Chili Will Become Your Go-To Recipe
There are countless reasons why this Taco Chili recipe is destined to become a beloved staple in your culinary repertoire:
- Effortlessly Simple: With a focus on convenient canned ingredients and minimal hands-on time, prep is a breeze. This recipe is designed to be straightforward, allowing you to whip up a delicious meal even on your busiest days. It’s truly a “dump and simmer” kind of dish after the initial browning.
- Explosion of Flavor: The innovative blend of traditional taco spices with dry ranch seasoning creates a taste sensation that is both familiar and exciting. It’s deeply savory, with a hint of tang and a well-rounded spice profile that will tantalize your taste buds and leave you wanting more.
- Versatile Cooking Methods: Adapt this recipe to fit your lifestyle! Whether you have an hour for a classic stovetop simmer, prefer the lightning speed of an Instant Pot for pressure cooking, or appreciate the set-it-and-forget-it ease of a slow cooker, this chili delivers exceptional results with any method.
- Family-Friendly & Crowd-Pleasing: This hearty and satisfying meal appeals to all ages, from picky eaters to adventurous foodies. Its balanced flavor profile makes it universally enjoyable, and you can easily adjust the spice level to suit everyone’s preference, ensuring smiles all around.
- Highly Customizable Toppings: The fun truly begins with the toppings! From creamy avocado and cool sour cream to sharp cheddar cheese and crispy tortilla strips, the possibilities are endless. Everyone at the table can personalize their bowl, making each serving a unique culinary adventure.
- Excellent for Meal Prep & Freezing: This chili tastes even better the next day as the flavors deepen, making it perfect for meal prepping healthy lunches or dinners throughout the week. It also freezes beautifully, allowing you to stock your freezer with ready-to-eat comfort food for those times when cooking from scratch isn’t an option.
- Budget-Friendly: Utilizing readily available and often affordable pantry staples, this recipe is kind to your wallet without sacrificing flavor or quality. It’s a smart choice for feeding a crowd without breaking the bank.
Step-by-Step Guide: Crafting Your Delicious Taco Chili
Creating this flavorful Taco Chili is straightforward, regardless of your chosen cooking method. Follow these simple steps for a truly satisfying meal that comes together quickly and easily:
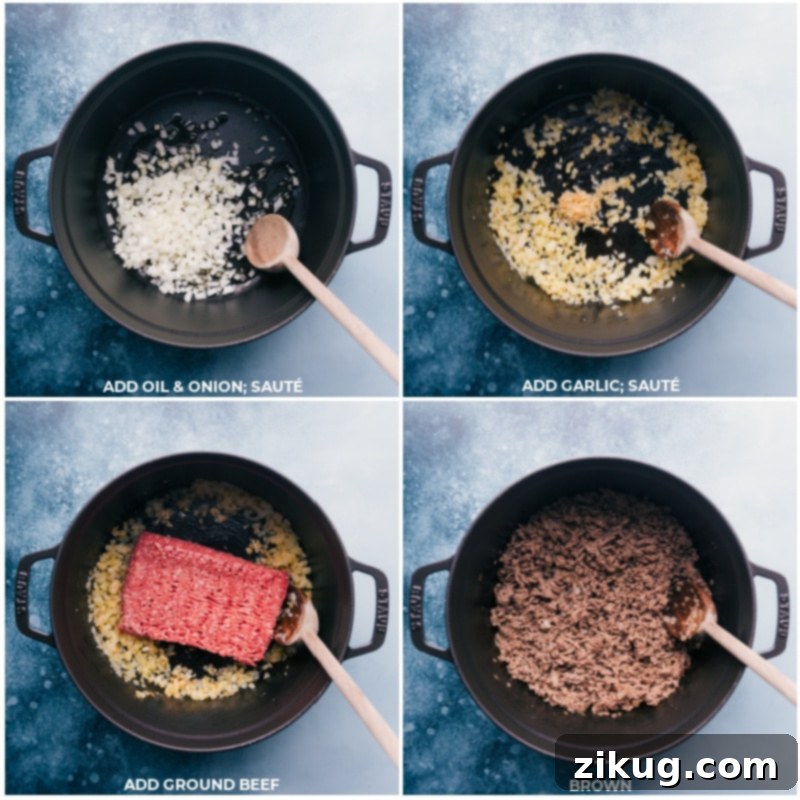
- Sauté Aromatics with Care: Begin by heating the olive oil in your selected cooking vessel – a large pot for the stovetop, the Instant Pot, or the base of your slow cooker if it has a sauté function. Add the diced yellow onions and cook them over medium-high heat until they become tender and translucent, developing a sweet aroma and a slight golden hue. This usually takes about 5-7 minutes. Next, stir in the minced garlic and cook for just another 30 seconds to 1 minute, until it becomes wonderfully fragrant. Be vigilant not to burn the garlic, as burnt garlic can impart a bitter taste to your chili.
- Brown the Beef to Perfection: Increase the heat slightly if needed and add your lean ground beef to the pot. Using a wooden spoon or spatula, break the beef apart into crumbles and cook until it is thoroughly browned and no pink remains. This step is absolutely crucial for developing deep, rich, savory flavors that form the backbone of your chili. Once cooked, carefully drain any excess fat or grease from the pot. A quick shortcut for this is to use paper towels held by tongs to dab up the grease without removing the beef.
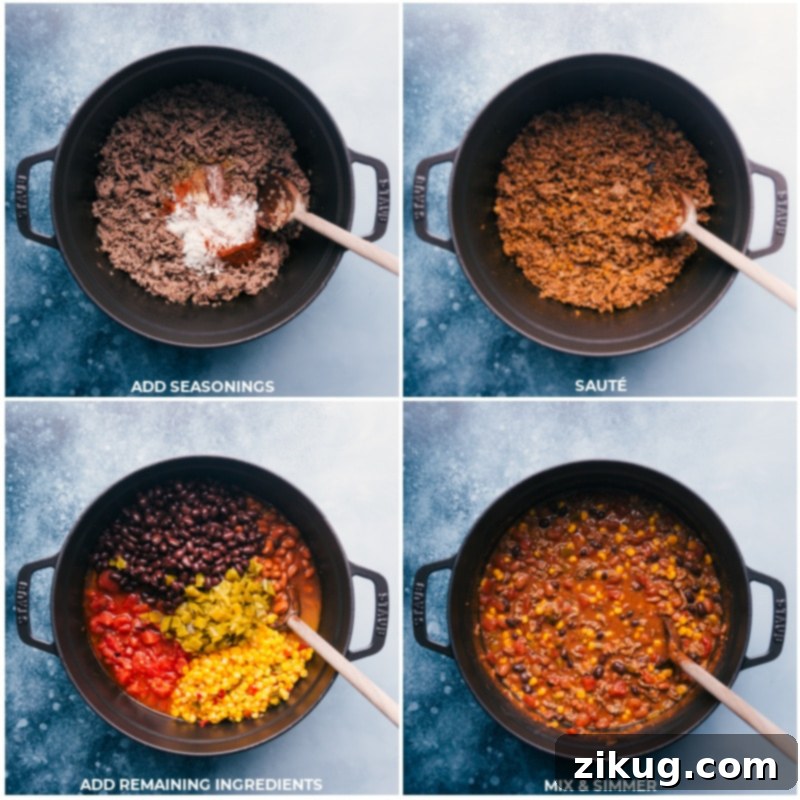
- Infuse with Seasonings for Depth: Reduce the heat to medium. Now, it’s time to build the robust flavor foundation for your chili. Add all the specified seasonings: chili powder (ensure it’s American chili powder, which is a blend, not pure ground chili), garlic powder, onion powder, dried oregano, ground cumin, and paprika. If you enjoy a touch of heat, this is the perfect moment to add the red pepper flakes. Crucially, stir in the secret ingredient – 3 tablespoons of dry ranch seasoning mix. Cook, stirring constantly, for 1-2 minutes. This brief cooking time allows the spices to toast and release their full, aromatic potential, intensifying their flavor significantly.
- Combine Canned Goodness (The Easy Part!): This is where the magic of “dump and simmer” truly shines. Pour in the canned chili beans (undrained, as the sauce is integral), southwestern corn (also undrained), fire-roasted diced tomatoes (undrained for that smoky depth), diced tomatoes with green chiles (undrained, choose your heat level), and finally, the mild diced green chiles. Do not forget the black beans, which should be drained and rinsed before adding. Stir all these ingredients together thoroughly until everything is well combined and evenly distributed throughout the pot.
- Simmer to Perfection (Choose Your Method):
- Stovetop: Bring the chili to a gentle simmer over low heat. Cook uncovered for at least 30 minutes, stirring occasionally. This simmering time is essential; it allows all the diverse flavors to meld beautifully, deepen, and the chili to thicken to a hearty, comforting consistency.
- Instant Pot: Before sealing the Instant Pot, ensure you add the canned tomatoes first and stir, vigorously scraping the bottom of the pot to deglaze and prevent any food from sticking (which could lead to a “burn” notice). Then add the remaining ingredients, secure the lid, and set the valve to “Sealing.” Select the “Soup/Stew” setting and cook on High Pressure for 10 minutes. Once cooking is complete, allow a Natural Pressure Release for 5 minutes before carefully performing a quick release for any remaining pressure.
- Slow Cooker: If you browned the ingredients in a separate pot (as many slow cookers lack a sauté function), transfer them along with all the remaining canned ingredients to the slow cooker insert. Stir everything well, cover with the lid, and cook on HIGH for 2-3 hours or on LOW for 3-6 hours. The extended, gentle cooking allows the flavors to develop a profound richness.
- Taste, Garnish, and Serve: Once the chili has finished simmering and thickened to your liking (and for Instant Pot/Slow Cooker, once it’s cooked), give it a final taste. Adjust seasonings with additional salt and pepper as needed to achieve your perfect flavor balance. While the chili is cooking, take the time to prepare your favorite toppings, as they are truly essential for the full Taco Chili experience. Serve your hot chili immediately with a generous array of preferred toppings and savor every delicious spoonful!
Essential Ingredients for a Perfect Taco Chili
This recipe shines because of its straightforward yet impactful ingredient list, relying heavily on readily available pantry staples. Here’s a closer look at what you’ll need and why each component is key to achieving that signature Taco Chili flavor:
- Olive Oil: A fundamental cooking fat, olive oil is essential for properly sautéing the aromatics and browning the ground beef. It provides a subtle, savory base for the chili’s flavors to build upon.
- Yellow Onion & Minced Garlic: These are the aromatic powerhouses of the chili. Sautéing them until tender and fragrant establishes a deep, savory, and slightly sweet foundation, crucial for any hearty chili.
- Lean Ground Beef (93/7): Using lean ground beef (93% lean, 7% fat) minimizes the amount of grease you’ll need to drain, resulting in a cleaner, less oily chili while still providing a robust, beefy flavor and satisfying texture. Ground turkey, chicken, or even a plant-based alternative can be substituted for dietary preferences.
- Chili Powder: This is a cornerstone of classic chili flavor. It’s vital to use American chili powder, which is a mild blend of various spices like cumin, paprika, oregano, and sometimes a touch of cayenne. It is distinctly different from pure ground chili powder, which is typically much hotter.
- Garlic Powder, Onion Powder, Dried Oregano, Ground Cumin, Paprika: This supporting cast of spices works harmoniously to amplify the savory, earthy, and smoky notes that are characteristic of both chili and taco flavors. Ground cumin, in particular, is indispensable for that authentic taco essence.
- Red Pepper Flakes (Optional): For those who appreciate a little extra kick, red pepper flakes are your go-to. Add them to taste to easily control the heat level of your chili, ranging from a subtle warmth to a noticeable spice.
- Ranch Seasoning Mix: This is the secret weapon that truly makes this Taco Chili unique and irresistible! This dry seasoning blend introduces a creamy, tangy, and herbaceous note that perfectly complements and balances the traditional taco spices. It adds an unexpected depth of flavor that sets this recipe apart from the rest.
- Chili Beans (Undrained): These canned beans are typically pinto beans already seasoned in a mild chili-spiked sauce. They contribute a wonderful pre-flavored base and body to the chili. Crucially, do NOT drain them, as the seasoned sauce is an integral part of the chili’s liquid and flavor profile. If unavailable, use plain pinto beans and consider adding an extra teaspoon of chili powder.
- Southwestern Corn (Undrained): This variety of canned corn often includes poblano and red peppers, offering a delightful smoky and slightly sweet element that enhances the chili’s overall profile. If you can’t find Southwestern corn, regular canned corn or fire-roasted corn works well; again, remember to keep the liquid for added flavor and moisture.
- Fire-Roasted Diced Tomatoes (Undrained): The roasting process that these tomatoes undergo before canning imparts a wonderful smoky depth of flavor that significantly enriches the chili’s taste compared to plain diced tomatoes. Keep them undrained to maximize flavor and liquid content.
- Diced Tomatoes with Green Chiles (e.g., Ro*Tel) (Undrained): These add a zesty, mildly spicy kick and another layer of bright tomato flavor to the chili. You can easily adjust the heat by choosing mild, original, or hot varieties based on your preference. For a completely non-spicy version, substitute with plain diced tomatoes.
- Mild Diced Green Chiles: These provide a gentle, earthy chile flavor without overpowering heat, further enhancing the Southwestern profile of the chili and adding subtle texture.
- Black Beans (Drained and Rinsed): Black beans contribute an additional layer of hearty texture and plant-based protein to the chili. It’s important to drain and rinse them thoroughly to remove excess sodium and any starchy liquid.
- Salt and Pepper: Essential for seasoning to taste. Always taste your chili before serving and adjust as needed to achieve perfect balance.
- Toppings: While not cooked into the chili, a generous assortment of toppings is absolutely essential for the full Taco Chili experience. See the dedicated section below for a plethora of delicious ideas to customize your bowl!
Elevate Your Bowl: Irresistible Taco Chili Toppings
While this Taco Chili is incredibly flavorful on its own, the right toppings can transform each bowl into a personalized gourmet experience. Creamy, crunchy, tangy, or zesty additions are all welcome. Don’t hold back – mix and match your favorites to create your perfect personalized chili masterpiece!
- Sharp Cheddar Cheese: A generous sprinkle of freshly grated sharp Cheddar cheese is a classic for a reason, providing that essential melty, savory goodness. Other fantastic options include Monterey Jack, Pepper Jack, or a Mexican blend.
- Fresh Tomatoes: For a burst of freshness and acidity, add diced cherry tomatoes, a spoonful of vibrant salsa, or homemade pico de gallo. They cut through the richness beautifully.
- Fresh Herbs: A sprinkle of freshly chopped cilantro is a must for many, adding a bright, herbaceous note that screams “taco.” If cilantro isn’t your preference, thinly sliced green onions (scallions) offer a milder, fresh oniony bite.
- Citrus Zest: Fresh lime wedges for squeezing over the top provide a refreshing tartness that brilliantly cuts through the richness of the chili, brightening all the flavors.
- Creamy Avocado: Diced avocado or a generous scoop of creamy guacamole adds healthy fats, a smooth, luxurious texture, and a cooling contrast to the warm chili.
- Spicy Enhancements: For those who crave more heat, a drizzle of your favorite taco sauce or a few dashes of your preferred hot sauce can kick up the spice. Fresh or pickled jalapeño peppers are also fantastic for adding a fiery crunch and tangy bite.
- Extra Creaminess: A dollop of cool sour cream (full-fat, fat-free, or low-fat options all work wonderfully) or plain Greek yogurt adds a cooling, tangy creaminess that is essential for many chili lovers. You could also try a creamy cilantro lime sauce for an additional layer of zesty flavor.
- Tangy Bites: Quick pickled red onions offer a delightful tang and a satisfying crunch that brightens the entire dish and adds a gourmet touch.
- Crunchy Elements: Crispy tortilla strips, crushed tortilla chips, or even Fritos are absolutely essential for adding a satisfying textural contrast with every spoonful. They provide that irresistible crunch that chili often needs.
- Hearty Sides: Serve your Taco Chili alongside warm cornbread muffins or a slice of cornbread for a complete, comforting, and quintessentially American meal.
Featured Comment
“Super delicious chili. Whole family loved it. Super easy to make. Thanks for the recipe. Yum!!!!”
– Michelle
Smart Shortcuts for a Quicker Taco Chili
Even though this Taco Chili recipe is already incredibly simple and designed for ease, a few smart shortcuts can make your preparation even faster, especially on those extra-busy weeknights when time is of the essence. Embrace these clever tricks to get dinner on the table in record time without sacrificing any of the amazing flavor:
- Pre-Chopped Onions: Eliminate the need for chopping (and save yourself from watery eyes!) by purchasing pre-chopped fresh onions, readily available in the produce section of most grocery stores. Alternatively, frozen chopped onions work beautifully and can be added directly to the pot, often thawing and cooking down even faster. For home cooks, a food processor can also be your best friend, quickly dicing a whole onion in mere seconds.
- Convenient Garlic Options: Skip the peeling and mincing of fresh garlic by opting for convenient alternatives. Dorot® frozen garlic cubes are an excellent choice, offering fresh garlic flavor in an easy-to-use format. Jarred minced garlic is another popular shortcut that delivers great flavor without the extra prep work.
- Fire-Roasted Crushed Tomatoes: While the recipe specifies fire-roasted diced tomatoes, using fire-roasted crushed tomatoes can offer an even more robust and concentrated smoky flavor. Additionally, crushed tomatoes contribute to a slightly smoother chili texture, which some prefer, all with no additional effort on your part.
- Ranch Seasoning Mix: This ingredient isn’t just a flavor enhancer; it’s a shortcut superhero! Instead of meticulously measuring out individual spices like dill, parsley, chives, and garlic powder, a single packet or scoop of dry ranch seasoning mix provides a perfectly balanced and consistent blend of these flavors, ensuring delicious results every single time with minimal fuss.
- Pre-cooked Ground Beef: If you’re a serious meal prepper or love to plan ahead, browning a large batch of ground beef (or ground turkey) at the beginning of the week and freezing it in individual portions can significantly cut down on cooking time for this and many other recipes. Simply thaw and add to your pot when you’re ready to make chili!
- Pre-Rinsed Canned Beans: While some beans are undrained in this recipe, for the black beans that require draining and rinsing, you can often find varieties labeled “no-drain” or “low sodium” that require less rinsing or no rinsing at all, saving you an extra step. Always check the can label.
Making Ahead, Storage, and Freezing
This Taco Chili is undeniably fantastic freshly made, but it’s arguably even better the next day as the flavors deepen and meld together more intimately. This characteristic makes it an excellent candidate for meal prep, bringing to potlucks, or freezing for future quick and satisfying dinners.
Storing Leftovers
If you have any of this delicious chili remaining after your meal, first allow it to cool completely to room temperature. This is important to prevent condensation and bacterial growth. Once cooled, transfer the chili (without any fresh toppings, as they tend not to hold up well) into an airtight container. Store it securely sealed in the refrigerator for a period of 3 to 5 days. When you’re ready to enjoy it again, simply reheat it gently. You can do this in a pot over low heat on the stovetop, stirring occasionally until it’s warmed through to your desired temperature. Alternatively, microwave individual servings in a microwave-safe bowl, making sure to cover the bowl to prevent any splattering messes and to ensure even heating.
Freezing for Future Meals
Taco Chili freezes exceptionally well, making it an ideal candidate for stocking your freezer with convenient, homemade meals. To freeze, ensure the chili is completely cooled (again, without any fresh toppings). Portion the chili into freezer-safe containers, leaving a little headspace for expansion, or into heavy-duty freezer bags. If using freezer bags, lay them flat on a baking sheet until frozen solid, then stack them vertically in your freezer to save valuable space. The chili will maintain its quality in the freezer for up to 3 months. When you’re ready to thaw and enjoy, transfer the frozen chili to the refrigerator overnight to thaw gradually. For a quicker method, you can gently thaw it in a pot over low heat on the stove, stirring frequently. For more comprehensive and expert tips on the best methods for thawing frozen soups and chilis, you can refer to helpful resources such as this insightful guide on Food52. Once thawed and reheated, simply add your favorite fresh toppings and savor a wonderfully comforting meal!
Frequently Asked Questions (FAQ) About Taco Chili
- Can I make this Taco Chili vegetarian or with a different protein?
- Absolutely! To make it vegetarian, simply omit the ground beef. You can replace it with an equal amount of plant-based ground “meat” crumbles, or add an extra can of black beans, kidney beans, or even lentils for more substance and protein. Sauté the onions and garlic as directed, then add your plant-based protein or additional beans along with the other canned ingredients. If using other meats, ground turkey or ground chicken are excellent lean alternatives to ground beef and work wonderfully in this recipe; just follow the same browning steps. Ground pork or a mix of ground meats can also be used for a different flavor profile.
- What if I can’t find chili beans or Southwestern corn? Are there good substitutes?
- No problem at all! For chili beans, which are typically pinto beans in a seasoned sauce, you can use regular canned pinto beans (undrained) as a substitute. To compensate for the lost seasoned sauce, consider adding an extra teaspoon of chili powder or a dash of hot sauce to the pot. For Southwestern corn, which often includes poblano and red peppers, plain canned corn or fire-roasted canned corn (undrained) are excellent substitutes that will still provide sweetness and texture. The key is to use the liquid from these cans as well for the chili’s consistency and flavor.
- How spicy is this chili? Can I adjust the heat level to my family’s preference?
- The base recipe, especially when made with mild American chili powder and mild diced green chiles, is designed to be relatively mild and family-friendly. You can very easily adjust the heat to suit your taste! For more spice, feel free to add more red pepper flakes, use original or hot diced tomatoes with green chiles (like Ro*Tel brand), or even a dash of cayenne pepper. For less spice, simply omit the red pepper flakes entirely and ensure you are using the “mild” versions of canned chiles and tomatoes.
- Why do I add ranch seasoning? It seems like an unusual ingredient for chili.
- While it might seem unconventional at first glance, ranch seasoning is truly the secret ingredient that gives this Taco Chili its unique and irresistible flavor profile. It provides a savory, tangy, and herbaceous background that perfectly complements the traditional taco spices, adding a depth, complexity, and subtle creaminess that sets this chili apart from standard recipes. It creates a harmonious blend that you’ll quickly fall in love with! Trust us on this one – it’s a game-changer that makes the chili incredibly craveable.
- Can I make this chili ahead of time for a party or meal prep?
- Absolutely! This Taco Chili is an ideal make-ahead meal. In fact, like many chilis and stews, it often tastes even better the day after it’s cooked, as the flavors have more time to meld and deepen. Prepare the chili following your chosen method, let it cool completely, and then store it in an airtight container in the refrigerator for up to 3-5 days. Simply reheat gently on the stovetop or in the microwave before serving. It also freezes beautifully for up to 3 months, making it perfect for long-term meal planning.
Explore More Delicious Chili Recipes:
Soups And Stews
Crockpot White Chicken Chili
Dinner
Crack Chicken Chili (Crockpot!)
Dinner
Crockpot Chili
Soups And Stews
Butternut Squash Chili

Pin Recipe
Print Recipe
Taco Chili (Stovetop, Instant Pot, Crockpot!)
Chelsea Lords
This ridiculously flavorful Taco Chili is a game-changer—packed with taco-seasoned beef, hearty beans, and smoky spices, it’s better than anything you’ll find at a restaurant. And the best part? It’s super simple to make, whether you’re using the stovetop, Instant Pot, or Crockpot. This family-friendly recipe is quick to prepare and incredibly versatile, making it perfect for any night of the week.
20 minutes
30 minutes
50 minutes
8 servings
Recipe Video (Optional)
For a visual guide on preparing this delicious Taco Chili, you can find a recipe video linked from the original source on Chelsea’s Messy Apron, offering helpful step-by-step demonstrations.
Equipment
-
Large pot (or Instant Pot or Crockpot)
Ingredients
- 1 tablespoon olive oil
- 1 cup diced yellow onion (approximately 1 medium onion)
- 2 teaspoons minced garlic (about 2 cloves, or use jarred/frozen for convenience)
- 1 pound ground beef (lean 93/7 recommended, or substitute ground turkey/chicken)
- 1 tablespoon chili powder (American blend, see note 1 below for details)
- 1/4 teaspoon garlic powder
- 1/4 teaspoon onion powder
- 1/4 teaspoon dried oregano
- 1-1/2 teaspoons ground cumin
- 1/2 teaspoon paprika
- 1/4 to 1/2 teaspoon red pepper flakes (optional, for added heat)
- 3 tablespoons ranch seasoning mix (note: this is not the entire package, typically a 1oz packet)
- 2 (16-ounce) cans chili beans (undrained, see note 2 for details)
- 1 (15.25-ounce) can southwestern corn (undrained, see note 3 for details)
- 1 (14.5-ounce) can fire-roasted diced tomatoes (undrained)
- 1 (10-ounce) can diced tomatoes with green chilies (undrained, e.g., Ro*Tel, see note 4 for heat preferences)
- 1 (4-ounce) can mild diced green chiles
- 1 (15.25-ounce) can black beans (drained and rinsed thoroughly)
- Salt and freshly ground black pepper (to taste)
- Toppings as desired (see note 5 and the Toppings section for ideas)
Instructions
-
Stovetop Method (Recommended for classic simmering):
1. Sauté Aromatics and Brown Beef: Heat the olive oil in a large, heavy-bottomed pot or Dutch oven over medium-high heat. Add the diced yellow onion and sauté for about 5-7 minutes, stirring occasionally, until it becomes tender and lightly golden. Stir in the minced garlic and cook for an additional 30 seconds to 1 minute, until it is fragrant. Increase the heat to high and add the ground beef. Cook, crumbling the beef with a wooden spoon or spatula, until it is thoroughly browned and no pink remains. Carefully drain any excess grease from the pot (see note 6 for a shortcut!).
2. Toast Seasonings: Reduce the heat to medium. Add all the seasonings: chili powder, garlic powder, onion powder, dried oregano, ground cumin, paprika, and red pepper flakes (if you are using them for heat). Stir in the 3 tablespoons of dry ranch seasoning mix. Cook, stirring constantly, for 1-2 minutes. This step allows the spices to bloom and become intensely fragrant, significantly enhancing their flavor.
3. Combine and Simmer: Add all the other ingredients to the pot: chili beans (undrained), southwestern corn (undrained), fire-roasted diced tomatoes (undrained), diced tomatoes with green chiles (undrained), mild diced green chiles, and the drained and rinsed black beans. Stir all the ingredients together thoroughly until everything is well combined. Bring the chili to a gentle simmer over low heat. Cook uncovered, stirring occasionally to prevent sticking, for 30 minutes. This simmering time is crucial for allowing the flavors to meld beautifully and for the chili to thicken to a hearty, comforting consistency. Taste the chili and season with additional salt and pepper as needed.
4. Serve: While the chili is simmering, prepare your favorite toppings. Serve the hot chili immediately with your preferred toppings and enjoy a truly satisfying meal!
-
Instant Pot Method (For a quicker cooking time):
1. Sauté Aromatics and Brown Beef: Select the “Sauté” setting on your Instant Pot. Once the pot is hot, add the olive oil and diced onion, sautéing until tender and lightly golden (approximately 5-7 minutes). Add the minced garlic and sauté for another 30 seconds to 1 minute until fragrant. Add the ground beef and cook, crumbling, until it is thoroughly browned. Drain any excess grease (see note 6 for a shortcut!).
2. Toast Seasonings: Add all seasonings: chili powder, garlic powder, onion powder, dried oregano, ground cumin, paprika, red pepper flakes (if using), and 3 tablespoons of dry ranch seasoning mix. Cook, stirring constantly, for 1-2 minutes until very fragrant.
3. Deglaze and Pressure Cook: Add the fire-roasted diced tomatoes and stir, making sure to scrape the bottom of the Instant Pot thoroughly with a wooden spoon to deglaze it and ensure nothing has stuck. This is important to prevent a “burn” notice. Once deglazed, add all remaining ingredients (chili beans, southwestern corn, diced tomatoes with green chiles, mild diced green chiles, and drained/rinsed black beans). Stir everything well to combine. Secure the lid on the Instant Pot and set the valve to “Sealing.” Select the “Soup/Stew” setting (or Manual/Pressure Cook) and set the cooking time to 10 minutes on High Pressure.
4. Release Pressure and Serve: Once cooking is complete, allow a Natural Pressure Release (NPR) for 5 minutes, then carefully quick-release any remaining pressure. Stir the chili, taste, and adjust seasonings with salt and pepper if needed. Prepare toppings while the chili cooks. Serve hot with your preferred toppings and enjoy immediately.
-
Slow Cooker Method (For hands-off convenience):
1. Sauté Aromatics and Brown Beef: If your slow cooker has a sauté function, you can perform this first part directly in its base. Otherwise, use a separate large pot on the stovetop. Heat the olive oil over medium-high heat. Add the diced onion and sauté until tender and lightly golden (5-7 minutes). Add the minced garlic and cook for another 30 seconds to 1 minute until fragrant. Add the ground beef, increase heat to high, and cook until browned, crumbling with a wooden spoon. Drain any excess grease (see note 6 for a shortcut!).
2. Toast Seasonings and Transfer: Reduce heat to medium. Add all seasonings: chili powder, garlic powder, onion powder, dried oregano, ground cumin, paprika, red pepper flakes (if using), and 3 tablespoons of dry ranch seasoning mix. Cook, stirring constantly, for 1-2 minutes until fragrant. Transfer this beef and seasoning mixture to the slow cooker insert (if you used a separate pot).
3. Combine and Cook: Add all the other ingredients to the slow cooker: chili beans (undrained), southwestern corn (undrained), fire-roasted diced tomatoes (undrained), diced tomatoes with green chiles (undrained), mild diced green chiles, and the drained and rinsed black beans. Stir everything together thoroughly. Cover the slow cooker with its lid. Cook on HIGH for 2-3 hours or on LOW for 3-6 hours, until the chili is thoroughly heated through and the flavors have beautifully blended and deepened.
4. Serve: While the chili cooks, prepare your favorite toppings. Taste the chili and adjust seasonings with salt and pepper if needed before serving. Serve warm with your preferred toppings and enjoy a comforting, easy meal.
Recipe Notes
Note 1: American Chili Powder: It is crucial to use American chili powder, which is a mild blend of spices often including cumin, paprika, garlic, and a small amount of cayenne. This is not to be confused with pure ground chili powder, which is made solely from ground dried chilies and can be significantly hotter. Brands like McCormick are common examples of American chili powder blends.
Note 2: Chili Beans: These beans are typically pinto beans that come pre-seasoned in a mild chili-spiked sauce. They add fantastic built-in flavor and body to the chili. Do NOT drain or rinse them before adding, as the seasoned liquid is an integral part of the recipe. If you cannot find “chili beans” (sometimes labeled “ranch-style beans” or “chili-ready beans”), a can of regular pinto beans can be used as a substitute, but you might want to add an extra pinch of chili powder to compensate for the lost seasoning.
Note 3: Southwestern Corn: This type of canned corn often contains a mix of corn kernels, poblano peppers, and red peppers, which collectively add a subtle smoky and sweet element to the chili. If this specific variety is unavailable, fire-roasted canned corn or even plain canned corn will work wonderfully. Again, remember not to drain or rinse the corn, as its liquid contributes to the chili’s consistency and flavor.
Note 4: Diced Tomatoes with Green Chiles: Popular brands for this ingredient include Ro*Tel. The spice level can vary, so choose a “mild” can if you are sensitive to heat. For those who prefer more spice, “original” or “hot” varieties are available. If you prefer no spice at all, simply substitute with an equal amount of plain diced tomatoes.
Note 5: Topping Suggestions: Beyond the comprehensive list provided in the main “Elevate Your Bowl” section, popular topping choices for this Taco Chili include cool sour cream (fat-free or light options are also great), freshly shredded sharp Cheddar cheese, creamy diced ripe avocado, fresh lime wedges for a zesty squeeze, and crispy tortilla strips or chips for a satisfying crunch.
Note 6: Draining Grease Shortcut: To efficiently remove excess grease from your browned ground beef, especially when there isn’t a massive amount, a quick and easy method is to use kitchen tongs to grab a few paper towels. Gently dab the paper towels around the pot and beef to absorb the grease, then discard them. This is often quicker and less messy than fully draining the beef through a colander.
Storage & Freezing: This delicious chili (without any fresh toppings) stores beautifully in an airtight container in the refrigerator for 3–5 days. To reheat, gently warm in a small pot over low heat on the stovetop until warmed to your desired preference, or microwave individual portions (covered to prevent splatters). For longer storage, Taco Chili (again, without toppings) freezes exceptionally well for up to 3 months. For detailed best practices on thawing frozen soups and chilis, you can consult helpful resources such as Food52’s guide on freezing and thawing soups.
Nutrition
Serving: 1 serving | Calories: 392kcal | Carbohydrates: 45g | Protein: 21g | Fat: 15g | Saturated Fat: 5g | Polyunsaturated Fat: 1g | Monounsaturated Fat: 7g | Trans Fat: 1g | Cholesterol: 40mg | Sodium: 1029mg | Potassium: 874mg | Fiber: 10g | Sugar: 9g | Vitamin A: 729IU | Vitamin C: 16mg | Calcium: 90mg | Iron: 5mg
Nutrition information is automatically calculated based on the ingredients listed and should only be used as an approximation. Actual values may vary based on specific brands and preparation methods.
Like this recipe? We’d love to hear from you! Leave a comment below!