
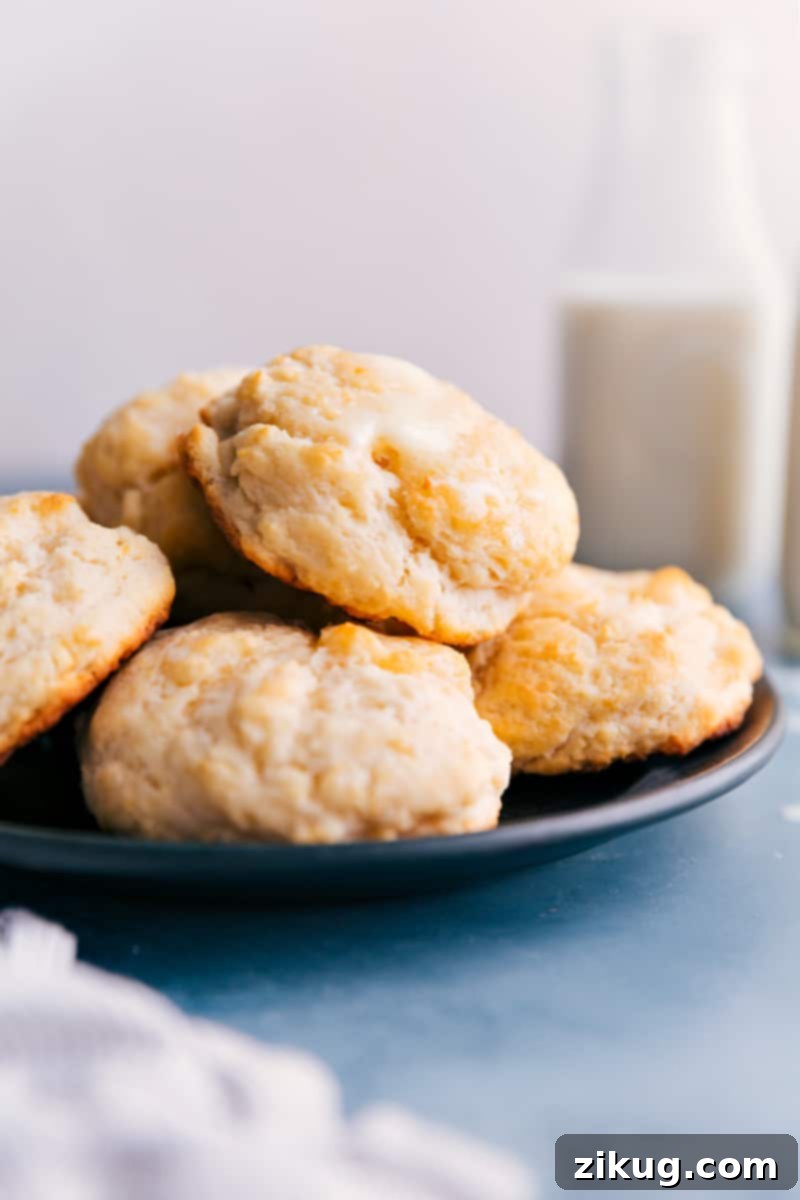
Welcome to the wonderful world of effortless baking with our incredibly Easy Drop Biscuits! Forget the complexities of rolling, cutting, and extensive kneading; this recipe introduces a simple prep “secret” that requires nothing more than a single bowl and a spoon. The result? Hot, unbelievably buttery, and undeniably flaky biscuits that truly melt in your mouth, fresh from your oven.
These versatile homemade biscuits are a breakfast dream, whether generously slathered with luscious honey butter, or serving as the perfect, tender foundation for a hearty plate of classic biscuits and gravy. But their appeal doesn’t stop at breakfast! They make a fantastic, comforting accompaniment to any dinner, a delightful addition to holiday meals, or simply a warm, satisfying snack any time of day. Prepare to elevate your home baking with this foolproof, quick, and simple recipe that promises maximum flavor with minimal fuss.
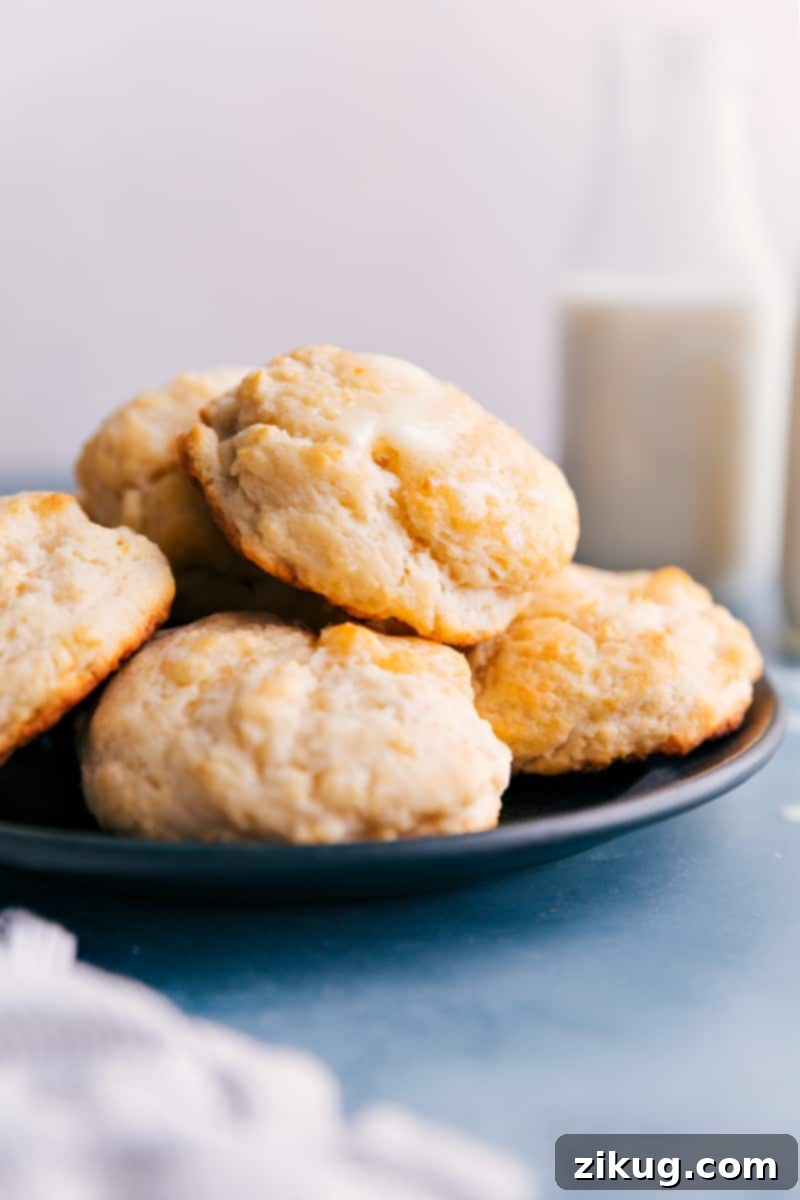
The Irresistible Charm of Drop Biscuits: A Shortcut to Homemade Goodness
When you envision traditional American biscuits, you might picture a meticulously rolled dough, carefully folded and cut into perfect, uniform circles, destined to rise tall with straight sides and a crisp, golden exterior. These “rolled” or “cut-out” biscuits often demand a bit more time and effort, involving careful handling of the dough, precise folding techniques, and sometimes even specialized tools like biscuit cutters. While undeniably delicious and a staple in many kitchens, their preparation can sometimes feel intimidating or simply too time-consuming for busy schedules.
This is where the Drop Biscuit truly shines as a culinary hero. What fundamentally sets a drop biscuit apart is its deliberately higher liquid content, resulting in a significantly wetter, softer, and stickier dough. This unique characteristic means the dough is simply too soft to be effectively kneaded, rolled out with a pin, or cut into shapes. Instead, as its name cleverly suggests, you bypass all that fuss and simply “drop” generous spoonfuls of the dough directly onto a baking sheet.
This seemingly unconventional method is not a compromise on quality but rather the genius secret to their incredibly tender, fluffy interior and wonderfully rustic appearance. Our recipe for these ridiculously easy drop biscuits fully embraces this straightforward approach, ensuring a minimal-effort, maximum-flavor outcome every single time. You get all the comforting warmth, buttery richness, and satisfying texture of a homemade biscuit without any of the intimidation, mess, or extra steps. They are the perfect solution for busy mornings, last-minute side dish needs, or whenever a craving for warm, fresh bread strikes, making them a true staple for any home baker.
Why These Easy Drop Biscuits Will Become Your New Favorite Recipe
Beyond their charmingly rustic appearance, there are countless reasons why these quick and simple drop biscuits are destined to become a staple in your kitchen:
- Effortlessly Simple: Say goodbye to pastry cutters, floured countertops, and rolling pins! This recipe truly lives up to its “easiest” title, requiring just one bowl and a spoon for mixing. It’s an ideal recipe for novice bakers and seasoned pros alike who are looking for a quick, delicious, and satisfying homemade baked good without any hassle.
- Incredibly Fast Preparation: From the moment you start mixing to the minute they hit the oven, these biscuits come together in mere minutes. They are the perfect last-minute addition when you need a warm, homemade treat but are genuinely short on time, making weeknight dinners or impromptu brunches a breeze.
- Unmatched Tender & Flaky Texture: Despite their simple preparation method, these drop biscuits boast an irresistible combination of a wonderfully flaky and buttery interior encased in a delightfully crisp, golden exterior. Each bite offers a comforting, melt-in-your-mouth experience that is truly divine.
- Remarkably Versatile: These biscuits are a chameleon in the kitchen! Whether you’re serving them alongside a hearty breakfast of eggs and sausage, as a comforting companion to a savory stew, a welcoming bread for a holiday roast, or simply slathered with your favorite jam or fruit butter, these biscuits complement nearly any meal or occasion.
- Easily Customizable: The basic recipe provides a fantastic foundation that is incredibly easy to adapt. Feel free to experiment with various sweet or savory additions to suit your specific cravings, dietary preferences, or the theme of your meal, making them a truly dynamic recipe.
- Less Mess, More Fun: Because there’s no rolling or cutting involved, cleanup is significantly reduced. This means more time enjoying your delicious creations and less time scrubbing dishes, which is always a win in our book!
Essential Ingredients for Perfect Fluffy Drop Biscuits
Crafting these simple yet spectacular drop biscuits relies on a few key ingredients. While the list is short and sweet, understanding the role each component plays is crucial for achieving the best results every time, ensuring light, tender, and flavorful biscuits.
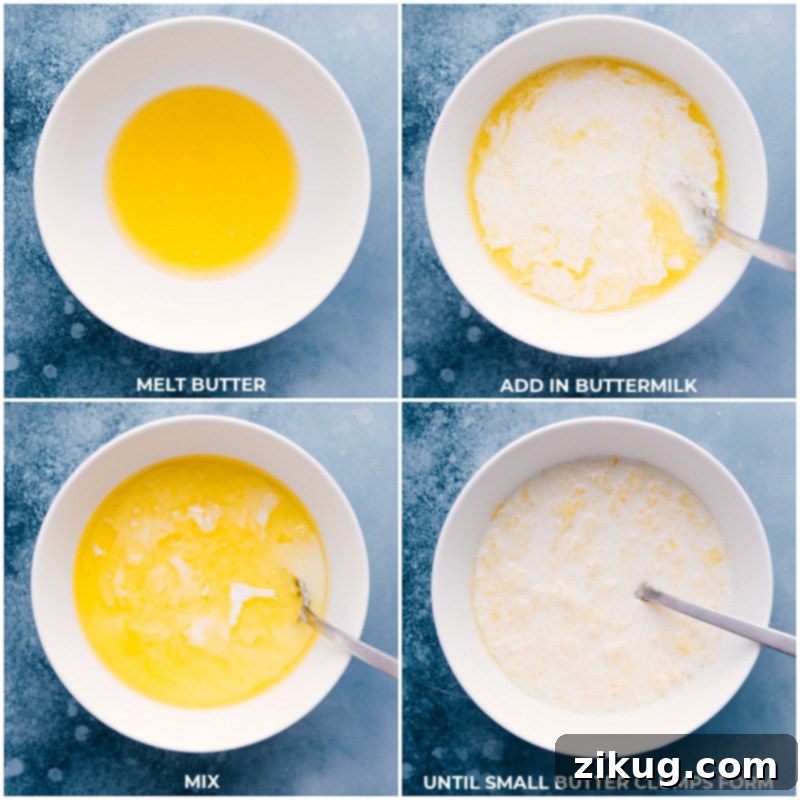
- Unsalted Butter: Using unsalted butter allows you to have complete control over the overall saltiness and flavor profile of your biscuits. The critical step here is to melt the butter and then cool it slightly. When this slightly cooled melted butter is combined with cold buttermilk, it miraculously creates small, irregular clumps of butter. These tiny pockets of butter are what steam rapidly in the hot oven, expanding and creating the characteristic flaky layers that are a hallmark of truly delicious biscuits, even in a “drop” variety.
- All-Purpose Flour: This forms the essential structure and foundation of our biscuits. Proper measurement of flour is absolutely vital for the right texture! Avoid scooping flour directly from the bag with your measuring cup, as this packs it too densely. Instead, spoon flour gently into your measuring cup until it’s overfilled, then use the back of a table knife or a straight edge to level it off. This method prevents you from inadvertently adding too much flour, which can lead to dense, dry, and tough biscuits.
- Baking Powder: As a primary leavening agent, baking powder is solely responsible for the biscuits’ beautiful rise, airy structure, and wonderfully fluffy texture. Always ensure your baking powder is fresh and active for optimal results; old or expired baking powder won’t give you that coveted lift, resulting in flat, heavy biscuits.
- Granulated Sugar (Optional): A small touch of granulated sugar in the dough serves multiple purposes: it subtly enhances the overall flavor, balancing the richness of the butter and tang of the buttermilk, and also contributes to a lovely, appealing golden-brown crust. If you’re aiming for a purely savory biscuit to serve with dinner, gravy, or chili, feel free to skip the sugar entirely.
- Fine Sea Salt: Salt is more than just a seasoning; it balances and amplifies the flavors of all the other ingredients, bringing out the richness of the butter and preventing the biscuits from tasting bland. A delicate sprinkle of flaky sea salt on top of the biscuits immediately after baking can also add a delightful textural crunch and a sophisticated finishing touch to the flavor.
- Buttermilk: This is arguably the most crucial ingredient for achieving tender, tangy, and incredibly moist biscuits. The natural acidity present in buttermilk reacts with the baking powder, producing additional carbon dioxide bubbles, which translates into extra lift and a wonderfully soft, delicate crumb. Crucially, always use buttermilk straight from the fridge; its cold temperature is absolutely essential for creating those distinct butter clumps when mixed with the melted butter, directly contributing to the desired flakiness. If you find yourself without buttermilk, you can easily make a substitute by adding 1 tablespoon of fresh lemon juice or white vinegar to a liquid measuring cup, then filling the rest with regular milk and letting it sit for 5-10 minutes until it slightly curdles.
- Optional Toppings: While delicious on their own, a simple brush of additional melted butter immediately after baking adds an extra layer of richness, moisture, and a beautiful, glossy sheen. Depending on your preference, you can also sprinkle the warm biscuits with a little extra granulated sugar for a sweeter finish or a pinch of flaky sea salt for a savory boost.
How To Make The Easiest Drop Biscuits: A Foolproof Step-by-Step Guide
Get ready to whip up a batch of warm, golden, and utterly delicious homemade biscuits in practically no time! Follow these simple, straightforward steps for perfect results every single time, even if you’re a beginner baker.
- Preheat Oven and Prepare Pan: Begin by adjusting your oven rack to the middle position and preheating your oven to a blazing 450°F (232°C). This high temperature is absolutely key for achieving a quick, impressive rise and a beautifully golden, crisp crust on your biscuits. Line a large baking sheet (approximately 15″ x 21″) with parchment paper or a silicone baking mat; this ensures easy cleanup and prevents any sticking. Alternatively, if you’re using a large, oven-safe cast-iron skillet, make sure it’s generously buttered all over. While the oven heats up, melt 8 tablespoons (which is 1/2 cup) of unsalted butter in the microwave and set it aside to cool slightly for about 3-4 minutes. It should be warm to the touch, but not piping hot.
- Prepare the Wet Ingredients: In a medium-sized mixing bowl, pour the cold buttermilk (taken straight from the fridge) into the slightly cooled melted butter. Give the mixture a gentle stir with a spoon. Don’t be alarmed; you will notice small clumps of butter forming in the buttermilk. This is exactly what we want! These small butter clumps are crucial for creating steam pockets in the oven, which ultimately lead to those coveted flaky layers in your baked biscuits. Set this mixture aside.
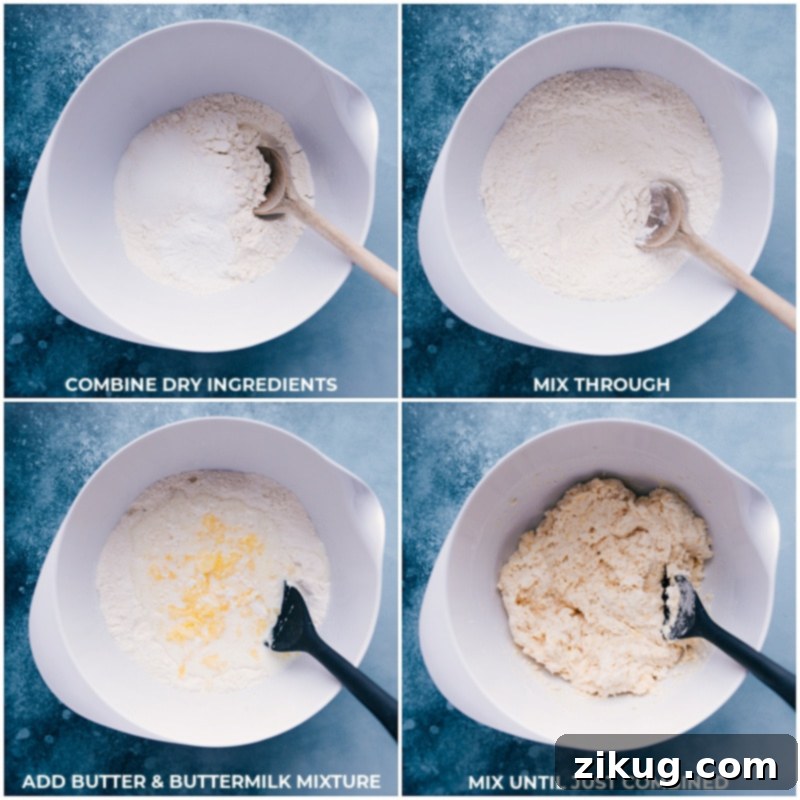
- Combine the Dry Ingredients: In a separate, larger mixing bowl, whisk together the precisely measured all-purpose flour (remembering our spoon-and-level technique from the ingredient notes!), baking powder, granulated sugar (if you’re using it), and fine sea salt until all the dry ingredients are thoroughly combined. Make a small well or indentation in the center of the dry mixture.
- Gently Mix Wet and Dry: Pour the entire buttermilk-butter mixture into the well of the dry ingredients. Using a sturdy wooden spoon or a spatula, gently mix the dough together just until all the ingredients are incorporated and no dry streaks of flour remain visible. It is paramount that you **do not overmix!** Overmixing develops the gluten in the flour, which will inevitably lead to tough, chewy biscuits instead of light, tender, and flaky ones. A few lumps or a slightly shaggy appearance in the dough are perfectly fine and even desirable.
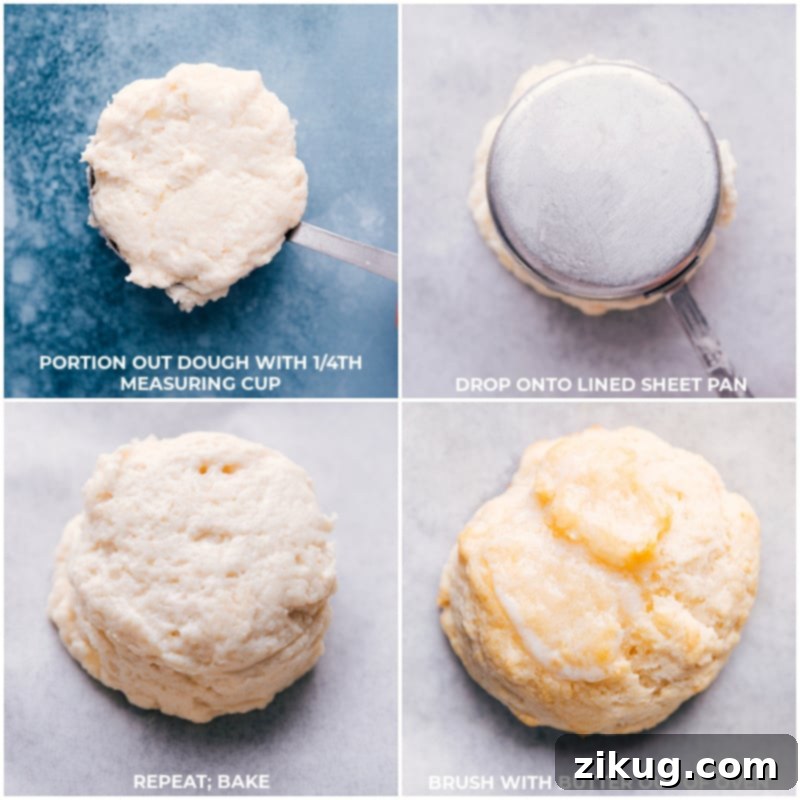
- Scoop, Drop, and Chill: To make scooping easier and cleaner, lightly spray a 1/4-cup measuring cup with a little nonstick cooking spray – this simple trick will help the sticky dough release effortlessly. Scoop approximately 1/4 cup of the biscuit dough for each individual biscuit and gently “drop” it onto your prepared baking sheet, ensuring you leave about 1 to 1 1/2 inches of space between each biscuit to allow for expansion. Once all the dough is on the pan, place the entire baking sheet into the refrigerator for 10 minutes. This quick chill helps the butter firm up again before baking, which maximizes the flakiness of the finished biscuits.
- Bake to Golden Perfection: Carefully transfer the chilled baking sheet to your preheated oven. Bake the biscuits for 12–15 minutes, or until their tops and bottoms are beautifully and evenly golden brown. To further confirm doneness, gently tap the top of a biscuit; it should sound slightly hollow. This indicates a fully cooked interior.
- Add the Finishing Touch (Optional): Once you pull the hot biscuits from the oven, immediately, if desired, use a pastry brush to lightly brush an additional 2 tablespoons of melted butter over their warm tops. A delicate sprinkle of fine sea salt (or even a pinch of flaky sea salt) can also be added at this stage for a wonderful savory finish that enhances their overall flavor profile.
- Serve Warm and Enjoy: Allow the baked biscuits to stand on the baking sheet for 5 minutes after baking. This crucial resting period allows the internal heat to distribute evenly, completing the cooking process and ensuring they are perfectly done and tender throughout. Then, transfer them to a wire cooling rack. These homemade drop biscuits are truly at their absolute best when enjoyed warm and fresh from the oven, ideally on the same day they’re baked. Serve them simply slathered with softened butter, your favorite fruit jam, or a generous drizzle of sweet honey – however you love your biscuits, they’re sure to be a hit!
Expert Tips for Perfectly Fluffy Drop Biscuits
Achieving light, fluffy, and tender drop biscuits is simple, especially when you keep these insider tips in mind. They’ll help you elevate your baking from good to absolutely perfect every single time:
- Monitor Baking Time Closely: Keep a very close eye on your buttermilk biscuits as they bake in the oven. Overbaking is the quickest and most common way to dry them out, making them tough and crumbly. Look for a beautiful light golden-brown color on the tops and bottoms, but don’t wait for them to turn dark brown.
- Allow for Resting Period: Once baked, resist the urge to immediately remove the biscuits from the sheet pan. Instead, leave them on the hot pan for an additional 5-10 minutes. This resting period allows the residual heat to distribute evenly throughout the biscuits, completing the cooking process from the inside out and ensuring a perfectly tender, moist interior.
- Cold Buttermilk is Non-Negotiable: Always use buttermilk directly from the fridge. The cold temperature of the buttermilk is absolutely crucial for reacting with the slightly cooled melted butter, promoting the formation of those vital small butter clumps that translate directly into the desired flaky texture once baked.
- Accurate Flour Measurement is Key: To avoid dense, dry biscuits, never press or scoop flour directly from the bag with your measuring cup. This method packs in far too much flour. Instead, gently spoon the flour into your measuring cup until it’s overfilled, then use the back of a table knife or a straight edge to level it off precisely. This ensures you’re using the correct amount for light and fluffy results.
- The Easy Release Spray Trick: A little clever hack for sticky dough: lightly spray your 1/4-cup measuring cup with a thin layer of nonstick cooking spray before you scoop the biscuit dough. This simple yet effective trick helps the sticky dough slide off effortlessly and cleanly onto the baking sheet, minimizing mess and frustration.
- Never Overmix the Dough: This cannot be stressed enough! Once you combine the wet and dry ingredients, mix the dough just until they are barely incorporated and no dry streaks of flour remain. Overmixing vigorously or for too long develops the gluten in the flour, which will inevitably result in tough, rubbery biscuits instead of the desired soft, tender, and flaky ones. A few small lumps in the dough are perfectly acceptable and actually contribute to a tender crumb.
Delicious Drop Biscuit Variations to Explore
While classic drop biscuits are perfect in their own buttery, flaky right, they also serve as an incredibly versatile canvas for creative flavor additions. Don’t be afraid to experiment with these exciting ideas to discover your new favorite way to enjoy these quick homemade treats!
- Parmesan and Bacon: For a truly savory and indulgent delight, stir in about 4-6 slices of cooked, finely crumbled bacon (ensure it’s crisp) and 1/2 cup of finely shredded Parmesan cheese into your dry ingredients before you add the wet mixture. These savory biscuits are fantastic alongside soups, stews, or as a hearty side to any dinner.
- Cheddar and Chive: Elevate a classic combination by adding 1/2 cup of shredded sharp cheddar cheese and 2 tablespoons of fresh, finely chopped chives to the dry ingredients. The sharpness of the cheddar paired with the mild oniony flavor of chives makes for a delightful biscuit, perfect with eggs or chili.
- Garlic-Herb Infusion: Infuse your biscuits with aromatic herbs and spices. Simply add 1 tablespoon of Italian seasoning (or a custom blend of dried parsley, oregano, and basil) and 1 teaspoon of garlic powder (or adjust to your preferred taste) to the dry ingredients. These herbaceous biscuits are wonderful served alongside pasta dishes, roasted chicken, or even just with a dollop of marinara sauce.
- Sweet Cinnamon-Sugar Swirl: For a dessert-like treat that’s perfect with coffee, increase the granulated sugar in the main recipe to 2 tablespoons and add 1 teaspoon of ground cinnamon to the dry ingredients. After baking, brush the warm biscuits with extra melted butter and sprinkle generously with a mixture of cinnamon and sugar.
- Spicy Jalapeño Cheddar: If you love a little kick, add 1/2 cup of shredded sharp cheddar cheese and 1-2 finely diced jalapeños (remove the seeds and membranes for less heat, or leave some for more spice) to the dry ingredients. These are fantastic with Mexican-inspired meals or simply enjoyed with a pat of butter.
- Everything Bagel Seasoning: For a trendy twist, after scooping the dough onto the baking sheet, sprinkle the tops generously with everything bagel seasoning before baking. The savory, garlicky, and oniony crunch is irresistible.
Storage and Reheating Homemade Drop Biscuits
For the absolute ultimate flavor and texture experience, we highly recommend enjoying your homemade drop biscuits fresh from the oven, ideally on the very same day they are baked. The crisp exterior and tender interior are at their peak then. However, if you find yourself with any delightful leftovers (a rare but welcome occurrence!), here’s how to properly store and reheat them to maintain as much of their deliciousness as possible:
- Refrigeration: Allow any leftover biscuits to cool completely to room temperature before storing. Once cool, place them in an airtight container or a sealed plastic bag. They will keep well in the refrigerator for up to 2-3 days. Storing them properly prevents them from drying out or becoming stale too quickly.
- Reheating Refrigerated Biscuits: To bring refrigerated biscuits back to life, you have a few options. For a quick warm-up, reheat them in a microwave for 5-10 seconds until they are warm through. For a crispier exterior and a more “freshly baked” feel, use a toaster oven or a conventional oven preheated to 300°F (150°C) for about 5-7 minutes.
- Freezing for Longer Storage: Drop biscuits freeze exceptionally well, making them perfect for meal prep or having a quick breakfast on hand! Once cooled completely, wrap each biscuit individually in plastic wrap. This prevents freezer burn and makes it easy to grab just one or two at a time. Then, place the wrapped biscuits into a larger freezer-safe bag or an airtight container. They can be frozen confidently for 2-3 months without a significant loss in quality.
- Thawing Frozen Biscuits: To thaw frozen biscuits, simply transfer the desired number of wrapped biscuits from the freezer to the refrigerator and let them thaw overnight. Once thawed, you can reheat them using the methods described above for refrigerated biscuits. You can also reheat them directly from frozen in a preheated oven (around 325°F/160°C) for 10-15 minutes, or until warmed through.
More Delicious Side Dishes to Complement Your Meal
Looking for more culinary inspiration to complete your meal or just expand your recipe repertoire? These fantastic side dishes pair wonderfully with homemade biscuits, or stand alone as delightful and easy additions to any breakfast, lunch, or dinner:
- Roasted Sweet Potatoes: A versatile side that’s both sweet and savory, with perfectly caramelized edges.
- Beet Goat Cheese Walnut Salad: A vibrant, fresh, and sophisticated salad featuring earthy beets, creamy goat cheese, crunchy walnuts, and a tangy honey dijon dressing.
- Baked Potato: Discover a “secret” method to bake these classic comfort foods in half the time for a quick and satisfying side.
- Creamy Corn Casserole: A rich, sweet, and comforting classic, made even better with the inclusion of buttermilk for extra flavor and moisture.
- Crockpot Mashed Potatoes: Achieve incredibly smooth, buttery, and perfectly seasoned mashed potatoes with minimal effort by using your slow cooker.

Rating: 5 out of 5 stars (based on 1 vote)
Easy Drop Biscuits Recipe
These easy Drop Biscuits are hot, buttery, and melt-in-your-mouth good! No special tools needed—just a bowl, a spoon, and a few simple steps for the perfect homemade biscuit. Perfect as a quick breakfast or a delightful side dish.
Prep Time: 15 minutes
Cook Time: 12 minutes
Total Time: 27 minutes
Servings: 12 biscuits
Equipment
- Large sheet pan (15″ x 21″) or a large cast-iron (oven-safe) skillet
- Parchment paper or a silicone baking mat
- Large mixing bowl
- Wooden spoon or sturdy spatula
- 1/4 cup measuring cup
- Pastry brush (optional, for melted butter topping)
Ingredients
- 8 tablespoons (1/2 cup) unsalted butter, melted and cooled slightly, plus 2 tablespoons for topping if desired
- 2 cups all-purpose flour (see note 1 for accurate measurement)
- 1 tablespoon baking powder
- 1 tablespoon granulated sugar (optional, for slightly sweeter biscuits)
- 1 teaspoon fine sea salt
- 1 cup cold buttermilk
- Serving suggestions (butter, jam, honey, gravy, etc. – see note 2)
Instructions
- Adjust your oven rack to the middle position and preheat your oven to a high 450°F (232°C). Line a large sheet pan with parchment paper or a silicone liner for easy removal. Alternatively, if using a large cast-iron skillet, generously butter the inside. Melt the 8 tablespoons of butter in the microwave and allow it to cool for 3–4 minutes until it’s warm but not hot.
- In a medium bowl, pour the cold buttermilk (straight from the fridge) into the slightly cooled melted butter. Stir gently with a spoon until small, distinct clumps of butter begin to form. This separation is key for flaky biscuits. Set this mixture aside.
- In a large mixing bowl, thoroughly whisk together the precisely measured all-purpose flour, baking powder, granulated sugar (if desired), and fine sea salt. Create a small well in the center of these dry ingredients.
- Pour the buttermilk-butter mixture into the well of the dry ingredients. Using a wooden spoon or a sturdy spatula, gently mix the dough together just until the ingredients are incorporated and no dry streaks of flour are visible. Be careful not to overmix, as this can lead to tough biscuits. A slightly lumpy dough is perfectly fine.
- Lightly spray a 1/4-cup measuring cup with nonstick cooking spray to ensure the sticky dough releases easily. Scoop approximately 1/4 cup of dough for each biscuit and “drop” it onto the prepared baking sheet, leaving about 1 to 1 1/2 inches of space between each biscuit. Once all the dough is on the pan, place the entire baking sheet into the refrigerator for 10 minutes. This chilling step helps the butter solidify, enhancing the flakiness when baked.
- Transfer the chilled baking sheet to your preheated oven. Bake the biscuits for 12–15 minutes, or until their tops and bottoms are beautifully golden brown. To check for doneness, gently tap the top of a biscuit; it should sound hollow.
- Remove the biscuits from the oven. Immediately, if you wish, use a pastry brush to brush on the additional 2 tablespoons of melted butter over the hot tops. A light sprinkle of fine sea salt can also be added for an extra savory touch.
- Allow the biscuits to stand on the sheet pan for 5 minutes after baking. This crucial resting time allows the residual heat to finish cooking the interior evenly. Then, transfer them to a wire cooling rack. These homemade drop biscuits are truly at their best when enjoyed warm and fresh from the oven, ideally on the same day they’re baked. Serve them with softened butter, your favorite jam, or a sweet drizzle of honey.
Recipe Notes
- Note 1 – Accurate Flour Measurement: For the lightest and fluffiest biscuits, avoid scooping flour directly from the bag with your measuring cup, as this packs in too much flour. Instead, gently spoon the flour into your measuring cup until it’s overfilled, then use the back of a table knife or a straight edge to level it off.
- Note 2 – Serving Suggestions: These versatile biscuits are delicious with a wide array of toppings. Enjoy them simply with butter, a dollop of your favorite fruit jam or preserves, or a generous drizzle of honey. They also serve as an excellent base for savory dishes such as sausage gravy, alongside hearty soups and stews, or even split and used for mini sandwiches. Don’t forget fresh apple butter!
- Storage: While best enjoyed fresh, cooled leftover biscuits can be stored in a sealed bag or airtight container in the refrigerator for up to 2-3 days. They tend to dry out quickly, so proper storage is important.
- Reheating Stored Biscuits: To reheat, simply warm refrigerated biscuits in a microwave for 5-10 seconds until heated through. For a crispier texture reminiscent of freshly baked, use a toaster oven or a conventional oven preheated to 300°F (150°C) for about 5-7 minutes.
- Freezing: For longer storage, drop biscuits freeze exceptionally well. Once they have cooled completely, wrap each biscuit individually in plastic wrap, then place them in a freezer-safe bag or airtight container. They can be frozen for 2–3 months. Thaw frozen biscuits in the refrigerator overnight before reheating.
Nutrition Information (Approximate)
Serving: 1 biscuit | Calories: 80kcal | Carbohydrates: 2g | Protein: 0.8g | Fat: 7.9g | Cholesterol: 21.2mg | Sodium: 39.8mg | Sugar: 2g
Nutrition information is automatically calculated and should be used as an approximation only. Individual results may vary based on ingredients and preparation methods.
This foolproof recipe method for easy drop biscuits is inspired by the culinary experts at Cooks Illustrated, known for their meticulous approach to developing perfect and reliable recipes.
Love this recipe? We’d love to hear from you! Leave a comment below!