
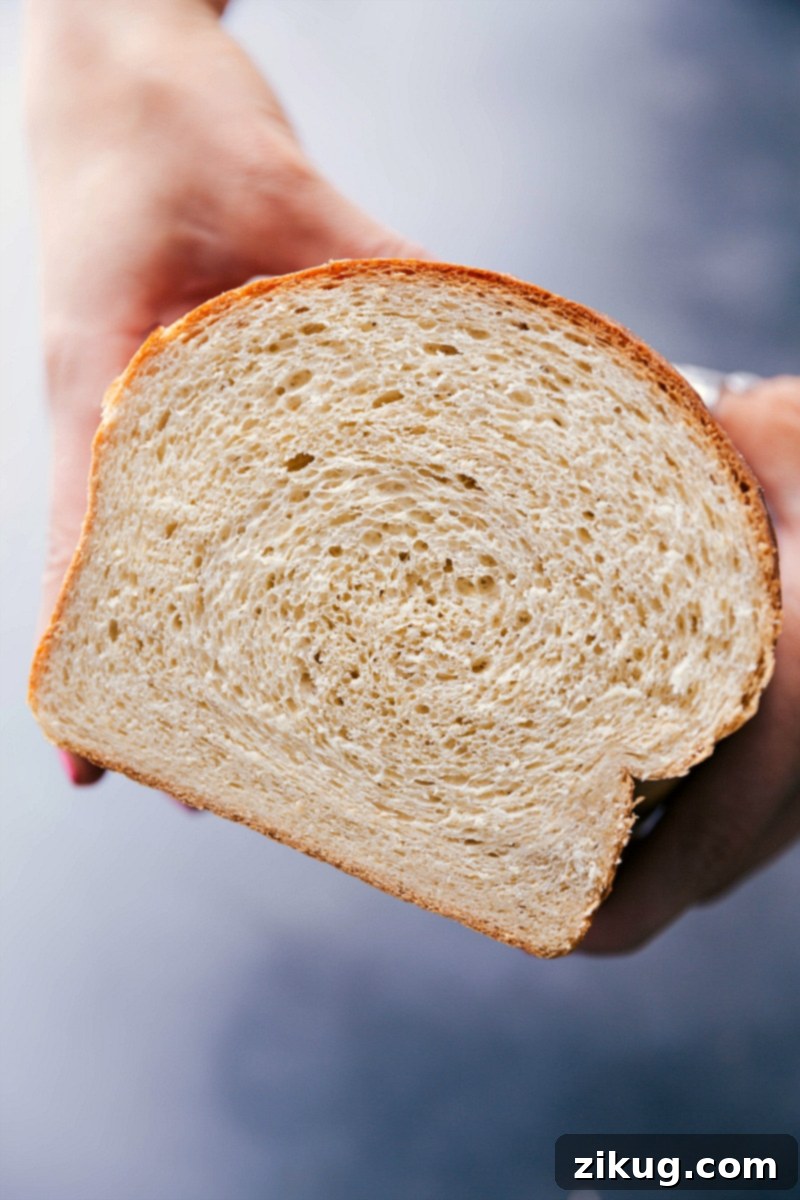
Honey Whole Wheat Bread is more than just a staple; it’s a comforting classic that brings warmth and delicious aromas to any home kitchen. This tried-and-true recipe delivers an exceptionally soft and chewy loaf, boasting a rich, golden-brown, buttery crust that will become an instant family favorite. Perfect for crafting wholesome sandwiches, enjoying a slice of morning toast, or simply tearing off a piece with a pat of butter, this bread offers a superior taste and texture that store-bought varieties simply can’t match.
Once you master this delightful recipe, you might also love trying our Classic White Bread for a lighter alternative, or these incredibly easy No-Knead Dinner Rolls, perfect for any meal.
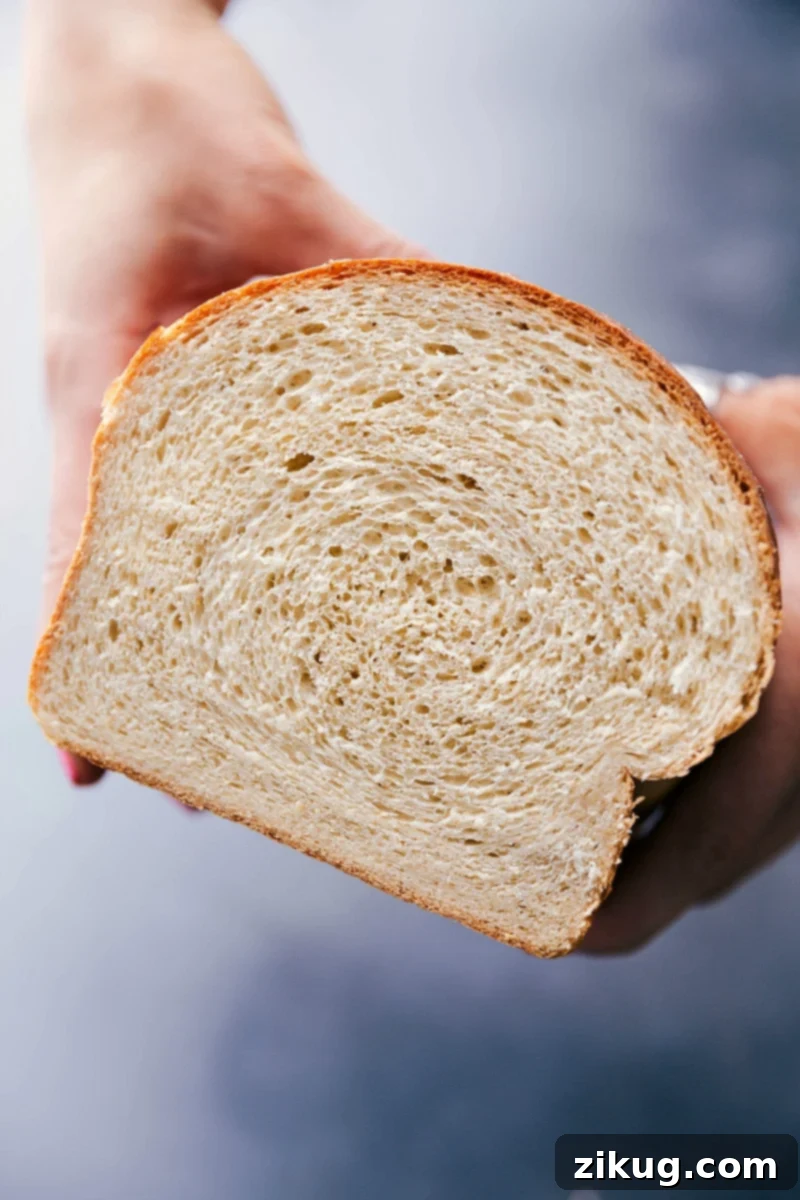
Mastering Homemade Honey Whole Wheat Bread
My journey to perfecting this Honey Whole Wheat Bread recipe began years ago, inspired by the unforgettable mini loaves served at a restaurant where I once worked. This establishment was renowned for not only its exquisite Crème Brûlée but also for the warm, honey-wheat bread mini loaves they offered with a side of luscious honey butter, a delightful treat for patrons while they waited. The moment I tasted that bread, I knew I had to replicate it at home.
After much persistence, I managed to acquire their original recipe. However, it was designed for commercial production, yielding a massive batch of about 600 mini loaves – far more than any home baker could realistically handle! Undeterred, I embarked on a culinary adventure involving countless hours of spreadsheet calculations to meticulously scale down the quantities and numerous rounds of testing in my own kitchen. It was a labor of love, but the dedication paid off.
The recipe I’m thrilled to share with you today is the culmination of that effort. While it might taste slightly different from the restaurant’s version (primarily due to the scale and home baking environment), my family and I honestly believe it’s even better! It strikes the perfect balance of sweetness, chewiness, and that distinct whole wheat flavor, all wrapped in an incredibly soft package. Prepare yourself for the ultimate homemade bread experience.
Essential Ingredients for Perfect Honey Whole Wheat Bread
Crafting exceptional bread begins with understanding the role of each ingredient. Here’s a detailed look at what makes this honey whole wheat bread truly special:
- Milk and Water: The combination of warm milk and water is crucial for gently activating the yeast. Milk adds richness and tenderness to the bread, contributing to a softer crumb and a beautifully golden crust, while water ensures proper hydration for a pliable dough. Maintaining the right temperature is key – too hot will kill the yeast, too cold will leave it dormant.
- Yeast: The magical leavening agent! Yeast is responsible for the dough’s magnificent rise and expansion, creating that desirable airy, fluffy texture. We recommend active dry yeast for this recipe, but instant yeast can also be used with slight adjustments (see FAQs).
- Sugar: Beyond adding a subtle sweetness, sugar plays a vital role in feeding the yeast, encouraging it to grow and produce the carbon dioxide needed for rising. It also contributes to the bread’s delightful golden-brown color during baking.
- Honey: Our star sweetener! Honey not only imparts a unique, complex sweetness that complements the whole wheat flavor beautifully but also acts as a natural humectant, drawing in and retaining moisture. This is essential for keeping the bread wonderfully soft and fresh for longer.
- Whole Wheat Flour: The backbone of this recipe! Whole wheat flour is a nutritional powerhouse, packed with fiber, vitamins, and minerals. It gives the bread its signature hearty texture and distinct, wholesome flavor. Using freshly ground whole wheat flour can elevate the taste even further.
- Bread Flour (or All-Purpose Flour): While whole wheat flour provides structure and nutrition, bread flour, with its higher protein content, contributes to the bread’s overall strength and chewiness. All-purpose flour can be used as a substitute, offering a slightly softer result, but bread flour is highly recommended for optimal texture.
- Salt: Absolutely indispensable for flavor. Salt enhances the taste of all other ingredients, balances the sweetness from the honey, and also plays a role in regulating yeast activity, ensuring a controlled rise and a more robust crumb structure. Don’t skip it!
- Melted Butter: This generous addition of melted butter is what gives our bread its luxurious richness, incredible flavor, and exceptional tenderness. It contributes to the soft crust and moist interior, making each bite truly indulgent.
- Olive Oil: Primarily used to grease the mixing bowl, olive oil prevents the dough from sticking during its initial rise, making it easier to handle and ensuring a smooth, even rise.
Quick Tip: Ensuring Perfect Yeast Activation with the Wrist Test
Achieving the ideal temperature for your liquids is crucial for successful yeast activation. The simplest and most reliable method is the “wrist test”! Drizzle a few drops of the warmed milk and water mixture onto the inside of your wrist. It should feel comfortably warm, like a baby’s bathwater. If it feels hot, it’s too warm and will likely kill the yeast, preventing your dough from rising. If it feels cool or cold, it’s not warm enough, and the yeast will remain dormant. Aim for that perfect, gentle warmth to ensure your yeast is happy and ready to work its magic.
Step-by-Step Guide: Crafting Your Own Honey Whole Wheat Bread
Making homemade bread might seem daunting, but with these clear steps, you’ll be baking like a pro in no time. Precision and patience are your best tools!
- Activate the Yeast: In a large mixing bowl (preferably for a stand mixer), combine the warm milk and warm water. Ensure the temperature is just right using the wrist test. Gently sprinkle the active dry yeast over the surface of the liquids, then follow with the sugar. Give it a brief whisk, just enough to combine everything. Let this mixture sit undisturbed for 5 to 10 minutes. During this time, the yeast should become foamy and bubbly, indicating it’s active and alive. If no foam forms, your yeast might be expired, or your liquids were too hot or cold, and you’ll need to start fresh.
- Incorporate Honey and Whole Wheat Flour: Once your yeast is beautifully foamy, stir in the honey until it’s fully dissolved. Then, add the whole wheat flour to the mixture. Using a sturdy spoon or your stand mixer’s paddle attachment, mix until all the flour is just incorporated and no dry spots remain. This step allows the whole wheat flour to hydrate properly, which is crucial for its texture. Let this mixture rest for another 10 minutes.
- Prepare Butter and Salt Mixture: While the whole wheat mixture is resting, melt your butter and allow it to cool slightly to room temperature. This prevents it from shocking and potentially harming the yeast. Once cooled, stir the salt into the melted butter. This ensures even distribution of salt throughout the dough, which is vital for flavor.
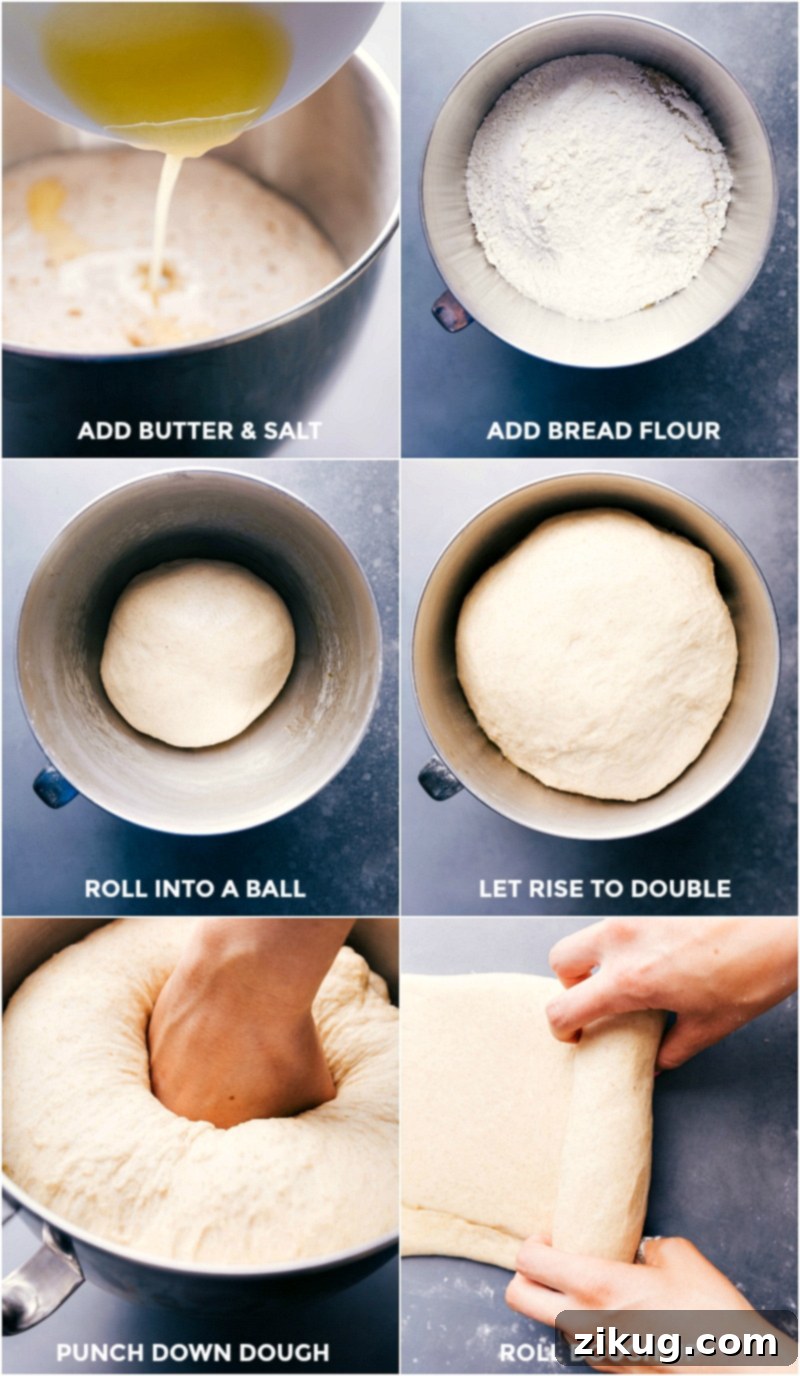
- Combine and Form Dough: After the 10-minute rest, switch to the dough hook attachment on your stand mixer (if using). Gradually add 4 cups of bread flour (or all-purpose flour) to the yeast mixture. Then, carefully scrape in the cooled butter and salt mixture. Begin mixing on low speed (typically speed 2 on most stand mixers). Continue mixing for 2 to 3 minutes, or until the dough starts to come together and pull away from the sides of the bowl, gathering around the dough hook. If the dough seems too sticky and doesn’t gather, add additional bread flour, one tablespoon at a time, up to an extra ½ cup, until the desired consistency is achieved.
- Knead to Perfection: Once the dough has formed a cohesive ball around the hook, increase the mixer speed to medium (speeds 4-6). Knead the dough for a full 10 minutes. This develops the gluten, which is essential for the bread’s structure, elasticity, and chewy texture. Keep an eye on your mixer during this vigorous kneading – some mixers might “walk” across the counter! If kneading by hand, prepare for a good arm workout, kneading for approximately 10 to 12 minutes on a lightly floured surface until the dough is smooth, elastic, and springs back when gently poked.
- First Rise (Bulk Fermentation): Lightly grease a large, clean bowl with olive oil. Shape your kneaded dough into a smooth ball and place it in the greased bowl, turning it once to coat all sides with oil. Cover the bowl snugly with a damp kitchen towel or plastic wrap to prevent the dough from drying out. Place the covered bowl in a warm, draft-free spot (like a slightly warmed oven that has been turned off, or a sunny windowsill). Let the dough rise until it has visibly doubled in size, which typically takes about 1 hour, but can vary based on ambient temperature.
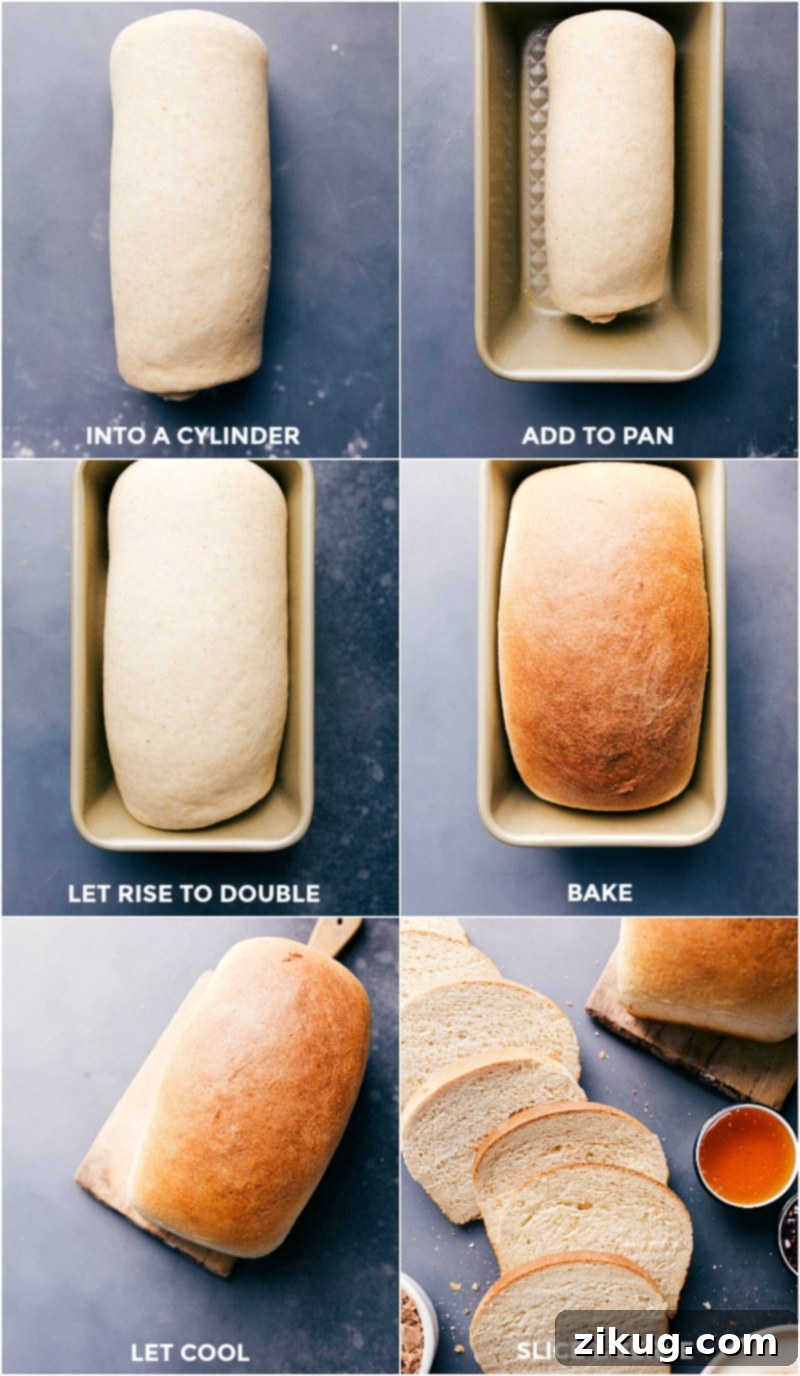
- Shape the Loaves and Second Rise (Proofing): Gently punch down the risen dough to release the accumulated gases. Turn the dough out onto a lightly floured surface and divide it into two equal parts. A food scale can be helpful here for precision, ensuring even loaves. Shape each half into a neat loaf. There are various techniques for shaping, but a simple method is to flatten the dough into a rectangle, roll it tightly into a cylinder, and pinch the seams to seal. Place each shaped loaf into separate, greased 8×4-inch bread pans. Cover the pans again with a damp cloth and allow them to rise in a warm place for a second time, until they have doubled in size again (approximately another hour). This second rise, known as proofing, is vital for a light, airy final product.
- Bake and Finish: While your loaves are undergoing their second rise, preheat your oven to 375°F (190°C). Once the loaves have doubled in size, carefully transfer them to the preheated oven. Bake for 30 to 35 minutes, or until the crust is a deep golden brown and the internal temperature reaches 190-200°F (88-93°C). As soon as the golden loaves emerge from the oven, immediately brush their tops generously with a little extra melted butter. This creates an irresistible, soft, and glossy crust. Let the bread cool in the pans for about 15 minutes before carefully transferring them to a wire rack to cool completely. Resist the urge to slice too early; cooling for at least 30 minutes allows the internal structure to set, preventing a gummy texture.
Expert Tips for Baking Flawless Honey Whole Wheat Bread
Baking bread is an art and a science, and these tips will help ensure your Honey Whole Wheat Bread turns out perfectly every time, even if you’re a beginner:
- Patience During Rising Times: This is perhaps the most crucial tip! Do not rush the rising process. Yeast needs time to work its magic. Over-proofing (letting it rise too long) can lead to a crumbly, gummy texture and a yeasty flavor, while under-proofing results in dense bread. Watch the dough, not the clock, as rising times can vary based on ambient temperature and yeast activity. The dough should double in size, and a gentle poke should leave a slight indentation that slowly springs back.
- Adjusting Flour Amount Carefully: The exact amount of flour needed can vary significantly due to factors like humidity, altitude, and even how you measure your flour. Always start with about 1/2 cup less flour than the recipe suggests. Gradually add more flour, one tablespoon at a time, until the dough is no longer excessively sticky but still remains moist and slightly tacky to the touch. The goal is a soft, pliable dough, not a dry, stiff one.
- Smart Kneading Techniques: For sticky doughs, avoid the temptation to heavily flour your work surface, as this can incorporate too much flour into your dough, leading to a dry loaf. Instead, use a dough scraper or a sturdy metal spatula to manage sticky areas. Alternatively, lightly coat your hands and the counter with cooking spray or a thin film of olive oil. This allows you to knead effectively without altering the dough’s hydration.
- Accurate Flour Measurement is Key: Improper flour measurement is a common pitfall. To measure flour accurately, use the “spoon and level” method: gently spoon flour into your measuring cup until it overflows, then use a straight edge (like a knife or the back of a spoon) to level off the excess. Never scoop flour directly from the bag or press it into the measuring cup, as this compacts it and results in using too much flour.
- Ensure Yeast Freshness: Your yeast is a living organism, and its freshness is paramount. If your yeast is old or inactive, your bread simply won’t rise. Always check the expiration date on your yeast package. If you’re unsure, you can test its freshness by sprinkling a teaspoon of yeast and a pinch of sugar into 1/4 cup of warm water (around 105-115°F or 40-46°C). After 5-10 minutes, it should be bubbly and foamy. If not, your yeast is dead, and you’ll need a fresh batch. For a comprehensive guide, check out resources like this post on checking yeast freshness.
- Cool Freshly Ground Wheat Flour: If you’re grinding your own whole wheat flour, it’s essential to allow it to cool completely to room temperature before incorporating it into your dough. Freshly ground flour can be warm from the milling process, and this heat could potentially kill your delicate yeast, hindering your bread’s rise.
- Oven Calibration: An uncalibrated oven can significantly impact baking results. If your bread consistently bakes unevenly or takes longer/shorter than expected, consider getting an oven thermometer. This inexpensive tool will give you an accurate reading of your oven’s true temperature, allowing you to adjust accordingly.
- Developing Gluten: The kneading process is critical for developing gluten, which provides the elasticity and structure necessary for a good rise and chewy texture. Don’t cut this step short. If using a stand mixer, ensure your dough hook is properly engaged and kneading thoroughly. If kneading by hand, pay attention to the dough’s feel – it should become smooth, elastic, and less sticky over time.
Frequently Asked Questions About Honey Whole Wheat Bread
Have questions about baking this delicious bread? We’ve got answers to help you troubleshoot and perfect your loaf.
Can I Use Instant Yeast Instead Of Active Dry Yeast?
Yes, you can generally substitute instant yeast for active dry yeast in this recipe. While I recommend active dry yeast for its slightly slower, more controlled rise which can develop deeper flavors, instant yeast will certainly work. If using instant yeast, you can typically add it directly to the dry ingredients as it doesn’t require proofing in warm liquid first. However, to be safe, you can still proof it with the warm milk, water, and sugar as per the recipe instructions. Just know it might activate a bit faster.
Why Is My Homemade Bread Dense?
Dense bread is a common issue, but usually stems from a few key factors. Understanding these can help you avoid it:
- Inactive or Dead Yeast: The most frequent culprit. If your yeast didn’t proof (become foamy) adequately, or if it was exposed to liquids that were too hot or too cold, it won’t produce enough carbon dioxide to make the dough rise. Always check yeast freshness and liquid temperature.
- Too Much Salt or Direct Contact with Yeast: Salt is vital for flavor, but too much can inhibit or even kill yeast. Adding salt directly onto the yeast without other ingredients in between can also be detrimental. Always mix salt with other dry ingredients or dissolved in butter as this recipe instructs.
- Improper Proofing Conditions: Yeast thrives in a warm, draft-free environment. If your dough is proofing in a spot that’s too cold, the yeast will be sluggish, leading to a minimal rise. Conversely, an environment that’s too hot can over-activate the yeast initially, causing it to exhaust itself too quickly.
- Insufficient Kneading: Kneading develops the gluten network, which traps the gases produced by the yeast, allowing the bread to rise. If the dough isn’t kneaded long enough, the gluten won’t be strong enough to hold the gases, resulting in a dense, tight crumb.
- Too Much Flour: Excess flour makes the dough stiff and dry, preventing it from expanding properly during rising and baking. Always add flour gradually until the dough is just slightly tacky, not dry and hard.
- Low-Protein Flour: While all-purpose flour works, bread flour has a higher protein content, which translates to better gluten development and a lighter, chewier texture. If your bread is consistently dense, try using bread flour.
- Over-Proofing: While under-proofing is bad, so is over-proofing. If the dough rises too much and then collapses, it will result in a dense, crumbly texture.
How Can You Tell If The Honey Whole Wheat Bread Is Done Baking?
Knowing when your bread is perfectly baked is crucial for optimal texture and flavor. Here’s how to tell:
- Visual Check: The crust should be a beautiful, uniform golden-brown, firm to the touch, and look dry, not pale or doughy.
- Internal Temperature: This is the most reliable method. Insert an instant-read thermometer into the center of the loaf. For a properly baked loaf, the internal temperature should register between 190°F and 200°F (88°C and 93°C).
- The Tap Test: Carefully remove the loaf from its pan, turn it upside down, and gently tap the bottom crust with your knuckles. A fully baked loaf will produce a hollow sound, much like tapping on a ripe melon. If it sounds dull or soft, it likely needs a few more minutes in the oven. Return it to the oven for an additional 5 minutes and re-test.
- When in Doubt, Over-bake Slightly: It’s generally better to slightly over-bake bread than to under-bake it. Under-baked bread can be gummy and unappetizing. If you consistently find your bread under-baked despite following instructions, consider that your oven temperature might be running cooler than its setting, and an oven thermometer could help.
What’s the Best Way to Slice Warm Bread?
While it’s tempting to slice into a warm loaf right out of the oven, it’s generally best to let bread cool completely (or at least for 30-60 minutes) before slicing. This allows the internal structure to set and steam to redistribute, preventing a gummy texture. When you do slice, use a sharp serrated bread knife with a gentle sawing motion, rather than pressing down, to avoid crushing the soft interior.
Storing Your Homemade Honey Whole Wheat Bread for Lasting Freshness
Proper storage is essential to maintain the freshness and delightful texture of your homemade Honey Whole Wheat Bread. Follow these guidelines to enjoy your loaves for as long as possible:
- Room Temperature is Best: For immediate consumption within 2-3 days, store your Honey Whole Wheat Bread at room temperature in a cool, dry place. The key is an airtight environment to prevent it from drying out. A large plastic bag, a bread box, or even wrapping it tightly in plastic wrap or foil will work perfectly.
- Avoid the Refrigerator: While it might seem counterintuitive, refrigerating bread actually accelerates the staling process. The cool, damp environment of a fridge causes the starch molecules in the bread to recrystallize quickly, making the bread firm, dry, and stale much faster than if left at room temperature.
- Freezing for Long-Term Storage: If you won’t be consuming your bread within a few days, freezing is an excellent option for long-term freshness. You can freeze whole loaves or, ideally, slice the bread before freezing. Wrap individual slices or the entire loaf tightly in plastic wrap, then place it in a freezer-safe bag or aluminum foil. This method helps prevent freezer burn. Frozen bread can be stored for up to 3 months.
- Thawing and Reheating: When ready to enjoy frozen slices, simply take out individual portions as needed. You can toast them directly from frozen, or let them thaw at room temperature for 15-30 minutes. For a whole loaf, thaw it overnight at room temperature while still wrapped, then refresh it in a preheated oven (300°F/150°C for 10-15 minutes) to bring back its fresh-baked aroma and soft interior.
Expand Your Baking Repertoire: More Delicious Projects to Try
If you’ve enjoyed the satisfying process of baking this Honey Whole Wheat Bread, you’re ready to explore even more delightful recipes. Here are some reader favorites and fool-proof baking projects that will continue to impress:
- Homemade Cinnamon Rolls: Indulge in warm, fluffy cinnamon rolls drenched in a decadent cream cheese glaze. This overnight recipe makes breakfast (or brunch!) effortlessly delicious.
- Fool-Proof French Bread: Achieve bakery-quality crusty French bread with a tender interior right in your own kitchen. This simple recipe guarantees success every time.
- Chewy Chocolate Chip Cookies: A timeless classic that’s always a crowd-plEaster. Our recipe delivers perfectly chewy cookies with gooey chocolate chips that are a consistent reader favorite.
- Easy Banana Bread with Greek Yogurt: Transform ripe bananas into a moist, flavorful quick bread. The addition of Greek yogurt makes it incredibly tender and adds a subtle tang.
- Edible Brownie Batter: Craving something sweet without the wait? This safe-to-eat brownie batter recipe (no eggs, heat-treated flour) is perfect for satisfying your sweet tooth instantly.
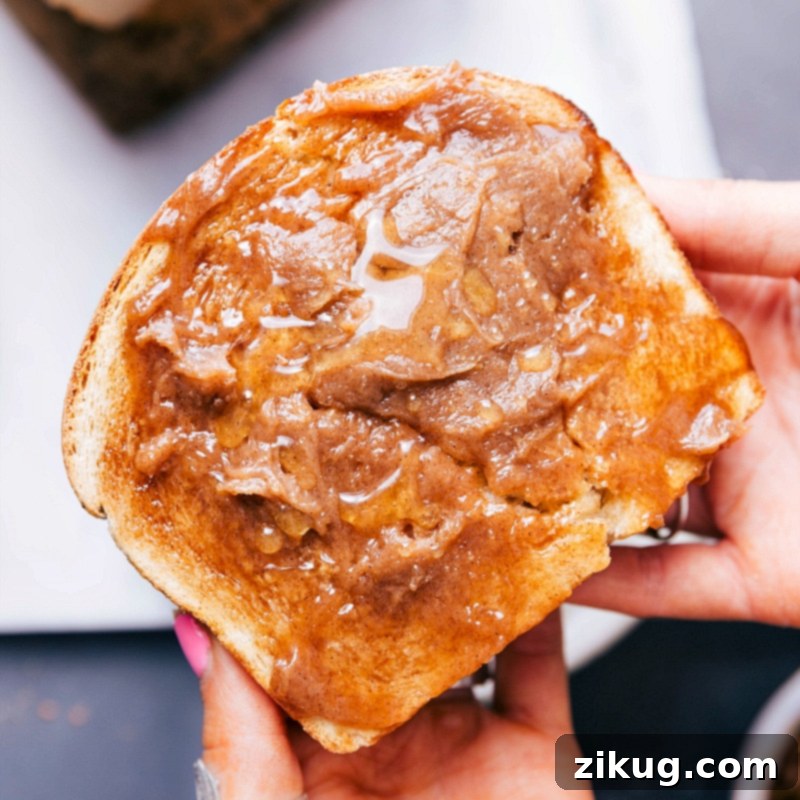
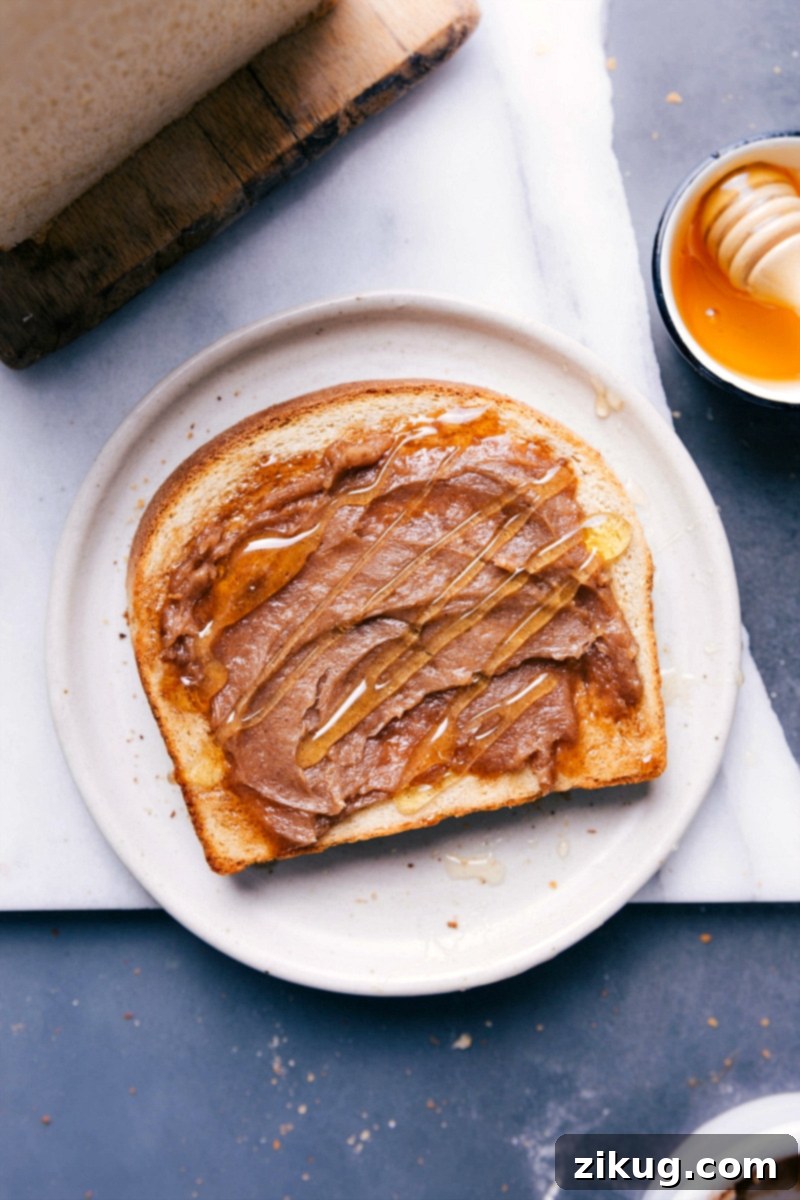
The only thing that can truly elevate a warm slice of this incredible bread? Slathering it generously in lots and lots of homemade Honey Butter! It’s the perfect sweet and creamy accompaniment.
Homemade Honey Whole Wheat Bread Recipe
By Chelsea Lords
This Honey Whole Wheat Bread is renowned for its soft, chewy texture and an irresistibly buttery, golden crust. Crafted with care, this detailed recipe provides step-by-step guidance, essential tips, and clear instructions to ensure your baking success. Prepare to create a truly remarkable homemade loaf that’s perfect for any occasion.
Prep Time: 20 minutes
Cook Time: 30-35 minutes
Rising Time: Approximately 2 hours (1 hour for first rise, 1 hour for second rise)
Total Time: Approximately 2 hours 50 minutes
Yields: 2 loaves of bread (approximately 24 slices)
Equipment You’ll Need:
- Stand mixer with paddle and dough hook attachments (or a large mixing bowl and strong arms for hand kneading)
- 2 8.5 x 4.5-inch bread pans
- Large bowl for rising
- Damp kitchen towel or plastic wrap
- Wire cooling rack
- Instant-read thermometer (optional, but recommended for accuracy)
Ingredients:
- 1 cup whole milk, warmed to 110℉ (43°C)
- 1 cup water, warmed to 110℉ (43°C)
- 1 tablespoon active dry yeast (or instant yeast)
- 1 teaspoon granulated sugar
- 1/2 cup honey
- 2 cups whole wheat flour
- 4 cups bread flour (or all-purpose flour), plus up to 1/2 cup extra as needed (see recipe notes)
- 1 tablespoon salt
- 6 tablespoons unsalted butter, melted and cooled to room temperature
- 1/2 tablespoon olive oil, for greasing the bowl
- Optional: Additional unsalted butter, melted, for brushing tops of baked loaves
Instructions:
- Activate Yeast: In the bowl of a stand mixer (or a large mixing bowl), combine the warm milk and warm water. Sprinkle the yeast over the liquids, then sprinkle the sugar on top. Whisk briefly to combine. Let this mixture sit for 5-10 minutes until it becomes foamy and bubbly. This indicates the yeast is active. If no foam forms, your yeast may be inactive, or your liquid temperature was incorrect; you will need to start over.
- Add Honey and Whole Wheat Flour: Stir the honey into the foamy yeast mixture. Add the whole wheat flour. Using the paddle attachment (or a sturdy spoon), mix until just combined and no dry flour streaks remain. Let this mixture rest for 10 minutes to allow the whole wheat flour to hydrate.
- Prepare Butter and Salt: While the mixture rests, melt the 6 tablespoons of butter and let it cool to room temperature. Stir the 1 tablespoon of salt into the cooled melted butter. Set aside.
- Form the Dough: After the 10-minute rest, switch to the dough hook attachment on your stand mixer. Gradually add the 4 cups of bread flour. Pour in the cooled butter and salt mixture, scraping the bowl with a spatula to ensure all of it is incorporated. Mix on low speed (speed 2) for about 2-3 minutes, until the dough comes together and starts to pull away from the sides of the bowl, wrapping around the dough hook. If the dough is still excessively sticky and won’t gather, add additional flour one tablespoon at a time, up to an extra 1/2 cup, until the desired consistency is reached.
- Knead the Dough: Increase the mixer speed to medium (speeds 4-6) and continue to knead for 10 minutes. This vigorous kneading is essential for developing the gluten structure, which will give your bread its elasticity and chewy texture. If kneading by hand, knead for 10-12 minutes on a clean, lightly oiled surface until the dough is smooth and elastic.
- First Rise (Bulk Fermentation): Lightly grease a large, clean bowl with 1/2 tablespoon of olive oil. Shape the kneaded dough into a smooth ball and place it in the greased bowl, turning it once to coat with oil. Cover the bowl securely with a damp kitchen towel or plastic wrap. Place the covered bowl in a warm, draft-free location (around 70-75°F or 21-24°C) and let it rise until it has visibly doubled in size, typically about 1 hour.
- Shape Loaves and Second Rise (Proofing): Gently punch down the risen dough to release the gases. Turn the dough out onto a lightly floured surface. Divide the dough into two equal portions (a food scale can help ensure even loaves). Shape each portion into a loaf. For a classic loaf shape, flatten the dough into a rectangle, then roll it up tightly from one long side to the other, pinching the seam closed and tucking the ends underneath. Place each shaped loaf seam-side down into two greased 8.5×4.5-inch bread pans. Cover the pans again with a damp cloth and let them rise in a warm spot for another hour, or until the loaves have doubled in size and look puffy.
- Bake the Bread: While the loaves are on their second rise, preheat your oven to 375°F (190°C). Once the loaves are adequately risen, carefully place them in the preheated oven. Bake for 30-35 minutes, or until the tops are golden brown and an instant-read thermometer inserted into the center of a loaf registers between 190°F and 200°F (88-93°C).
- Finish and Cool: As soon as the baked loaves are removed from the oven, immediately brush their tops generously with a little extra melted unsalted butter (if desired) for a soft, rich crust. Let the bread cool in the pans for 15 minutes. Then, carefully remove the loaves from the pans and transfer them to a wire rack to cool completely for at least 30 minutes before slicing and serving. This cooling time is crucial for the internal structure to set.
Recipe Notes:
1. Flour Adjustment: The precise amount of flour can vary. Factors like humidity, altitude, and how flour is measured can affect hydration. Always start with the recommended amount and add more gradually, one tablespoon at a time, until the dough is slightly sticky but not overly wet. The dough should be soft and pliable, not stiff or dry.
2. Shaping the Dough: There are various methods to shape bread dough. You can roll the dough out into a rectangle with a rolling pin and then roll it into a cylinder, or simply shape it by hand into a compact oval. If the dough is resistant or difficult to work with during shaping, cover it and let it rest for 10-15 minutes. This allows the gluten to relax, making it much easier to handle.
3. Storage Guidelines: To keep this bread fresh, store it at room temperature in an airtight plastic bag or container in a cool, dry place for 2-3 days. Avoid refrigerating, as it causes bread to stale quickly. For longer storage, slice the bread and freeze it in an airtight freezer bag for up to 3 months. Individual slices can be toasted directly from frozen.
Nutrition Information:
(Approximate values per serving, based on 24 slices per recipe)
- Serving Size: 24 servings (per loaf)
- Calories: 172 kcal
- Carbohydrates: 30.5 g
- Protein: 4.7 g
- Fat: 3.8 g
- Cholesterol: 7.8 mg
- Fiber: 1.8 g
- Sugar: 8 g
Nutrition information is automatically calculated and should be used as an approximation.