
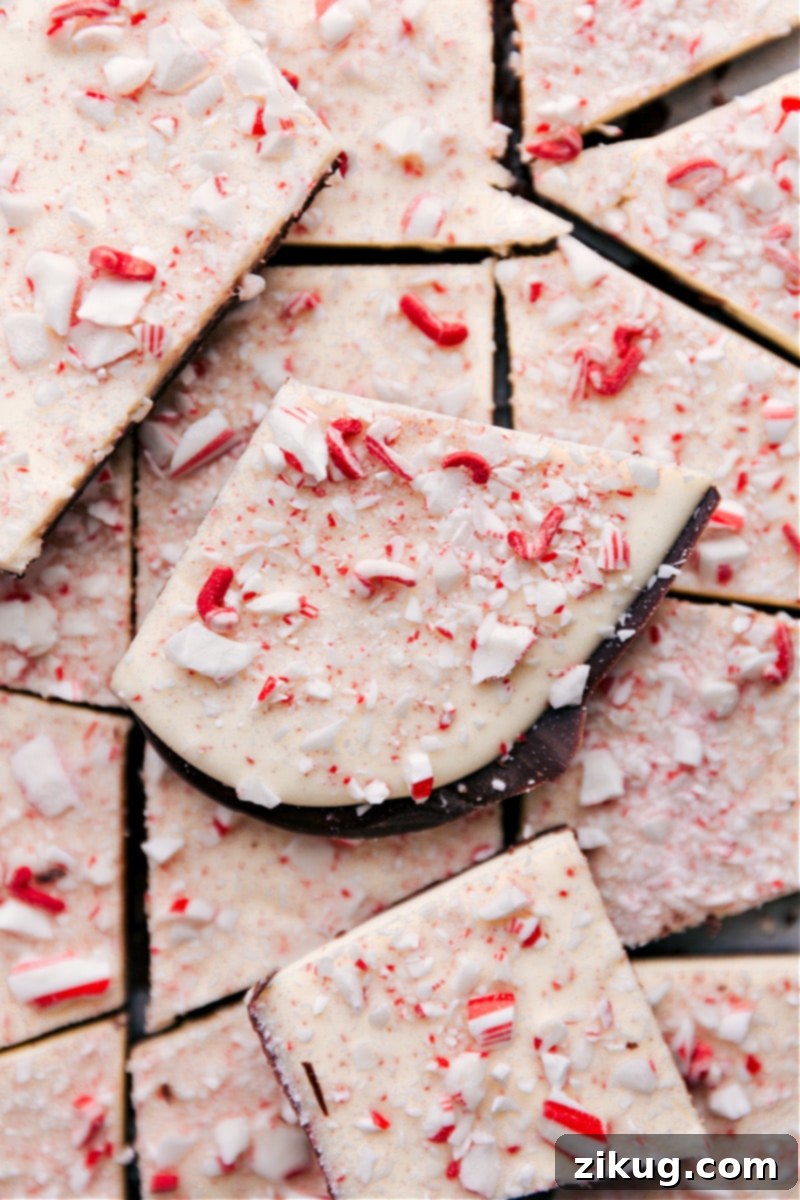
Discover the ultimate Peppermint Bark recipe, a quintessential holiday treat crafted with a luxurious blend of three distinct chocolates and generously crowned with crisp, crushed peppermint. This festive confection is not just a dessert; it’s an experience, promising to be the highlight of your holiday baking!
If you adore the vibrant flavor of peppermint, be sure to explore these other cherished recipes: our delightful Peppermint Bark Pretzels, the fun and festive Peppermint Muddy Buddies, and our irresistible Peppermint Bark Cookies!
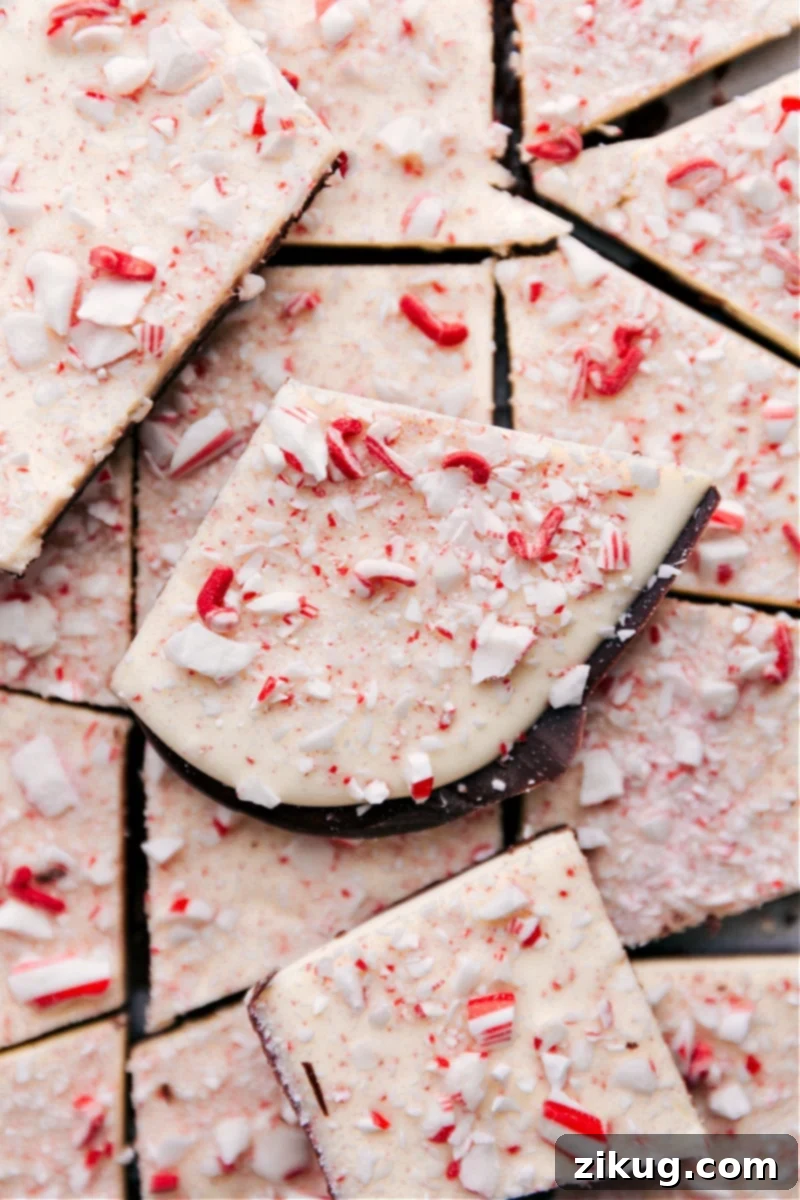
Crafting the Perfect Peppermint Bark for Your Holiday Table
In our household, the moment Christmas festivities begin is marked by the creation of our very first batch of homemade Peppermint Bark. It’s more than just a sweet treat; it’s a cherished tradition, signaling the true start of the holiday season and a personal favorite that evokes warmth and joy.
Growing up, December was synonymous with non-stop baking sessions alongside my mom. Our kitchen would overflow with delicious aromas from classics like Carmelitas and 7 Layer Bars. However, when it came to candy making, we often opted for convenience, picking up a bag of store-bought Ghirardelli® peppermint bark. While delicious, there’s a unique charm and flavor that only homemade can offer.
Over the past few years, I’ve made it a point to get my own children involved in the art of candy making. They absolutely adore whipping up Buttercrunch Candy, while I personally can’t get enough of a good homemade Toffee. It was during one of these delightful sessions that I realized it was high time we bypassed the store shelves and crafted our very own peppermint bark from scratch.
The beauty of homemade bark lies in its endless possibilities. You have complete freedom to mix and match different types of premium chocolates, precisely adjust the intensity of the peppermint flavor to your liking, and break off pieces in any size you desire – from delicate shards to satisfyingly large chunks. Truly, nothing compares to the rich taste and personal touch of a homemade batch of Peppermint Bark.
Embrace the holiday spirit by making this simple yet elegant candy. It’s a wonderful activity for families, creating lasting memories along with delectable treats. The vibrant colors of white chocolate and crushed red candy canes, combined with the deep hues of dark or milk chocolate, make for an eye-catching presentation that will impress guests and delight loved ones.

Essential Ingredients for Irresistible Peppermint Bark
Creating truly exceptional peppermint bark starts with selecting the right ingredients. Quality makes a noticeable difference in both flavor and texture. Here’s a closer look at what you’ll need and why:
- Candy Canes (or Hard Peppermint Candies): These provide the signature crunch and cooling peppermint flavor. For best results, double-bag them before crushing. This prevents sharp pieces from tearing through the bag and makes for an easier, less messy process. Aim for varying small chunks, not a fine powder, for optimal texture.
- White Chocolate Baking Bar: Crucial for the distinct white layer. Always opt for high-quality white chocolate baking bars over chocolate chips or morsels. Baking bars contain more cocoa butter, which allows them to melt more smoothly and set with a superior, non-streaky finish. Chips often contain stabilizers that prevent them from melting truly smoothly.
- Dark, Semi-Sweet, or Milk Chocolate Baking Bar: This forms the base layer, offering a rich contrast to the white peppermint layer. You can choose your favorite – dark chocolate provides a deep, slightly bitter note, semi-sweet offers a classic balance, and milk chocolate delivers a creamy, milder sweetness. As with white chocolate, using baking bars ensures better melting and a glossier, more stable bark. Save a small amount (about 2 tablespoons) to stir in after melting for a glossy, tempered-like finish.
- Vegetable or Coconut Oil: A small amount of neutral oil helps create a smooth, fluid chocolate consistency, making it easier to spread evenly. It also aids in preventing the chocolate from seizing during melting and contributes to a beautiful, pourable texture.
- Peppermint Extract: This amplifies the peppermint flavor, giving your bark that refreshing kick. Start with a smaller amount (1/4 teaspoon) and taste, then adjust to your personal preference for intensity, up to 1/2 teaspoon. Remember, a little goes a long way with extracts!
Mastering the Art of Crushing Peppermint
Before you even think about melting chocolate, the first vital step is to properly crush your peppermint. The texture of the crushed peppermint significantly impacts the overall experience of your bark.
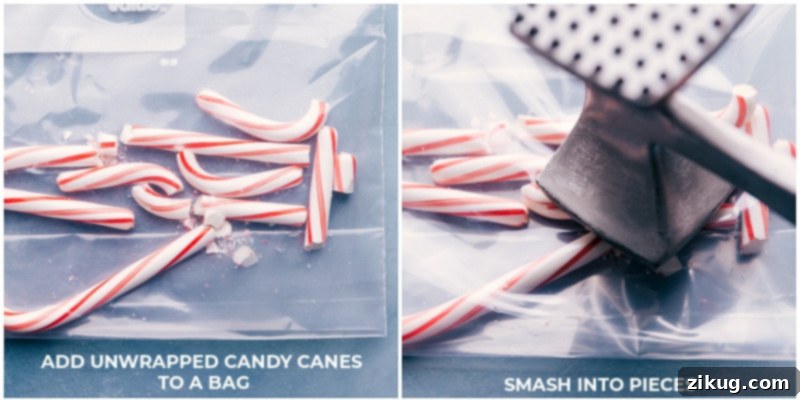
- You can use either traditional **candy canes or sturdy hard peppermint candies**. Both work beautifully, but the key is to achieve small, irregular chunks, not a fine, powdery dust. The chunks provide a satisfying bite and visual appeal.
- Carefully unwrap your candies and place them inside a robust plastic bag. For extra security and to prevent any tears from the sharp edges of the candy, **it is highly recommended to use two bags**. This simple trick will save you from a potential mess. Once the candies are inside, seal the bag, pressing out as much air as possible.
- Now comes the fun part: **smash them with a rolling pin or a meat mallet**. Apply steady, firm pressure, rolling and hitting until you achieve your desired crumb size. This method gives you excellent control over the texture.
- **Resist the urge to use blenders or food processors.** While tempting for speed, these appliances tend to pulverize the candy into too fine a powder. A powder will melt into the chocolate rather than providing distinct, crunchy pieces, diminishing the bark’s signature texture.
Your Step-by-Step Guide to Homemade Peppermint Bark Perfection
Creating this festive Peppermint Bark is a straightforward process, but attention to detail, especially during the melting and layering stages, will ensure a stunning and delicious result. Follow these steps for an irresistible holiday treat:
- Prepare Your Peppermint: Begin by crushing your candy canes or hard peppermint candies into small, delightful chunks. Remember the double-bagging tip to avoid tears and ensure uniform pieces. Set these vibrant red and white bits aside, ready for their grand finale sprinkle.
- Set Up Your Pan: Line an 8×8 or 9×9-inch baking pan with parchment paper, leaving a generous overhang on the sides. This parchment paper sling will be your best friend for effortless removal of the hardened bark later. Coarsely chop all your chocolate baking bars (white, semi-sweet, and milk).
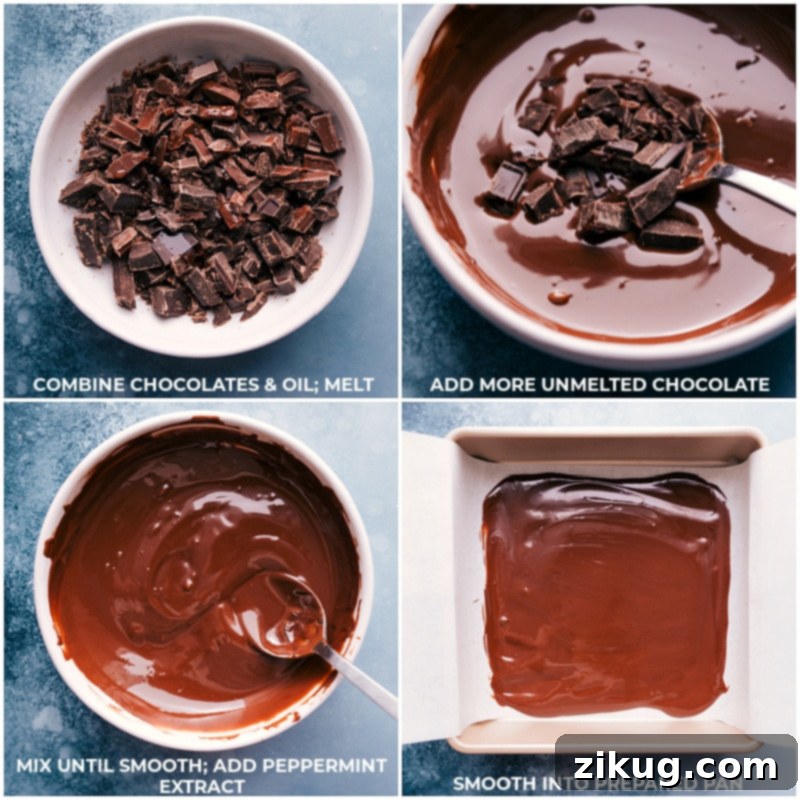
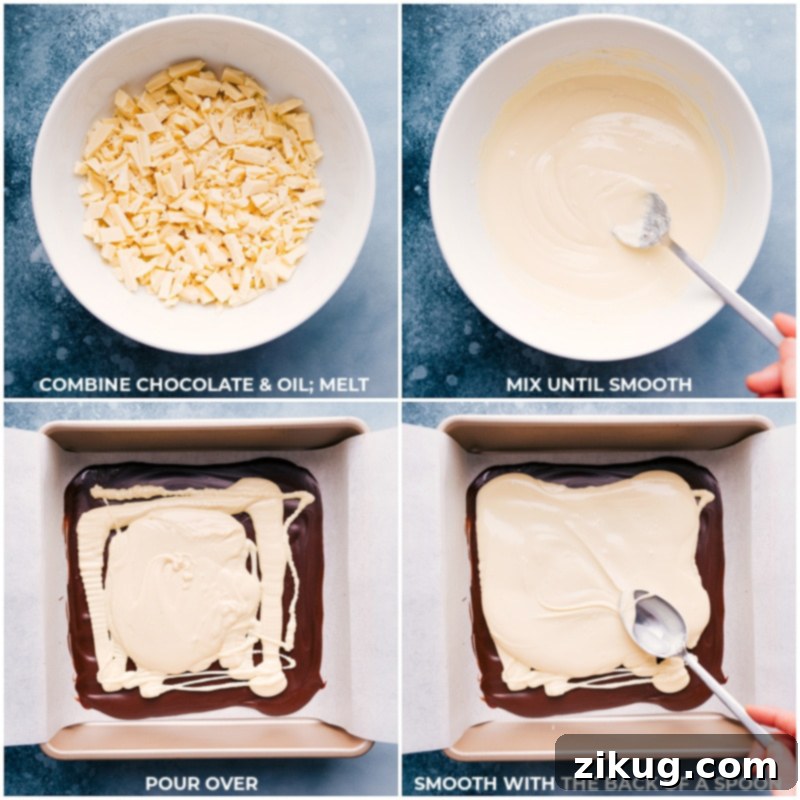
- Melt the First Chocolate Layer (Dark/Semi-Sweet/Milk): Take all but 2 tablespoons of your chosen dark, semi-sweet, or milk chocolate and place it in a sturdy, microwave-safe bowl. Add 1/2 teaspoon of vegetable or coconut oil. Microwave for 15-second intervals, stirring vigorously for 15 seconds after each burst. The key is to melt the chocolate gently, allowing residual heat to do most of the work, preventing burning and ensuring a smooth, lustrous finish. Continue this process until the chocolate is mostly melted. Once it’s mostly liquid, stir in the reserved 2 tablespoons of chopped chocolate. This technique, known as seeding, helps to temper the chocolate, ensuring a stable, glossy finish that snaps beautifully and resists melting at room temperature. Stir until completely smooth and at room temperature.
- Infuse and Spread the First Layer: Once your chocolate is perfectly smooth and melted, stir in the peppermint extract. Start with 1/4 teaspoon for a subtle hint and increase to 1/2 teaspoon for a bolder peppermint punch. Pour this fragrant chocolate mixture into your prepared pan and spread it into an even layer using a spatula. Resist the urge to refrigerate; allow it to set at room temperature while you prepare the white chocolate layer.
- Melt the White Chocolate Layer: In a separate microwave-safe bowl, combine all but 2 tablespoons of your chopped white chocolate baking bar with the remaining 1/2 teaspoon of oil. Repeat the gentle melting process described in step 3 (15-second bursts, vigorous stirring). Add the reserved 2 tablespoons of white chocolate and stir until completely smooth and tempered.
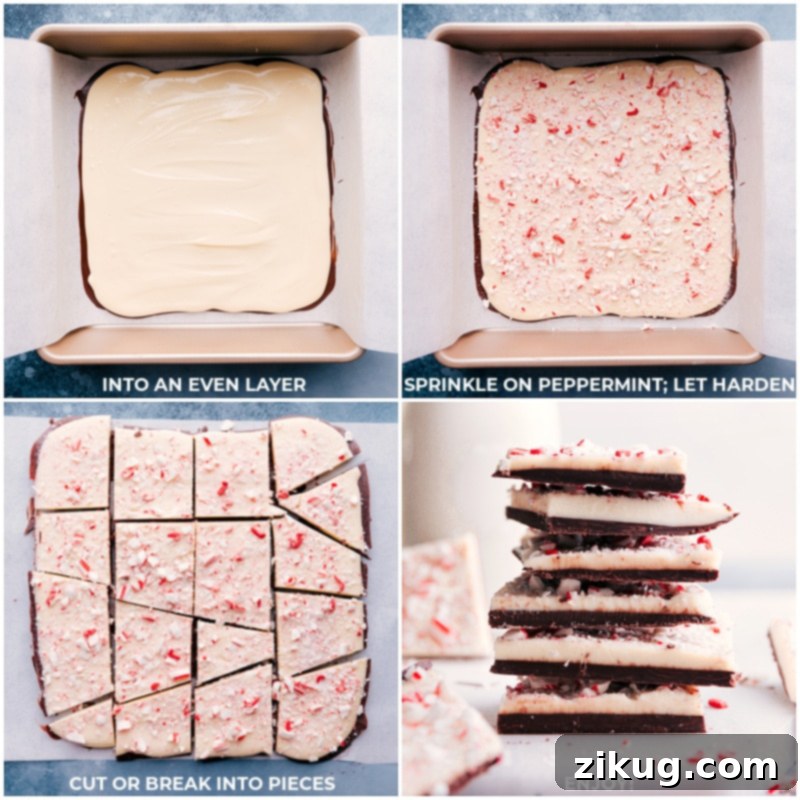
- Layer and Garnish: As soon as your white chocolate is smooth, carefully drizzle it evenly over the slightly set chocolate base layer. Using the back of a spoon or a small offset spatula, gently spread the white chocolate into an even layer, being mindful not to swirl or mix it with the base layer. Work quickly but deliberately. Immediately after spreading the white chocolate, generously sprinkle your crushed candy canes over the entire surface. You control the amount – from a light dusting to a thick, crunchy blanket.
- Allow to Set: This step requires patience. Do NOT place the bark in the refrigerator or freezer. Let it cool and harden completely at room temperature, which typically takes about 3 to 5 hours. Rushing the setting process by chilling can lead to streaky chocolate, separation of layers, and a dull finish.
- Break or Cut and Enjoy: Once the peppermint bark is fully hardened and firm, use the parchment paper overhang to lift it from the pan. Now, you can either artfully break it into rustic, irregular chunks or, for a cleaner presentation, use a sharp, warm knife to cut it into neat squares or rectangles (see Tips for Success below for cutting technique). Share and savor your homemade holiday masterpiece!
Expert Tips for Flawless Peppermint Bark
Achieving truly professional-looking and tasting peppermint bark is easier than you think with these expert tips:
- The Art of Gentle Melting (Tempering Lite): This is perhaps the most crucial tip. To achieve a smooth, glossy finish that snaps crisply and doesn’t melt in your fingers, you’ll want to employ a “seeding” method. Melt most of your chocolate (about 90%) slowly and gently, then stir in the remaining unmelted pieces. This helps to cool the melted chocolate slightly and introduces stable cocoa butter crystals, effectively tempering it without complex equipment. This ensures a beautiful, streak-free result.
- Choose the Right Tools: Always use strong, microwave-safe bowls for melting chocolate. Glass or ceramic bowls are ideal. Avoid plastic or melamine, as these can retain heat unevenly and may interact negatively with the chocolate.
- Patience is a Virtue (No Overheating!): When microwaving, heat in short 15-second bursts, stirring diligently for 15 seconds after each. Chocolate retains heat, meaning it continues to melt even after it’s out of the microwave. Overheating is the enemy of smooth chocolate; it can cause it to seize, become grainy, or burn, rendering it unusable. Aim for gently warmed, not hot, chocolate.
- Quality Chocolate Matters: As mentioned in the ingredients, using high-quality chocolate baking bars (rather than chips or morsels) is paramount. Baking bars have a higher cocoa butter content, allowing for a silkier melt and a more stable, less prone-to-separate bark.
- Room Temperature Setting is Key: It bears repeating: do not refrigerate or freeze your bark to speed up setting. Rapid temperature changes can lead to layers separating, a dull, streaky finish, and a less desirable texture. Patience at room temperature will yield the best results.
- Even Spreading: When layering the chocolates, work carefully and steadily. Use an offset spatula or the back of a spoon for the white chocolate layer to ensure an even spread without disturbing the base layer.
Quick Tip for Glossy, Stable Chocolate
The secret to perfectly smooth, shiny, and streak-free chocolate lies in slow, controlled melting and frequent stirring. By adding a small amount of unmelted chocolate to the mostly melted batch, you effectively “temper” it, cooling it down and introducing stable cocoa butter crystals. This critical step ensures your bark sets firm at room temperature, boasts a beautiful gloss, and won’t easily melt on your fingers, giving it that desirable professional snap.
Peppermint Bark FAQs: Your Questions Answered
While it might be tempting to place your pan in the refrigerator between layers or to speed up the final setting, it’s strongly advised against. Rapid cooling can cause the chocolate to cool too quickly, leading to an undesirable streaky or dull appearance on the surface. It can also cause the chocolate to bloom (where cocoa butter separates and rises to the surface, leaving a whitish, unappetizing film) and, more importantly, increase the likelihood of the layers separating when you break the bark. Patience for room temperature setting truly yields the best results.
If you prefer clean, precise pieces over rustic broken chunks, a large, sharp chef’s knife is your best tool. For the cleanest cuts, heat the blade of your knife under very hot running water for about 30 seconds. Quickly wipe it completely dry with a kitchen towel (residual water can cause chocolate to seize). Then, make a swift, firm, decisive cut through the bark. Repeat this heating and drying process for each subsequent cut to maintain crisp edges and prevent cracking or dulling of the chocolate.
Several factors contribute to layers separating in peppermint bark, but they are all avoidable:
– Chocolate Quality: Using chocolate chips or morsels, which often contain palm oil or other stabilizers, can prevent layers from adhering properly. Always opt for high-quality baking bars.
– Timing of Layers: Don’t wait too long to add the second layer. The first layer should be just set (firm to the touch but not completely hard or cold) before the second is poured on. This allows the layers to bond effectively.
– Insufficient Setting Time: Ensure the bark is fully hardened and at a stable room temperature before attempting to break or cut it. The longer it sets, the more robust the bond between layers will be.
– Temperature Shock: Breaking the bark before it’s reached full room temperature, or putting it in the fridge or chilling it at any point, can make the layers brittle and prone to splitting. Consistency in temperature is key.
Absolutely! While candy canes are traditional, you can certainly experiment with other hard peppermint candies. Just ensure they are unwrapped and crushed to the appropriate consistency – small chunks, not powder. Some prefer the pure peppermint flavor of a hard disc candy, while others enjoy the slight sweetness that comes with traditional candy canes.
Chocolate seizing (becoming thick, clumpy, and grainy) usually happens due to even a tiny amount of moisture coming into contact with it, or from overheating. To prevent this, ensure all your bowls, spatulas, and utensils are perfectly dry. Also, strictly adhere to the short bursts and vigorous stirring method when melting, avoiding high heat. If it does seize, sometimes you can rescue it by stirring in a teaspoon of vegetable oil or melted coconut oil, but it may not return to its perfectly smooth, glossy state.
Storage Tips for Homemade Peppermint Bark
Keeping Your Peppermint Bark Fresh
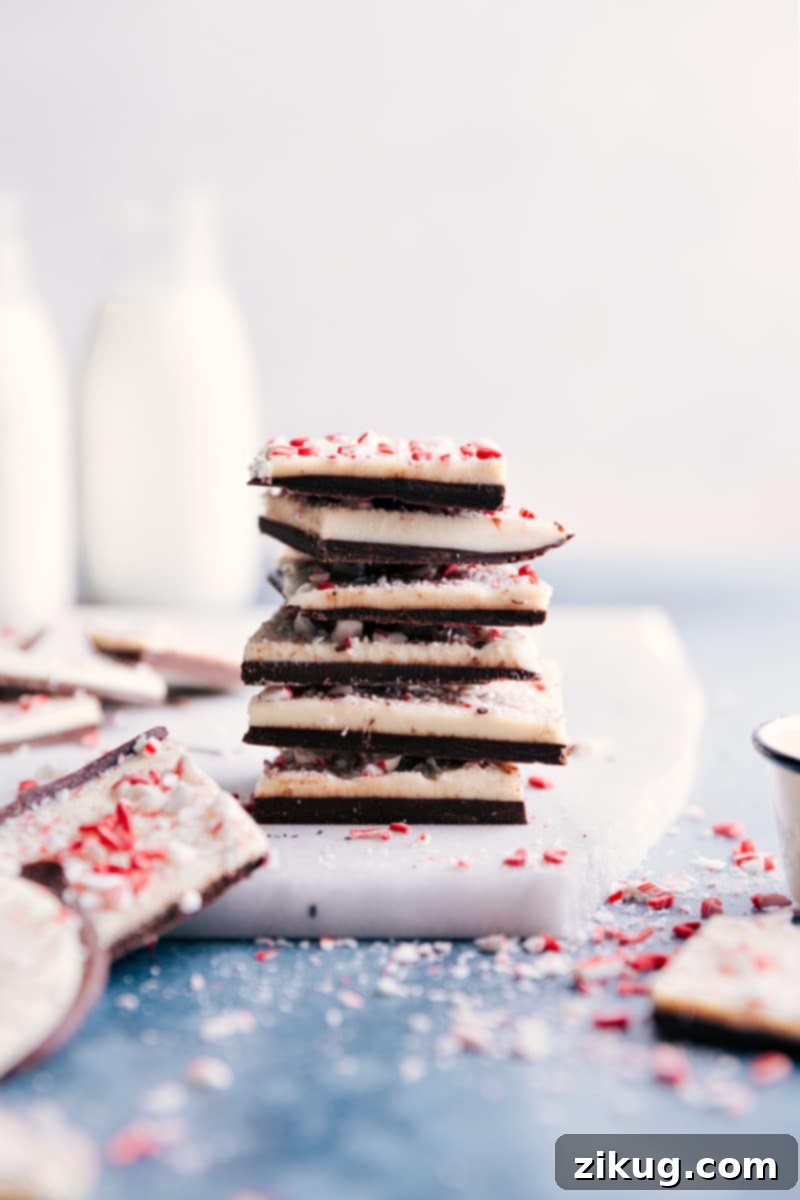
To preserve the delightful flavor and crisp texture of your homemade Peppermint Bark, proper storage is essential. It’s best enjoyed within two weeks of preparation. Store your bark in an airtight container to protect it from moisture and odors. Choose a cool, dark pantry or cupboard at room temperature – refrigeration is not necessary and can actually cause condensation, leading to sugar bloom or a less desirable texture. Layer pieces between sheets of parchment paper to prevent them from sticking together. This method ensures that each piece remains as fresh and delicious as the day it was made, ready to be enjoyed or shared with friends and family throughout the holiday season.
More Festive Christmas Treats to Explore
The holiday season is a perfect time for baking and sharing delicious treats. If you’ve enjoyed making this Peppermint Bark, you’ll love these other festive recipes that are sure to bring cheer to your home:
- Christmas Snack Mix with its cheerful red and green M&M’s, perfect for munching during holiday movies.
- Christmas Oreo Pops, offering four creative and easy decorating ideas for a fun edible craft.
- Our unbelievably simple 3 Ingredient Christmas Cookies, proving that delicious doesn’t have to be complicated.
- 6 Easy Christmas Gifts you can bake, complete with free printables for thoughtful homemade presents.
- Adorable Santa Cookies, festive and fun with their signature red and green M&M’s, a joy for kids and adults alike.

Print Recipe
The Best Peppermint Bark Recipe
Recipe Video (Optional)
Equipment
-
8 x 8-inch baking pan or 9 x 9-inch pan for thinner bark
-
Parchment paper
-
Microwave-safe bowls (glass or ceramic)
-
Rolling pin or meat mallet
-
Spatula or offset spatula
Ingredients
- 2 to 3 full-sized candy canes about 1/3 cup when crushed
- 8 ounces white chocolate baking bar see note 1 for best results
- 4 ounces semi-sweet baking bar
- 2 ounces milk chocolate or additional semi-sweet or dark chocolate
- 1 teaspoon vegetable oil or coconut oil, divided
- 1/4 to 1/2 teaspoon peppermint extract
Instructions
-
To prepare your peppermint topping, add the unwrapped candy canes to a large, heavy-duty plastic bag. For extra protection against tears from sharp candy pieces, use two bags. Seal the bag, pressing out as much air as possible, then use a rolling pin or meat mallet to crush the candy canes into coarse crumbs and small chunks. Set aside the crushed peppermint.
-
Line an 8×8-inch or 9×9-inch baking pan with parchment paper, allowing a generous overhang on all sides. This will make removing the hardened bark much easier. Coarsely chop all the white, semi-sweet, and milk chocolate baking bars into small, uniform pieces to ensure even melting.
Important Tip: Patience is crucial when melting chocolate. Avoid rapid temperature changes such as microwaving for too long, stirring excessively, or chilling the bark layers in the refrigerator or freezer. Slow and steady wins the race for perfect texture and appearance.
-
For the base layer, place all but 2 tablespoons (refer to note 2 for details) of the chopped semi-sweet and milk chocolate into a large, microwave-safe bowl. Add 1/2 teaspoon of the vegetable or coconut oil. Microwave the chocolate for 15 seconds, then remove and stir vigorously for another 15 seconds. Continue this process, microwaving in 15-second intervals and stirring, until the chocolate is mostly melted. The goal is for the chocolate to be warm enough to melt gradually, eventually reaching a smooth, room-temperature consistency, not hot. Once the chocolate is mostly melted, add the reserved 2 tablespoons of chopped chocolate and stir continuously until it is completely melted and smooth. Only microwave in 5-second bursts if the chocolate isn’t melting after stirring for a full minute.
-
Once the chocolate for the base layer is fully melted and beautifully smooth, stir in the peppermint extract. Use 1/4 teaspoon for a subtle peppermint flavor or up to 1/2 teaspoon for a more intense kick. Mix thoroughly to combine. Pour this aromatic chocolate mixture into your prepared pan and spread it into an even, consistent layer using a spatula. Do not refrigerate this layer; allow it to set at room temperature while you prepare the next layer.
-
Now, prepare the white chocolate layer. Place all but 2 tablespoons of the chopped white chocolate into a separate large, microwave-safe bowl. Add the remaining 1/2 teaspoon of oil. Follow the same gentle melting and seeding directions as outlined in step 3 for the dark chocolate. Once the white chocolate is completely smooth and melted, carefully drizzle it evenly over the set chocolate base layer. With the back of a spoon or a small offset spatula, carefully and slowly smooth the white chocolate into an even layer, taking care not to swirl or mix the two chocolate layers together. Immediately after smoothing, generously sprinkle the crushed candy canes on top. You can add as much or as little as you desire for flavor and visual appeal. Again, set the pan aside at room temperature (not in the fridge) until the bark is completely hardened, which will take approximately 3–5 hours.
-
Once the bark is fully hardened, gently lift it from the pan using the parchment paper overhang. You can now either break it into rustic, irregular pieces or, for a more uniform look, cut it into squares or rectangles (refer to note 3 for a clean cutting technique). Serve and savor your homemade Peppermint Bark, a perfect holiday treat!
Recipe Notes
For peppermint bark that boasts a flawless snap, a glossy finish, and layers that won’t separate, it is crucial to use high-quality chocolate baking bars. Chocolate chips or morsels often contain added stabilizers like palm oil, which prevent them from melting completely smoothly and can inhibit proper bonding between layers. This can result in a streaky appearance, crumbly texture, or layers that easily split when you break or cut the bark. Invest in good baking bars for the best outcome.
Note 2: The Art of Melting Chocolate (Tempering Simplified)
The key to preventing streaks and achieving a beautiful, stable chocolate is to melt it slowly and stir frequently. The “seeding” method, where you add a bit of unmelted chocolate at the end, helps cool and stabilize the melted chocolate. This introduces stable cocoa butter crystals, which ensures a smooth, glossy finish that sets properly at room temperature, making it less likely to melt on your fingers and giving it a satisfying snap.
Note 3: Achieving Clean Cuts
If you prefer to cut your bark into neat pieces rather than breaking it, a large, sharp knife is indispensable. To achieve clean, crisp cuts, run the knife under very hot water for a few moments, then thoroughly dry the blade with a clean kitchen towel. Make a quick and decisive cut through the bark. For each subsequent cut, repeat the process of heating and drying the knife to ensure smooth, professional-looking edges.
Storage: When properly stored, homemade peppermint bark is best enjoyed within two weeks. Keep it in a tightly sealed, airtight container in a cool, dark pantry or cupboard at room temperature. There is absolutely no need to refrigerate the bark; chilling can negatively affect its texture and appearance.
Nutrition Facts (Approximate)
Nutrition information is automatically calculated, so should only be used as an approximation.