
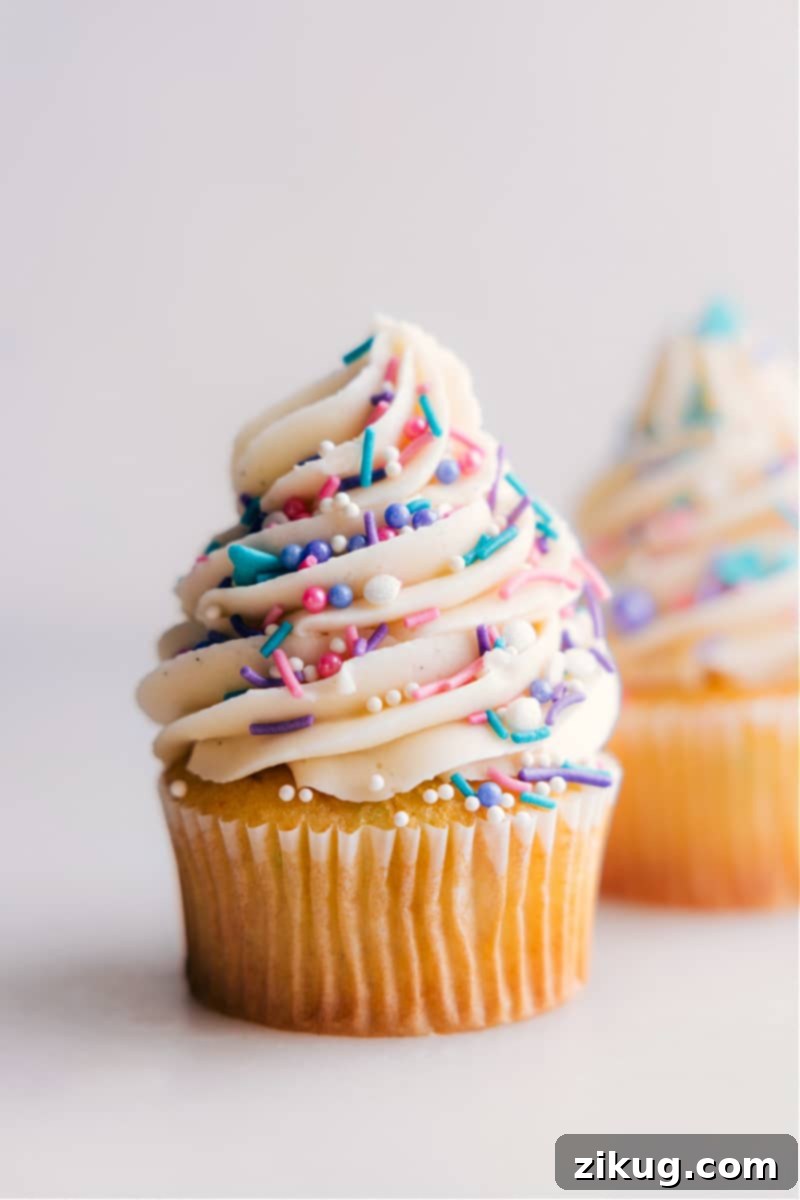
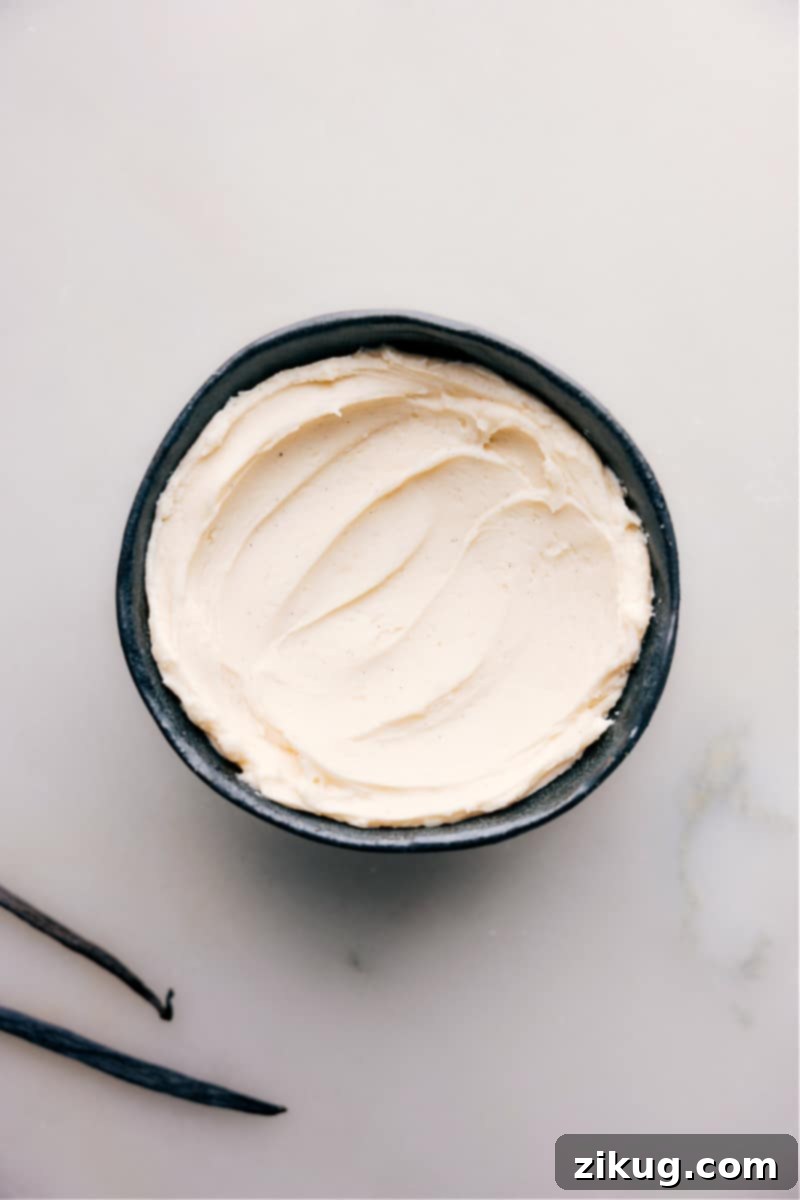
Welcome to the ultimate guide for crafting the perfect Vanilla Frosting Recipe. This incredibly creamy, dreamily smooth, and wonderfully versatile frosting is made with just 5 essential ingredients, transforming simple desserts into show-stopping masterpieces. Whether you’re a seasoned baker or just starting your culinary journey, this recipe is designed for ease of use, making it perfect for elegant piping or simply spreading over your favorite sweet treats.
Looking for more delightful frosting ideas? Explore these fantastic recipes next: Cream Cheese Frosting, Chocolate Buttercream Frosting, or our rich Peanut Butter Frosting.
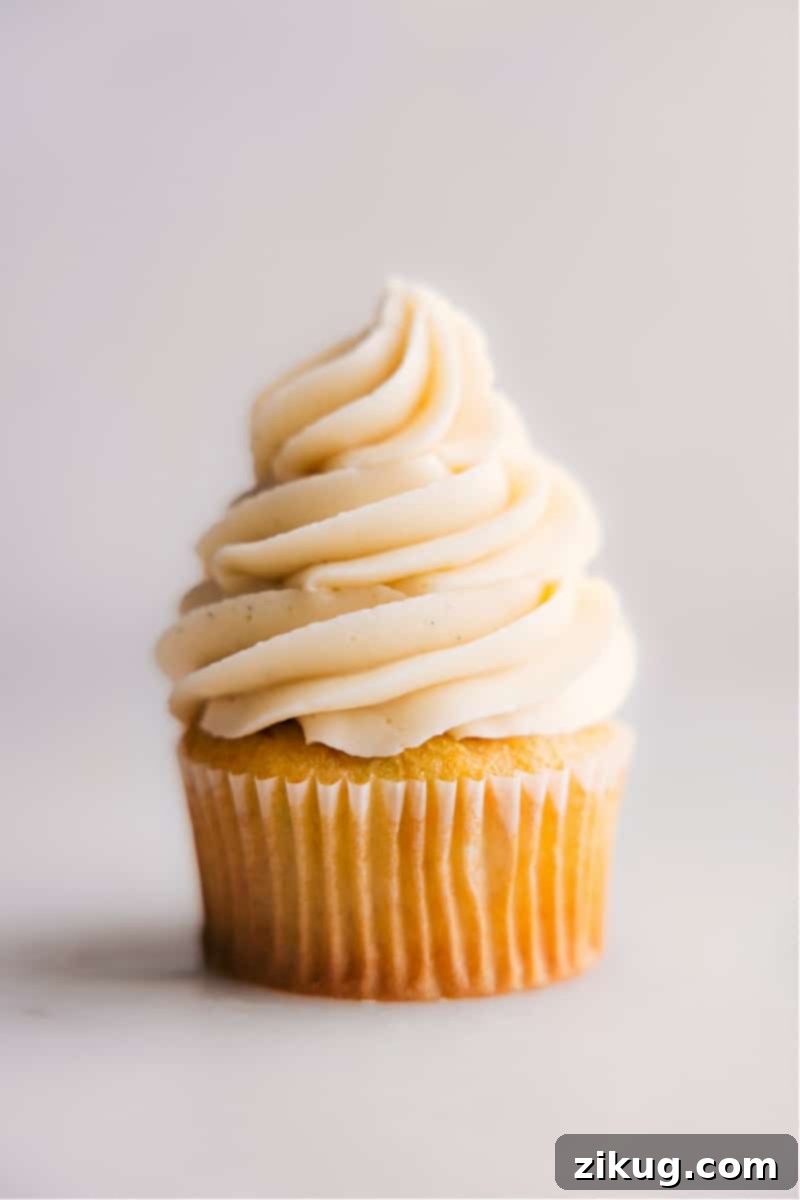
The Ultimate All-Purpose Vanilla Buttercream Frosting
This vanilla frosting recipe has been my trusted secret for countless desserts over the years. It’s so effortlessly simple and consistently perfect that, for the longest time, I never bothered to jot down the precise measurements. However, after repeatedly sharing cupcakes adorned with this delectable topping at various gatherings and being inundated with requests for the recipe, I realized it was high time to commit the exact proportions to paper. Now, you too can master this essential, versatile, and simply irresistible vanilla buttercream.
Crafting this frosting is a breeze, whether you prefer the convenience of a hand mixer or the power of a stand mixer. Its light, airy texture and rich vanilla flavor make it an ideal companion for virtually any dessert, from classic chocolate cakes to vibrant funfetti cupcakes. The beauty of this recipe lies in its simplicity, relying on common pantry and fridge staples that you likely already have on hand. What’s more, it’s incredibly adaptable! Easily customize it with food coloring to match any party theme or fold in sprinkles for an extra festive touch. This isn’t just a recipe; it’s a foundational baking skill that you’ll return to again and again.
Many home bakers often wonder if making homemade frosting is worth the effort compared to store-bought alternatives. The answer, unequivocally, is yes! This homemade vanilla frosting offers a superior flavor profile, a silkier texture, and an overall freshness that canned frostings simply cannot replicate. It’s also free from artificial preservatives and often contains fewer ingredients, allowing the natural goodness of butter and vanilla to shine through. Once you try this recipe, you’ll understand why it’s a game-changer for all your baking endeavors.
Vanilla Frosting Recipe: Key Ingredients for Perfection
Achieving a perfectly creamy and flavorful vanilla frosting starts with understanding the role of each ingredient. This recipe calls for just five simple components, each playing a crucial part in creating that irresistible texture and taste:
- Unsalted Butter: The foundation of any great buttercream, unsalted butter provides the rich, creamy base. It’s crucial to let your butter soften at room temperature. This isn’t just for ease of mixing; properly softened butter emulsifies better with the sugar, leading to a smooth, light, and airy frosting. If your butter is too cold, your frosting will be lumpy; if it’s melted, it will be greasy and thin.
- Powdered Sugar (Confectioners’ Sugar): This is what gives the frosting its sweetness and structure. Unlike granulated sugar, powdered sugar dissolves instantly, ensuring a smooth, grit-free finish. If your powdered sugar is particularly clumpy, sifting it beforehand is highly recommended. This extra step prevents lumps and guarantees a velvety smooth frosting texture, essential for piping and an elegant presentation.
- Heavy Cream: The secret to an exceptionally rich and creamy frosting. Heavy cream adds moisture and richness, resulting in a luxurious, decadent texture that melts in your mouth. While you can substitute with milk or half-and-half in a pinch, be aware that they are thinner. If using a substitute, start with less liquid and add gradually until you reach your desired consistency, as too much will make your frosting runny.
- Vanilla Extract or Vanilla Bean Paste: The star of the flavor profile! High-quality vanilla extract provides that classic, warm, and inviting vanilla taste. For an even more intense and visually appealing vanilla flavor (thanks to the tiny black specks), consider using vanilla bean paste. The choice depends on your preference for flavor depth and visual aesthetic.
- Salt: Often overlooked, a tiny pinch of fine salt is a game-changer. It balances the sweetness of the sugar, enhancing the overall flavor of the frosting and preventing it from being cloyingly sweet. Use fine-grained salt to ensure it blends seamlessly into the frosting without any discernible texture. Adjust the amount to your personal taste, starting small and adding more if needed.
Using quality ingredients and paying attention to their preparation (like softening butter and sifting sugar) will elevate your homemade vanilla frosting from good to truly exceptional.
How to Make the Best Vanilla Frosting Recipe (Expert Tips)
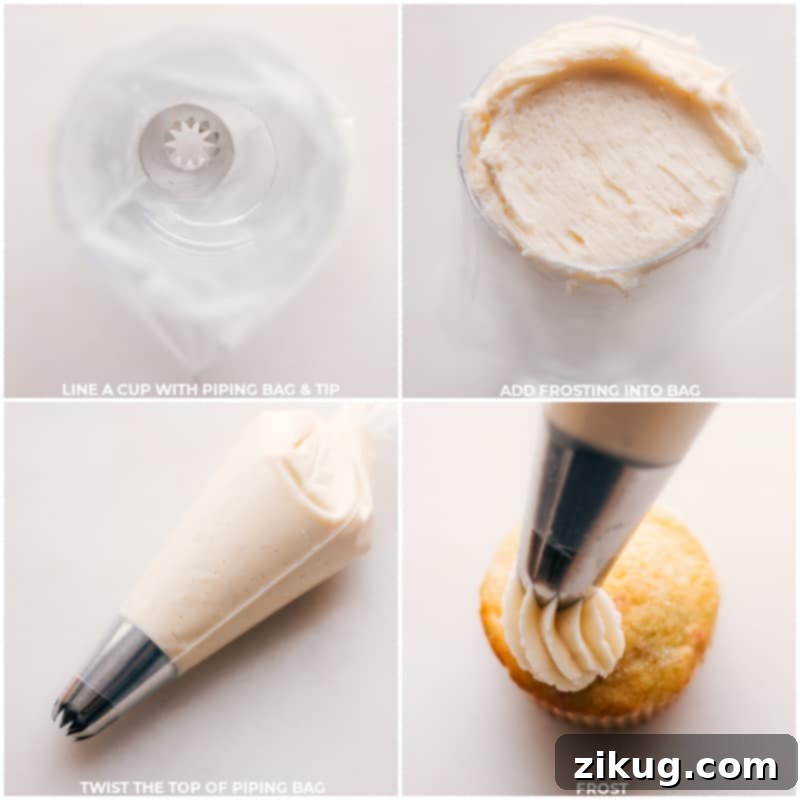
Creating this delicious vanilla frosting is straightforward, but a few key tips can ensure your batch turns out perfectly every time. Follow these steps for a smooth, creamy, and pipeable frosting:
- Achieve Perfect Softened Butter: The foundation of perfect buttercream is properly softened butter. It should be soft enough to yield easily to pressure, yet still cool to the touch and hold its shape. Avoid melted or overly greasy butter, as this will result in a runny, oily frosting. If your butter is too firm, it won’t cream properly, leading to a lumpy texture.
- Sift Your Powdered Sugar for Smoothness: This is a crucial step for achieving that silky-smooth texture. Powdered sugar often contains small lumps from moisture, and sifting it before adding it to the butter ensures your frosting is free of any gritty bits. Don’t skip this step if you want a professional-looking and tasting frosting.
- Gradual Cream Addition for Ideal Consistency: When adding heavy cream (or milk), do so slowly, one tablespoon at a time. This allows you to control the consistency of your frosting precisely. If your frosting seems too thick for spreading or piping, add a little more cream. Conversely, if it becomes too thin and loose, gradually beat in more powdered sugar (two tablespoons at a time) until it reaches the desired firmness.
- Taste and Adjust Seasoning: Never underestimate the power of a pinch of salt! After the main ingredients are combined, taste your frosting. If it feels too sweet, a small amount of fine salt can wonderfully balance the flavor. If you desire more sweetness, add a bit more powdered sugar. This step ensures your frosting is perfectly tailored to your palate.
- Mix Until Creamy and Smooth: Once all ingredients are incorporated, increase your mixer speed to medium-high and beat for several minutes. The goal is to achieve a light, fluffy, and smooth consistency. Be careful not to over-whip, which can incorporate too much air and lead to a less stable frosting, but ensure it’s thoroughly combined and velvety.
- Understand Your Frosting Yield: This versatile recipe yields a generous amount, perfect for various baking projects. It makes enough frosting to cover a standard 9×13-inch sheet cake, perfectly frost a beautiful 2-layer 8 or 9-inch round cake, or generously ice 12 cupcakes. If you prefer a lighter touch, it can modestly frost up to 24 cupcakes, making it incredibly adaptable for different occasions.
Creative Ways to Use Your Homemade Vanilla Frosting
This classic vanilla frosting is incredibly versatile, making it a fantastic addition to almost any dessert. Beyond cakes and cupcakes, its smooth texture and delightful flavor open up a world of culinary possibilities. Here are some creative ways to incorporate this delicious frosting into your repertoire:
- Elevated Parfaits & Trifles: Layer the frosting with crumbled cake, cookies, brownies, or fresh fruit for a decadent and visually stunning dessert. The frosting acts as a creamy binder and adds a burst of flavor to each spoonful.
- Perfect for Cakes & Cupcakes: This is its most classic application! Spread or pipe generously onto cooled cakes or cupcakes. It pairs exceptionally well with a wide range of flavors, including rich chocolate, traditional vanilla, or festive Funfetti creations. Its stability makes it ideal for intricate piping designs.
- Delicious Cake Filling: Use this frosting between cake layers to add another dimension of flavor and moisture. It helps to hold the layers together and provides a lovely creamy contrast to the cake’s texture.
- Gourmet Cookie Sandwiches: Transform ordinary cookies into extraordinary treats by spreading a thick layer of vanilla frosting between two of your favorite cookies. Think soft chocolate chip, snickerdoodle, or even homemade sugar cookies for a delightful twist.
- Homemade Doughnut Filling: Take your homemade or store-bought doughnuts to the next level by filling them with this creamy vanilla frosting. A simple piping bag and nozzle can turn a plain doughnut into a special treat.
- Irresistible Brownie Topping: Frost freshly baked brownies with a generous layer of this vanilla frosting. The combination of fudgy brownie and sweet, creamy frosting is absolutely divine and incredibly satisfying.
- Sweet Dessert Dip: Serve this frosting as a fun and easy dip for an array of dippables. Fresh fruits like strawberries, apple slices, or banana chunks are wonderful complements. Pretzel sticks or graham crackers also offer a delightful sweet and salty crunch when paired with this creamy dip.
Quick Tip: How to Soften Butter to Room Temperature
Achieving perfectly softened butter is key to a smooth, lump-free frosting. Here are a few reliable methods to quickly bring butter to room temperature without melting it:
- Cut into Pieces: For the fastest method, slice your cold butter stick into small, approximately 1-inch chunks. Spread these pieces out on a plate. This increases the surface area exposed to the air, allowing it to soften much quicker, usually within 15-20 minutes.
- Warm Glass Method: Heat a glass or bowl with hot water for about 30 seconds, then pour out the water and thoroughly dry the glass. Invert the warm glass over your stick of butter on a plate. The residual heat from the glass will gently warm the butter, helping it soften in just 5-10 minutes.
- Microwave Method (with caution): If you’re in a hurry, the microwave can work, but proceed with extreme caution to avoid melting. Place the butter stick in the microwave and heat at 10% power for 8-10 seconds. Check its softness. If needed, repeat in 5-second intervals. The goal is softened butter that still holds its shape, not a melted puddle.
Remember, properly softened butter should still feel cool to the touch and yield to slight pressure, leaving an indentation, but not be greasy or shiny.
Storage Solutions for Leftover Vanilla Frosting
How to Store Vanilla Frosting for Future Use
One of the best things about homemade frosting is that it can often be made ahead of time or stored for later use, saving you time and effort when you’re ready to decorate. Properly storing your vanilla frosting ensures it stays fresh and delicious for future baking projects:
For short-term storage, keep any leftover Vanilla Frosting in an airtight container in the refrigerator for up to one week. The cold temperature will firm up the frosting, but it will return to its creamy state once brought to room temperature. If you need to store it for a longer period, it can be kept in the freezer for up to three months. When freezing, place the frosting in a freezer-safe container or a heavy-duty freezer bag, pressing out as much air as possible to prevent freezer burn.
When you’re ready to use frozen frosting, transfer it to the refrigerator to thaw overnight. Once thawed, allow it to come to room temperature on your countertop for about an hour. Before using, give it a good stir or re-whip it briefly with your mixer to restore its smooth, creamy consistency, ensuring it’s perfect for spreading or piping.
If you plan to make the frosting ahead of time for an upcoming event, simply prepare it as directed and store it in the fridge. About an hour before you intend to use it, remove it from the refrigerator, let it soften, and then re-mix it thoroughly. This small step will ensure your frosting is beautifully smooth and ready for decoration.
More Irresistible Dessert Recipes to Try:
If you enjoyed making and using this versatile vanilla frosting, you’re sure to love these other fantastic dessert creations:
- Lemon Icebox Cake: A refreshing and incredibly easy dessert made with only four simple ingredients!
- Dessert Cheese Ball: Indulge in the rich, comforting flavor of brownie batter in a delightful cheese ball format.
- Swig Sugar Cookies: These soft, chewy sugar cookies are perfectly complemented by a luscious vanilla frosting – a match made in dessert heaven!
- Cinnamon Roll Cake: Enjoy the warm, comforting flavors of cinnamon rolls in a quick and easy skillet cake, ready in just 30 minutes with no dough rising required!
- Brookies: Can’t decide between brownies and cookies? Get the best of both worlds with this mashed-up treat that combines fudgy brownies and chewy cookies in one delicious bite.

Pin Recipe
Print Recipe
Vanilla Frosting
Equipment
-
Stand mixer or hand mixer
Ingredients
- 16 tablespoons unsalted butter, softened to room temperature (see note 2)
- 4-1/2 cups powdered sugar, up to 5 cups (see note 3)
- 4 to 6 tablespoons heavy cream or milk in a pinch (see note 4)
- 1-1/2 teaspoons vanilla bean paste or 2 teaspoons vanilla extract
- 1/8 teaspoon salt
Instructions
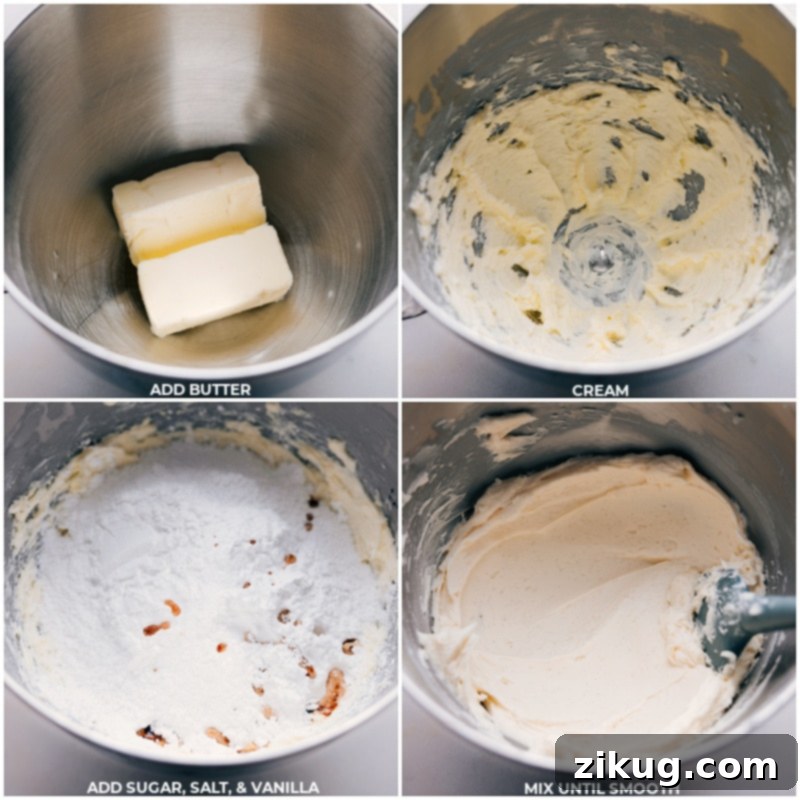
- In a stand mixer fitted with a paddle attachment, or in an extra-large bowl using hand mixers, beat the room temperature butter on medium speed until creamy, typically 90 seconds to 2 minutes. The butter should be light and fluffy.
- Gradually add the powdered sugar, vanilla extract, and salt to the creamed butter. Begin beating on low speed, slowly adding the cream one tablespoon at a time (start with 4 tablespoons). Continue mixing until the ingredients are mostly combined.
- Increase the mixer speed to medium-high and beat for several seconds until all the liquid is fully incorporated and whipped into the frosting. Turn off the mixer and use a spatula to scrape down the sides and bottom of the bowl, ensuring everything is well combined. Adjust consistency: if the frosting is too thick, add more cream (1 tablespoon at a time); if it’s too soft, add more powdered sugar (2 tablespoons at a time).
- Switch the mixer back to medium-high speed and beat for another 1–2 minutes until the frosting is perfectly smooth and creamy, but avoid over-whipping which can incorporate too much air. Taste the frosting and adjust for saltiness or sweetness as desired, adding a pinch more salt or a tablespoon of sugar if needed.
Recipe Notes
Note 1: Yield Information: This recipe provides enough frosting to generously frost a 9×13-inch sheet cake, a beautiful 2-layer cake (using 8 or 9-inch round pans), approximately 24 lightly frosted cupcakes, or 12 richly frosted cupcakes as depicted in the post photos. You can easily adjust the recipe quantity if you need more or less frosting.
Note 2: Butter Temperature is Key: Ensure your butter is truly at room temperature, which means it should still feel cool to the touch but easily indent when gently pressed. It should hold its shape but be pliable. If the butter is too soft or even slightly melted, the frosting will likely turn out too loose and greasy. Conversely, if the butter is too cold or hard, it won’t cream properly, resulting in a lumpy and uneven frosting texture. For tips on quickly softening butter, refer to the “Quick Tip” section earlier in the post.
Note 3: Powdered Sugar for Consistency: Always start with 4-1/2 cups of powdered sugar. You can add up to 5 cups, or even a little more, depending on your desired sweetness level and frosting consistency. For accurate measurement, spoon the powdered sugar into your measuring cup and level off the top with the straight edge of a kitchen knife. For an exceptionally smooth frosting, especially if your powdered sugar has visible clumps, sifting it before use is highly recommended. (A personal confession: I often skip sifting if my sugar is lump-free, and it still turns out beautifully!)
Note 4: Cream vs. Milk: Heavy cream is preferred for this recipe as it imparts a superior richness and texture to the frosting. However, if heavy cream is unavailable, whole milk can be used as a substitute. Keep in mind that milk is thinner than cream, so you will likely need less of it. Add milk very slowly, a tablespoon at a time, until you achieve the desired smooth and spreadable consistency.
Nutrition Note: The nutrition information provided is an approximation, calculated based on 12 servings (which typically corresponds to generously frosting one cupcake). Please remember that these values can vary based on specific ingredient brands and exact measurements used.
Storage: If you’re not planning to use the frosting immediately, store it in an airtight container. It can be kept at room temperature for up to 2 days in a cool environment, or refrigerated for 5–7 days. Prior to using stored frosting, allow it to return to room temperature and then re-mix it thoroughly with a hand mixer or stand mixer to restore its original smooth and pipeable consistency. This re-mixing step is crucial for achieving that fresh-made texture.
Nutrition
Nutrition information is automatically calculated and should be used as an approximation only.