
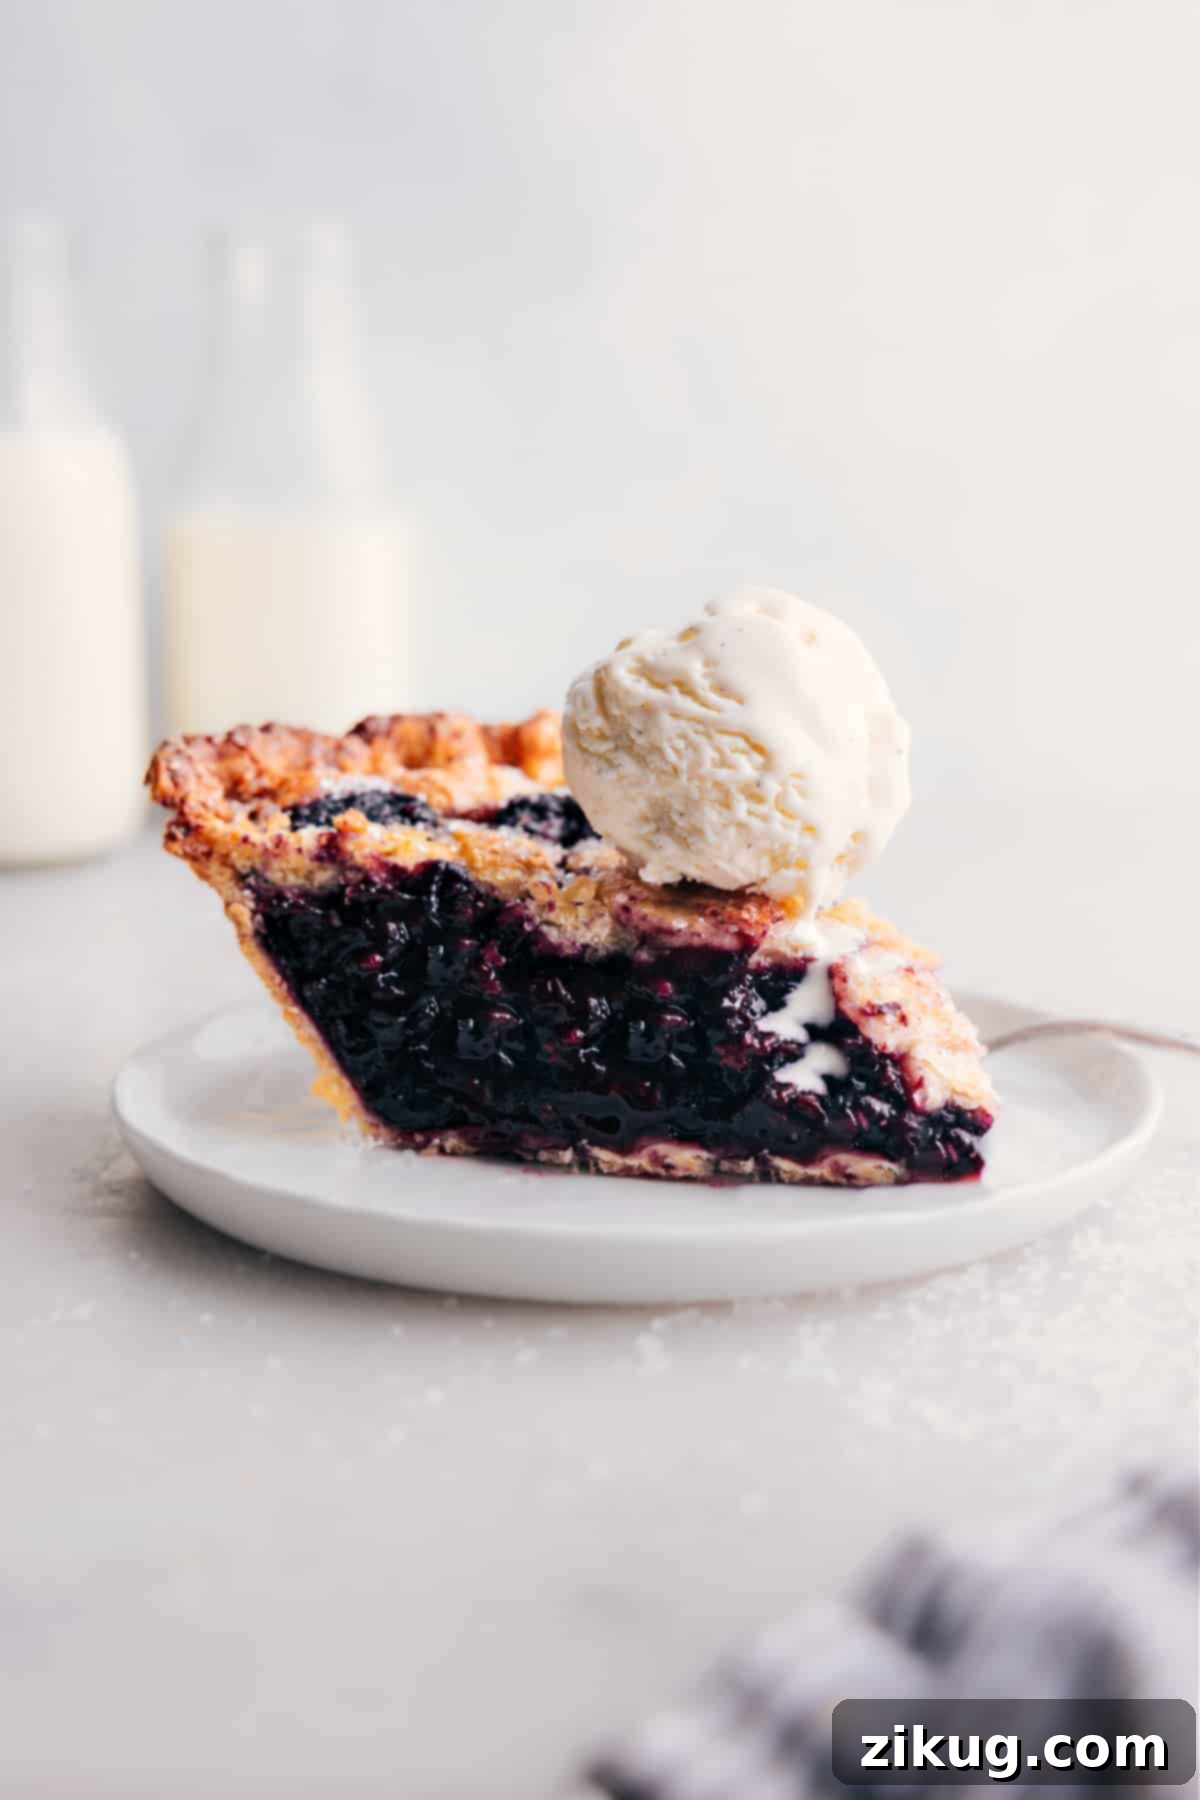
Indulge in the ultimate homemade dessert experience with this exquisite **Berry Pie Recipe**. Featuring a perfectly buttery, undeniably flaky crust filled with a vibrant, luscious triple-berry mixture, this pie is designed to be enjoyed all year round. Whether it’s a summer picnic, a festive holiday gathering, or a cozy evening at home, this berry pie promises a delightful blend of sweet and tart flavors in every bite, making it a perennial favorite for good reason.
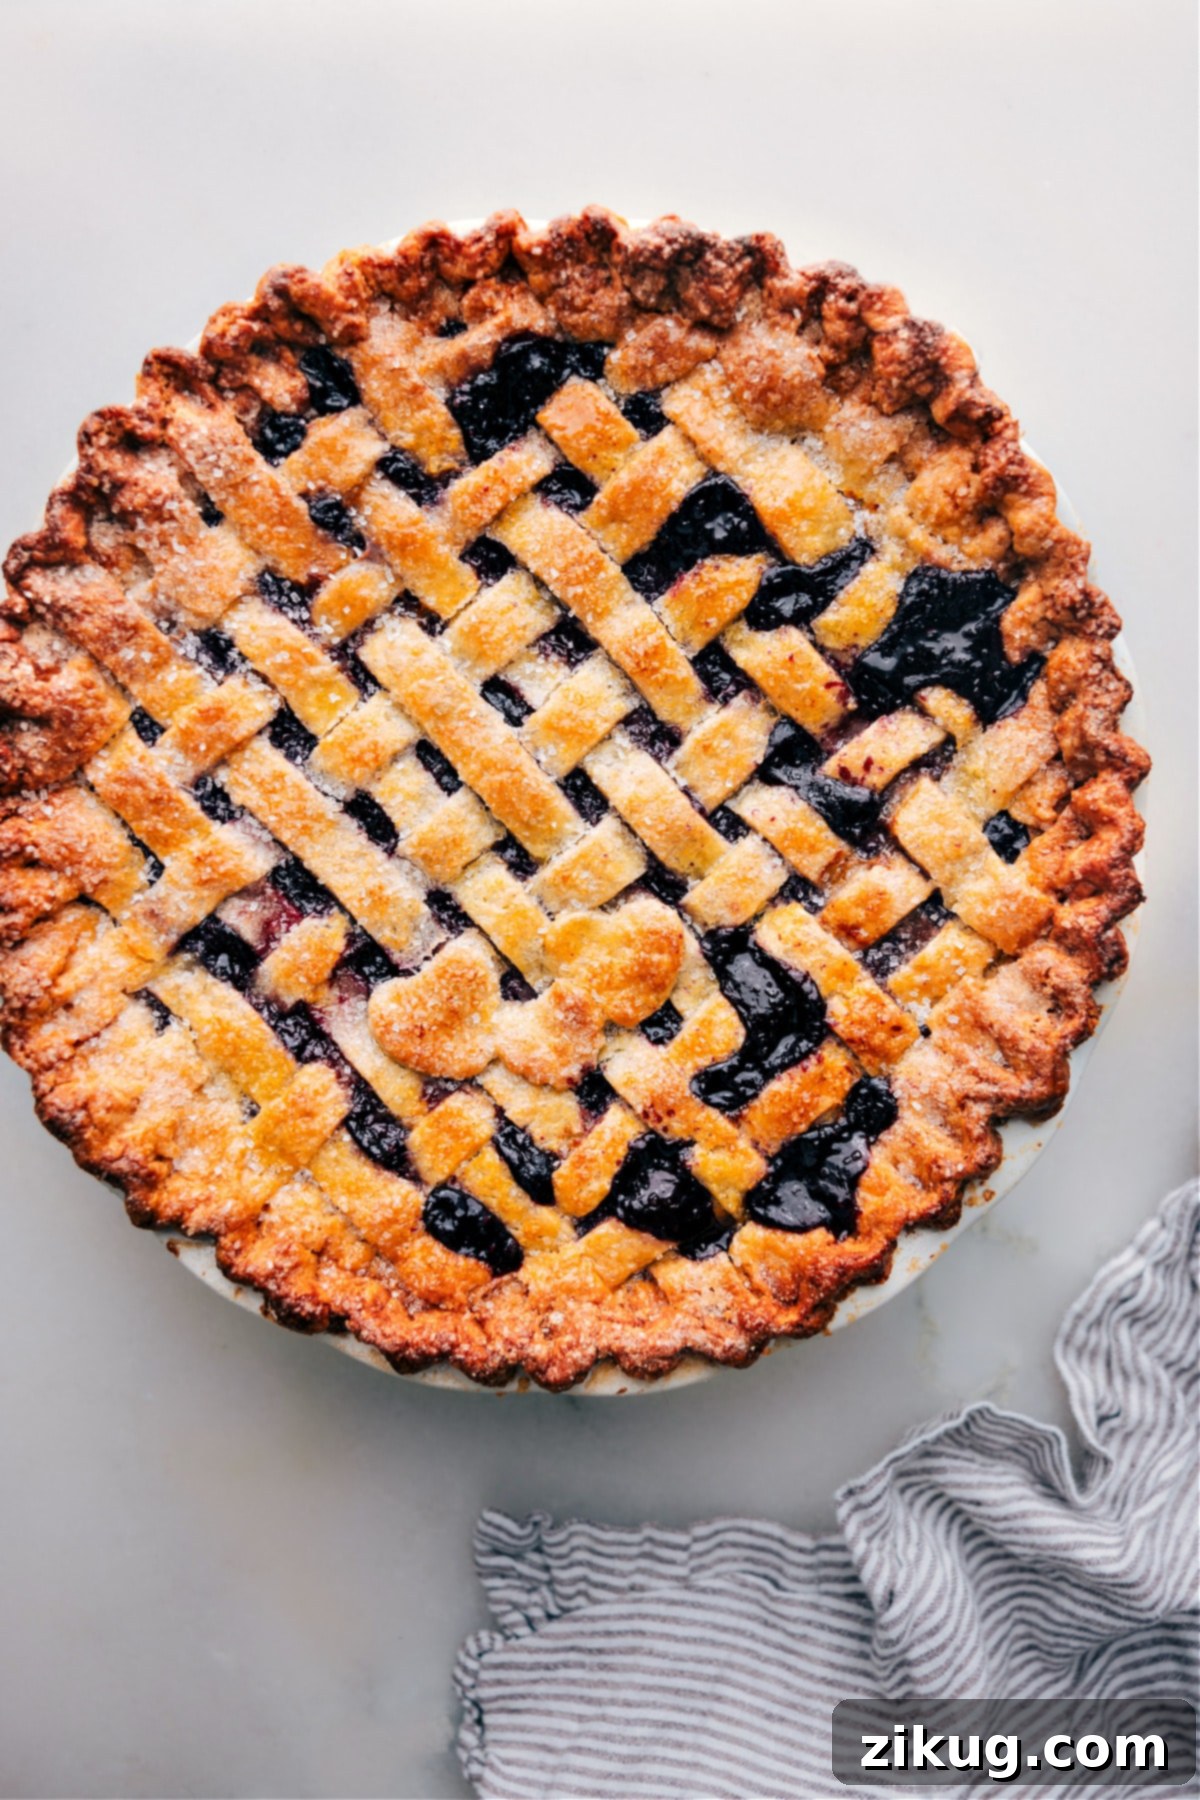
Crafting the Ultimate Berry Pie: A Timeless Classic
Is there any dessert more comforting and universally adored than a warm, fruit-filled pie? For many, including myself and my father, berry pie holds a special place in our hearts and on our tables. There’s something truly magical about the combination of sweet, succulent berries encased in a golden, crispy crust, especially when paired with a generous scoop of vanilla bean ice cream that slowly melts into the warm fruit filling.
This isn’t just *a* berry pie recipe; it’s designed to be **the best berry pie recipe** you’ll ever make. We’ve meticulously crafted this guide to ensure every element—from the robust, juicy filling to the perfectly golden, tender crust—is nothing short of spectacular. Our recipe strikes that ideal balance between the natural sweetness and bright tartness of mixed berries, all nestled within a homemade, incredibly flaky, and rich buttery pie crust that simply melts in your mouth.
One of the standout features of this recipe is its versatility. You can effortlessly use either high-quality frozen or fresh berries, transforming them into a thick, juicy filling that holds its shape beautifully. This flexibility means you can savor the taste of summer berries even in the dead of winter, making it an excellent choice for any season. Serve it warm to experience its full aromatic potential, allowing the sweet berry juices to mingle with the creamy cold ice cream for an unforgettable dessert experience.
Why This Homemade Berry Pie Stands Out
What sets this berry pie apart from others? It begins with the foundation: a truly exceptional homemade pie crust. While store-bought crusts can offer convenience, our recommended homemade crust provides an unparalleled flakiness and buttery flavor that perfectly complements the vibrant berry filling. This attention to detail in the crust transforms a good pie into an extraordinary one.
Furthermore, the berry filling is carefully crafted to achieve the ideal consistency – not too runny, not too firm, but wonderfully luscious and bursting with fruit flavor. By using a blend of berries, you get a complex flavor profile that keeps each bite interesting. The subtle additions of lemon and vanilla elevate the natural fruit flavors, making this a truly gourmet yet approachable dessert.
Essential Ingredients for Your Perfect Berry Pie
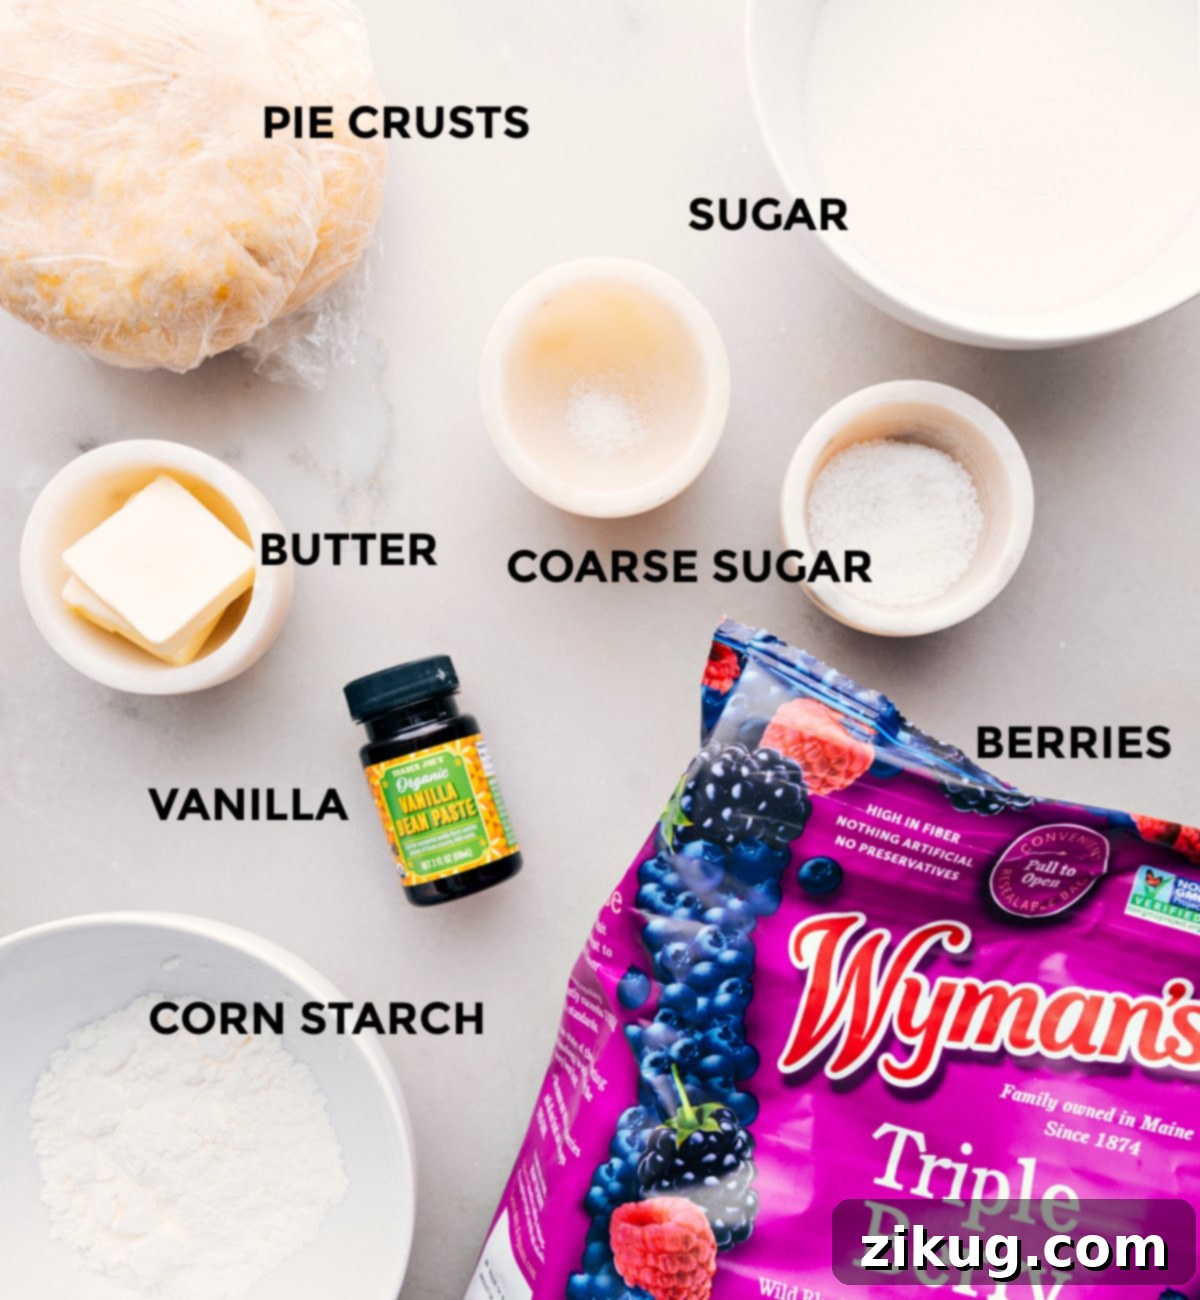
Creating a spectacular berry pie starts with selecting the right ingredients. Each component plays a vital role in achieving that perfect balance of flavor and texture. Here’s a detailed look at what you’ll need to assemble this magnificent dessert:
- Homemade Pie Crusts: We highly recommend making your own pie crusts from scratch. The effort is well worth it for the superior buttery flavor and flaky texture that perfectly cradles the juicy berry filling. If you need a reliable recipe, our comprehensive guide on making the best possible pie crust is an invaluable resource.
- Frozen Mixed Berries: For convenience and consistent quality year-round, frozen mixed berries are an excellent choice. Our personal favorite is Wyman’s® Triple Berry Blend, which typically includes a delightful mix of wild blueberries, blackberries, and raspberries. If you opt for fresh berries, aim for equal portions of blueberries, blackberries, and raspberries to achieve a similar balanced flavor.
- White Granulated Sugar: This provides the primary sweetness for the filling. The amount can be adjusted based on the natural tartness of your berries and your personal preference. Sweeter berries may require less sugar, while tarter varieties might need a little more.
- Salt: A pinch of salt is crucial for enhancing the overall flavor of the pie. It helps to balance the sweetness of the sugar and brightens the fruit flavors, preventing the pie from tasting flat.
- Cornstarch: This is a non-negotiable ingredient for thickening the berry filling. Berries release a significant amount of liquid during baking, and cornstarch effectively absorbs this moisture, creating a beautifully luscious, jam-like consistency. Ensure it’s fully dissolved to avoid any lumps or a gritty texture.
- Fresh Lemon Juice: A splash of lemon juice isn’t just for tartness; it’s a flavor enhancer that adds a refreshing brightness to the berries. It also helps to prevent the filling from becoming overly sweet and complements the natural acidity of the fruit.
- Unsalted Butter: Using unsalted butter allows you complete control over the total salt content in your recipe. When stirred into the cooked filling, it adds a rich, luxurious mouthfeel and a subtle dairy note that harmonizes wonderfully with the berries.
- Vanilla Extract: High-quality vanilla extract (or vanilla bean paste for an even richer flavor) adds a warm, aromatic depth that beautifully complements the fruit. It’s a subtle but essential ingredient that rounds out the flavor profile of the filling.
- Large Egg & Milk (for Egg Wash): A simple egg wash (egg whisked with a touch of milk) is brushed over the top crust before baking. This gives the pie a gorgeous, golden-brown sheen and helps any sprinkled sugar adhere beautifully, adding a lovely crisp texture to the crust.
- White Sparkling Sugar (Optional): Sprinkling sparkling sugar on top of the egg wash adds a beautiful shimmer and a delightful crunch to the crust. Regular granulated sugar can also be used for a simpler finish.
- Vanilla Bean Ice Cream or Whipped Cream (for Serving): While delicious on its own, a warm slice of berry pie is truly elevated when served with a scoop of creamy vanilla bean ice cream or a dollop of freshly whipped cream. The contrast in temperature and texture is simply divine.
Step-by-Step Guide: How to Bake the Perfect Berry Pie
Baking a homemade berry pie is a rewarding experience, and with these clear instructions, you’ll achieve delicious results every time. Follow these steps for a pie that’s as beautiful as it is tasty:
- Prepare Pie Crusts: For optimal results and to manage your time, prepare your two homemade pie crusts at least a day in advance. After preparing the dough, wrap them tightly and refrigerate. Chilled crust is essential for achieving that desirable flaky texture.
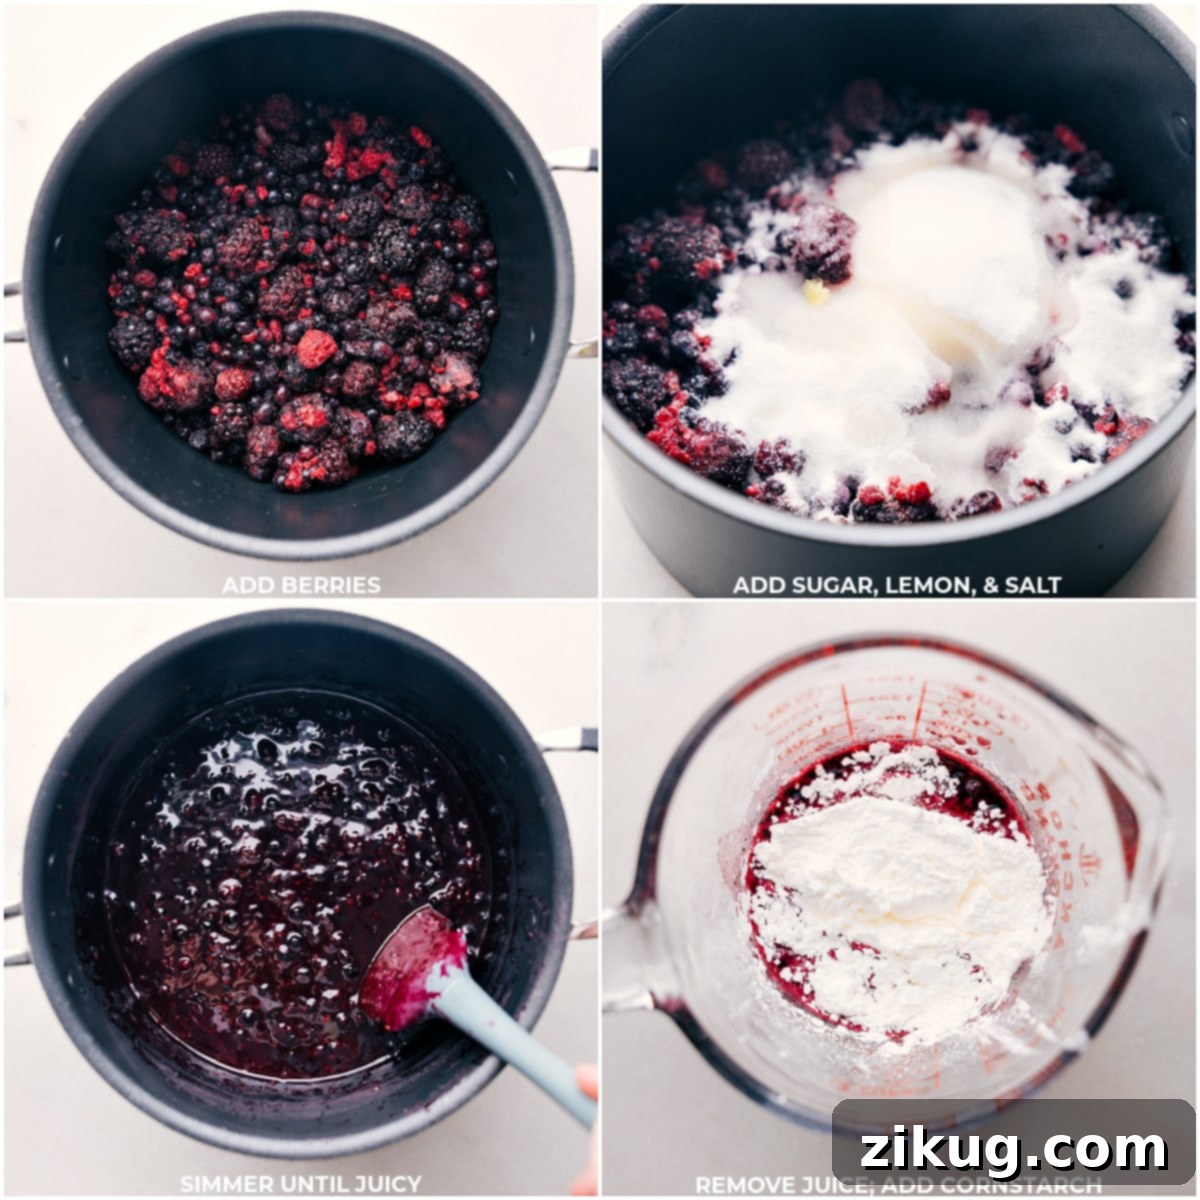
- Cook the Berries: In a large, heavy-bottomed pot, combine your chosen mixed berries (straight from the freezer if using frozen), granulated sugar, salt, and lemon juice (if using). Place the pot over medium heat and allow the mixture to gently simmer for about 5 to 10 minutes. Stir occasionally and gently to prevent sticking and ensure even cooking. The berries should become warm, release their juices, and soften slightly.
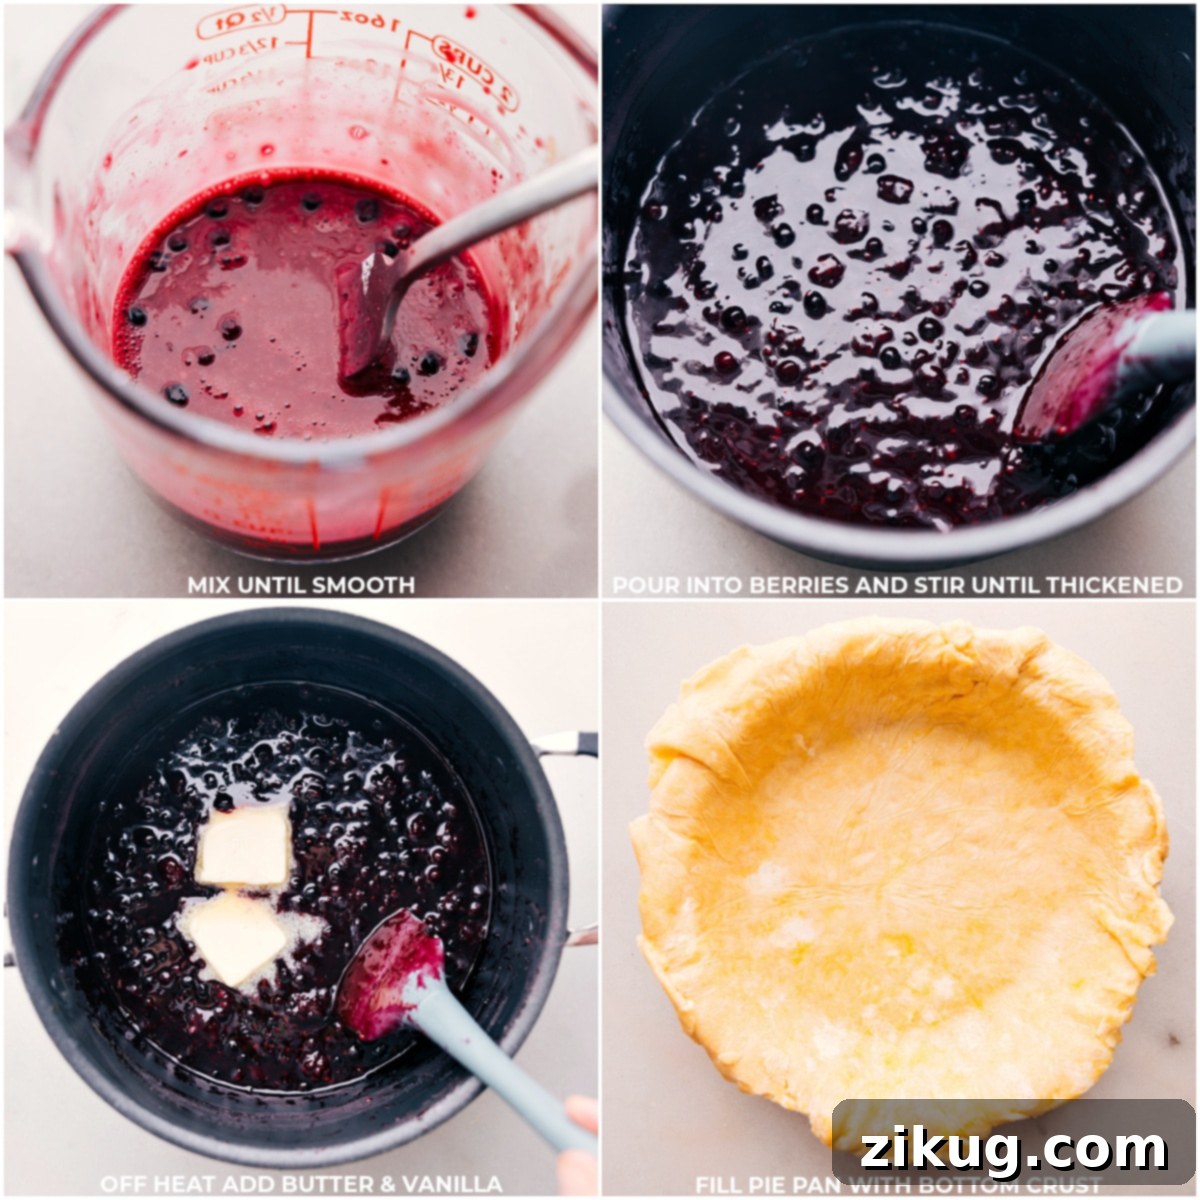
- Thicken the Filling: While the berries are simmering, remove approximately 1/3 cup of the hot berry juice from the pot into a separate small bowl. Add the cornstarch to this juice and whisk vigorously until the mixture is completely smooth and free of lumps. This step is critical for preventing a gritty texture in your final pie. Gradually pour this cornstarch slurry back into the simmering berries in the pot, stirring constantly. Continue to stir gently over medium heat for another 5 minutes or until the mixture thickens to a consistency similar to jam. It should coat the back of a spoon.
- Flavor and Cool: Remove the thickened berry mixture from the heat. Stir in the unsalted butter until it has fully melted and is incorporated, then add the vanilla extract (or vanilla bean paste). Taste the filling at this point and adjust the sweetness if necessary; add more sugar a tablespoon at a time if the berries are particularly tart or if you prefer a sweeter pie. It is crucial to allow the filling to cool completely to room temperature before assembling the pie. A warm filling will make your bottom crust soggy.
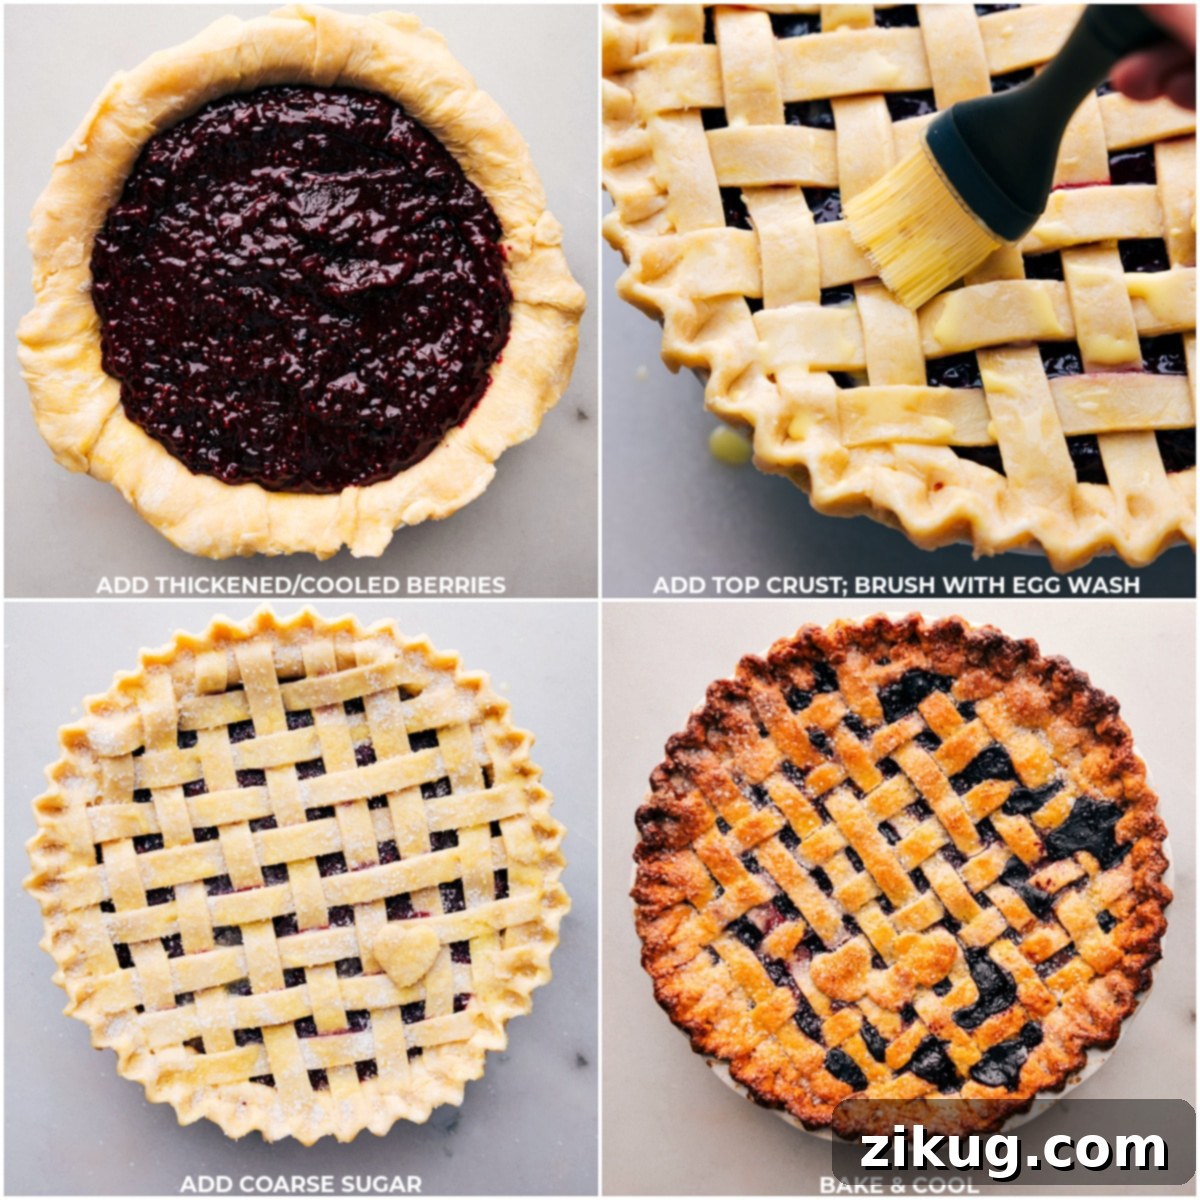
- Assemble the Pie: Preheat your oven to 400°F (200°C). Carefully place one of your chilled pie crusts into a 9-inch deep-dish pie pan, pressing it gently to fit the contours. Pour the completely cooled berry filling evenly into the prepared crust. Next, cover the filling with your second pie crust. You can either place it directly on top, cut a few steam vents with a sharp knife, or create a beautiful lattice top (refer to the instructions below for a detailed guide on making a lattice crust). Once the top crust is in place, crimp the edges of both crusts together to create a secure seal and a decorative finish.
- Egg Wash and Sugar: In a small bowl, whisk together one large egg with one tablespoon of milk to create an egg wash. Lightly brush this mixture over the entire top crust of the pie. This will help achieve a gorgeous golden-brown color during baking. For an extra touch of sweetness and sparkle, generously sprinkle white sparkling sugar (or regular granulated sugar) over the egg-washed crust.
- Bake and Cool: Place the assembled pie onto a large baking sheet (this catches any potential drips and makes transferring easier). Bake in your preheated oven at 400°F (200°C) for 40 to 50 minutes, or until the crust is deeply golden brown and the filling is visibly bubbling through the vents. If you notice the edges of your pie browning too quickly, you can cover them loosely with aluminum foil or use a specialized pie shield to prevent over-browning. Once baked, remove the pie from the oven and place it on a wire rack to cool completely. This cooling period is critical and should last at least 3 to 5 hours, allowing the filling to fully set.
- Serve and Enjoy: Once fully cooled and set, slice your magnificent berry pie and serve it warm (if desired, a quick reheat in a 350°F oven for 10-15 minutes works wonders) with a scoop of premium vanilla bean ice cream or a cloud of freshly whipped cream.
Elevating Your Presentation: How to Make a Lattice Pie Crust
A lattice pie crust isn’t just beautiful; it also allows steam to escape more effectively, preventing a soggy top crust and ensuring a perfectly baked filling. While it may look intricate, it’s a surprisingly simple technique that adds a professional touch to your homemade berry pie. Here’s how to create one:
- Roll Out the Crust: On a lightly floured surface, take one of your chilled pie crusts and roll it out into a circle that is approximately 1 to 2 inches larger in diameter than your pie pan. Aim for an even thickness.
- Cut Strips: Using a very sharp knife, a pastry wheel, or even a pizza cutter, carefully cut the rolled-out dough into strips of your desired width. For a classic look, aim for strips about 3/4 to 1 inch wide. You can make them uniform or vary the widths for a more rustic appearance.
- First Layer: Once your berry filling is in the bottom crust, begin assembling your lattice. Place the longest dough strip directly down the center of the pie. Then, lay additional strips parallel to the first, spacing them evenly across one half of the pie. Repeat on the other half, ensuring even spacing.
- Begin Weaving: Now for the weaving! Fold back every other strip from one side (e.g., the second, fourth, sixth strips). Take a new, long dough strip and lay it perpendicularly across the center of the pie, over the strips that are still flat. Unfold the folded strips back over this new perpendicular strip.
- Continue Weaving: Next, fold back the *other* alternating strips (e.g., the first, third, fifth strips) from the same side. Lay another new perpendicular strip across the pie, parallel to the first perpendicular strip, but spaced out. Unfold the folded strips over this second perpendicular strip. Continue this weaving pattern, alternating which strips you fold back, until your entire berry pie is covered with a beautiful lattice pattern.
- Trim and Seal: Once the lattice is complete, use a sharp knife or kitchen shears to trim any excess dough from the edges, leaving about a 1/2-inch overhang. Then, gently fold this overhang under itself and pinch the lattice top and bottom crusts together around the entire rim of the pie pan. Crimp the edges decoratively using your fingers or a fork to create a beautiful, secure seal.
Expert Tips for Your Best Berry Pie Ever
Achieving a truly remarkable berry pie is a culmination of careful technique and attention to detail. These expert tips will help ensure your pie turns out perfectly, from its flaky crust to its luscious filling:
- Keep Everything Chilled: This is arguably the most important tip for a flaky pie crust. Ensure all your pie crust ingredients (especially butter) are as cold as possible. Furthermore, allow your berry filling to cool completely to room temperature (or even chill it slightly) before pouring it into the unbaked pie crust. Cold components prevent the butter in the crust from melting too quickly, resulting in those desirable flaky layers, and also prevent the bottom crust from becoming soggy.
- Berry Quality Matters: Whether using fresh or frozen, the quality of your berries impacts the final flavor. If using frozen berries, ensure they are not overly icy. If there’s excessive ice, it can lead to a watery filling. A quick rinse under cold water in a colander and then patting them dry can help remove some excess ice without thawing the berries. If using fresh berries, choose ripe, plump ones for the best flavor.
- Adjust Sugar to Taste: Berries vary greatly in their natural sweetness and tartness depending on the season and variety. Always taste your berry mixture before thickening it, and adjust the amount of granulated sugar as needed. Sweeter berries will require less sugar, while tarter ones might need a touch more to achieve the perfect balance.
- Thorough Thickening is Key: For a perfectly set, jam-like filling, it’s essential to ensure the cornstarch is fully dissolved in a small amount of berry juice before adding it to the main pot. Whisk until there are absolutely no lumps. Continue stirring the berry mixture gently over heat until it reaches a thick, visibly jam-like consistency. An under-thickened filling will result in a runny pie.
- Prevent Over-Browning: Pie crusts, especially lattice tops, can sometimes brown more quickly than the filling finishes baking. If you notice the edges of your pie crust becoming too dark before the rest of the pie is done, cover them loosely with strips of aluminum foil or use a dedicated pie shield. This protects the edges while allowing the center to continue baking to perfection.
- Don’t Rush the Cooling Process: The most common mistake bakers make with fruit pies is cutting into them too soon. A pie needs ample time to cool on a wire rack—typically 3 to 5 hours—for the filling to fully set. Cutting into a warm pie will result in a runny, messy slice. Patience is a virtue when it comes to pie!
- Using a Deep-Dish Pie Pan: For a generous, beautifully domed pie, a 9-inch deep-dish pie pan is ideal. It provides enough space for ample berry filling and ensures a substantial slice.
Berry Pie Recipe FAQs: Your Questions Answered
For berry pies, cornstarch is widely considered the best thickener. Berries inherently release a lot of juice when cooked with sugar. Cornstarch excels at absorbing this juice and creates a clear, glossy, and beautifully set filling with a smooth texture, without imparting any cloudiness or starchy flavor like flour sometimes can.
To prevent a soggy bottom crust, there are two primary keys: first, ensure your pie crust dough is very cold before adding the filling and baking. Second, and crucially, let the berry filling cool completely to room temperature before pouring it into the unbaked pie crust. Warm filling releases steam that can soften the bottom crust prematurely. Additionally, baking the pie on a hot baking sheet can help create a crisper bottom.
Absolutely! Frozen berries are not only perfectly suitable but often preferred for pies, especially for year-round baking. You can use them directly from the freezer without the need to thaw. This is because the frozen berries will gradually release their juices as they heat up, creating a rich syrup that is then thickened with cornstarch. Just be sure to account for a slightly longer simmering time if using very icy berries.
Your berry pie is typically fully cooked when the crust is a deep golden brown all over, and the filling is visibly bubbling thickly through the steam vents or lattice openings. The bubbling indicates that the filling has reached a high enough temperature to activate the cornstarch and properly thicken. If you have a food thermometer, the center of the filling should register at least 200-205°F (93-96°C).
Yes, absolutely! While a classic berry pie is delicious on its own, a touch of spice can add wonderful complexity. A pinch of ground cinnamon, nutmeg, or even a tiny amount of cardamom can complement the berry flavors beautifully. Start with about 1/4 to 1/2 teaspoon of your chosen spice mixed into the filling before cooking, and adjust to your preference in future bakes.
Proper Storage for Your Berry Pie
Berry Pie Storage Guidelines
To ensure your homemade berry pie remains fresh and delicious, proper storage is key:
- Cool Completely: Always allow the baked pie to cool completely on a wire rack for several hours until it reaches room temperature. This is essential for the filling to fully set and for the crust to remain crisp.
- Room Temperature: Once cooled, you can loosely cover the pie with plastic wrap or foil and store it at room temperature for up to two days. This is generally preferred for optimal crust texture.
- Refrigerate: For longer storage, or if your kitchen is particularly warm, cover the pie tightly with plastic wrap or aluminum foil and refrigerate it for up to four days.
- Freeze for Longer: To freeze an entire baked pie, first cool it completely. Then, wrap it thoroughly in several layers of plastic wrap, followed by a layer of aluminum foil. Freeze for up to four months. When ready to enjoy, thaw the pie in the refrigerator overnight before reheating.
- Reheat (Optional): For that warm, fresh-from-the-oven experience, you can gently reheat slices of pie (or a whole pie) in a preheated oven at 350°F (175°C) until warmed through, usually 10-15 minutes for a slice and 20-30 minutes for a whole pie.
Explore More Delicious Pie Recipes:
Pies
Decadent Banana Cream Pie Recipe
Pies
Classic Banoffee Pie Recipe
Desserts
Traditional Apple Pie
Pies
Rich Chocolate Cream Pie Recipe

Berry Pie Recipe
Equipment
-
Deep dish pie pan 9-inch
-
Large pot
Ingredients
- 2 homemade pie crusts or store-bought crusts
- 7-1/2 cups frozen mixed berries see note 1
- 1 cup granulated sugar plus more to taste
- 1/8 teaspoon salt
- 2 teaspoons fresh lemon juice optional
- 1/4 cup cornstarch
- 2 tablespoons unsalted butter
- 1 teaspoon vanilla extract
- 1 large egg for egg wash
- 1 tablespoon milk for egg wash
- White sparkling sugar optional, for topping
- Vanilla bean ice cream or whipped cream, for serving
Instructions
-
Prep Tip: For best results and to ease assembly, consider preparing your two pie crusts and the berry filling a day in advance. Refrigerate both until you are ready to assemble the pie. The colder all ingredients are before baking, the flakier your crust will be!
-
In a large, heavy-bottomed pot, combine the frozen berries (straight from the freezer), granulated sugar, salt, and fresh lemon juice (if using). Place the pot over medium heat and allow the mixture to gently simmer for approximately 5–10 minutes, stirring occasionally and gently. The berries will release their juices and become warm and softened.
-
Carefully remove about 1/3 cup of the hot berry juice from the pot and transfer it to a small bowl. Add the cornstarch to this juice and whisk vigorously until it is completely smooth and fully dissolved, with no lumps remaining. Gradually stir this cornstarch mixture back into the simmering berries in the pot. Continue stirring gently over medium heat until the filling thickens to a jam-like consistency, which should take about 5 minutes.
-
Remove the thickened berry filling from the heat. Stir in the unsalted butter until it has melted completely. Then, add the vanilla extract (or vanilla bean paste). Taste the filling and adjust the sweetness if desired, adding more sugar a tablespoon at a time for tarter berries or personal preference. Allow the filling to cool completely to room temperature before proceeding.
-
Preheat your oven to 400°F (200°C). Carefully place one of your chilled pie crusts into a 9-inch deep-dish pie pan, gently pressing it to fit. Pour the completely cooled berry filling into the crust, smoothing it into an even layer. Cover the pie with the second crust. You can either cut several small steam vents in the top crust or create a decorative lattice top (refer to the “How to Make a Lattice Pie Crust” section for detailed instructions). Crimp the edges of both crusts together to seal them securely and create a beautiful border.
-
In a small bowl, whisk together the large egg and 1 tablespoon of milk to create an egg wash. Lightly brush this egg wash over the entire top crust of the pie. Then, sprinkle a generous amount of coarse (or regular) granulated sugar over the egg-washed crust for a sparkling finish and added texture.
-
Place the prepared pie on a sturdy baking sheet (this will catch any potential drips and make it easier to transfer). Bake in the preheated oven at 400°F (200°C) for 40–50 minutes, or until the crust is a rich, golden brown and the berry filling is bubbling thickly through the vents. If the edges of the crust start to brown too quickly, loosely cover them with strips of aluminum foil or a pie shield. Once baked, remove the pie from the oven and cool it completely on a wire rack for a minimum of 3–5 hours. This crucial cooling time allows the filling to fully set.
-
Once the pie is fully cooled and the filling is set, slice and serve. Enjoy your delicious berry pie with a dollop of fresh whipped cream or a scoop of creamy vanilla bean ice cream for the ultimate dessert experience.
Recipe Notes
Note 2: Lattice Crust Instructions
- Roll out: On a lightly floured surface, roll one of your chilled pie crusts into a circle that is 1–2 inches larger in diameter than your 9-inch pie pan.
- Cut strips: Use a very sharp knife, pastry wheel, or pizza cutter to cut the dough into strips of your desired width (e.g., 3/4 to 1 inch wide).
- First layer: Place the longest strip down the center of the pie. Then, arrange additional strips parallel to the first, evenly spaced, across one half of the pie. Repeat on the other side.
- Weave: Gently fold back every other strip from one side. Lay a new strip perpendicularly across the pie, over the remaining flat strips. Unfold the folded strips back over this new strip.
- Repeat weaving: Now, fold back the *other* alternating strips from the same side. Lay another new perpendicular strip, parallel to the first, across the pie. Unfold the folded strips over this second strip. Continue this weaving process until the pie is fully covered with a lattice pattern.
- Trim and seal: Trim any excess dough from the edges, leaving about a 1/2-inch overhang. Fold this overhang under itself, then pinch the lattice top and bottom crusts together around the entire rim of the pie pan. Crimp the edges decoratively to seal.
Note 3: How to Crimp Pie Edges To crimp the edges of a pie crust, gently pinch the dough (from both the top and bottom crusts) between your thumb and forefinger around the entire rim of the pie pan. Work your way around, pressing firmly but gently to create a consistent, decorative wavy pattern. Alternatively, you can press the tines of a fork around the edge for a simpler crimp.
Nutrition Note: The nutrition information provided includes both pie crusts and is an approximation. Actual values may vary based on specific ingredient brands and preparation methods.
Storage: Allow the pie to cool completely before storing. It can be covered loosely and stored at room temperature for up to 2 days. For longer storage, refrigerate for up to 4 days, covered tightly. To freeze, wrap the cooled pie well in plastic wrap and then foil, and freeze for up to 4 months. Thaw in the refrigerator before reheating.
Nutrition
Nutrition information is automatically calculated, so should only be used as an approximation.