
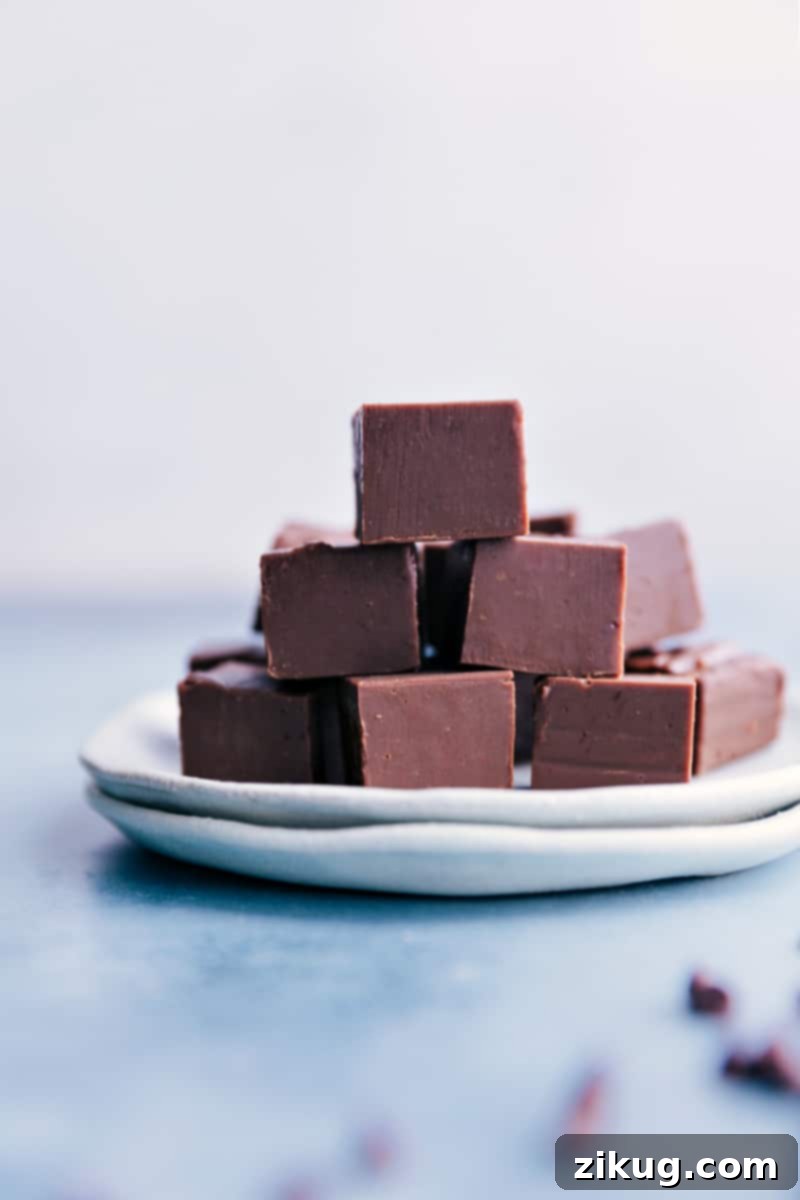
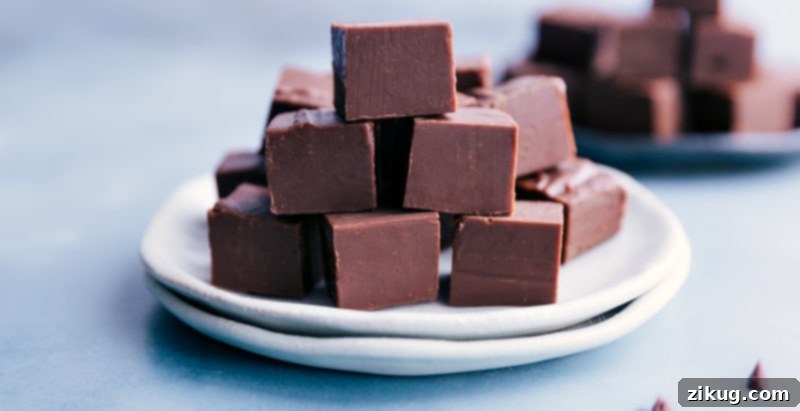
Welcome to the easiest and most **foolproof homemade chocolate fudge recipe** you’ll ever find! Forget complicated candy thermometers or specialized equipment; this quick and delicious treat is designed for success, even for beginner bakers. Prepare to indulge in velvety smooth, intensely rich chocolate fudge that melts in your mouth with every bite.
If you love exploring delightful variations, you might also enjoy our double-layered Tiger Butter Fudge, the festive Caramel Apple Fudge, or the ever-popular Oreo Fudge. Each offers a unique twist on this beloved classic, but none are quite as simple as the one you’re about to discover.
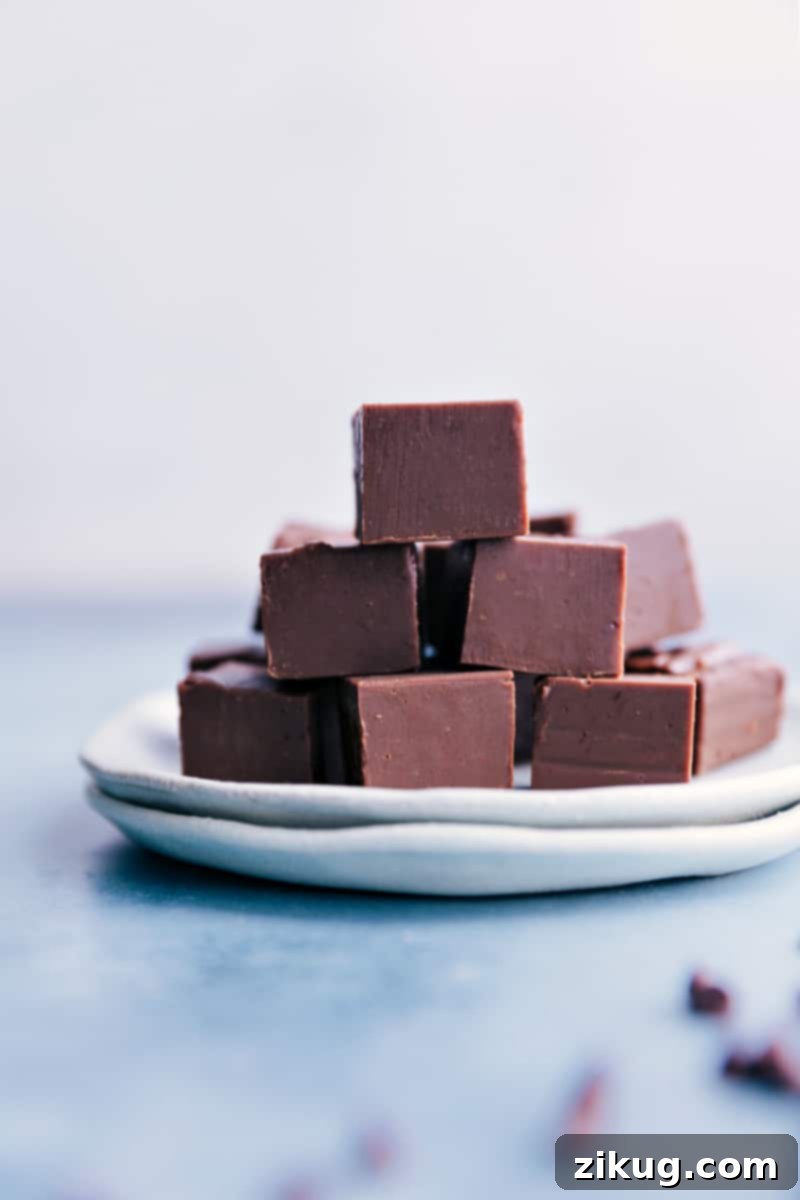
The Ultimate Easy Fudge Recipe
This **fudge recipe with condensed milk** stands out as my absolute favorite method for crafting perfect fudge every single time. It’s practically foolproof, a rare and welcome departure from the often tricky world of candy making. The secret lies in the simple combination of a few key ingredients, expertly melted to create a confectionary masterpiece that requires neither special tools nor a candy thermometer.
What makes this truly the **best easy fudge recipe**? It’s the unparalleled combination of an ultra-creamy texture, ridiculously rich flavor, and an undeniably indulgent taste. It’s so good that it forms the foundation for many other favorite treats, including creamy Reese’s Fudge, nostalgic S’mores Fudge, and refreshingly festive Peppermint Fudge. This base recipe is truly a canvas for endless creativity, proving that simple ingredients can yield extraordinary results.
Essential Ingredients for Perfect Fudge
Creating sensational fudge begins with selecting the right ingredients. Each component plays a vital role in achieving that sought-after creamy texture and rich flavor. Here’s a closer look at what you’ll need and why quality matters:
- Quality Chocolate Chips: The chocolate is the star of the show. Using good-quality chocolate chips is paramount, as the better the chocolate, the richer and more satisfying the fudge flavor will be. Whether you prefer milk chocolate, semi-sweet, dark chocolate, or even a blend, invest in a brand you trust for superior taste and texture.
- Unsalted Butter: Butter is essential for giving this fudge its incredibly smooth and creamy texture. Always opt for unsalted butter to maintain precise control over the overall saltiness of your fudge. Margarine is not a suitable substitute, as its water content and different fat composition can compromise the fudge’s consistency.
- Fine Sea Salt: A touch of fine sea salt is crucial. It doesn’t just add a subtle hint of savory; it expertly balances the intense sweetness of the chocolate and condensed milk, enhancing the overall flavor profile and preventing the fudge from being overly cloying.
- Sweetened Condensed Milk: This is the magical ingredient that makes this fudge so incredibly easy and virtually foolproof. It’s vital to use regular, full-fat sweetened condensed milk. Do *not* substitute with low-fat, sugar-free, or evaporated milk, as these will not deliver the same creamy consistency or desired sweetness. Sweetened condensed milk is a thick, syrupy product with added sugar, which is key to the fudge setting correctly.
- Optional: Vanilla Extract: While optional, a dash of vanilla extract adds a beautiful aromatic finish to the fudge. Its warm, comforting notes complement the chocolate perfectly, elevating the overall taste experience.
Unlocking the Secret to Perfect Fudge: Essential Tips
Achieving perfectly smooth, non-grainy fudge is surprisingly simple when you follow a few key techniques. These aren’t complicated, but they are crucial for success, ensuring your homemade chocolate fudge turns out beautifully creamy every time:
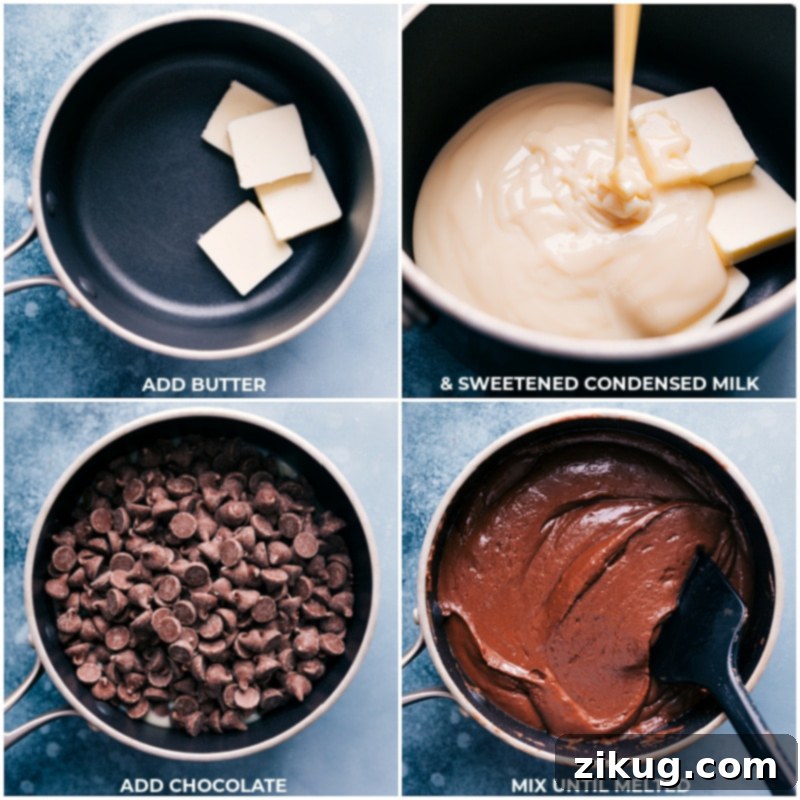
- Choose the Right Pan: Start with a **sturdy nonstick pan** that boasts excellent heat distribution. This prevents hotspots and ensures ingredients melt slowly and evenly, which is vital for preventing scorching and achieving a uniform texture.
- Embrace Low Heat: Patience is a virtue in fudge making. **Keep the heat low** throughout the melting process. Gentle, slow melting allows the chocolate, butter, and condensed milk to combine smoothly without overheating, which can lead to a grainy texture. Resisting the urge to rush this step on higher heat is paramount.
- Stir Continuously: Constant agitation is your best friend. **Stir constantly** with a heat-safe spatula, diligently scraping the bottom and sides of the pan. This ensures all ingredients melt uniformly and prevents any part of the mixture from sticking or burning, which could impart an undesirable taste and texture.
- Act Quickly Off the Heat: The moment your ingredients are fully melted and perfectly combined, **swiftly remove the fudge from the heat**. Prolonged cooking, even after melting, can cause the sugar to crystallize, resulting in grainy or crumbly fudge. Immediately pour the mixture into your prepared pan to halt the cooking process and begin cooling.
Fudge Recipe Notes for Success
Beyond the core technique, these additional tips will help you achieve fudge perfection and allow for creative customization:
- Prepare Your Pan Properly: Don’t skip lining your baking pan! Using parchment paper or aluminum foil, leaving a slight overhang on the sides, is essential. This creates “handles” that make lifting the set fudge out of the pan incredibly easy and mess-free, ensuring beautiful, clean squares.
- Allow Ample Setting Time: Fudge requires patience to properly firm up. It needs several hours to harden completely in the refrigerator. Plan ahead if you intend to serve it to guests or bring it to an event. Rushing this step will result in soft, unsliceable fudge. For best results, allow at least 3-5 hours, or even overnight.
- Unleash Your Creativity: Make It Your Own: This basic fudge recipe is incredibly versatile. Feel free to experiment with different types of chocolate chips, such as rich dark chocolate, sweet white chocolate, or even a combination. Incorporate crushed candies (like peppermint or toffee bits), chopped nuts (walnuts, pecans, almonds), or crumbled cookies (Oreos, graham crackers) for added texture and flavor. You can also drizzle toppings like extra chocolate or luscious caramel, as demonstrated in this microwave fudge recipe. The possibilities are truly endless, allowing you to tailor this treat to any preference or occasion.
Fudge Recipe FAQs & Troubleshooting
Even with the most foolproof recipes, questions can arise. Here are answers to common fudge-making queries:
Grainy fudge is a common issue that often stems from overcooking the mixture, applying too high heat during the melting process, or using low-quality chocolate. Overheating can cause sugar crystals to form, leading to a coarse texture. Ensure you stick to low heat and remove the mixture promptly once melted.
Crumbly fudge, similar to grainy fudge, is usually a result of overcooked fudge or excessive heat. When the mixture is cooked beyond the necessary melting point, too much moisture evaporates, causing the fudge to become dry and brittle instead of smooth and firm. Always keep the heat low and watchful.
No, these two are not interchangeable and cannot be swapped in this recipe. Evaporated milk is cow’s milk that has had about 60% of its water removed, resulting in a creamier, shelf-stable product, but it contains no added sugar. Sweetened condensed milk, on the other hand, also has water removed but has a significant amount of sugar added, giving it its thick, syrupy consistency and sweet flavor crucial for this fudge recipe.
Storage and Freezing Guidelines
Can You Freeze Fudge?
Yes, fudge freezes beautifully, allowing you to enjoy this delightful treat for longer. To properly freeze fudge, begin by cutting the cooled and set fudge into individual squares. Wrap each piece meticulously in plastic wrap, ensuring it is as airtight as possible to prevent freezer burn. Once individually wrapped, place all the wrapped pieces into a large freezer-safe bag or an airtight container. Press out as much air as possible before sealing.
If you prefer not to wrap each piece individually, you can layer them in a container, but be sure to separate each layer with wax paper to prevent them from freezing and sticking together. For thawing, simply transfer the frozen fudge from the freezer to the refrigerator and allow it to thaw slowly. This gradual thawing helps maintain its creamy texture. Stored correctly, fudge can last for several months in the freezer.
For everyday storage, leftover fudge is best kept in an airtight container in the refrigerator. While it can stay fresh for 1-2 weeks this way, we find it’s at its absolute best when consumed within 2-3 days. If left out of the fridge for extended periods, the fudge tends to dry out and lose its appealing softness.
More Delightful Candy Recipes:
If you enjoyed making this easy fudge, you might want to try your hand at some of these other fantastic homemade candy recipes:
- Butter Mints with their delicate texture and refreshing peppermint flavoring.
- Rich and buttery Toffee, often coated in chocolate and sprinkled with sugared almonds.
- Decadent Turtle Candy, a surprisingly simple treat made with only three ingredients.
- Crisp and airy Honeycomb Candy, featuring a delightful crunch and often enrobed in chocolate.
- The BEST Brigadeiros, a traditional Brazilian treat that’s rich, chewy, and utterly irresistible.
Print Recipe
Foolproof Chocolate Fudge Recipe
Equipment
-
8 x 8-inch baking pan (or 9 x 9-inch, see note 1)
-
Parchment paper
-
Medium nonstick pot
Ingredients
- 4 tablespoons unsalted butter
- 3 cups chocolate chips (see note 2)
- 1/4 teaspoon salt
- 1 (14-ounce) can sweetened condensed milk (full-fat, not evaporated milk)
- 1 teaspoon vanilla extract
Instructions
- Line your baking pan with parchment paper, allowing an overhang on the sides for easy removal of the fudge. This step is crucial for neat presentation. Cut the unsalted butter into 1-tablespoon-sized pieces.
- In a thick-bottomed nonstick pan, combine the butter, chocolate chips, salt, and sweetened condensed milk. Heat the mixture on the lowest heat setting. Using a heat-resistant spatula, stir constantly, ensuring you scrape the sides and bottom of the pan to prevent sticking and burning. Resist the urge to increase the heat; patience will be rewarded with smooth, creamy fudge.
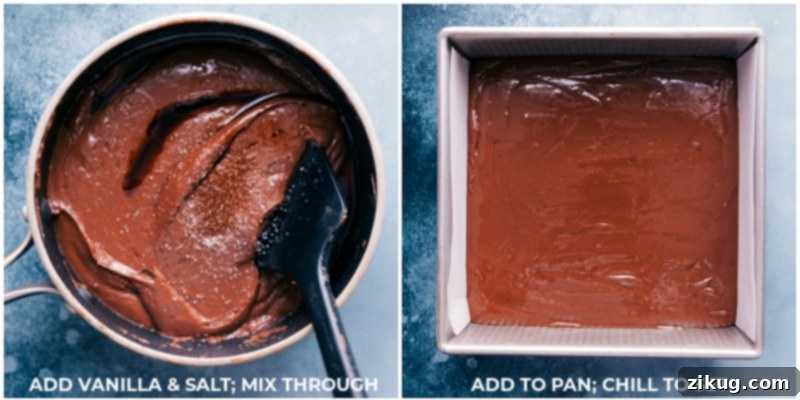
- As soon as all the butter, condensed milk, and chocolate chips are fully melted and smoothly combined, immediately remove the pan from the heat. Stir in the vanilla extract until it is thoroughly incorporated.
- Transfer the warm fudge mixture to the prepared pan. Lightly spray a spatula with cooking spray and use it to smooth the fudge into an even layer with a flat top. Cover the pan and refrigerate for 3–5 hours, or until the fudge is completely firm and set.
- Once firm, use the parchment-paper overhang to lift the fudge from the pan. For clean cuts, use a hot, very sharp knife. Run the knife under hot water, dry it quickly, and make swift, decisive cuts. Since this fudge is incredibly rich, we recommend cutting it into small, bite-sized pieces.
Recipe Notes
Note 2: The quality of your chocolate significantly impacts the taste of this fudge. My personal favorites are Ghirardelli® and Guittard® (this is not a sponsored recommendation). Feel free to use your preferred chocolate flavor—or even a blend. I often enjoy a mix of milk and dark chocolate (half and half) or simply plain milk chocolate.
Storage: Leftover fudge stores best in an airtight container in the refrigerator, where it will remain fresh for 1–2 weeks. However, it’s most delicious when enjoyed within 2–3 days. If left out of the fridge for too long, the fudge can become dry.
Freezing: To freeze fudge, cut it into squares and wrap each piece individually in plastic wrap, ensuring it’s as airtight as possible. Place the wrapped pieces in a large freezer bag, sealing it while removing as much air as you can. If you skip individual wrapping, separate the fudge pieces with wax paper to prevent them from sticking together. Thaw frozen fudge in the refrigerator before serving.
Nutrition
Nutrition information is automatically calculated, so should only be used as an approximation.