
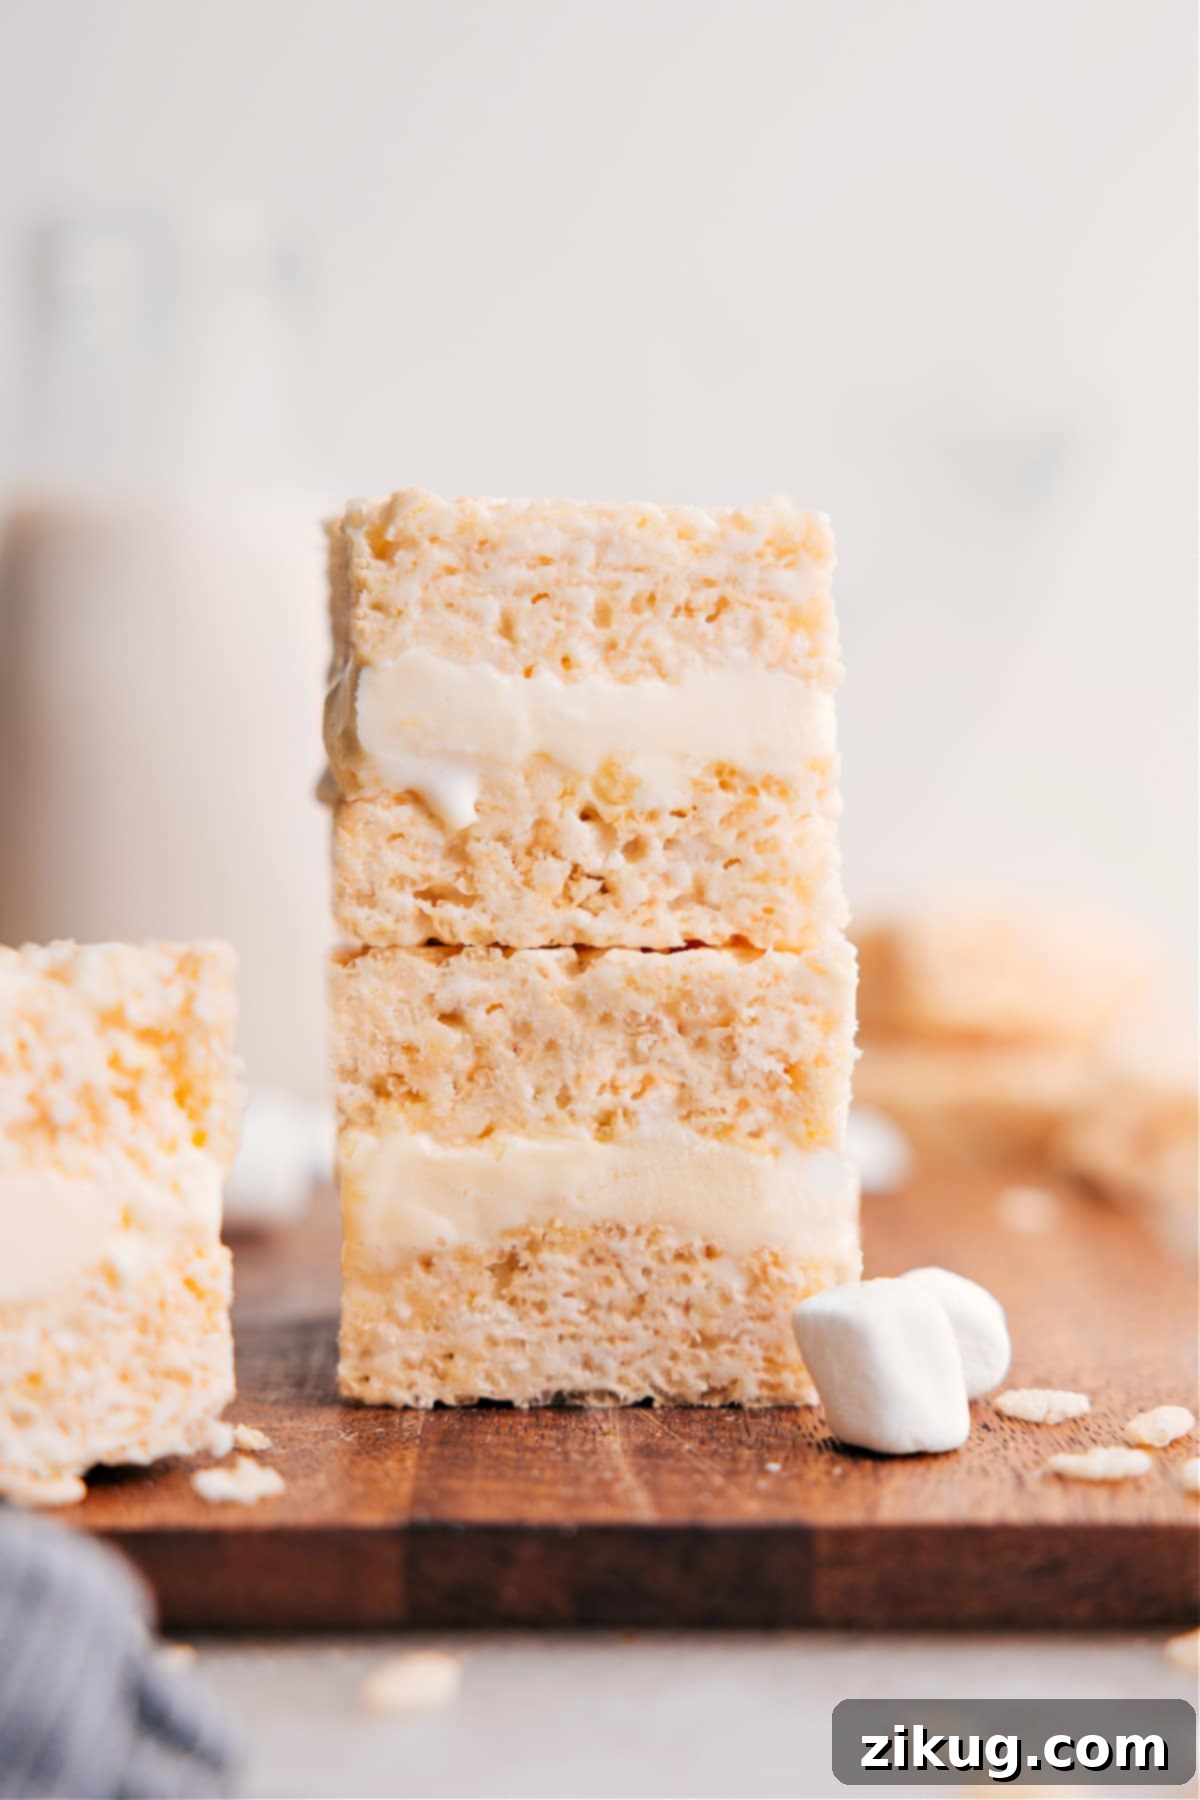
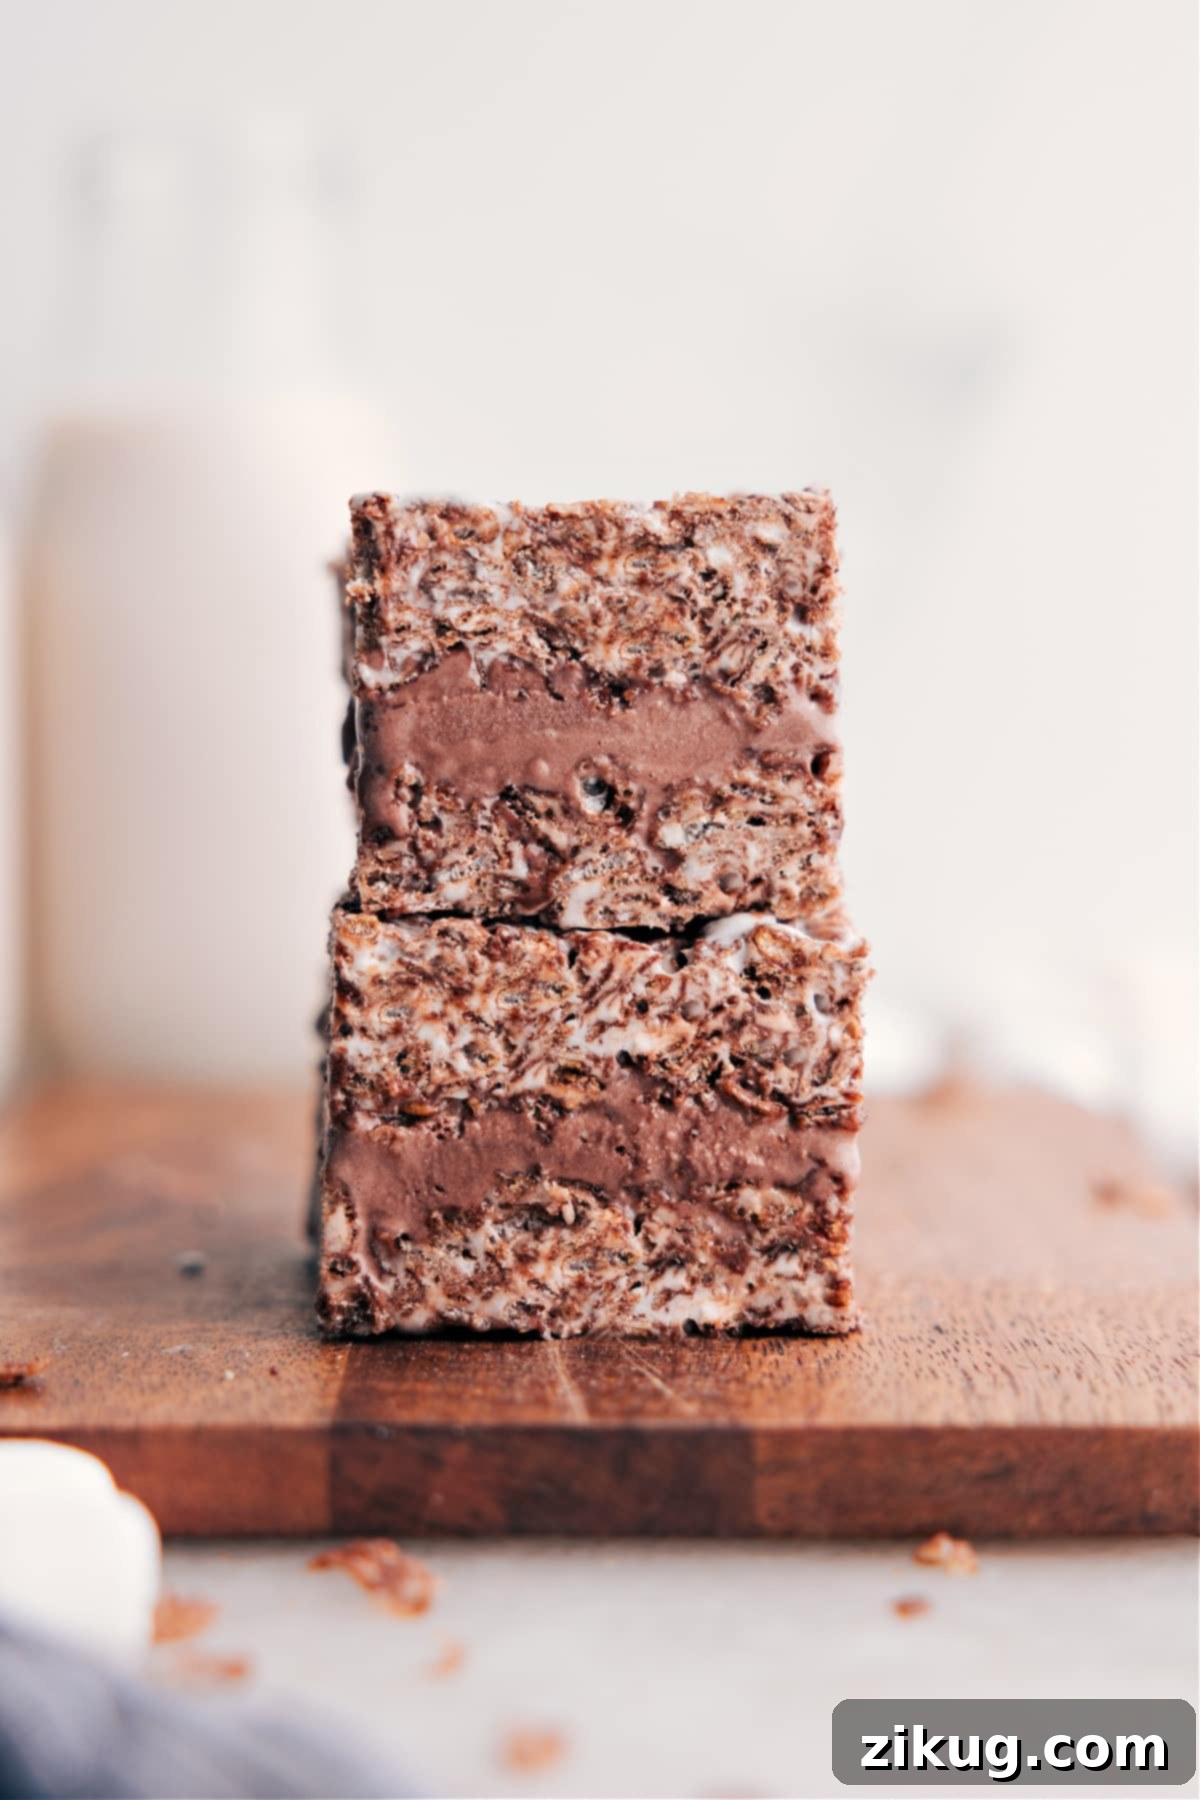
Rice Krispies Treats Ice Cream Sandwiches are the quintessential frozen dessert, offering a delightful combination of chewy, gooey cereal bars perfectly complemented by a rich, creamy ice cream filling. This incredible treat promises to be the highlight of your summer, or any time you crave a nostalgic, no-bake indulgence.
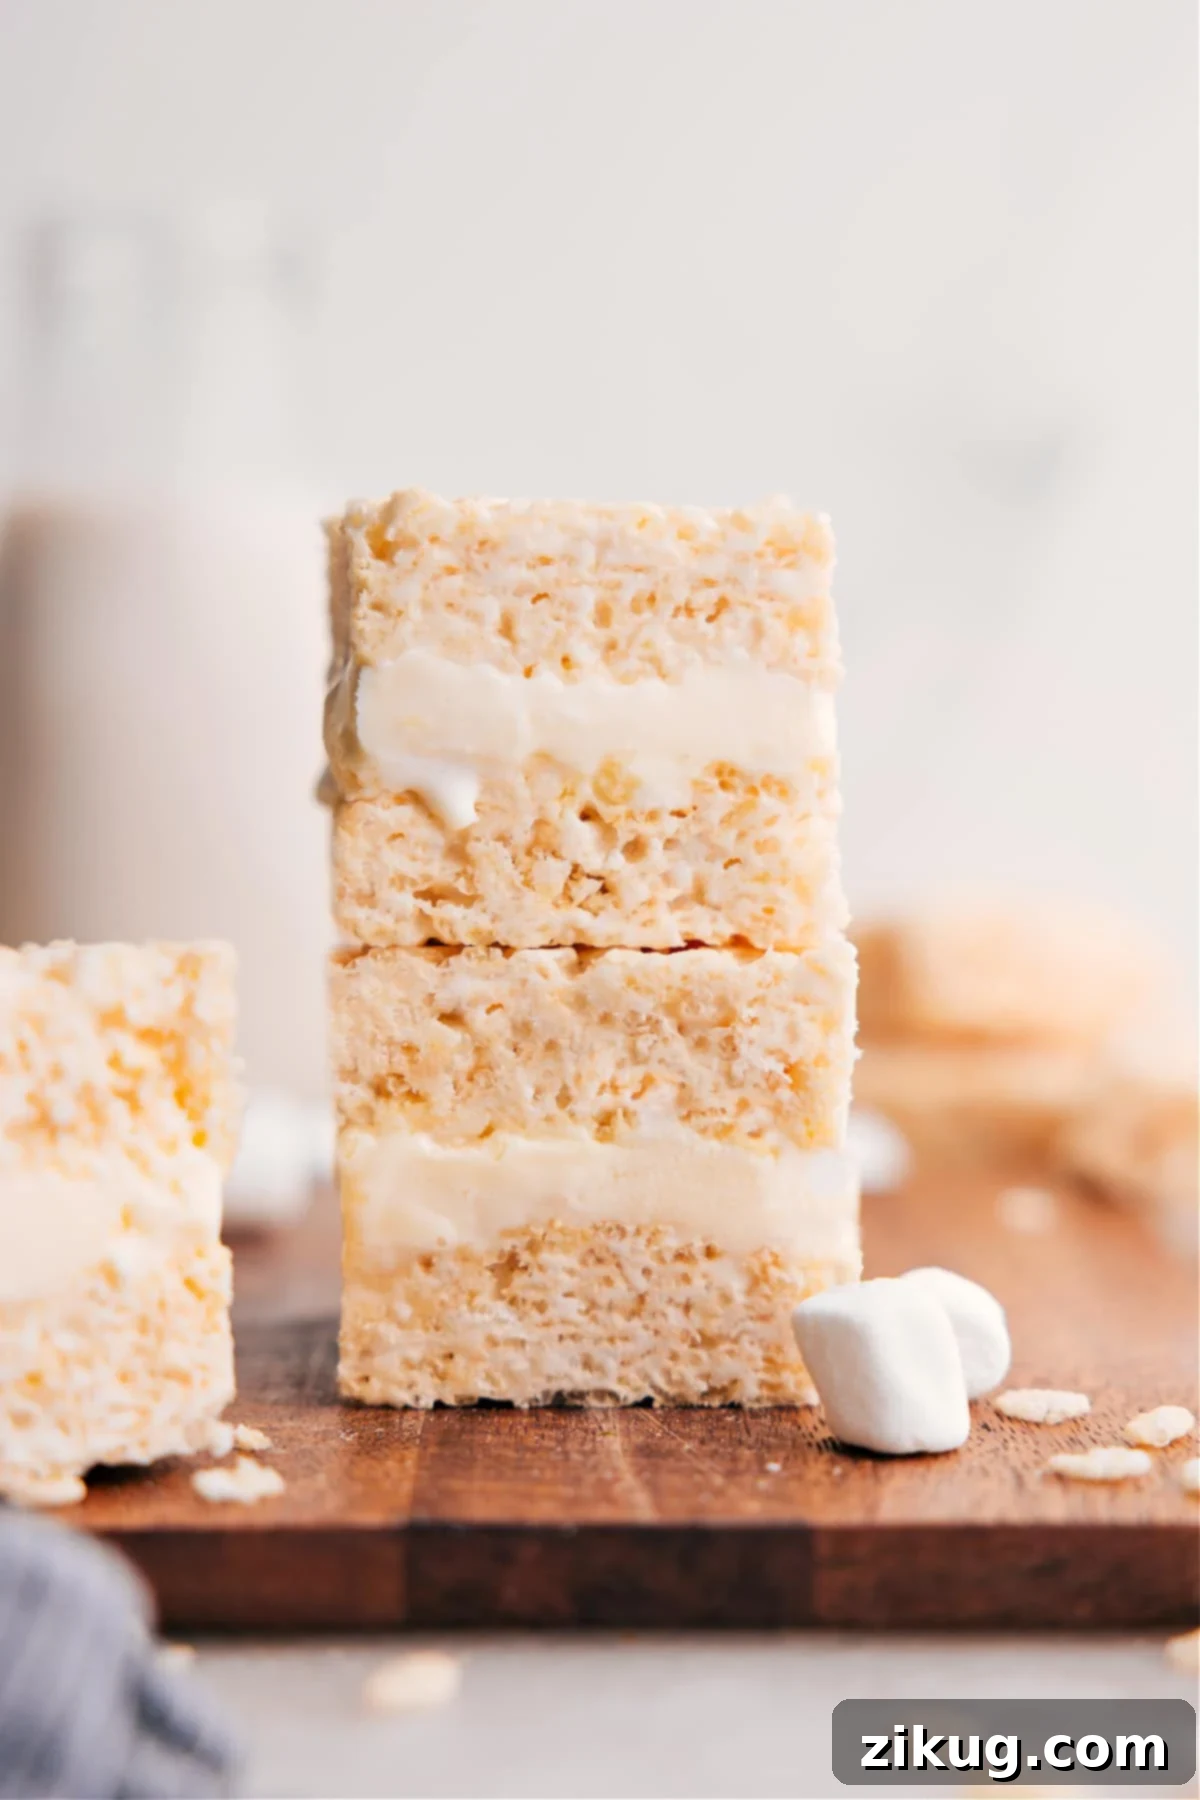
Crafting the Perfect Homemade Rice Krispies Treats Ice Cream Sandwich
Recently, store-bought Rice Krispies Treats Ice Cream Sandwiches in vanilla and chocolate flavors have taken the internet by storm, leaving many clamoring to find them. While the commercial versions are tempting, there’s an undeniable charm and superior taste to crafting these delightful treats right in your own kitchen. Forget the frantic search at grocery stores; this homemade version transcends expectations and guarantees a fresh, customizable, and incredibly delicious experience.
Having perfected this recipe through multiple trials—three batches of vanilla and one chocolate in a single week—I can confidently declare these homemade Rice Krispies Ice Cream Sandwiches among the best desserts I have ever tasted. The consensus among my family and friends is unanimous: they are simply the best. Not only are they incredibly easy to make with no baking required, but the process itself is also incredibly fun and rewarding. You control the quality of ingredients, the thickness of the ice cream layer, and the chewiness of your Rice Krispies treats, ensuring every bite is pure perfection.
Why Homemade Rice Krispies Treats Ice Cream Sandwiches Reign Supreme
While the convenience of a store-bought treat is undeniable, going the homemade route for your Rice Krispies Treats Ice Cream Sandwiches offers numerous advantages. First and foremost is the unparalleled freshness. You know exactly what goes into your dessert, from the butter to the marshmallows and the quality of the ice cream. This control ensures a superior flavor and texture that mass-produced versions simply cannot replicate.
Homemade treats allow for complete customization. Want a thicker layer of ice cream? Prefer a different cereal base like Cocoa Krispies or Fruity Pebbles? Dreaming of a specific gourmet ice cream flavor? The power is in your hands! You can experiment with various combinations to create a truly unique dessert tailored to your personal preferences. Furthermore, the satisfaction of creating such a beloved treat from scratch is a joy in itself, making it a perfect activity for families or a delightful solo project.
From a texture perspective, homemade Rice Krispies treats are notoriously soft, chewy, and wonderfully gooey, especially when made fresh. This contrasts beautifully with the cold, firm ice cream, creating a textural symphony that is hard to resist. Store-bought versions often lack this delicate balance, sometimes feeling too hard or too bland. By making them at home, you ensure that soft, buttery krispie layer that perfectly cradles the creamy filling, delivering the ultimate bite every single time.
Mastering the Art of Rice Krispies Treats Ice Cream Sandwich Assembly
The secret to perfectly structured Rice Krispies Treats Ice Cream Sandwiches lies in a smart preparation technique: making two smaller batches of the cereal treats rather than one large one. This method is crucial for achieving consistent layers and a more manageable process.
Here’s why this approach yields superior results:
- It helps the top and bottom layers stay perfectly even, ensuring a balanced sandwich with every cut.
- Smaller batches are significantly easier to mix and press into the pan, preventing over-compression that can lead to hard, dense treats. This ensures your krispie layers remain delightfully soft and chewy.
For a standard recipe yielding about 24 bars, I recommend using one 12-ounce box of Rice Krispies cereal and a 1/2 gallon of high-quality ice cream. It’s always better to have a little extra of both, especially the ice cream, to account for any personal preferences or accidental scoops during assembly.
Essential Ingredients for Irresistible Treats
Creating mouth-watering Rice Krispies Treats Ice Cream Sandwiches requires just a handful of simple ingredients. Quality matters here, as each component plays a vital role in the final flavor and texture:
- Butter: Unsalted butter is preferred as it gives you control over the overall saltiness of the treats. Its rich flavor is fundamental to the classic Rice Krispies treat taste and contributes to their signature chewiness.
- Mini Marshmallows: The fresher, the better! Fresh miniature marshmallows melt more smoothly and consistently, resulting in soft, gooey, and pliable cereal bars. Older, drier marshmallows can lead to stiff, crumbly treats that are hard to work with and enjoy.
- Rice Krispies Cereal: Fresh cereal is key for maximum crispness. While classic plain Rice Krispies are a timeless choice, feel free to experiment with other varieties. Cocoa Krispies offer a chocolatey twist, while Fruity Pebbles can introduce a vibrant, fruity note. Ensure your cereal isn’t stale, as this will compromise the desired crispy texture.
- Salt: A small amount of salt is a game-changer. It doesn’t make the treats salty, but rather acts as a flavor enhancer, balancing the intense sweetness of the marshmallows and butter and bringing out the depth of all the ingredients.
- Vanilla Ice Cream: The creamy core of our sandwich! A good quality vanilla bean ice cream provides a classic, universally loved flavor that pairs beautifully with the crispy treats. However, don’t hesitate to match your ice cream flavor to your chosen cereal. Chocolate ice cream with Cocoa Krispies, strawberry ice cream with Fruity Pebbles, or even a coffee ice cream for an adult twist can create exciting variations.
- Cooking Spray & Parchment Paper: These are your best friends for easy release and clean up, preventing sticking and making the assembly process seamless.
Pro Tips for Perfect Rice Krispies Treats Ice Cream Sandwiches
Achieving the ideal balance of chewy, creamy, and crispy requires a few key considerations. Follow these expert tips to ensure your homemade ice cream sandwiches turn out perfectly every time:
- Control the Ice Cream Layer Thickness: A thin, approximately 1-inch thick layer of ice cream is crucial. If the ice cream layer is too thick, the bars will become excessively hard when frozen, making them difficult to bite into without the ice cream squishing out or breaking the cereal layers.
- Always Use Fresh Marshmallows: This cannot be stressed enough! Old, stale marshmallows lose moisture and won’t melt into that silky, gooey consistency needed for tender treats. They can result in crumbly, hard cereal bars that lack the signature chewiness.
- Avoid Overcooking the Marshmallows: Melt the marshmallows over low to medium-low heat, stirring constantly, until they are just smooth and fully incorporated with the butter. Excessive heat or prolonged cooking will cause the sugar in the marshmallows to harden, leading to stiff, unyielding cereal treats once they cool and freeze. As soon as they are melted, remove them from the heat.
- Ensure Adequate Freezing Time: Patience is a virtue here. Allow the assembled ice cream sandwiches to freeze for at least 4-8 hours, or ideally overnight, until completely solid. Rushing this step will result in a messy, squishy sandwich as the ice cream will melt and ooze out when you try to cut or eat it.
- Work Swiftly with Ice Cream: Ice cream melts quickly, especially at room temperature. Have all your tools ready and work as fast as possible when scooping and spreading the ice cream layer. The quicker you spread and top it with the second cereal layer, the less melt you’ll have, ensuring a cleaner final product.
- Use a Hot, Sharp Knife for Cutting: To achieve clean, neat slices, run a very sharp knife under hot water for a few seconds, then wipe it dry before each cut. The warmth helps the blade glide through the frozen ice cream and sticky treats without tearing or sticking. Repeat for each slice.
Creative Variations and Serving Suggestions
While the classic vanilla Rice Krispies Treats Ice Cream Sandwich is a triumph, don’t shy away from culinary creativity! This recipe is incredibly versatile and lends itself beautifully to various flavor explorations:
- Chocolate Lover’s Dream: Substitute plain Rice Krispies with Cocoa Krispies and fill with chocolate ice cream (or even chocolate fudge swirl!).
- Fruity Fun: Use Fruity Pebbles for the cereal layers and pair with strawberry, raspberry, or even lime sherbet for a tangy-sweet experience.
- Nutty Indulgence: Add a tablespoon of peanut butter to your melted marshmallow mixture for a subtle nutty flavor in the cereal treats, then fill with peanut butter swirl ice cream or even a simple vanilla.
- Add-ins Galore: Before pressing your cereal layers, gently fold in mini chocolate chips, sprinkles, or crushed candies into the Rice Krispies mixture for extra texture and flavor.
- Drizzle & Dip: Once frozen, half-dip your sandwiches in melted chocolate and sprinkle with sea salt, chopped nuts, or more sprinkles for an impressive finish.
These ice cream sandwiches are perfect for summer parties, potlucks, or just a delightful treat on a warm evening. They can be pre-made and stored, making them an excellent choice for entertaining. Serve them individually wrapped for easy grab-and-go enjoyment, or arrange them on a platter for a stunning dessert display.
Storage Solutions
To preserve the incredible texture and flavor of your Rice Krispies Treats Ice Cream Sandwiches, proper storage is key. Once cut into individual bars, wrap each sandwich tightly in plastic wrap or aluminum foil. This barrier prevents freezer burn and keeps the treats fresh. Store them in an airtight container in the freezer. For the best taste and consistency, enjoy them within one week. Beyond that, the cereal treats may start to harden slightly, though they will still be delicious!
More Easy Dessert Recipes to Explore:
- No Bake Cookies: A classic combination of chocolate and peanut butter that requires no oven time.
- Ice Cream Pie: Featuring a delightful graham cracker crust, this pie is endlessly customizable with your favorite ice cream flavors.
- Ice Cream Sandwich Cake: Layered with store-bought cookies and cream ice cream, this dessert is shockingly simple yet incredibly impressive.
- Pistachio Icebox Cake: A light and refreshing treat made with creamy whipped cream and nutty pistachio pudding.
- Cinnamon Roll Cheesecakes: Bite-sized cheesecakes topped with a decadent cream cheese frosting, perfect for any occasion.
Homemade Rice Krispies Treats Ice Cream Sandwich
By Chelsea Lords
Rice Krispies Treats Ice Cream Sandwich elevates dessert to an unforgettable experience. Imagine soft, buttery, chewy krispie treats embracing a rich, creamy vanilla ice cream center. This no-bake wonder is perfect for any occasion!
Yields: 24 bars
Equipment
- 2 9 x 13-inch baking pans (plus parchment paper)
- Large pot
Ingredients
- Cooking spray
- 10 tablespoons unsalted butter, divided
- 16 cups miniature marshmallows, divided (see note 1)
- 12 cups Rice Krispies cereal, divided (see note 2)
- 1/2 teaspoon salt, divided
- 1 gallon vanilla bean ice cream
Instructions
- Line two 9×13-inch pans with parchment paper, ensuring an overhang on the sides for easy lifting. Lightly spray the parchment paper with cooking spray and set aside.
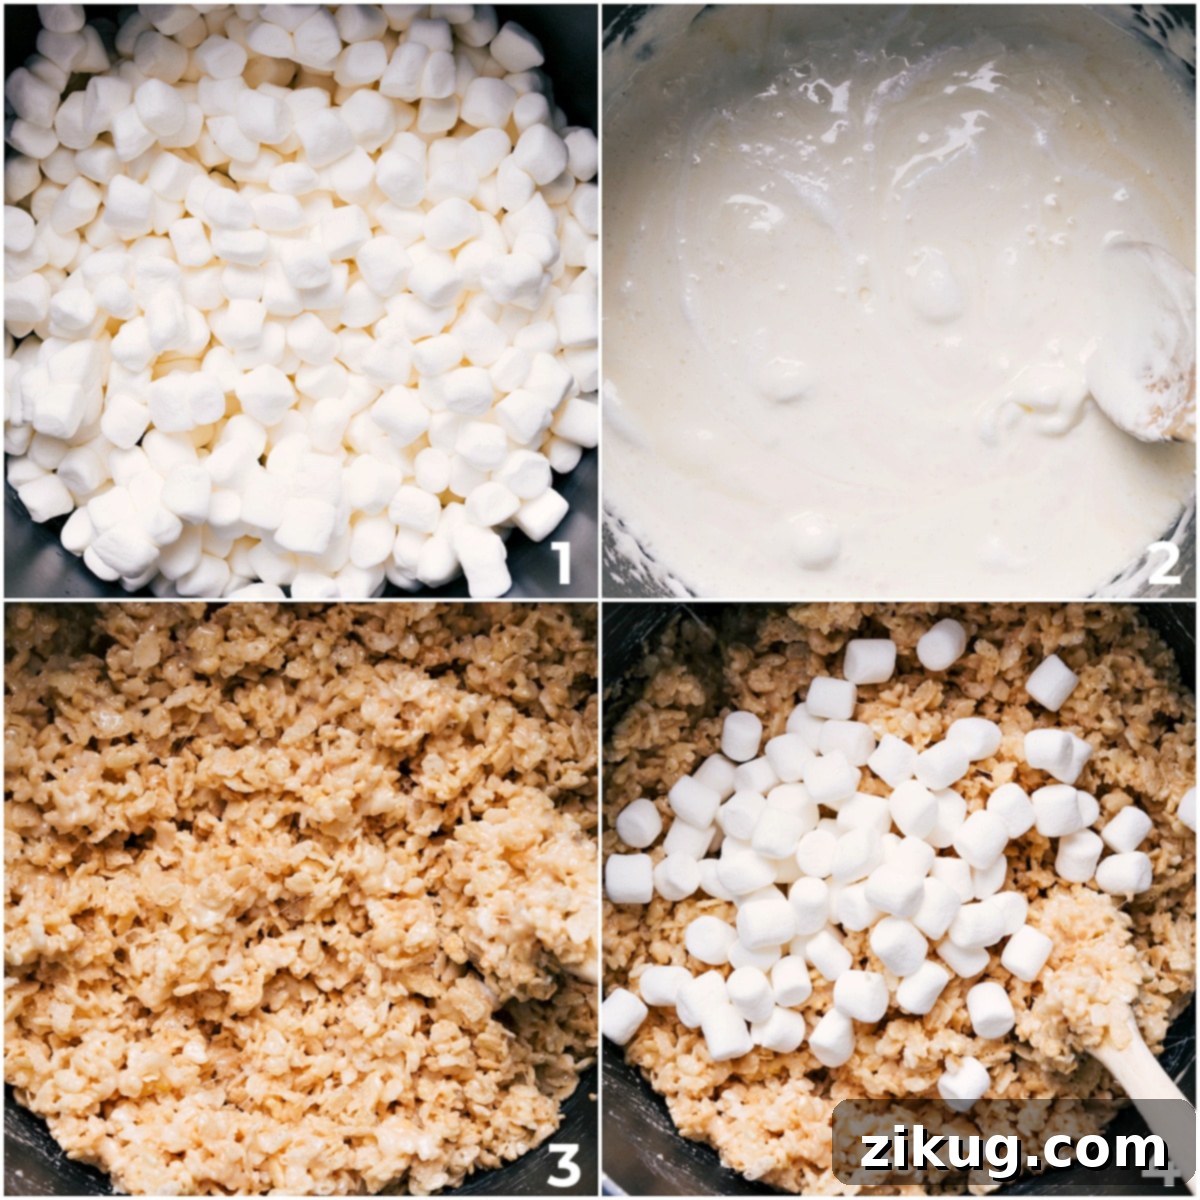
- In a large pot, melt 5 tablespoons of unsalted butter over medium-low heat. Once the butter is completely melted, reduce the heat to low. Add 8 cups of miniature marshmallows to the pot and stir constantly until they are just melted and smooth. Be careful not to increase the heat, as this can make the treats hard. Remove the pot from the heat as soon as the marshmallows are melted.
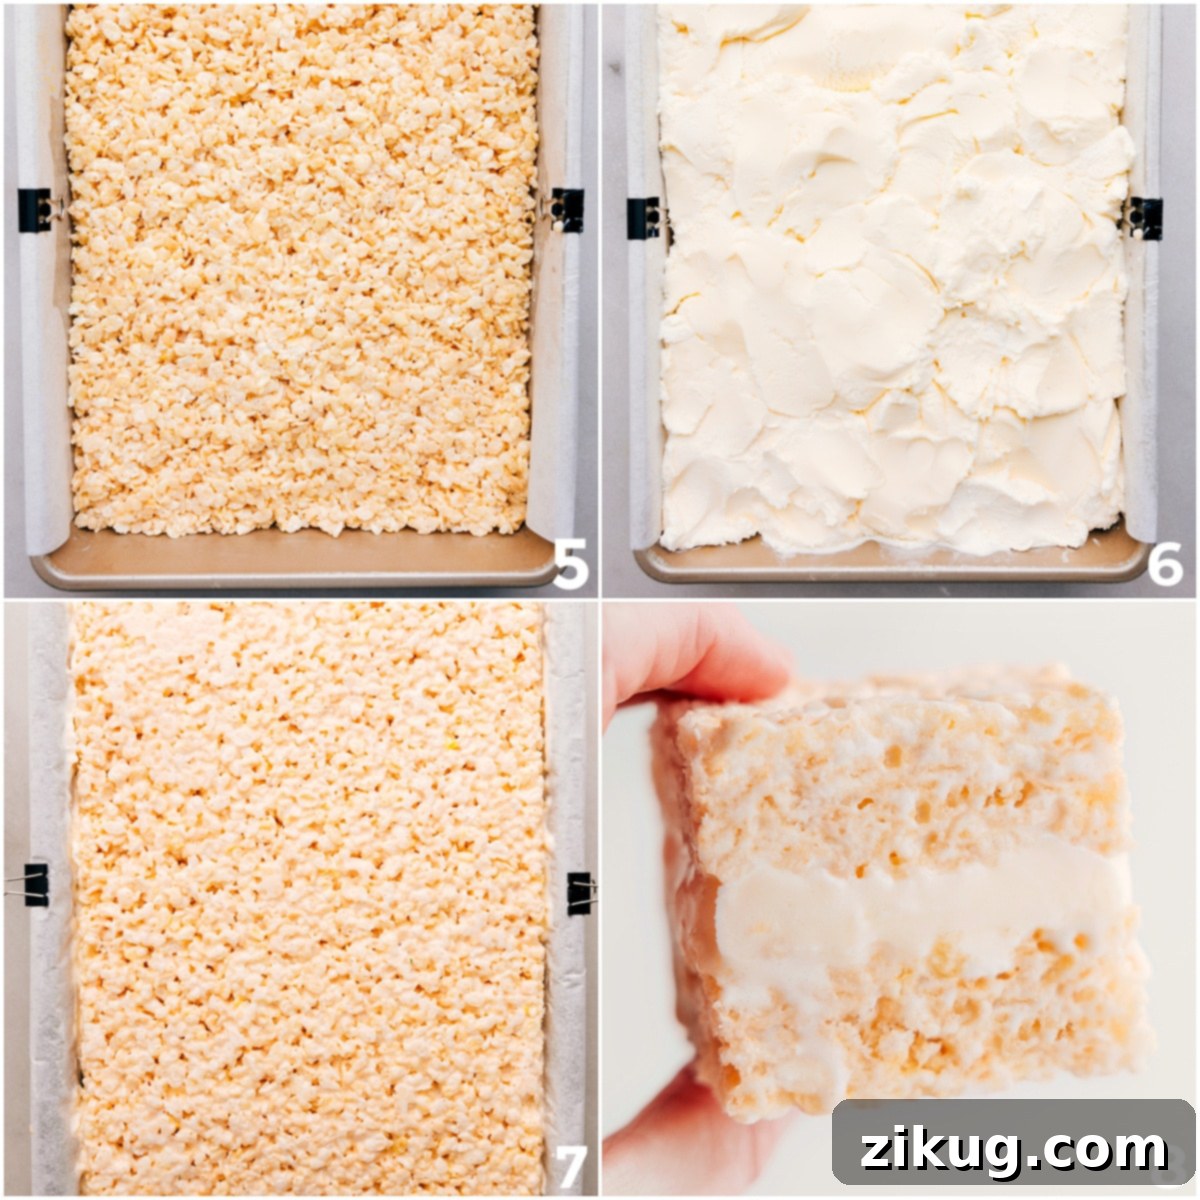
- Once off the heat, stir in 1/4 teaspoon of salt and 6 cups of Rice Krispies cereal. Mix gently but thoroughly until the cereal is evenly coated with the marshmallow mixture. Transfer this mixture to one of the prepared pans and gently press it into an even layer using lightly greased hands or a spatula. Avoid pressing too firmly, as this will result in dense, hard treats; aim for a soft, chewy texture.
- Repeat steps 2 and 3 to make a second batch of Rice Krispies treats using the remaining 5 tablespoons of butter, 8 cups of marshmallows, 1/4 teaspoon of salt, and 6 cups of Rice Krispies. Press this second batch into the second prepared 9×13-inch pan. Allow both pans of Rice Krispies treats to cool at room temperature for about 30 minutes.
- While the cereal treats are cooling, allow the vanilla bean ice cream to soften slightly at room temperature for 10-15 minutes, making it easier to spread. Scoop a thin layer of ice cream (approximately 1 inch thick) evenly over one pan of the cooled Rice Krispies treats. Work quickly to spread and press it into a smooth, even layer. A thicker ice cream layer will make the finished bars too hard to bite into.
- Using the parchment paper overhang, carefully lift the second block of Rice Krispies treats out of its pan. Flip it over and gently place it directly on top of the ice cream layer in the first pan. Press down firmly and evenly across the entire surface to ensure the layers adhere well. Carefully peel off the parchment paper from the top layer.
- Cover the assembled ice cream sandwich tightly with plastic wrap or aluminum foil. Transfer it to the freezer and allow it to freeze until completely solid, which will take approximately 4-8 hours, or ideally overnight, to prevent a messy outcome when cutting.
- Once thoroughly frozen, use the parchment paper overhang to lift the entire ice cream sandwich block onto a cutting board. For clean, precise cuts, use a very sharp knife that has been run under hot water and thoroughly dried before each slice. Cut the block into individual bars of your desired size. If the bars seem too hard to cut, let them sit at room temperature for 5-10 minutes to soften slightly. Promptly return any uneaten bars to the freezer and cover them tightly to maintain their freshness and texture.
Recipe Notes
Note 1: For the softest and chewiest bars, always use fresh miniature marshmallows. Avoid cooking them for too long or on high heat, as this will cause the sugar to crystallize and result in firm, hard bars, especially after freezing.
Note 2: While plain Rice Krispies are traditional, feel free to get creative! Try using Cocoa Krispies for a chocolatey base, or Fruity Pebbles for a colorful, sweet twist. If opting for Cocoa Krispies, chocolate ice cream makes an excellent complementary filling!
Storage: To keep your ice cream sandwiches at their best, wrap each individual bar tightly in plastic wrap or foil. Store them in an airtight container in the freezer. They are best enjoyed within one week for optimal texture and flavor.
Nutrition Information
The following nutrition information is an approximation and should be used as a general guide.
- Serving: 1 serving
- Calories: 452 kcal
- Carbohydrates: 66g
- Protein: 6g
- Fat: 19g
- Saturated Fat: 12g
- Polyunsaturated Fat: 0.2g
- Monounsaturated Fat: 1.3g
- Cholesterol: 102mg
- Sodium: 306mg
- Potassium: 213mg
- Fiber: 0.5g
- Sugar: 43g
- Vitamin A: 966IU
- Calcium: 106mg
- Iron: 0.5mg
Nutrition information is automatically calculated and should only be used as an approximation. Individual results may vary based on exact ingredients and preparation methods.