
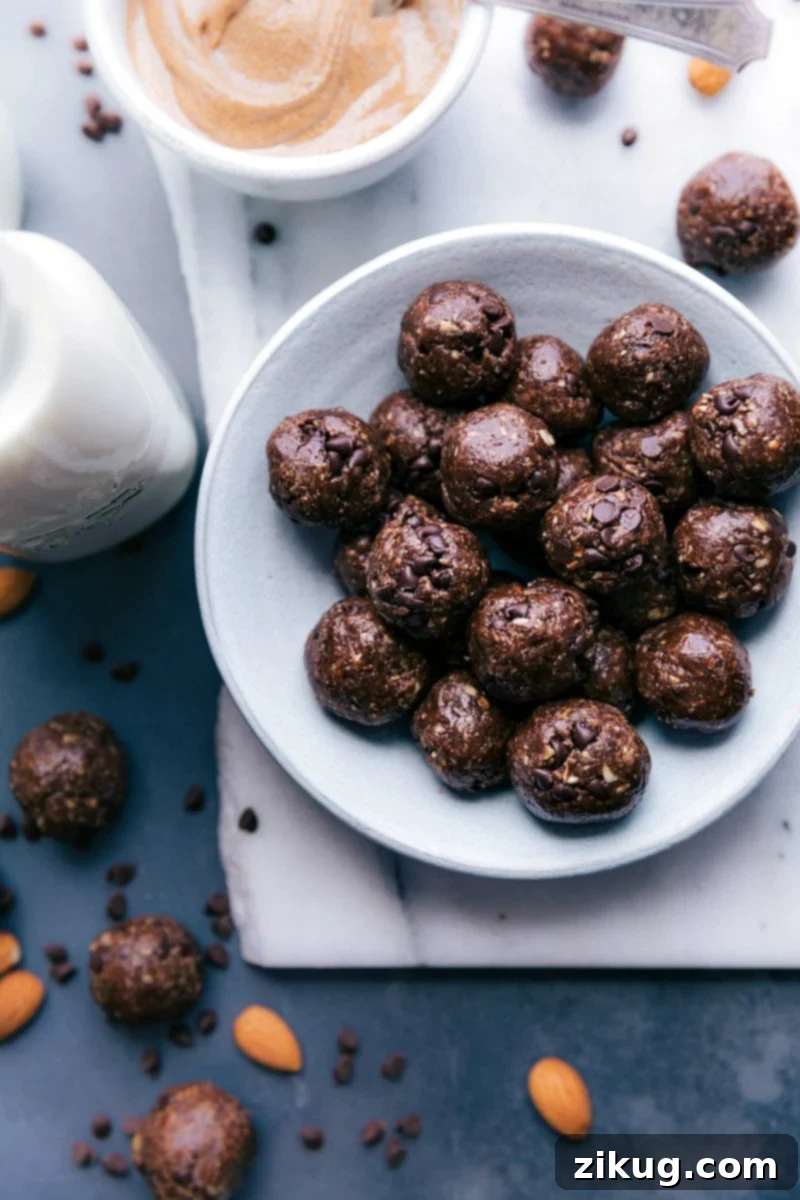
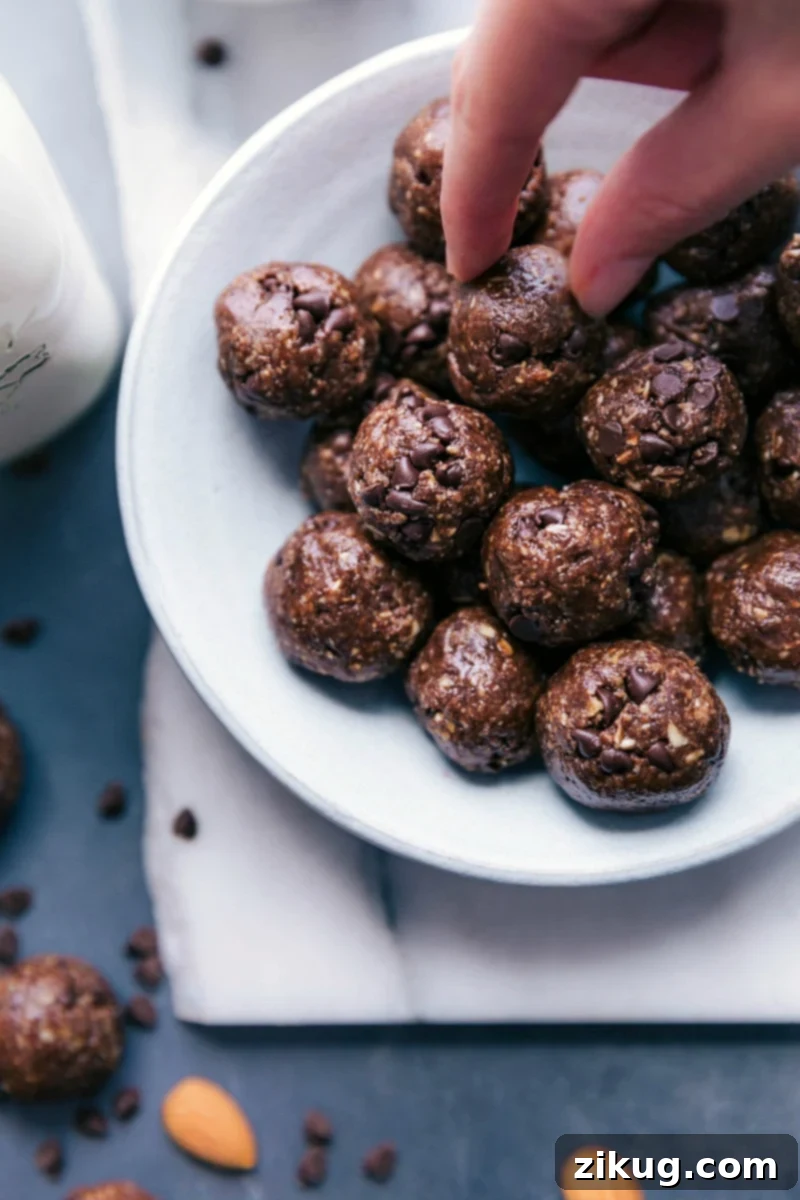
Chocolate Protein Balls are your new go-to healthy snack! These rich, nutty, and incredibly satisfying energy bites come together swiftly with only a handful of wholesome ingredients. Perfect for a quick energy boost, a post-workout treat, or a guilt-free dessert, you’ll find yourself making these delicious protein balls every week.
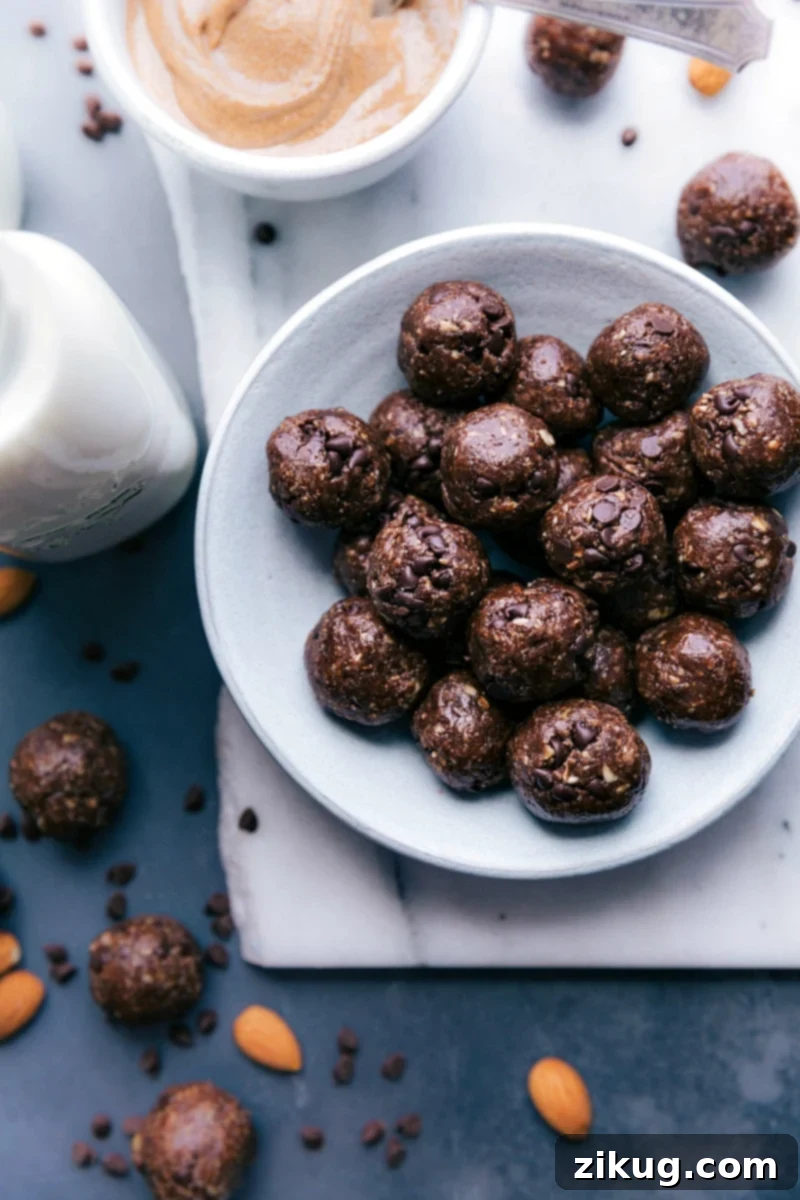
Irresistible Chocolate Protein Balls: Your Perfect Healthy Snack
Searching for a snack that satisfies your sweet tooth while fueling your body? Look no further than these incredible chocolate protein balls. This recipe is an absolute favorite for a reason: they taste like a decadent cocoa-roasted almond treat with just the right amount of natural sweetness. Beyond their irresistible flavor, they are remarkably quick to prepare, requiring only seven simple ingredients. Their ease of creation makes them ideal for busy schedules, whether you’re meal prepping for the week or need a last-minute energy boost.
With such a minimal ingredient list, the quality of each component truly shines through. Choosing the right almonds, a superior almond butter, and the perfect cocoa powder can elevate these protein balls from good to absolutely extraordinary. Below, we’ll delve into my top recommendations for each ingredient, ensuring your homemade chocolate protein balls are nothing short of spectacular.
Key Ingredients for the Best Chocolate Protein Balls
Crafting the perfect chocolate protein ball begins with selecting high-quality ingredients. Each component plays a vital role in both flavor and texture. Here’s a closer look at what you’ll need and why certain choices make a big difference:
- Almonds: For the most profound flavor, always opt for roasted almonds. They add a depth of nutty goodness without any extra effort on your part to toast them. My preference leans towards dry roasted and lightly salted almonds, which introduce a subtle savory note that beautifully complements the chocolate and sweetness. If your almonds are unsalted, remember to add a tiny pinch of salt to the mixture later to balance the flavors.
- Almond Butter: This ingredient is a cornerstone of our protein balls, contributing healthy fats, additional protein, and a creamy texture that helps bind everything together. The type of almond butter you choose can significantly impact the final taste. We’ll explore this further in a dedicated section below.
- Honey: As a natural sweetener, honey not only provides a pleasant taste but also acts as a crucial binding agent for the dough. Its natural stickiness helps hold the balls together and adds a wonderful subtle flavor that pairs beautifully with cocoa and almond.
- Vanilla Extract: While not strictly essential if you don’t have it on hand, a good quality vanilla extract adds a complex aromatic layer that enhances the overall chocolate and nutty flavors. It’s a subtle addition that makes a noticeable difference in richness.
- Dutch Process Cocoa Powder: This is where the magic truly happens for the chocolate flavor! Unlike natural cocoa powder, Dutch process cocoa is alkalized, which gives it a darker color and a smoother, less bitter, and more intensely deep chocolate taste. We’ll dive deeper into why this specific type is recommended below.
- Oats: Old-fashioned rolled oats or quick oats are both excellent choices for this recipe. They provide structure, fiber, and a wholesome base for the protein balls. Oats are known for their sustained energy release, making these balls a truly effective energy bite.
- Miniature Dark Chocolate Chips: While milk or semi-sweet chocolate chips can be used, miniature dark chocolate chips are highly recommended. Dark chocolate is not only richer in flavor but also offers significant health benefits. It’s packed with essential fats your body needs and serves as a powerful source of antioxidants (source). The “mini” size ensures an even distribution of chocolatey goodness throughout each bite.
Quick Tip: Balancing Flavor with Salt
If you’re using unsalted almonds and unsalted almond butter, a pinch or two of fine sea salt can dramatically enhance the flavors in these chocolate protein balls. Salt helps to bring out the sweetness of the honey and the richness of the chocolate, creating a more balanced and delicious treat.
The Secret to Success: Using a Quality Almond Butter
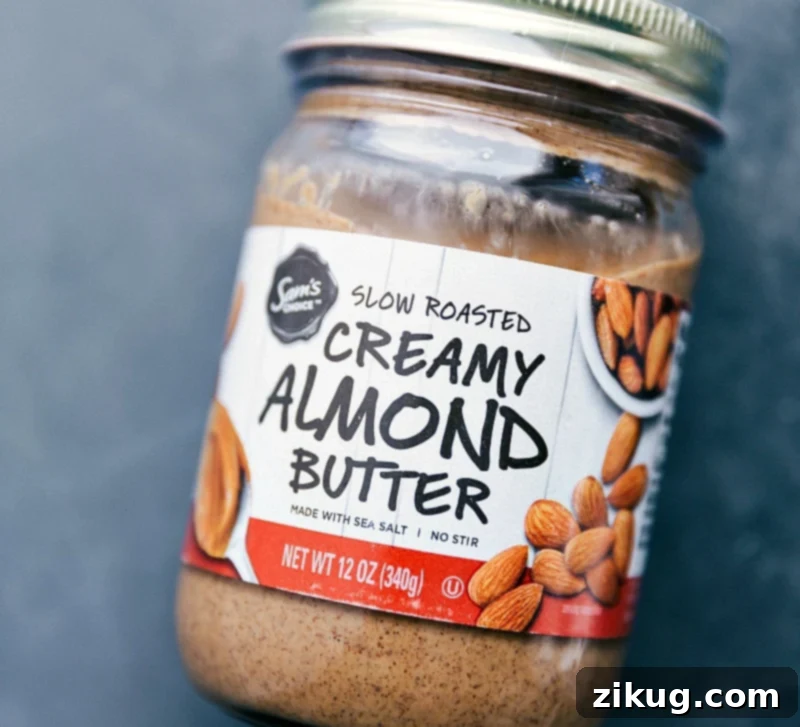
The almond butter you choose is more than just a binder; it’s a major flavor contributor to these protein balls. This healthy nut butter adds not only protein and healthy fats but also dictates a significant part of the overall taste profile. For the best results, I strongly recommend using a **slow-roasted and lightly salted almond butter** – specifically, one that you genuinely enjoy eating straight from the jar.
Think about it: if you don’t find the almond butter appealing on its own, it’s unlikely to miraculously improve the flavor of your chocolate protein balls. A good quality almond butter will have a rich, deep nutty taste that complements the cocoa and honey beautifully. Avoid overly processed, sugary almond butters, as they can overpower the natural goodness of the other ingredients. Look for brands with minimal ingredients, ideally just almonds and perhaps a touch of salt. The natural oils in a high-quality almond butter also contribute to the perfect, pliable texture of the dough, making it easier to mix and roll.
Unlocking Deep Chocolate Flavor with Dutch Process Cocoa Powder
One of the distinctive ingredients that truly sets these chocolate protein balls apart is the choice of **cocoa powder**. While natural or plain cocoa powder works in many recipes, for these protein balls, I highly recommend using **Dutch-process cocoa powder**. The difference is profound.
Dutch-process cocoa powder has been treated with an alkalizing agent to reduce its acidity. This process results in a cocoa powder that is darker in color, smoother in flavor, and less bitter than natural cocoa. It delivers a much more robust and intensely deep chocolate flavor, creating a luxurious taste that natural cocoa powder simply can’t match in this recipe. Using regular cocoa powder will not only yield a less flavorful result but can also lead to a drier, more crumbly texture in your protein balls. For those wondering, Hershey’s “Special Dark”® cocoa powder is a widely available and excellent example of a Dutch-process cocoa powder that you can readily find at most grocery stores.
Mastering the Blend: Oats & Almonds for Optimal Texture
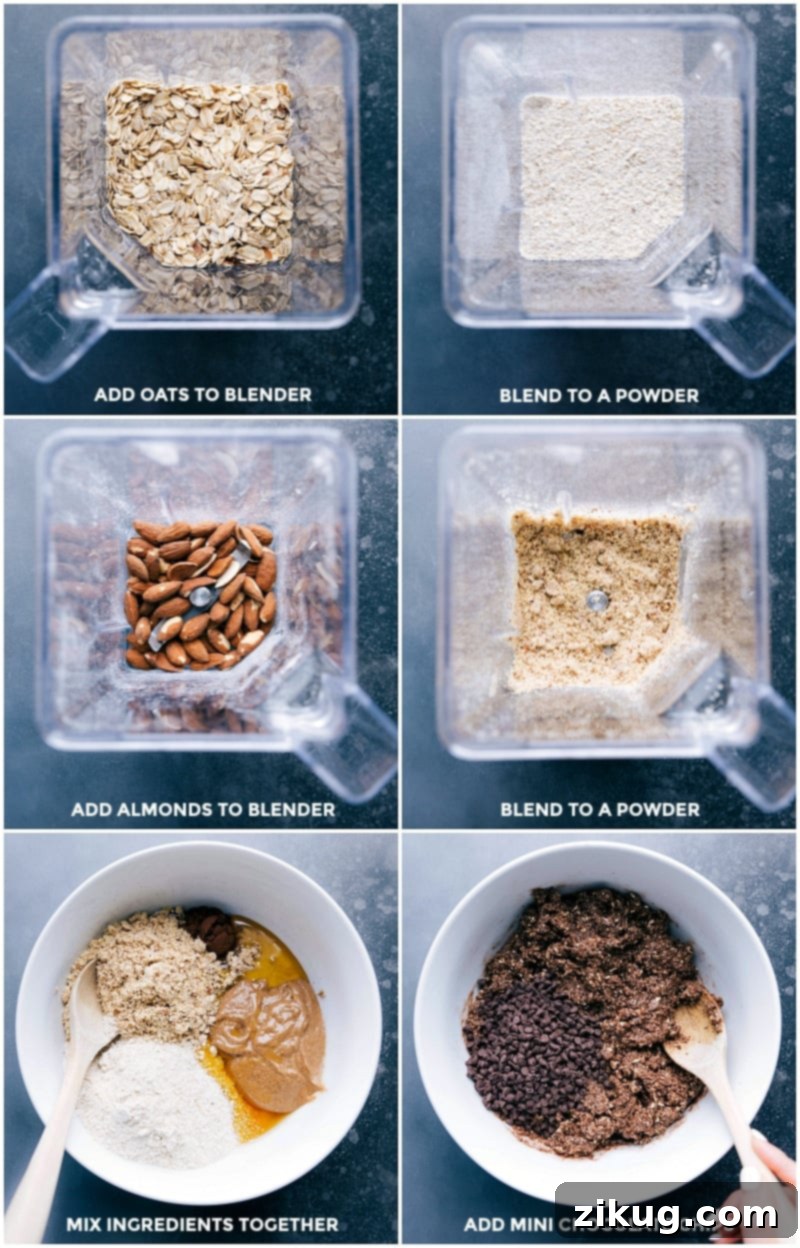
Achieving the right texture for your chocolate protein balls starts with properly processing the oats and almonds. You will need a **high-powered blender** or a **food processor** to quickly pulse these ingredients into a fine, flour-like consistency. This step is crucial for the overall smoothness and bind of your protein balls.
When blending the oats, aim for a fine powder. It should resemble flour, not oatmeal. Similarly, with the almonds, the goal is a fine meal. Exercise caution and precision here: it’s very easy to over-process almonds. If blended for too long, the natural oils will release, and they will quickly transform from a coarse flour into almond butter. We want them to remain a dry, flour-like consistency to absorb moisture and provide structure. I recommend using a pulse-and-stir technique: pulse for a few seconds, then stop, stir the mixture, and repeat until the desired fine powder has formed. This prevents over-processing and ensures a consistent texture.
Mixing the Dough: Achieving the Ideal Consistency
Once your dry ingredients are prepped, it’s time to bring everything together. The dough for these chocolate protein balls is naturally thick and sticky, which is exactly what we want for perfectly formed, chewy bites. For ease and efficiency, an electric hand mixer is an excellent tool for combining all the ingredients thoroughly. A stand mixer, equipped with a paddle attachment, also works wonderfully and can save your arms some effort.
If you’re mixing by hand with a sturdy wooden spoon, be prepared for a bit of a workout! The mixture will be quite dense. In this case, you may find it helpful to switch to using your hands to knead the mixture in the final stages. This hands-on approach ensures all ingredients are well incorporated and helps the dough come together nicely into a cohesive, pliable mass. Don’t be afraid to get your hands a little sticky – it’s part of the process for these delightful homemade treats!
Adjusting Dough Consistency: A Pro Tip
The exact amount of honey or oats needed can sometimes vary slightly depending on the specific brand and consistency of your almond butter, as well as the humidity. If your dough feels too wet and isn’t holding its shape, gradually add a bit more of the finely ground oats (pulse extra oats in your blender/food processor). Conversely, if the mixture is too dry and crumbly, struggling to come together, add an additional teaspoon or two of almond butter or honey until it reaches the desired pliable, sticky consistency.
The Health Benefits of These Delicious Bites
Beyond their amazing taste and convenience, these chocolate protein balls offer a myriad of health benefits, making them a smart choice for anyone looking for a nutritious snack. Each ingredient contributes to a wholesome profile:
- Sustained Energy: The combination of complex carbohydrates from oats and healthy fats from almonds and almond butter provides a steady release of energy, preventing sugar crashes.
- Rich in Fiber: Oats and almonds are excellent sources of dietary fiber, which supports digestive health and helps you feel fuller for longer.
- Good Source of Protein: Almonds and almond butter contribute plant-based protein, essential for muscle repair and growth, especially beneficial as a post-workout snack.
- Antioxidant Power: Dark chocolate and cocoa powder are packed with antioxidants, which help combat free radicals in the body and contribute to overall well-being.
- Wholesome Fats: Almonds and almond butter provide monounsaturated and polyunsaturated fats, which are crucial for heart health and nutrient absorption.
- Natural Sweetness: Using honey as the primary sweetener avoids refined sugars, offering a more natural and less processed option.
Get Creative: Variations & Customization Ideas
While this classic chocolate protein ball recipe is perfect as is, it also serves as a fantastic base for experimentation! Feel free to customize them to your taste or dietary needs:
- Add Seeds: Boost the nutritional profile with a tablespoon or two of chia seeds, flax seeds (ground), or hemp hearts. These add extra fiber, omega-3s, and a delightful texture.
- Coconut Love: Fold in a quarter cup of shredded unsweetened coconut for a tropical twist and added chewiness.
- Spice it Up: A pinch of cinnamon, nutmeg, or even a tiny dash of cayenne pepper (for a Mexican hot chocolate vibe) can add an interesting depth of flavor.
- Nut Butter Alternatives: While almond butter is recommended, you can experiment with other nut butters like cashew butter or peanut butter for different flavor profiles. Just be mindful of consistency adjustments.
- Extract Experiments: Beyond vanilla, try a drop of peppermint extract for mint chocolate protein balls, or a hint of orange extract for a citrusy twist.
- Protein Powder Boost: For an extra protein punch, you can mix in a scoop of your favorite chocolate or unflavored protein powder. You might need to adjust the wet ingredients slightly to maintain the right dough consistency.
Storage Tips for Freshness and Convenience
One of the best aspects of these chocolate protein balls is how well they store, making them ideal for meal prepping and having healthy snacks readily available throughout the week. Proper storage ensures they remain fresh, delicious, and safe to eat.
- Room Temperature: If you plan to consume them within a day or two, you can store your protein balls in an airtight container at room temperature. Ensure your kitchen isn’t overly warm, as chocolate chips might soften.
- Refrigerator (Recommended): For optimal freshness and to extend their shelf life, store the protein balls in an airtight container in the refrigerator for up to 1-2 weeks. Chilling them also helps them firm up, providing a more satisfying chew.
- Freezer (Long-Term Storage): These protein balls freeze beautifully! Place them in a single layer on a parchment-lined baking sheet to flash freeze for about an hour. Once firm, transfer them to a freezer-safe airtight container or a resealable freezer bag. They will keep well in the freezer for up to 2-3 months. When you’re ready to enjoy, simply grab one and let it thaw for a few minutes at room temperature, or enjoy it chilled directly from the freezer for a firmer texture.
More Delicious & Healthy Snack Ideas
If you loved these chocolate protein balls, be sure to explore more of our favorite easy-to-make, wholesome snack recipes:
- Classic No-Bake Energy Bites
- Easy homemade Granola
- Fudgy Dark Chocolate Granola Bars with Coconut Oil
- No-bake Healthy Breakfast Cookies
- Healthy Greek Yogurt Blueberry Muffins
Chocolate Protein Balls
Chelsea Lords
With just 7 clean, nutritious ingredients and a fast prep time, these Chocolate Protein Balls are destined to become a weekly meal prep favorite, perfect for a healthy energy boost.
15 minutes
20 minutes
35 minutes
30 balls
Equipment
-
Blender or food processor
-
Hand mixer (optional, but recommended)
-
Large mixing bowl
Ingredients
- 1-1/2 cups old-fashioned oats or quick oats
- 1/2 cup dry roasted and lightly salted almonds
- 1-1/2 tablespoons Dutch process cocoa powder
- 1 teaspoon vanilla extract
- 6 tablespoons honey (divided, plus more if needed)
- 1/2 cup almond butter
- 1/2 cup mini dark chocolate chips
- Pinch of sea salt (optional, if using unsalted almonds/almond butter)
Instructions
-
Prepare the Oats: In a high-powered blender or food processor, add the old-fashioned or quick oats. Pulse or blend them until they reach a fine, flour-like consistency. You may need to stop and stir the oats periodically to ensure they are all evenly blended. Transfer the ground oats to a large mixing bowl.
-
Process the Almonds: Next, add the dry roasted almonds to the same processor or blender. Pulse until they also resemble a fine flour. Be very careful not to over-process the almonds, as they will quickly turn into almond butter due to their natural oils. Aim for a dry, powdery texture. Add the ground almonds to the bowl with the oats. (Note: The ingredient measurements for oats and almonds are for their whole form; there’s no need to re-measure after grinding.)
-
Combine Wet and Dry Ingredients: To the bowl containing the ground oats and almonds, add the Dutch-process cocoa powder, vanilla extract, 4 tablespoons of honey, almond butter, and mini dark chocolate chips. If your almonds or almond butter are unsalted, now is the time to add a pinch of sea salt to enhance the flavors. Using an electric hand mixer is highly recommended for this step, as the mixture will be quite thick. Mix until well combined, then use your hands to knead the mixture until a uniform, thick dough forms. This kneading ensures everything is perfectly incorporated.
-
Adjust Consistency (if needed): If the dough feels too dry and crumbly, add the remaining 2 tablespoons of honey, one tablespoon at a time, mixing until the desired consistency is reached. Often, this extra honey is needed, but occasionally, the almond butter might be wet enough that it’s not required. If, conversely, the dough is too wet or sticky, add a little more finely ground oats to absorb the excess moisture until it’s easy to handle.
-
Roll the Balls: Take approximately 2 teaspoons of the dough mixture for each ball and roll it between your palms to form smooth, uniform spheres. This recipe typically yields around 30 delicious protein balls.
-
Chill and Enjoy: For best results, place the finished chocolate protein balls on a plate or tray and refrigerate for at least 20 minutes to allow them to firm up. Once chilled, they are ready to enjoy!
Recipe Notes
Storage: Store your chocolate protein balls in an airtight container. They can be kept in the fridge for up to 1-2 weeks, in the freezer for up to 2-3 months, or at room temperature for 1-2 days (if your environment is cool and dry).
Nutrition Information (Approximate)
Serving: 1 ball | Calories: 57 kcal | Carbohydrates: 6.5g | Protein: 1.1g | Fat: 2g | Sodium: 0.8mg | Fiber: 0.7g | Sugar: 4.3g
Nutrition information is automatically calculated and should be used as an approximation. Actual values may vary based on specific ingredients and preparation methods.
We hope you enjoy making and indulging in these fantastic Chocolate Protein Balls! They are a testament to how simple, clean ingredients can create something truly delicious and nourishing. Don’t forget to share your creations and comments below!