
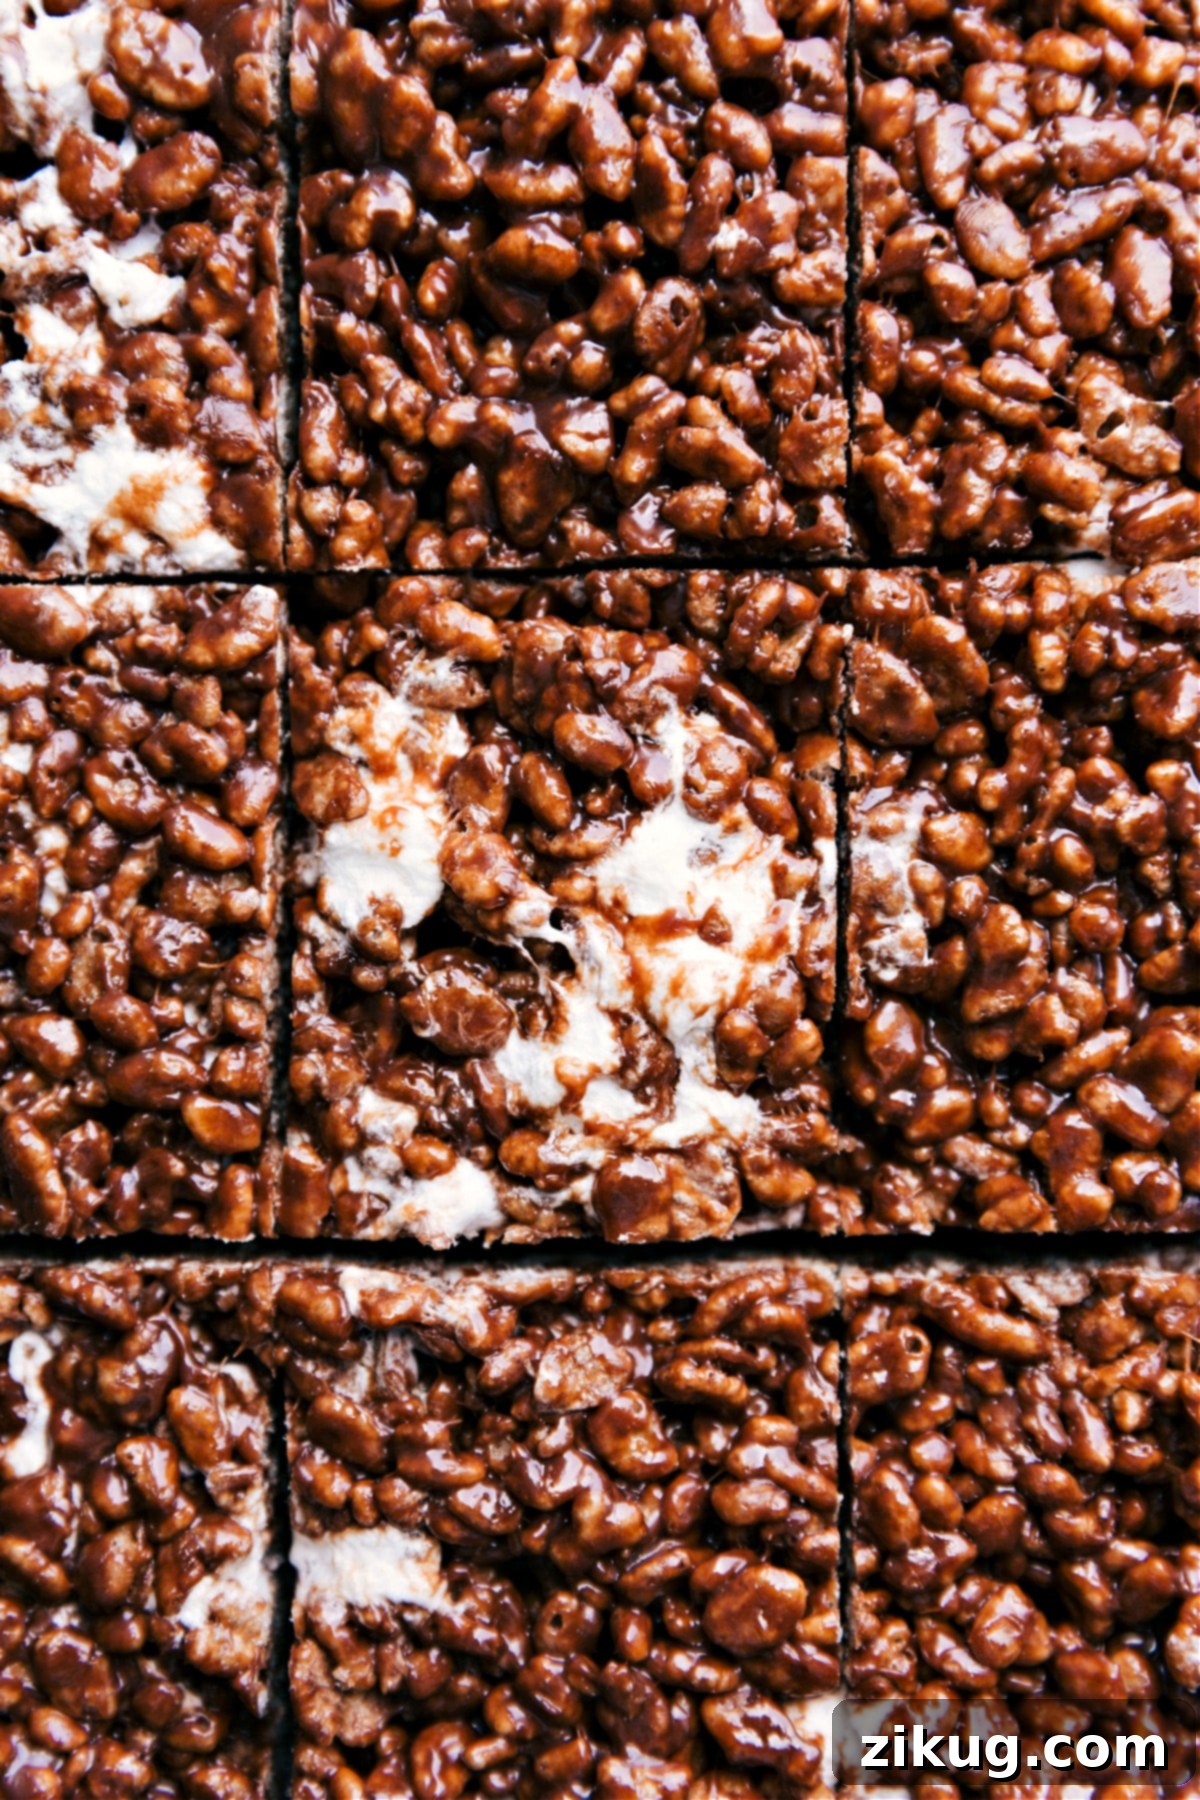
Chocolate Rice Krispie Treats are a timeless classic, reimagined for ultimate gooeyness and rich chocolate flavor! This incredibly simple, no-bake recipe uses cocoa-coated cereal and generous amounts of chocolate, delivering a delightful dessert ready in under 30 minutes. Perfect for parties, lunchboxes, or a nostalgic treat, these squares are sure to become a family favorite.
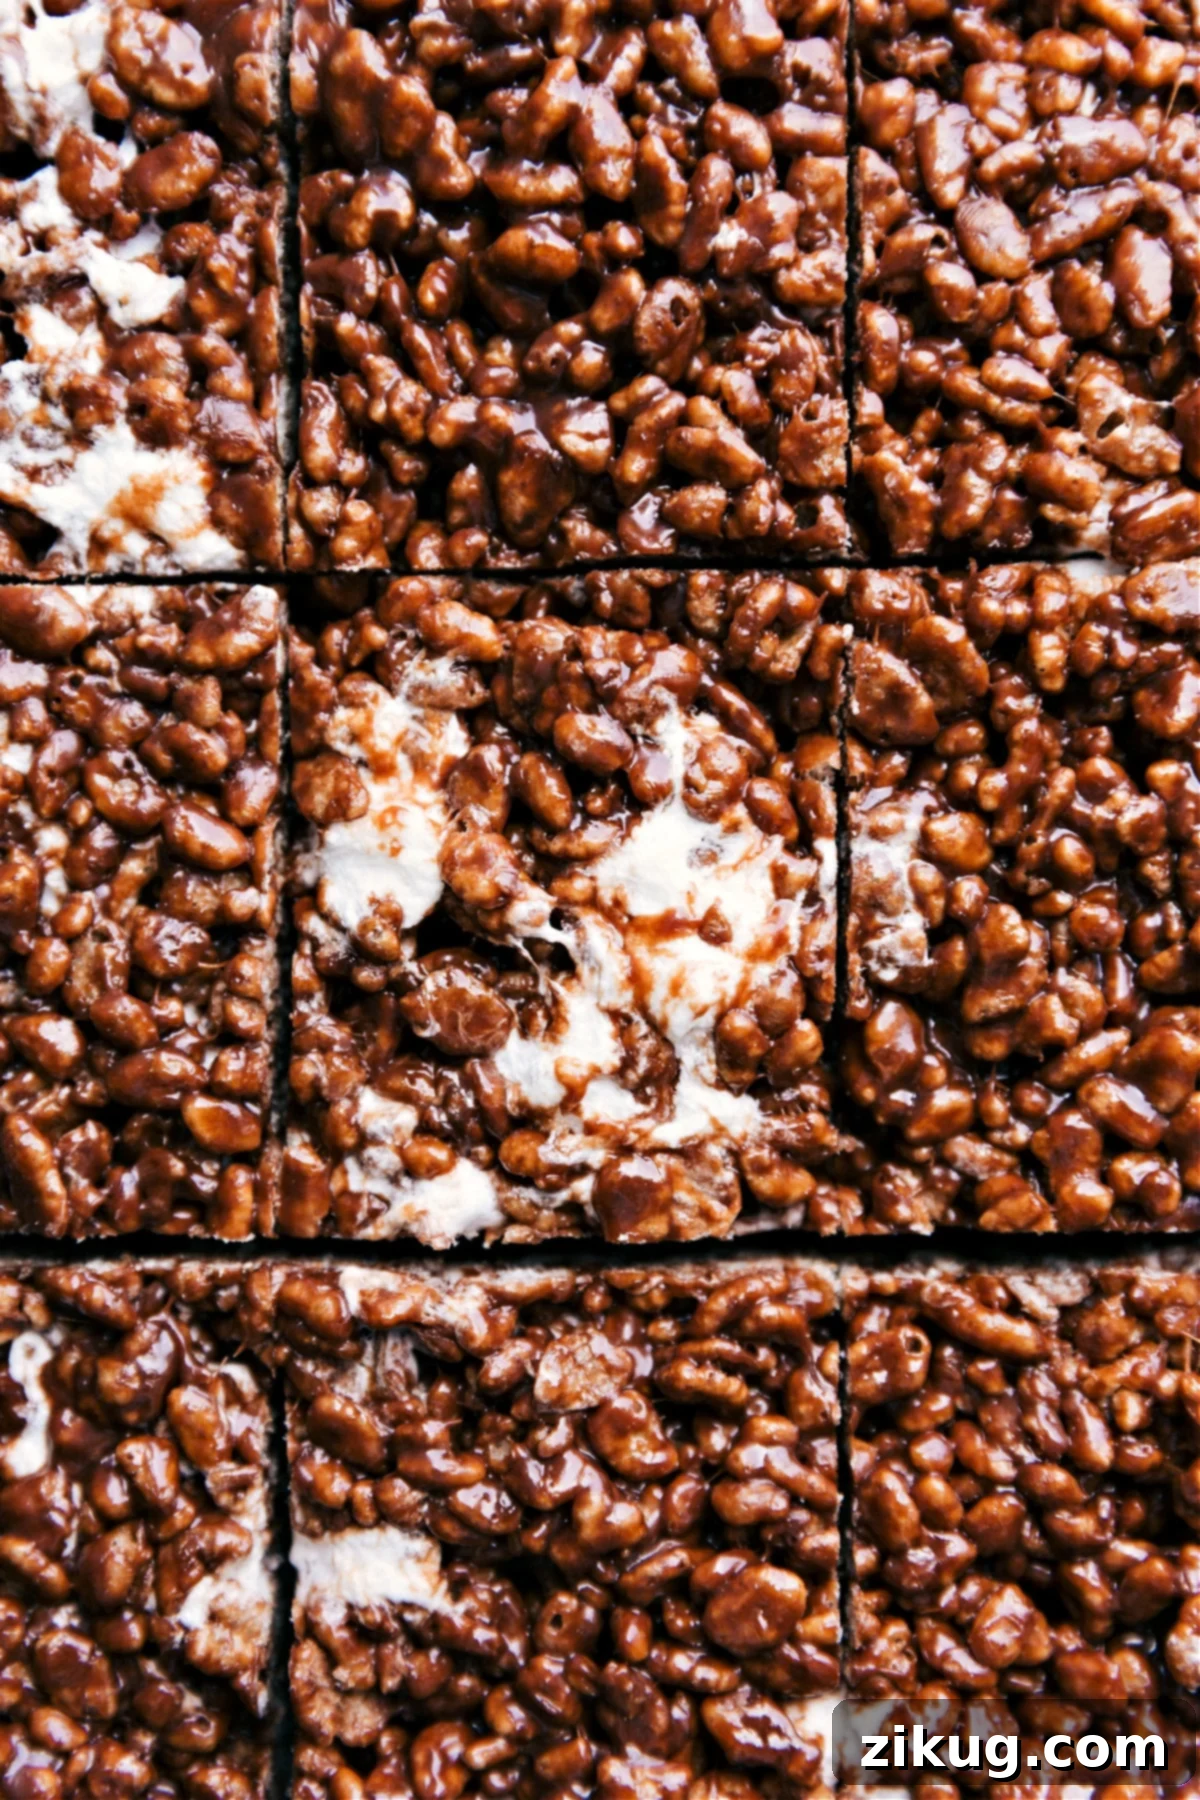
The Best Gooey Chocolate Rice Krispie Treats: A No-Bake Delight
There’s something universally comforting about a classic Rice Krispie Treat, but when you introduce the magic of chocolate, you elevate it to an entirely new level. These aren’t just any chocolate Rice Krispie Treats; they are the ultimate version, guaranteed to be extra gooey, wonderfully chewy, and bursting with deep chocolate flavor. Inspired by cherished childhood memories of my mom’s kitchen, this recipe is designed to recreate that perfect balance of sweetness and cocoa, making it an irresistible indulgence for all ages.
What makes these treats truly special is their triple-chocolate threat: a foundation of rich Cocoa Krispies® cereal, unsweetened cocoa powder woven into the marshmallow mixture, and a generous scattering of quality chocolate chips. Because when it comes to chocolate, sometimes, more truly is more! This combination creates a depth of flavor that a single chocolate element simply can’t achieve, offering a sophisticated twist on a beloved simple dessert.
Whether you’re looking for a quick after-school snack, a crowd-pleasing party dessert, or a sweet treat to satisfy your chocolate cravings, these no-bake wonders are your answer. They require minimal effort and time, making them a fantastic option for busy days or impromptu gatherings. Get ready to experience the perfect blend of crispy, chewy, and intensely chocolatey in every single bite.
Essential Ingredients for Perfect Chocolate Rice Krispie Treats
Creating these delightful chocolate Rice Krispie Treats doesn’t require a long list of exotic items. In fact, you’ll likely find most of these staples already in your pantry. The key lies in selecting fresh, good-quality ingredients to ensure the best flavor and texture. Here’s a closer look at what you’ll need and why each component is crucial:
- Unsalted Butter: Starting with unsalted butter gives you complete control over the salt content in your treats. This allows you to perfectly balance the sweetness and enhance the chocolate flavor. Opt for a good quality butter for the best overall taste.
- Miniature Marshmallows: The fresher your marshmallows, the softer and gooier your treats will be! Always check the expiry date and feel the bag for softness before purchasing. Old, stale marshmallows can lead to stiff, hard treats, so don’t skimp on freshness here. We’ll use most of them melted into the butter, and a portion reserved to stir in at the end for extra pockets of gooeyness.
- Unsweetened Cocoa Powder: This is where a significant part of your deep chocolate flavor comes from. Regular unsweetened cocoa powder is ideal, as its acidity reacts with baking soda (though not in this no-bake recipe, it has a brighter, more intense chocolate flavor profile). Avoid Dutch-process cocoa powder for this recipe, as it has been alkalized, leading to a mellower, darker flavor that might not yield the desired intensity here.
- Quality Chocolate Chips: Using good-quality chocolate chips truly makes a difference in the final taste and texture. Brands like Ghirardelli® offer superior melting properties and flavor. I personally love semi-sweet chocolate chips for a balanced sweetness, but milk chocolate chips can also be used if you prefer a sweeter, creamier chocolate profile. They melt beautifully into the warm marshmallow mixture, adding another layer of rich chocolate.
- Cocoa Krispies® Cereal: This is the star of the show for that undeniable chocolate crunch. Cocoa Krispies cereal adds a robust chocolate base that traditional Rice Krispies simply can’t replicate for this specific recipe. Its inherent cocoa coating ensures every bite is infused with chocolatey goodness. If you prefer a slightly less intense sweetness, you can use a 50/50 mix of Cocoa Krispies and regular Rice Krispies, as noted in the recipe tips.
- Salt: A pinch of salt might seem counterintuitive in a sweet dessert, but it’s a crucial flavor enhancer. It doesn’t make the treats salty; instead, it cleverly balances the sweetness of the marshmallows and chocolate, bringing out the deeper, more complex notes of the cocoa.
- Pure Vanilla Extract: Vanilla extract is a fantastic complement to chocolate, adding depth and warmth to the overall flavor profile. A good quality pure vanilla extract will elevate the taste, providing a subtle aromatic background that rounds out the rich chocolate notes beautifully.
Gathering these simple ingredients is the first step towards creating an unforgettable batch of homemade Chocolate Rice Krispie Treats!
Step-by-Step Guide: How to Make Gooey Chocolate Rice Krispie Treats
Making these chocolatey delights is incredibly straightforward, requiring no baking and minimal prep time. Follow these simple steps for perfectly gooey and delicious treats every time:
- Prepare Your Pan: First, line a 9×9-inch baking dish with parchment paper, ensuring there’s an overhang on two sides. This overhang will act as handles, making it incredibly easy to lift the entire slab of treats out once set. Lightly spray the parchment paper with nonstick cooking spray to prevent sticking. Measure out your Cocoa Krispies cereal and set it aside—this helps ensure you can add it quickly once the marshmallow mixture is ready.
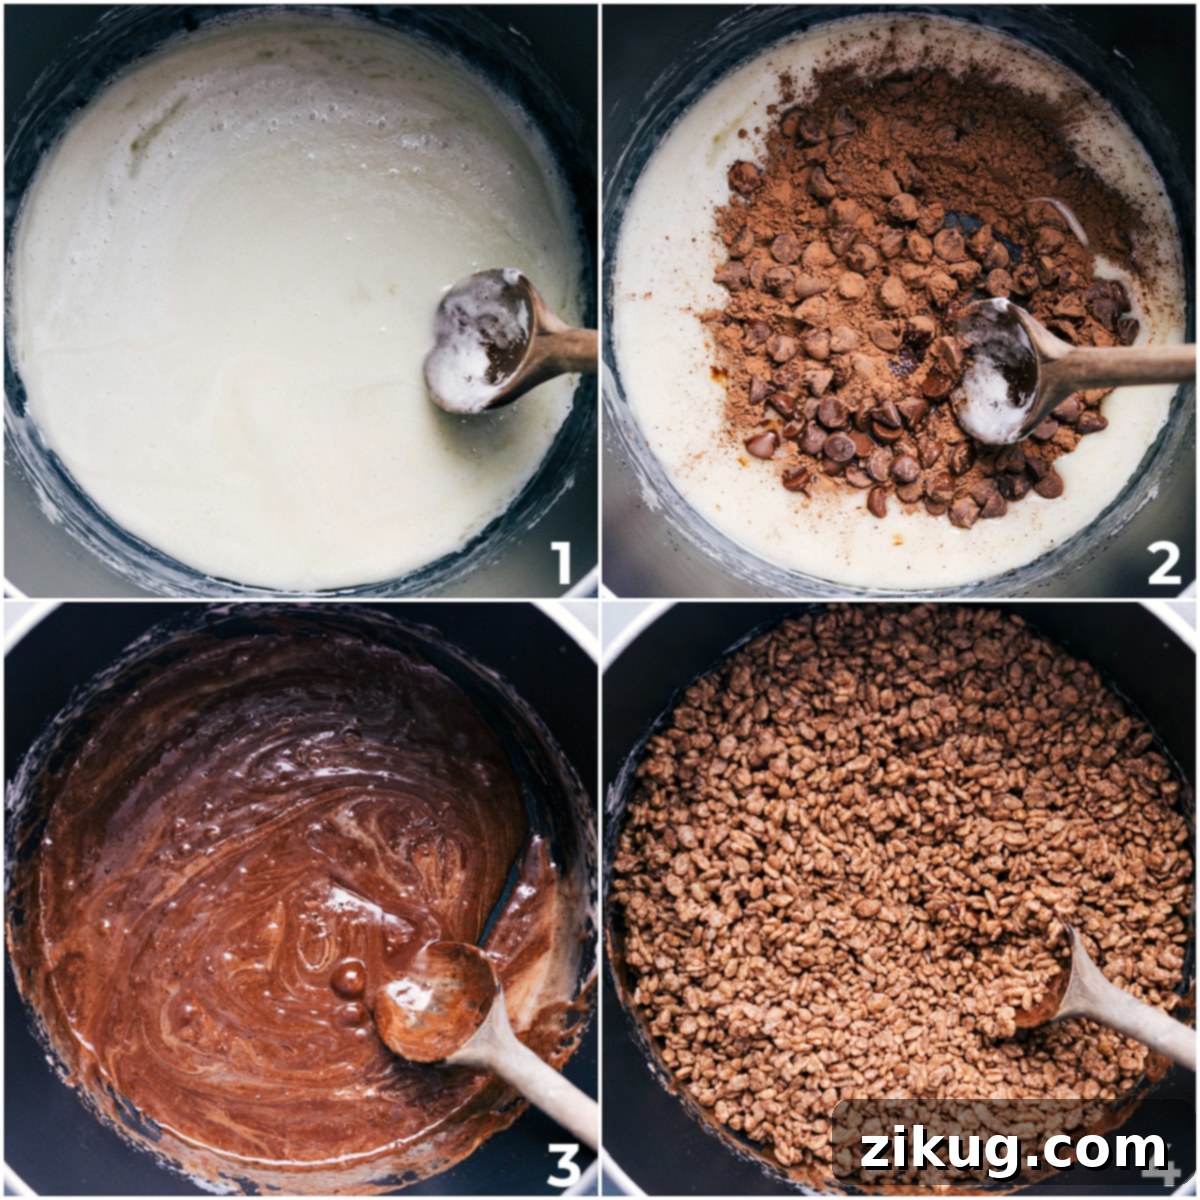
- Melt Butter and Marshmallows: In a large, nonstick pot or Dutch oven, melt the unsalted butter over low heat. It’s crucial to keep the heat low to prevent the butter from browning too quickly and to ensure the marshmallows melt evenly. Once the butter is fully melted, add almost all of the miniature marshmallows to the pot, reserving about 2.5 cups (a generous handful) for later. Stir constantly with a heat-resistant spatula until the marshmallows are completely melted and smooth. This constant stirring prevents scorching and ensures a consistent texture.
- Incorporate Chocolate & Flavorings: Remove the pot from the heat immediately after the marshmallows are melted. This prevents the mixture from overheating and becoming too stiff. Quickly stir in the cocoa powder, chocolate chips, salt, and vanilla extract until everything is well combined and the chocolate chips have melted into the warm marshmallow mixture. The residual heat from the melted marshmallows will be enough to melt the chocolate chips.
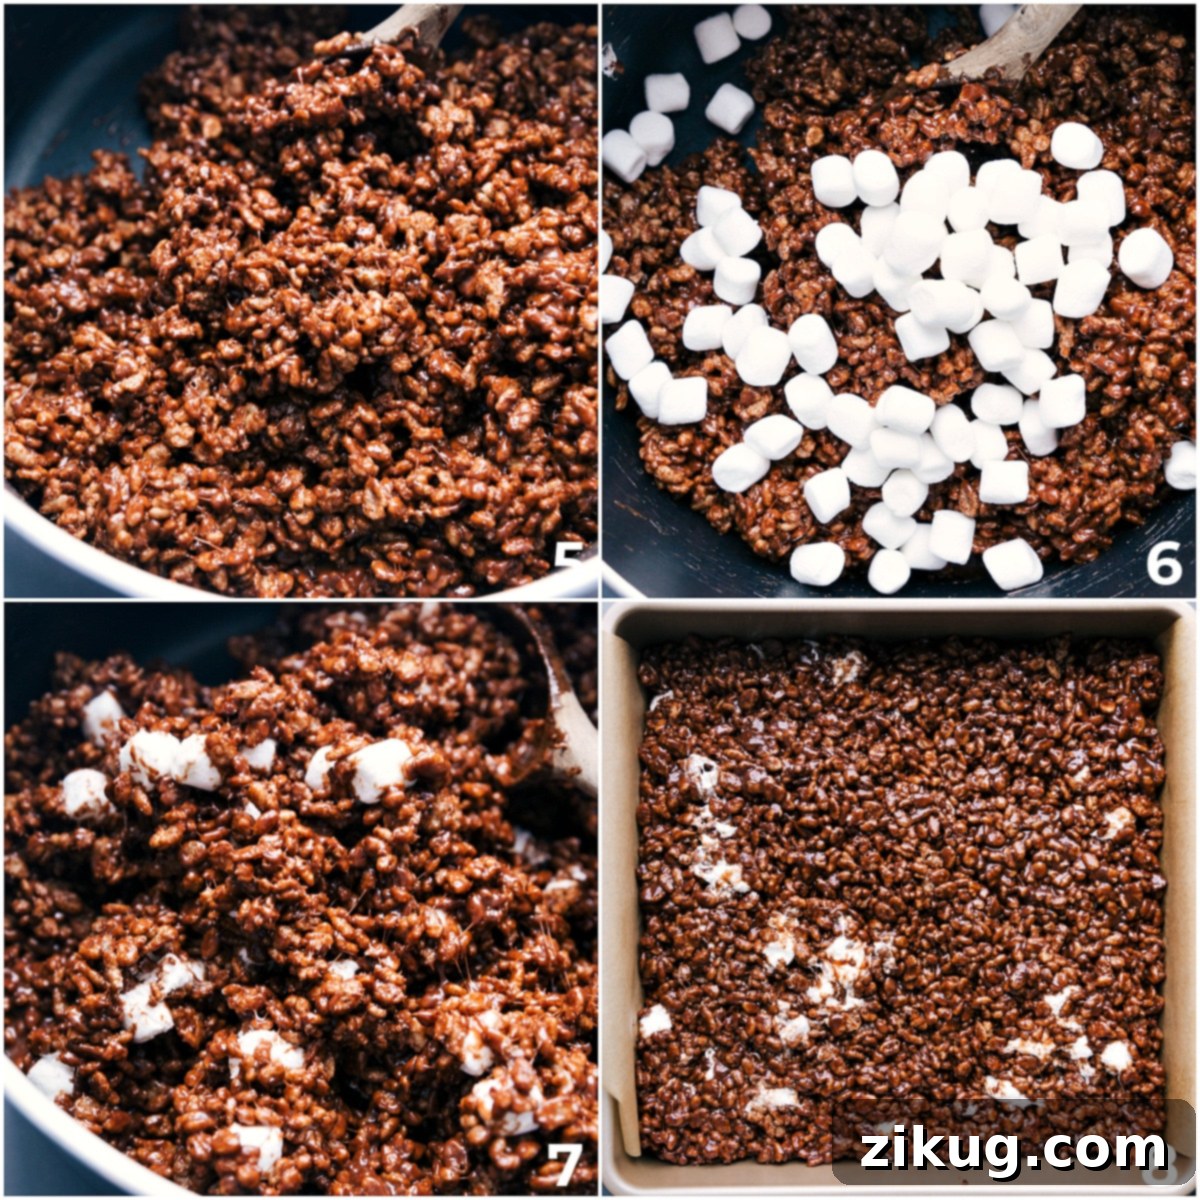
- Add Cereal and Remaining Marshmallows: Now, it’s time for the cereal! Gently but swiftly stir in the Cocoa Krispies cereal until they are evenly coated with the chocolate-marshmallow mixture. Work quickly here, as the mixture will start to set as it cools. Finally, fold in the reserved 2.5 cups of miniature marshmallows. These will remain mostly whole, creating delightful pockets of extra gooey marshmallow throughout your finished treats.
- Press into Pan, Cool, and Cut: Pour the entire mixture into your prepared 9×9-inch pan. Lightly spray your hands or a rubber spatula with nonstick cooking spray to prevent sticking. Gently press the mixture into an even layer in the pan. The key word here is *gently*—avoid pressing too firmly, as this can compress the cereal and result in dense, hard treats instead of soft, chewy ones. Allow the treats to cool and set at room temperature for about 15-20 minutes. Once they are firm enough to handle, use the parchment paper overhang to lift the entire block out of the pan. Place it on a cutting board and cut into squares using a sharp, lightly greased knife.
And just like that, you have a batch of homemade, incredibly delicious Chocolate Rice Krispie Treats ready to enjoy!
Pro-Tips for the Perfect Batch
Achieving that ideal gooey, chewy texture in your Chocolate Rice Krispie Treats is simple with a few expert tricks. Always use the freshest possible miniature marshmallows. The softer they are, the more pliable and delicious your treats will be. Before buying, give the bags a gentle squeeze to find the softest ones, and aim to use them within a few days of opening for optimal results.
Another crucial tip is to be gentle when pressing the mixture into the pan. Many recipes suggest firmly pressing, but this compresses the cereal, making the treats dense and hard. Instead, lightly press the mixture just enough to create an even layer. This delicate touch ensures your treats remain wonderfully soft and gooey, never stiff or crunchy.
Finally, using a nonstick pot and lightly greasing your spatula and hands will make the mixing and pressing process much smoother, preventing frustrating stickiness.
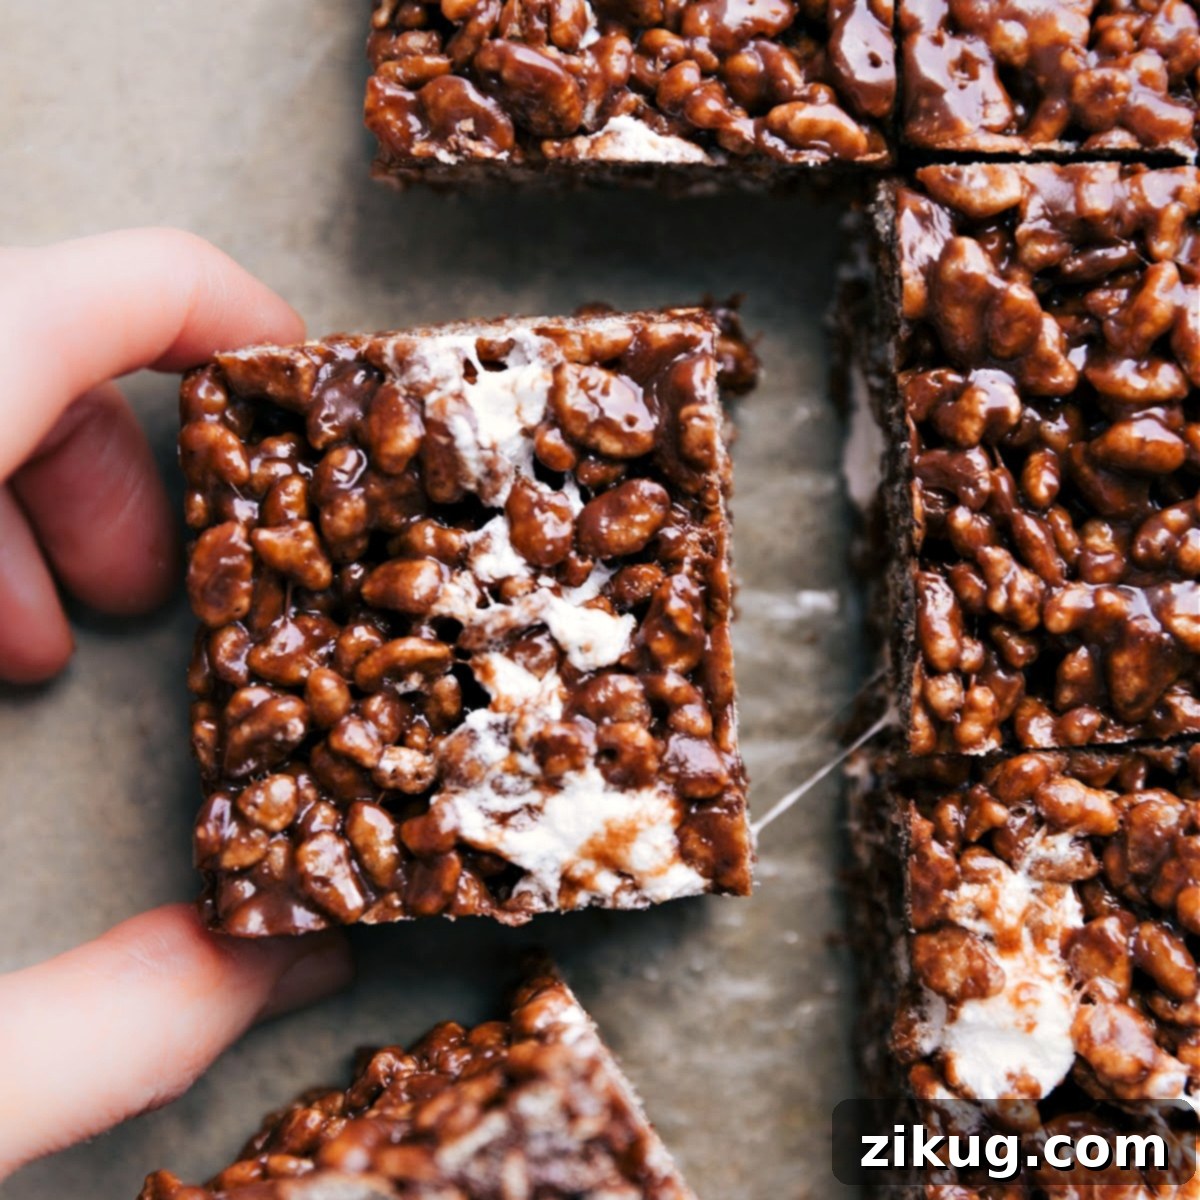
Creative Variations & Customizations
While these Chocolate Rice Krispie Treats are perfect as is, they also serve as a fantastic canvas for your culinary creativity! Here are some ideas to customize them for different tastes and occasions:
- Extra Chocolate Drizzle: For the ultimate chocolate lover, melt an additional 1/2 cup of chocolate chips with a teaspoon of coconut oil and drizzle it over the cooled treats before cutting.
- Sprinkle Fun: Add festive sprinkles to the top of the treats immediately after pressing them into the pan, while the mixture is still warm and sticky. This is perfect for birthdays, holidays, or just adding a pop of color.
- Nutty Crunch: Fold in 1/2 cup of chopped nuts like pecans, walnuts, or almonds along with the cereal for an added layer of texture and flavor.
- Mint Chocolate Twist: Add 1/2 teaspoon of peppermint extract to the melted marshmallow mixture along with the vanilla for a refreshing mint chocolate flavor, especially great during the holidays.
- Peanut Butter Swirl: For a delightful chocolate and peanut butter combination, swirl 1/4 cup of creamy peanut butter into the melted marshmallow mixture before adding the cereal.
- Different Chocolate Types: Experiment with different types of chocolate chips – dark chocolate for a richer, less sweet treat, or white chocolate for a contrast in flavor and color.
- Salted Caramel: Drizzle a homemade or store-bought salted caramel sauce over the cooled treats for a sweet and salty indulgence.
Storage & Freezing Guidelines
These Chocolate Rice Krispie Treats are truly at their peak freshness and gooey perfection on the day they are made. However, if you find yourself with leftovers (a rare occurrence!), proper storage ensures they remain delicious for a little longer.
- Room Temperature Storage: To keep your treats soft and chewy, store any leftovers in an airtight container at room temperature. They will retain their best quality for 1-2 days. After that, they tend to firm up a bit, but are still perfectly edible.
- Freezing (Optional) for Longer Enjoyment: If you want to prepare a batch in advance or save some for later, these treats freeze beautifully!
- To Freeze: Wrap each individual bar tightly in wax paper, then follow with a layer of plastic wrap to prevent freezer burn. Place the wrapped bars in a freezer-safe bag or an airtight container. Freeze for up to six months.
- To Thaw: Simply remove the desired number of bars from the freezer and let them sit at room temperature for about 15-20 minutes. They will quickly return to their soft, chewy texture.
No matter how you choose to store them, these chocolatey delights are always a welcome treat!
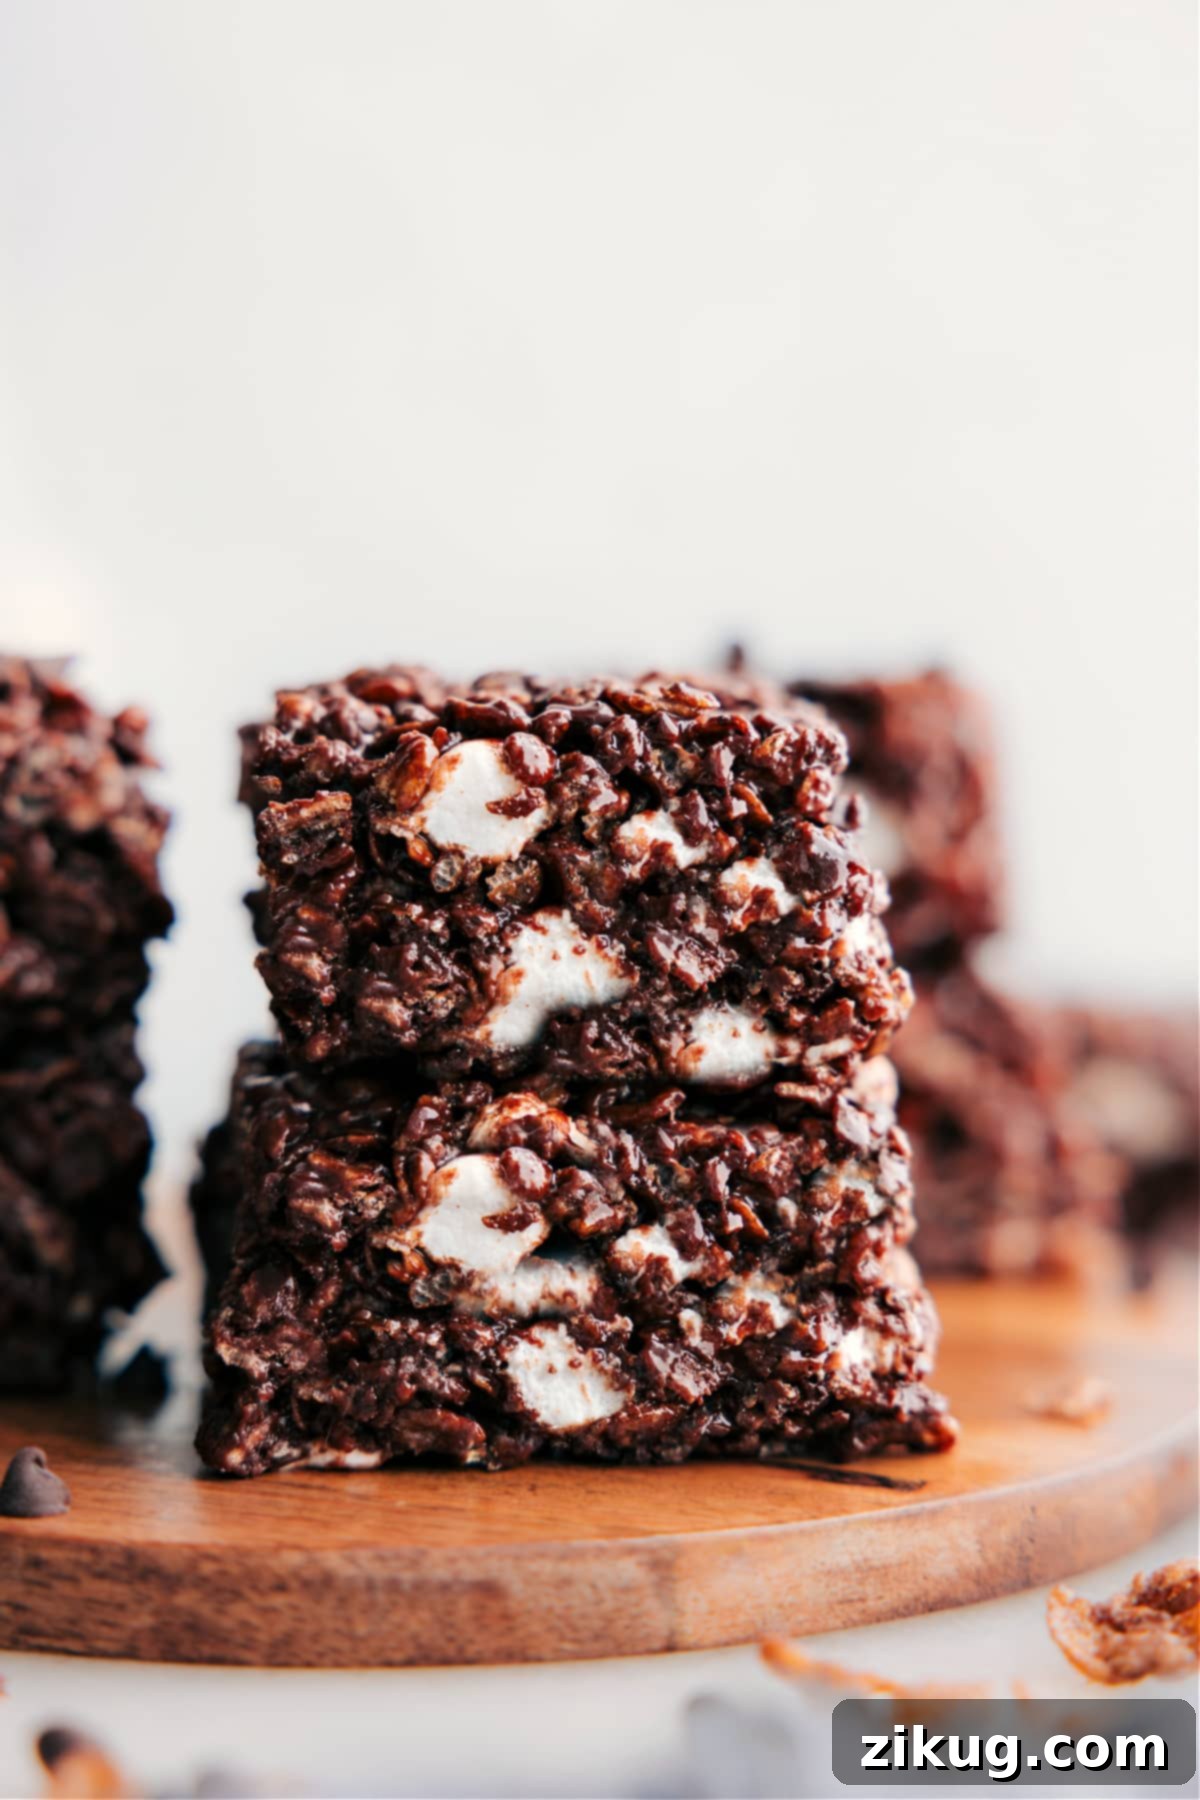
Frequently Asked Questions (FAQ)
Here are some common questions about making and enjoying Chocolate Rice Krispie Treats:
- Why are my treats hard?
The most common reasons for hard Rice Krispie Treats are using stale marshmallows, melting the marshmallows over too high heat (which can caramelize them and make them brittle), or pressing the mixture too firmly into the pan. Always use fresh marshmallows, melt them slowly over low heat, and press gently into the pan.
- Can I use regular Rice Krispies instead of Cocoa Krispies?
Yes, you can, but the flavor will be less intensely chocolatey. If you use regular Rice Krispies, you might want to increase the cocoa powder by an extra tablespoon or two, or add more chocolate chips, to boost the chocolate flavor.
- What kind of chocolate chips are best?
Semi-sweet chocolate chips (like Ghirardelli®) are generally recommended as they provide a balanced sweetness. Milk chocolate chips will make the treats sweeter and creamier, while dark chocolate chips will result in a richer, less sweet treat. Choose according to your preference!
- Can I double the recipe?
Absolutely! If you’re making them for a large crowd, you can easily double the recipe. Use a larger pot and a 9×13-inch baking dish for a thicker treat, or two 9×9-inch pans for a similar thickness.
- How long do these treats last?
For optimal freshness and gooeyness, these treats are best enjoyed within the first 1-2 days when stored in an airtight container at room temperature. They can last up to 4-5 days, but the texture will become firmer.
- Can I add other mix-ins?
Definitely! Feel free to experiment with additions like chopped nuts, mini M&M’s, peanut butter chips, or even a swirl of caramel. Add these along with the cereal for even distribution.
Explore More Delicious Rice Krispie Treat Recipes:
If you loved these chocolatey delights, you might enjoy trying other creative variations of this classic no-bake dessert:
- Fruity Pebbles Rice Krispies Treats: A colorful and fun twist with fruit-flavored crispy rice cereal.
- Peanut Butter Rice Krispies Treats: Indulge in the perfect combination of peanut butter and a luscious chocolate topping.
- Classic Rice Krispies Treats: Go back to basics with the beloved original version – simple, sweet, and perfectly crispy.
- Candy Corn Krispie Treats: A festive and creative treat, decorated to resemble colorful candy corn, perfect for Halloween!
The Ultimate Chocolate Rice Krispie Treats Recipe
Chocolate Rice Krispie Treats
By Chelsea Lords
These Chocolate Rice Krispie Treats are incredibly gooey and bursting with rich chocolate flavor. Made with cocoa cereal, they’re quick, easy, and ready in under 30 minutes with absolutely no baking required. A perfect, comforting dessert for any chocolate lover!
Prep Time: 20 minutes
Set Up Time: 15 minutes
Total Time: 35 minutes
Servings: 12 bars
Equipment
- 9 x 9-inch baking pan (lined with parchment paper)
- Large nonstick pot
Ingredients
- Cooking spray (for pan and hands)
- 6 cups Cocoa Krispies cereal (or half Cocoa Krispies, half regular Rice Krispies for less sweetness)
- 5 tablespoons unsalted butter
- 16 ounces miniature marshmallows, divided (approx. 10 cups)
- 1/4 cup unsweetened cocoa powder
- 3/4 cup chocolate chips (semi-sweet or milk chocolate)
- 1/4 teaspoon salt
- 1 teaspoon pure vanilla extract
Instructions
- Prepare Pan: Line a 9×9-inch baking pan with parchment paper, leaving an overhang on two sides for easy removal. Lightly spray the parchment with cooking spray. Measure out the Cocoa Krispies cereal and set aside.
- Melt Marshmallows: In a large nonstick pot, melt the butter over low heat. Once melted, add about 13.5 ounces (approx. 7.5 cups) of the miniature marshmallows, reserving the remaining 2.5 cups (approx. 2.5 cups) for later. Stir constantly over low heat until the marshmallows are fully melted and smooth.
- Mix in Chocolate & Flavorings: Remove the pot from the heat. Stir in the cocoa powder, chocolate chips, salt, and vanilla extract until smooth and the chocolate chips are melted.
- Combine with Cereal: Quickly and gently mix in the Cocoa Krispies cereal until evenly coated. Finally, fold in the reserved 2.5 cups of miniature marshmallows until just combined.
- Set & Cut: Pour the mixture into the prepared pan. Lightly spray your hands with cooking spray and gently press the mixture into an even layer in the pan. Avoid pressing too hard to keep the bars soft. Let the bars cool and set at room temperature for about 15–20 minutes. Once set, use the parchment overhang to lift the bars out and cut them into 12 squares.
Recipe Notes
- Cereal Sweetness: For a slightly less sweet treat, use 3 cups of Cocoa Krispies and 3 cups of regular Rice Krispies cereal.
- Storage: These Chocolate Rice Krispie Treats are best eaten fresh on the day they’re made. Store any leftovers in an airtight container at room temperature for up to 2 days for best texture.
- Freezing: To freeze, wrap individual bars in wax paper, then plastic wrap, and store in a freezer bag for up to 6 months. Thaw at room temperature for 15-20 minutes before enjoying.
Nutrition (per 1 serving)
- Calories: 248 kcal
- Carbohydrates: 42g
- Protein: 1g
- Fat: 10g
- Saturated Fat: 6g
- Polyunsaturated Fat: 0.2g
- Monounsaturated Fat: 1g
- Trans Fat: 0.2g
- Cholesterol: 13mg
- Sodium: 127mg
- Potassium: 100mg
- Fiber: 1g
- Sugar: 27g
- Vitamin A: 713IU
- Vitamin C: 7mg
- Calcium: 33mg
- Iron: 2mg
Nutrition information is automatically calculated and should only be used as an approximation.
We hope you love these incredibly gooey and delicious Chocolate Rice Krispie Treats as much as we do! Don’t hesitate to share your creations and leave a comment below with your thoughts and any variations you try. Happy treating!