
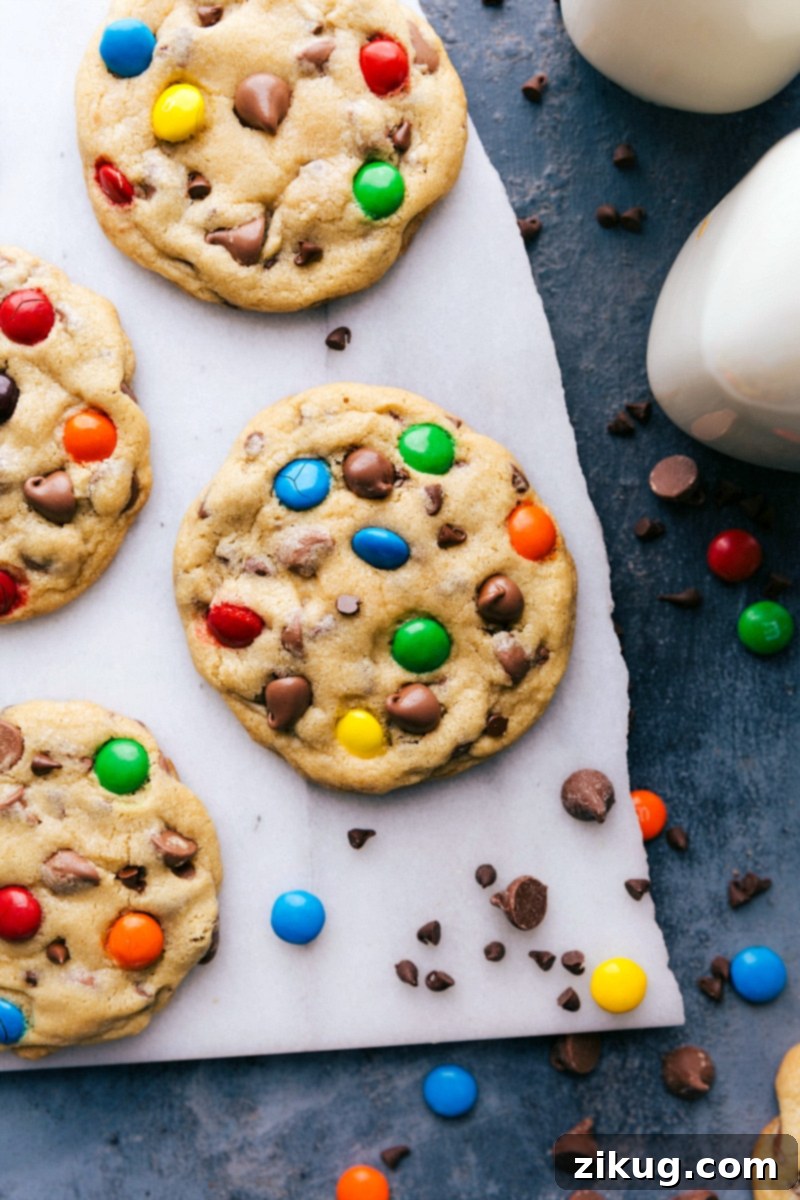
Chocolate Chip M&M Cookies with chewy centers and crisp edges—these are the cookies I always come back to. They’re a family favorite for a reason!
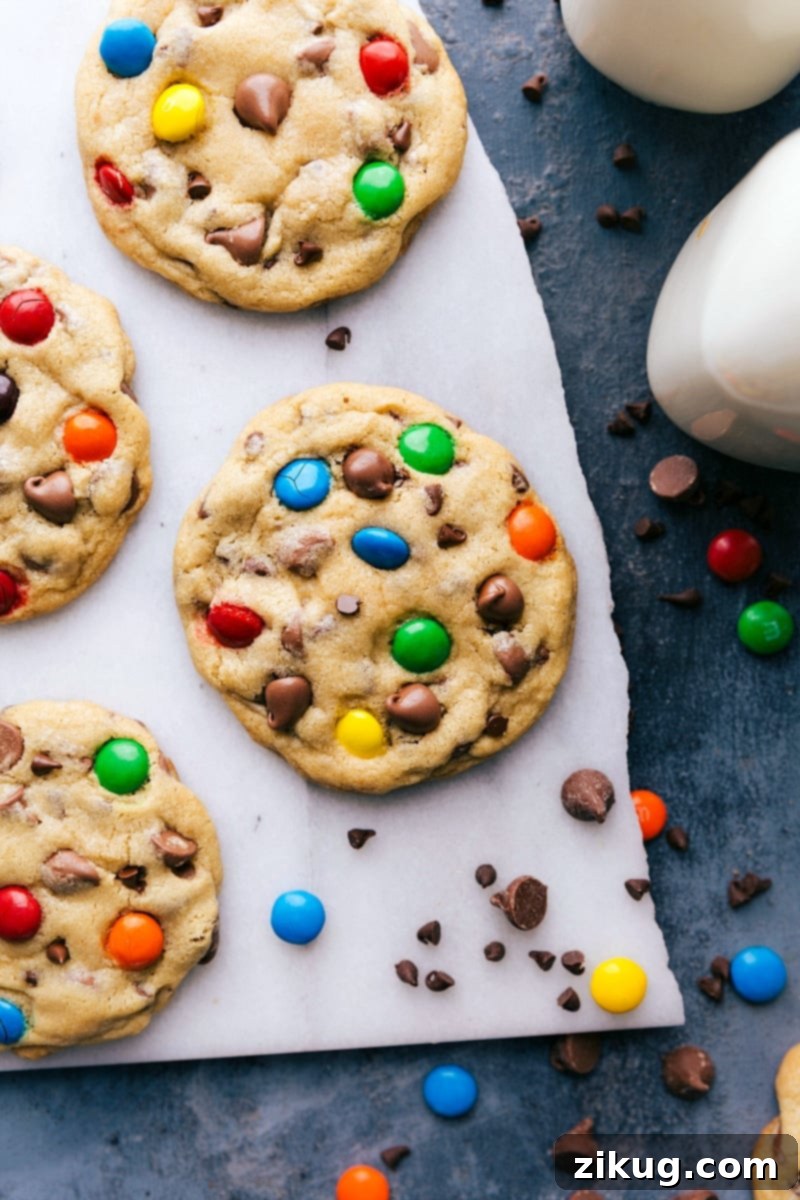
The Ultimate Bakery-Style Chocolate Chip M&M Cookies: A Cherished Family Recipe!
There’s an undeniable joy that comes from a freshly baked cookie, and these **Bakery-Style Chocolate Chip M&M Cookies** are designed to deliver pure bliss. Imagine a cookie that masters every desirable trait: edges that are delightfully crisp, yielding to a luxuriously soft and irresistibly chewy center. Each bite is a celebration of rich, melted chocolate and vibrant, colorful M&M’s. This isn’t just another cookie recipe; it’s a meticulously perfected family favorite, engineered to bring that coveted “bakery-style” experience right into the warmth of your home kitchen.
Say goodbye to disappointing, dry, or flat cookies. Our recipe promises massive, satisfying treats that are guaranteed to impress every palate. What makes them truly stand apart? We’re thrilled to unveil two “secret ingredients” that elevate these cookies from merely good to absolutely extraordinary: **whipped egg whites and oat flour**. Curious how these seemingly unconventional additions perform their magic to transform a classic into something unforgettable? Continue reading to unravel the culinary secrets and the delightful science behind these unbelievably delicious cookies.
Why These M&M Cookies Stand Out: Unveiling the Secret Ingredients
The quest for the perfect chocolate chip cookie often leads to endless variations, but our Chocolate Chip M&M Cookies boast a unique edge, all thanks to two often-underestimated ingredients that revolutionize their texture and flavor. Let’s explore the powerful impact of these secrets:
The Magic of Whipped Egg Whites for Unparalleled Chewiness
Most cookie recipes traditionally call for whole eggs or primarily egg yolks. However, our method involves a crucial step: separating one large egg and whipping its white until it achieves a light, airy, and fluffy consistency. This delicate meringue-like mixture is then gently folded into the cookie dough. The air meticulously incorporated into the egg white creates an incredibly tender crumb, directly contributing to that highly sought-after soft and chewy center without making the cookies dense or cake-like. Furthermore, this technique helps the cookies maintain their robust shape during baking, ensuring they spread just enough to create those appealing crisp edges while retaining their desirable bakery-style thickness and a delightful puff.
The Subtle Sophistication of Oat Flour for Tender Perfection
The inclusion of oat flour might strike some as an unconventional twist in a classic chocolate chip cookie recipe, yet its role is profoundly significant. Just a mere couple of tablespoons of finely ground oats introduce a subtle, wholesome nuttiness that beautifully complements the sweetness of the chocolate. More importantly, oat flour lends an unbelievably tender texture to the cookies. It efficiently absorbs moisture within the dough, which is instrumental in preventing the cookies from spreading too thinly on the baking sheet and ensures they develop that quintessential soft, chewy interior. It’s a true game-changer for achieving a perfect textural balance of chewiness and structural integrity.
When combined, these two ingenious ingredients orchestrate a cookie experience that is truly unparalleled. You’ll be rewarded with cookies that are flawlessly balanced in flavor, wonderfully chewy, delightfully thick, and visually stunning with their generous size and vibrant M&M’s. Prepare for an unforgettable treat that will quickly become your new go-to recipe.
Mastering the Art of Baking These Irresistible Cookies
Creating these perfect, bakery-quality cookies is more straightforward than you might anticipate, especially with our comprehensive, step-by-step instructions. By following these guidelines meticulously, you’ll be savoring warm, gooey, and absolutely delicious cookies in practically no time!
- Essential Preparation: Oven and Pan: Begin by preheating your oven precisely to 350°F (175°C). Next, line a large, sturdy baking sheet (a 15″ x 10″ sheet pan is ideal) with either high-quality parchment paper or a reliable silicone baking mat. This crucial step not only ensures effortless removal of your baked cookies but also prevents any sticking, contributing to their beautifully uniform shape and golden finish. Set the prepared pan aside.
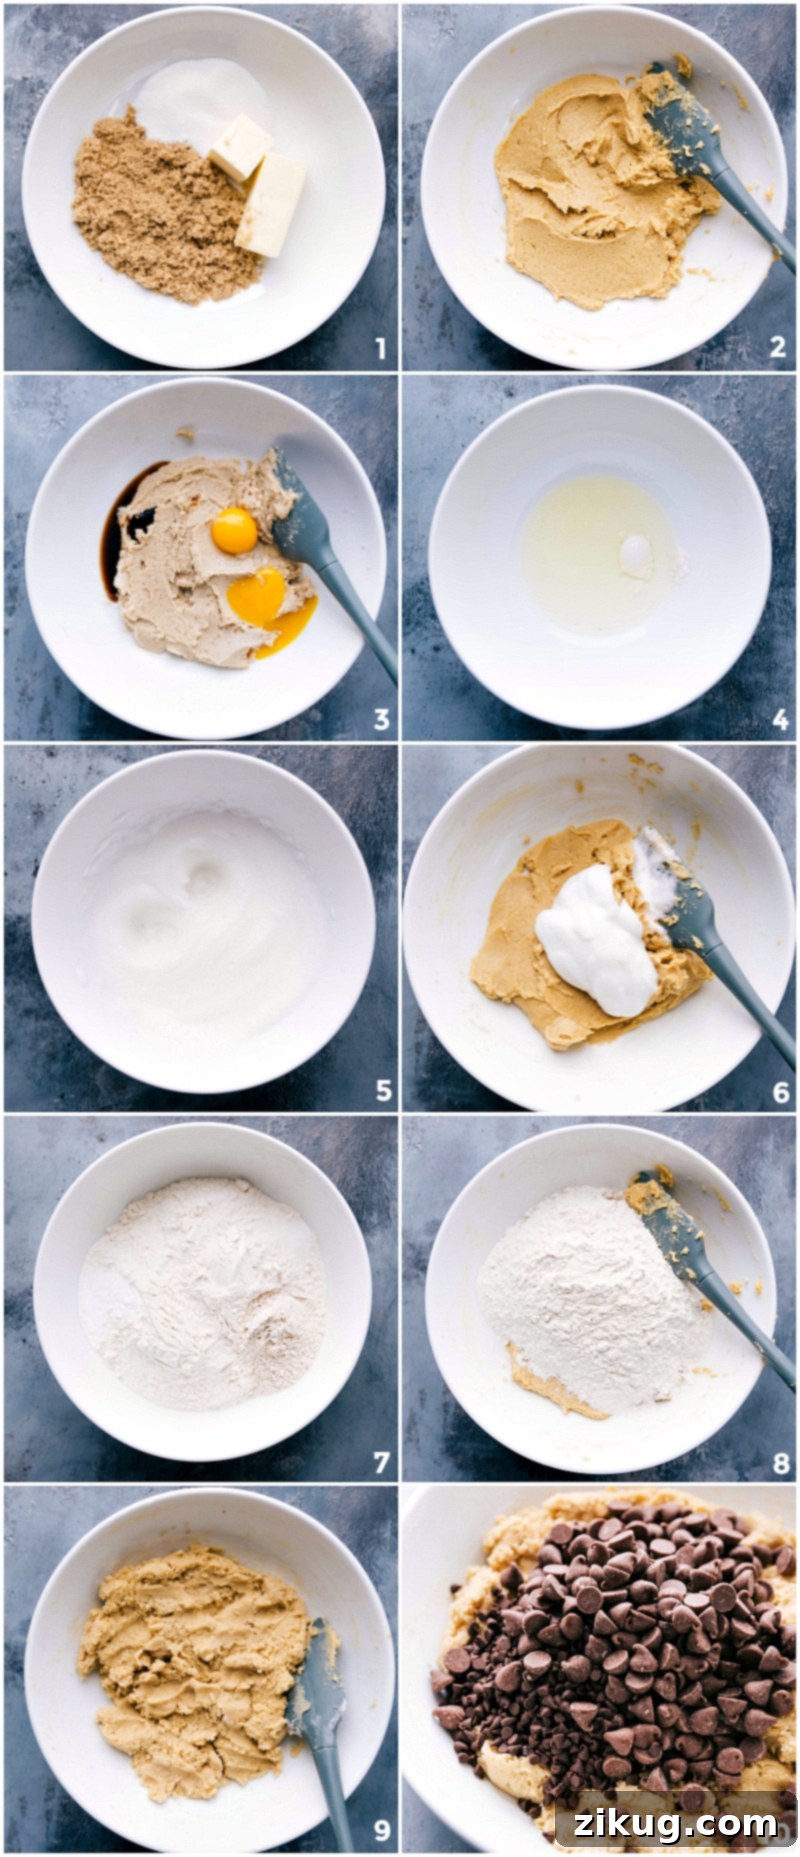
- Creaming the Foundation: Butter and Sugars: In a generously sized mixing bowl, combine your softened unsalted butter with both the rich light brown sugar (ensure it’s lightly packed for accurate measurement) and the sparkling granulated white sugar. This creaming step is foundational for the ultimate cookie texture. Utilize either a stand mixer equipped with a paddle attachment or a powerful hand mixer. Cream these ingredients together for a full 3 to 4 minutes. The mixture should transform into a light, airy, fluffy, and noticeably creamy consistency. Resist the urge to shorten this process; thorough creaming incorporates essential air, which is vital for the cookies’ final tender and chewy texture.
- Incorporating the Eggs (The Secret Begins!): With precision, separate the yolk from one large egg. You will incorporate this egg yolk, along with an additional egg yolk (ensuring a total of two yolks are used in this step), and the fragrant pure vanilla extract into your creamed butter and sugar mixture. Mix these ingredients on low speed until they are just combined, pausing occasionally to scrape down the sides of the bowl to ensure everything is fully incorporated. Pro Tip: Don’t discard the extra egg white! It can be cleverly utilized in other recipes, such as these delicious spinach and feta wraps.
- Whipping the Secret White: In a separate, impeccably clean mixing bowl, combine the reserved single egg white with ½ teaspoon of cream of tartar. Cream of tartar acts as a remarkable stabilizer, enabling the egg white to whip up higher and maintain its airy, structured form. Discover more about the fascinating role of cream of tartar in baked goods. Beat this mixture diligently for several minutes until it transforms into a stunningly light, airy, and fluffy meringue-like consistency.
- Gently Folding for Airiness: With care and a light hand, delicately add the whipped egg white mixture to your wet ingredients (the creamy blend of butter, sugars, and egg yolks). Employ a flexible rubber spatula to gently fold it in. The primary goal here is to integrate the egg white without deflating the precious air you’ve just whipped into it, thereby preserving that essential airy texture that contributes to the cookies’ signature chewiness.
- The Perfectly Balanced Dry Mix: In a third separate bowl, whisk together all your dry ingredients: the all-purpose flour, the subtle secret oat flour (which should be finely blended – consult our baking tips section for precise preparation instructions), baking soda, and salt. Ensure these components are thoroughly combined and evenly distributed. This uniformity guarantees that the leavening agents work effectively and consistently throughout your dough.
- Bringing it All Together: The Dough Formation: Gradually introduce the dry ingredient mixture into the wet ingredients. Mix on the lowest speed setting of your mixer, or gently by hand, until the dough is just combined. The critical rule here is to **avoid overmixing**, as excessive blending develops gluten, which can result in tough, less tender cookies. Stop mixing as soon as no dry streaks of flour are visible and you have a thick, uniformly smooth cookie dough.
- Chocolate Overload: The Grand Finale of Flavor: Now, it’s time to introduce the undeniable stars of the show – the chocolate chips! Generously fold in both the regular-sized chocolate chips and the smaller mini chocolate chips (or delightful chocolate chunks). Ensure they are evenly dispersed throughout every part of the dough. Important Note: Resist the temptation to add the M&M’s at this stage! They are reserved for pressing on top later, which maximizes their visual appeal and ensures their vibrant colors don’t bleed during baking.
Featured Comment
I made these cookies for the first time tonight, and they are the yummiest “homemade” cookies I’ve ever made or eaten! They are also full, fluffy, and as pretty as your pictures. Thank you for sharing this recipe!!!
– Bekah
Baking the Perfect M&M Cookies: From Dough to Golden Delight
The final stages of baking are crucial for ensuring your cookies not only deliver an explosion of amazing flavor but also boast that coveted, picture-perfect look, as if they’ve just emerged from a gourmet bakery display.
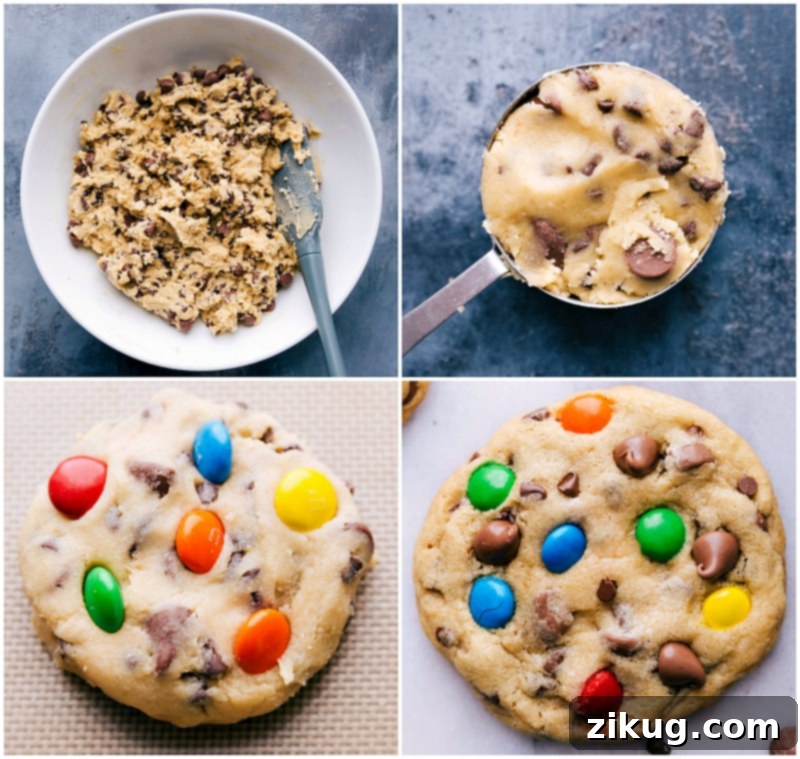
- Precise Portioning for Perfection: For consistently sized and evenly baked cookies, use a ¼-cup measuring cup or a large cookie scoop to portion out generous amounts of dough. This uniformity is key to achieving those desirable large, bakery-style cookies that bake flawlessly.
- Expert Shaping and Artistic Decoration: Gently roll each carefully portioned ball of dough into a thick, uniform sphere. Then, with a gentle hand, slightly flatten each ball into a wide disc. This specific shaping technique is essential for developing those signature crisp edges while simultaneously preserving the soft, incredibly chewy center. Now for the most visually appealing step: meticulously press the colorful M&M’s candies directly onto the tops of these dough discs. You can also strategically place a few extra chocolate chips at this stage to enhance their visual appeal even further and guarantee that every single bite is packed with delightful chocolate.
- Baking to Golden Perfection: Arrange no more than 4 to 6 of your prepared dough discs on the lined baking sheet, ensuring ample space between each cookie for proper spreading during baking. Place the sheet into your preheated oven and bake for approximately 10 to 12 minutes. The cookies are perfectly ready when their edges are delicately golden brown, yet their centers still retain a slightly soft and deliciously gooey appearance. Remember, a slight **underbake is the golden rule for achieving incredibly soft and wonderfully chewy cookies.**
- Graceful Cooling for Optimal Texture: Once baked to perfection, carefully remove the sheet pan from the oven. Allow the cookies to cool undisturbed on the hot pan for about 4 to 5 minutes. The residual heat from the baking sheet will continue to gently cook the cookies, allowing their edges to set beautifully while magically preserving that coveted soft, ultra-chewy center. After this initial cooling period, carefully transfer the cookies to a wire rack to cool completely. Or, if you simply can’t resist, indulge in them warm, straight from the cooling rack – a truly irresistible experience!
Expert Baking Tips for Flawless Chocolate Chip M&M Cookies
Achieving absolute cookie perfection often hinges on mastering a few key techniques and understanding critical considerations. Here are our top professional tips to ensure your Chocolate Chip M&M Cookies turn out flawlessly, delivering that desired bakery-quality texture and taste every single time:
- Mastering Accurate Flour Measurement: The Key to Texture: This step is arguably the most paramount for consistent and successful baking. Simply pushing a measuring cup directly into a bag or container of flour can pack in significantly more flour than is actually needed, which will invariably result in dry, dense, and crumbly cookies. Instead, always employ the “spoon and level” method: gently spoon the flour into your measuring cup until it’s generously overfilled. Then, use the flat back of a knife or a specialized bench scraper to carefully level off the top. This meticulous process guarantees you’re using the precise amount of flour required for the perfect cookie texture. Watch this helpful video for a clear visual demonstration.
- The Significance of Room Temperature: Butter & Eggs: It is absolutely crucial to always begin your baking process with both butter and eggs at true room temperature. Room-temperature butter creams far more effectively and smoothly with sugar, creating a lighter, more aerated mixture. This aeration is a direct contributor to a tender, lighter cookie texture. Conversely, cold butter will not cream properly, resulting in a dense dough, while melted butter will lead to greasy, excessively flat cookies that spread too much. Similarly, room-temperature eggs emulsify much better with the fats in the butter, ensuring a more uniform, cohesive, and perfectly blended cookie dough. If you find yourself pressed for time, consult this practical guide for quick and effective tricks to bring both butter and eggs to room temperature efficiently.
- Quality Ingredients: The Foundation of Exceptional Flavor: The superior flavor profile of your finished cookies is directly proportional to the quality of the ingredients you select. Always opt for real, high-quality unsalted butter (margarine contains higher water content and will negatively affect texture), pure vanilla extract (avoid artificial imitations), and premium chocolate chips. Brands like Guittard® or Ghirardelli® are consistently excellent choices; they melt beautifully, distribute rich flavor, and elevate your M&M cookies to truly gourmet status. Investing in good ingredients truly makes a discernible difference.
- Consistent Portioning for Even Baking and Presentation: For cookies that are not only perfectly uniform in appearance but also bake consistently and evenly, investing in a ¼-cup measuring cup or a dedicated large cookie scoop is highly recommended. This ensures that each cookie portion is roughly the same size and thickness, which prevents some cookies from burning while others remain undercooked. Uniformity is a critical element in achieving that professional “bakery-style” look and guarantees a delightful bite every time.
- Do Not Overbake: The Secret to a Chewy Center: This tip is paramount for achieving that signature soft, wonderfully chewy center. Cookies continue to bake for a few precious minutes after they are removed from the oven, thanks to residual heat from the baking sheet. Therefore, it is essential to pull them out when their edges are just set and lightly golden, even if their centers still appear slightly soft or even a little underdone. They will firm up perfectly as they cool, leaving you with that irresistible chewiness.
More Delicious Cookie Recipes to Satisfy Your Cravings
If you’ve fallen in love with these extraordinary Chocolate Chip M&M Cookies, you’re in for an absolute treat with these other fantastic and equally beloved cookie recipes from our extensive collection. Get ready to expand your baking repertoire!
- Pumpkin Chocolate Chip Cookies: A runaway reader favorite! These seasonal delights are perfectly spiced, incredibly moist, and irresistibly chewy – absolutely guaranteed to be non-cakey and utterly delicious.
- Brown Butter Chocolate Chip Cookies with Oats: Take your classic chocolate chip cookie experience to the next level with the deep, rich, nutty flavor of brown butter and the wholesome, satisfying chewiness added by oats.
- Lemon Curd Shortbread Cookies: Indulge in delicate, exquisitely buttery shortbread cookies, artfully filled with a bright, tangy, and refreshing lemon curd. They offer a perfect harmony of sweet and tart flavors.
- Chocolate Crinkle Cookies: Dive into the rich, fudgy depths of these intensely chocolatey cookies, beautifully rolled in powdered sugar. They bake up with charming crinkled tops that are as visually appealing as they are delightfully festive and decadent.
- Pistachio Cookies with Honey: Discover a truly unique and delightful cookie featuring the subtle, natural sweetness of honey perfectly paired with the distinct, nutty flavor and vibrant color of pistachios. A sophisticated treat for any occasion.
Chocolate Chip M&M Cookies Recipe

By: Chelsea Lords
These family-favorite Chocolate Chip M&M Cookies are crisp on the outside, soft on the inside, and feature two secret ingredients for an unparalleled bakery-style experience!
Prep Time: 30 minutes
Cook Time: 10-12 minutes
Total Time: Approximately 40-42 minutes
Servings: 16 large cookies
Equipment
- Large Sheet pan (15″ x 10″) lined with parchment paper or silicone baking mat
- Stand mixer or hand mixer
- Large mixing bowls (2-3)
- Small bowl for egg white
- Whisk or rubber spatula
- ¼-cup measuring cup or large cookie scoop
- Wire cooling rack
Ingredients
- ¾ cup (1½ sticks) unsalted butter, softened to room temperature
- ¾ cup light brown sugar, lightly packed
- 6 tablespoons granulated sugar
- 1 large egg, separated (yields 1 yolk for dough, 1 white for whipping)
- 1 additional egg yolk (total of 2 yolks used in dough)
- ½ teaspoon cream of tartar
- 2 teaspoons pure vanilla extract
- ¼ teaspoon salt
- 1 teaspoon baking soda
- 2¼ cups all-purpose flour (see Note 1 for accurate measurement)
- 2 tablespoons oat flour (see Note 2 for preparation)
- 1½ cups regular-sized chocolate chips (Guittard® or Ghirardelli® recommended for best results)
- ½ cup mini chocolate chips or chocolate chunks
- ½ cup M&M’s candies, for decorating cookie tops
Instructions
- Prepare Oven & Baking Sheet: Preheat your oven to 350°F (175°C). Line a large sheet pan with parchment paper or a silicone baking mat and set it aside.
- Cream Butter & Sugars: In a large bowl, using a stand mixer with a paddle attachment or a hand mixer, beat together the softened butter, light brown sugar, and granulated sugar for 3-4 minutes until the mixture is light, fluffy, and very creamy.
- Incorporate Egg Yolks & Vanilla: Add the two egg yolks (one from the separated egg, plus an additional yolk) and the vanilla extract to the creamed butter mixture. Mix on low speed until just combined, scraping down the sides of the bowl as needed.
- Whip Egg White with Cream of Tartar: In a separate, clean bowl, combine the reserved single egg white with ½ teaspoon of cream of tartar. Beat for several minutes until the egg white is light, fluffy, and forms soft peaks.
- Gently Fold Egg White: Carefully fold the whipped egg white mixture into the wet ingredients. Be gentle to maintain the airiness. Mix until just combined.
- Combine Dry Ingredients: In another bowl, whisk together the all-purpose flour, oat flour, salt, and baking soda. Ensure these dry ingredients are thoroughly mixed.
- Combine Wet & Dry Mixtures: Gradually add the dry ingredient mixture to the wet ingredients. Mix on low speed until just combined. Be careful not to overmix the dough.
- Add Chocolate Chips: Fold in the regular-sized chocolate chips and mini chocolate chips (or chocolate chunks) until they are evenly dispersed throughout the dough. Reserve the M&M’s for topping.
- Portion & Decorate: Use a ¼-cup measuring cup or a large cookie scoop to portion out the dough onto your prepared baking sheet. Roll each portion into a ball, then slightly flatten it into a wide disc. Press additional chocolate chips and the M&M’s directly onto the tops of the cookie dough discs for a beautiful finish. Place no more than 4-6 cookies per sheet.
- Bake: Bake in the preheated oven for 10-12 minutes, or until the edges are lightly golden brown and the centers still appear slightly soft. Slight underbaking is key for a chewy center.
- Cool: Remove the sheet pan from the oven and allow the cookies to cool on the pan for 4-5 minutes. Then, transfer the cookies to a wire rack to cool completely.
Recipe Notes
- Note 1: Accurate Flour Measurement: To avoid dense cookies, always spoon flour into your measuring cup until it’s overfilled, then level off with the back of a knife. Never scoop directly from the bag. See a visual demonstration here.
- Note 2: Making Oat Flour: Simply add quick or old-fashioned oats to a food processor or small blender. Pulse until they reach a fine, powdery consistency. Stir to check for any whole oats and continue blending if necessary. It’s important to measure the oat flour *after* blending.
- Storage: Store completely cooled Chocolate Chip M&M Cookies in an airtight container at room temperature for up to 5 days. They remain wonderfully chewy!
- Freezing Dough: To enjoy freshly baked cookies anytime, scoop the cookie dough into balls and place them on a lined baking sheet. Freeze until firm (about 1-2 hours), then transfer the frozen dough balls to a freezer-safe bag or airtight container. Store in the freezer for up to 3 months. When ready to bake, place frozen dough balls on a prepared baking sheet and add a few extra minutes to the baking time (typically 12-15 minutes).
Nutrition Information (Approximate Per Serving)
Serving: 1 cookie | Calories: 451kcal | Carbohydrates: 65g | Protein: 5g | Fat: 19g | Saturated Fat: 12g | Polyunsaturated Fat: 1g | Monounsaturated Fat: 2g | Trans Fat: 0.4g | Cholesterol: 45mg | Sodium: 127mg | Potassium: 144mg | Fiber: 1g | Sugar: 37g | Vitamin A: 327IU | Vitamin C: 0.1mg | Calcium: 52mg | Iron: 2mg
Nutrition information is automatically calculated and should be used as an approximation.
Loved this recipe for the ultimate Chocolate Chip M&M Cookies? We’d absolutely love to hear from you! Please leave a comment below and share your baking experience, tips, or any questions you might have.
Don’t forget to **pin this recipe** to your favorite boards for easy access later or **share it with friends and family** who appreciate truly delicious homemade cookies!