
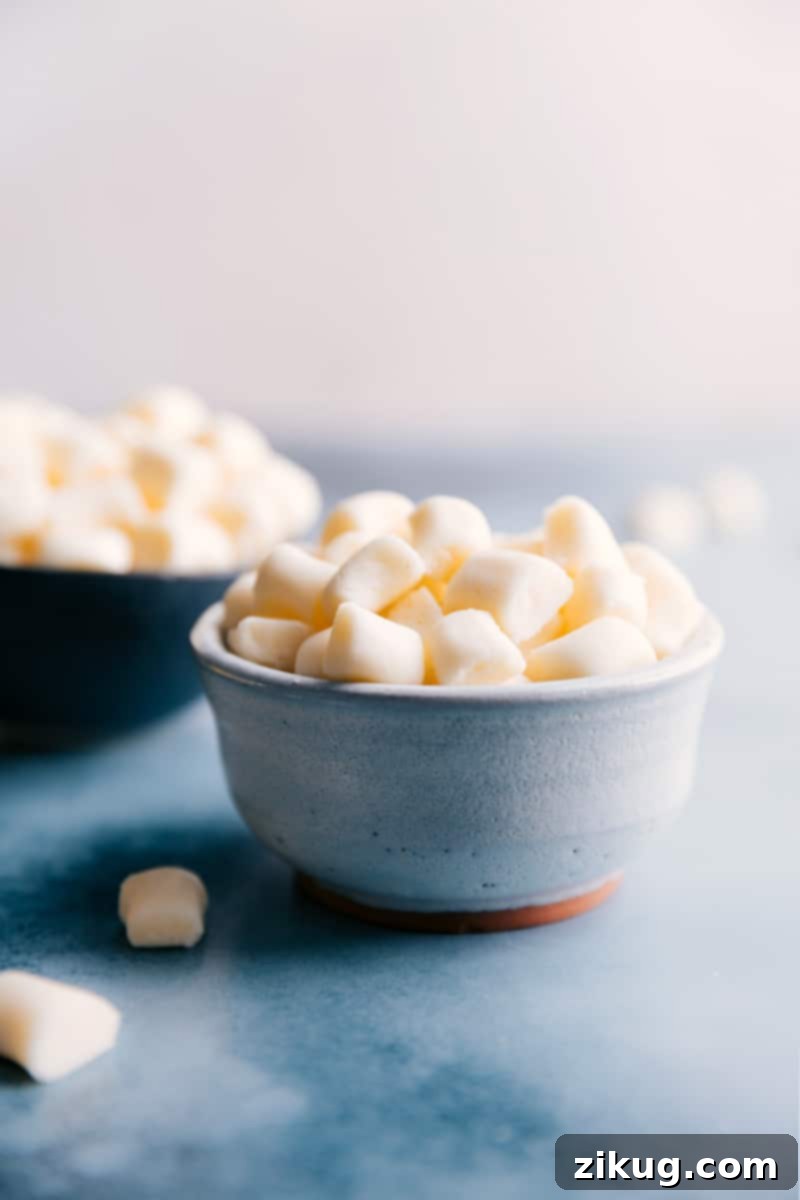
Homemade Butter Mints: Sweet, Creamy, Melt-in-Your-Mouth Perfection
Butter Mints are a true classic: delightfully sweet, refreshingly pepperminty, and so incredibly soft they practically dissolve on your tongue. Forget the stale, overly strong store-bought versions; this homemade recipe is quick, surprisingly easy, and requires absolutely no fancy candy thermometer. Get ready to impress with these irresistible, melt-in-your-mouth confections!
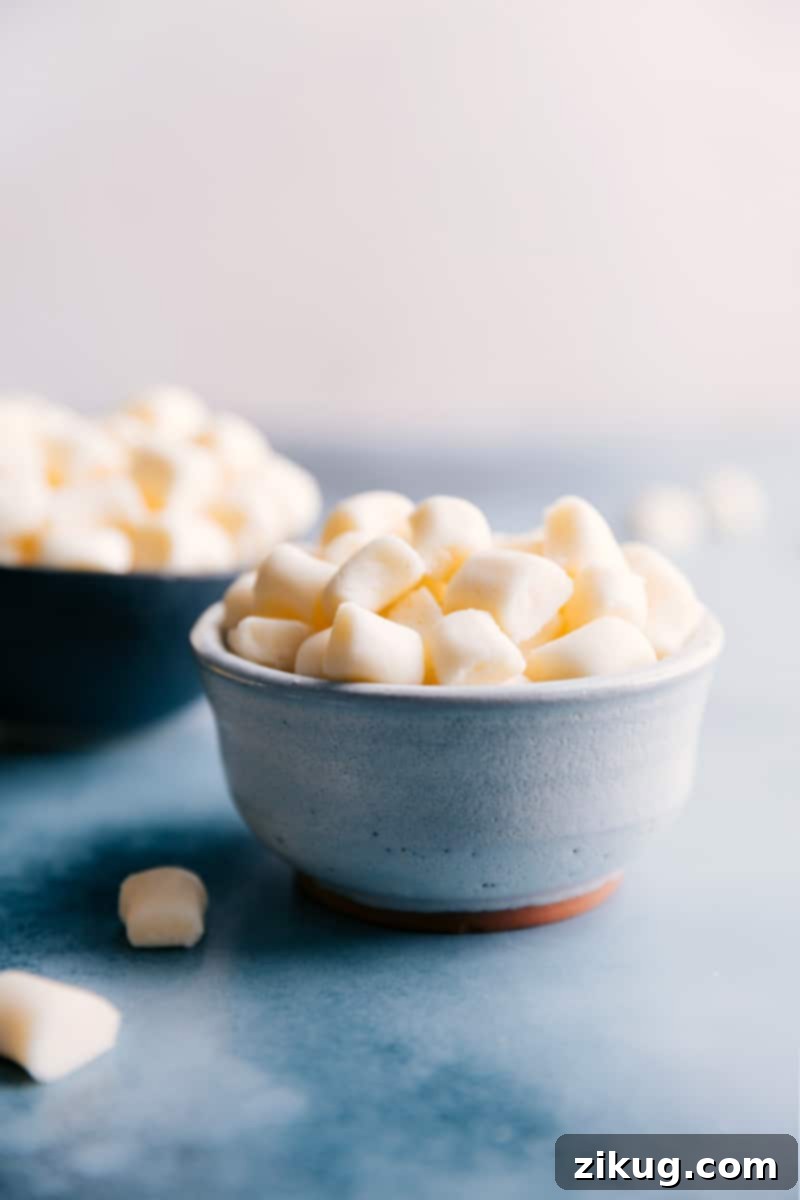

A Note from the Kitchen: Say Goodbye to Stale Mints!
Butter Mints, sometimes affectionately known as “Wedding Mints” or “Dinner Mints,” hold a special place in my heart. I still remember working at a bustling restaurant where a large bowl of these soft, creamy delights always sat by the host stand. On quieter nights, I’m pretty sure I consumed my body weight in those comforting little squares!
However, I quickly learned that store-bought mints can often disappoint. They’re either hard and stale, or their peppermint punch is far too aggressive. That’s what inspired me to create my own recipe, and honestly, I’ve never looked back.
These homemade butter mints are a revelation. They are incredibly simple to make, yet they consistently earn rave reviews from everyone who tries them. The best part? You don’t need a candy thermometer or any other specialized equipment. Just a good mixer and a few minutes of your time stand between you and a batch of pepperminty perfection. Once you experience the superior flavor and texture of homemade, you’ll understand why I’m never going back!
What Are Butter Mints? A Sweet Tradition
Butter Mints are a classic confection renowned for their delicate, melt-in-your-mouth texture and refreshing peppermint flavor. Unlike hard candies, these soft, creamy treats offer a unique, almost fudge-like consistency that makes them utterly irresistible. Often served at gatherings, holidays, and special events like weddings, they provide a delightful sweet finish that isn’t too heavy. Their charm lies in their simplicity and the nostalgic comfort they evoke.
Why Choose Homemade Over Store-Bought?
While store shelves are lined with various mints, there are compelling reasons to opt for a homemade batch:
- Unmatched Freshness: Homemade mints are always fresher, ensuring a soft, pliable texture that store-bought varieties often lack. Say goodbye to hard, crumbly mints!
- Superior Flavor Control: You dictate the intensity of the peppermint. Want a subtle hint or a bolder kick? You’re in charge. Plus, using high-quality extracts makes a noticeable difference.
- No Mystery Ingredients: With homemade, you know exactly what goes into your treats. No artificial preservatives or unfamiliar additives.
- Cost-Effective: Making butter mints from scratch is often more economical than repeatedly purchasing bags from the store, especially for large events.
- The Joy of Creation: There’s immense satisfaction in crafting delicious treats with your own hands. It’s a fun project, even for novice bakers or candy makers!
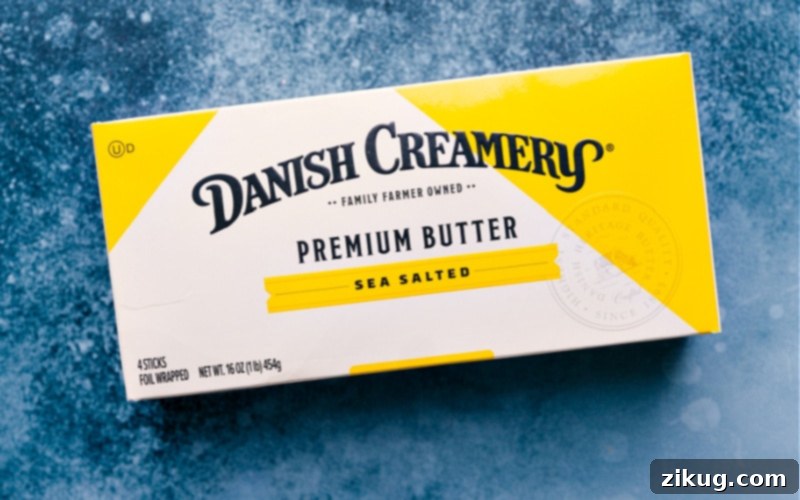
Essential Ingredients for Perfect Butter Mints
Crafting these delectable butter mints requires just a few basic ingredients, each playing a crucial role in achieving that signature creamy texture and refreshing flavor:
- Unsalted Butter (Room Temperature): This is the star of the show! High-quality butter at the correct temperature (soft but not melted) is paramount for a smooth, homogenous dough that blends beautifully with the other ingredients. It provides the richness and creamy foundation for the mints.
- Powdered Sugar (Confectioners’ Sugar): This fine sugar is key to the mints’ smooth, non-gritty texture. It also provides the bulk and sweetness. Be prepared to adjust the quantity slightly, adding more if your dough feels too sticky to handle.
- Heavy Cream: Do not substitute this! Heavy cream is essential for providing the necessary fat and thickness to achieve the mints’ characteristic melt-in-your-mouth consistency. Milk or half-and-half are simply not rich enough and will result in a different, less desirable texture.
- Vanilla Extract: While peppermint is the dominant flavor, a touch of vanilla extract isn’t just for sweetness; it rounds out the flavor profile and adds a subtle depth, enhancing the overall taste without overpowering the mint.
- Peppermint Extract: This is where the magic happens! Be absolutely sure to use peppermint extract, not peppermint oil. Extracts offer a more balanced and nuanced flavor that integrates smoothly into the dough, whereas oils can be much more potent and can sometimes separate, leading to an uneven taste. Always start with the recommended amount and adjust to your preference.
- Salt: A small pinch of salt is a secret weapon in many sweet recipes. It doesn’t make the mints salty, but rather balances the intense sweetness of the powdered sugar and heightens the vibrant peppermint and creamy butter notes, making all the flavors pop.
- Food Coloring (Optional): For an extra festive touch or to match a theme, food coloring can transform your mints. Classic white is elegant, but pastel pink, blue, yellow, or green can make them perfect for baby showers, holidays, or any celebration.
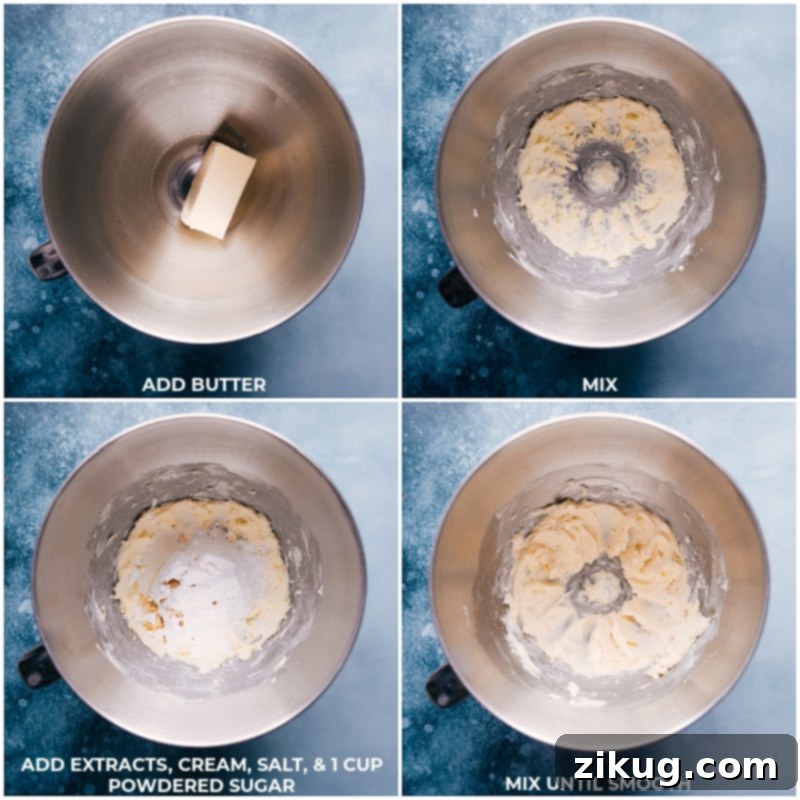
Step-by-Step Guide: Crafting Your Own Butter Mints
Creating these delightful butter mints is surprisingly simple and requires just a few straightforward steps. Follow along to achieve perfect, creamy results:
1. Prepare Your Workspace & Mix Ingredients
- Line a Baking Sheet: Begin by lining a large sheet pan (approximately 15″ x 10″) with parchment paper. This will be where your finished mints dry, preventing sticking. Set it aside for later.
- Soften the Butter: In the bowl of a stand mixer fitted with the whisk attachment (or using a hand mixer), beat your softened unsalted butter on low speed until it becomes smooth and creamy. Ensure the butter is at true room temperature – soft enough to indent with a finger, but not melted or greasy.
- Combine Wet and Initial Dry Ingredients: Add 1 cup of powdered sugar to the butter, along with the heavy cream, vanilla extract, peppermint extract, and salt. Beat on low speed until all these ingredients are just combined and lump-free.
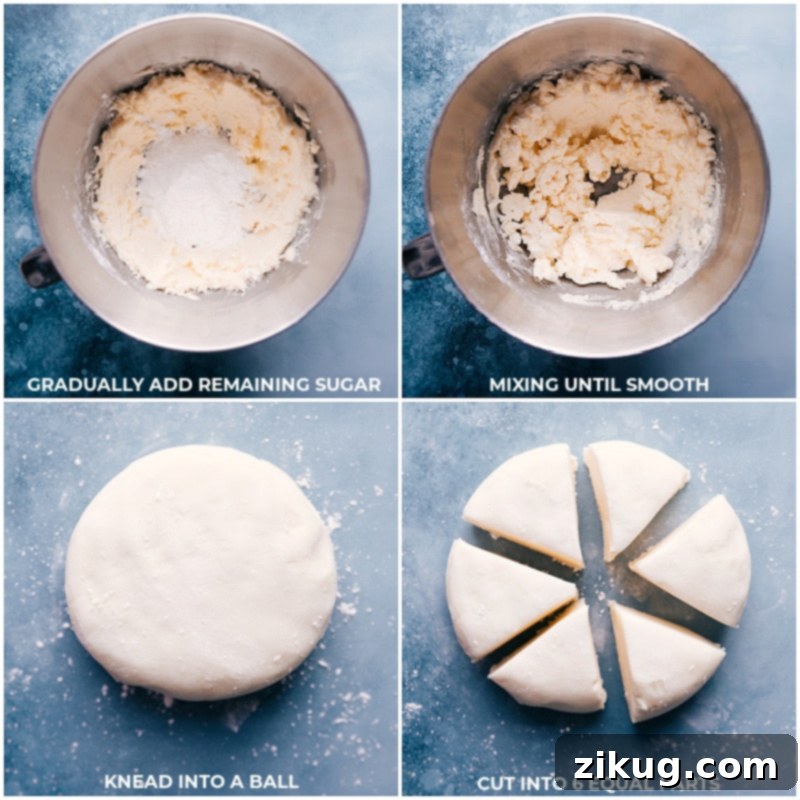
- Gradually Add Remaining Powdered Sugar: Slowly incorporate the remaining powdered sugar, about 1 cup at a time, mixing at a low-to-medium speed. Continue mixing until the sugar is fully combined and the mixture is smooth. Remember to scrape down the sides of the bowl with a spatula periodically to ensure everything is evenly incorporated.
- Add Food Coloring (Optional): If you desire colored mints, now is the time to add 2-3 drops of your chosen food coloring.
- Form a Smooth Dough: Increase the mixer speed to high and beat until a smooth, pliable dough forms. The dough should be soft but not overly sticky. Scrape the bowl as needed to ensure consistency. Once smooth, turn off the mixer.
2. Shape Your Mint Treasures
- Prepare for Kneading: Sprinkle a generous handful of powdered sugar onto a clean, flat surface, such as a countertop or a large cutting board.
- Lightly Knead and Divide: Transfer the dough from the mixer bowl onto the sugared surface. Gently knead the dough a few times, just enough to bring it together into a thick, uniform disc. Using a sharp knife or bench scraper, divide the disc into six equal portions.
- Prevent Drying: Crucially, cover the unused portions of dough with a damp kitchen towel to prevent them from drying out while you work on one piece.
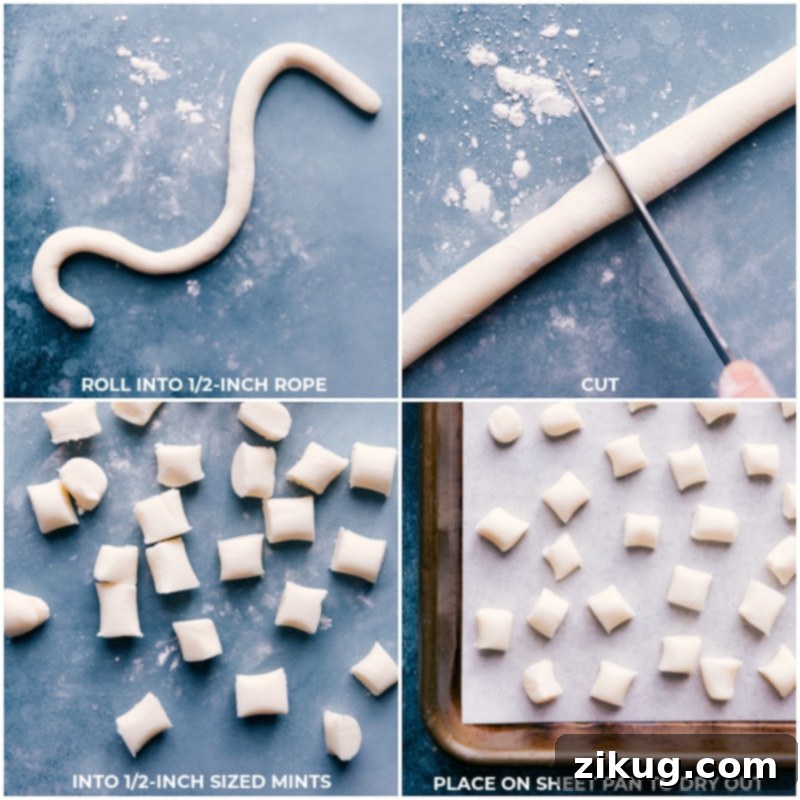
- Roll and Cut: Take one portion of dough and roll it into a long, uniform rope, approximately 1/2-inch thick. Ensure the thickness is consistent for even-sized mints. Using a sharp knife, cut the rope into small, 1/2-inch wide pieces. These are your individual butter mints!
- Transfer to Pan: Carefully transfer the freshly cut mints to the prepared parchment-lined sheet pan, arranging them in a single layer. Repeat this rolling and cutting process with the remaining dough portions, uncovering them one at a time.
3. Dry for the Perfect Texture
- Air Dry: Once all your mints are shaped and arranged on the sheet pan, leave them uncovered to air dry. This drying process typically takes 10 to 12 hours, or overnight.
- Achieving Creamy Softness: During this time, the mints will develop a slightly firmer exterior while retaining their characteristic soft, creamy interior. It’s important to note that homemade butter mints will remain softer than most commercial varieties, which is precisely what makes them so wonderfully delicious and gives them that coveted melt-in-your-mouth quality!
Quick Tip: Peppermint Extract vs. Oil
Always use peppermint extract, not peppermint oil, for the best flavor balance and even distribution. Different brands of extract can have varying strengths. I personally recommend McCormick’s® for its consistent quality. Always taste a tiny bit of your dough before shaping (if safe to do so) and add a little more extract if you prefer a stronger minty flavor.
Pro Tips for Perfectly Creamy Butter Mints
Achieving that perfect melt-in-your-mouth texture is easier with a few expert tips:
- Butter Consistency is Key: Ensure your butter is truly soft but not melted. If it’s too cold, it won’t blend smoothly; if it’s melted, the dough will be too sticky and difficult to work with. Let it sit out for at least an hour, or try a quick softening method like placing it in the microwave on low power for very short bursts (5-10 seconds) until pliable.
- Gradual Sugar Addition: Don’t dump all the powdered sugar in at once. Adding it gradually, about a cup at a time, ensures a smooth dough without lumps and allows you to better control the consistency.
-
Adjust Dough Consistency: The perfect dough is soft, pliable, and only slightly sticky.
- If the dough feels too dry or crumbly: Add a tiny amount (1/2 teaspoon at a time) of additional heavy cream until it comes together. Be careful not to add too much!
- If the dough is too sticky to handle: Gradually add more powdered sugar, a tablespoon at a time, up to an extra 1/4 cup, until the desired consistency is reached.
- Keep Dough Covered: As you work with portions of the dough, always keep the remaining dough covered with a damp kitchen towel. This prevents it from drying out and becoming difficult to roll and shape.
- Consistent Thickness for Ropes: When rolling the dough into ropes, aim for a consistent 1/2-inch thickness. This ensures all your mints are roughly the same size and dry evenly.
- Use a Sharp Knife: A sharp knife makes clean cuts, resulting in neatly shaped mints. If your knife gets sticky, wipe it clean periodically.
Creative Variations: Make These Butter Mints Your Own!
While classic peppermint butter mints are undeniably delicious, this recipe is incredibly versatile. Here are some fun ways to customize your batch:
- Vibrant Food Coloring: Don’t limit yourself to just plain white! Use food coloring to create festive yellow butter mints, soft pink for spring, or bright green for holiday cheer. You can even divide the dough and make a rainbow assortment.
-
Themed for Special Occasions:
- Baby Showers & Gender Reveals: Color the dough pastel pink or baby blue. For a gender reveal party, make half pink and half blue for a delightful surprise.
- Holidays: Red and green for Christmas, orange and black for Halloween, or pastel shades for Easter.
-
Switch Up the Flavor: Peppermint is traditional, but feel free to experiment!
- Coconut Extract: For a tropical twist, replace peppermint with coconut extract.
- Almond Extract: A subtle almond flavor can be wonderfully sophisticated.
- Lemon or Orange Extract: For a zesty, fruity mint.
- Chocolate Mint: Add a teaspoon of cocoa powder to the dough and use peppermint extract for a classic chocolate mint combination.
- Decorative Shapes: Instead of simple squares, you can gently press the cut mints into small candy molds or use tiny cookie cutters for fun shapes (e.g., hearts, stars). Just be aware that intricate shapes might require a slightly firmer dough and a light dusting of powdered sugar in the molds.
Serving Your Homemade Butter Mints
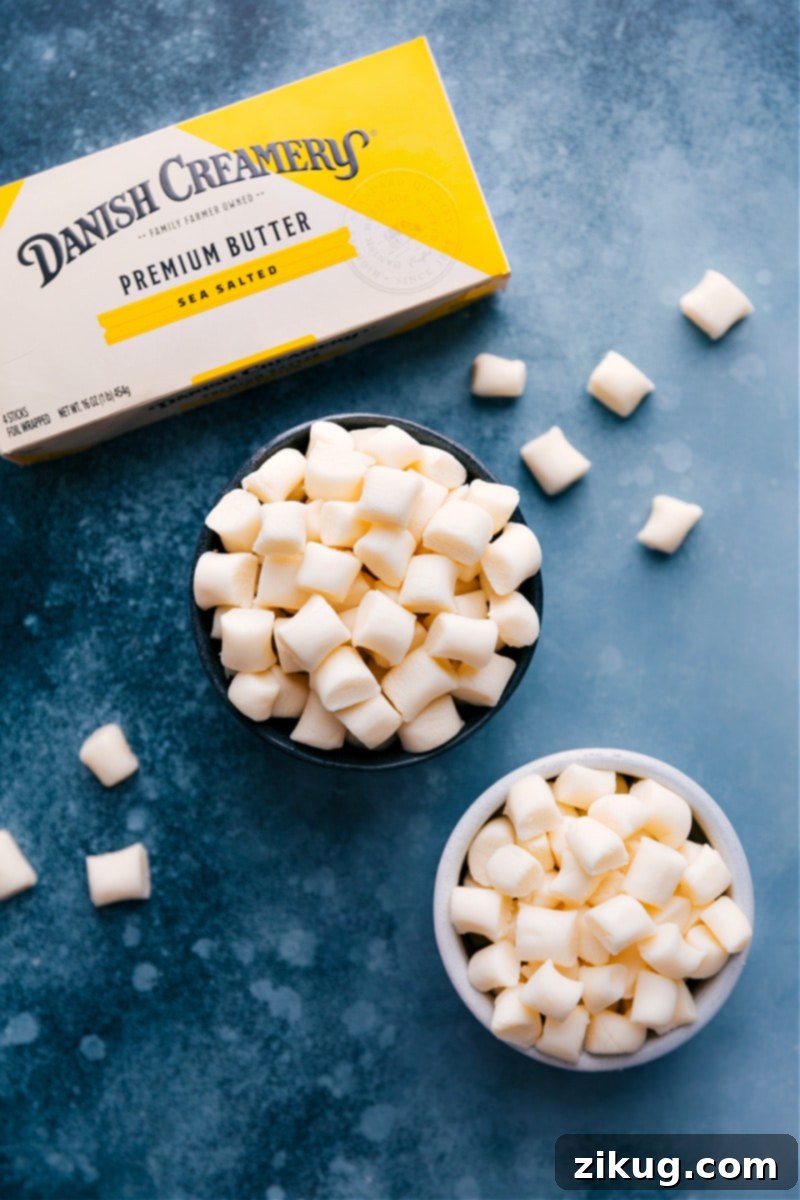
These charming butter mints are perfect for a wide array of occasions. Arrange them in a pretty bowl on a dessert table for parties, use them as thoughtful wedding or baby shower favors, or simply keep a batch on hand for a sweet after-dinner treat. They also make a lovely homemade gift when packaged in a decorative tin or cellophane bag. Their delicate nature and refreshing flavor make them an ideal palate cleanser or a light sweet indulgence at any time.
Storage & Shelf Life: Keeping Your Mints Fresh
Proper storage is essential to maintain the freshness and delightful texture of your homemade butter mints:
- Room Temperature: Store your butter mints in an airtight container at room temperature for up to 1 to 3 weeks. Keep them away from direct sunlight or heat, which can cause them to soften too much.
- Refrigeration: For extended freshness, transfer them to an airtight container and store them in the refrigerator for up to 3 to 4 weeks. They might firm up slightly when cold, but will soften quickly at room temperature.
- Signs of Expiration: Trust your senses! If your mints lose their characteristic vibrant peppermint aroma, develop an off-flavor, or show any significant change in color or texture (e.g., becoming excessively hard, crumbly, or moldy), they are no longer good to eat and should be discarded.
- Freezing for Long-Term Storage: Butter mints freeze beautifully! To freeze, arrange the fully dried mints in a single layer on a baking tray and place them in the freezer until solid. Once frozen, transfer them to a freezer-safe airtight container or a heavy-duty freezer bag. They can be stored in the freezer for up to 2 months. Thaw them at room temperature before serving.
Troubleshooting Common Butter Mint Issues
Even with simple recipes, sometimes things don’t go exactly as planned. Here are some solutions to common butter mint problems:
- Mints are Too Sticky: This is often due to butter being too warm or not enough powdered sugar. Add powdered sugar a tablespoon at a time, mixing until the dough is manageable and no longer excessively sticky. Chilling the dough briefly can also help make it easier to handle.
- Dough is Too Dry or Crumbly: If your dough won’t come together or feels too dry, add a very small amount (1/2 teaspoon) of heavy cream at a time, mixing until the dough reaches a cohesive, pliable consistency.
- Mints Aren’t Setting/Hardening: Ensure the mints have adequate airflow during the drying process and are not covered. Humidity can also affect drying time; in very humid conditions, they might take longer to firm up. They will always be softer than commercial mints, so temper expectations for a rock-hard candy.
- Unevenly Flavored Mints: Make sure your extracts are well-mixed into the butter and sugar mixture. Taste a tiny amount of the dough (before the long drying period) to adjust peppermint intensity if needed.
Frequently Asked Questions (FAQs) About Butter Mints
Here are answers to some common questions about making and enjoying homemade butter mints:
- Can I use salted butter? While unsalted butter is generally recommended for baking and candy making to control salt levels, you can use salted butter. Just omit the added 1/8 teaspoon of salt from the recipe.
- Do I have to let them dry overnight? Yes, the drying period is crucial for developing the characteristic slightly firm exterior while maintaining a creamy interior. Skipping this step will result in mints that are too soft and might not hold their shape as well.
- Can I make these ahead of time? Absolutely! Butter mints are excellent for making ahead, especially for parties or holidays. They store well at room temperature for weeks or even longer in the fridge or freezer.
- Are these suitable for people with dietary restrictions? This recipe contains dairy (butter, heavy cream) and sugar. It is not suitable for vegan, dairy-free, or sugar-free diets without significant modifications.
- Can I use a different kind of extract? Yes, as mentioned in the variations section, you can swap peppermint extract for other flavors like almond, coconut, or even a citrus extract for a different twist.
More Delicious Treats to Explore
If you enjoyed making these butter mints, you might love these other delightful recipes from Chelsea’s Messy Apron:
- Fudge Brownie Cookies with real hot fudge for the ultimate chocolate indulgence!
- Nutella Swirled Macadamia Nut Banana Bread – a rich twist on a classic.
- Bakery-Style Chocolate Chip M&M Cookies with a secret ingredient for chewy perfection.
- Sparkling Raspberry Limeade, a refreshing beverage made with fresh limes and real raspberries.
- Easy 3-Ingredient Turtle Candy for a quick and decadent homemade treat!
Butter Mints Recipe
This Butter Mints recipe creates sweet, pepperminty confections with a creamy, melt-in-your-mouth texture. Easy to make without a candy thermometer, these homemade mints are a delightful alternative to store-bought options.
Author: Chelsea Lords
Prep Time: 15 minutes
Resting Time (For Mints To Harden): 10-12 hours
Total Time: 10 hours 15 minutes
Yields: Approximately 150 mints
Equipment
- Sheet pan (15″ x 10″) lined with parchment paper
- Stand mixer with whisk attachment; or hand mixer
Ingredients
- 1/2 cup unsalted butter, at room temperature
- 3 3/4 cups powdered sugar (confectioners’ sugar), see Note 1
- 1 tablespoon heavy cream, see Note 2
- 1 teaspoon vanilla extract
- 1/4 teaspoon peppermint extract, see Note 3
- 1/8 teaspoon salt
- Food coloring (optional)
Instructions
- Line a large sheet pan with parchment paper and set it aside. In a stand mixer with a whisk attachment, beat the softened butter on low speed until smooth. (A hand mixer can also be used.)
- Add 1 cup of powdered sugar and the remaining ingredients (heavy cream, vanilla extract, peppermint extract, salt), then beat on low speed until just combined. Gradually add the rest of the powdered sugar, about 1 cup at a time, mixing at low-to-medium speed until smooth. Scrape down the sides of the bowl as needed to ensure all ingredients are incorporated.
- Once the powdered sugar is fully incorporated and the dough is smooth, you can add 2–3 drops of food coloring if desired. Increase the mixer speed to high and beat until a smooth, pliable dough forms, scraping the bowl as needed.
- Once the dough is smooth, turn off the mixer. Sprinkle a handful of powdered sugar on a clean countertop. Transfer the dough to the counter and gently knead it, shaping it into a thick disc.
- Use a sharp knife to cut the disc into six equal portions. Set one portion aside and cover the remaining dough with a damp kitchen towel to prevent it from drying out.
- Roll the removed portion into a long, uniform 1/2-inch thick tube shape. Then, cut it into 1/2-inch wide mints. Transfer the cut mints to the prepared sheet pan. Repeat this process with the remaining dough portions until all the mints are cut.
- Let the mints sit uncovered to dry overnight or for 10–12 hours at room temperature. These mints will remain softer than commercial varieties, contributing to their creamy and delicious melt-in-your-mouth texture!
Recipe Notes
- Powdered Sugar Measurement: The amount of powdered sugar needed can vary based on how densely it’s packed and humidity. If the mixture is too dry, gradually add a little more heavy cream (1/2 teaspoon at a time). If it’s too wet or sticky, add a bit more powdered sugar, up to 1/4 cup extra, until it reaches a workable consistency.
- Heavy Cream Substitute: Unfortunately, milk is not a suitable substitute for heavy cream in this recipe as it is not thick enough and will alter the texture significantly.
- Peppermint Extract vs. Oil: Be sure to use peppermint extract, not peppermint oil. Peppermint oil is much more concentrated and can give a different, sometimes medicinal, flavor profile. Extracts provide a more balanced taste.
- Storage: Store homemade butter mints in an airtight container at room temperature for 1-3 weeks, or in the fridge for up to 4 weeks. For longer storage, freeze them for up to 2 months (see full storage details above).
Nutrition
Nutrition information is automatically calculated, so should only be used as an approximation.
Like this recipe? We’d love to hear from you! Leave a comment below and share your experience.