
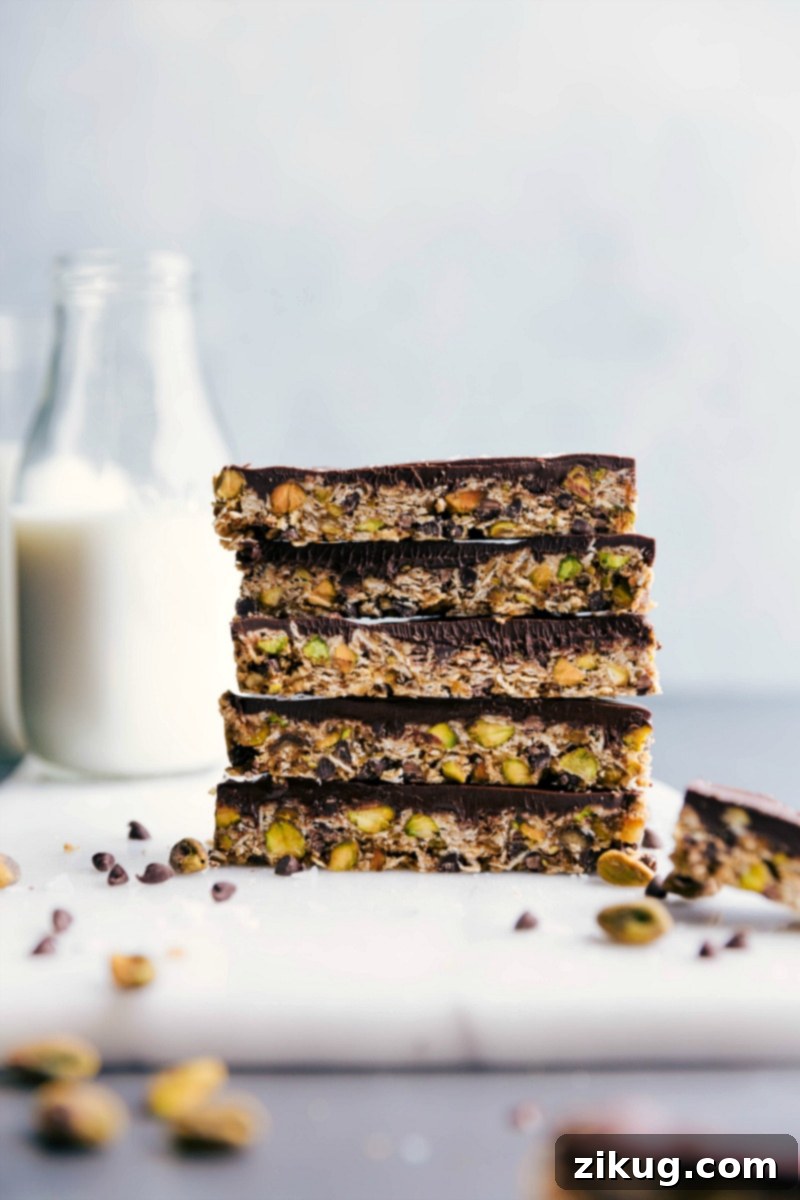
Welcome to the ultimate guide for crafting your own **homemade granola bars**! These delicious and healthy **no-bake granola bars** are naturally sweetened, incredibly easy to customize, and bursting with flavor. Perfect for a quick breakfast, an energizing snack, or a wholesome dessert, these bars require absolutely no baking, making them a simple yet satisfying treat for anyone. For an extra special touch, consider adding a luscious layer of melted chocolate on top!
If you’re exploring other granola bar options, you might enjoy our “Chewy” Copycat Granola Bars or these rich Chocolate Granola Bars.
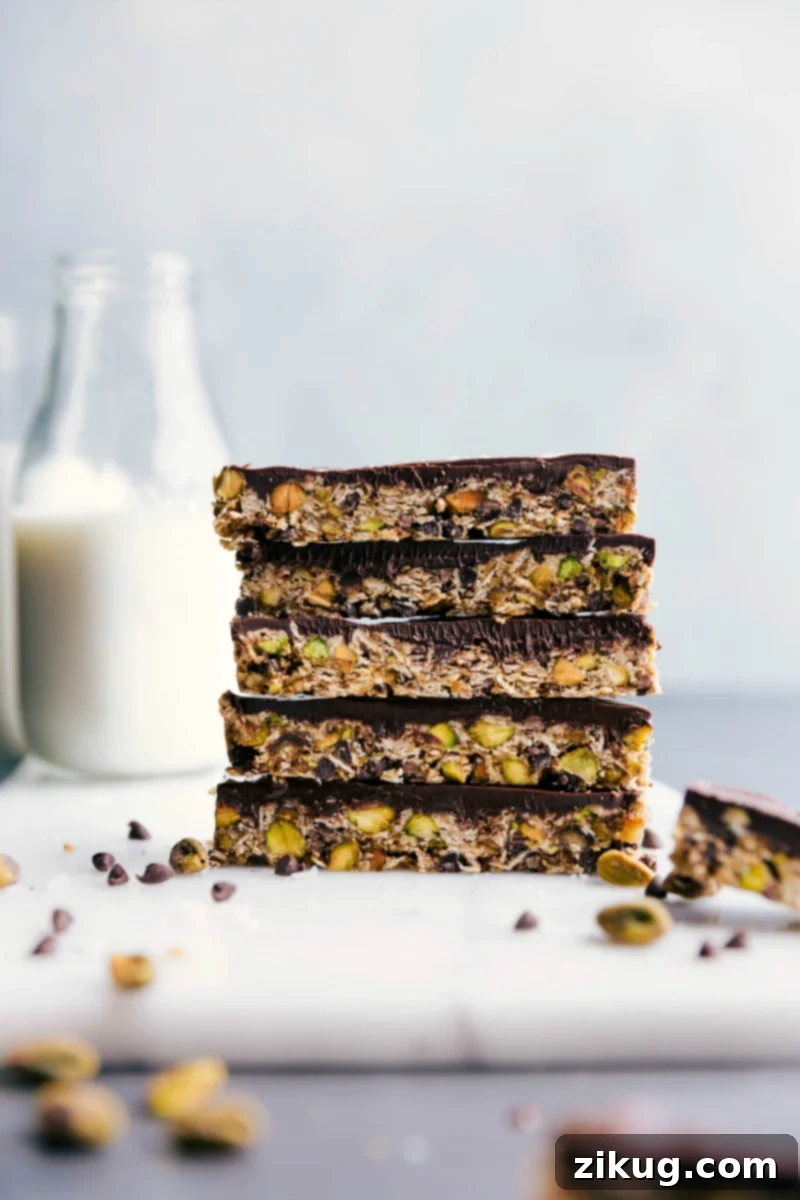
Irresistibly Delicious No-Bake Granola Bars
From granola and muesli to energy bites, I have a deep appreciation for wholesome, chewy snacks. Truthfully, I often find myself reaching for these homemade granola bars over a traditional candy bar. They offer a perfect balance of natural sweetness and rich flavor, paired with a satisfying chewy texture. The best part? I always feel fantastic after enjoying them, knowing they’re packed with good-for-you ingredients.
What makes these bars truly special is their natural sweetness, derived primarily from dates and pure maple syrup, steering clear of refined sugars (depending on your choice of chocolate). If you’re new to baking or cooking with dates, prepare for a delightful discovery! Dates, the naturally sweet fruit of the date palm tree, are incredible for enhancing the flavor of baked goods, smoothies, sauces, desserts, and, of course, these fantastic granola bars. They provide a unique caramel-like sweetness and a wonderfully sticky texture that acts as a natural binder.
Beyond their sweetness, dates offer numerous health benefits, being a great source of fiber, potassium, and antioxidants. While you can delve deeper into the health benefits of dates here, today we’ll focus on how to harness their power to create these wholesome and satisfying no-bake granola bars.
Quick Tip: Date Varieties
Dates, originating from specific palm trees, come in various types. Medjool dates are notably large, soft, and moist, making them excellent for stuffing and providing about 66 calories per date. Deglet Noor dates, on the other hand, are smaller, firmer, and less sticky, with a slightly milder sweetness, typically containing around 20 calories each. Both varieties are perfectly suitable for this recipe and contribute wonderfully to the bar’s texture and flavor.
The Essential Ingredient: Dates for Perfect Binding and Sweetness
Dates are the secret to the perfect texture and natural sweetness in these granola bars. Their sticky nature acts as a fantastic binder, holding all the ingredients together without the need for excessive added fats or refined sugars. Proper preparation of dates is crucial for achieving the desired consistency and ensuring a smooth mixture.
-
Sourcing Your Dates: You can typically find dates in the produce section of most grocery stores, often near other dried fruits or sometimes in the international aisle. Look for reputable brands like Sunsweet® or Natural Delights®. For this recipe, both Deglet Noor and Medjool dates work beautifully, with Deglet Noor often being a personal favorite for its consistent texture, though Medjool offers a richer, more caramel-like flavor.
Here’s where to find dates in the grocery store if you need guidance. -
Pitting is Paramount: Always ensure the dates you are using are pitted. An un-pitted date can severely damage your blender blades or food processor. Trust us, it’s not a mistake you want to make!
- How to Pit a Date: To remove the pit, use a small serrated or paring knife to carefully slice lengthwise down one side of the date. Gently pull the date open to expose the long, hard pit. Remove and discard it. If your dates are particularly soft and pliable, you might even be able to pull them apart with your hands and extract the pit without a knife.
-
Ensuring Softness: The dates should be soft enough to easily squish or pull apart with your hands to remove the pit. If they feel dry or firm, they will need to be rehydrated before use.
- How to Soak Dates: Place the firm dates in a bowl and cover them with warm water. Let them soak for anywhere from 30 minutes to 2 hours, or until they are soft enough to easily pit and squish. Once softened, make sure to drain them thoroughly and gently squeeze out any excess water before incorporating them into your granola bar mixture. Too much moisture can make your bars too wet.
- Creating the Date Paste: The date paste is the primary binder and sweetener for these bars. For best results, use a high-powered blender or a food processor to blend the pitted dates until a thick, smooth, and sticky paste forms. This process may require a bit of patience; you might need to stop and scrape down the sides of the bowl or jar, stirring the mixture before blending again, to ensure everything is thoroughly processed. With a powerful appliance, this typically takes 1-2 minutes for well-softened dates.
Unleash Your Creativity: Customizable Granola Bar Variations
One of the best aspects of making these no-bake granola bars is how incredibly adaptable they are. Feel free to experiment with different ingredients to suit your taste preferences or dietary needs. Here are some fantastic ways to customize your batch:
-
Nutty Delights: Swapping Nuts
While chopped pistachios add a wonderful texture and unique flavor, almost any nut will work beautifully in this recipe. Consider almonds, walnuts, pecans, or hazelnuts for different flavor profiles. Regardless of your choice, ensure the nuts are coarsely chopped to provide a pleasant crunch throughout the bars. We recommend using 3/4 cup (approximately 98g) of nuts. If you have nut allergies or prefer a nut-free option, you can easily replace the nuts with an equal amount of coarsely chopped dried fruit, such as dried tart cherries, cranberries, apricots, or raisins. This swap maintains the chewy texture and adds a different dimension of sweetness.
-
Creamy Foundations: Exploring Nut Butters
Peanut butter provides a classic, comforting flavor, but don’t hesitate to experiment with other nut butters. Almond butter, cashew butter, or even sunflower seed butter (for a nut-free alternative) can be fantastic choices. Keep in mind that different nut butters have varying consistencies. Almond butter, for example, tends to be slightly drier than peanut butter, so you might need to add a little more to achieve the right consistency. If your mixture appears crumbly and isn’t coming together well, gradually add an additional 1-2 tablespoons of nut butter until it reaches the desired sticky, pliable texture.
-
Sweetening Your Way: Alternative Natural Sweeteners
Maple syrup is a wonderful natural sweetener, but you can swap it for agave nectar or honey if those are your preferred choices. It’s important to note that the dates are a fundamental component of this recipe, acting as both a primary sweetener and a crucial binder, so we highly recommend against omitting or substituting them entirely. Their unique properties are key to the success of these no-bake bars.
-
The Irresistible Chocolate Topping
The dark chocolate topping is optional but highly recommended for an extra layer of decadence. If dark chocolate isn’t your preference, feel free to leave it off entirely – the bars are delicious on their own! Alternatively, you can swap the dark chocolate for milk chocolate or semi-sweet chocolate chips, though this will introduce refined sugars and make the bars sweeter. For a lighter touch, you could melt just 1/4 cup of chocolate and simply drizzle it over the bars, similar to our No-Bake Granola Bars recipe, for a hint of chocolate flavor without a full layer.
Quick Tip: Enhanced Flavor with Toasted Ingredients
For an effortless boost of flavor, use roasted and salted nuts in your granola bars. If you only have raw nuts or want to intensify the flavor of your oats, you can quickly toast them in the oven. Simply spread the oats and nuts in a single layer on a lined baking sheet and bake at 350°F (175°C) for 8-10 minutes, stirring once halfway through. They should become fragrant and lightly golden, but be careful not to burn them. This simple step adds a deeper, nuttier flavor profile to your bars.
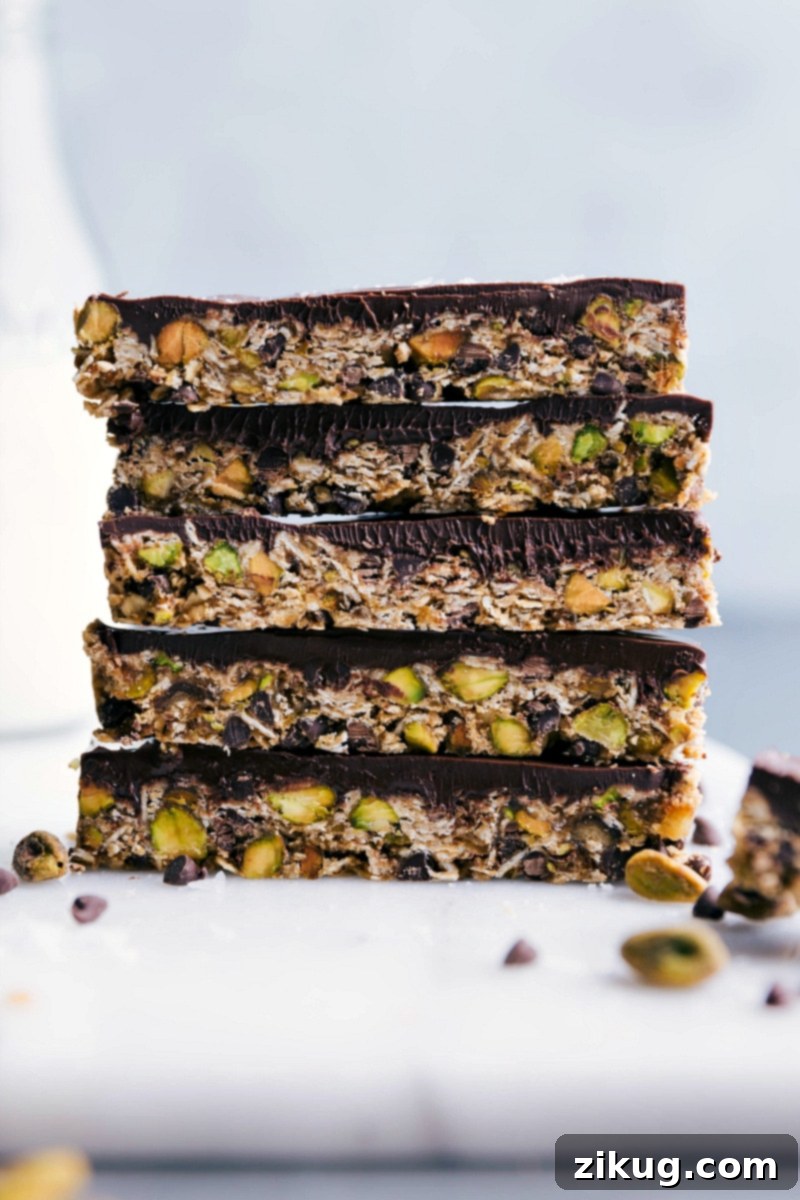
Expert Tips for Granola Bar Perfection
Achieving perfectly structured and delicious no-bake granola bars is simple with a few key techniques. These tips will help ensure your bars hold together beautifully and offer the best possible flavor and texture:
- Thorough Mixing is Key: The granola bar mixture can be quite thick and sticky, making it challenging to combine all ingredients by hand. Using an electric hand mixer or a stand mixer can be incredibly helpful in ensuring the date paste, nut butter, and other components are uniformly incorporated. This thorough mixing is essential for a consistent texture and for the bars to bind effectively. Don’t be afraid to get your hands in there to knead the mixture if needed to achieve a perfectly cohesive dough.
- Press the Bars Firmly into the Pan: Once your ingredients are thoroughly mixed, the next crucial step is compressing the mixture firmly into your prepared pan. The more tightly packed and compressed the mixture is, the less likely your bars are to crumble or fall apart once cut. Use the flat bottom of a measuring cup or a clean, flat spatula to press down with significant force, creating a dense and even layer across the entire pan. This compression creates the structural integrity of your no-bake bars.
- The Perfect Pinch of Salt: Salt plays a vital role in balancing the sweetness of the dates and maple syrup, enhancing the overall flavor profile of your granola bars. If you are using roasted and salted nuts, or if you plan to sprinkle sea salt flakes on top of your finished bars (especially with a chocolate topping), you might not need to add additional salt to the base mixture. However, if your nuts are raw and unsalted, or if you prefer a more pronounced flavor balance, we highly recommend adding a scant 1/4 teaspoon of fine sea salt to the base mixture. This small addition makes a significant difference in taste.
- Cut with Precision: For clean, professional-looking granola bars that hold their shape, use a large, sharp knife. A dull knife tends to drag and tear the mixture, making the bars more prone to falling apart. Before cutting, ensure the bars are thoroughly chilled, especially if they have a chocolate topping, as this will help them firm up and slice cleanly. If the chocolate is too hard to cut, let it sit at room temperature for a few minutes before slicing.
Quick Tip: Making Granola Bars Gluten-Free
The ingredients in these delicious no-bake granola bars are naturally gluten-free. However, for those with gluten sensitivities or celiac disease, it’s crucial to check all ingredient labels carefully. Specifically, ensure that your oats are certified gluten-free, as conventional oats can sometimes be processed in facilities that also handle wheat, leading to cross-contamination. Always verify labels to guarantee a truly gluten-free snack.
More Wholesome Snack Ideas to Fuel Your Day
If you’re looking for more healthy and easy snack options, here are some other reader favorites that are perfect for meal prep or quick indulgences:
- Homemade Granola: A versatile base for yogurt, milk, or just by the handful.
- No-bake Energy Bites: Quick, pop-able, and full of energy-boosting ingredients.
- Yogurt and Berry Parfait: Layered goodness with fresh fruit and creamy yogurt.
- Healthy No-Bake Cookies: A classic treat, made healthier.
- No-Bake Healthy Breakfast Cookies: Perfect for busy mornings, offering a wholesome start to your day.
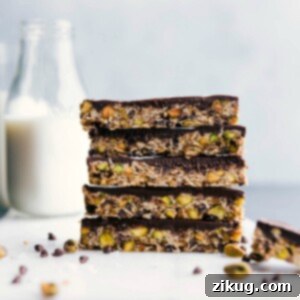
Granola Bars
Equipment
-
8 x 8-inch baking pan
-
Parchment paper or aluminum foil
-
Small blender or a food processor
-
Hand mixer
Ingredients
- 1 cup packed pitted dates (see note 1)
- 1/3 cup creamy peanut butter
- 1/3 cup maple syrup
- 1 teaspoon vanilla extract
- 1/2 cup quick oats (the one-minute kind)
- 1 cup old-fashioned oats
- 3/4 cup roasted and salted pistachios (coarsely chopped, see note 2)
- 1/2 cup mini chocolate chips (see note 3)
- 1 cup chocolate chips (dark or milk chocolate)
- 2 teaspoons coconut oil
Instructions
-
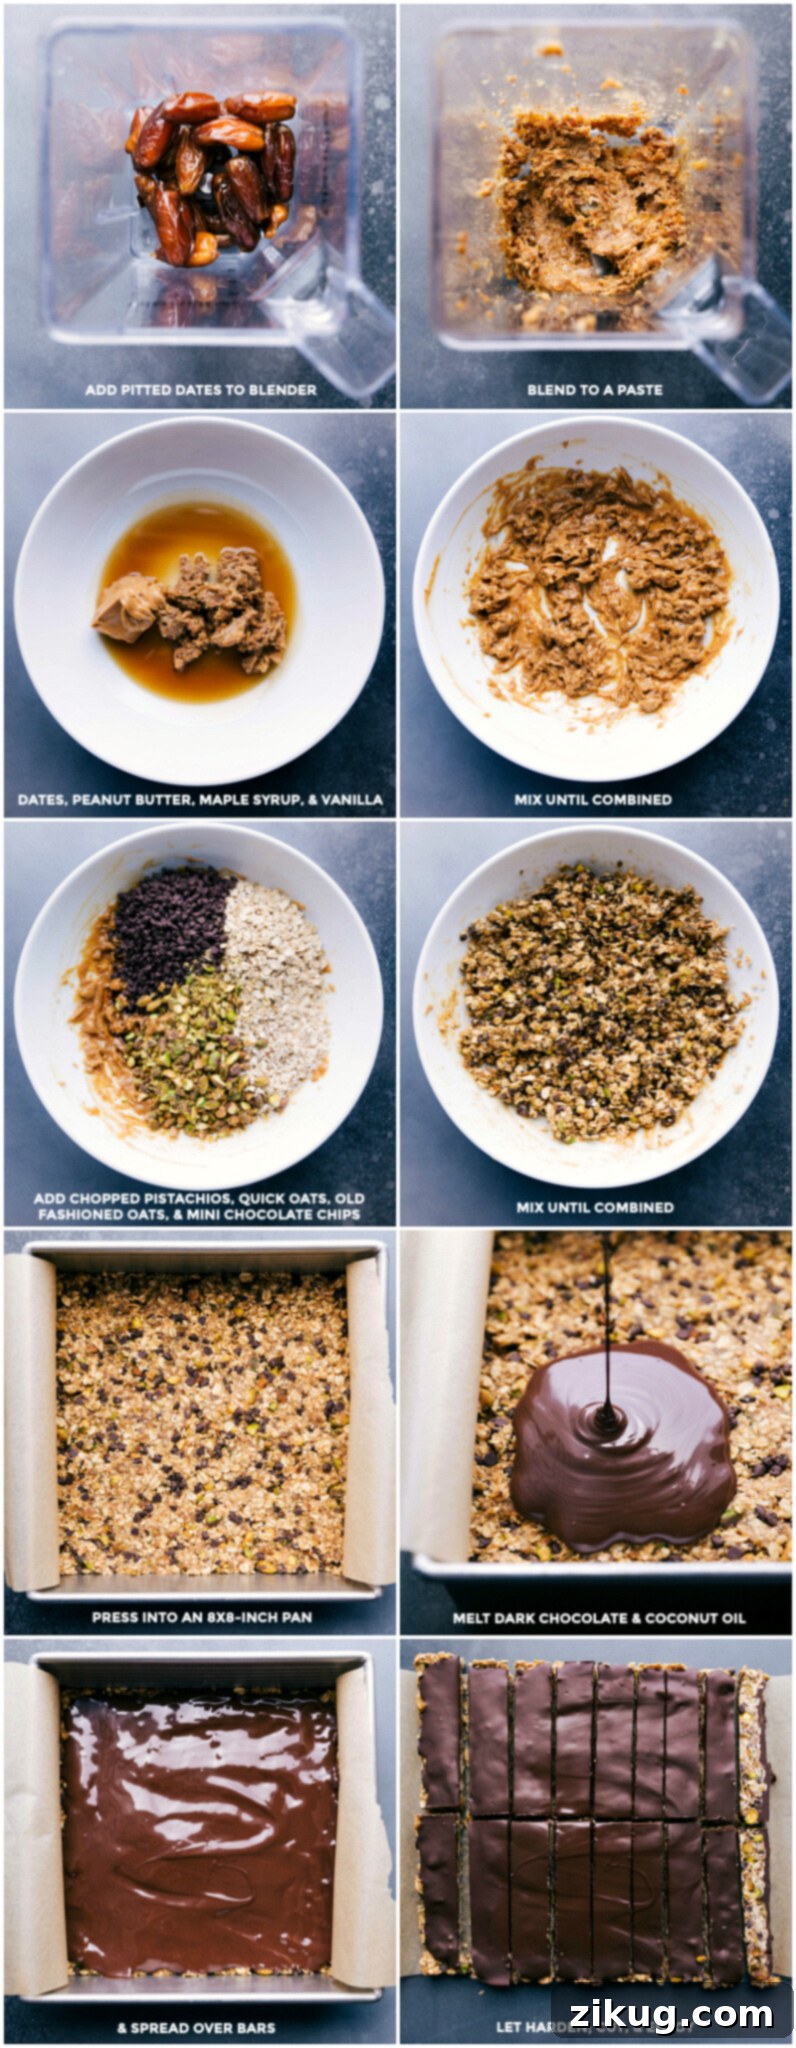
Line an 8×8-inch pan with parchment paper or foil, ensuring an overhang on the sides for easy removal of the bars later. Avoid spraying with cooking spray, as this can make the bars greasy. Set the prepared pan aside.
-
Prepare the Dates: (Refer to Note 1 for more details on dates.) In a small blender or food processor (a small Twister Jar with a Blendtec blender works exceptionally well), pulse the pitted dates until they form a very thick and sticky paste. This step requires patience; you may need to stop and stir the mixture with a spoon and re-blend several times to achieve a smooth, uniform paste.
-
Carefully scoop out every last bit of the date paste and transfer it to a large mixing bowl. Add the peanut butter, maple syrup, and vanilla extract to the bowl. Use an electric hand mixer to beat these ingredients together until they are thoroughly combined and smooth.
-
Stir in the quick oats, old-fashioned oats, mini chocolate chips, and coarsely chopped pistachios. If your pistachios and peanut butter are unsalted, consider adding a scant 1/4 teaspoon of fine sea salt to the mixture. Continue to mix until all ingredients are thoroughly combined. If the mixture is very thick, you may need to use your hands to knead it until a well-combined and cohesive dough forms.
-
Transfer the entire mixture into the prepared 8×8-inch baking pan. Using the bottom of a flat 1-cup measuring cup or a sturdy spatula, press the mixture down very firmly into an even layer across the entire pan. The firmer you press, the better the bars will hold together. Set the pan aside.
-
Optional Chocolate Topping: In a large, microwave-safe bowl, combine the chocolate chips and coconut oil (measured when the oil is in a hardened state). Microwave in 15-second bursts, stirring vigorously for 15 seconds after each burst, until the chocolate is completely melted and smooth. Pour the melted chocolate evenly over the pressed granola bar mixture. Gently tilt the pan from side to side to create a smooth, even layer of chocolate on top. Cover the pan and refrigerate until the chocolate topping is completely set and firm.
-
Once the bars are chilled and firm, use the parchment paper overhang to carefully lift the entire slab of granola bars from the pan. Place on a cutting board and use a large, sharp knife to cut them into equal-sized bars. Store any leftover bars in an airtight container in the refrigerator for up to 1 week.
Recipe Notes
- How to Soak Dates: Place dates in warm water for 30 minutes to 2 hours, until they soften enough to easily remove the pits. Drain them very well and pat dry to remove any excess water before using in the granola bar mixture.
Note 2 – Roasting Nuts for Flavor: For a deeper flavor, use roasted and salted nuts. If you have raw nuts, you can toast them (and your oats!) in the oven. Spread nuts (and oats, if desired) on a lined baking sheet and bake at 350°F (175°C) for 8–10 minutes, stirring once. They should be fragrant but not burned. If using unsalted nuts, add a scant 1/4 teaspoon fine sea salt to the bar mixture.
Note 3 – Chocolate Choices: To keep these bars entirely free of refined sugar, opt for sugar-free chocolate chips. Alternatively, you can substitute the chocolate chips with another finely chopped ingredient in the same quantity, such as extra nuts or dried fruit.
Storage: Store any leftover granola bars in an airtight container in the refrigerator for up to 1 week to maintain freshness and texture.
Nutrition
Nutrition information is automatically calculated and should only be used as an approximation.
Enjoyed this recipe? Share your thoughts below!