
4 Incredibly Easy Halloween Cookies (Just 4 Ingredients Each!)
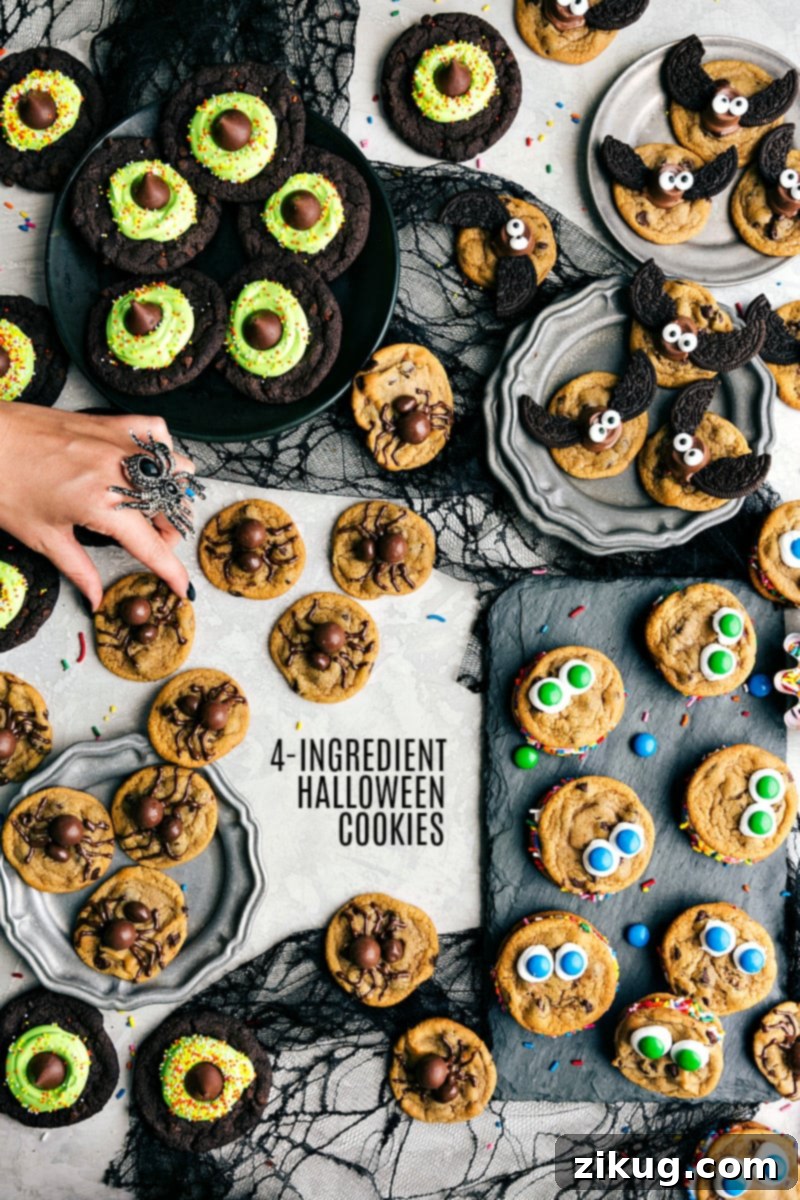
Get ready to elevate your Halloween celebrations with these unbelievably easy and delightfully spooky cookie recipes! We’re bringing you four distinct, fun, and irresistibly delicious Halloween cookie ideas, each requiring only four simple ingredients. Whether you’re a seasoned baker or just looking for a quick, festive treat, these recipes are designed to add a touch of magic to your October.
To further enhance your Halloween experience, don’t miss out on these fantastic complementary resources: grab our FREE Halloween Bag Toppers – perfect for party favors! And for more festive bites, explore our collection of Spooky Halloween Appetizers or try these fun Halloween Oreo Pops.
Halloween is undoubtedly one of the most exciting times of the year, and I’m always searching for creative ways to immerse myself in the spirit of the season. With October often being a whirlwind of activities, these easy Halloween cookies have become my ultimate go-to for a quick, yet perfectly festive, indulgence. They’re fantastic for getting the kids involved in the kitchen, turning baking into a fun, memorable activity. Imagine their delight as they help transform simple ingredients into edible spiders, monsters, bats, and witch hats!
The recipes you’ll find below are crafted for simplicity and speed, making them ideal for those last-minute party preparations or for anyone who isn’t usually keen on extensive baking. However, for the enthusiastic bakers who enjoy a bit more hands-on time and wish to create everything from scratch, I’ve also included guidance on how to prepare each cookie base from square one. No matter your baking preference, you’re in for a treat. Enjoy the process and have a wonderfully Happy Halloween!
Effortless Halloween Cookie Creations
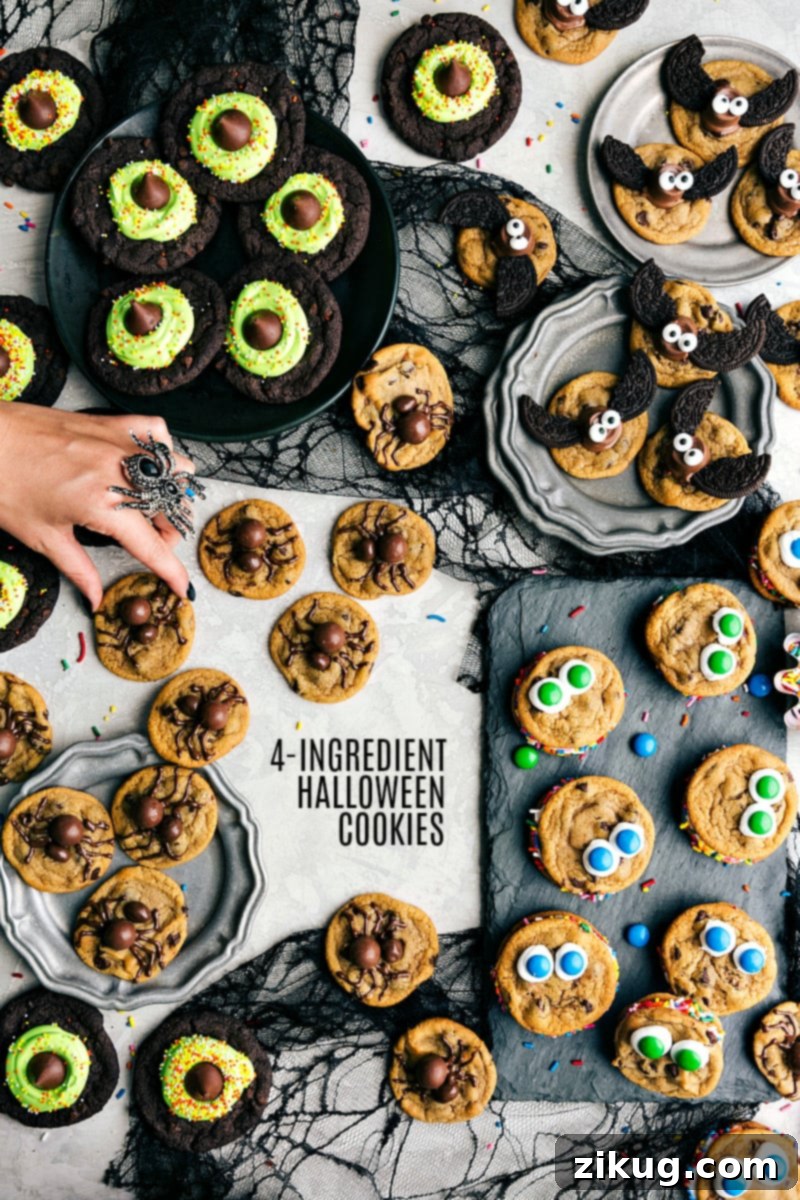
Halloween treats don’t have to be complicated to be spectacular. Our focus here is on maximizing festive fun with minimal fuss. Each of these recipes leverages store-bought cookie dough or an easy homemade base, then transforms them with just a few decorative elements. This approach means less time in the kitchen and more time enjoying the spooky season with family and friends.
These cookies are not just easy; they are also incredibly versatile. You can easily adapt them to your favorite cookie base, whether it’s classic chocolate chip, sugar cookie, or even snickerdoodle. The key is the creative decoration, which is where the magic truly happens. Let’s dive into these fantastic ideas!
Spooky Spider Halloween Cookies: A 4-Ingredient Delight
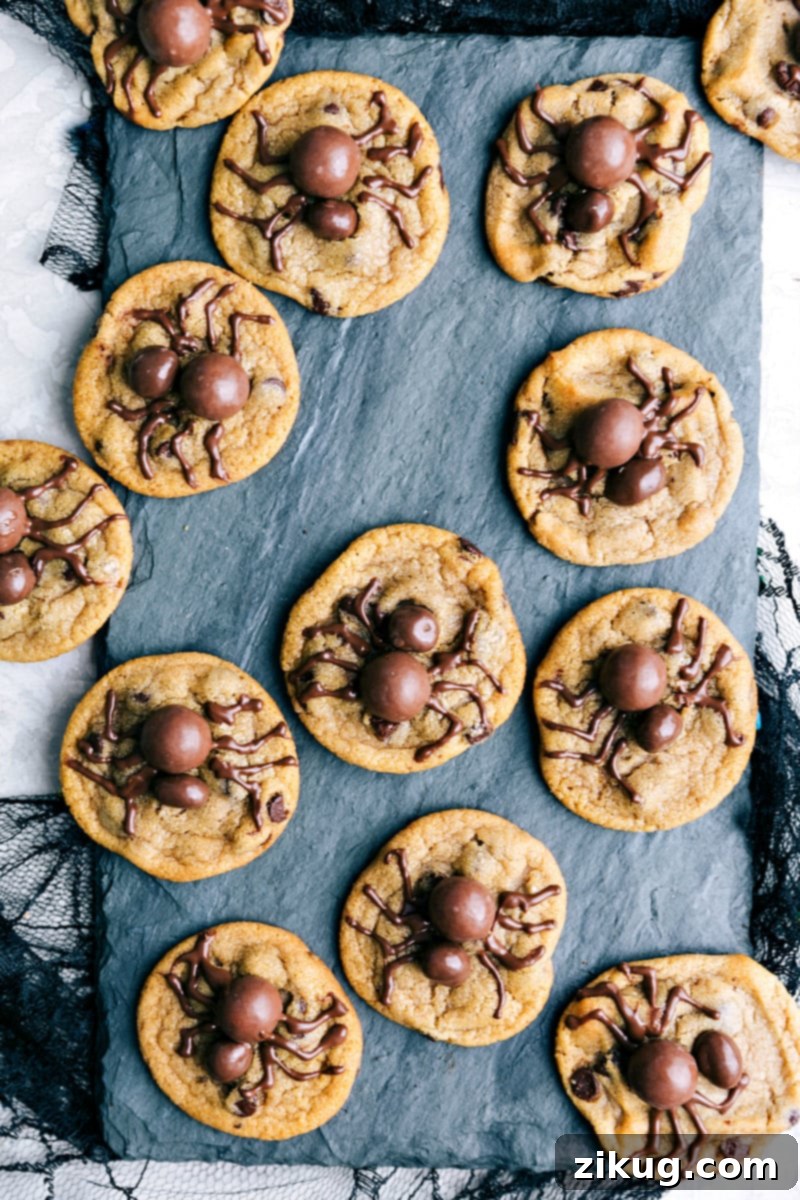
These adorable spider cookies are guaranteed to be a hit at any Halloween gathering. With a chewy cookie base, a delightful malted candy body, and intricate chocolate legs, they’re as fun to look at as they are to eat. The best part? You only need four ingredients (plus an optional fifth for perfect chocolate consistency) to bring these eight-legged friends to life!
For those who love to bake from scratch, you can use your favorite homemade chocolate chip cookie recipe as the base. Consider trying these Caramel Stuffed Cookies (simply omit the caramel or substitute extra chocolate chips for M&Ms) or a classic refrigerated chocolate chip cookie dough. If time is short, a store-bought chocolate chip cookie will work perfectly. Once your cookie base is ready, follow the simple decoration steps below to finish these creepy-crawly treats!
Spider Cookie Recipe
Recipe Summary
Get ready for a spooky treat with these spider cookies! These easy four-ingredient Spider Cookies are the perfect addition to your Halloween cookie platter.
- Author: Chelsea Lords
- Prep Time: 15 minutes
- Cook Time: 10 minutes
- Chilling/Set-up Time: 1 hour
- Total Time: 1 hour 25 minutes
- Yields: 24 cookies
Equipment
- Sheet pan (15″ x 10″)
- Piping bag or resealable plastic bag
Ingredients
- 1 (16-ounce) package ready-to-bake chocolate-chip cookie dough (see note 1 for homemade options)
- 24 Whoppers or other malted candies
- 14 chocolate-covered raisins (used for eyes)
- 1/2 cup milk chocolate chips (or dark or semi-sweet chocolate chips)
- 1/4 teaspoon shortening or vegetable oil (optional, for smooth chocolate)
Instructions
- Preheat your oven according to the cookie package directions. Line your sheet pans with parchment paper or a silicone baking mat. Bake the cookies as instructed on the package until golden brown.
- Once baked, remove the cookies from the oven and let them cool on the sheet pan for 2 minutes. While still warm, gently press one Whopper candy into the bottom third of each cookie. Immediately above the Whopper, press a chocolate-covered raisin to form the spider’s head. Allow them to cool for an additional 3 minutes on the sheet pan, then carefully transfer them to cooling racks to cool completely, which typically takes about 30 minutes.
- Once the cookies are completely cool, place your chocolate chips (and the optional shortening or vegetable oil) into a microwave-safe bowl. Microwave in short 15-second bursts, stirring for about 10 seconds between each burst, until the chocolate is fully melted and smooth. Be careful not to overheat the chocolate, as it can seize.
- Carefully transfer the melted chocolate into a piping bag fitted with a small #2 or #3 round tip. If you don’t have a piping bag, a resealable plastic bag with a tiny corner snipped off will work just as well. Pipe eight delicate spider legs extending from the Whopper body towards the edges of the cookie. Allow the chocolate to set completely at room temperature, or in the refrigerator for quicker setting. These cookies are best enjoyed within 2–3 days.
Recipe Notes
Note 1: If you prefer to make your cookie dough from scratch, you can adapt your favorite chocolate chip cookie recipe. Ensure the cookies are flat enough to accommodate the candy decorations.
Nutrition Information (per serving)
Serving: 1 serving | Calories: 243 kcal | Carbohydrates: 50g | Protein: 2g | Fat: 13g | Saturated Fat: 4g | Trans Fat: 1g | Cholesterol: 4mg | Sodium: 164mg | Potassium: 57mg | Fiber: 1g | Sugar: 39g | Vitamin A: 18IU | Vitamin C: 1mg | Calcium: 4mg | Iron: 1mg
Nutrition information is automatically calculated and should only be used as an approximation.
Fun & Furry Monster Halloween Cookies: Simple Steps for Spooky Sandwiches
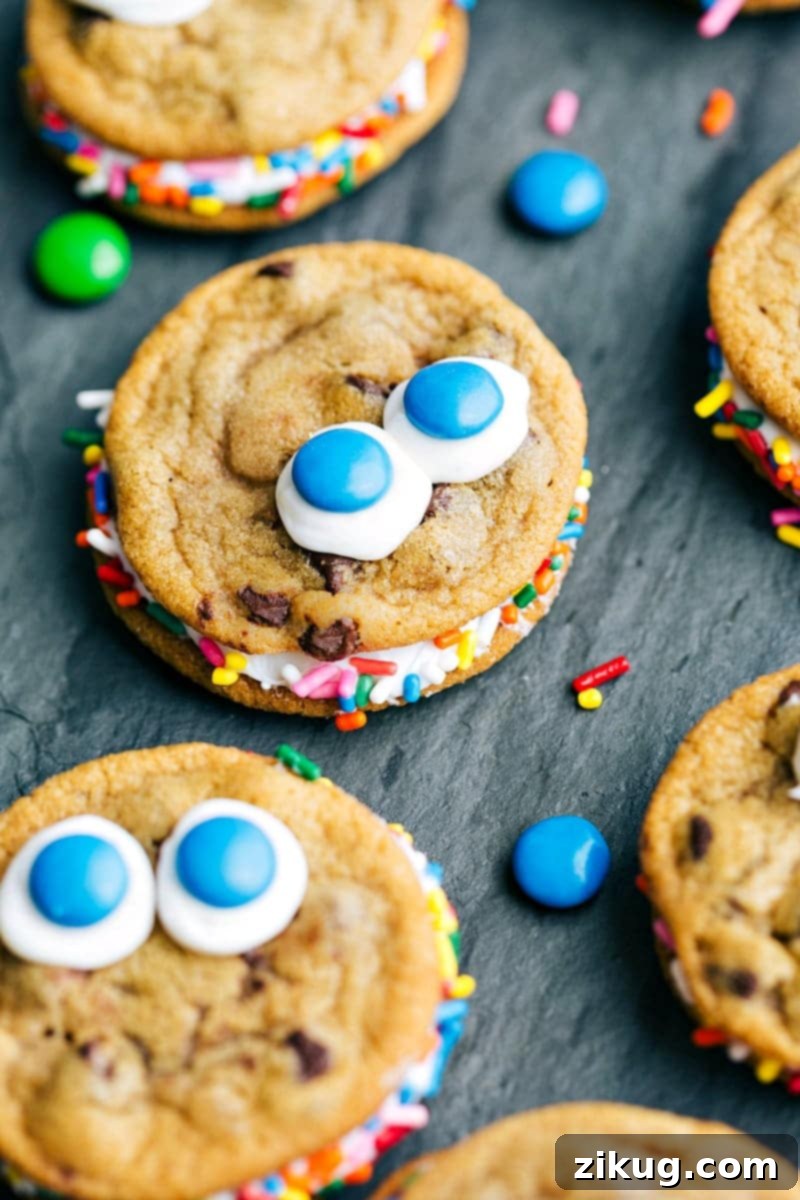
Unleash your inner monster with these playful and colorful Halloween cookies! These monster sandwich cookies are incredibly simple to assemble and are guaranteed to bring smiles to faces. With vibrant frosting, candy eyes, and a generous coating of sprinkles, they’re a visual delight and a sweet treat for any Halloween celebration. Like our other festive cookies, they call for just a few main ingredients, making them perfect for a quick project.
For those who love baking, you can use a homemade sugar cookie base and a delicious vanilla or cream cheese frosting (minus any cinnamon, if you use a spiced recipe). If you’re opting for convenience, ready-to-bake sugar cookie dough or even store-bought sugar cookies are fantastic starting points. Feel free to experiment with different food colorings for your frosting to create an array of monstrous hues!
For a unique twist, try using snickerdoodle cookies as your base. Fill them with a rich cream cheese frosting and, instead of rainbow sprinkles, roll the edges in cinnamon sugar for a warm, autumnal monster that tastes as good as it looks!
Monster Cookie Recipe
Recipe Summary
Ready for a Halloween cookie upgrade? These adorable Monster Cookies are easy to make and a tasty treat at any Halloween party!
- Author: Chelsea Lords
- Prep Time: 20 minutes
- Cook Time: 10 minutes
- Total Time: 30 minutes
- Yields: 12 cookies
Equipment
- Sheet pan (15″ x 10″)
Ingredients
- 1 (16-ounce) package ready-to-bake chocolate-chip cookie dough (see note 1 for homemade options)
- 1 container vanilla frosting (or cream cheese frosting, see note 1)
- 24 M&M’s (blue and green work great for a monster look)
- 1/2 cup Jimmies rainbow sprinkles
Instructions
- Preheat your oven to the temperature specified on your cookie dough package. Line your sheet pans with parchment paper or a silicone baking mat. Bake the cookies according to the package directions until they are lightly golden around the edges. Allow them to cool completely on a wire rack before proceeding.
- Once the cookies are thoroughly cooled, take half of the cookies and spread a generous layer of vanilla frosting on the flat underside of each. Then, gently place the remaining 12 cookies on top to form sandwiches, pressing lightly so that the frosting subtly oozes out around the edges. This creates the “furry” look.
- While the frosting around the edges is still soft and pliable, carefully roll the frosting-coated edges of each cookie sandwich into a shallow bowl filled with rainbow sprinkles. The sprinkles will adhere to the frosting, creating a colorful, textured “fur” for your monsters.
- Scoop any remaining frosting into a small plastic bag and snip off a tiny corner from the tip. Pipe two small circles of frosting onto the top of each cookie sandwich to serve as eye bases. Immediately press one M&M into each frosting circle to create the monster’s eyes. For the best taste and texture, these delightful monster cookies are best enjoyed within 2-3 days.
Recipe Notes
Note 1: Not a fan of store-bought cookies or frosting? Feel free to use your favorite homemade cookie recipe (like a classic sugar cookie) and a homemade cream cheese frosting for an even more gourmet touch. Just ensure the frosting is thick enough to hold the sprinkles and M&Ms.
Nutrition Information (per serving)
Calories: 322 kcal | Carbohydrates: 50g | Protein: 2g | Fat: 13g | Saturated Fat: 4g | Trans Fat: 1g | Cholesterol: 4mg | Sodium: 164mg | Potassium: 65mg | Fiber: 1g | Sugar: 39g | Vitamin A: 18IU | Vitamin C: 1mg | Calcium: 6mg | Iron: 1mg
Nutrition information is automatically calculated and should only be used as an approximation.
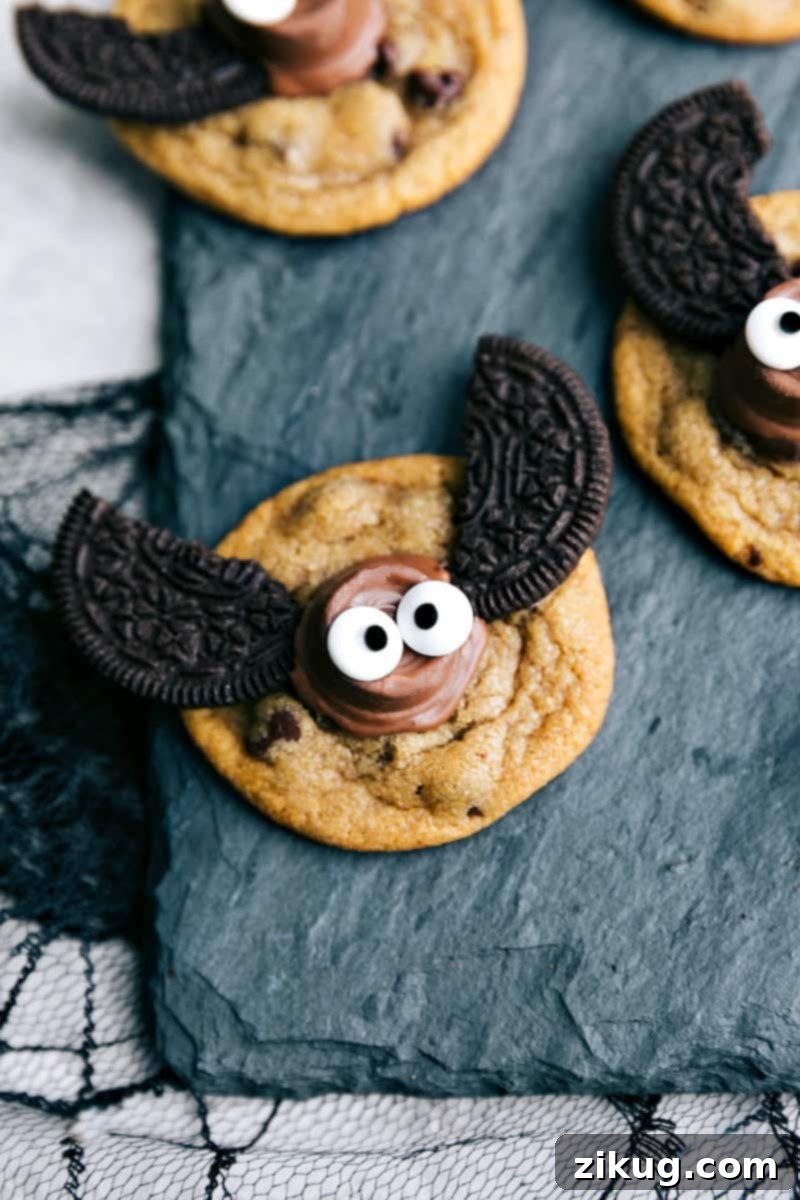
Cute & Creepy Bat Halloween Cookies: A Quick 4-Ingredient Recipe
Flitter into fun with these adorable bat Halloween cookies! These treats are incredibly simple, yet boast a charmingly spooky appeal that’s perfect for any October celebration. Featuring a gooey Rolo candy body and iconic Oreo cookie wings, these bats are a delightful combination of textures and flavors. Best of all, they only require four key ingredients, making them a fantastic last-minute project or a fun activity for kids.
For the cookie base, you can use your go-to chewy chocolate chip cookie recipe, or for ultimate ease, opt for refrigerated cookie dough or even pre-made store-bought cookies. The magic truly happens when you transform these simple elements into delightful little bats. Read on for the full instructions to create these creepy cuties!
Bat Cookie Recipe
Recipe Summary
Get ready for some spooky fun with these 4-ingredient bat cookies! Gooey Rolo candy forms the bat’s body, while Oreo wings complete the look. Enjoy these creepy cuties as a great Halloween treat!
- Author: Chelsea Lords
- Prep Time: 15 minutes
- Cook Time: 10 minutes
- Total Time: 25 minutes
- Yields: 24 cookies
Ingredients
- 1 (16-ounce) package ready-to-bake chocolate-chip cookie dough (see note 1 for homemade options)
- 24 Rolos candies, unwrapped
- 1 package chocolate sandwich cookies (Oreo Thins work best for breaking into wing shapes)
- 48 candy eyeballs
- 1/4 cup chocolate chips (optional, for securing eyeballs)
- 1/4 teaspoon shortening or vegetable oil (optional, for melting chocolate smoothly)
Instructions
- Preheat your oven to the temperature specified on the cookie package. Line your sheet pans with parchment paper or a silicone baking mat. Bake the chocolate chip cookies as directed on the package until they are soft and golden.
- Once the cookies are baked, remove them from the oven and let them cool on the sheet pan for just 1–2 minutes. While they are still warm and soft, firmly press an unwrapped Rolo candy into the center of each cookie. Allow the Rolos to sit for a few minutes on the warm cookies to soften slightly.
- Carefully separate the chocolate sandwich cookies (Oreos), scraping off the cream filling. Break each cookie in half to create two bat wings. (Be prepared for some cookies to break unevenly, so have extra on hand!). Press two of these half-Oreo “wings” into the soft Rolo candy on each cookie, positioning them to resemble bat wings.
- The warmth from the Rolo candy should be enough to make it slightly melty and sticky, allowing the candy eyeballs to adhere. If the Rolo isn’t soft enough, you can melt the optional chocolate chips with a tiny bit of shortening or vegetable oil in the microwave. Use a small dab of this melted chocolate to pipe onto the back of the candy eyeballs and attach them to the top of the Rolo for a truly spooky effect. Alternatively, these cookies still look like cute bats even without the candy eyeballs!
- Allow the decorated bat cookies to set up completely at room temperature until the Rolos and chocolate have firmed up. These delightful bats are best enjoyed within 2–3 days.
Recipe Notes
Note 1: For a homemade cookie base, use your favorite chocolate chip cookie recipe. Ensure the cookies are baked until just set, allowing them to remain slightly soft for pressing in the Rolos.
Nutrition Information (per serving)
Calories: 206 kcal | Carbohydrates: 31g | Protein: 2g | Fat: 9g | Saturated Fat: 3g | Trans Fat: 1g | Cholesterol: 3mg | Sodium: 153mg | Potassium: 80mg | Fiber: 1g | Sugar: 20g | Vitamin A: 15IU | Vitamin C: 1mg | Calcium: 14mg | Iron: 2mg
Nutrition information is automatically calculated and should only be used as an approximation.
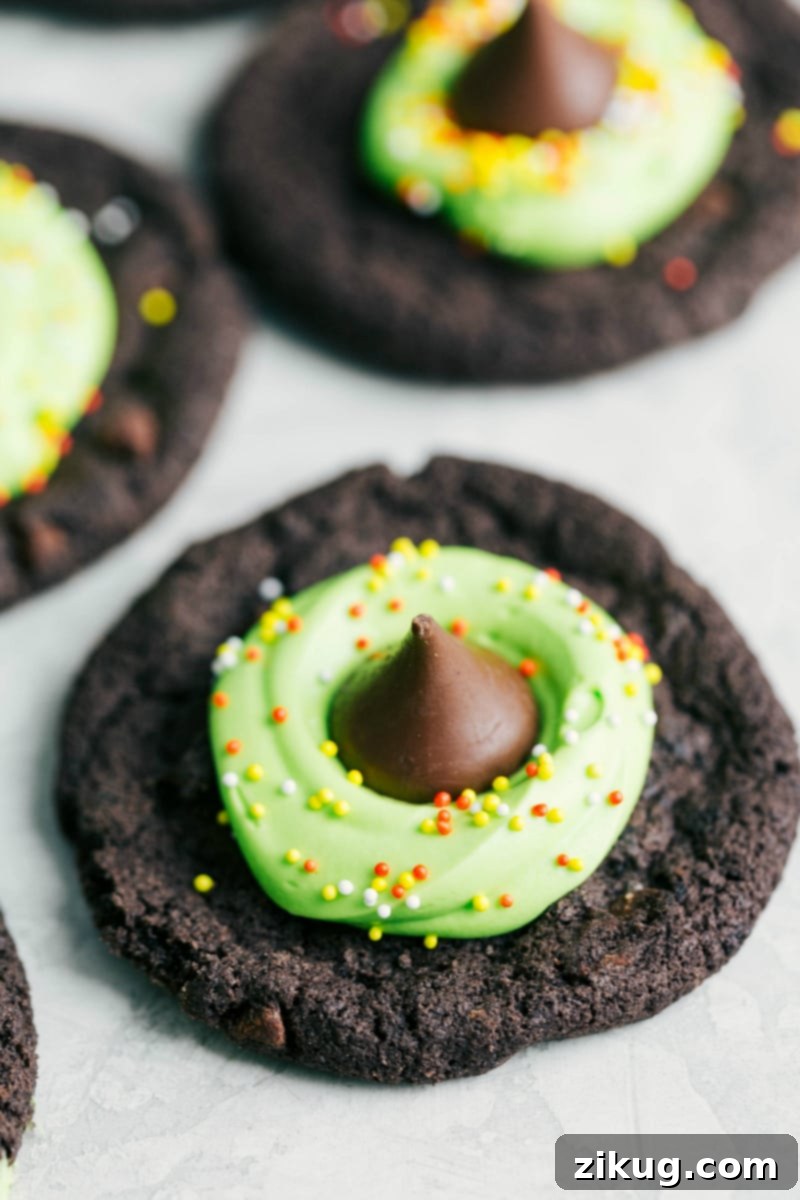
Whimsical Witch Hat Halloween Cookies: Simple Spooky Magic
Cast a spell of deliciousness with these charming witch hat Halloween cookies! These treats are deceptively simple to make, yet they capture the essence of Halloween with their iconic shape and vibrant colors. Featuring a dark cookie base, a swirl of colorful frosting, and a chocolate kiss point, they’re an enchanting addition to any festive table. With just four ingredients, these cookies are perfect for a quick project that delivers impressive results.
For a homemade touch, prepare a batch of your favorite chocolate cookies as the base. You can also whip up this frosting recipe (omitting the cinnamon for a more neutral flavor). For maximum convenience, refrigerated chocolate cookie dough or pre-made store-bought chocolate cookies will work wonderfully. The key is the fun and easy decoration!
If you’re making homemade frosting, a few drops of green food dye will give it that classic witchy hue. Then, simply follow the steps below to transform your cookies into magical witch hats, complete with optional sparkling sprinkles!
Witch Hat Cookie Recipe
Recipe Summary
Get ready to indulge in some Halloween magic with these 4-ingredient Witch Hat Cookies! Just bake, frost, and top with a chocolate kiss.
- Author: Chelsea Lords
- Prep Time: 15 minutes
- Cook Time: 10 minutes
- Total Time: 25 minutes
- Yields: 24 cookies
Equipment
- Sheet pan (15″ x 10″)
- Resealable plastic bag or piping bag
Ingredients
- 1 (16-ounce) package chocolate cookie dough (refrigerated, see note 1 for homemade options)
- 1 container vanilla frosting (or cream cheese frosting, use green food coloring if desired, see note 1)
- 24 Chocolate candy kisses, unwrapped
- Pareil sprinkles (optional, for extra sparkle)
Instructions
- Preheat your oven according to the cookie package directions. Line your sheet pans with parchment paper or a silicone baking mat. Bake the chocolate cookies as directed on the package until they are cooked through but still soft. Allow them to cool completely on a wire rack before decorating.
- If desired, dye your vanilla or cream cheese frosting with green food coloring until it reaches your preferred shade. Transfer the colored frosting into a resealable plastic bag or a piping bag fitted with an extra-large pastry tip. If using a plastic bag, snip off a small corner with scissors to create an opening. Pipe a generous dollop or blob of frosting directly into the center of each cooled cookie, creating a base for the “hat.”
- Gently press one unwrapped chocolate candy kiss into the middle of the frosting blob on each cookie. The frosting will hold the chocolate kiss in place, forming the point of the witch’s hat. For an extra touch of magic, scatter some festive pareil sprinkles around the base of the chocolate kiss. These enchanting witch hat cookies are best enjoyed within 2–3 days.
Recipe Notes
Note 1: If you prefer to make your cookie base and frosting from scratch, you can use your favorite chocolate cookie recipe and a homemade vanilla or cream cheese frosting. Adjust the sweetness and consistency as needed for easy piping and stability.
Nutrition Information (per serving)
Calories: 164 kcal | Carbohydrates: 24g | Protein: 1g | Fat: 7g | Saturated Fat: 2g | Cholesterol: 3mg | Sodium: 85mg | Potassium: 33mg | Fiber: 1g | Sugar: 18g | Vitamin A: 7IU | Calcium: 11mg | Iron: 1mg
Nutrition information is automatically calculated and should only be used as an approximation.
More Halloween Fun & Inspiration
These four easy Halloween cookie recipes are just the beginning of your spooky season culinary adventures! Halloween is the perfect time to get creative in the kitchen, and there are countless other treats you can whip up to delight trick-or-treaters and party guests alike. Whether you’re looking for more quick fixes or want to delve into slightly more elaborate (but still fun!) projects, we’ve got you covered.
From gooey rice krispie treats to savory appetizers, expanding your Halloween menu is easy and enjoyable. Consider setting up a decorating station at your next Halloween party, where kids and adults can personalize their own cookies with extra frosting, candies, and sprinkles. This not only adds to the fun but also helps in keeping everyone entertained!
Here are a few more fantastic ideas to make your Halloween extra special and delicious:
- Spooky & Sweet Halloween Rice Krispie Treats
- Four More 3-Ingredient Halloween Treats for Instant Fun
- Easy Halloween Appetizers for Your Festive Gathering
- Ghoulishly Good Halloween Popcorn Mix
Happy baking, happy decorating, and most importantly, Happy Halloween! We hope these recipes bring joy and deliciousness to your celebrations. Don’t forget to share your creations and comments below!