
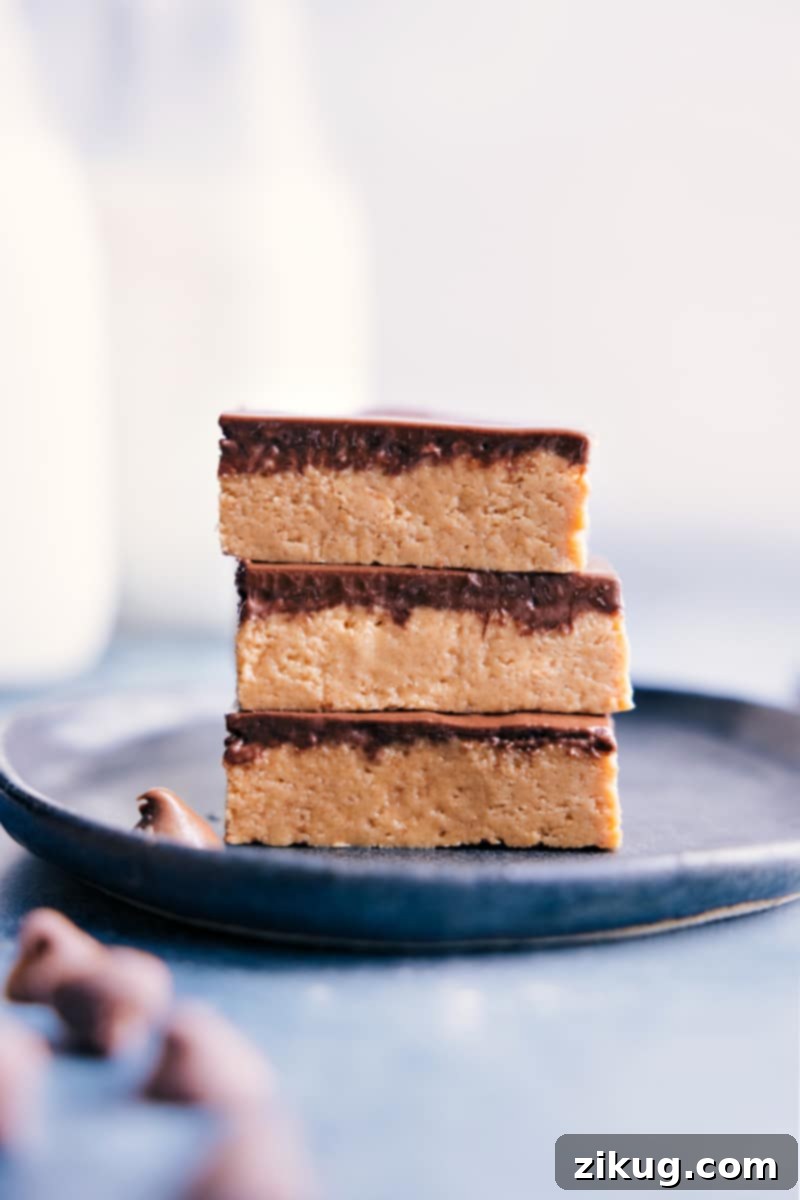
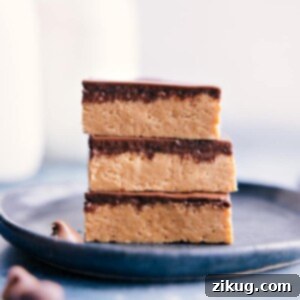
Get ready to discover your new favorite dessert! These incredibly easy, no-bake Peanut Butter Bars are an absolute dream, featuring a thick, sweet peanut butter base perfectly crowned with a smooth, luscious chocolate topping. Crafted with just seven simple ingredients, they deliver maximum flavor with minimal effort, making them the ultimate crowd-pleaser for any occasion.
Quick Dessert Alternatives
Craving frosted peanut butter bars? Don’t miss our famous Old Fashioned Peanut Butter Bars (often affectionately called Lunch Lady Bars!). If you’re looking for a healthier twist, our Peanut Butter Banana Bars offer a delicious, wholesome option, naturally sweetened with ripe bananas and made with blended oats.
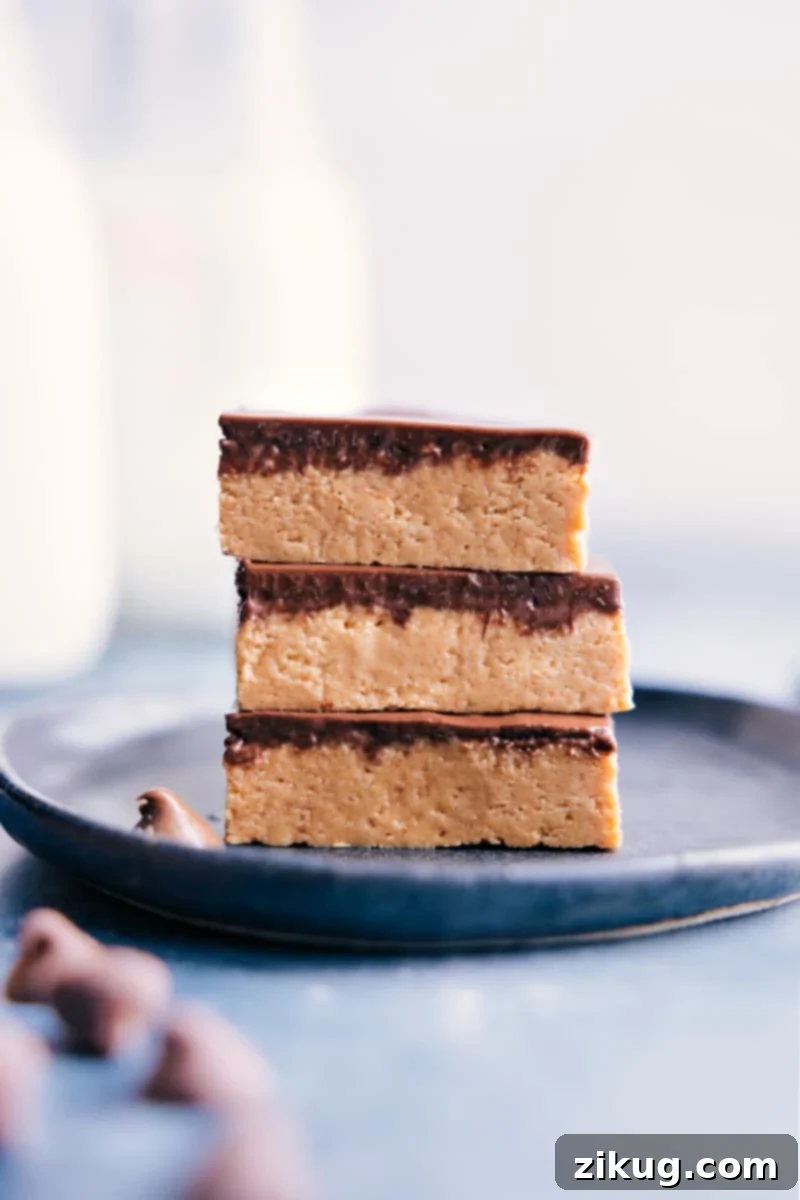
The Ultimate No-Bake Peanut Butter Bars: A Dessert Dream Come True
There’s a reason homemade Peanut Butter Bars are a timeless classic, and this no-bake version takes convenience and deliciousness to an entirely new level. They are incredibly simple to whip up, require only a handful of common ingredients, and best of all, you won’t need to turn on your oven. This means more time enjoying your treat and less time cleaning up!
Each bite of these bars offers a thick, rich, and utterly indulgent experience. Imagine the classic taste of a peanut butter cup, but amplified – creamier, gooier, and fresher than anything you’ll find in a store-bought candy. The homemade touch truly elevates these bars, making them far superior to any pre-packaged treat. In fact, many say these bars are even tastier than a Reese’s, all thanks to their straightforward preparation and seven magical ingredients.
Why You’ll Fall in Love with This Recipe
- Effortlessly Delicious: No oven required! Just mix, press, chill, and enjoy. Perfect for hot days or when you want a quick dessert.
- Simple Ingredients: Made with just seven pantry staples, you likely have everything on hand right now.
- Irresistible Flavor: The perfect balance of sweet, salty, and rich, mirroring your favorite peanut butter candy, but with a fresher, homemade taste.
- Crowd-Pleaser: These bars are universally loved by kids and adults alike, making them ideal for parties, potlucks, or family gatherings.
- Make-Ahead Friendly: They store beautifully in the fridge and freezer, allowing you to prepare them in advance.
- Customizable: Easily adapt to your preferences with different chocolate types or fun add-ins.
Essential Ingredients for Perfect Peanut Butter Bars
Crafting these delectable no-bake peanut butter bars requires a selection of simple yet crucial ingredients. The quality and type of each component significantly impact the final taste and texture. Here’s a detailed look at what you’ll need, along with expert tips and brand recommendations for the best results:
- Creamy Peanut Butter: This is the star of the show! For the best texture and flavor, we highly recommend a smooth, creamy peanut butter. Brands like Skippy® Creamy Peanut Butter or Jif® work wonderfully. It’s crucial to avoid natural peanut butters that separate and require stirring, as their oil content can lead to greasy, less firm bars. The consistent emulsification of conventional creamy peanut butter is key to achieving that perfect, melt-in-your-mouth base.
- Graham Crackers: These crunchy biscuits form the foundational texture of our peanut butter base, adding a subtle sweetness and a delightful crumbly element. They’re crushed into fine crumbs and integrated into the peanut butter mixture. Honeymaid® honey-flavored graham crackers are a popular choice and provide an excellent flavor profile that complements the peanut butter beautifully. Ensure they are finely crushed to avoid large chunks that could compromise the smooth texture of the bars.
- Powdered Sugar (Confectioners’ Sugar): Absolutely essential for achieving the light, smooth, and no-grainy texture of the peanut butter layer. Granulated sugar or brown sugar will not work as substitutes, as they would create a gritty texture and fail to properly bind the ingredients. Powdered sugar dissolves seamlessly, contributing to the bar’s luxurious consistency.
- Unsalted Butter: Using unsalted butter gives you complete control over the saltiness of your bars. This allows you to perfectly balance the sweetness and savory notes. If you only have salted butter, you can use it, but omit the additional salt from the recipe. Just be aware that the overall salt content might be slightly higher.
- Salt: Even with unsalted butter, a small amount of fine salt is vital. It acts as a flavor enhancer, cutting through the sweetness of the peanut butter and chocolate, and bringing out the depth of their flavors. Don’t skip this, as it truly makes a difference in creating a well-rounded taste.
- Chocolate: The choice of chocolate for the topping is a matter of personal preference, allowing you to customize the sweetness.
- Milk Chocolate: For a classic, sweeter profile akin to Reese’s Peanut Butter Cups, milk chocolate chips are ideal.
- Semi-Sweet or Dark Chocolate: If you prefer a less sweet, more intense chocolate flavor, opt for semi-sweet or dark chocolate chips.
- Combination: Many enjoy a blend of both! Try using half milk chocolate and half semi-sweet chocolate chips for a balanced flavor that appeals to a wide range of palates. High-quality chocolate brands like Ghirardelli® or Guittard® (not sponsored, just highly recommended for their superior melting properties and taste) will yield the best results for a smooth, glossy topping.
- Vanilla Extract: A touch of pure vanilla extract adds a lovely aromatic complexity and depth to the peanut butter base. While optional, it provides a nice finishing touch that elevates the overall flavor. Even without it, the Peanut Butter Bars will be delicious, but vanilla truly enhances the experience.
Smart Uses for Leftover Graham Crackers
Don’t let any leftover graham crackers go to waste! They’re fantastic for making delightful Graham Cracker Cookies or crafting a delicious, homemade Graham Cracker Crust for pies and cheesecakes.
How To Make The Best No-Bake Peanut Butter Bars
This recipe is designed for ease and efficiency, coming together quickly with minimal fuss. However, a few key tips and techniques will ensure your Peanut Butter Bars turn out perfectly irresistible every single time – firm yet creamy, with a pristine chocolate topping.
Step-by-Step Instructions
- Prepare Your Pan: First, line an 8×8-inch pan (for thicker bars) or a 9×9-inch pan (for slightly thinner bars) with parchment paper or aluminum foil. Ensure there’s an overhang on the sides – this will be your handle for easy removal later. Set it aside.
- Melt and Cool Butter: Melt the unsalted butter in the microwave. This step is critical: once melted, set the butter aside and allow it to cool completely to room temperature. Introducing hot butter to the sugar and graham cracker crumbs will melt them prematurely, resulting in greasy bars that don’t set properly.
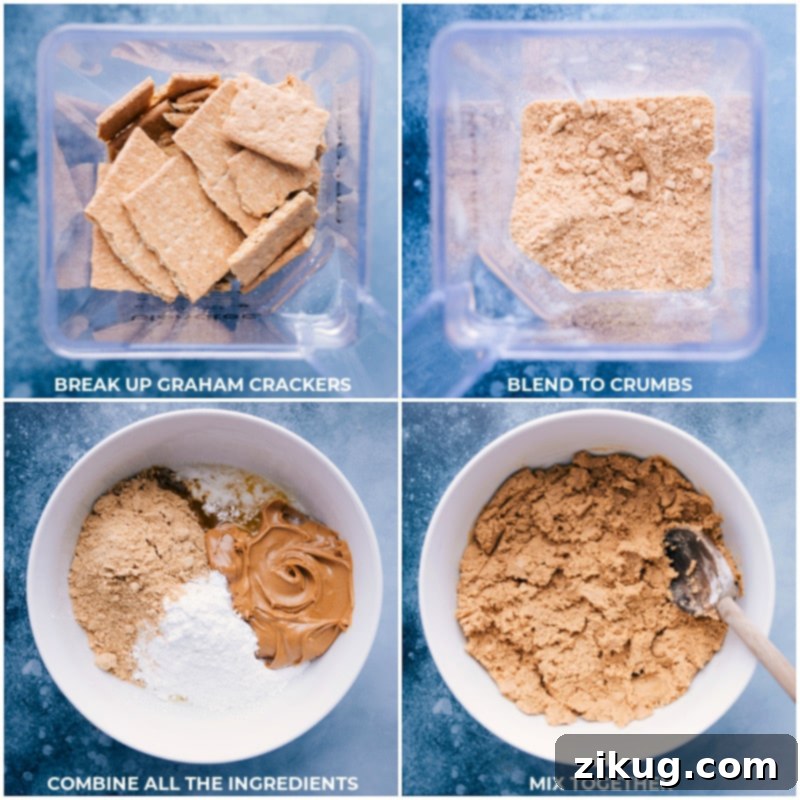
- Crush Graham Crackers: Achieve fine, even graham cracker crumbs. You can do this quickly by pulsing them in a blender or food processor until no large pieces remain. If you don’t have these tools, place the graham cracker sheets in a gallon-sized plastic bag, seal out the air, and use a rolling pin, meat mallet, or the bottom of a heavy frying pan to crush them into fine crumbs. Ensure consistency for the best texture in your bars.
- Combine Base Ingredients: In a large mixing bowl, combine the cooled melted butter, salt, finely crushed graham cracker crumbs, powdered sugar, vanilla extract, and 1 cup of creamy peanut butter. Use a hand mixer on low speed or a sturdy wooden spoon to mix everything together until a thick, uniform dough forms. It should be pliable but firm.
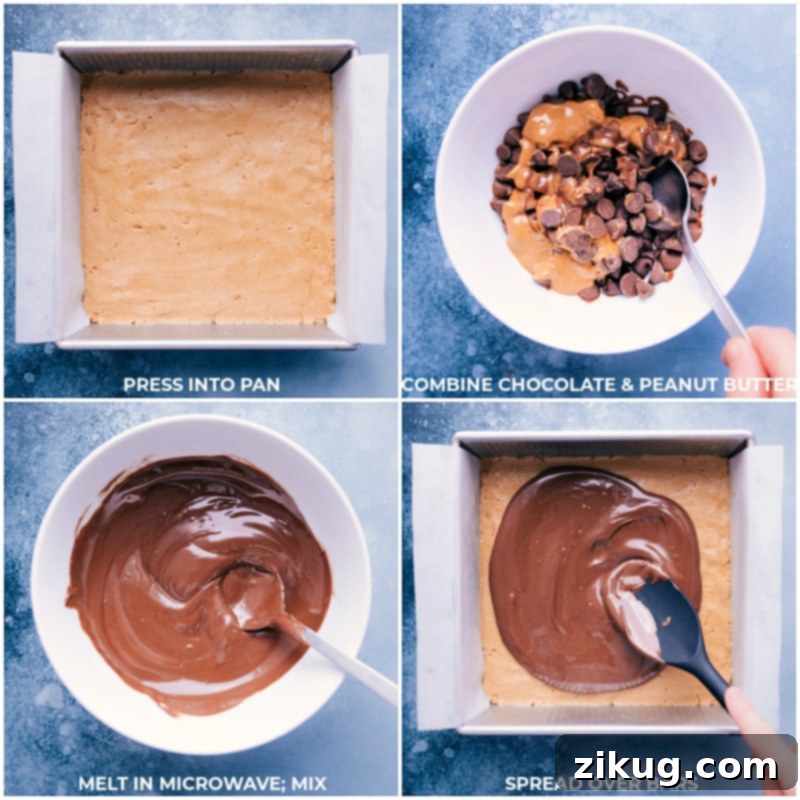
- Press the Base: Transfer the peanut butter dough into your prepared pan. Using the back of a spoon, a spatula, or your clean hands, press the mixture firmly and evenly into the bottom of the pan. Make sure it’s compacted and flat across the entire surface. Place the pan in the refrigerator to chill while you prepare the chocolate topping.
- Prepare Chocolate Topping: In a microwave-safe bowl, combine the chocolate chips and the remaining 2 tablespoons of creamy peanut butter. Microwave in short bursts of 15 seconds, stirring well for 10 seconds between each burst. Continue this process until the chocolate is fully melted and the mixture is smooth and glossy. The added peanut butter helps create a silkier texture that is less prone to cracking.
- Layer and Chill: Pour the melted chocolate mixture evenly over the chilled peanut butter base. Gently tap the pan on your counter a few times to help the chocolate spread smoothly and evenly across the entire surface, removing any air bubbles. Return the pan to the refrigerator and chill for at least 1.5 to 2 hours, or until the chocolate topping is completely firm and set.
- Slice and Serve: Before cutting, let the chilled bars sit at room temperature for about 5-10 minutes. For perfect, clean slices, run a sharp knife under hot water for a few seconds, wipe it dry, make a cut, and repeat for each slice. This technique prevents the chocolate from cracking and yields beautiful, neat bars.
Crushing Graham Crackers Like a Pro
While a powerful blender or food processor makes quick work of turning graham crackers into fine crumbs, you don’t need fancy equipment. A simple, sturdy plastic bag and a rolling pin, meat mallet, or the bottom of a heavy frying pan work just as effectively. Just ensure the crackers are crushed uniformly to avoid undesirable large chunks in your bars.
Storage Solutions for Your Peanut Butter Bars
These delectable Peanut Butter Chocolate Bars are perfect for making ahead and enjoying over several days or even months. Here’s how to ensure they stay fresh and delicious:
- Make-Ahead Excellence: These bars are an ideal make-ahead dessert. Simply follow the recipe instructions, cover the pan tightly with plastic wrap or foil, and let them chill in the refrigerator overnight. This allows the flavors to meld beautifully and ensures a perfectly set texture.
- Refrigeration: When stored properly in an airtight container in the refrigerator, these bars will maintain their quality and freshness for 5-7 days. For optimal serving, allow them to sit at room temperature for about 10-15 minutes before cutting and enjoying, as this softens the chocolate and peanut butter base slightly for a more pleasant texture.
- Freezing for Longer Enjoyment: Peanut Butter Bars freeze exceptionally well, allowing you to savor them for much longer. To freeze, wrap each individual bar tightly in plastic wrap, then place all the wrapped bars into a large freezer-safe plastic bag or an airtight container. They will remain fresh in the freezer for up to 3 months. To thaw, simply transfer the frozen bars to the refrigerator overnight.
More Irresistible Peanut Butter Dessert Recipes
If you love the classic combination of peanut butter and chocolate, you’ll definitely want to explore these other fantastic recipes:
- Chocolate Peanut Butter Pie with an indulgent Oreo cookie crust.
- Buttercrunch Candy featuring a delectable chocolate-topped peanut candy.
- Tiger Butter Fudge for a beautiful swirl of peanut butter and white chocolate.
- Peanut Butter Cup Brownies packed with chopped Reese’s cups.
- Peanut Butter Rice Krispie Treats elevated with a dreamy chocolate peanut butter topping.
Print Recipe
Peanut Butter Bars
Chelsea Lords
20 minutes
1 hour
1 hour
20 minutes
16
bars (these are rich—a little goes a long way!)
Video Overview
For a visual guide on how to make these delicious peanut butter bars, watch our step-by-step video below.
Equipment
-
8 x 8-inch baking pan or 9 x 9-inch for thinner bars
-
Parchment paper or aluminum foil
-
Blender or food processor for crushing graham crackers
-
Hand mixer or a sturdy wooden spoon
Ingredients
Scale:
- 8 tablespoons unsalted butter melted and cooled to room temperature
- 1/4 teaspoon salt
- 8 full graham cracker sheets (yields approximately 1 cup of fine crumbs)
- 2 cups powdered sugar
- 1 teaspoon vanilla extract
- 1 cup creamy peanut butter plus 2 tablespoons for topping (see Note 1)
- 1 cup chocolate chips semi-sweet or milk chocolate (see Note 2)
Instructions
-
Line an 8×8-inch pan (for thicker bars) or 9×9-inch pan (for thinner bars) with parchment paper or foil, ensuring an overhang for easy removal. Set aside. Melt the unsalted butter in the microwave, then allow it to cool completely to room temperature. (Hot butter will melt the sugar and crushed graham crackers, leading to greasy bars.) Crush graham crackers into fine crumbs using a blender, food processor, or by hand in a sealed plastic bag with a rolling pin or heavy object (see Note 3).
-
In a large bowl, combine the cooled melted butter, salt, graham cracker crumbs, powdered sugar, vanilla extract, and 1 cup of creamy peanut butter. Mix with a hand mixer or wooden spoon until a thick, uniform dough forms. Press this dough firmly and evenly into the base of your prepared pan. Place the pan in the refrigerator to chill while you prepare the topping.
-
For the topping, add the chocolate chips and the remaining 2 tablespoons of peanut butter to a microwave-safe bowl. Microwave in 15-second bursts, stirring for 10 seconds between each burst, until the chocolate is fully melted and smooth. Pour the melted chocolate mixture over the chilled peanut butter layer. Gently tap the pan on the counter a few times to spread the chocolate into an even, smooth layer.
-
Chill the bars in the refrigerator for at least 1 to 1-1/2 hours, or until completely firm. Before cutting, let the bars sit at room temperature for 5-10 minutes. For clean, neat slices, heat a sharp knife under hot water, wipe it dry, make a slice, and repeat this process for each cut. Enjoy your perfectly crafted peanut butter bars!
Recipe Notes
Note 2: Choosing Your Chocolate: The type of chocolate you choose will dictate the sweetness of your dessert. Use milk chocolate for a sweeter, more classic Reese’s-like experience, or opt for semi-sweet or dark chocolate for a less sweet, richer treat. A combination of half milk and half semi-sweet chocolate chips is also an excellent choice for balanced flavor. Always use good quality chocolate (like Ghirardelli® or Guittard®) for the best taste and smoothest topping.
Note 3: Achieving Fine Graham Cracker Crumbs: For the best texture in your peanut butter bars, it’s essential to blend or crush the graham crackers until they are very fine, consistent crumbs. Large chunks can create an uneven and unappealing texture. If using a blender or food processor, ensure all pieces are finely processed. If crushing by hand, double-check that no large fragments remain.
Storage: To store leftover bars, cover them tightly with plastic wrap or transfer them to an airtight container and refrigerate for 5–7 days. For longer storage, wrap each bar individually in plastic wrap, then place them in a freezer-safe bag or container. They can be frozen for up to 3 months. Thaw frozen bars overnight in the refrigerator before serving.
Nutrition Information (Approximate)
|
Calories: 305 kcal
|
Carbohydrates: 33.4g
|
Protein: 5.1g
|
Fat: 18.5g
|
Cholesterol: 15.3mg
|
Sodium: 116.2mg
|
Fiber: 2.2g
|
Sugar: 26.1g
Nutrition information is automatically calculated and should only be used as an approximation.
Love this recipe? Leave a comment and rating below!
Frequently Asked Questions (FAQs)
Can I use natural peanut butter for these bars?
We do not recommend using natural peanut butter that separates and requires stirring. The excess oil in these types of peanut butter can make the bars greasy and prevent them from setting properly, resulting in a less firm and potentially oily texture. For best results, stick to creamy, no-stir peanut butter like Skippy® or Jif®.
How can I prevent my peanut butter bars from being greasy?
The key to avoiding greasy bars is ensuring your melted butter is cooled to room temperature before mixing it with the other base ingredients. Hot butter will melt the powdered sugar and graham cracker crumbs, leading to an oily consistency. Also, as mentioned, avoid natural peanut butter as its oil content can contribute to greasiness.
What if I don’t have a blender or food processor for graham crackers?
No problem! You can easily crush graham crackers by placing them in a sturdy gallon-sized plastic bag, sealing out most of the air, and then crushing them with a rolling pin, the bottom of a heavy frying pan, or a meat mallet until fine crumbs are achieved. Just ensure they are consistently fine to avoid large chunks in your bars.
Can I make these bars vegan or gluten-free?
To make these bars vegan, you would need to use a plant-based butter substitute and ensure your chocolate chips are dairy-free. For a gluten-free version, substitute regular graham crackers with gluten-free graham crackers. Always double-check ingredient labels to ensure all components meet your dietary requirements.
My chocolate topping cracked, what did I do wrong?
Cracking often occurs if the chocolate cools too quickly or if the layer is too thin. To minimize cracking, ensure your chocolate mixture isn’t too hot when poured, allow it to cool gradually in the refrigerator, and use the suggested amount of chocolate chips (1 cup) to create a substantial enough layer. Also, letting the bars sit at room temperature for 5-10 minutes before cutting can help prevent cracking as the chocolate slightly softens.
Can I add other mix-ins to the peanut butter base?
Absolutely! Feel free to customize your bars. Mini chocolate chips, chopped nuts (like peanuts or walnuts), or even a sprinkle of shredded coconut can be folded into the peanut butter base for added flavor and texture. Just be mindful that additional mix-ins might alter the overall consistency slightly.