
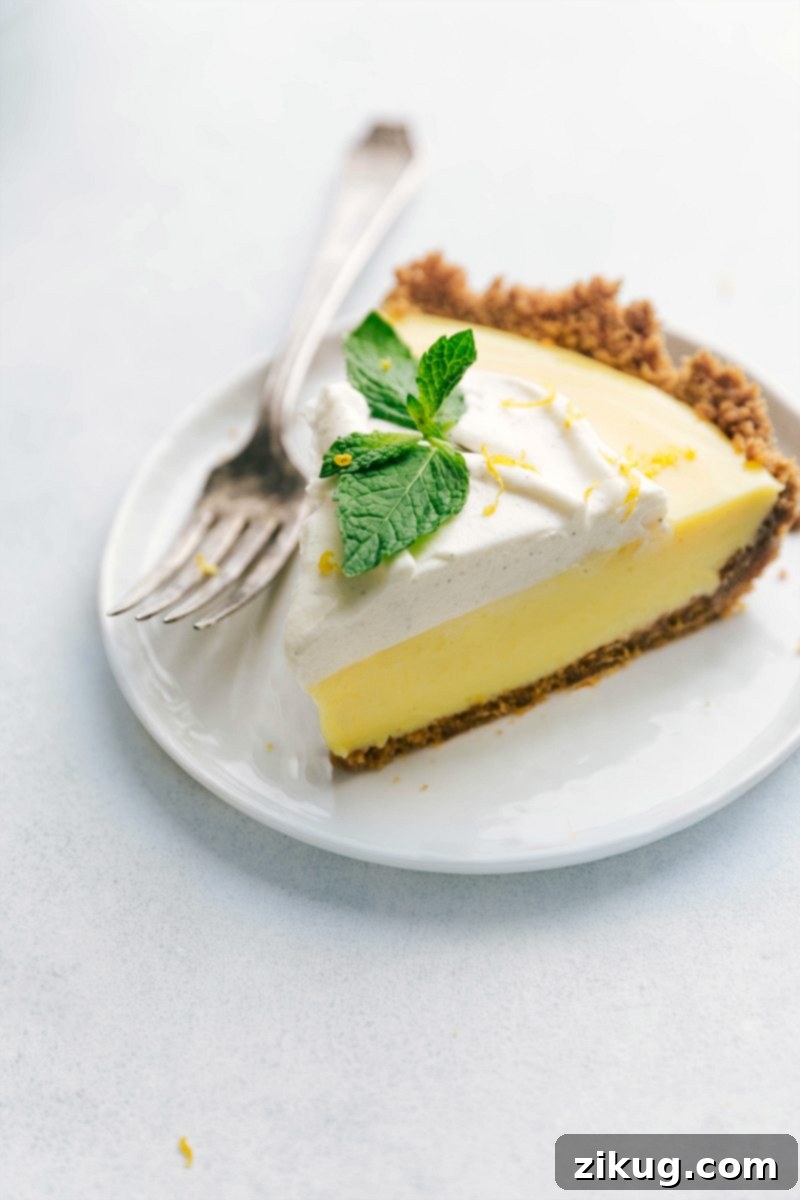
Lemon Pie receives a delectable upgrade in this perfected rendition of Joanna Gaines’ renowned Magnolia Lemon Pie. Prepare to indulge in a luxurious dessert featuring a robust, buttery graham cracker crust, a velvety-smooth, intensely lemony filling, and a crowning cloud of freshly whipped cream. This recipe isn’t just a dessert; it’s an experience, designed to captivate your taste buds with every irresistible bite.
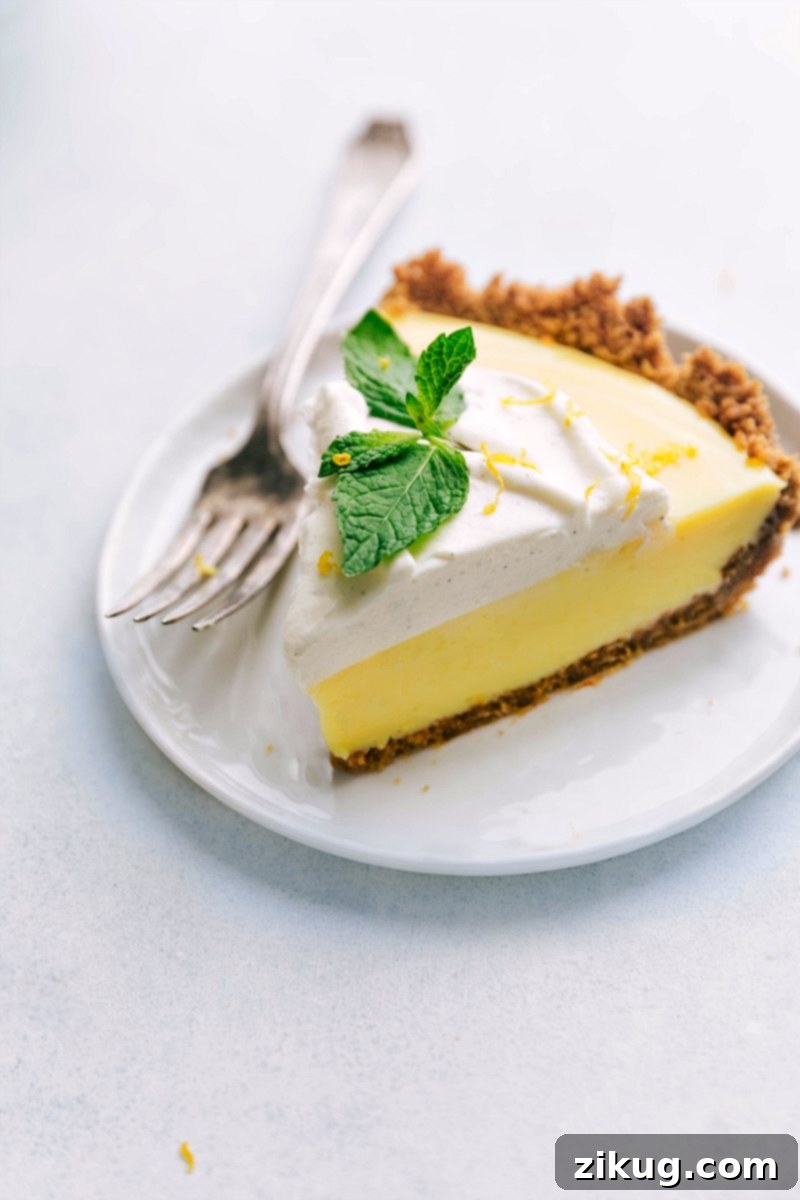
Crafting the Ultimate Lemon Pie: A Beloved Classic Reimagined
Like countless enthusiasts worldwide, I’ve been a long-time admirer of the Gaines family and the inspiring empire they’ve built. From the captivating transformations on “Fixer Upper” to their curated home collections, their influence is undeniable. Yet, amongst all their ventures, it was Joanna’s celebrated lemon pie that truly captured my culinary imagination. While my recipe collection boasts a variety of lemon desserts, this particular pie stood out as a revelation, delivering on every promise of bright, tangy, and creamy delight.
This lemon pie transcended mere satisfaction to become an instant favorite, earning its place among my top lemon-infused creations. Its exquisite balance of zesty citrus and luxurious creaminess is simply unparalleled. While my version remains faithfully close to the spirit of the original, I’ve introduced a few carefully considered adjustments over time. These subtle tweaks are designed to enhance the flavor and texture, transforming an already fantastic pie into an extraordinary dessert that I’m thrilled to share with fellow home bakers.
My Signature Enhancements: Elevating Joanna’s Lemon Pie to Perfection
Embracing the essence of Joanna Gaines’ original creation, I’ve dared to refine this lemon pie with a few strategic modifications. These adjustments aren’t about reinventing the wheel but rather about amplifying the best qualities of the pie, ensuring a more vibrant, balanced, and utterly irresistible final product that consistently garners rave reviews.
- An Intense Burst of Lemon Flavor: To achieve a truly pronounced citrus profile without compromising the filling’s luscious texture, I’ve subtly increased the amount of both fresh lemon juice and pure lemon extract. This thoughtful combination ensures a bright, tangy explosion of lemon that resonates beautifully, leaving a lingering freshness on the palate.
- Harmonious Sweetness: While a lemon pie should be sweet, an excessive amount can overshadow its delicate nuances. To achieve a perfectly balanced sweetness that allows the lemon’s natural zest to shine, I incorporate a touch of fine salt and a generous measure of pure vanilla extract. These ingredients work synergistically, tempering the sweetness and adding a layer of sophisticated depth to the overall flavor.
- The Ultimate Graham Cracker Crust: For the foundation of this exquisite dessert, I opt for my tried-and-true Graham Cracker Crust recipe. This isn’t just any crust; it’s a robust, buttery, and slightly salty base that delivers a delightful crunch, providing a perfect textural counterpoint to the silky lemon filling. It’s a crust so good, you might even recognize it from my beloved Coconut Cream Pie!
- Decadent Fresh Whipped Cream: To crown this magnificent pie, I prepare a homemade whipped cream, elevated with the addition of pure vanilla bean paste. The paste not only imparts a richer, more complex vanilla flavor than standard extract but also introduces those charming black specks that are the hallmark of true gourmet quality. It’s the ideal airy, light, and subtly sweet topping that complements the tangy lemon filling without overpowering it.
Pro Tip: Mastering Your Lemon Flavor
For a lemon pie that truly sings with citrus brightness, lemon extract is your secret ingredient. Unlike lemon juice, which adds liquid and acidity, a pure lemon extract delivers an intense, concentrated lemon flavor without altering the delicate texture of your filling. Always seek out pure lemon extract, typically found in the baking aisle alongside vanilla and other essences, and steer clear of “emulsions” or “flavor oils” which can offer an artificial taste. Additionally, for the freshest and most authentic flavor, always use freshly squeezed lemon juice from ripe, vibrant lemons. The zest of these lemons can also be incorporated into the filling or used as a garnish for an extra aromatic kick.
Key Ingredients for an Unforgettably Silky Lemon Pie Filling
The magic of this lemon pie lies in its perfectly balanced and exceptionally smooth filling. Achieving this requires attention to a few carefully selected ingredients, each playing a vital role in creating that signature creamy texture and bright, tangy flavor. Here’s a closer look at the stars of our lemon filling:
- Sweetened Condensed Milk: This is the backbone of our lemon pie filling. It serves a dual purpose: providing rich sweetness and acting as the primary thickening agent. The high sugar content and viscosity of sweetened condensed milk eliminate the need for additional sugar or starches, yielding a beautifully dense, gooey, and smooth texture that holds its shape perfectly.
- Fresh Lemons (and an Efficient Citrus Juicer): For a truly vibrant and authentic lemon flavor, freshly squeezed juice is non-negotiable. The bright acidity and natural essential oils from fresh lemons contribute an unparalleled zest that bottled juice simply cannot replicate. A reliable citrus juicer makes the task of extracting every last drop of precious juice quick and mess-free. Consider zesting a lemon before juicing to incorporate even more aromatic citrus notes into your pie.
- A Touch of Salt: While it may seem unusual to add salt to a sweet dessert, it’s a culinary secret that makes a world of difference. A small pinch of salt doesn’t make the pie salty; instead, it acts as a flavor enhancer, much like in savory cooking. It brightens the lemon notes, deepens the vanilla, and beautifully balances the sweetness of the condensed milk, preventing the pie from tasting cloyingly sweet and adding a subtle complexity to the overall profile.
- Egg Yolks Only: To achieve that luxurious, rich, and velvety-smooth texture that defines a perfect lemon pie, we use only the egg yolks. The yolks contribute fat and emulsifying properties, which are essential for creating a stable, custardy filling that sets beautifully without becoming rubbery or overly firm. Don’t let those leftover egg whites go to waste! They can be frozen for later use in light and crispy meringue cookies, a savory egg wrap, or any other recipe that calls for egg whites.
Mastering the Art of Your Favorite Graham Cracker Crust
The foundation of an exceptional lemon pie is a crust that delivers both flavor and structural integrity. My go-to graham cracker crust is thick, sweet, and imbued with a rich butter flavor that provides the perfect counterpoint to the tangy filling. Achieving this ideal crust is simpler than you might think, especially with these insider tips:
- Allow Melted Butter to Cool: This is a critically important step often overlooked by even seasoned bakers. After melting your butter, always allow it to cool completely to room temperature before combining it with the graham cracker crumbs and sugar. Hot butter can prematurely melt the sugar in your mixture, leading to a greasy, dense, and ultimately crumbly crust that struggles to hold its shape. Patiently waiting for the butter to cool ensures a flaky, firm, and perfectly textured crust.
- Measure Crumbs with Precision: For a consistently perfect crust, precise measurement of your graham cracker crumbs is key. While it might seem like a small detail, the exact ratio of crumbs to butter and sugar profoundly affects the final texture. Slightly overfill your measuring cups and then use the back of a knife or a straight edge to level off the crumbs, ensuring accuracy and consistency every time.
- Thoroughly Blend Graham Crackers into Fine Crumbs: To achieve a smooth, cohesive crust that slices effortlessly and doesn’t fall apart, it’s essential to process your graham crackers into very fine crumbs. Any large chunks can create weak spots within the crust, making it prone to crumbling when you attempt to cut a clean slice. A food processor or high-speed blender is ideal for pulverizing the crackers into a sandy, uniform consistency.
- Press Crumbs Evenly and Firmly: Once your crumb mixture is ready, transfer it to your pie dish and press it firmly and uniformly into the bottom and up the sides. The flat bottom of a measuring cup or a sturdy glass works perfectly for this task. Applying even, consistent pressure is vital for creating a compact and solid crust that provides the necessary structural support, preventing it from disintegrating when serving.
- Pre-Bake the Crust to Prevent Sogginess: A short pre-bake of the graham cracker crust is a non-negotiable step for ensuring your pie remains crisp and delicious, rather than soggy. This brief baking period helps to set the butter and creates a barrier against the moisture from the filling. After baking, allow the crust to cool slightly before pouring in the lemon filling. This ensures a beautifully firm and perfectly baked base for your pie.
The Ethereal Touch: Homemade Fresh Whipped Cream
While the vibrant lemon filling is undeniably the star of this pie, the addition of real, fresh whipped cream transforms it into an utterly divine dessert experience. There is simply no substitute for the light, airy texture and delicate sweetness of homemade whipped cream, offering a perfect textural contrast and flavor complement to the rich, tangy lemon filling.
- Select Premium Heavy Cream: The journey to perfect whipped cream begins with high-quality heavy cream. Look for products that list only “cream” as an ingredient, and ideally, choose one with a higher fat content (typically 36% or more). This ensures maximum richness and stability, resulting in a whipped cream that holds its shape beautifully and tastes incredibly luxurious.
- Ensure Your Cream is Ice-Cold: This is a fundamental rule for successful whipped cream. It is paramount that your heavy cream is very cold before you begin whipping. Many experienced bakers go a step further by chilling their mixing bowl and whisk attachments in the freezer for 10-15 minutes prior to whipping. Cold temperatures help the fat globules in the cream to emulsify and aerate properly, leading to a much thicker, more stable, and impressively airy whipped cream that won’t deflate quickly.
- Expertly Flavor and Sweeten: Beyond just the cream, strategic flavoring elevates your whipped topping. A tiny pinch of salt works wonders to enhance the overall taste, subtly highlighting the vanilla and balancing the sweetness. For unparalleled vanilla flavor and those charming visual black specks, vanilla bean paste is my top recommendation. If unavailable, a good quality vanilla extract will also work beautifully. Gradually incorporate powdered sugar (confectioners’ sugar) for sweetness. Powdered sugar is preferred over granulated sugar because it dissolves instantly, ensuring a silky-smooth, non-gritty texture. Taste the cream as you whip and adjust the sugar or vanilla to achieve your desired level of sweetness and aromatic depth.
Effortlessly Create Your Homemade Lemon Pie: A Step-by-Step Guide
Crafting this delightful Lemon Pie is a surprisingly enjoyable process, broken down into three distinct and straightforward stages. Follow these detailed steps to assemble a dessert that not only looks stunning but tastes absolutely incredible:
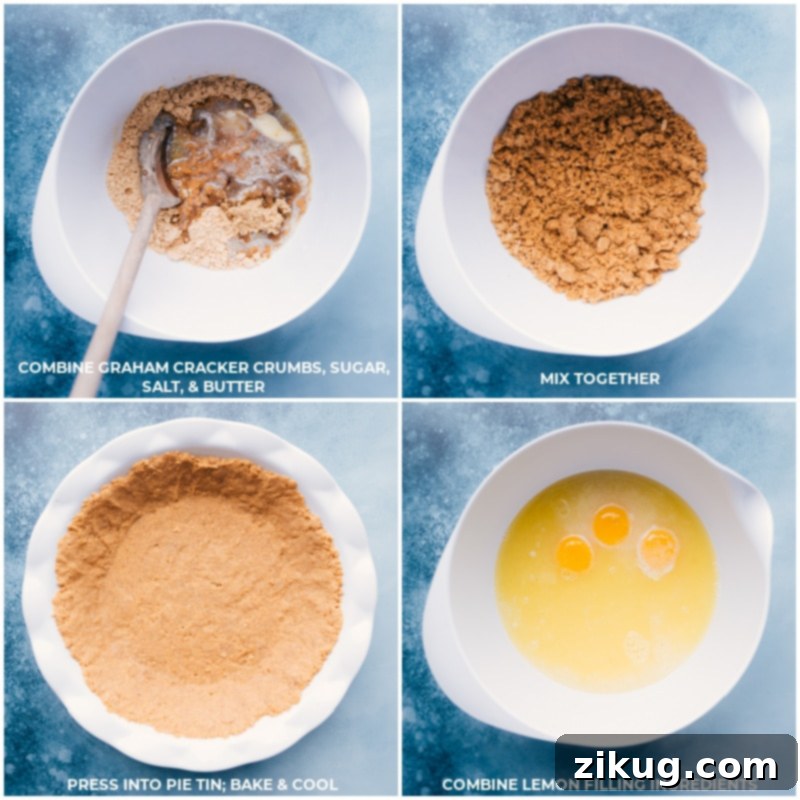
- Prepare the Perfect Graham Cracker Crust: Begin by preheating your oven to 350°F (175°C). Lightly coat a 9-inch pie dish with cooking spray. In a medium bowl, combine the finely crushed graham cracker crumbs, granulated sugar, and a small pinch of salt. Pour in the melted unsalted butter, ensuring it has cooled to room temperature. Mix thoroughly with a spatula until all the crumbs are evenly moistened and resemble wet sand. Transfer this mixture to your prepared pie dish, then use the flat bottom of a measuring cup or a sturdy glass to press the crumbs firmly and evenly into the bottom and up the sides of the pan. Bake the crust in the preheated oven for 8 minutes, just until lightly golden and fragrant. Remove it from the oven and let it cool completely on a wire rack. This cooling step is crucial to prevent a soggy crust once the filling is added.
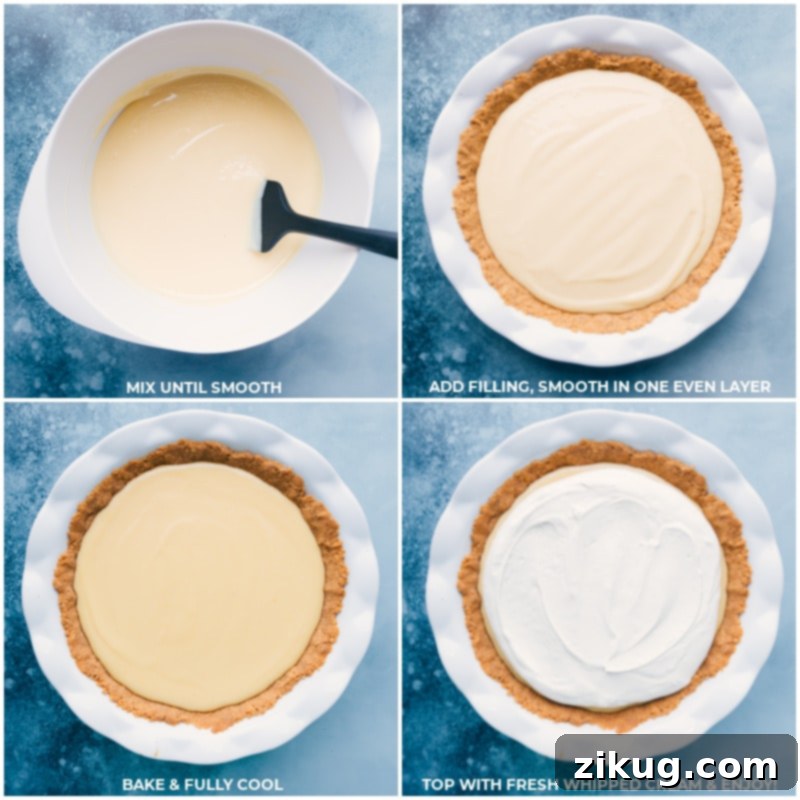
- Craft the Creamy Lemon Filling: While your crust cools, prepare the star of the show: the luscious lemon filling. In a large mixing bowl, or the bowl of a stand mixer fitted with the whisk attachment, combine the sweetened condensed milk, three large egg yolks, 3/4 cup of freshly squeezed lemon juice, 1-1/2 teaspoons of pure lemon extract, and an 1/8 teaspoon of salt. Beat these ingredients together on medium speed for 2–4 minutes, until the mixture becomes wonderfully smooth, slightly thickened, and takes on a pale, creamy yellow hue. Pour this vibrant filling carefully into your cooled, pre-baked graham cracker crust. Return the pie to the 350°F (175°C) oven and bake for an additional 12–17 minutes. The pie is done when the edges appear set and slightly puffed, and the center still has a slight, delicate jiggle when gently shaken. If you notice the crust browning too quickly, loosely tent the pie with aluminum foil. Once baked, remove the pie from the oven and let it cool completely at room temperature for at least 30 minutes. After cooling, cover the pie loosely with plastic wrap and refrigerate for a minimum of 1-2 hours to allow it to fully chill and set. For the best firm texture, chilling overnight is highly recommended.
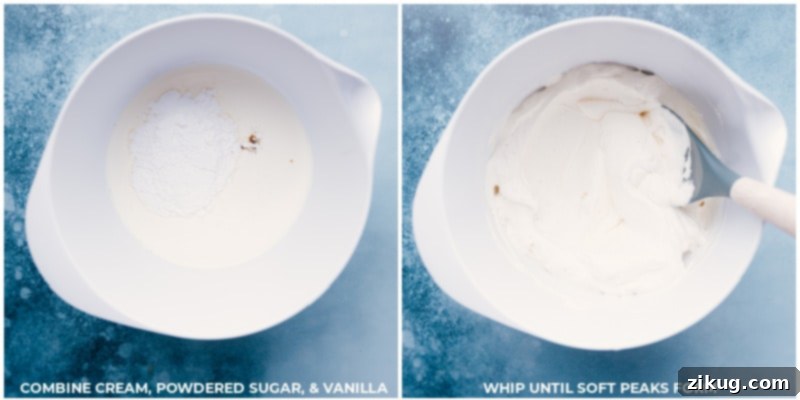
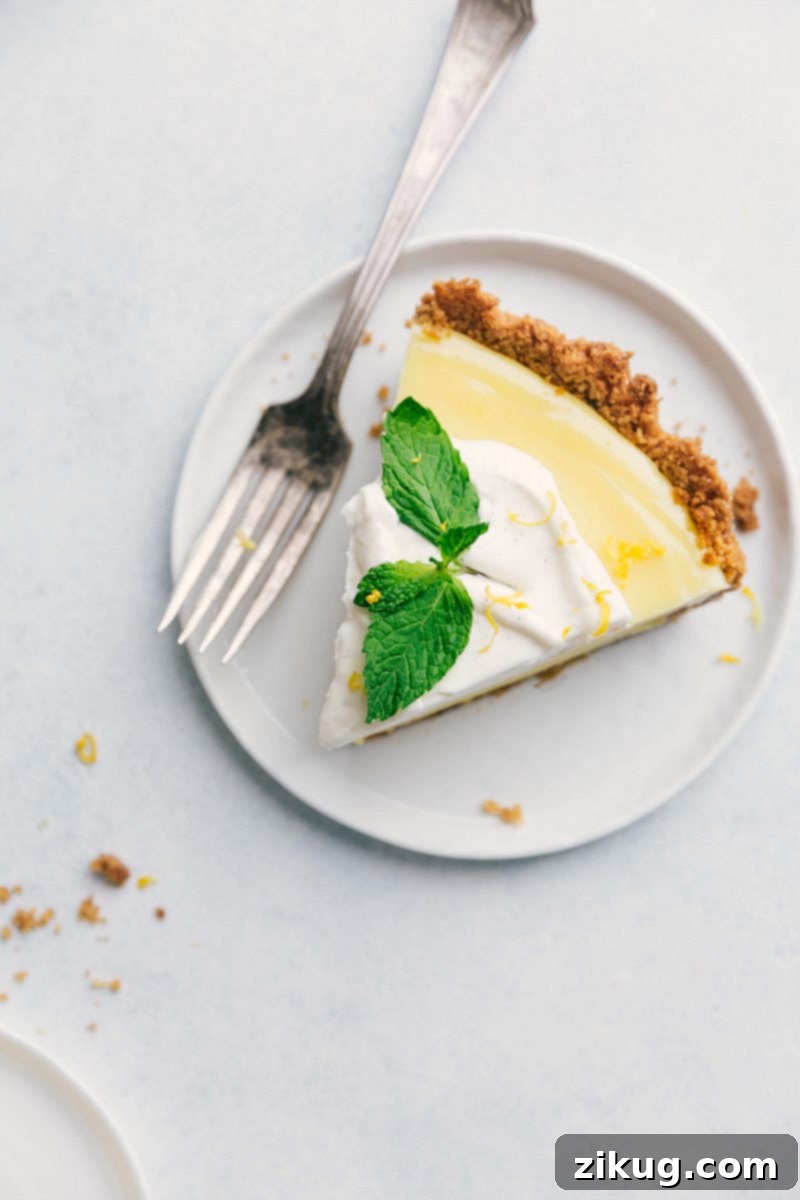
- Whip Up the Dreamy Topping and Serve: Just before you’re ready to serve, prepare your fresh whipped cream. In a very cold mixing bowl (chilled for best results), combine the cold heavy cream, powdered sugar, and vanilla bean paste (or vanilla extract). Using a stand mixer with a whisk attachment or a hand mixer, beat the mixture on medium-high speed until soft, fluffy peaks form. Be careful not to over-whip, which can quickly turn into butter! Gently spread the ethereal whipped cream over the entire cooled and set pie for a show-stopping presentation, or alternatively, add dollops of cream to individual slices just before serving. This latter method helps prevent the cream from becoming watery if you anticipate having leftovers. Garnish your beautiful pie with optional lemon zest, thin lemon slices, or fresh mint sprigs for an elegant touch. Serve chilled and savor every exquisite bite!
Smart Storage and Freezing Tips for Your Lemon Pie
To ensure your delightful lemon pie remains as fresh and delicious as possible, proper storage is key. Here’s a guide to keeping your pie perfect, whether for a few hours or a few months:
- At Room Temperature: This pie, due to its dairy content, should ideally be refrigerated. However, it can safely remain at room temperature for up to 2 hours if serving immediately.
- In the Refrigerator: For longer storage, cover any leftover lemon pie tightly with plastic wrap or place it in an airtight container. Store it in the refrigerator for 2-4 days. If the entire pie has been topped with whipped cream, it’s best consumed within 1-2 days, as the whipped cream may start to become watery over time. For best results, add whipped cream to individual slices just before serving.
- Can You Freeze Lemon Pie?: Yes, you absolutely can! This pie freezes beautifully without the whipped cream topping. To freeze, wrap individual slices or the entire pie (without whipped cream) tightly first in plastic wrap, then again in a layer of aluminum foil. Place the well-wrapped pie in a freezer-safe container or heavy-duty freezer bag to protect it from freezer burn. It can be frozen for up to 2-3 months. To thaw, transfer the frozen pie to the refrigerator overnight. Once thawed, let it sit at room temperature for about 30 minutes before serving. Add freshly whipped cream just before enjoying.
Explore More Zesty Lemon Desserts to Brighten Your Day
If you’ve fallen in love with the vibrant, refreshing taste of lemon in this pie, you’ll be thrilled to discover these other fantastic lemon-infused treats. Each recipe offers a unique way to enjoy the bright, tangy flavors of citrus:
- Lemon Bundt Cake: A wonderfully moist and tender Bundt cake bursting with intense lemon flavor, generously crowned with a luscious, tangy lemon buttercream frosting. Perfect for any gathering.
- Homemade Lemon Curd: Learn the secrets to making a rich, velvety, and perfectly tart lemon curd from scratch. This versatile spread is fantastic on toast, scones, or as a filling for tarts and cakes.
- Sparkling Blueberry Lemonade: A refreshingly effervescent beverage that perfectly marries the sweetness of ripe blueberries with the invigorating tartness of fresh lemon juice, finished with a delightful fizz.
- Lemon Blueberry Sweet Rolls: Indulge in soft, fluffy sweet rolls generously swirled with juicy blueberries and bright lemon zest, all finished with a decadent, tangy lemon glaze. An irresistible breakfast or brunch treat.
- Refreshing Peach Lemonade: A delightfully simple yet incredibly flavorful drink made with just four essential ingredients, combining the natural sweetness of ripe peaches with the zesty kick of fresh lemon.
Lemon Pie Recipe
By Chelsea Lords
This delightful spin on Magnolia’s famous Lemon Pie features a buttery graham cracker crust, a perfectly creamy lemon filling, and a dollop of fresh whipped cream.
Prep Time: 20 minutes
Cook Time: 25 minutes
Chilling: 1 hour 30 minutes
Total Time: 2 hours 15 minutes
Yields: 12 pieces (1, 9-inch pie)

Equipment
- Pie pan (9-inch)
- Blender or food processor
- Stand mixer or hand mixer
Ingredients
Graham Cracker Crust
- 1-3/4 cups graham cracker crumbs (from 12 to 13 full graham cracker sheets)
- 6 tablespoons unsalted butter, melted and cooled
- 1/4 cup granulated sugar or light brown sugar
- 1/8 teaspoon salt
Pie Filling
- 2 (14-ounce) cans sweetened condensed milk (Eagle Brand recommended)
- 3 large egg yolks
- Juice of 5 lemons (approximately 3/4 cup, plus optional lemon slices and zest for garnish)
- 1-1/2 teaspoons lemon extract (see Note 1)
- 1/8 teaspoon salt
Whipped Cream
- 1 cup heavy cream, very cold
- 1/3 cup powdered sugar
- 1 teaspoon vanilla bean paste or 2 teaspoons vanilla extract
- Mint sprigs for garnish, optional
Instructions
- Preheat your oven to 350°F (175°C). Lightly spray a 9-inch pie dish with cooking spray and set aside.
- Melt the unsalted butter in a microwave-safe bowl. Allow the melted butter to cool for at least 5 minutes to prevent a greasy crust. Process the graham crackers in a blender or food processor until very fine crumbs are achieved. Measure 1 and 3/4 cups of these crumbs into a large mixing bowl. Add the granulated sugar and 1/8 teaspoon salt, then mix in the cooled melted butter using a spatula until fully combined and the crumbs are moistened.
- Pour the graham cracker mixture into the prepared pie dish. Using the flat bottom of a measuring cup or a sturdy glass, press the crumbs firmly and evenly into the bottom and up the sides of the pan. Bake in the preheated oven for 8 minutes. Remove from the oven and allow the crust to cool completely on a wire rack before adding the filling.
- While the crust cools, prepare the pie filling. In the bowl of a stand mixer fitted with the whisk attachment (or using a hand mixer), combine the sweetened condensed milk, large egg yolks, 3/4 cup fresh lemon juice, 1-1/2 teaspoons lemon extract, and 1/8 teaspoon salt. Beat these ingredients together on medium speed for 2–4 minutes, or until the mixture becomes wonderfully smooth, slightly thickened, and takes on a pale, creamy yellow hue.
- Carefully pour the prepared lemon filling into the cooled, pre-baked graham cracker crust. Return the pie to the 350°F (175°C) oven and bake for an additional 12–17 minutes. The pie is done when the edges appear set and slightly puffed, and the center still has a slight, delicate jiggle when gently shaken. If you notice the crust browning too quickly, loosely tent the pie with aluminum foil. Once baked, remove the pie from the oven and let it cool completely at room temperature for at least 30 minutes.
- Once cooled to room temperature, cover the pie loosely with plastic wrap and refrigerate for a minimum of 1 hour to allow it to chill thoroughly and set completely. For best results, chill for at least 2-4 hours, or even overnight.
- For the Whipped Cream: In a very cold mixing bowl, combine the cold heavy cream, powdered sugar, and vanilla bean paste (or vanilla extract). Using a stand mixer with a whisk attachment or a hand mixer, beat on medium-high speed until soft, fluffy peaks form. Be careful not to over-whip.
- To serve, spread the fresh whipped cream over the entire cooled pie just before serving, or add dollops to individual slices. Covering the whole pie with whipped cream ahead of time may cause it to become watery if there are leftovers. Garnish with optional lemon zest, thin lemon slices, or fresh mint sprigs. Enjoy your perfectly chilled Lemon Pie!
Recipe Notes
- Note 1 (Lemon Extract): Lemon extract is a powerful flavor enhancer that intensifies the citrus notes of the pie without adding extra liquid or acidity, unlike lemon juice. It’s similar to vanilla extract and is typically found in the baking aisle. For the most authentic and robust lemon flavor, use pure lemon extract. If you can’t find it, you can omit it, but the lemon flavor in your pie will be milder.
- Note 2 (Clean Slices): For perfectly clean slices that impress, dip your knife in hot water for a few seconds, wipe it dry, and then make one slice. Repeat this process for each slice. This keeps the knife warm and prevents the creamy filling from sticking.
- Storage:
- Room Temperature: The pie can sit at room temperature for up to 2 hours.
- Refrigerator: Store leftovers in an airtight container in the fridge for 2–4 days.
- Freezing: Yes, you can freeze lemon pie (without the whipped cream). Wrap individual slices or the whole pie tightly in plastic wrap, then aluminum foil. Freeze for up to 2-3 months. Thaw in the refrigerator, then let sit at room temperature for 30 minutes before serving. Add fresh whipped cream after thawing.
Nutrition Facts (Approximate per serving)
- Serving:
- 1 serving
- Calories:
- 543 kcal
- Carbohydrates:
- 76 g
- Protein:
- 9 g
- Fat:
- 24 g
- Saturated Fat:
- 13 g
- Polyunsaturated Fat:
- 1 g
- Monounsaturated Fat:
- 7 g
- Trans Fat:
- 1 g
- Cholesterol:
- 112 mg
- Sodium:
- 371 mg
- Potassium:
- 343 mg
- Fiber:
- 1 g
- Sugar:
- 56 g
- Vitamin A:
- 713 IU
- Vitamin C:
- 8 mg
- Calcium:
- 236 mg
- Iron:
- 2 mg
Nutrition information is automatically calculated and should be used as an approximation.
Enjoyed this recipe? Share your thoughts below!