
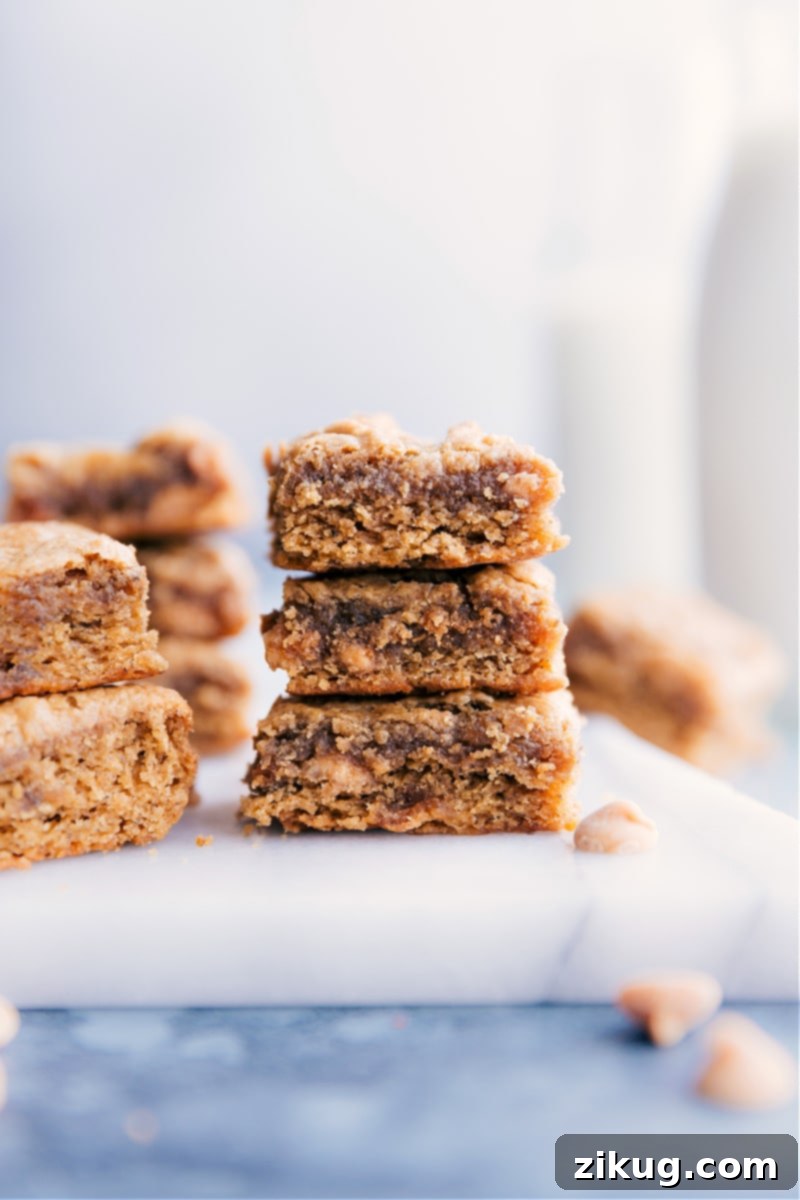
These incredibly nutritious and utterly delicious Peanut Butter Banana Bars are a delightful treat crafted from simple, wholesome ingredients. Starring sweet overripe bananas, rich peanut butter, and a touch of honey, these bars skip the butter, oil, and white flour, offering a healthier alternative without compromising on flavor or texture. Prepare for a fudge-like, satisfyingly chewy experience that comes together effortlessly in a single bowl, requiring no exotic ingredients or special trips to a health food store. They are perfect for anyone seeking a guilt-free indulgence or a wholesome snack to fuel their day, appealing to both adults and children alike.
Looking for more better-for-you baked goods? Explore some of our other healthy favorites that celebrate natural flavors and simple preparation. Try this homemade peanut butter granola for a crunchy start to your day, these delightful healthy zucchini muffins for a vegetable-packed treat, or our popular banana bread featuring Greek yogurt for an extra boost of protein and moisture. Each recipe is designed to be both delicious and nutritious, proving that healthy eating can also be incredibly satisfying and easy to integrate into your daily life.
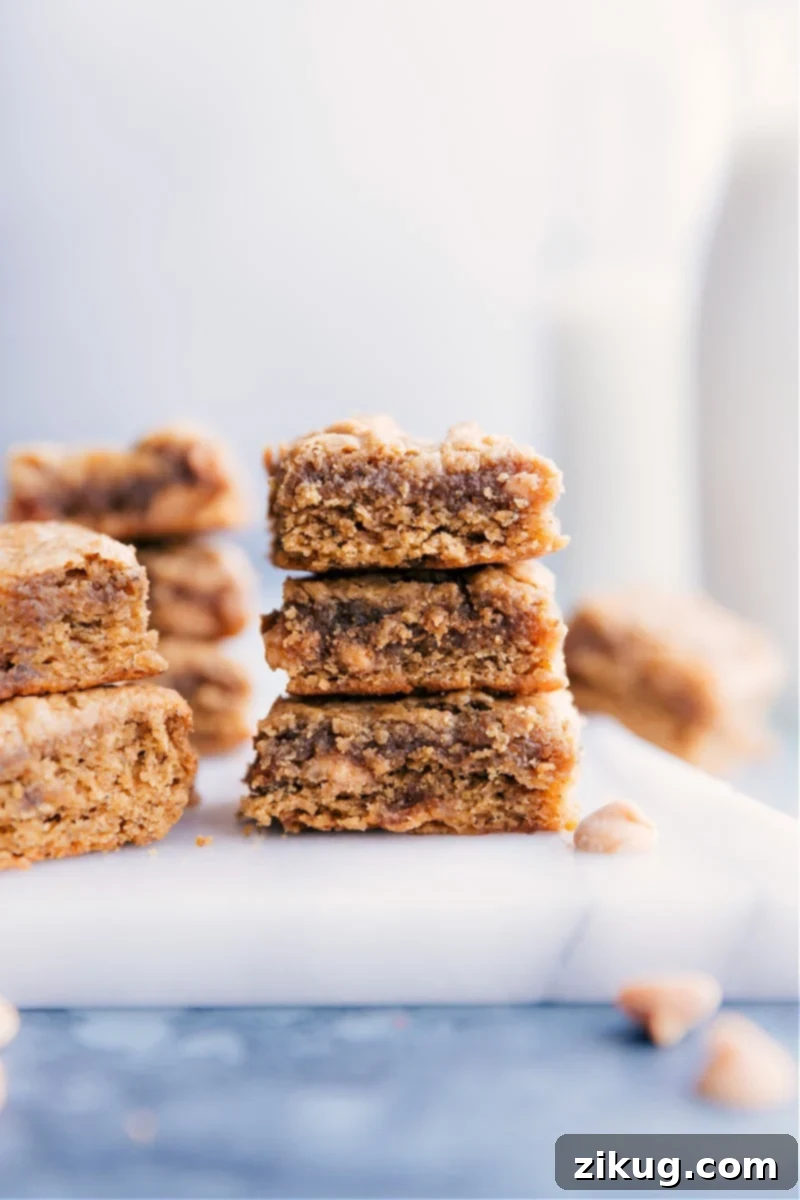
Peanut Butter Banana Bars: Your Ultimate Healthy, One-Bowl Treat
If your kitchen counter is graced with a few forgotten, spotted bananas, congratulations – you’re just moments away from creating something truly magical! These scrumptious Peanut Butter Banana Bars are the ideal solution for transforming those overripe fruits into a delightful afternoon pick-me-up, a convenient on-the-go breakfast, or a truly satisfying healthier dessert. They embody everything you crave in a baked good: rich flavor, pleasing texture, and a touch of wholesome goodness that makes them a guilt-free pleasure.
While the appearance of overripe bananas might not always be the most appealing, their internal transformation is precisely what makes them baking gold. As bananas ripen, their starches convert into natural sugars, intensifying their sweetness and developing a deeper, more complex flavor. This natural caramelization is a key component of these bars, allowing us to minimize added sugars. A small amount of honey and brown sugar goes a long way, complementing the bananas’ inherent sweetness without overpowering the subtle, wholesome flavors. This reliance on natural sweeteners contributes significantly to the bars’ overall healthier profile, making them a smart choice for those mindful of their sugar intake.
Beyond their natural sweetness, overripe bananas contribute significantly to the bars’ moist, tender crumb. Combined with the creamy richness of peanut butter, they create a wonderfully dense, almost fudge-like texture that makes these bars incredibly satisfying and robust. Peanut butter isn’t just for flavor; it also packs a punch of protein and healthy fats, ensuring these bars are not just a fleeting treat, but a genuinely satiating snack. We’ve found them to be an absolute hit with kids after school – a hearty, wholesome bite that keeps them full and happy until dinnertime, a win for parents everywhere looking for nutritious and appealing options.
This recipe truly celebrates simplicity and healthy swaps. By choosing oat flour instead of traditional white flour, we boost the fiber content, adding a pleasant chewiness and a subtle nutty flavor while making the bars more digestible and energy-sustaining. The absence of butter and oil means you’re indulging in a treat that’s lighter and better for you, without sacrificing that beloved baked good experience. These bars are a testament to how easy it is to enjoy delicious desserts and snacks while making mindful dietary choices, proving that healthy can be incredibly flavorful and convenient.
Expert Tips for Baking Your Best Peanut Butter Banana Bars
Achieving the perfect batch of Peanut Butter Banana Bars is simpler than you might think, especially when armed with these expert tips and tricks. Follow these guidelines to ensure your bars are consistently delicious, fudgy, and perfectly baked every time:
- Embrace Overripe Bananas as Your Secret Weapon: This is perhaps the most crucial tip for flavor and texture. The riper your bananas are – think brown spots, extensive speckling, or even fully brown skin – the sweeter and more intensely flavored your bars will be. As bananas mature, their starches convert into natural sugars, which not only sweetens the bars but also contributes to their moist, tender crumb. Perfectly speckled bananas are ideal for this recipe, ensuring maximum natural sweetness and a superior, richer banana flavor that truly shines through.
- Mash Bananas to a Velvety Smooth Consistency: For a consistently smooth, fudge-like texture that melts in your mouth, it’s imperative that your bananas are mashed exceptionally well. You want to avoid any large chunks of banana, as they can lead to an uneven bake, pockets of unmixed fruit, and an inconsistent texture in the final bar. A sturdy fork works wonders for this task, but for a quicker and even smoother result, a hand mixer or even a potato masher can make short work of mashing. This step ensures the banana sweetness and moisture are evenly distributed throughout the entire batter.
- Thoughtfully Adjust the Sweetness Level: This recipe is intentionally designed to be moderately sweet, relying heavily on the natural sugars from the overripe bananas. If you typically prefer treats that are less sweet, the provided amount of brown sugar will likely be perfect for your palate. However, if you have a sweeter tooth, or if your bananas aren’t as ripe as you’d like, feel free to add an extra 1-3 tablespoons of light brown sugar to taste. It’s important to note that adding more honey is not recommended, as its liquid consistency can significantly alter the delicate texture and moisture balance of these Peanut Butter Banana Bars, potentially making them too moist, dense, or causing them to not set properly.
- Always Line Your Baking Pan for Easy Removal: This is a non-negotiable step for effortlessly removing your baked bars and ensuring they stay beautifully intact. Always line your 8×8-inch baking pan with parchment paper, making sure to leave an overhang on all sides. This overhang acts as convenient handles, allowing you to lift the entire batch of baked bars out of the pan with ease once they have cooled. Attempting to remove these fudgy bars from an unlined pan can be quite challenging and often results in breakage. Please note that aluminum foil is not an adequate substitute for parchment paper, as the bars tend to stick to it.
- Unlock the Magic of Homemade Oat Flour: Don’t be intimidated by “oat flour” – it’s simply regular rolled oats that have been finely ground into a flour. This ingredient is a game-changer for these bars, as it adds a fantastic chewy texture, a subtle nutty flavor, and a significant boost in fiber and whole-grain goodness. Incorporating oat flour makes the bars inherently healthier, more satisfying, and gives them a distinct, wholesome character. If you don’t have oat flour on hand, you can easily make it at home using a blender or food processor.
Quick Tip: Effortless Homemade Oat Flour in Seconds
Forget the hassle and expense of buying pre-made oat flour! You can effortlessly create your own in 30 seconds or less right in your kitchen. Simply add regular oats (either old-fashioned rolled oats or quick oats work perfectly) to a high-speed blender or food processor. Blend on high until the oats reach a fine, powdery, flour-like consistency. Any standard blender, from a budget-friendly model to a high-end appliance, will do the trick effectively. A crucial detail: always ensure you measure the oat flour *after* blending, as whole oats take up more volume than their flour counterpart, and measuring before blending will result in an incorrect amount for the recipe.
It’s important to stick to oat flour as specified in this recipe. Other types of flours, such as all-purpose white flour or even whole wheat flour, absorb liquids differently and will significantly alter the texture and consistency of these bars. Oat flour’s unique absorption properties are key to achieving the bars’ signature fudgy, chewy success and their wholesome structure.
Enhance Your Peanut Butter Banana Bars with Flavorful Chips (or Healthy Alternatives!)
While these Peanut Butter Banana Bars are absolutely delicious on their own, adding a touch of baking chips can elevate them to an even more irresistible level, introducing delightful bursts of flavor and textural contrasts. We particularly love incorporating Reese’s peanut butter baking chips for an extra layer of creamy, nutty goodness that complements the banana and peanut butter base beautifully. You can typically find these delectable chips conveniently located alongside other baking supplies in the baking aisle of most well-stocked grocery stores.
However, if you’re aiming for an even more nutritious option, or simply prefer a different flavor profile, don’t hesitate to experiment with alternatives. Sugar-free chocolate chips or dark chocolate chips are fantastic choices that marry wonderfully with the existing flavors. Dark chocolate, in particular, adds a touch of sophisticated bitterness that elegantly balances the inherent sweetness of the bananas and honey, while also providing the added benefit of antioxidants. Feel free to customize your bars with whatever chips or mix-ins you fancy – chopped nuts, dried fruit, or even white chocolate chips could be delightful additions. The possibilities for personalization are truly endless, allowing you to tailor these bars to your exact taste preferences.
Quick Tip: Creative Uses for Leftover Peanut Butter Chips
Don’t let those extra peanut butter baking chips languish in your pantry! They are incredibly versatile and can be used in a variety of other delicious recipes, ensuring no flavor goes to waste. A particularly popular and indulgent choice is our Reese’s Fudge recipe, which transforms them into a rich, creamy, and irresistible confection. Beyond fudge, they’re also fantastic for mixing into your favorite cookie dough, scattering over brownies before baking, or even sprinkling over ice cream or yogurt parfaits for an instant flavor and texture boost. Keep them on hand for unexpected baking cravings!
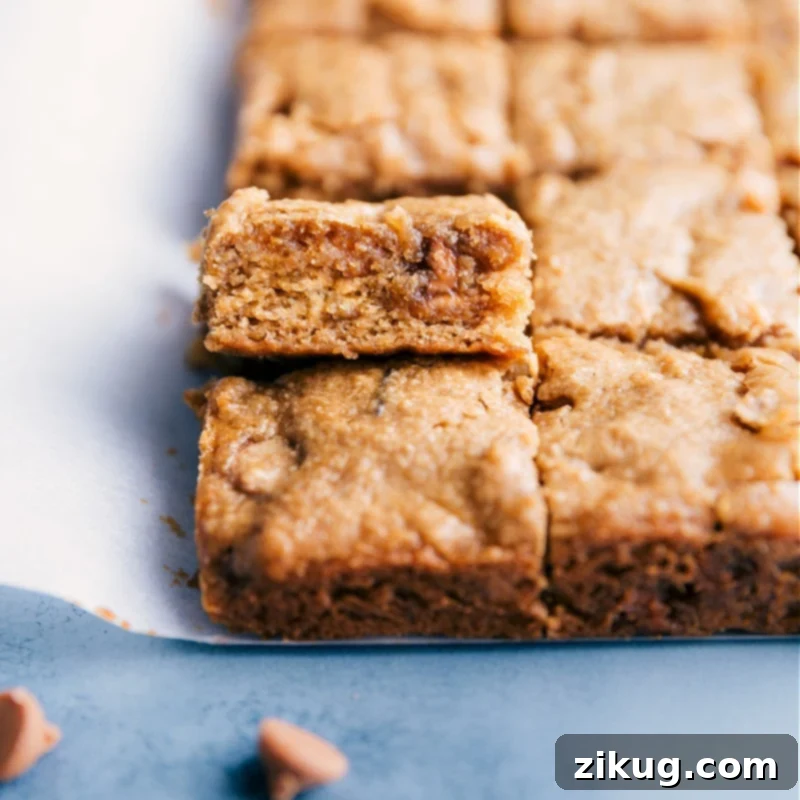
Mastering the Bake: Knowing When Your Peanut Butter Banana Bars Are Perfectly Done
Baking can sometimes feel like a delicate art, with numerous variables influencing the final result, such as altitude, humidity levels, individual oven calibration, and even the type of baking pan you use. For these fudgy Peanut Butter Banana Bars, knowing precisely when they’re done baking is key to achieving that perfect chewy, tender, and moist consistency. Underbaking can lead to a gooey center, while overbaking can result in dry, crumbly bars. Here’s what to watch for:
- The Right Temperature is Absolutely Essential: It’s a common habit for many home bakers to automatically preheat their oven to 350°F, but for these specific bars, a preheated oven at 300°F (150°C) is critically important. Baking at a slightly lower temperature ensures a more gentle and even bake throughout the bars, preventing the edges from becoming overly dry or crisp before the center is properly set. Resist the urge to crank up the heat; patience at 300°F will be richly rewarded with superior bars that maintain their desired fudgy texture.
- Strategic Steps to Prevent Under-baked Bars: To guarantee your bars bake through perfectly and aren’t disappointingly gooey in the middle, a few crucial precautions are necessary. First and foremost, verify that your oven is correctly calibrated. An inaccurate oven temperature can be the root cause of many baking frustrations. Always allow your oven to fully preheat to the specified temperature before placing the pan inside – opening the door too soon can cause temperature fluctuations. Additionally, positioning the baking pan in the dead center of the oven rack promotes optimal air circulation and ensures the most even heat distribution, critical for consistent baking.
- Key Visual Cues for Perfect Doneness: Unlike some cakes or breads where a toothpick comes out clean, the fudgy nature of these bars means the toothpick test can sometimes be misleading. Instead, rely on these distinct visual indicators to tell you when your Peanut Butter Banana Bars have reached perfection:
- The edges of the bars will begin to subtly pull away from the sides of the pan. This slight separation is a clear sign that the batter has cooked and set.
- The edges will take on a delicate, light golden-brown hue, indicating they are cooked through and have started to caramelize beautifully.
- The top surface of the bars will appear visibly set and firm to the touch, no longer glossy, wet, or jiggly in the center. A gentle touch should reveal a slight springiness.
Bake for approximately 18 to 25 minutes, keeping in mind that actual baking times can vary slightly depending on your specific oven and pan. It is vital to keep a close eye on them towards the end of the baking time. Overbaking is the primary enemy here; it can result in dry, crumbly bars that lose their delightful chewiness and robust, natural flavor, transforming them from fudgy to cakey. Aim for just-set rather than firm for the best results.
Beyond Bars: More Creative and Delicious Ways to Use Overripe Bananas
Overripe bananas are a true treasure in the kitchen, a baker’s best friend that signals the perfect time to get creative! Their intense sweetness and soft texture make them ideal for a wide array of recipes, extending far beyond just these delicious Peanut Butter Banana Bars. If you find yourself with an abundance of spotted, forgotten bananas, don’t let them go to waste! Here are some other fantastic and wholesome recipes that transform them into irresistible treats, ensuring maximum flavor and minimizing food waste:
- Cinnamon Banana Bread with a delightful streusel topping – a classic comfort food elevated with warm spices and an irresistible, crunchy streusel. It’s perfect for breakfast, brunch, or an afternoon snack.
- Chocolate Banana Bread featuring creamy Greek yogurt for added moisture, richness, and a boost of protein – a decadent yet healthier twist on a perennial favorite, ideal for chocolate lovers.
- Flourless Banana Muffins studded with mini chocolate chips – a wonderfully moist and tender gluten-friendly option that’s perfect for breakfast on the go or a quick, satisfying snack.
- Fluffy Banana Pancakes served with warm maple syrup – an excellent and naturally sweet way to start your day, turning ordinary pancakes into a special morning treat.
- Refreshing Strawberry Banana Smoothie sweetened with a touch of honey – a quick and easy, nutrient-packed beverage that’s perfect for a healthy breakfast, post-workout refuel, or a cool afternoon pick-me-up.
Peanut Butter Banana Bars Recipe
By Chelsea Lords
These Peanut Butter Banana Bars are irresistibly chewy, wonderfully fudgy, and packed with wholesome goodness! Crafted with naturally sweet ripe bananas, creamy peanut butter, and a touch of honey, this recipe is designed to be free from butter, oil, or traditional white flour. Enjoy a fuss-free, one-bowl baking experience that yields delicious, healthier treats perfect for any occasion.
Key Recipe Information:
- Prep Time: 20 minutes
- Cook Time: 22 minutes
- Total Time: 42 minutes
- Servings: 16 bars
Equipment You’ll Need:
- 8 x 8-inch baking pan
- Parchment paper
- Hand mixer
- Blender or food processor
Ingredients:
- 1/2 cup mashed ripe banana (approximately 1 medium overripe banana)
- 1/2 cup creamy peanut butter (Skippy is recommended for consistent results)
- 2 tablespoons honey
- 1 teaspoon vanilla extract
- 1/4 cup light brown sugar, lightly packed (see Note 1 for sweetness adjustments)
- 1 large egg
- 1/4 teaspoon salt
- 1/2 teaspoon baking soda
- 1/4 teaspoon baking powder
- 1 cup oat flour (easily made from blended oats, refer to Note 2)
- 1/2 cup peanut butter baking chips or dark chocolate chips
Instructions:
- Preheat your oven accurately to 300°F (150°C). Line an 8×8-inch baking pan with parchment paper, ensuring there’s a generous overhang on all sides. This parchment overhang will be essential for easily lifting the entire slab of baked bars out of the pan once cooled. Using aluminum foil is not recommended as the bars tend to stick.
- Peel your overripe banana and mash it thoroughly with a fork or hand mixer until it is very smooth and free of large chunks. Measure out 1/2 cup of the mashed banana after this process.
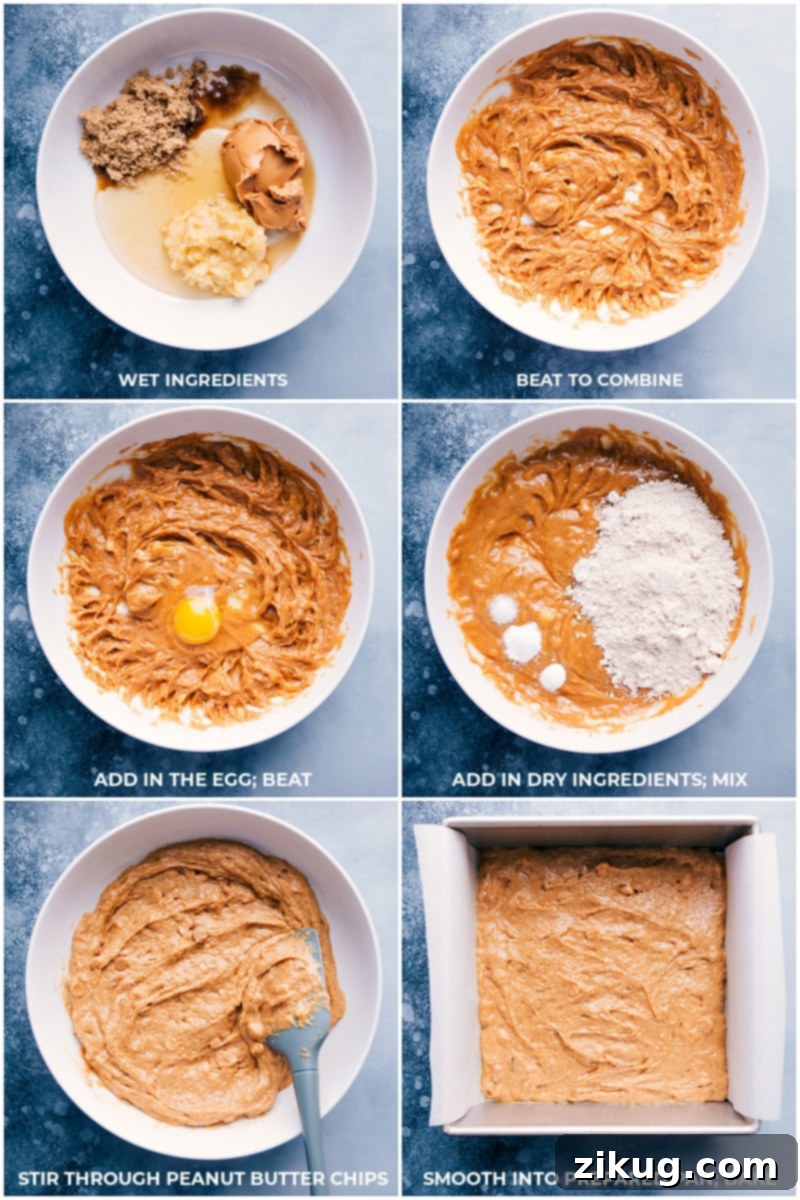
- In a large mixing bowl, combine the thoroughly mashed banana, creamy peanut butter (ensure it’s at room temperature for easy mixing, but do not warm it), honey, vanilla extract, and light brown sugar. Using a hand mixer, beat these wet ingredients together until they are completely smooth and well-combined. Then, beat in the large egg until it is fully incorporated into the mixture.
- Next, add the dry leavening agents and seasoning: baking soda, baking powder, and salt. Beat these in until just combined into the wet mixture. Gradually add the oat flour (refer to Note 2 for simple instructions on how to make your own) and mix until no streaks of dry flour remain in the batter. Finally, gently fold in your chosen peanut butter chips (or chocolate chips) with a spatula until evenly distributed.
- Transfer the prepared batter into your pre-lined 8×8-inch baking pan. Use a spatula to spread the mixture evenly into a smooth, consistent layer across the bottom of the pan.
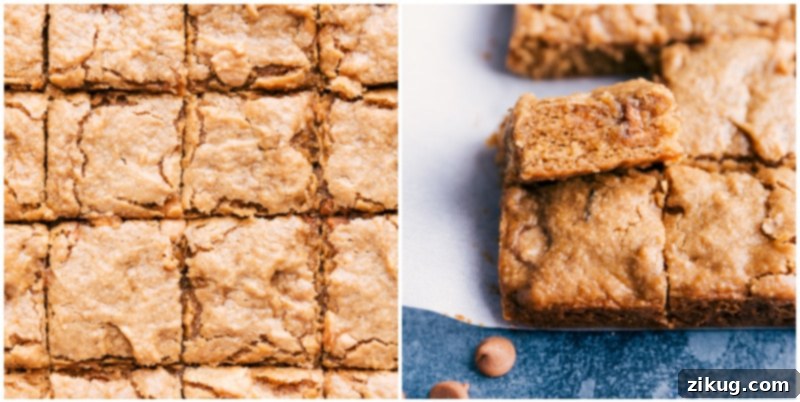
- Bake for 18 to 25 minutes. The bars are ready when the edges appear lightly golden brown and have subtly pulled away from the sides of the pan. The top surface should look set and firm to the touch, no longer glossy or wet in the center. It’s crucial to be careful not to overbake, as this can lead to dry and less flavorful bars, losing their desired fudgy texture.
- Once baked, remove the pan from the oven and allow the bars to cool completely within the pan on a wire rack. Cooling is important for them to set properly. Once fully cooled, use the parchment paper overhang to gently lift the entire slab of bars from the pan. Cut them into 16 individual bars and serve. These bars are best enjoyed within 1-2 days of baking, as they have a tendency to become more moist over prolonged storage.
Recipe Notes:
- Note 1 (Adjusting Sweetness): The natural sweetness contributed by truly overripe bananas is a key component of this recipe. If your bananas are not extremely ripe (and thus less sweet) or if you generally prefer a sweeter treat, you might consider increasing the light brown sugar by an additional 1 to 2 tablespoons. However, it’s very important to avoid adding more honey, as its liquid consistency can significantly alter the moisture content and overall texture of the bars, potentially making them too soft or dense.
- Note 2 (Homemade Oat Flour Simplified): To easily make your own oat flour, simply take regular rolled oats (either old-fashioned or quick oats work well) and pulse them in a high-speed blender or food processor until they achieve a fine, powdery, flour-like consistency. For precise measurements, it is essential to measure the oat flour *after* it has been blended, as whole oats will yield more flour volume than their initial state might suggest.
- Storage Recommendations: To maintain freshness, store any leftover Peanut Butter Banana Bars in an airtight container at room temperature for up to 2-3 days. For extended freshness, they can be stored in the refrigerator for up to a week. If you plan to keep them longer, these bars freeze wonderfully: wrap individual bars tightly in plastic wrap and then place them in a freezer-safe bag or container for up to 2-3 months. Thaw at room temperature or gently warm before enjoying.
Nutrition Information:
(Approximation per serving – 1 bar)
- Calories: 111 kcal
- Carbohydrates: 13.8g
- Protein: 3.3g
- Fat: 5.2g
- Cholesterol: 11.6mg
- Sodium: 44.1mg
- Fiber: 1.1g
- Sugar: 7.3g
Nutrition information provided is an automatic calculation based on ingredients and may vary. It should be used as an approximation only.
Enjoyed this recipe?
We’d love to hear from you! Your feedback helps us grow. Please consider leaving a comment below to share your experience, offer your own tips, or ask any questions about these delightful Peanut Butter Banana Bars. We look forward to reading your thoughts!
Leave a Comment!