
Decadent Samoas Brownie Ice Cream Bars: Your Ultimate No-Bake Summer Dessert
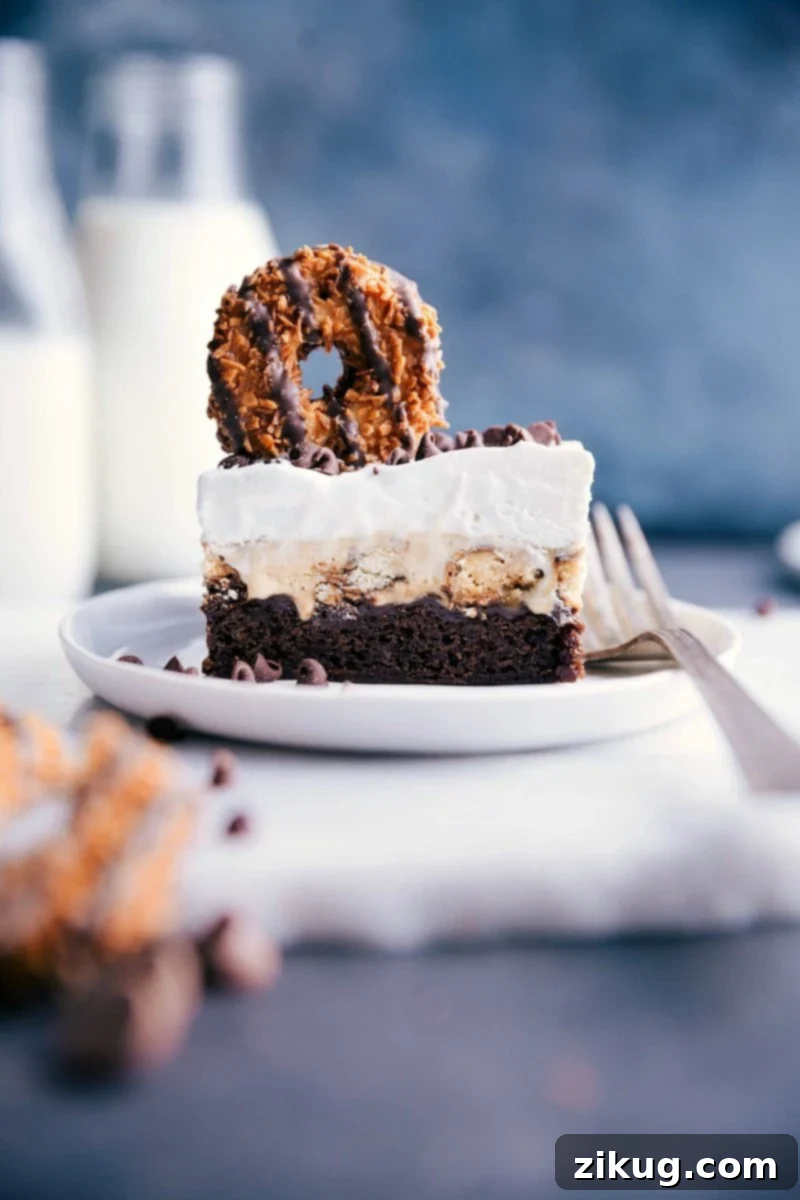
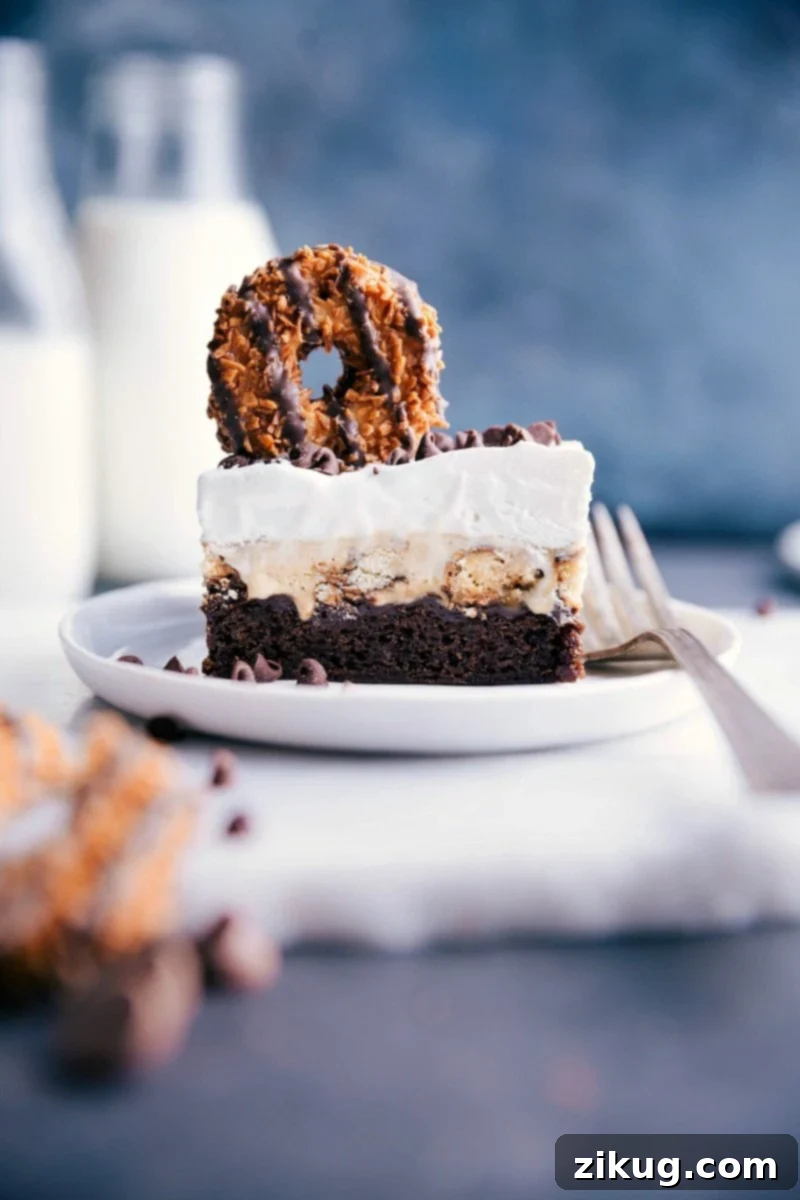
Indulge in the ultimate frozen treat with these incredible Brownie Ice Cream Bars. Featuring a rich, fudgy brownie base, these bars are layered with luscious hot fudge, chunks of iconic Samoas (or Coconut Dreams) cookies, creamy caramel ice cream, and a cloud of fluffy whipped cream. This dessert is a celebration of textures and flavors, promising a truly unforgettable experience.
Samoas Brownie Ice Cream Bars: A Heavenly Combination
As a devoted cookie enthusiast, I confess my unending love for all kinds of baked delights, from chewy Snickerdoodles to classic Chocolate Chip Cookies. While homemade treats hold a special place in my heart, there’s always room for the undeniable charm of Girl Scout® Cookies. Among them, Samoas (or Caramel deLites, depending on the bakery!) and Thin Mints reign supreme as personal favorites.
Today, we’re taking the beloved flavor profile of Samoas – that perfect blend of toasted coconut, caramel, and chocolate – and transforming it into a spectacular frozen dessert. These Brownie Ice Cream Bars are not just any ice cream bars; they’re an elevated experience, combining the fudgy goodness of brownies with the irresistible crunch and chew of chopped Samoas, swirled caramel ice cream, rich hot fudge, and a light whipped topping. It’s a dessert where “more is definitely more,” delivering a symphony of sweet, salty, and satisfying flavors in every bite.
Perfect for summer gatherings, holiday celebrations, or simply treating yourself to something extraordinary, these Samoas Brownie Ice Cream Bars offer a delightful contrast of textures and temperatures that will leave everyone craving another slice. Forget complicated recipes; this decadent dessert achieves gourmet results with surprisingly simple assembly.
Crafting Your Own Samoas Brownie Ice Cream Bars
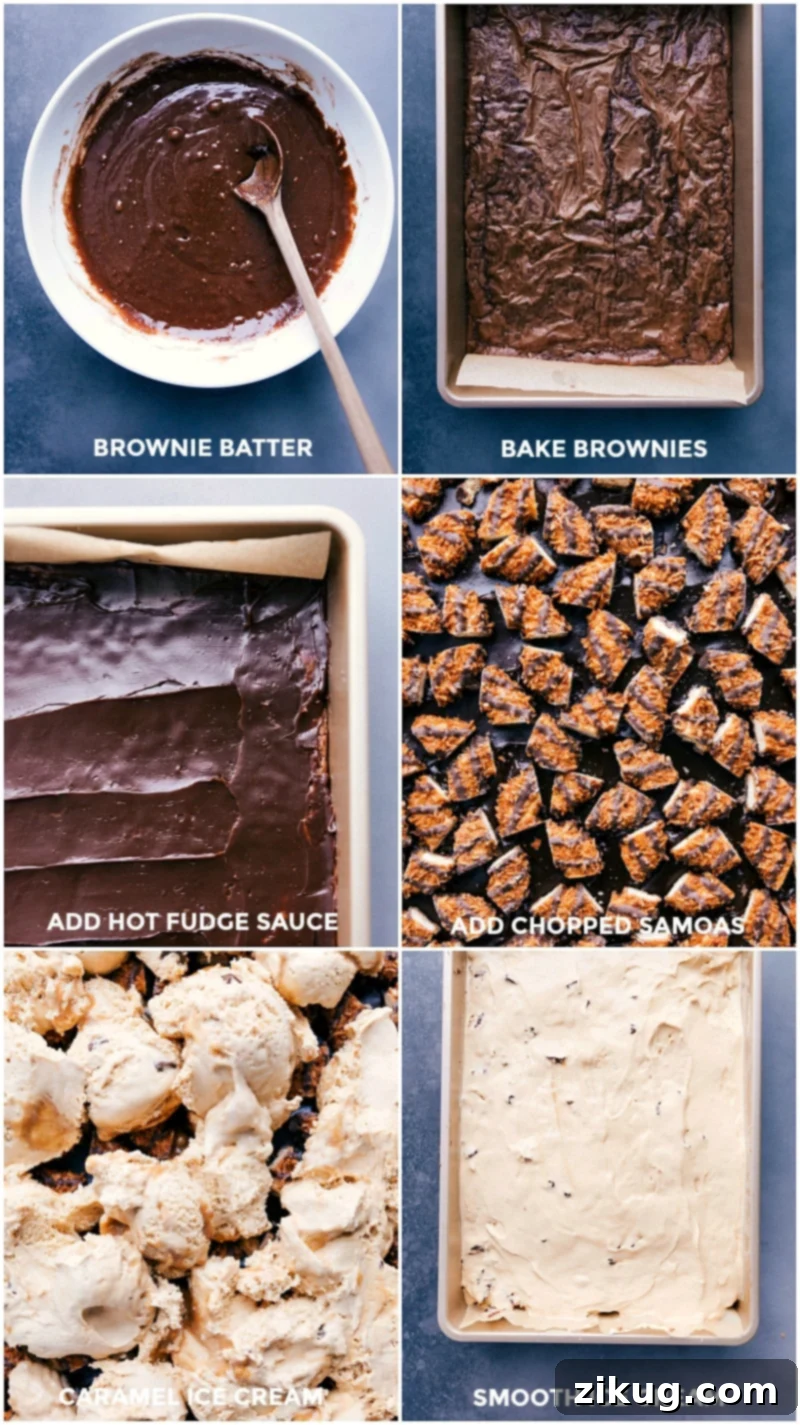
Despite their impressive appearance and luxurious taste, these brownie ice cream bars are incredibly straightforward to make. With just a few key ingredients and some freezer time, you’ll be on your way to a dessert that’s easy to assemble and utterly impossible to resist. Here’s how we build these layers of pure bliss:
1. The Fudgy Brownie Base
Our journey to the perfect ice cream bar begins with a rich, dense brownie base. For ultimate convenience without compromising on flavor, we recommend starting with a quality boxed brownie mix. This choice allows us to achieve delicious results quickly, making it ideal for a dessert where speed and ease are a bonus. If you prefer to bake from scratch, feel free to use your favorite homemade brownie recipe, ensuring it’s suitable for a 9×13-inch pan. The key is a deep, chocolatey base that holds up to the layers above.
A personal favorite for this recipe is Betty Crocker’s Supreme Triple Chunk® Brownie Mix. Make sure to select a mix designed for a 9×13-inch pan to ensure the correct base thickness. For those with dietary considerations, my Gluten-Free Brownies recipe also makes an excellent base – just remember to omit the frosting if you use it for these bars. Regardless of your choice, the fudginess of the brownie is paramount, providing a sturdy and flavorful foundation for our frozen masterpiece.
2. The Irresistible Fudge and Samoa Layer
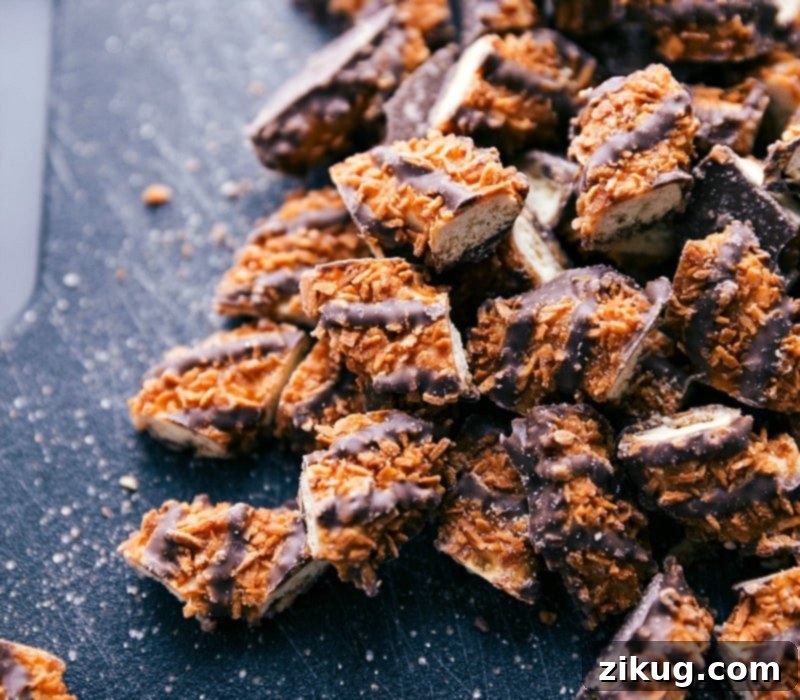
While your brownies are baking to perfection, prepare your Samoas cookies. Coarsely chop them into delightful, bite-sized pieces. While I refer to “Samoas” throughout, you’re not limited to the seasonal Girl Scout Cookie version. Keebler® offers an almost identical cookie, their “Coconut Dreams,” which are readily available year-round and work wonderfully in this recipe. They deliver the same delicious combination of coconut, caramel, and chocolate that makes Samoas so iconic.
Once your brownies are baked and cooled, and here’s a crucial tip: slightly underbake them! Since these bars will be frozen, a slightly softer brownie prevents them from becoming too hard when chilled. After cooling completely, generously spread a jar of warm hot fudge over the brownie layer. The warmed fudge will be easier to spread evenly and will provide a sticky bed for our chopped cookies. Gently press the chopped Samoas (or Coconut Dreams) into the hot fudge. The “pressing” part is important – don’t just scatter them. This ensures they adhere beautifully to the fudge, preventing them from falling off when sliced and guaranteeing a cookie crunch in every mouthful.
3. Creamy Caramel Ice Cream Perfection
The next delectable layer is the ice cream! For these bars, caramel ice cream is the star, perfectly complementing the flavors of the Samoas and fudge. Choose your favorite brand of caramel ice cream – a rich and creamy variety will yield the best results. If you’re unsure where to start, many culinary reviews highlight excellent options. Dreyer’s® Slow Churned Caramel Delight Ice Cream has proven to be a fantastic choice for its smooth texture and rich caramel flavor, seamlessly blending with the other elements of the bar.
When adding the ice cream, work quickly. Scoop the ice cream onto the cookie layer and gently spread it evenly with a spatula. Avoid letting the ice cream melt too much, as this can lead to ice crystals forming once it’s refrozen, compromising the creamy texture. The goal is a smooth, consistent layer that will freeze into a delightful cool treat.
4. The Cloud-Like Whipped Topping
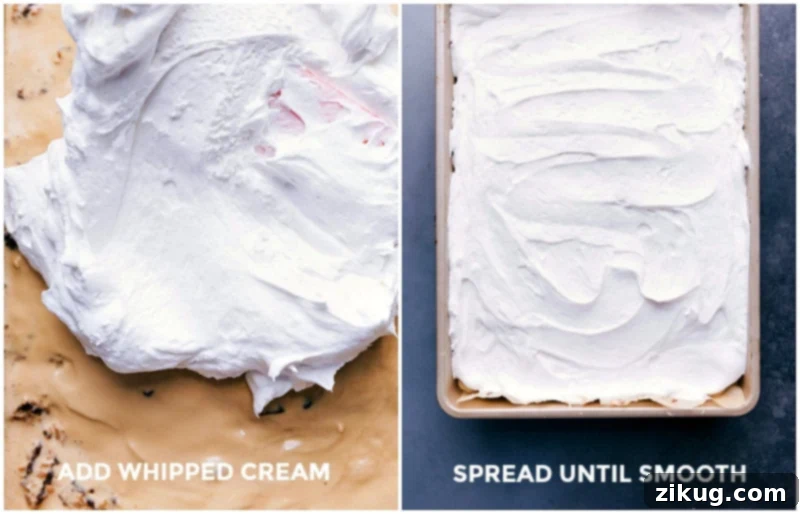
Finally, we crown these exquisite bars with a light and airy whipped topping. You have the option to make your own homemade whipped cream (find a great recipe here) for an extra touch of freshness, or simply use a container of thawed, frozen whipped topping for ultimate convenience. Both options provide a wonderful, soft contrast to the chewy brownie and firm ice cream.
Once the whipped topping is smoothed over the top, these bars are ready for their finishing touches! Feel free to add some leftover crushed Samoas cookies, a drizzle of extra caramel sauce, or a sprinkle of miniature chocolate chips for garnish. This final flourish not only enhances the visual appeal but also adds an extra layer of flavor and texture. These ice cream bars are destined to be a crowd-pleaser, perfect for any occasion that calls for a truly special dessert.
Creative Topping Ideas to Elevate Your Bars
While these Samoas Brownie Ice Cream Bars are utterly delicious on their own, don’t hesitate to get creative with toppings! Adding a little extra flair can transform them even further, catering to individual tastes and making them truly spectacular for any occasion. Here are some fantastic ideas:
- Rich Caramel Sauce: A generous drizzle of caramel sauce, whether store-bought for convenience or homemade for an extra touch of gourmet, will amplify the caramel notes already present in the cookies and ice cream. It adds a beautiful sheen and a luxurious, gooey texture.
- Extra Samoas Crunch: Crush any remaining Samoas cookies that weren’t incorporated into the layers and sprinkle them liberally over the whipped topping. For an even more impressive presentation, you can garnish individual slices with a whole Samoas cookie on top. This not only reinforces the signature flavor but also adds a delightful textural contrast.
- Miniature Chocolate Chips: A sprinkle of mini chocolate chips provides an extra burst of chocolate flavor and a pleasing, delicate crunch. They’re a classic pairing with both brownies and caramel.
- Toasted Coconut Flakes: To highlight the coconut in Samoas, lightly toast some shredded coconut flakes in a dry pan until golden brown, then sprinkle them over the bars. The toasted coconut adds a deeper, nuttier flavor and an irresistible aroma.
- Sea Salt Flakes: A tiny pinch of flaky sea salt can beautifully balance the sweetness of the dessert, enhancing the caramel and chocolate flavors with a sophisticated touch.
- Chocolate Drizzle: A simple drizzle of melted chocolate or chocolate syrup can add an artistic touch and an extra layer of chocolatey goodness.
Exciting Variations for Your Ice Cream Bars
While the Samoas version of these brownie ice cream bars is undeniably a winner, the base recipe is incredibly versatile! Feel free to experiment with different flavor combinations to create new favorites. Here are a few inspiring variations:
- Cookies and Cream Dream: Craving something different? Try transforming this recipe into a cookies and cream delight. My popular Brownie Oreo Ice Cream Bars recipe on this website is a huge hit, replacing Samoas with classic Oreo cookies for a universally loved flavor profile.
- Oreo Crust Base: For a completely different textural experience, consider replacing the brownie base with a crunchy Oreo crust. Simply crush Oreo cookies, mix with melted butter, press into the pan, and chill. If you opt for this route, I recommend making the ice cream layer slightly thicker to maintain balance.
- Thin Mint Indulgence: If Thin Mints are your Girl Scout Cookie obsession, you can easily adapt this recipe. For a mint-chocolate version, try my Mint Ice Cream Bars and simply replace the Oreos with crushed Thin Mint cookies for a refreshing and decadent twist. A mint chocolate chip ice cream would be perfect here!
- Peanut Butter Perfection: For peanut butter lovers, swap the caramel ice cream for a rich peanut butter ice cream and the Samoas for chopped peanut butter cups or Nutter Butter cookies. Drizzle with a little chocolate and peanut butter sauce.
- Rocky Road Revelation: Use chocolate fudge ice cream, add chopped marshmallows, and sprinkle with nuts (like almonds or peanuts) and extra chocolate chunks for a classic Rocky Road flavor.
Chef’s Tip: Stocking Up on Samoas
If you absolutely must have authentic Girl Scout Samoas and nothing else will do, plan ahead! The next time the Girl Scouts are selling cookies, do yourself a favor and stock up. Purchase several boxes, store them in a freezer-safe container, and keep them frozen until you’re ready to use them in this irresistible recipe!
Essential Tips for Perfect Brownie Ice Cream Bars
Achieving perfectly layered, delectable ice cream bars is simple with a few smart techniques. Follow these tips to ensure your Samoas Brownie Ice Cream Bars turn out beautifully every time:
- Parchment Paper is Your Best Friend: Always line your 9×13-inch pan with parchment paper, leaving an overhang on the sides. This creates “handles” that make it incredibly easy to lift the entire frozen slab out of the pan for clean slicing. Lightly spray the parchment with cooking spray for extra assurance.
- Keep it Cold: Temperature control is crucial. Work quickly and return the bars to the freezer as much as possible between layers. If the ice cream or fudge gets too soft and melty during assembly, it can result in an icy, less creamy texture once refrozen. A well-chilled foundation is key to perfectly set layers.
- Slightly Underbake Your Brownies: This is a game-changer! Since the brownies will be frozen solid, baking them for the full time indicated on the package can make them rock-hard when chilled. Removing them 2-3 minutes early ensures they remain delightfully fudgy and chewy, providing a pleasing contrast to the soft ice cream and whipped topping once frozen.
- Add Whipped Topping Just Before Serving: For the best flavor and texture, apply the whipped topping and any delicate garnishes (like extra crushed cookies) right before you plan to serve the bars. Whipped cream tends to degrade in texture and flavor if it’s refrozen, becoming less airy.
- For Cleaner Slices: To achieve beautifully neat and defined slices, run a sharp knife under hot water for a few seconds, then wipe it clean with a towel. Repeat this process between each slice. The warm blade glides effortlessly through the frozen layers, preventing crumbling and sticky messes.
- Overnight Freeze for Best Results: While 3 hours is the minimum freezing time, allowing the bars to freeze overnight yields the best structural integrity and ensures all layers are perfectly set and firm, making for easier slicing and serving.
- Serving Temperature: Let the bars sit out at room temperature for 5-10 minutes before cutting and serving. This allows the layers to soften slightly, making them easier to slice and more enjoyable to eat.
More Crowd-Pleasing Dessert Recipes to Explore
If you loved these Samoas Brownie Ice Cream Bars, you’re sure to enjoy these other delightful and easy-to-make dessert recipes:
- S’mores Cookie Bars
- Ice Cream Sandwich Cake
- Strawberry Shortcake Trifle
- Edible Cookie Dough
- Waffle Cake
Brownie Ice Cream Bars With Samoas
Equipment
-
9 x 13-inch baking pan lined
Ingredients
- 1 (21-ounce) package fudge brownie mix family sized, fully prepared, see note 1
- 1 (12-ounce) container hot fudge topping
- 1 (8.5-ounce) package fudge stripe coconut cookies see note 2
- 1 (1.5-quart) container caramel ice cream
- 1 (8-ounce) container frozen whipped topping
- Toppings as desired see note 3
Instructions
-
Line a 9×13-inch pan with parchment paper and lightly spray with cooking spray. Preheat oven according to the brownie mix instructions.
-
Follow package directions to prepare the brownies. Spread the brownie batter into the prepared 9×13-inch pan. Bake according to package directions but remove 2–3 minutes earlier than indicated.
-
Remove and allow to cool to room temperature. Cover and place in the freezer for 30 minutes. Warm hot fudge in the microwave for 15–20 seconds for easier spreading, and then top the brownies evenly with the hot fudge topping.
-
Coarsely chop all but 3 of the cookies and gently press the cookie pieces on top of the fudge topping. Cover and freeze for 10 minutes.
-
Scoop the ice cream on top of the cookie pieces. Don’t let the ice cream melt too much or it will get icy after re-freezing. Using a spatula, gently press and spread the ice cream as evenly as possible; then cover and return to the freezer until very firm, at least 3 hours. I like freezing them overnight.
-
Before serving, smooth the thawed whipped topping over the bars and crush the remaining 3 cookies. Sprinkle those crumbs over the bars along with mini chocolate chips if desired.
-
Let bars sit out for 5–10 minutes before cutting into them. For cleaner slicing, run your knife under hot water and wipe it off with a towel between slices. Top individual bars with caramel sundae sauce if desired.
Recipe Notes
Note 2: For the cookies, it’s great to use Keebler’s Coconut Dreams Cookies or Girl Scout Samoas cookies.
Note 3: I love to top these bars with caramel sundae sauce, extra cookies, and mini chocolate chips!
Storage: Cover bars tightly before refreezing. It’s best not to add the whipped cream and crushed cookies until you’re ready to eat, those additions don’t refreeze well.
Nutrition
Nutrition information is automatically calculated, so should only be used as an approximation.
Like this? Leave a comment below!
We hope you enjoy making and devouring these sensational Samoas Brownie Ice Cream Bars! They’re truly a labor of love that results in a dessert everyone will adore.