
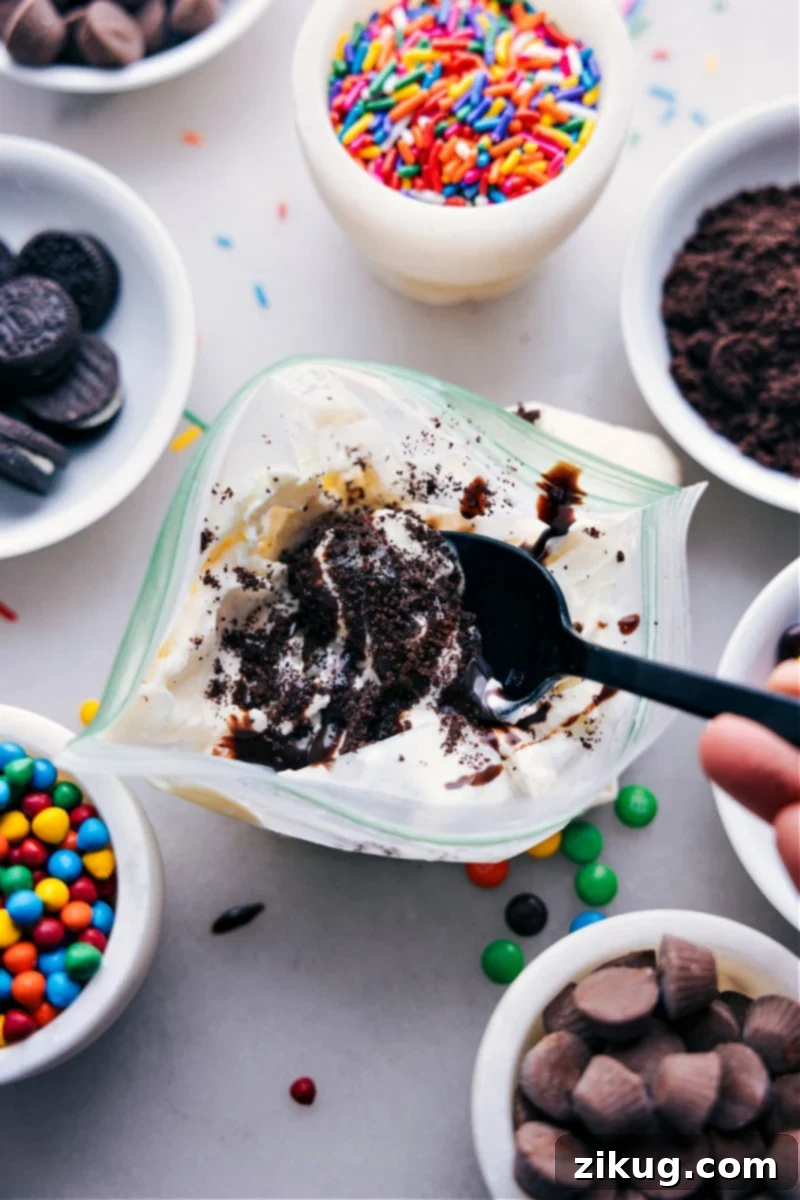
Homemade Ice Cream In A Bag is the ultimate solution for a quick, fun, and irresistibly creamy treat, all without the need for an expensive or bulky ice cream machine! With just a handful of simple ingredients, ice, and a dash of rock salt, you can whip up delicious, soft-serve style ice cream in a matter of minutes. This method is not only incredibly easy but also doubles as a fantastic educational activity for kids, making it a perfect project for family fun or a classroom science experiment.
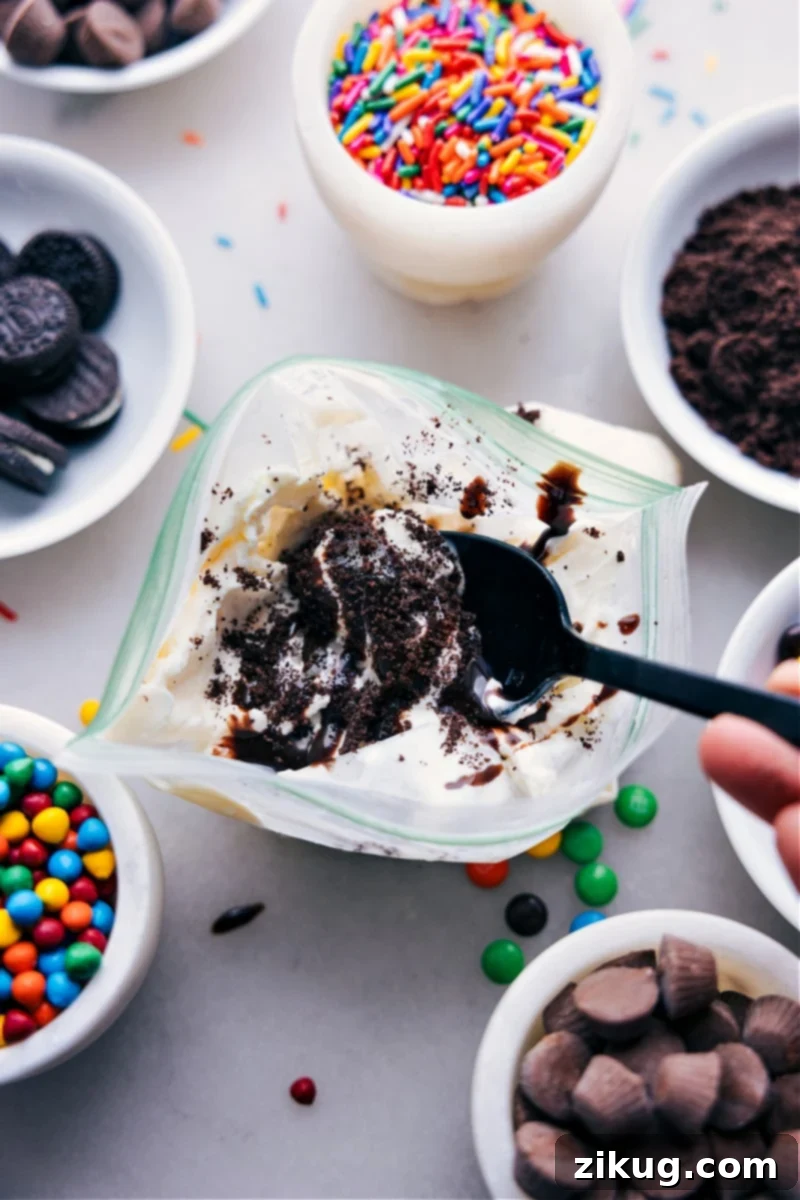
Homemade Ice Cream in a Bag: The Easiest No-Machine Recipe!
Forget the days of needing a dedicated ice cream maker or enduring hours of freezing time to satisfy your sweet cravings. Our homemade Ice Cream in a Bag recipe simplifies the entire process, bringing you rich, smooth, and delicious ice cream in a flash. This innovative technique is not just about speed and convenience; it’s a delightful culinary adventure that engages all ages, offering a hands-on experience that ends with a delightful dessert.
This recipe holds a special place in my heart, reminding me of fun science classes where we learned about freezing points while making a delicious treat. It’s incredibly rewarding to see the simple ingredients transform right before your eyes, resulting in a perfectly smooth and creamy consistency that rivals store-bought varieties. What makes this recipe truly stand out is its versatility. While a classic vanilla or chocolate base is always a hit, the real magic happens when you start customizing. Imagine stirring in crushed cookies, swirls of caramel, vibrant fresh berries, or even a hint of mint. The possibilities are truly endless!
And let’s not overlook the joy of toppings! Once your soft and creamy ice cream is ready, it’s time to unleash your creativity. Pile on colorful sprinkles, a generous dollop of homemade whipped cream, a luscious drizzle of hot fudge, crunchy nuts, or any other favorite toppings. Each spoonful becomes a personalized masterpiece, tailored exactly to your taste. This recipe isn’t just about making ice cream; it’s about creating memories and enjoying a truly personalized dessert experience.
The Science Behind Ice Cream In A Bag: A Fun Experiment!
Making ice cream in a bag isn’t just a delicious activity; it’s a fascinating display of basic chemistry and physics in action! The magic behind this no-churn method relies on two key scientific principles: lowering the freezing point and efficient heat transfer.
- Freezing Point Depression: When you add rock salt to ice, something remarkable happens. Salt dissolves in the thin layer of water that naturally forms on the surface of ice. This saltwater solution has a lower freezing point than pure water. As the salt dissolves, it needs to draw heat from its surroundings to melt the ice, causing the temperature of the ice-salt mixture to drop significantly, often well below 32°F (0°C). This super-cold environment is what makes your ice cream mix freeze quickly.
- Optimized Heat Transfer: The warm (room temperature or slightly chilled) liquid ice cream mixture, sealed within its smaller bag, is surrounded by this super-cold ice and rock salt bath in the larger bag. The temperature difference drives a rapid heat transfer process. Heat energy quickly moves from the warmer ice cream mix to the colder ice-salt mixture. As the ice cream mixture loses its heat, its temperature drops, and the dairy fats and sugars begin to crystallize, transforming into creamy ice cream.
Constant shaking is crucial during this process. Shaking ensures that the ice cream mixture is continuously exposed to the coldest parts of the ice-salt bath, promoting even freezing and preventing the formation of large ice crystals that would make the ice cream icy rather than smooth. In just 5 to 10 minutes of shaking, you’ll achieve a delightful soft-serve consistency. For those who prefer a firmer scoop, simply transfer the bag to a traditional freezer for an additional 20-30 minutes. Be careful not to freeze it for too long, as it can become excessively hard, losing its enjoyable texture.
Gather Your Tools: Essential Supplies for Ice Cream in a Bag
Before you dive into making your delicious ice cream, gather these simple supplies. Having everything ready will make the process smooth, fun, and mess-free!
- Gallon-sized Resealable Bag: This larger bag will hold your ice and rock salt, creating the chilling bath. It’s absolutely essential that this bag is strong, leak-proof, and seals very tightly to prevent any salty water from getting into your ice cream mixture. Consider double-bagging for extra security, especially with enthusiastic shakers!
- Small Resealable Bag (Pint or Sandwich-sized): This smaller bag is where your actual ice cream mixture will go. Like the larger bag, it must be completely leak-proof and seal securely to keep the ice cream mix separate from the salty ice bath.
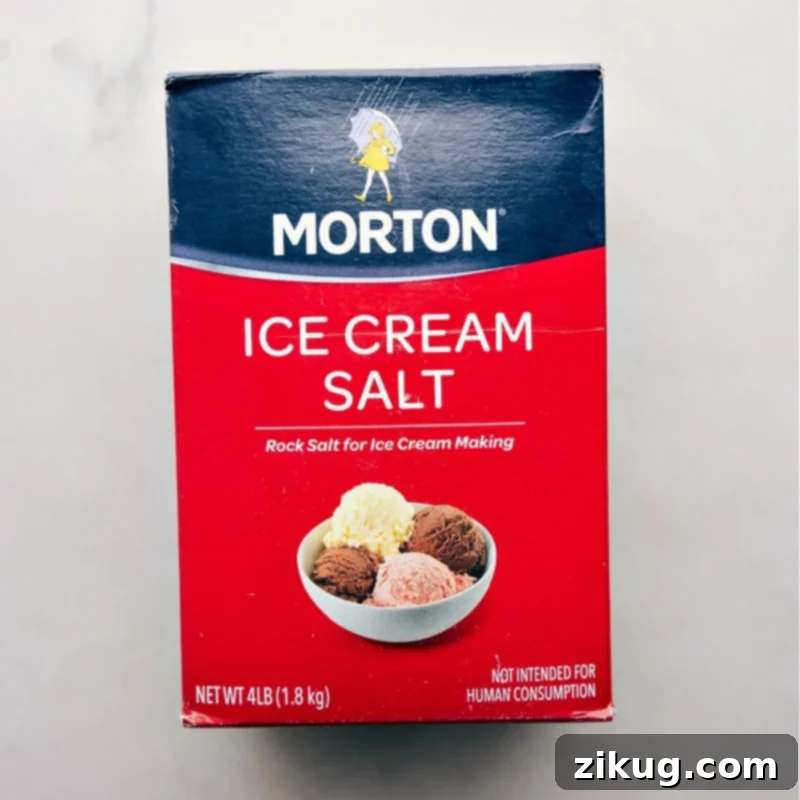
- Rock Salt (Ice Cream Salt): This is the scientific star of the show! Rock salt (sodium chloride) is coarse and ideal for lowering the freezing point of water more effectively than fine table salt. Look for it in the spice aisle of your grocery store, often on the bottom shelf, or where canning supplies are sold. Do not substitute with regular table salt, as it won’t produce the same dramatic temperature drop needed for quick freezing.
- Ice: The foundation of your freezing bath! Crushed ice is highly recommended as it has a larger surface area, allowing it to cool down faster and make better contact with the rock salt and the inner ice cream bag. If you only have large cubes, you can crush them yourself using a blender or by placing them in a sturdy bag and breaking them with a mallet or rolling pin.
- Oven Mitts or Towel (Optional but Recommended): Your hands will get very cold from shaking the bag! Oven mitts, gardening gloves, or even a kitchen towel wrapped around the bag will provide insulation and make the shaking experience much more comfortable.
Essential Ingredients for Creamy Bliss
Creating delicious ice cream in a bag starts with a few basic, high-quality ingredients. Each component plays a vital role in achieving that perfect creamy texture and rich flavor.
- Half-and-Half or Heavy Cream: The foundation of your ice cream!
- Heavy Cream: Opt for heavy cream (also known as whipping cream) for the richest, most decadent, and creamiest ice cream. Its higher fat content results in a smoother texture and less ice crystal formation.
- Half-and-Half: If you prefer a lighter ice cream with fewer calories, half-and-half is a great alternative. It will still yield a delicious treat, though it might be slightly less dense and creamy than using heavy cream. Ensure your dairy is very cold when you start for the best results.
- Granulated Sugar: Sweetness is key! Sugar not only provides flavor but also contributes to the ice cream’s texture by lowering its freezing point slightly and preventing it from becoming too hard. You can adjust the amount to your personal preference, but remember that flavors tend to taste slightly milder when frozen, so don’t be afraid to taste and adjust your mixture before freezing.
- Vanilla Extract: The classic flavor enhancer! Pure vanilla extract is highly recommended for its warm, aromatic notes that elevate the entire ice cream experience. While imitation vanilla can be used, pure extract provides a superior, more complex flavor.
- Pinch of Fine Sea Salt: A small amount of salt might seem counterintuitive for a sweet dessert, but it’s a secret weapon for flavor! A tiny pinch of fine sea salt doesn’t make the ice cream salty; instead, it balances the sweetness and makes all the other flavors (especially vanilla) pop and become more pronounced.
Flavor Adventures: Ice Cream In A Bag Customization Ideas
This recipe is a blank canvas for your creativity! Here are some exciting flavor ideas to inspire your next batch of homemade ice cream:
- Decadent Chocolate: Easily transform your vanilla base into a chocolate lover’s dream! Simply stir in 2 tablespoons of hot fudge sauce or high-quality chocolate syrup into your cream mixture. For a richer chocolate experience, you can also add a tablespoon of unsweetened cocoa powder.
- Caramel Swirl: For a buttery, sweet twist, replace the chocolate syrup with 2 tablespoons of your favorite caramel sauce. A pinch of flaky sea salt alongside the caramel will create an irresistible salted caramel flavor.
- Refreshing Mint Chip: Add a few drops of peppermint extract (start with 1/4 teaspoon and add more to taste) and a generous handful of mini chocolate chips for a cool, classic combination. For a vibrant green color, add a tiny drop of green food coloring.
- Cookies ‘n’ Cream: Crush about 2-3 Oreo cookies (or any chocolate sandwich cookie) and fold them into your mixture just before freezing. The crushed cookies add both flavor and a delightful textural contrast.
- Peanut Butter Perfection: Mix in 1-2 tablespoons of creamy peanut butter for a rich, nutty ice cream. For an extra treat, stir in some crushed peanut butter cups.
- Berry Delight: For a taste of summer, mash a few fresh strawberries, raspberries, or blueberries and gently fold them into your base. This adds natural sweetness, a lovely tartness, and a beautiful color.
- Tropical Paradise: Add a splash of coconut extract and some shredded coconut, or even a tablespoon of mango puree for an exotic escape.
- Coffee Lover’s Dream: Stir in a teaspoon of instant espresso powder (dissolved in a tiny bit of hot water) or a tablespoon of cold brew coffee concentrate for a delightful coffee-flavored ice cream.
- Spice It Up: Experiment with a tiny pinch of cinnamon, nutmeg, or even pumpkin pie spice for a warm, comforting flavor.
Don’t be afraid to experiment with your favorite candies, chocolates, fruit purees, or extracts to create your signature flavor!
Pro Tips for Perfect Ice Cream In A Bag
Follow these expert tips to ensure your homemade ice cream in a bag turns out perfectly creamy and delicious every time, with minimal mess and maximum fun!
- Seal Both Bags Tightly (and Double-Check!): This is the most critical step to prevent a salty, watery mess. After adding your ice cream mixture to the small bag, squeeze out as much air as possible before sealing it securely. Then, when you place the small bag inside the large bag with ice and salt, repeat the process: press out excess air and ensure the large bag is sealed tightly. A common mishap is a leaky bag, which can ruin your delicious ice cream with salt water. Consider using two smaller bags for your ice cream mixture for an extra layer of protection, especially when making this with enthusiastic children.
- Shake, Shake, Shake! And Keep Moving: The key to smooth, evenly frozen ice cream is constant and vigorous shaking. Don’t just hold it still; continuously move the ice and salt around the inner bag. This ensures that all parts of your ice cream mixture come into contact with the super-cold environment, preventing large ice crystals and creating a uniform, creamy texture. You can shake it, gently toss it back and forth, or even pass it around with friends and family.
- Protect Your Hands: Wear Oven Mitts or Wrap in a Towel: The ice and rock salt mixture gets incredibly cold! To keep your hands from getting uncomfortably chilly (or even numb), always wear a pair of thick oven mitts, gardening gloves, or wrap the large bag in a kitchen towel. This insulation will make the shaking process much more enjoyable and allow you to shake for the full duration needed.
- Chill Your Serving Bowls: For the ultimate ice cream experience, pop your serving bowls into the freezer for about 10-15 minutes before your ice cream is ready. Serving your freshly made, soft-serve style ice cream in a chilled bowl will help it stay cold and creamy longer, giving you more time to savor every spoonful before it melts.
- Eat Immediately for Best Texture: Ice cream made in a bag is best enjoyed right after it’s prepared. It has a delightful soft-serve consistency that melts relatively quickly. While you can store leftovers (see notes below), the freshly made texture is unparalleled.
- Clean Up is Easy: Once your ice cream is transferred, carefully dispose of the salty ice water. You can rinse and reuse the bags if they’re sturdy, or simply discard them for easy cleanup.
More Easy Dessert Recipes to Explore
- Chocolate Chip Cookie Icebox Cake: A decadent, no-bake cake requiring only four simple ingredients.
- Mint Oreo Truffles: Indulge in these delightful truffles made with refreshing mint Oreos.
- No-Bake Cookies: A classic combination of chocolate and peanut butter in a quick, fuss-free cookie.
- Buncha Crunch: Satisfy your cravings with this crispy, chocolatey treat made with just three ingredients!
- Sugar Cookie Fruit Pizzas: Bright, colorful, and fun dessert using convenient store-bought sugar cookies.

Print Recipe
Ice Cream In A Bag
Homemade Ice Cream in a Bag offers a delightful, quick, and fun way to make creamy ice cream—no machines needed! Just mix everyday ingredients, add rock salt and ice, and shake your way to a dreamy dessert in minutes.
Video Tutorial
Watch this quick video to see how simple it is to make delicious ice cream in a bag!
Equipment
- 1 Gallon-sized Resealable Plastic Bag
- 1 Sandwich-sized Resealable Bag (pint-sized also works)
- Oven mitts or a kitchen towel (optional, for comfort)
Ingredients
- 1/3 cup rock salt (also called ice cream salt; see Note 1 below)
- Plenty of Ice (crushed ice is best, but cubes work)
- 1/2 cup heavy cream or half-and-half (see Note 2 below)
- 1 tablespoon granulated sugar
- 1/2 teaspoon vanilla extract (pure vanilla recommended)
- 1/8 teaspoon fine sea salt
- 2 tablespoons chocolate syrup (optional, for chocolate ice cream)
- Toppings as desired (see Note 3 below for ideas)
Instructions
- Prepare Toppings & Chill Bowls: First, get any desired toppings ready and set them aside. For the best serving experience, consider placing your serving bowl(s) in the freezer to chill while you make the ice cream. This will help keep your treat colder for longer.
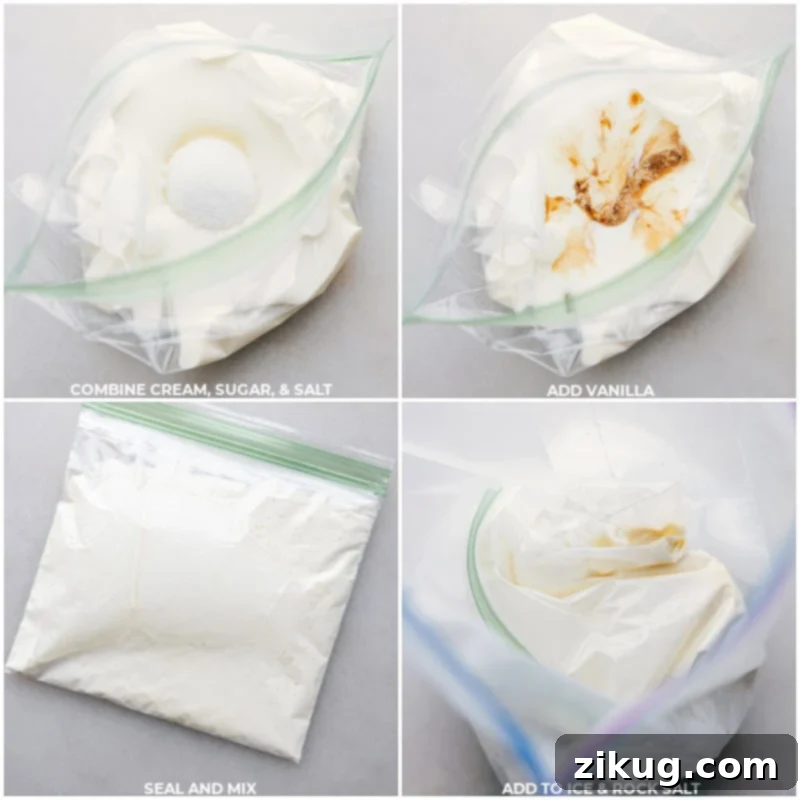
- Mix Ice Cream Base: Carefully pour the heavy cream (or half-and-half), granulated sugar, vanilla extract, and fine sea salt into the small resealable bag. If you’re making a chocolate version, add the chocolate syrup now. Seal the bag tightly, removing as much air as possible to prevent leaks and promote even mixing. Gently smoosh the bag with your hands to combine all ingredients thoroughly until the sugar is dissolved. Set this bag aside.
- Prepare Ice Bath: Fill the large gallon-sized resealable bag halfway with crushed ice. Add the rock salt directly into the ice. Seal this large bag, again removing as much air as possible. Briefly shake or knead the bag to distribute the rock salt evenly throughout the ice.
- Combine & Shake: Place the small bag containing your ice cream mixture inside the large bag with the ice and rock salt. Seal the large bag securely, ensuring no air or liquid can escape. To protect your hands from the extreme cold, wrap the entire bag in a thick kitchen towel or wear oven mitts. Now, vigorously shake, massage, and toss the bag continuously for 5 to 10 minutes. You’ll notice the mixture in the small bag gradually thickening and transforming into soft-serve consistency. The more you shake and move the ice around, the faster and creamier your ice cream will be.
- Serve and Enjoy: Once your ice cream has reached your desired soft-serve consistency, carefully remove the small bag from the larger bag. Be mindful of any salty water that might be on the outside of the inner bag and wipe it clean before opening. Squeeze the freshly made ice cream into your chilled serving bowl(s). Add your favorite toppings immediately and dig in! Remember, this fresh, soft-serve ice cream melts quickly, so enjoy it without delay.
Recipe Notes
Note 1: Rock Salt (Ice Cream Salt)
Rock salt is crucial for this recipe. It’s often found in the spice aisle of grocery stores, sometimes on the bottom shelf, or with canning supplies. It’s specifically chosen for its ability to significantly lower the freezing point of ice water, creating the super-cold environment needed to freeze your ice cream quickly. Do not substitute with table salt, as it will not yield the same results.
Note 2: Cream Choice – Heavy Cream vs. Half-and-Half
For the richest, most luxurious, and creamiest ice cream, heavy cream is your best choice due to its higher fat content. If you’re looking for a lighter option, half-and-half works well, though the resulting ice cream will be slightly less dense and creamy. Always ensure your dairy product is well-refrigerated and very cold before you begin for optimal freezing. You can also make your own half-and-half by combining equal parts whole milk and heavy cream.
Note 3: Topping Ideas
Unleash your creativity with toppings! Popular choices include crushed Oreo cookies, crushed toffee bits, warm hot fudge sauce, mini chocolate chips, colorful sprinkles, fresh fruit (like berries or sliced bananas), chopped nuts, caramel sauce, whipped cream, or even a drizzle of honey. The possibilities are endless!
Nutrition Note:
The provided nutrition information is an approximation calculated for one serving of basic vanilla ice cream without any additional toppings or optional chocolate syrup. Actual values may vary based on specific ingredients and additions.
Storage:
While best enjoyed immediately, any leftover ice cream can be transferred to an airtight container and frozen. For the creamiest texture, it’s best consumed within a few days, as it may become firmer over time when stored in a conventional freezer.
Nutrition Information
Serving: 1 serving | Calories: 457kcal | Carbohydrates: 16g | Protein: 3g | Fat: 43g | Saturated Fat: 27g | Polyunsaturated Fat: 2g | Monounsaturated Fat: 11g | Cholesterol: 134mg | Sodium: 32mg | Potassium: 116mg | Sugar: 16g | Vitamin A: 1749IU | Vitamin C: 1mg | Calcium: 79mg | Iron: 0.1mg
Nutrition information is automatically calculated and should only be used as an approximation. It does not include optional ingredients or toppings.
Enjoyed this recipe? Share your thoughts and leave a comment below!
Making homemade ice cream in a bag is more than just a recipe; it’s an experience. It’s an opportunity to create delicious memories with family, explore basic scientific principles in a fun way, and enjoy a perfectly customizable dessert that’s ready in minutes. Whether you’re a seasoned chef or a kitchen novice, this easy, no-machine method guarantees a satisfyingly creamy treat that will become a go-to favorite for any occasion. So grab your ingredients, gather your crew, and get ready to shake up some sweet, frosty fun!