
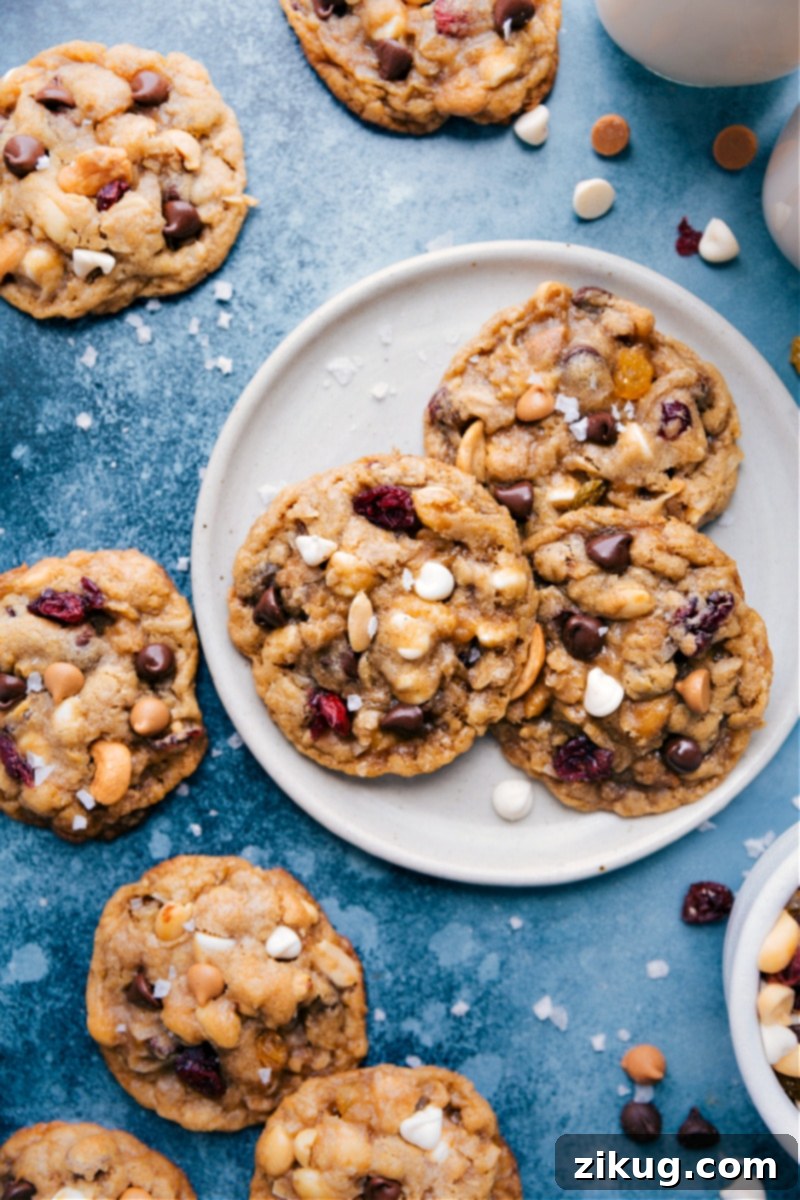
Get ready to elevate your cookie game with these incredible Trail Mix Cookies! This recipe takes everything you love about classic oatmeal cookies and infuses it with the vibrant, diverse flavors and textures of your favorite trail mix. The result is a delightful symphony of sweet and salty, chewy and crunchy in every single bite. If you’re searching for a new go-to cookie that’s both easy to make and endlessly customizable, look no further. These trail mix cookies are destined to become a beloved staple in your kitchen, perfect for snacks, desserts, or sharing with friends and family.

Author’s Note
The Ultimate Trail Mix Cookie Mash-Up: A Personal Culinary Journey!
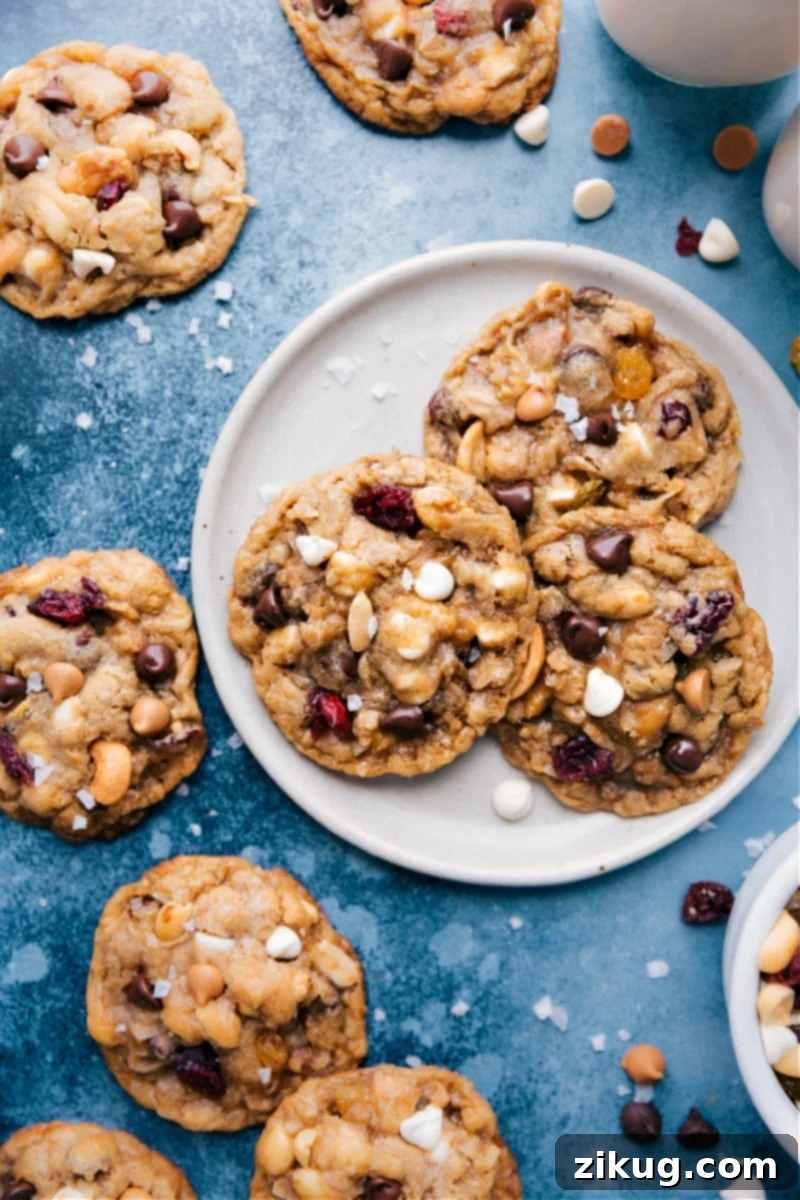
As a huge fan of trail mix, it’s a snack you’ll almost always find stocked in my pantry. Its delightful blend of flavors and textures—from crunchy nuts to sweet dried fruit and decadent chocolate—makes it a perfect pick-me-up. My recent obsession with cowboy cookies, which often feature a generous helping of nuts, sparked an idea. While developing new oatmeal cookie recipes, it suddenly clicked: why not incorporate trail mix directly into the cookie dough?
Trail mix is essentially a pre-packaged blend of all the best cookie mix-ins! It’s got the crunch, the chew, the sweetness, and often a touch of saltiness that elevates any baked good. This simple realization led to the creation of these fantastic Trail Mix Cookies. Each bite is an adventure, bursting with rich chocolate, wholesome nuts, and chewy dried fruit. What makes this recipe truly special is its incredible versatility; you can use any trail mix you adore. This means every batch feels fresh, exciting, and uniquely yours, making baking an even more enjoyable and creative experience.
These cookies aren’t just a treat; they’re a celebration of flavor and convenience. They bring together the comfort of a homemade cookie with the exciting variety of a gourmet snack. They’ve quickly become a family favorite, and I’m sure they’ll become one of yours too!
Choosing Your Perfect Trail Mix for the Best Cookies
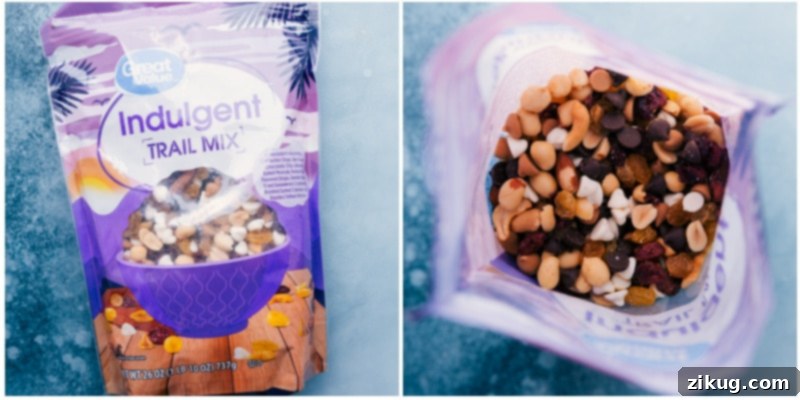
The heart of these Trail Mix Cookies lies, of course, in the trail mix itself. While I’ve explored countless store-bought options at my local grocery store, I often prefer to craft my own. Creating your own mix is not only more budget-friendly but also offers the freedom to select your absolute favorite chocolate chips, nuts, and dried fruits, ensuring every ingredient contributes to the ultimate cookie experience. This customization allows you to cater to specific tastes or dietary preferences, making the cookies truly personal.
Through extensive testing with various blends, the Indulgent Trail Mix (whether homemade or store-bought) consistently emerged as the top contender. Its rich combination of sweet and savory elements perfectly complements the chewy cookie base. The Mountain Trail Mix was a very close second, offering a more classic nutty and fruity profile. Both options provide an excellent balance, but feel free to experiment with any high-quality trail mix you enjoy. Just ensure it doesn’t contain overly large or hard pieces that could make chewing difficult. Consider the balance of sweetness from chocolates or dried fruits, and the saltiness and crunch from nuts. A good trail mix for cookies should have a variety that enhances, rather than overwhelms, the cookie’s base flavor.
Crafting Your Own Indulgent Trail Mix: Ingredients Breakdown
If you’re inspired to create your own signature “Indulgent Trail Mix” for these cookies, here are the exact ingredients I use to achieve that perfect balance of flavors and textures:
- White chocolate chips—1/3 cup (55g)
- Milk chocolate chips—1/3 cup (55g)
- Peanut butter baking chips—1/3 cup (55g)
- Dried sweetened cranberries—1/2 cup (62g)
- Dry-roasted and lightly salted cashews—1 cup (126g)
- Dry-roasted and lightly salted peanuts—1/2 cup (70g)
This specific combination offers a delightful mix of creamy white chocolate, classic milk chocolate, a hint of nutty peanut butter flavor, the tart sweetness of cranberries, and the satisfying crunch of cashews and peanuts. The lightly salted nuts are key, as they provide a subtle counterpoint to the sweetness, creating that irresistible sweet and salty dynamic that makes these cookies so addictive.
Featured Comment
“These are a huge hit at our house!! LOVE LOVE LOVE this recipe.”
– Ozzie
Expert Baking Tips for Perfect Trail Mix Cookies Every Time
Baking delicious cookies is an art, and a few simple tips can make all the difference between a good cookie and an absolutely phenomenal one. Follow these helpful guidelines to ensure your Trail Mix Cookies turn out perfectly chewy, flavorful, and beautifully presented. The full detailed recipe is provided below, but these insights will help you master the technique.
- Measure Flour with Precision: This is perhaps one of the most crucial steps in cookie baking. Incorrect flour measurement is a common culprit for dense, cakey, or dry cookies. Always spoon your flour into the measuring cup and then level it off with the back of a knife. Never scoop the flour directly from the bag with your measuring cup, as this compacts it, leading to excessive flour in your dough. Precise measurement ensures the perfect texture: a cookie that is tender and chewy, not tough.
- The Magic of a Silicone Liner: For optimal baking, I highly recommend using a silicone baking mat. These liners provide superior heat distribution, preventing the bottoms of your cookies from burning while ensuring even cooking. They also create a non-stick surface, making it incredibly easy to remove your cookies without breakage. If you don’t have a silicone liner, high-quality parchment paper is an excellent alternative that still delivers great results. Avoid baking directly on an unlined metal sheet pan, as it can lead to uneven baking and sticking.
- Embrace Slight Underbaking for Chewy Perfection: The secret to a delightfully chewy cookie lies in a slightly underbaked center. When you remove the cookies from the oven, they should appear just set around the edges and still look a tiny bit gooey or soft in the very middle. Don’t be tempted to bake them until they are firm throughout. The residual heat from the baking sheet will continue to cook them as they cool, leading to that coveted soft, chewy texture. Overbaking results in dry, hard cookies.
- Aesthetic Appeal: Make ’em Pretty!: For cookies that look as good as they taste, try this simple trick: immediately after removing the cookies from the oven, gently press a few extra pieces of trail mix (chocolate chips, nuts, or dried fruit) into the tops of the warm cookies. This makes them visually appealing, showcasing all the wonderful mix-ins and giving them that irresistible, bakery-style finish. It’s a small step that makes a big impact on presentation.
By keeping these tips in mind, you’re well on your way to baking a batch of Trail Mix Cookies that are not just delicious, but truly spectacular!
Creative Variations: Switch Up Your Trail Mix Cookies!
One of the best aspects of these Trail Mix Cookies is their inherent flexibility. The “trail mix” component itself is a world of possibilities, allowing for endless customization to suit your cravings or the ingredients you have on hand. Here are some fantastic ways to experiment and create new favorites:
- Peanut Butter Powerhouse: If you’re a peanut butter enthusiast, this variation is a must-try! You can either use a peanut butter-focused trail mix for an intensified nutty flavor, or integrate trail mix into a classic peanut butter cookie base. For the latter, simply add 1¾ cups of your chosen trail mix to my popular Peanut Butter Cookies recipe, reducing the all-purpose flour by 1/3 cup to maintain the perfect dough consistency. The combination of peanut butter with crunchy nuts and sweet elements from the trail mix is truly divine.
- Easy Cookie Bars: Transform these delectable cookies into convenient cookie bars for a crowd-pleasing dessert that’s easy to serve. Instead of individual cookies, swap out the chocolate chips in my versatile Cookie Bars recipe for an equal amount of trail mix. Press the dough into a prepared baking pan and bake until golden. Cookie bars are perfect for parties, potlucks, or simply when you want a quick and easy dessert without the fuss of scooping individual cookies.
- Oatmeal Base, Your Way: While this recipe uses an oatmeal cookie base, you can further tailor it. If you’re not a fan of coconut, or simply prefer a different profile, consider using my Oatmeal Chocolate Chip Cookies recipe as your foundation. Then, instead of just chocolate chips, incorporate your favorite trail mix. This ensures a hearty oatmeal cookie texture with all the exciting elements of trail mix, offering a slightly different flavor dynamic.
- Spice It Up: Add a pinch of your favorite warm spices like nutmeg, allspice, or a touch more cinnamon to the dough for an extra layer of flavor, especially if your trail mix is more on the savory side.
- Citrus Zest Boost: A little orange or lemon zest can brighten the flavor profile, especially if your trail mix includes dried cranberries or apricots.
- Seed Power: For an added nutritional punch and texture, consider trail mixes that include pumpkin seeds, sunflower seeds, or chia seeds. These add a subtle earthiness and extra crunch.
Storage Solutions for Maximum Freshness
Proper storage is key to maintaining the delicious taste and texture of your Trail Mix Cookies. Here’s how to keep them fresh, whether you’re enjoying them now or saving them for later:
- Room Temperature Storage: Once your Trail Mix Cookies have completely cooled, transfer them to an airtight container. They will stay fresh and delicious at room temperature for up to 3 days. To maintain optimal freshness, ensure the container is sealed tightly to prevent air exposure, which can dry out the cookies. They are truly at their peak flavor and texture within the first 2-3 days after baking.
- Freezing Baked Cookies: If you’ve baked a large batch or want to save some for a later treat, freezing is an excellent option. First, allow the cookies to cool completely. Then, arrange them in a single layer on a baking sheet and place in the freezer until solid. Once frozen, transfer the cookies to freezer-safe bags or containers, placing sheets of parchment paper between layers to prevent them from sticking together. While still delicious, expect a slight change in texture upon thawing; they might be a little softer than freshly baked cookies. Thaw at room temperature or gently warm in the microwave for a few seconds.
- Freezing Cookie Dough Balls: For ultimate convenience, freeze the dough before baking. After shaping the cookie dough into balls, place them on a baking tray lined with parchment paper and freeze until firm. Once solid, transfer the frozen dough balls to an airtight, freezer-safe container or bag. When you’re ready to bake, simply place the frozen dough balls on a prepared baking sheet and add a few extra minutes to the baking time (typically 2-4 minutes longer than the recipe suggests for thawed dough). This method allows for freshly baked cookies on demand, anytime you crave them!
By following these storage tips, you can enjoy your homemade Trail Mix Cookies for longer, ensuring every bite is as satisfying as the first.
Explore More Delicious Cookie Recipes:
Desserts
Bakery Style Chocolate Cookies
Desserts
Maple Cookies Recipe
Desserts
Funfetti Cookies
Desserts
Crumbl Oreo Cookies

Trail Mix Cookies
Chelsea Lords
25
10
1
1
35
24
cookies
Video Overview
A video tutorial for making these Trail Mix Cookies would typically be embedded here. It would demonstrate key steps from mixing the dough to final baking for visual guidance.
Equipment
-
Stand mixer
or hand mixer -
2 Sheet pan (15″ x 10″)
-
2 Silicone baking mat
or parchment paper -
Cooling rack
Ingredients
- 8 tablespoons unsalted butter at room temperature
- 1 cup dark brown sugar or light brown sugar, see note 1
- 1 large egg
- 1 teaspoon vanilla extract
- 1/2 teaspoon baking soda see note 2
- 1/2 teaspoon salt
- 1/4 teaspoon ground cinnamon optional
- 1/2 cup old-fashioned oats see note 3
- 1-1/4 cup all-purpose flour
- 1/2 cup sweetened coconut flakes not desiccated coconut
- 1 cup trail mix see note 4
Instructions
-
In the bowl of a stand mixer fitted with the whisk attachment (or use a large bowl and a hand mixer), combine room temperature butter (ensure it’s not melted, but softened to the touch) and brown sugar. Beat at medium speed until the mixture becomes light in color and fluffy, typically about 1–2 minutes. Next, add the large egg and vanilla extract, continuing to beat until the mixture is light and fluffy, which usually takes an additional 2 minutes. Remember to scrape down the sides of the bowl as needed to ensure all ingredients are well incorporated.
-
Add the baking soda and salt to the butter mixture. Mix until these dry ingredients are just combined, approximately 20 seconds. Then, incorporate the old-fashioned oats, all-purpose flour, and sweetened coconut flakes. Mix until the ingredients are just blended and no streaks of flour remain, about 30 seconds.
-
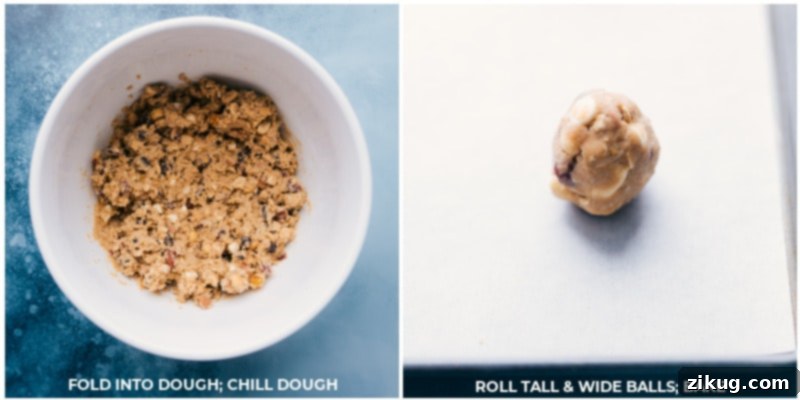
Gently fold in the trail mix. Mix until the ingredients are just combined, being careful not to overmix or overbeat the dough. Overworking the dough can lead to tough, dense cookies rather than the desired chewy texture. Once mixed, cover the bowl of dough tightly with plastic wrap and chill it in the refrigerator for 30 minutes. This chilling period is crucial for flavor development and helps prevent the cookies from spreading too much during baking.
-
Shape the chilled cookie dough into uniform balls. Aim for about 2 packed tablespoons per cookie (if you have a food scale, each ball should weigh approximately 40 grams). It’s beneficial to roll the balls taller rather than wider (refer to the accompanying picture for visual guidance). Place the shaped dough balls on a plate lined with parchment paper and gently cover them with plastic wrap. Return them to the refrigerator for another 30–45 minutes. Avoid chilling for too long, as excessively cold dough can cause cookies not to spread properly. If you’re short on time, you can freeze the dough balls for a quick 20–25 minutes instead.
-
Preheat your oven to 325°F (160°C). Line 2 large baking sheets with silicone liners (this is very important to prevent the cookie bottoms from burning and ensures even baking). Place no more than 6 dough balls per pan, ensuring ample space between each as they will spread significantly. Bake for 9–14 minutes (my oven typically takes around 11–12 minutes). Remember, these cookies are best when slightly underbaked; they should look ever-so-slightly gooey in the center (they will firm up as they cool) and be lightly golden brown around the edges. Remove from the oven. If your cookies appear too puffy, gently bang the sheet pan a few times on the counter to help them flatten out. (See note 5 for further troubleshooting tips.)
-
Immediately after taking the cookies out of the oven, you can press a few more chocolate chips or choice pieces of trail mix into the tops. This enhances their visual appeal and ensures every cookie looks generously packed with delicious mix-ins. Allow the cookies to cool and set on the hot baking sheet for 5–10 minutes. This critical step allows them to firm up enough to be safely transferred to a wire cooling rack without breaking.
-
Transfer the cookies to a wire rack and let them cool completely before eating. Patience is key here, as they firm up considerably as they reach room temperature, developing their ultimate chewy texture. Store the cooled cookies in an airtight container at room temperature for up to 4 days. For the best taste and texture, consume them within 2–3 days of baking.
Recipe Notes
Note 2: Baking Soda Freshness: The effectiveness of your baking soda directly impacts the rise and spread of your cookies. To check if your baking soda is still fresh, perform this quick test: mix a small amount with a little vinegar or lemon juice; it should fizz vigorously. If it’s clumpy, make sure to press it through a mesh sieve before adding it to your dry ingredients to ensure it disperses evenly.
Note 3: Oat Selection: For this recipe, only old-fashioned rolled oats will work correctly. Quick oats or steel-cut oats have different textures and absorption properties, which will result in a significantly different (and less desirable) cookie texture. Stick to old-fashioned oats for that classic chewy consistency.
Note 4: Trail Mix Customization: These Trail Mix Cookies have been tested with several trail mix varieties. The “Indulgent Trail Mix” was the undisputed favorite, offering a superb balance of flavors and textures, with “Mountain Trail Mix” coming in a close second. Feel empowered to customize! If you prefer your cookies without raisins, simply pick them out before measuring your 1 cup of trail mix. Similarly, if your chosen trail mix contains overly large candy pieces or nuts, you might want to roughly chop them or remove some to ensure even distribution and pleasant bites.
Note 5: Troubleshooting Cookie Spreading:
- Cookies not spreading enough? This is often a sign of too much flour (due to improper measurement) or dough that was over-chilled. If you notice this during baking, remove the sheet from the oven, gently press down the tops of the cookies with the back of a metal spatula to encourage spreading, and then return them to the oven for an additional 1–3 minutes until cooked through.
- Cookies spreading too much? This can be caused by too little flour, old or inactive leavening agents (baking soda), or dough that wasn’t adequately chilled. If your cookies are spreading excessively, act quickly: immediately after removing them from the oven, use a metal spatula to gently push the edges inwards, helping them achieve a more desirable round shape.
Storage for Longevity: Store your fully cooled Trail Mix Cookies in an airtight container at room temperature for up to 3 days. To freeze unbaked dough, shape into balls and place on a baking sheet to freeze, then transfer to freezer-safe bags or containers. No need to thaw before baking; simply add a few minutes to the bake time. For freezing baked cookies, allow them to cool completely, then freeze on a sheet pan before transferring to bags/containers with parchment paper between layers. Be aware that freezing baked cookies may result in a slight texture change upon thawing.
Nutrition
Serving:
1
serving
|
Calories:
172
kcal
|
Carbohydrates:
18.2
g
|
Protein:
2
g
|
Fat:
10.5
g
|
Cholesterol:
17.9
mg
|
Sodium:
5.3
mg
|
Fiber:
0.3
g
|
Sugar:
9.6
g
Nutrition information is automatically calculated, so should only be used as an approximation.
Like this? Leave a comment below!