
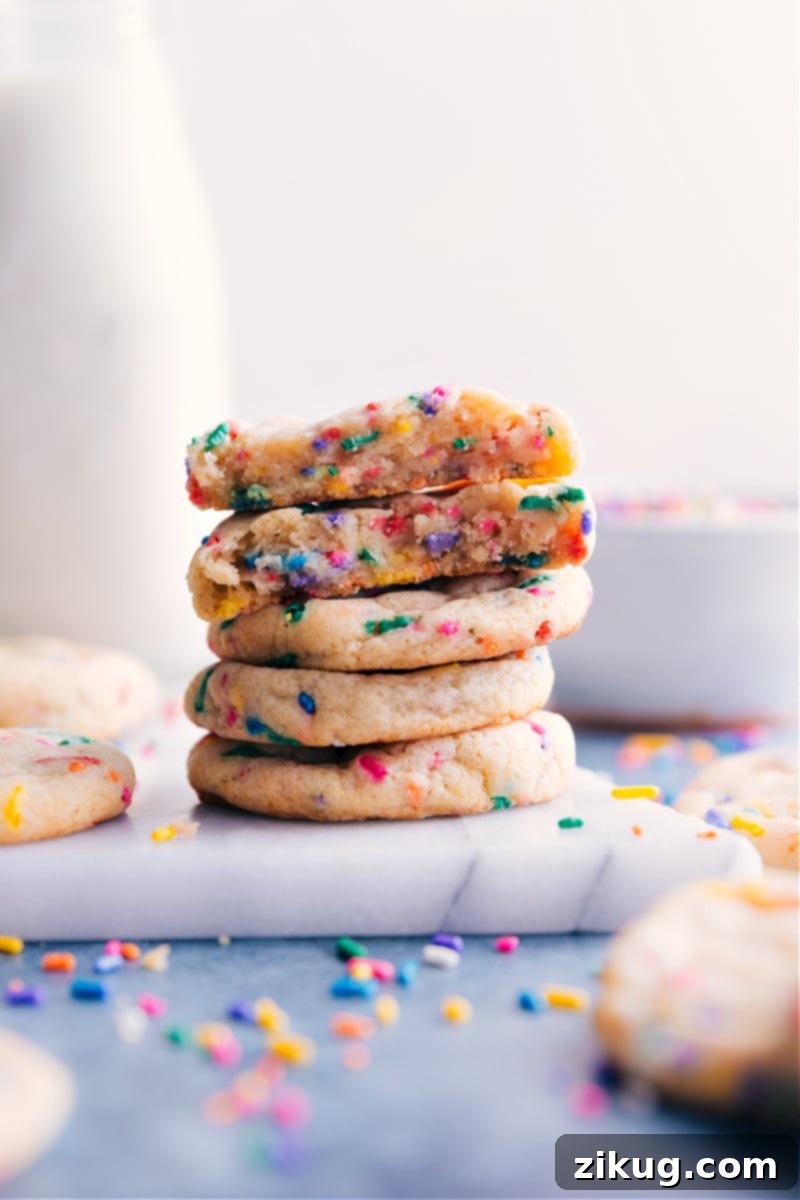
Ultimate Soft & Chewy Funfetti Cookies: A Sprinkle-Filled Celebration!
Dive into a world of vibrant color and irresistible flavor with our ultimate recipe for soft and chewy Funfetti Cookies. These delightful treats are a celebration in every bite, generously loaded with cheerful rainbow sprinkles. Imagine the comforting embrace of a classic sugar cookie perfectly fused with the festive joy of Funfetti cake – that’s exactly what these cookies deliver. Whether you’re celebrating a birthday, a special occasion, or simply brightening an ordinary day, these homemade Funfetti cookies are guaranteed to bring smiles and satisfy any sweet craving.

Unlock the Secret to Perfect Homemade Funfetti Cookies
For many of us, Funfetti brings back cherished childhood memories of easy-to-make box mix cakes and cookies. While those quick fixes held a special place, nothing quite compares to the rich, nuanced flavor and delightful texture of a truly homemade Funfetti cookie. As bakers grow, so does the appreciation for quality ingredients and thoughtful techniques. This recipe elevates the nostalgic charm of Funfetti to an entirely new level, offering cookies that are exceptionally soft, wonderfully chewy, delightfully buttery, and absolutely packed with sprinkles – just like the classics, but undeniably superior. The best part? Achieving this bakery-quality result is almost as straightforward as using a pre-made mix!
We’ve meticulously crafted this recipe to ensure every cookie is a masterpiece. From the initial mixing of ingredients to the careful handling of the dough, each step is designed to produce a treat that’s both visually stunning and incredibly delicious. Forget dry, crumbly cookies; prepare for tender centers, slightly crisp edges, and a burst of vanilla and butter that perfectly complements the playful sprinkles. These Funfetti cookies aren’t just a dessert; they’re an experience, a joyous expression of baking from the heart, perfect for sharing with loved ones or enjoying as a personal indulgence.
The Essential Art of Chilling Cookie Dough for Superior Texture and Flavor
Patience is a virtue, especially in baking, and nowhere is this more true than with chilling cookie dough. While it might feel like an extra step, allowing your Funfetti cookie dough to chill is a critical component for achieving those coveted soft, chewy centers and perfectly shaped cookies. This isn’t just an old wives’ tale; there’s real baking science at play, ensuring your efforts result in the best possible outcome.
- Solidifying Fats: The primary reason to chill dough is to re-solidify the butter. When butter is cold and firm, it melts more slowly in the oven. This slower melting process means the cookies spread less, retaining a thicker, chewier texture. Without chilling, the butter would melt too quickly, leading to thin, overly crisp, and potentially greasy cookies.
- Hydrating Sugars and Flour: Chilling also grants the dry ingredients, particularly the flour and sugar, ample time to absorb the liquids in the dough. This hydration process prevents excessive spreading during baking, contributing to a more uniform and desirable cookie structure. Properly hydrated dough bakes more evenly, resulting in a consistent texture throughout each cookie.
- Deepening Flavors: Beyond texture, chilling allows the flavors within the dough to meld and mature. The vanilla, butter, and honey have more time to integrate, leading to a richer, more complex, and overall tastier cookie. This is especially true for our Funfetti cookies, where a well-developed flavor profile truly shines alongside the visual appeal of the sprinkles.
Aim for at least 90 minutes of chilling time for optimal results, but don’t hesitate to chill for longer if time permits. Overnight chilling can yield even more flavorful and perfectly structured cookies. It’s a small investment of time that pays off immensely in the final product, transforming good cookies into truly exceptional ones, ensuring every bite is a delightful experience.
Crafting Bakery-Style Funfetti Cookies: Expert Rolling and Shaping Techniques
Achieving that picture-perfect, bakery-quality look for your Funfetti cookies is simpler than you might think. Beyond the delicious taste, the shape and consistency of your cookies play a huge role in their appeal. Follow these expert tips to ensure every cookie not only tastes incredible but also looks professionally made, with an ideal texture from edge to center, making them perfect for gifting or serving at any celebratory event.
- The Precision of a Food Scale (Optional but Recommended): While not strictly necessary, using a food scale to portion your dough is a game-changer for consistency. It ensures each cookie is the exact same size (around 1.5 tablespoons or 30g), which is crucial for even baking. When all cookies bake at the same rate, you avoid over-baked small cookies and under-baked larger ones, resulting in a batch of uniformly perfect treats that are a joy to behold.
- Shape for Success: Tall and Thin is Key: Forget perfectly round balls of dough! For thick, chewy centers and delightfully crispy edges, form your chilled dough into taller, more cylindrical shapes rather than flat, perfectly spherical ones. This allows the cookie to spread out evenly while maintaining a good height, creating that desirable contrast in textures that sets homemade cookies apart.
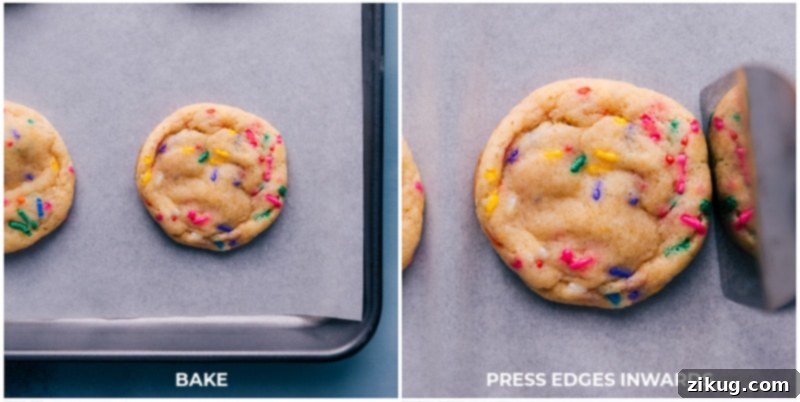
- The Post-Bake Edge Press: This is a secret weapon for perfecting your cookie’s shape and texture immediately after baking. As soon as your cookies come out of the oven, while they are still hot and pliable, use the back of a metal spatula or a spoon to gently press any stray edges inward. This quick action helps create those perfectly rounded, slightly thicker edges that contribute to a chewier center, locking in moisture and flavor. Work quickly, as the cookies will set as they cool. This small detail makes a big difference in presentation and bite.
By paying attention to these details during the shaping and post-bake stages, you’ll elevate your Funfetti cookies from simple homemade treats to show-stopping bakery delights, impressive for any gathering or personal indulgence, ensuring a consistent and delicious experience with every single cookie.
The Wonderful World of Sprinkles: Choosing Your Confetti Wisely
Sprinkles are the heart and soul of Funfetti cookies, transforming a simple sugar cookie into a burst of joyful color. But not all sprinkles are created equal, especially when baking. Choosing the right type and handling them correctly ensures your cookies are as visually stunning as they are delicious, without any unwelcome color bleed. The right sprinkles make all the difference in achieving that iconic Funfetti look.
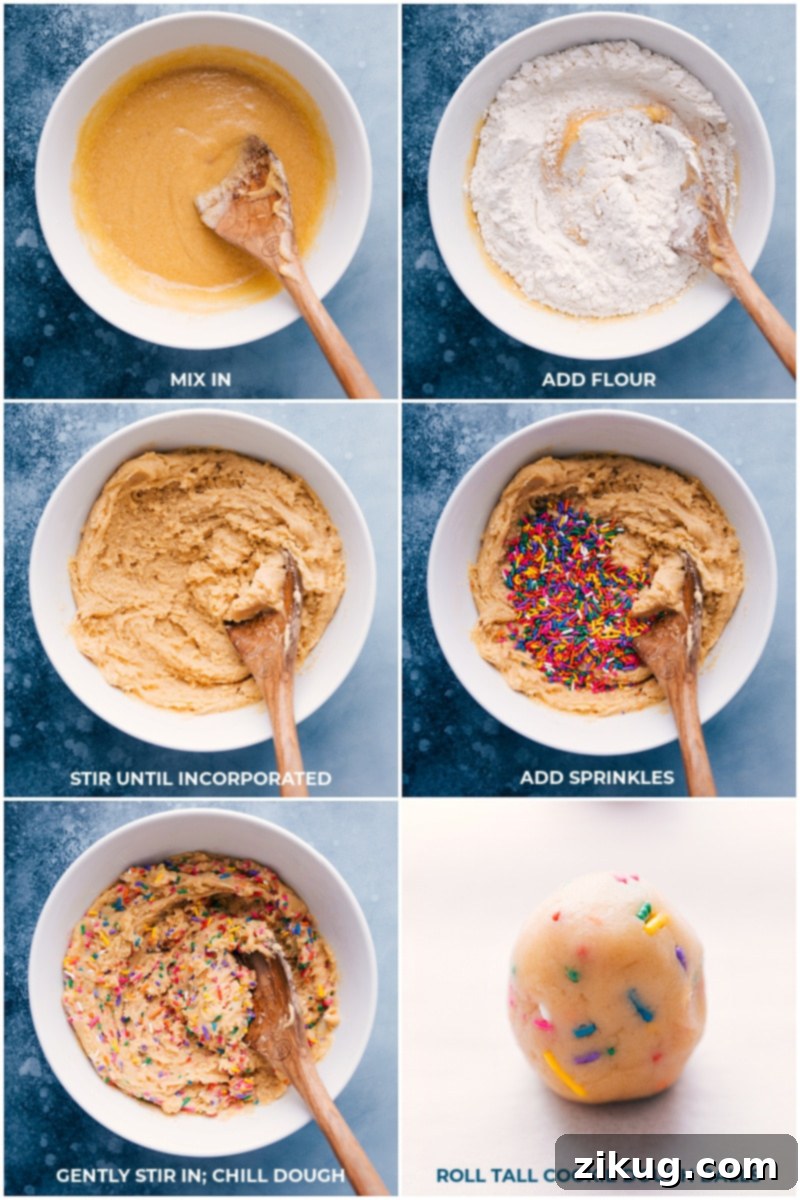
- Gentle Mixing is Crucial: When incorporating jimmie sprinkles into your dough, always stir gently. A wooden spoon or spatula is ideal for this task. The goal is to distribute the sprinkles evenly throughout the dough without crushing them or excessively mixing, which can cause their colors to bleed and tint your dough in unintended ways. You want distinct, vibrant specks of color, not a muted, muddy hue that can diminish the festive appearance.
- Jimmies Over Nonpareils: The Color Secret: This is a golden rule for Funfetti baking. Always opt for jimmie sprinkles (the elongated, rod-shaped ones) instead of nonpareils (the tiny, spherical ones). Jimmies are typically wax-based, which makes them much more resistant to melting and bleeding their colors into the dough during mixing and baking. Nonpareils, on the other hand, are largely sugar-based and prone to dissolving and releasing their dyes, potentially leaving your beautiful dough with “funky colors” that detract from the overall festive look.
- Customize Your Celebration: The beauty of Funfetti is its versatility. While rainbow jimmies are the classic choice, don’t hesitate to get creative! Replace the standard rainbow with jimmies in colors that perfectly match a specific holiday, event, or party theme. Think red and green for Christmas, pastels for Easter, orange and black for Halloween, or school colors for graduation. This simple swap can make your Funfetti cookies truly unique and personal, adding a special touch to any occasion.
By understanding the nuances of sprinkles, you ensure that every batch of your Funfetti cookies is not just a treat for the taste buds but also a feast for the eyes, perfectly encapsulating the celebratory spirit they represent, making them an instant hit at any gathering.
Expert Tips for Flawless Funfetti Cookie Baking Every Time
Baking truly exceptional cookies involves more than just following a recipe; it’s about understanding the subtle nuances that elevate a good cookie to a great one. These tried-and-true tips will help you achieve consistently perfect Funfetti cookies, ensuring they are always soft, chewy, and bursting with flavor, making every batch a resounding success.
- Embrace Room-Temperature Ingredients: This tip is crucial for a smooth, cohesive dough. Eggs, in particular, blend far more effectively with other ingredients when at room temperature, creating a stable emulsion that leads to a better texture in your baked cookies. If you forget to take your eggs out in advance, simply submerge them in a bowl of warm water for 10-15 minutes to quickly bring them to temperature. Similarly, ensure your melted butter has cooled to room temperature before mixing with sugars, preventing a greasy final product and ensuring proper incorporation.
- Mastering Flour Measurement: The Key to Texture: Incorrect flour measurement is a common pitfall that can drastically alter your cookie’s texture, making them dry and tough. Avoid scooping directly from the bag with your measuring cup, as this compacts the flour. Instead, use the “spoon and level” method: gently spoon flour into your dry measuring cup until it’s overfilled, then use the flat side of a knife or straight edge to level off the excess. This ensures you’re using the precise amount of flour needed for soft, chewy cookies.
- Leave Ample Space on the Baking Sheet: Overcrowding your baking sheet is a common mistake that can compromise your cookies’ texture and appearance. Bake only 6-8 cookies at a time, allowing ample space between each one. This ensures proper air circulation around each cookie, promoting even baking and allowing them to spread without merging into a giant cookie sheet monster. If cookies are too close, they can steam instead of bake, leading to a less desirable texture and uneven browning.
- The Art of Underbaking for Chewyness: For that ultimate soft and chewy texture, it’s always better to slightly underbake your cookies. Remember, cookies continue to bake for a few minutes after they’re removed from the oven, thanks to the residual heat of the baking sheet. Pull them out as soon as the edges begin to set and lightly brown, even if the centers still look a little soft. They will firm up perfectly as they cool, retaining their delightful chewiness and preventing them from becoming dry or crispy.
- Patience is a Virtue: Let Them Cool: While it’s tempting to dive into warm cookies, Funfetti cookies truly shine after they’ve had a chance to cool. As they cool, the flavors deepen and meld together, and the texture becomes even more pronounced. For the absolute best flavor experience, consider letting them cool completely on a wire rack, or even enjoying them the next day, as the flavors continue to develop overnight, creating a richer, more satisfying treat.
By incorporating these professional tips into your baking routine, you’ll consistently churn out batches of Funfetti cookies that are nothing short of spectacular, impressing everyone who takes a bite and making you a true cookie connoisseur.
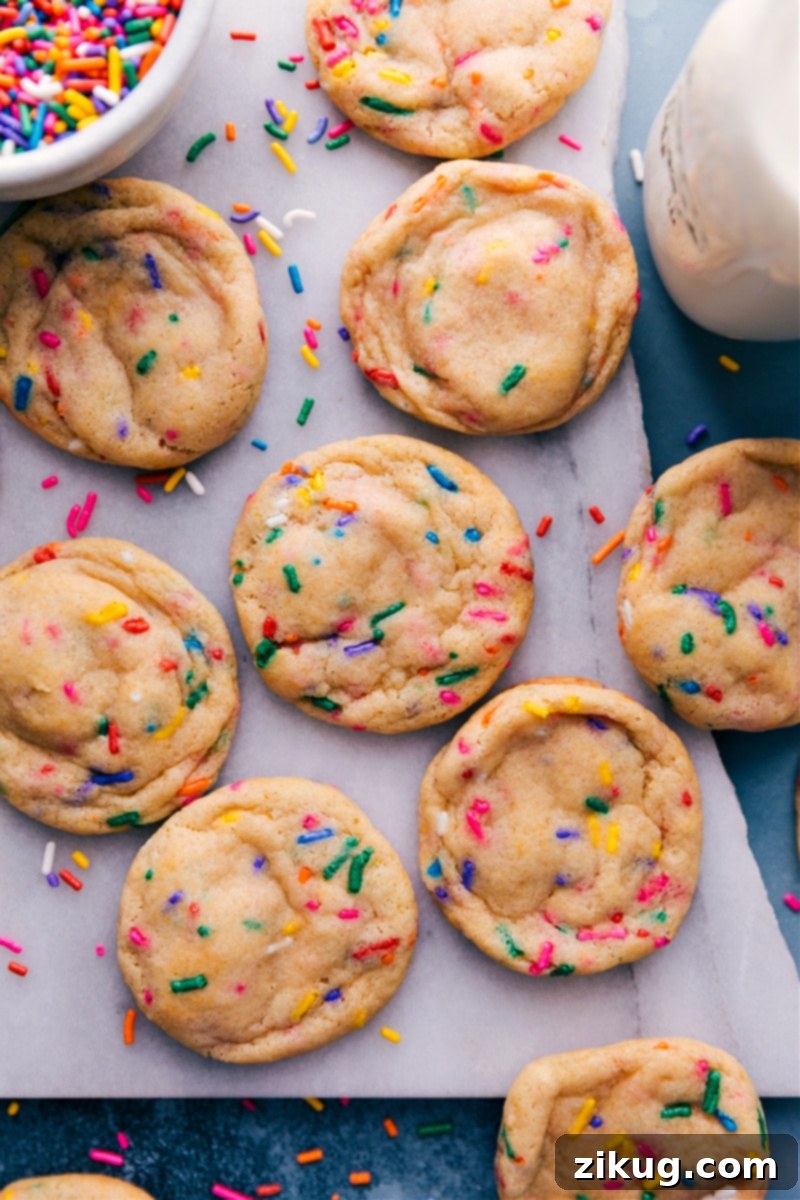
Storing Your Funfetti Cookie Delights and Freezing Dough for Later
Once you’ve baked a batch of these incredible Funfetti cookies, you’ll want to ensure they stay fresh and delicious for as long as possible. Proper storage is key to maintaining their soft, chewy texture and vibrant flavors. Here’s how to keep your cookies at their best, along with a clever tip for future baking ease, so you can enjoy freshly baked treats whenever the craving strikes.
- Room Temperature Storage: For immediate enjoyment, store your baked Funfetti cookies in an airtight container at room temperature. A cookie jar with a tight-fitting lid or a sealed plastic container works perfectly. They will retain their peak freshness and delightful texture for up to 3-4 days. To prevent them from drying out, you can even add a slice of bread to the container; the cookies will absorb moisture from the bread, keeping them softer for longer.
- Freezing Cookie Dough for Future Cravings: While you can freeze baked cookies, freezing the dough offers superior results and incredible convenience. This method allows you to have freshly baked cookies whenever a craving strikes, with minimal effort. To freeze dough:
- Scoop individual portions of cookie dough (about 1.5 tablespoons each) and roll them into the desired cylindrical shape.
- Place the dough balls on a baking sheet lined with parchment paper, ensuring they don’t touch.
- Freeze the dough balls until they are completely solid (this usually takes 1-2 hours).
- Once frozen, transfer the solid dough balls to a freezer-safe, airtight container or a heavy-duty freezer bag. Label with the date.
- Store in the freezer for up to three months.
To Bake from Frozen: There’s no need to thaw the dough! Simply place the frozen dough balls on a prepared baking sheet and bake as directed in the recipe, adding a few extra minutes (typically 2-4 minutes) to the cook time. Watch for the edges to lightly brown and the centers to remain soft for perfectly fresh-from-the-oven cookies. This is a fantastic way to ensure you always have a delightful treat on hand for unexpected guests or a spontaneous sweet tooth.
With these storage methods, you can savor your Funfetti cookies over several days or enjoy the luxury of warm, homemade cookies whenever you desire, making every moment a little more celebratory and delicious.
More Irresistible Dessert Recipes to Explore
If you’ve fallen in love with the joy of baking and the delicious results of our Funfetti Cookies, you’re in for a treat! Our kitchen is always bustling with new and exciting dessert ideas designed to delight your palate and impress your guests. From classic comforts to innovative twists, there’s always something wonderful to bake. Expand your baking repertoire with these fantastic recipes, each promising a delightful culinary adventure:
- Magic Cookie Bars with M&M’s candies – A truly magical layered treat that’s impossible to resist, packed with sweet surprises and varying textures.
- Dessert Cheese Ball brownie-batter flavored – The ultimate party appetizer or sweet indulgence, rich with the irresistible taste of brownie batter, perfect for dipping.
- Gingersnap Cookies with an amazing spice blend – Warm, spicy, and perfectly crisp, these cookies are a timeless favorite, especially delightful during cooler months.
- Chewy Granola Bars with mini chocolate chips – A wholesome yet delicious snack, perfect for on-the-go energy, a quick sweet bite, or a lunchbox treat.
- Sugar Cookie Snack Mix with powder sugar-coated cereal – An addictive blend of sweet and crunchy textures, perfect for movie nights, casual gatherings, or simply satisfying a snack craving.
Don’t let your baking adventure stop here! Each recipe is crafted with care, ensuring clear instructions and delicious outcomes, making your time in the kitchen enjoyable and rewarding. Happy baking!
Funfetti Cookies: The Full Recipe

Funfetti Cookies
By Chelsea Lords
Soft, chewy, and bursting with rainbow sprinkles, these Funfetti Cookies are like sugar cookies and Funfetti cake rolled into one irresistible treat!
Rating: 5/5 stars from 6 votes
- Prep Time: 30 minutes
- Cook Time: 10 minutes
- Chilling Time: 1 hour 10 minutes
- Total Time: 1 hour 50 minutes
- Servings: 22 cookies
Print Recipe
Video Tutorial
Watch how to make these delicious Funfetti Cookies for a visual guide:
Equipment Needed
- Sheet pan (15″ x 10″)
- Parchment paper or silicone baking mat
Ingredients
- 8 tablespoons unsalted butter
- 1/3 cup light brown sugar, firmly packed
- 1/3 cup granulated sugar
- 1 large egg
- 1/2 teaspoon vanilla extract
- 1 tablespoon honey
- 3/4 teaspoon salt
- 1/2 teaspoon baking soda
- 1/2 teaspoon baking powder
- 1-3/4 cups all-purpose flour (see note 1 below)
- 1/3 cup jimmies sprinkles (see note 2 below)
Instructions
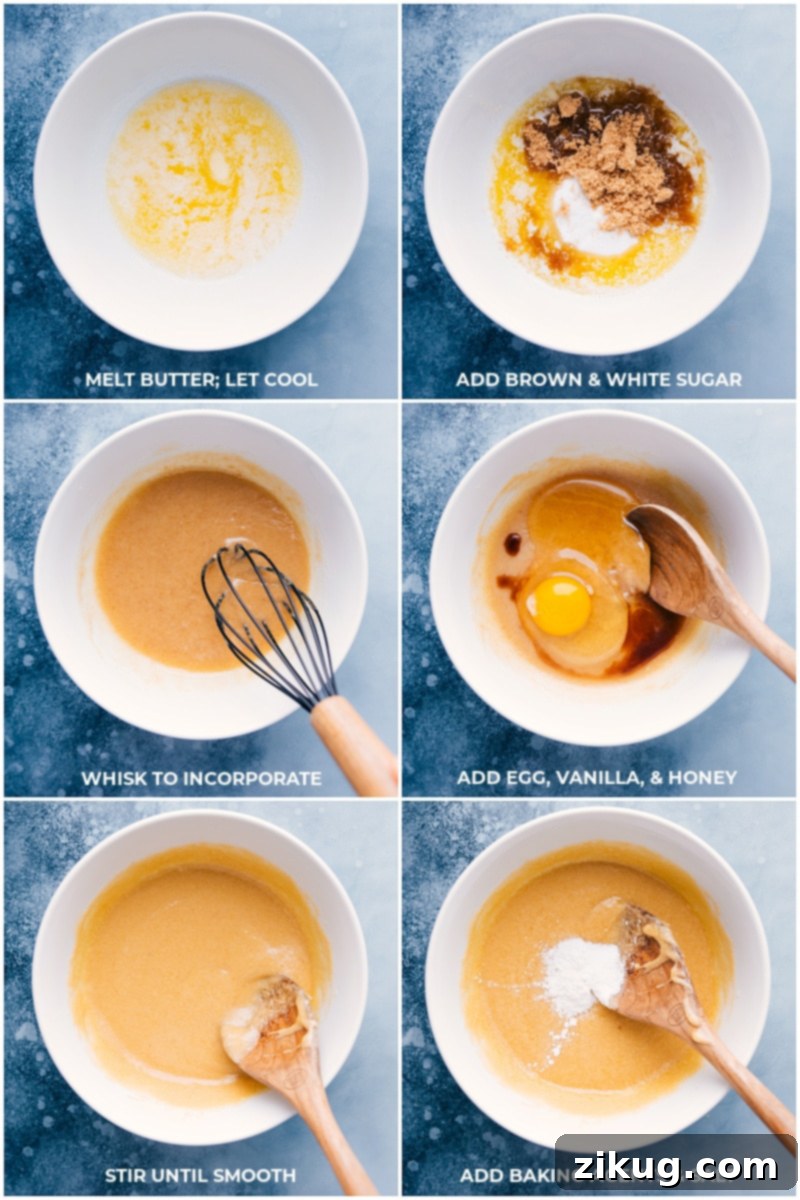
- Melt the butter in a very large, microwave-safe bowl. Once melted, set aside for 5–10 minutes to cool to room temperature. It’s crucial that the butter isn’t hot, as hot butter can prematurely melt the sugar and lead to greasy cookies.
- Once the butter has cooled to room temperature, stir in the light brown sugar and granulated sugar. Whisk thoroughly until the mixture is smooth and the butter and sugars are fully incorporated, which should take about 1–2 minutes. Don’t rush this step; even if it seems like they won’t combine, continue mixing until completely integrated. Next, stir in the egg, vanilla extract, and honey until smooth.
- Add the salt, baking soda, and baking powder to the mixture, stirring well to integrate them. Then, add the correctly measured all-purpose flour (refer to Note 1 for accurate measuring technique) and mix until just combined. Be careful not to overmix, as this can develop the gluten too much, resulting in tough cookies. Gently fold in the jimmies sprinkles. Cover the bowl tightly with plastic wrap and chill the dough for at least 90 minutes.
- Preheat your oven to 350°F (175°C). Line a large sheet pan with parchment paper or use a nonstick silicone baking mat. Scoop dough balls, each about 1.5 tablespoons (30g) in size, and roll them into tall, cylindrical shapes (refer to the images above for an ideal visual guide). Arrange only 6 cookie balls on the prepared pan, ensuring ample space for them to spread without touching. Place the pan with the shaped cookie balls into the freezer for 10 minutes; this quick chill helps firm up the dough that has softened from handling. Repeat this process with the remaining cookie dough; this recipe typically yields around 20–21 delicious cookies.
- After the 10-minute freezer chill, transfer the pan to the preheated oven and bake for 8–12 minutes. For the softest and chewiest results, it’s always better to slightly underbake them (we recommend around 10 minutes). The cookies will continue to bake slightly on the hot sheet pan after being removed from the oven. Take them out as soon as the edges begin to lightly brown. Immediately upon removal from the oven, use the back of a metal spatula to gently press any edges that have spread outward back into a neat, round shape. Let the cookies cool on the pan for 5 minutes before carefully transferring them to a wire rack to cool completely. Continue baking the remaining dough, or opt to freeze some dough for later (see storage notes below).
Recipe Notes
- Note 1: Accurate Flour Measurement: To avoid dense or dry cookies, proper flour measurement is essential. Do not simply press a measuring cup directly into a bag of flour, as this compacts the flour and results in using too much. Instead, gently spoon the flour into your dry measuring cup until it is overfilled. Then, use the back of a straight table knife or a leveling tool to scrape off the excess flour, ensuring a level and accurate measurement.
- Note 2: Choosing the Right Sprinkles: For vibrant, bleed-free Funfetti cookies, it is critical to use jimmie sprinkles. Jimmies are typically wax-based and hold their color much better during mixing and baking. Avoid nonpareils (the tiny, round sprinkles) as they are prone to dissolving and bleeding their colors into the dough, which can result in a less appealing, ‘funky-colored’ cookie dough.
- Storage: Store baked Funfetti cookies in an airtight container at room temperature. They are best enjoyed within 3–4 days to maintain their optimal soft and chewy texture.
- Freezing Dough: Instead of freezing baked cookies, we highly recommend freezing the unbaked dough. To do this, drop individual dough balls onto a large sheet pan and freeze until completely solid. Once solid, transfer the frozen dough balls to an airtight container or a heavy-duty freezer bag and freeze for up to 3 months. When ready to bake, simply place the frozen dough balls directly onto a prepared baking sheet (no thawing needed!) and add a few extra minutes to the baking time, until the edges are lightly browned and the centers are still soft.
Nutrition Information
Nutrition information is automatically calculated and should be used as an approximation.
- Serving: 1 cookie
- Calories: 97 kcal
- Carbohydrates: 13g
- Protein: 1g
- Fat: 5g
- Saturated Fat: 3g
- Trans Fat: 1g
- Cholesterol: 19mg
- Sodium: 118mg
- Potassium: 12mg
- Fiber: 1g
- Sugar: 11g
- Vitamin A: 145IU
- Vitamin C: 1mg
- Calcium: 11mg
- Iron: 1mg
Enjoyed this recipe? We’d love to hear from you! Leave a comment below and share your baking experience!