
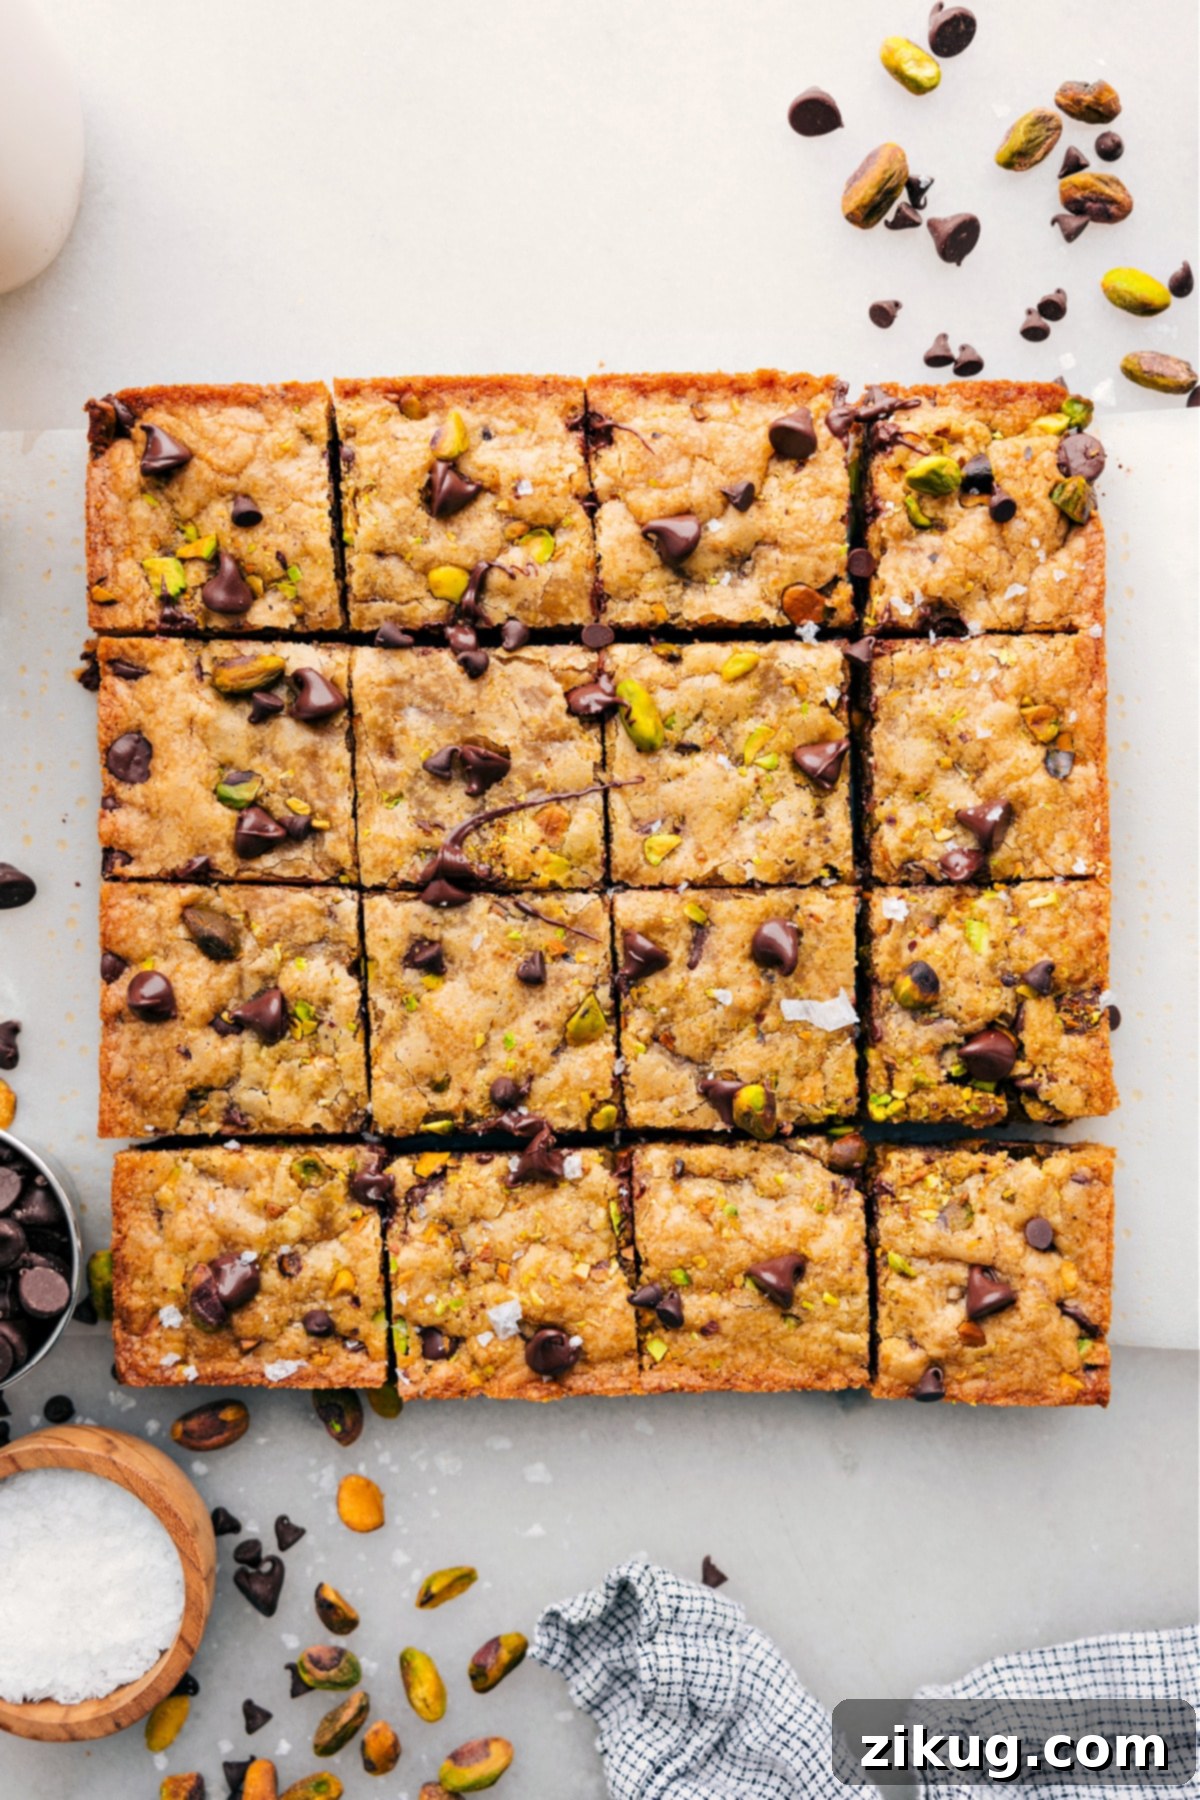
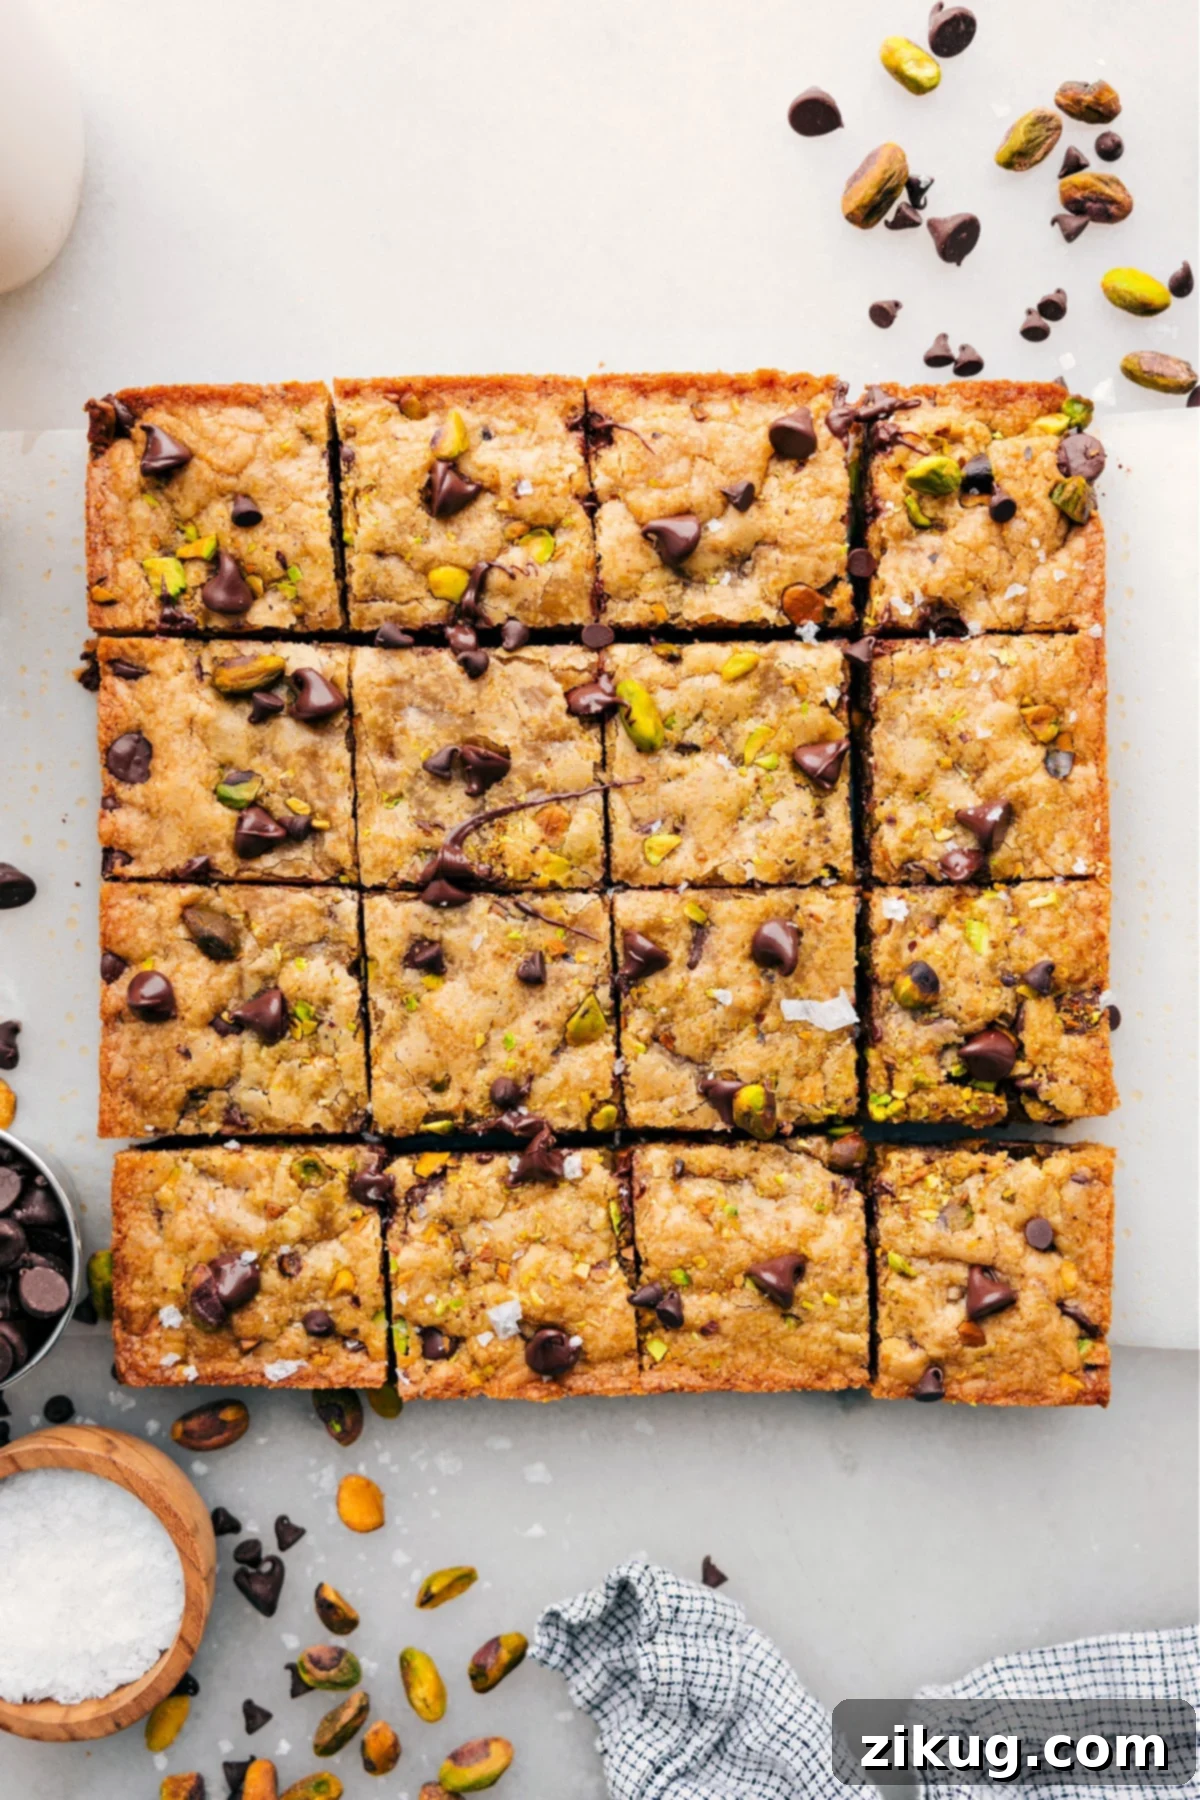
Prepare to be enchanted by this truly remarkable Blondie Recipe. These bars are celebrated for their incredible thickness, irresistible chewiness, and an underlying depth of flavor that comes from perfectly browned butter. What makes them truly special is how effortlessly you can personalize them, incorporating your favorite mix-ins—be it crunchy nuts, sweet candy pieces, or decadent chocolate in any form you desire. This isn’t just a recipe; it’s an invitation to create your perfect dessert bar, time and time again.

Author’s Note
The Best Blondies That Converted a Brownie Enthusiast
As someone whose heart has always belonged to the rich, dark allure of classic brownies, admitting that a blondie could ever compete, let alone steal the spotlight, feels like a confession. Yet, here we are. This particular Blondie Recipe has done just that. While it still offers the delightful presence of chocolate (because, let’s be honest, can any dessert truly be complete without it?), it introduces a flavor profile that is utterly unique and undeniably addictive.
My quest for the perfect blondie led me through countless iterations, but it was a recipe from Inspired Taste that truly sparked the inspiration for this version. After refining and perfecting, I can confidently say this is hands down the best blondie I’ve ever baked, or tasted. Its consistent rave reviews are a testament to its exceptional qualities, and I’m thrilled to share why it stands above the rest:
- Unparalleled Versatility: This recipe is a blank canvas for your creativity. Craving something new? Simply swap out the chocolate chips and nuts for different candies, dried fruits, or even a swirl of caramel for an entirely new, exciting treat.
- Effortless Preparation: Don’t let its gourmet taste fool you. This recipe comes together with remarkable speed, requiring only a handful of everyday kitchen staples. It’s perfect for last-minute cravings or spontaneous baking sessions.
- The Pinnacle of Texture: The texture is what truly elevates these blondies. They are gloriously dense, wonderfully chewy, and possess a tender crumb that melts in your mouth. This combination makes them truly irresistible and, dare I say, addicting.
- Signature Brown Butter Flavor: The secret weapon in this recipe is browned butter. This simple step transforms ordinary butter into a nutty, aromatic elixir that infuses the blondies with an incredible depth of caramel-like flavor, setting them apart from any other blondie you’ve tried.
Trust me, these golden bars are more than just a dessert; they’re an experience that will have you reconsidering your dessert loyalties. Get ready to bake a batch that will impress everyone, including yourself!
Essential Ingredients for The Best Blondie Recipe
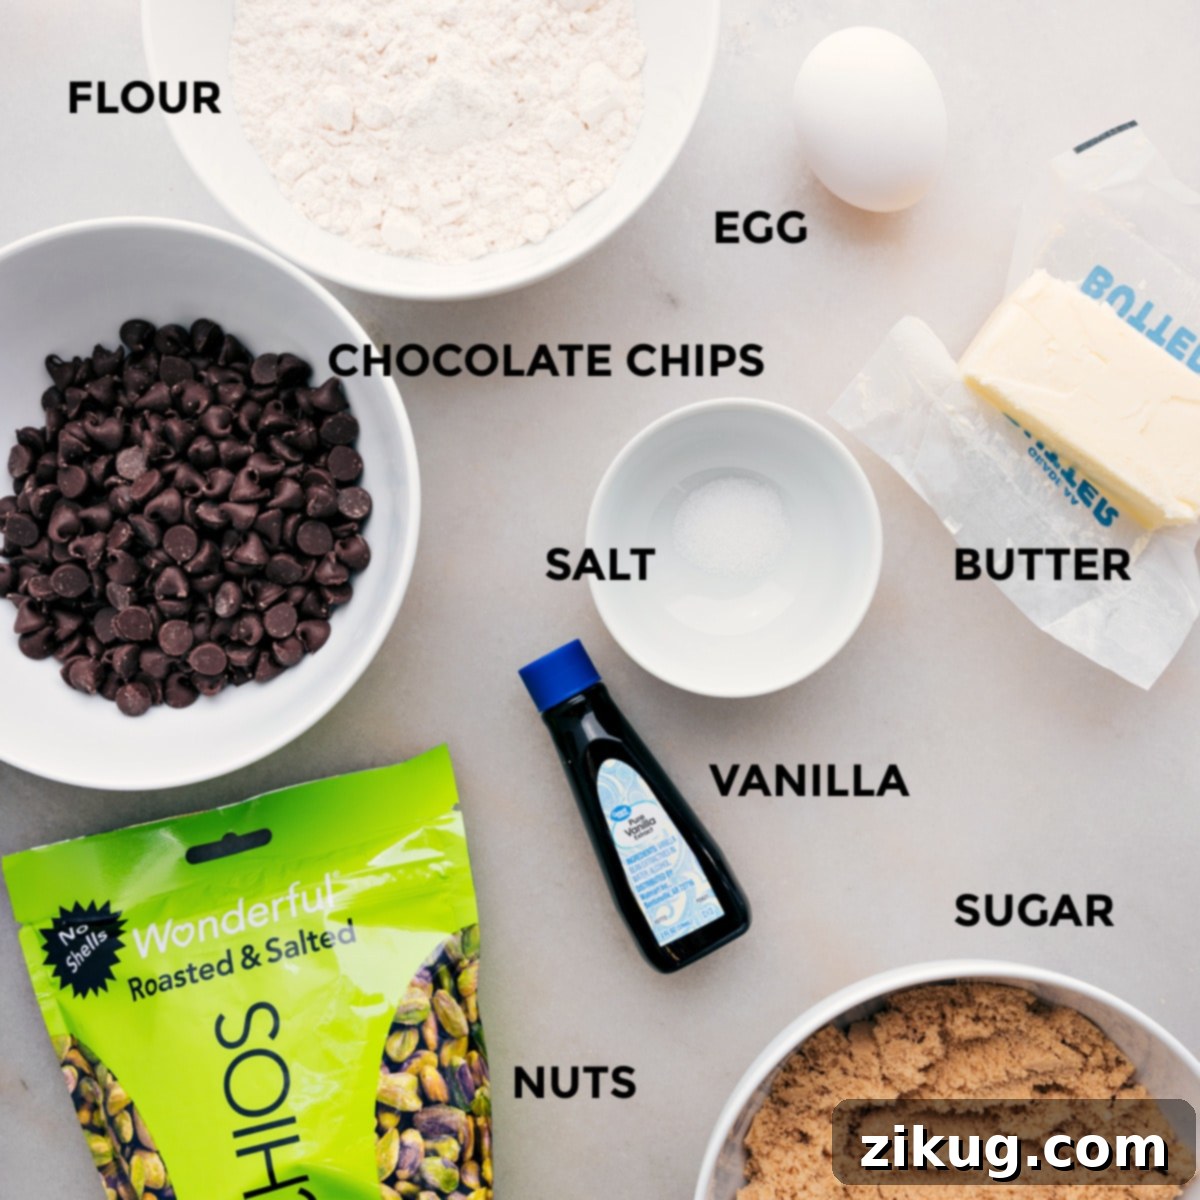
Crafting the perfect blondie starts with selecting the right ingredients. Each component in this recipe plays a crucial role in achieving that sought-after chewy texture and rich, deep flavor. Here’s a closer look at what you’ll need and why:
- Unsalted Butter: The star of the show! Browning the butter is a game-changer here, infusing the blondies with a nutty, caramel-like aroma and flavor that’s unparalleled. If you’ve ever tried my Brown Butter Oatmeal Cookies, you know the magic this simple step creates. Always use unsalted butter to control the overall saltiness of your baked goods.
- Light Brown Sugar: This is key to the blondies’ signature moistness and caramel-like flavor. The molasses in light brown sugar contributes to their chewiness and adds a wonderful depth that white sugar alone cannot achieve. Avoid dark brown sugar, as its higher molasses content can make the blondies too moist and alter the intended flavor balance.
- Vanilla Bean Paste (or Vanilla Extract): Vanilla is more than just a flavor enhancer; it’s essential for rounding out and brightening the sweet notes. Vanilla bean paste offers a richer, more pronounced vanilla flavor with visible flecks of vanilla bean, but a good quality vanilla extract works beautifully as well. For an adventurous twist, consider almond or maple extract to give your blondies a unique and delightful flavor profile.
- Large Egg: This humble ingredient is vital for structure and moisture. The egg acts as a binder, holding the blondie dough together, and contributes significantly to its rich, fudgy texture. Ensure it’s a large egg for consistent results.
- Salt: Often underestimated, salt is a flavor powerhouse in baking. It doesn’t just make things salty; it enhances and balances the sweetness, preventing the blondies from tasting overly sugary. A quarter teaspoon is just enough to make all the other flavors pop, so definitely don’t skip it!
- All-Purpose Flour: The foundation of our blondies. It provides the necessary structure without making the bars tough. The key is to mix the flour in just until it’s combined. Overmixing can develop the gluten too much, leading to dense, cake-like blondies instead of the soft, tender, and chewy texture we’re aiming for.
- Chocolate Chips: A non-negotiable for many, chocolate chips add pockets of melty delight. The beauty is you can use any variety you love: semi-sweet for a classic balance, milk chocolate for extra sweetness, dark chocolate for a sophisticated contrast, or even white chocolate for a creamy, sweet touch. Mix and match to find your favorite combination!
- Nuts (Optional, but Recommended): Nuts add a fantastic textural contrast and an extra layer of flavor. While any nut you like will work (pecans, walnuts, almonds), I highly recommend using roasted and lightly salted nuts. The roasting process deepens their flavor, and a touch of salt enhances the overall profile, creating an incredibly satisfying bite. Pistachios are a personal favorite for their vibrant color and unique taste.
With these quality ingredients in hand, you’re well on your way to baking the best blondies of your life!
How to Make the Best Chewy Blondie Recipe
Creating these sensational blondies is a straightforward process, even for novice bakers. Follow these detailed steps to ensure perfectly chewy, flavorful bars every time:
- Prepare Your Pan and Preheat Oven: Begin by preheating your oven to 350°F (175°C). This ensures the oven is at the correct temperature when your batter is ready, promoting even baking. Lightly spray an 8×8-inch baking pan with cooking spray, then line it with parchment paper. Leave a generous overhang on two sides; this creates “handles” that make lifting the baked blondies out of the pan incredibly easy and prevents them from sticking.
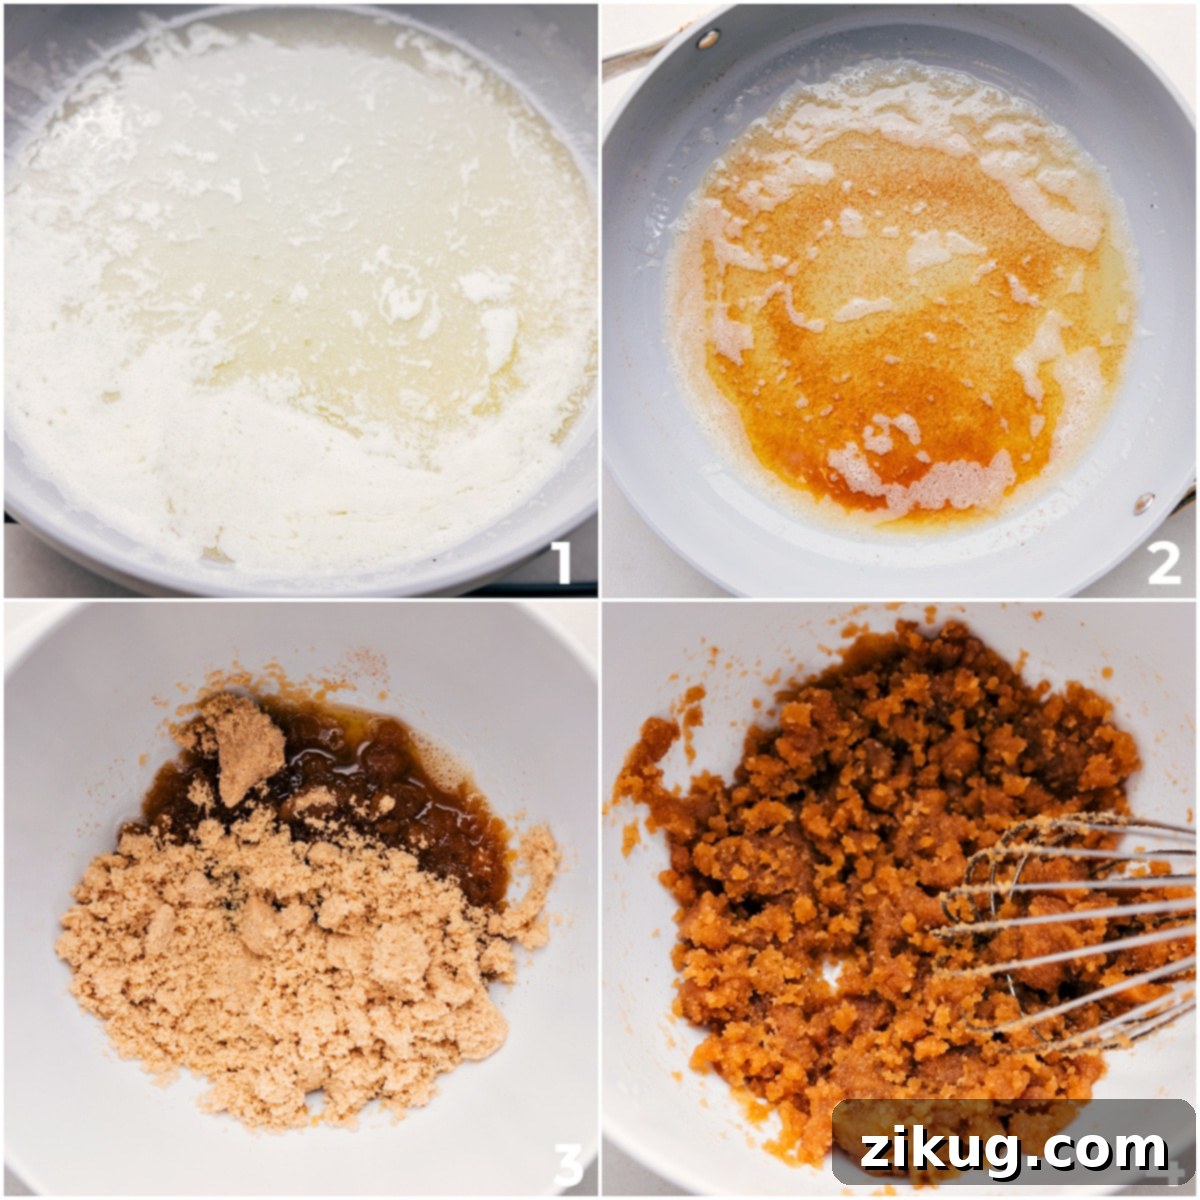
- Master the Brown Butter: This step is crucial for flavor! In a light-colored, wide pan (the lighter color helps you monitor the butter’s browning process), melt the cubed unsalted butter over medium-high heat. Once fully melted, reduce the heat to medium and stir constantly with a silicone spatula. The butter will first foam, then bubble. Keep stirring, scraping the bottom of the pan to prevent scorching. After a few minutes, you’ll notice tiny golden-brown specks forming at the bottom, and the butter will emit a distinct nutty aroma. As soon as you see these specks and smell that fragrance, immediately remove the pan from the heat. Pour the browned butter into a heatproof bowl, making sure to scrape all those precious brown bits from the bottom of the pan – these tiny flecks are packed with flavor! Allow the browned butter to cool for about 5 minutes; it should still be warm but not scorching hot.
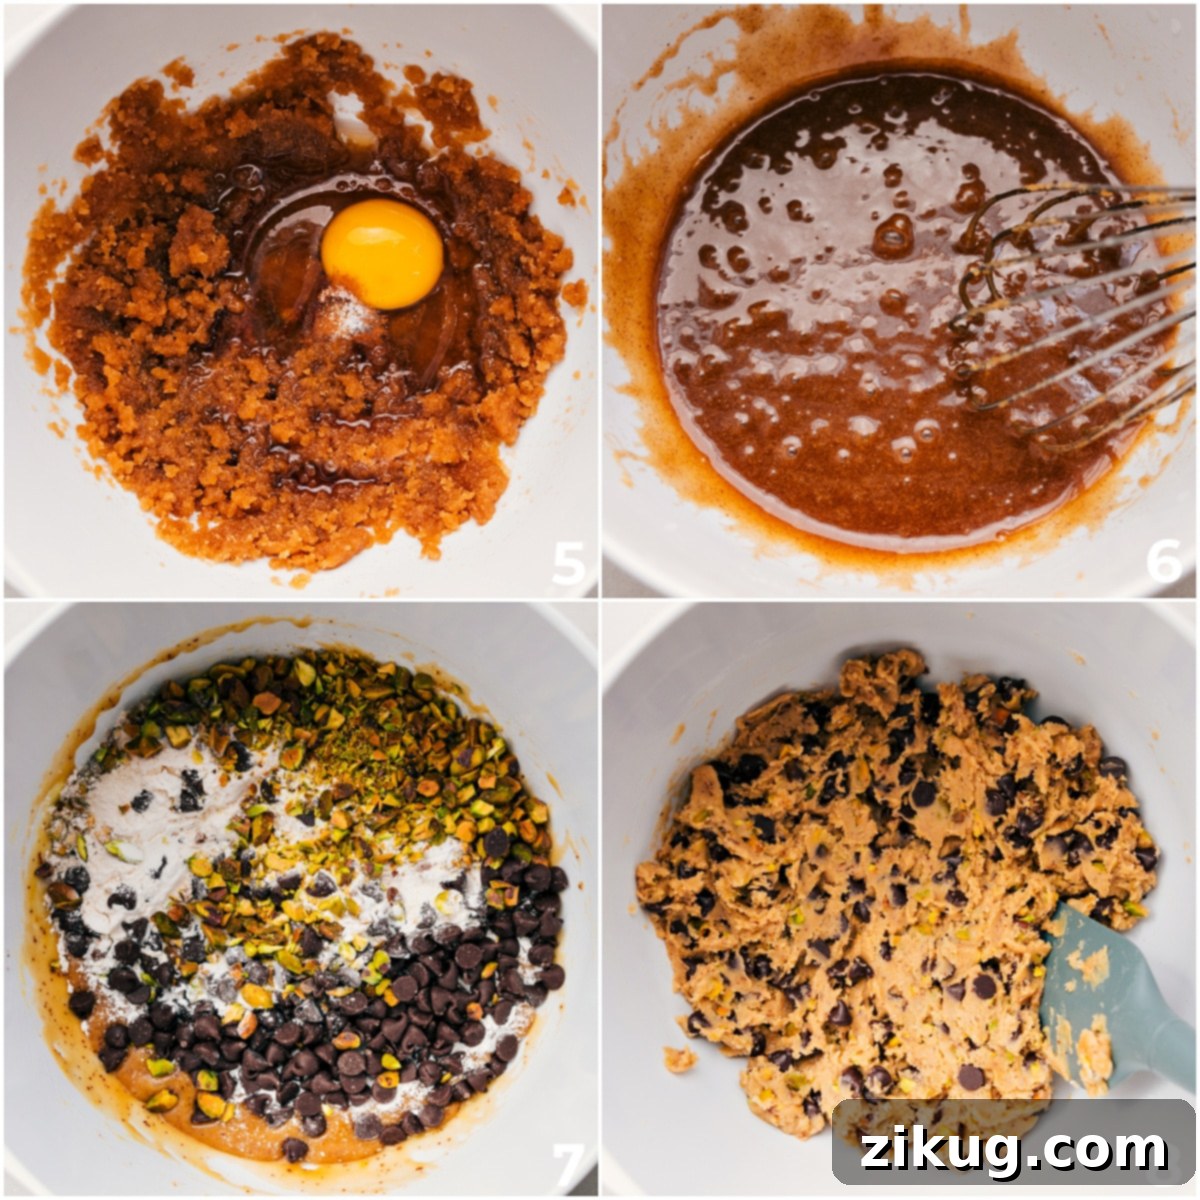
- Combine Wet Ingredients: To the slightly cooled browned butter, add the packed light brown sugar. Whisk vigorously until the mixture is uniform and resembles wet sand. This vigorous mixing helps dissolve the sugar and creates a smooth base. Next, add the large egg, vanilla bean paste (or extract), salt, and a pinch of cinnamon (if using, cinnamon adds a lovely warmth!). Whisk briskly for about 1-2 minutes until the mixture becomes very creamy, lighter in color, and beautifully emulsified. This aeration is important for the blondies’ texture.
- Gently Fold in Dry Ingredients and Mix-ins: Now, add the all-purpose flour to the wet ingredients. Switch from a whisk to a sturdy spatula. Gently fold the flour into the batter until almost no dry streaks of flour remain. Be careful not to overmix! Once the flour is mostly incorporated, fold in your chosen chocolate chips and nuts. Continue folding just until everything is evenly distributed and no dry flour pockets are visible. The batter will be quite thick and dense.
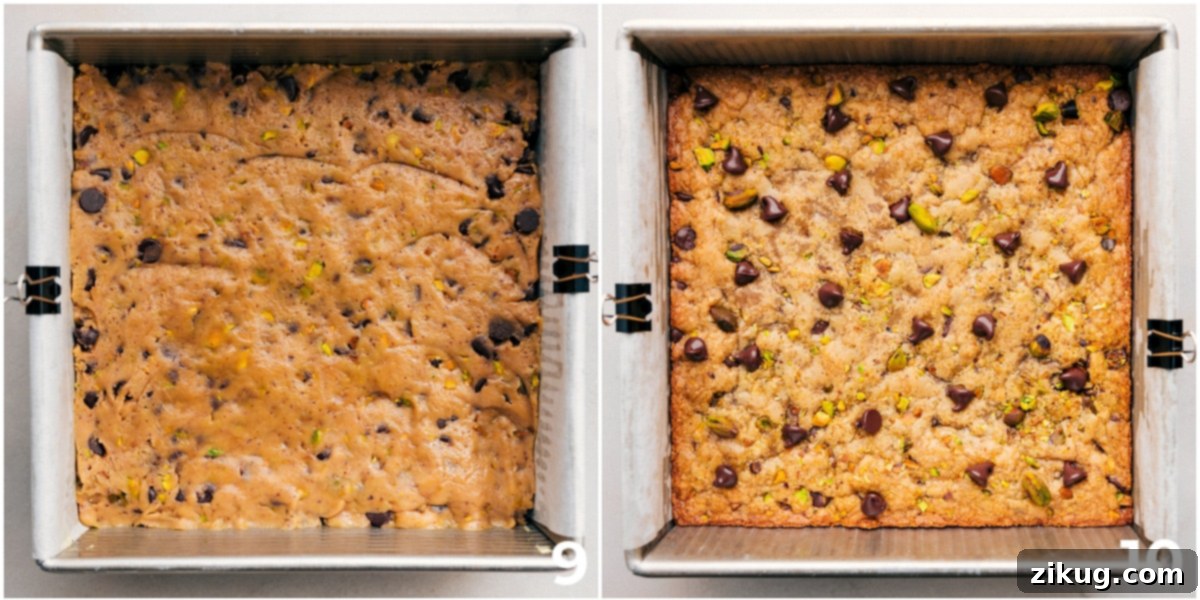
- Bake to Golden Perfection: Evenly spread the thick blondie batter into your prepared 8×8-inch pan. Use the back of the spatula to smooth the top. Bake for 25–27 minutes. The blondies are ready when the edges are lightly golden brown and the center is set (a toothpick inserted into the center might come out with moist crumbs, but not wet batter). Avoid overbaking, as this can lead to dry blondies.
- Cool, Slice, and Serve: Once baked, remove the pan from the oven. It’s crucial to let the blondies cool in the pan for 10–15 minutes. This allows them to set further and prevents crumbling. After partial cooling, use the parchment paper overhang to carefully lift the entire slab of blondies onto a cooling rack. Remove the parchment paper and allow them to cool completely before cutting into bars. This final cooling step ensures clean slices and the best chewy texture. Then, slice into your desired bar size and enjoy!
Following these steps will result in a batch of blondies that are perfectly chewy, rich, and utterly irresistible!
Pro Tips for Making Perfect Blondies
Achieving bakery-quality blondies is easy with a few expert tricks. These tips will help you master this delicious recipe and ensure every batch is a success:
- Perfect Your Brown Butter: Browning butter is a simple step that yields immense flavor, but it requires attention. Always use a light-colored pan; this allows you to easily see the color changes as the butter browns, preventing it from burning. Once those golden-brown flecks appear at the bottom and you smell a nutty aroma, immediately transfer the butter (including all those flavorful bits!) into a separate bowl to stop the cooking process. Those tiny browned specks are crucial for the rich, caramel notes in your blondies.
- Fold Gently, Don’t Overmix: When incorporating the flour and mix-ins, switch to a spatula and use a gentle folding motion. Overmixing develops the gluten in the flour too much, which can lead to tough, cake-like blondies instead of the desired soft and chewy texture. Stop mixing as soon as no dry streaks of flour are visible.
- Cool Completely Before Cutting: Patience is key! While it’s tempting to dive into warm blondies, allowing them to cool completely in the pan before cutting is crucial. Cooling helps the blondies set properly, preventing them from crumbling and ensuring clean, neat slices. Warm blondies are delicious, but fully cooled ones will have the best texture and structure.
- Line the Pan for Easy Removal: Don’t skip lining your baking pan with parchment paper! Not only does it make lifting the entire batch of blondies out of the pan incredibly easy (especially if you leave an overhang), but it also helps prevent the bottom of the blondies from over-browning and sticking, ensuring a beautifully golden and evenly baked base.
- Choose a Light-Colored Baking Pan: Just like with browning butter, using a light-colored metal baking pan for the blondies themselves is beneficial. Darker pans absorb more heat, which can lead to the edges and bottom of your blondies baking faster and potentially over-browning or drying out before the center is cooked through. A light-colored pan ensures more even heat distribution and a perfectly baked blondie.
- Customize Your Mix-ins: The versatility of this blondie recipe is one of its greatest strengths. Beyond chocolate chips and nuts, consider adding white chocolate, butterscotch chips, M&Ms, chopped pretzels for a salty crunch, shredded coconut, dried cranberries, or even a swirl of caramel or peanut butter into the batter before baking. Experiment to find your favorite combinations!
- Don’t Overbake: Blondies are meant to be dense and chewy, not dry and crumbly. Keep a close eye on them during the last few minutes of baking. They should be lightly golden brown around the edges, and the center should appear set. A toothpick inserted into the center might still come out with some moist crumbs, which indicates a perfectly chewy blondie.
By keeping these tips in mind, you’ll be well on your way to baking a batch of the best homemade blondies that everyone will love!
Storage Solutions for Blondie Bars
How to Store Your Delicious Blondies
While blondies are truly at their peak the day they’re baked – when they’re at their softest, chewiest, and freshest – proper storage can help extend their deliciousness for several days, or even months!
- Room Temperature Storage: For immediate enjoyment or short-term storage, place any leftover blondies in an airtight container at room temperature. They will remain wonderfully soft and chewy for 2-4 days. To maintain optimal freshness, you can also place a slice of bread in the container with the blondies; the bread will absorb moisture, keeping your blondies soft.
- Refrigeration (Not Recommended for Texture): While safe, refrigerating blondies can alter their texture, making them denser and firmer than desired. If you must refrigerate, allow them to come to room temperature before serving for a better eating experience. Store them in an airtight container for up to a week.
- Freezing for Long-Term Enjoyment: Blondies freeze beautifully, making them perfect for meal prep or saving for a future treat. To freeze, first ensure the blondies are completely cooled. Then, wrap each individual blondie bar tightly in plastic wrap, followed by a layer of aluminum foil. This double-layer protection prevents freezer burn. Place the wrapped blondies into a large, freezer-safe zip-top bag or an airtight container. They can be frozen for up to 3 months.
- Thawing Frozen Blondies: When you’re ready to enjoy a frozen blondie, simply remove it from the freezer and let it thaw at room temperature for an hour or two. You can also gently warm it in the microwave for 10-15 seconds for a soft, fresh-baked feel, but be careful not to overheat it.
No matter how you choose to store them, these brown butter blondies are a treat worth savoring!
More Delicious Cookie and Bar Recipes You’ll Love:
Desserts
Ultimate Chocolate Chip Cookie Bars Recipe
Snacks
Easy Energy Bars Recipe (No-Bake, 5-Ingredients!)
Desserts
Classic Magic Cookie Bars
Desserts
Homemade Twix Bar Recipe
Irresistible Brown Butter Blondie Recipe
Chelsea Lords
This blondie recipe is the ultimate quick dessert, and they taste amazing! These are my favorites, soft, chewy, and loaded with delicious mix-ins that make every bite a pure delight.
20 minutes
25 minutes
45 minutes
16 bars
Print Recipe
Rated 5 out of 5 stars by 1 reader.
Equipment
- 8 x 8-inch baking pan (lined with parchment paper)
- Large, light-colored saucepan (for browning butter, see Note 1)
- Mixing Bowls
- Whisk
- Rubber Spatula
- Cooling Rack
Ingredients
- 8 tablespoons unsalted butter, cubed
- 1 cup light brown sugar, packed
- 1 teaspoon vanilla bean paste (or pure vanilla extract)
- 1 large egg
- 1/4 teaspoon salt
- 1 cup all-purpose flour
- 1 cup chocolate chips (your favorite variety: semi-sweet, milk, dark, or white)
- 1/2 cup chopped roasted pistachios (or any nut you prefer, roasted and salted recommended)
- Optional: 1/4 teaspoon ground cinnamon (for added warmth)
Instructions
- Prepare Pan & Preheat Oven: Preheat oven to 350°F (175°C). Lightly spray an 8 x 8-inch pan with cooking spray, then line it with parchment paper, leaving a generous overhang on two sides for easy removal.
- Brown the Butter: In a light-colored, wide saucepan, melt the butter over medium-high heat. Once melted, reduce heat to medium and stir constantly with a silicone spatula. The butter will bubble and foam. When it smells nutty and you see light-brown specks forming under the foam, quickly remove from heat and pour all the butter (scraping all bits!) into a bowl. Let it cool for 5 minutes.
- Mix Wet Ingredients: Add the brown sugar to the cooled browned butter and whisk vigorously until the mixture resembles wet sand. Add the egg, vanilla bean paste (or extract), salt, and optional cinnamon. Whisk briskly for 1-2 minutes until the mixture is very creamy and emulsified.
- Fold in Dry & Mix-ins: Add the flour, chocolate chips, and nuts to the wet mixture. Switch to a spatula and gently fold the dough until no dry streaks of flour remain. Be careful not to overmix; the batter will be thick.
- Bake: Spread the batter evenly into the prepared pan and smooth the top with a spatula. Bake for 25–27 minutes, or until the edges are lightly golden and the top is set. A toothpick inserted into the center may come out with moist crumbs, which is perfect for a chewy blondie.
- Cool & Serve: Remove from the oven and let the bars cool in the pan for 10–15 minutes. Use the parchment-paper overhang to transfer the bars to a cooling rack, then gently remove the parchment paper. Allow to cool completely before cutting into bars and serving for the best texture.
Recipe Notes
Note 1 (Browning Butter): Using a large, light-colored saucepan is ideal for browning butter. This allows you to clearly see the butter’s color transformation and those crucial browned specks, ensuring you don’t burn it. This small detail truly makes a difference in achieving the perfect nutty flavor.
Storage: These blondie bars are at their absolute best on the first day, when they are perfectly fresh, soft, and chewy. Store any leftovers in an airtight container at room temperature. They will remain delicious for 2-4 days, though their texture will be softest on day one. For longer preservation, blondies can be individually wrapped and frozen for up to 3 months. Thaw at room temperature before enjoying.
Nutrition Information (Approximate)
- Serving: 1 bar
- Calories: 154 kcal
- Carbohydrates: 19.5 g
- Protein: 2 g
- Fat: 7.9 g
- Cholesterol: 26.9 mg
- Sodium: 45.2 mg
- Fiber: 0.6 g
- Sugar: 12.6 g
Nutrition information is an automatic calculation and should only be used as an approximation.
Enjoyed this recipe? Share your thoughts below!
Your feedback helps others discover delicious treats.
Frequently Asked Questions About Blondies
The primary difference lies in their base flavor and ingredients. Blondies are known for their golden color, butterscotch-like or caramel flavor, and are typically made with brown sugar and vanilla, without cocoa powder. Brownies, on the other hand, are dark, rich, and intensely chocolatey, deriving their flavor from cocoa powder or melted chocolate. While both are chewy bar cookies, blondies offer a lighter, vanilla-forward alternative to their chocolate counterparts.
While you could technically substitute white sugar, it’s not recommended for this blondie recipe. Brown sugar is crucial for achieving the signature chewy texture and deep, caramel-like flavor that defines a good blondie. The molasses in brown sugar adds moisture and contributes to the fudgy consistency. Using only white sugar would result in a crisper, less moist, and less flavorful bar, more akin to a sugar cookie bar than a true blondie.
Several factors can lead to dry or cakey blondies. The most common culprit is overbaking. Blondies should be slightly underbaked in the center for that perfect chewy texture. Another reason could be overmixing the flour; excessive mixing develops gluten, leading to a tougher, more cake-like crumb. Ensure your oven temperature is accurate and that you’re measuring your flour correctly (using a kitchen scale for accuracy is best, or spooning flour into a measuring cup and leveling off). Lastly, ensure your ingredients, especially the butter and sugar, are properly incorporated to trap moisture.
The beauty of blondies is their versatility! Beyond the classic chocolate chips and nuts (like pistachios, pecans, or walnuts), try adding white chocolate chunks, butterscotch chips, M&Ms, chopped pretzels (for a sweet and salty crunch), shredded coconut, dried cranberries or cherries, toffee bits, or even a swirl of peanut butter or caramel before baking. Feel free to experiment with combinations that excite your taste buds!
Look for golden-brown edges and a set center. The top should appear lightly golden, and if you gently press the center, it should spring back slightly. A toothpick inserted into the center should come out with moist crumbs attached, but not wet batter. Avoid baking until the toothpick comes out completely clean, as this usually means they’re overbaked and will be dry once cooled.