
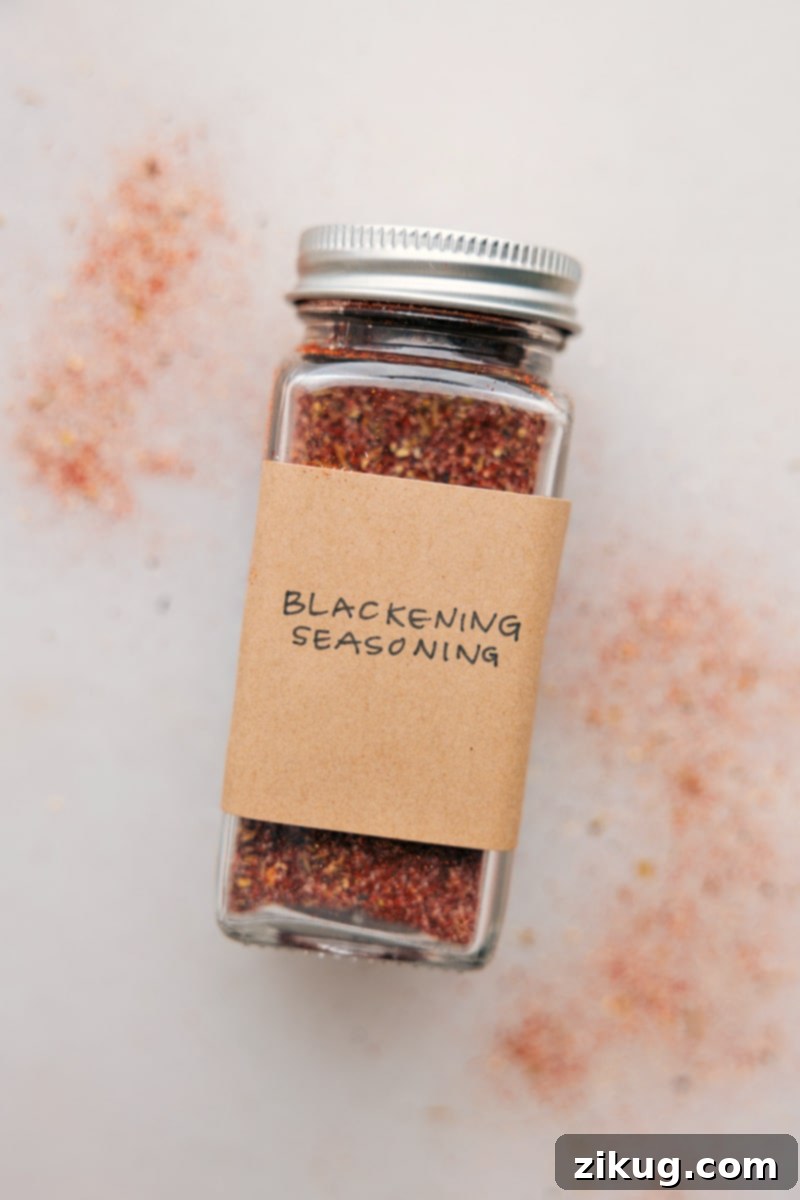
Homemade Blackened Seasoning: The Ultimate Flavor Enhancer
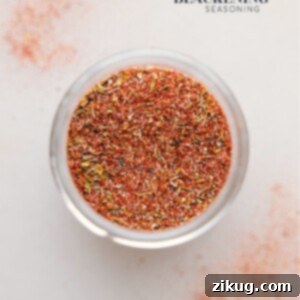
Elevate your culinary creations with this exceptional **Blackened Seasoning Recipe**. This meticulously crafted blend offers a symphony of smoky, spicy, and deeply savory notes, designed to transform ordinary ingredients into extraordinary dishes. Blackening is a beloved cooking technique that creates a distinctive, dark crust on the exterior of food while keeping the interior succulent and moist. Our homemade seasoning makes this process simple and accessible, bringing the authentic taste of Southern-inspired cuisine right to your kitchen. It’s incredibly easy to prepare, offers endless customization possibilities, and can be stored efficiently, ensuring you always have fresh, potent flavor at your fingertips.
The Irresistible Advantages of Crafting Your Own Seasoning Blends
While convenience often leads us to store-bought spice mixes, the benefits of making your own are truly unparalleled. Investing a few minutes to blend your own spices, especially for a powerful mix like this Blackened Seasoning, yields superior results that you’ll taste and appreciate in every bite. Here’s why you should make the switch:
- Unmatched Freshness and Flavor Intensity: Spices, much like other perishable ingredients, lose their potency over time. Pre-packaged blends found in stores can sit on shelves for extended periods, resulting in a duller flavor profile. By mixing your own, you ensure that you’re using fresh spices, directly contributing to a significantly more vibrant, aromatic, and intense taste experience in your dishes. The difference in aroma alone is astonishing.
- Tailored to Your Taste Buds (Customization): One of the greatest freedoms of homemade seasoning is the ability to adapt it to your specific preferences. Do you crave more heat? Amp up the cayenne. Prefer a smokier undertone? Increase the smoked paprika. Have a dietary restriction or a dislike for a particular spice? Simply adjust or omit it. This recipe provides a foundational base, inviting you to experiment and perfect a blend that’s uniquely yours.
- Thoughtful and Unique Gifting Option: A beautifully packaged jar of homemade Blackened Seasoning makes for an incredibly thoughtful and practical gift. It’s a personal touch that shows care, perfect for housewarmings, holiday presents, or simply as a token of appreciation for a fellow food enthusiast. It’s a gift that keeps on giving, inspiring delicious meals.
- Economical in the Long Run (Saves Money): While the initial purchase of individual spices might seem like a larger upfront cost, buying them in larger quantities or in bulk is far more cost-effective over time. You’ll find yourself using these staple spices in numerous other recipes, making your pantry a powerhouse of flavor without the recurring expense of smaller, more expensive pre-mixed packets.
- Purity and Transparency (No Unnecessary Extras): Commercial seasoning blends often include fillers, anti-caking agents, excessive sodium, or artificial flavor enhancers. When you make your own, you have complete control over every ingredient. This ensures a pure, natural blend, free from any additives or allergens you wish to avoid, contributing to healthier and more wholesome cooking.
- Boosts Culinary Confidence: Engaging in the creation of your own spice blends deepens your understanding of flavor components and how different spices interact. This hands-on experience not only enhances your culinary intuition but also builds confidence in the kitchen, encouraging you to explore new recipes and techniques.
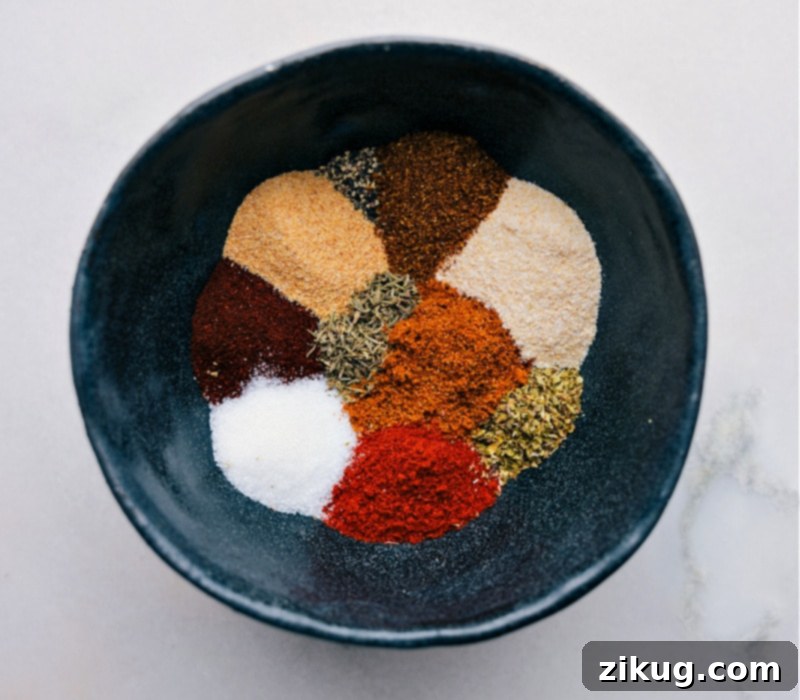
Diving Deep into the Flavor Profile: Key Blackened Seasoning Ingredients
Each ingredient in this Blackened Seasoning blend is carefully selected to contribute to its distinctive, complex flavor. Understanding the role of each spice will not only help you appreciate the blend but also empower you to customize it further. Here’s a detailed look:
- Salt: The fundamental flavor amplifier. Salt is crucial for enhancing the individual notes of all other spices and drawing out moisture from proteins, which is essential for creating that desirable crispy crust during the blackening process. Using a fine-grain salt ensures even distribution throughout the blend.
- Black Pepper: Providing a sharp, pungent, and aromatic kick, black pepper adds a foundational layer of warmth. For the most intense flavor, opt for freshly ground black pepper, which offers a noticeably brighter and more robust taste than pre-ground varieties.
- Dried Thyme: A staple in Cajun and Creole cuisine, dried thyme introduces earthy, slightly floral, and minty undertones. It contributes a classic herbaceous note that is both comforting and robust. If dried thyme is unavailable, a good quality Italian seasoning can serve as a decent, though slightly different, aromatic substitute.
- Dried Oregano: Known for its bold, somewhat bitter, and peppery character, dried oregano adds another layer of Mediterranean-inspired herbaceousness that stands up well to high-heat cooking. Dried basil can be used in its place, offering a slightly sweeter and more anise-like aroma.
- Garlic Powder: This essential ingredient delivers a deep, savory, and aromatic foundation without introducing moisture, which is ideal for a dry spice blend. It provides an umami richness that permeates the entire mix, ensuring a full-bodied flavor.
- Onion Powder: Complementing the garlic, onion powder enhances the overall savory profile with its mild, sweet, and pungent onion flavor. It rounds out the aromatic base, adding depth without any harshness.
- Paprika: Crucial for both its beautiful reddish hue and its mild, sweet, peppery flavor. While standard paprika is good, for an authentic and deeply flavorful blackened seasoning, I strongly recommend using a combination of half regular paprika and half smoked paprika. The smoked variety adds an incredible depth and a wonderful campfire aroma that truly defines the “blackened” experience.
- Cayenne Pepper: The primary source of the characteristic heat in this blend. The amount of cayenne can be precisely adjusted to match your heat tolerance. Start with a smaller quantity for a milder flavor, or be more generous if you prefer a fiery kick.
- Old Bay® Seasoning (optional): While not universally found in all traditional blackening recipes, adding a teaspoon of Old Bay can introduce a unique, complex layer of savory, celery-salt-infused goodness. It adds an extra dimension of flavor that many find irresistible. If you don’t have it on hand, the blend will still be incredibly delicious without it.
Quick Tip: Spice Freshness is Key!
The quality of your final seasoning blend is directly proportional to the freshness of your individual spices. Always choose fresh, high-quality spices. For the most potent and vibrant flavor, consider buying whole spices and grinding them yourself just before blending. Store all your spices, both individual and mixed, in a cool, dark, and dry place, away from direct sunlight, heat, and humidity, to preserve their precious essential oils and aromatic compounds for as long as possible.
How to Unleash the Power of Blackened Seasoning in Your Cooking
Blackened seasoning is incredibly versatile, extending its flavorful reach far beyond the classic high-heat cooking method. Its bold and robust profile makes it a fantastic addition to a wide array of dishes. Here’s how to incorporate this dynamic blend into your culinary repertoire:
The Classic Blackening Technique:
To achieve the authentic “blackened” crust, high heat and generous seasoning are paramount. This method creates a dark, flavorful, almost charred exterior while locking in the moisture, leaving the interior tender and juicy. It’s especially effective for:
- Meats & Fish: This is the traditional and most celebrated application for blackening seasoning.
- Preparation: Begin by patting your chosen protein (such as chicken breasts, thin-cut steaks, pork tenderloin slices, firm fish fillets like cod, salmon, tilapia, or shrimp) exceptionally dry with paper towels. This step is critical for ensuring a crisp, dark crust rather than a steamed surface.
- Coating: In a shallow dish, melt unsalted butter or use clarified butter (ghee is an excellent alternative due to its higher smoke point). Dip the protein into the melted butter, ensuring an even coating on all sides. Immediately, dredge the buttered protein generously in the homemade blackened seasoning, pressing lightly so the spices adhere firmly.
- Cooking: Heat a heavy-bottomed skillet, preferably cast iron, over high heat until it begins to smoke lightly. If using a little oil in the pan, ensure it’s also smoking hot. Carefully place the seasoned protein into the screaming hot pan. Cook for approximately 2-4 minutes per side, depending on the thickness of the item, until a rich, dark, crusty char develops. To maintain high heat and achieve proper blackening, cook in small batches and ensure adequate ventilation in your kitchen (e.g., turn on your range hood, open windows).
- Popular Blackened Dishes: Experiment with Blackened Chicken for salads or tacos, succulent Blackened Steak, tender Blackened Shrimp, or various fish fillets like snapper, catfish, or mahi-mahi.
Beyond Blackening: Everyday Culinary Applications
The versatility of this seasoning extends far beyond the skillet. Incorporate its smoky, spicy goodness into a variety of other dishes:
- Roasted or Grilled Vegetables: Transform ordinary vegetables into flavor bombs! Toss hearty vegetables like bell peppers, zucchini, corn on the cob, asparagus, sweet potatoes, or broccoli florets with a drizzle of olive oil and a generous sprinkle of blackened seasoning before roasting in the oven or grilling. The spices will caramelize beautifully, adding incredible depth.
- Dynamic Dry Rub for Grilling & Smoking: Use the blend as a potent dry rub for larger cuts of meat, such as pork shoulder, ribs, brisket, or whole chicken. Apply liberally and let it marinate for several hours or even overnight in the refrigerator to allow the flavors to penetrate deeply, resulting in a tender, flavorful bark.
- Enhancing Soups, Stews, and Chili: Stir a teaspoon or two into your favorite comfort foods like gumbo, jambalaya, lentil soup, bean chili, or even a simple chicken noodle soup. It will impart a wonderful smoky, spicy, and complex character that elevates the entire dish.
- Jazz Up Breakfast & Brunch: Sprinkle over scrambled eggs, omelets, frittatas, or breakfast potatoes for a zesty and unexpected morning kick. It pairs exceptionally well with a runny yolk.
- Gourmet Popcorn and Snacks: For a uniquely flavorful snack, lightly spray freshly popped popcorn with a touch of oil or melted butter and dust generously with the seasoning. It’s also delicious on roasted nuts or homemade potato wedges.
- Vibrant Marinades & Dressings: Whisk a small amount of the seasoning into olive oil, lemon juice, and a splash of vinegar or Worcestershire sauce to create a quick, vibrant marinade for any protein. It can also be incorporated into homemade salad dressings or creamy dips for an exciting flavor boost.
- Bread & Butter: Mix a teaspoon into softened butter for a delicious compound butter to spread on cornbread or crusty bread.
Optimizing Storage for Long-Lasting Freshness
To preserve the vibrant flavor and potency of your homemade Blackened Seasoning, proper storage is paramount. Once prepared, transfer the blend to an airtight glass container, a durable spice jar, or a heavy-duty, sealed bag. Crucially, store it in a cool, dark, and dry environment, such as a pantry, cupboard, or dedicated spice cabinet. Avoid storing it near heat sources like your stove, oven, or direct sunlight, as heat and light can rapidly degrade the spices’ essential oils and diminish their flavor. Clearly label the container with the name of the seasoning and the date it was made. For optimal flavor intensity, it is recommended to **use the blend within one year** of preparation. Periodically, inspect your stored seasoning for any indications of spoilage: a dull or “off” smell, noticeable changes in its color, or the presence of moisture or caking are all signs that its quality may have deteriorated.
Mastering the Blackening Technique: A Step-by-Step Guide for Perfect Results
While the seasoning provides the flavor, the art of blackening truly comes alive through a specific high-heat cooking method. This technique is what creates that iconic dark, crisp, and intensely flavored crust. Here’s a detailed guide to help you achieve perfect blackened dishes:
- Select Your Ideal Protein: Blackening works best with proteins that cook relatively quickly. Popular choices include firm fish fillets (like catfish, red snapper, mahi-mahi, or salmon), boneless, skinless chicken breasts (pounded thin for even cooking), shrimp, scallops, or thin cuts of steak (such as flank or skirt steak).
- Ensure Absolute Dryness: This step cannot be overstated. Moisture on the surface of your protein will cause it to steam rather than sear, preventing the formation of that crucial blackened crust. Use paper towels to thoroughly pat the food dry on all sides before seasoning.
- Prepare Your Fat Layer: Traditionally, blackening involves dipping the seasoned food in melted unsalted butter. The milk solids in butter contribute significantly to the dark color and rich flavor of the crust. However, butter has a low smoke point. For best results and to prevent excessive burning, consider using clarified butter (ghee), which has a higher smoke point, or a blend of melted butter and a high-smoke-point oil (like avocado or grapeseed oil) in a shallow dish for dipping.
- Season Liberally: After drying and dipping in fat (if using butter), dredge both sides of your protein generously in your homemade blackened seasoning. Press the seasoning firmly onto the surface to ensure a thick, even coating. Don’t be shy; a substantial layer of spice is key to the blackening process.
- Achieve Extreme Pan Heat: This is perhaps the most critical component. Place a heavy-bottomed skillet, ideally a cast-iron skillet, over high heat on your stovetop. Allow it to heat until it is smoking hot. You should see wisps of smoke emanating from the pan. An underheated pan will result in dull, steamed food, not a blackened crust.
- Add Cooking Fat to the Pan (Optional): Once the skillet is screaming hot, you can add a very thin layer of high-smoke-point oil (like avocado oil) or clarified butter to the pan itself. This can further aid in preventing sticking and promoting an even, beautiful crust.
- Cook Quickly with Ample Ventilation: Carefully place the seasoned protein into the furiously hot pan. You will hear an immediate, loud sizzle. Cook for approximately 2 to 4 minutes per side, depending on the thickness of your food, until a dark, almost charcoal-like crust forms. Use tongs to flip. Be prepared for significant smoke; ensure you have robust ventilation (turn on your range hood to maximum, open windows, or even consider cooking on an outdoor side burner if possible).
- Avoid Overcrowding the Pan: Cook in small batches if necessary. Placing too much food in the pan at once will drastically lower the temperature, leading to steaming instead of proper blackening, and a less desirable result.
- Rest and Serve Immediately: Once cooked through and beautifully blackened, remove the food from the skillet and allow it to rest for a few minutes. This resting period allows the juices to redistribute, ensuring a tender and maximally flavorful interior. Serve your perfectly blackened dish hot and enjoy!
Frequently Asked Questions About Homemade Blackened Seasoning
To help you confidently use and enjoy your homemade blackened seasoning, here are answers to some common questions:
- What is the primary difference between Cajun seasoning and Blackened Seasoning?
While often sharing many similar ingredients and originating from the same regional culinary traditions (Louisiana), there’s a key distinction. Blackened seasoning, like this recipe, is specifically formulated and often contains ingredients in ratios that are optimized to create the characteristic dark, flavorful crust when cooked at very high temperatures. Cajun seasoning is a broader category of spicy, savory blends used across a wider range of Cajun and Creole dishes, not exclusively for the blackening technique. Our blend is meticulously designed for that intense searing process.
- Can I adjust the spice level to be less intense?
Absolutely! The primary source of heat in this blend is the cayenne pepper. To make your seasoning milder, simply reduce the amount of cayenne to 1/2 teaspoon, 1/4 teaspoon, or even omit it entirely if you prefer no heat. You can always add a pinch of red pepper flakes directly to your food while cooking if you decide you want a little warmth later.
- How long will my homemade blackened seasoning stay fresh?
When stored correctly in an airtight container in a cool, dark, and dry place (away from heat and light), your homemade blackened seasoning will retain its peak flavor and aroma for approximately 6 to 12 months. After this period, it won’t necessarily “spoil” in a harmful way, but its potency and aromatic qualities will gradually diminish. Always perform a quick smell test – if the aroma seems faint or dull, it’s a good indication that it’s time to whip up a fresh batch.
- Is it possible to use fresh herbs in this seasoning instead of dried?
For this particular blackening blend and its intended high-heat cooking method, dried herbs are generally preferred. Dried herbs have a more concentrated flavor profile and are much less prone to burning compared to fresh herbs when exposed to the intense heat required for blackening. If you were creating a fresh herb rub for grilling at lower temperatures or for a marinade, fresh herbs would be excellent, but for this recipe, stick to dried for optimal results.
- Is this homemade seasoning gluten-free and vegan-friendly?
Yes, assuming you use pure, individual spices that have not been processed with other ingredients, this homemade blackened seasoning recipe is inherently gluten-free and vegan. It contains no animal products, dairy, gluten, or common nuts. However, always verify the labels of your individual spices if you have severe allergies or strict dietary requirements.
Explore More Homemade Seasoning Blends:
Seasoning Mixes
Homemade Taco Seasoning Recipe
Seasoning Mixes
Everything Bagel Seasoning Blend
Seasoning Mixes
Homemade Chicken Fajita Seasoning
Seasoning Mixes
Classic Pumpkin Pie Spice Recipe
Print Recipe
Blackening Seasoning Recipe
Chelsea Lords
5 minutes
5 minutes
Approximately 6 tablespoons
Equipment
-
Small mixing bowl
-
Airtight spice jar or container
Ingredients
- 1 teaspoon dried thyme
- 1 teaspoon dried oregano
- 1 teaspoon garlic powder
- 1 tablespoon onion powder
- 3 tablespoons paprika (see Note 1)
- 1 teaspoon cayenne pepper (see Note 2)
- 1 teaspoon Old Bay seasoning (optional)
- 1 teaspoon black pepper
- 1 teaspoon salt
Instructions
-
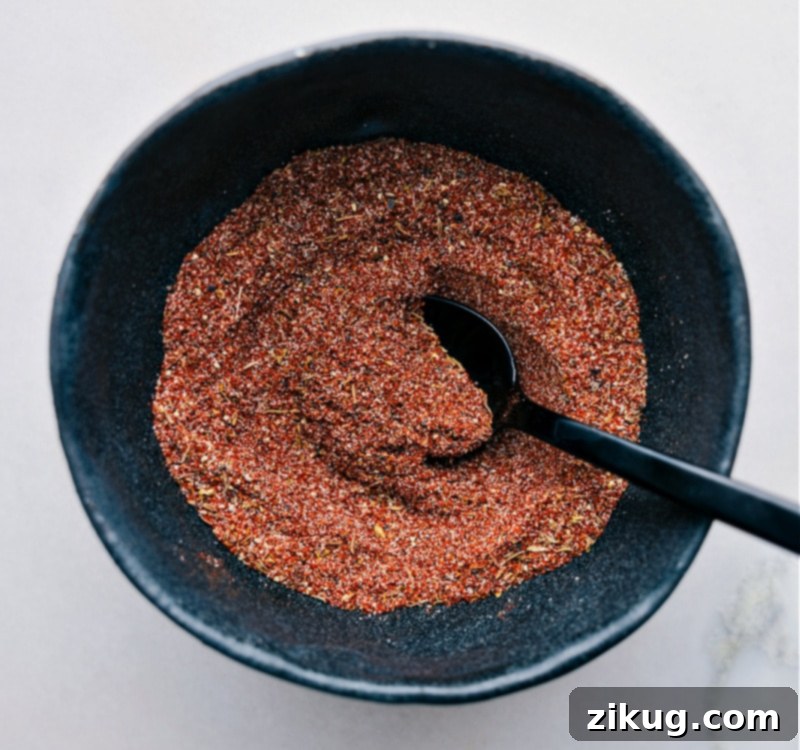
In a small bowl or container, combine all the listed spices. Stir thoroughly with a spoon or whisk until all ingredients are completely mixed and evenly distributed. This ensures a consistent flavor profile with every use.
-
Once blended, transfer your fresh Blackened Seasoning to an airtight container. Store it in a cool, dark, and dry place, such as your pantry or spice cabinet, away from direct heat and sunlight, to maintain its vibrant flavor and aroma.
Recipe Notes
Note 1 (Paprika Selection): For a more complex and truly authentic blackened flavor, I highly recommend using a blend of half regular paprika and half smoked paprika. The smoked variety adds a beautiful depth and an unmistakable, rustic campfire aroma that significantly enhances the overall “blackened” experience.
Note 2 (Adjusting Heat Levels): Cayenne pepper is the primary ingredient responsible for the heat in this seasoning blend. If you or those you’re cooking for are sensitive to spicy food, or if you’re preparing meals for children, it’s wise to begin with a smaller quantity of cayenne, such as 1/4 or 1/2 teaspoon. You can always taste your finished dish and add more heat during the cooking process if desired.
Optimal Storage for Freshness: To ensure your homemade Blackened Seasoning remains potent and aromatic, transfer it into an airtight glass jar or a heavy-duty, sealable bag. Store this container in a cool, dark, and dry location, such as a pantry or spice cabinet, away from any sources of direct heat or bright light. It is essential to label the container clearly with the seasoning’s name and the date it was prepared. For the most intense and best-quality flavor, plan to use your blend within one year. Regularly check the seasoning for any signs of degradation, including a faded or “off” smell, visible changes in its color, or the presence of moisture or clumps, which indicate it’s time for a fresh batch.
Nutrition Information (Approximate)
Serving: 1 tablespoon | Calories: 12 kcal | Carbohydrates: 3g | Protein: 0.4g | Fat: 0.2g | Saturated Fat: 0.05g | Polyunsaturated Fat: 0.1g | Monounsaturated Fat: 0.02g | Sodium: 389mg | Potassium: 52mg | Fiber: 1g | Sugar: 0.5g | Vitamin A: 393IU | Vitamin C: 10mg | Calcium: 19mg | Iron: 1mg
Disclaimer: The nutrition information provided is automatically calculated and should be considered an approximation. Actual nutritional values may vary based on specific ingredient brands, preparation methods, and any customizations made to the recipe.
Loved this homemade seasoning? We’d love to hear your thoughts! Leave a comment below!