
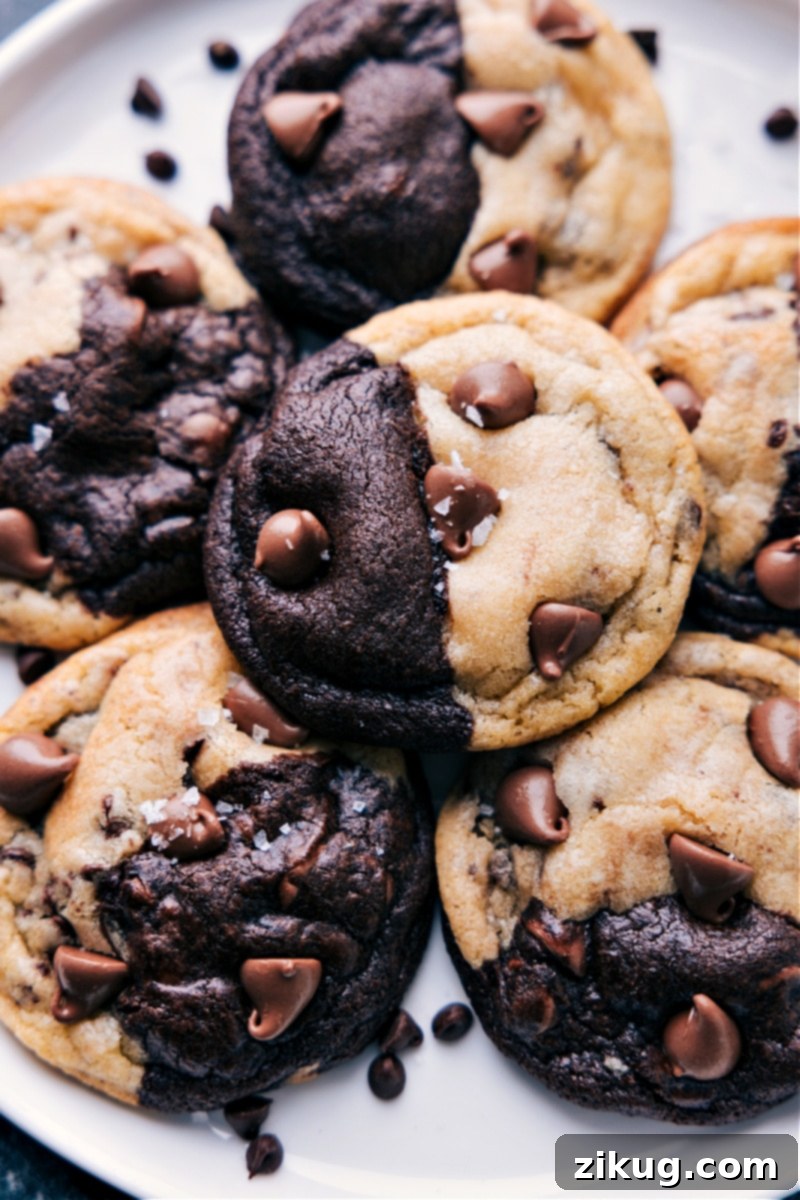
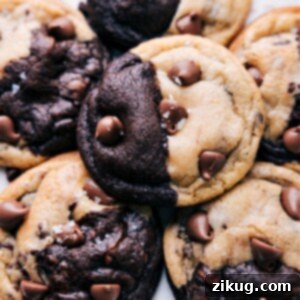
Brookies are the ultimate dessert mashup, flawlessly combining the rich, fudgy delight of brownie cookies with the classic, buttery chewiness of chocolate chip cookies. This irresistible treat delivers a symphony of chocolatey, sweet, and buttery flavors in every single bite, making it a fan-favorite for any occasion and a must-try for all dessert enthusiasts.
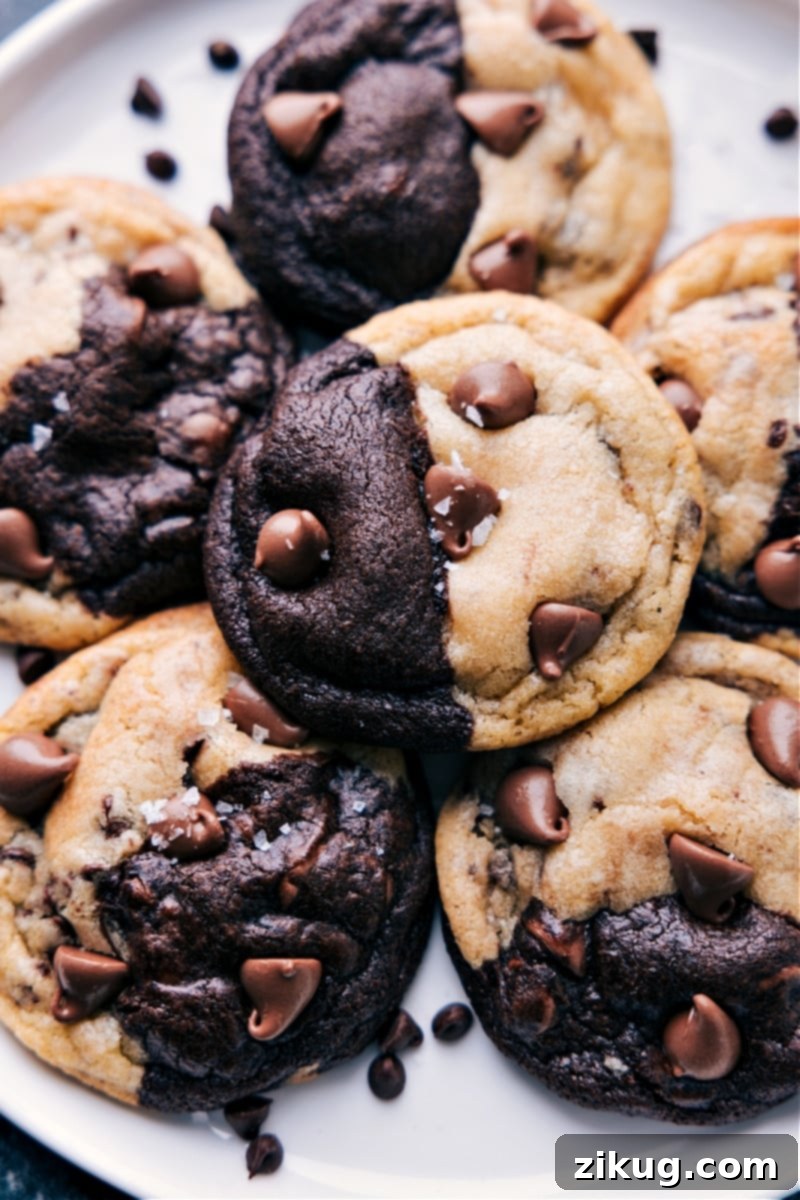
The Ultimate Brookies Recipe: Fudgy Brownie & Chewy Chocolate Chip Cookie Bliss
Prepare yourself for a truly extraordinary baking adventure with our ultimate Brookies recipe. This delectable hybrid dessert unites two of the world’s most beloved treats – rich, fudgy brownies and iconic, chewy chocolate chip cookies – into one harmonious, mouthwatering creation. The result is a symphony of textures and flavors that will captivate your taste buds and leave everyone asking for more. From the moment the aroma fills your kitchen to the last delicious crumb, these Brookies promise a delightful experience. While crafting these Brookies requires a little more attention than your average cookie, the unparalleled deliciousness makes every moment in the kitchen absolutely worth it. Read on to discover why this recipe is about to become your new go-to for impressive homemade treats.
Why You’ll Love This Irresistible Brookies Recipe
Baking these Brookies isn’t just about making another cookie; it’s about creating a memorable dessert experience that combines the best of two worlds. Here’s why this particular recipe stands out and should be at the top of your baking list:
- A Decadent Flavor Fusion: This recipe masterfully combines the deep, intense chocolate notes of fudgy brownie cookies with the comforting, buttery sweetness and scattered chocolate chips of classic chocolate chip cookies. Each bite offers a perfect balance, eliminating the need to choose between two favorites. It’s truly a match made in dessert heaven, offering a complexity of flavor and texture that single-layered cookies simply can’t achieve. You get the chewiness and depth of a brownie perfectly complemented by the familiar warmth and sweetness of a chocolate chip cookie.
- Generous Yield for Sharing (or Savoring!): Our Brookies recipe yields a substantial batch of cookies, making them ideal for large gatherings, school events, office parties, or simply ensuring you have plenty to enjoy throughout the week. This large quantity also makes them perfect for holiday cookie exchanges or as thoughtful homemade gifts. Plus, we’ll guide you on how to freeze the dough, so you can bake fresh cookies whenever a craving strikes, providing instant gratification with minimal future effort.
- A Unique and Exciting Treat: Break away from traditional cookie offerings with Brookies. Their distinctive two-tone appearance and dual-texture appeal make them a conversation starter and a delightful surprise at any party or potluck. They look as impressive as they taste, elevating your dessert spread. They’re also perfect for gifting, showcasing your baking prowess with a homemade touch that feels truly special and gourmet.
- Endless Customization Possibilities: While phenomenal on their own, these Brookies are also a fantastic canvas for creative culinary exploration. Our recipe includes exciting suggestions for adding various fillings like gooey Nutella, creamy Hershey Kisses, or caramel-filled Rolos, elevating them to an even more indulgent level. These additions introduce an unexpected burst of flavor and a delightful textural contrast that takes your Brookies from great to absolutely extraordinary, allowing you to tailor them to any preference.
Pro Baking Tip: Achieve the Perfect Chewy Texture
The secret to perfectly soft, chewy Brookies lies in preventing overbaking. It’s crucial to pull them from the oven when their edges are just firm and lightly golden brown, and the centers appear set but still slightly soft to the touch. Remember, residual heat will continue to bake the cookies for a few minutes after they’re removed from the oven, allowing them to firm up beautifully without drying out. A slightly underbaked cookie guarantees a delightfully soft and chewy interior; an overbaked one will be dry and crumbly, losing its signature appeal.
Expert Tips for Mastering Your Brookies (Baking Guide)
To ensure your Brookies turn out absolutely perfect every time – beautifully textured, uniformly baked, and bursting with flavor – pay close attention to these baking nuances. These simple yet crucial tips will elevate your cookie game and guarantee a batch of delightful treats that everyone will adore.
- Precision in Measuring Ingredients: Baking is a science, and accuracy is key. This is especially true for flour and leavening agents. Using too much flour can result in dry, dense, and crumbly cookies, while too little can make them spread excessively thin. Always spoon flour into your measuring cup and level it off with a straight edge (like a butter knife) for consistent results. For the utmost accuracy, consider using a kitchen scale to measure dry ingredients by weight, if possible.
- Avoid Overmixing the Dough: Once dry ingredients (flour, cocoa powder, baking soda, etc.) are added to the wet ingredients, mix just until they are combined. Overmixing vigorously develops the gluten in the flour, which leads to tough, rubbery cookies – and not in the desirable chewy way! A light hand and gentle mixing ensure your Brookies remain tender, soft, and delightful. Remember to scrape down the sides of your bowl frequently with a spatula to ensure all ingredients are incorporated evenly without overworking the dough.
- Utilize Silicone Mats or Parchment Paper: For hassle-free baking, consistent results, and exceptionally easy cleanup, always line your baking sheets with either a high-quality silicone baking mat or parchment paper. This vital step prevents the cookies from sticking to the pan, promotes more even heat distribution for uniform baking, and makes transferring the warm, delicate cookies a breeze, preserving their beautiful shape.
- Don’t Skip the Dough Chilling Step: Chilling the dough is a non-negotiable step for superior Brookies. This allows the butter to firm up, significantly preventing excessive spreading during baking, which results in thicker, chewier cookies with a better structure. More importantly, chilling allows the flavors to meld and deepen, enhancing the overall taste profile of both cookie layers. Stick precisely to the recommended chilling times for both the individual cookie doughs and the combined Brookie balls for optimal results.
- Allow for Initial Cooling on the Baking Sheet: Freshly baked cookies are incredibly delicate and prone to breaking. Resist the urge to immediately transfer them to a wire rack after removing them from the oven. Instead, let them cool on the baking sheet for a few minutes (typically 5-10 minutes, as specified in the recipe). This allows them to set up, firm, and develop their structure, preventing breakage and ensuring they maintain their beautiful, round shape when moved.
- Shape Warm Cookies for Perfection: For that perfectly round, professionally baked look, use this simple trick: As soon as the cookies come out of the oven, while they are still warm and pliable, use the back of a spoon or a round cookie cutter (slightly larger than your cookie) to gently push and swirl around the edges of each cookie. This technique helps to create perfectly round, uniformly shaped cookies with crisp edges and a soft, inviting center.
Creative Brookie Variations to Elevate Your Treat
While these classic Brookies are incredible on their own, they also serve as a versatile foundation for exciting flavor experiments. Get creative and customize your batch with these delightful variations to impress your family and friends:
Stuffed Brookies: A Sweet Surprise Inside!
Imagine biting into a Brookie to discover a gooey, melting center! This is easily achievable by stuffing the centers with small chocolate candies or other delicious morsels. Favorites include:
- Chocolate Kisses: For an extra dose of creamy milk chocolate that melts beautifully when warmed.
- Rolos: To add a decadent, chewy caramel surprise that becomes wonderfully soft and gooey.
- Mini Peanut Butter Cups: For a delightful, classic chocolate and peanut butter combination that’s always a hit.
- Caramel Bits: Small, soft caramel pieces that integrate seamlessly and create pockets of molten caramel.
- Marshmallow Fluff: A tiny dollop frozen firm can create a wonderfully soft, melt-in-your-mouth center.
To successfully stuff your Brookies, ensure the chosen candy or filling is fully concealed within the dough. Simply take one portion of brownie dough and one portion of chocolate chip dough, flatten each slightly into discs. Place your chosen candy or frozen filling in the center of one disc, top with the other flattened dough, and then carefully pinch and roll them together into a smooth, seamless ball, ensuring no filling is exposed. This prevents the filling from melting out during baking.
Nutella-Stuffed Brookies: An Irresistible Twist
Nutella adds a rich, hazelnut-chocolate dimension that is simply divine and takes these Brookies to an indulgent new level. Follow these specific steps for perfect Nutella-stuffed Brookies:
- Prepare Nutella portions: Scoop small, approximately 1-teaspoon sized dollops of Nutella onto a parchment-lined baking sheet. The exact size will depend on your desired filling amount and the overall size of your Brookies.
- Freeze until solid: Place the baking sheet with Nutella dollops in the freezer for about 20-30 minutes, or until they are completely solid. This critical step prevents the Nutella from becoming too messy and ensures it stays put during the stuffing process.
- Assemble your Brookies: Once frozen, take one brownie dough ball and one chocolate chip dough ball. Flatten each slightly into a disc. Place a frozen Nutella dollop onto the center of one disc (e.g., the brownie dough), then cover it with the other flattened dough disc (chocolate chip dough). Gently pinch the edges and roll and press them together into a single, cohesive ball, making absolutely sure the Nutella is completely enclosed within the combined cookie dough.
- Keep Nutella frozen: To prevent the remaining Nutella dollops from thawing too quickly while you work through the batch, keep the tray of frozen Nutella in the freezer. Take out only the amount you need for each cookie as you assemble them. This method ensures the Nutella remains firm and easy to work with throughout the entire process.
Other Brookie Enhancements
- Different Chocolate Chips: Experiment with white chocolate chips, butterscotch chips, peanut butter chips, or even large dark chocolate chunks for varied flavor profiles and textural experiences.
- Add Nuts: Toasted chopped walnuts or pecans can add a wonderful crunch and earthy flavor to either the brownie layer or the chocolate chip layer. Mix them directly into the respective dough.
- Flaky Sea Salt: A sprinkle of flaky sea salt on top of the warm, freshly baked Brookies enhances the chocolate flavor and provides a delightful savory contrast.
- Espresso Powder: A teaspoon of instant espresso powder added to the brownie dough can deepen and intensify the chocolate flavor without adding a coffee taste.
- Candy Bits: Crush up your favorite candy bars (like Snickers or Butterfinger) and fold them into the dough for a fun, personalized twist.
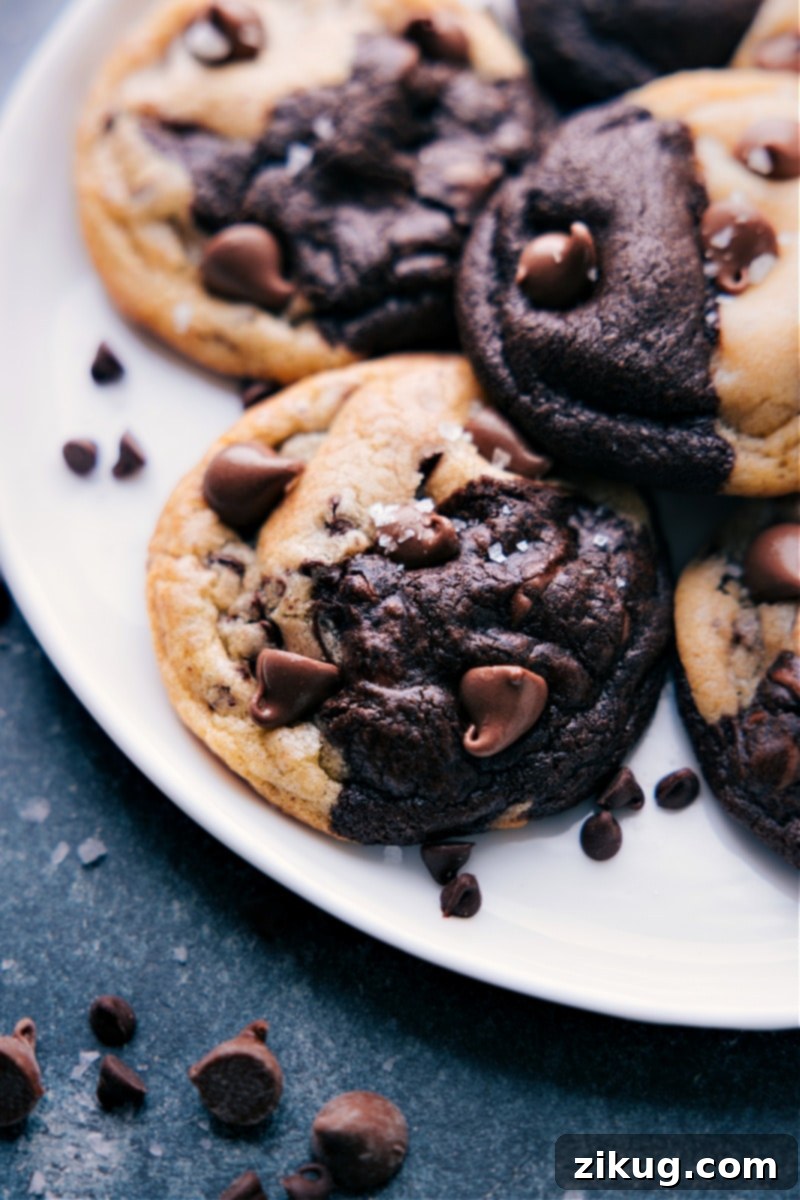
Brookies Storage Guide
Proper storage ensures your Brookies remain fresh, soft, and delicious for as long as possible. Here’s how to keep them at their best, whether baked or as dough for future enjoyment:
Storing Baked Brookies
Once your Brookies have completely cooled to room temperature, store them in an airtight container. Keep the container at room temperature, away from direct sunlight or heat sources. They will maintain their optimal taste and delightfully chewy texture for about 2-3 days. Beyond this period, the cookies tend to lose their fresh texture and can become dry and crumbly. For best results, avoid refrigerating baked cookies, as the cold environment can actually dry them out and make them hard.
Freezing Brookie Dough for Later Enjoyment
One of the best ways to enjoy fresh-baked Brookies whenever you want, without the full prep time, is to freeze the dough. This method is highly recommended over freezing baked cookies, as it preserves the quality and texture of the cookies much better, resulting in a practically fresh-baked experience every time.
- Form Dough Balls: After assembling the individual brownie and chocolate chip cookie dough portions into Brookie balls (as per the recipe instructions, including any stuffings), arrange them in a single layer on a baking sheet lined with parchment paper. Ensure they are not touching.
- Flash Freeze: Place the entire baking sheet with the dough balls in the freezer for about 30-60 minutes, or until the dough balls are solid. This flash-freezing step is crucial as it prevents the dough balls from sticking together once they are transferred to a storage container.
- Transfer to Airtight Container: Once frozen solid, transfer the dough balls from the baking sheet into a freezer-safe, airtight container or a heavy-duty freezer bag. Squeeze out any excess air if using a bag to prevent freezer burn. Label the container with the date. Frozen Brookie dough can be stored in the freezer for up to 3 months, allowing you to enjoy fresh cookies for weeks to come.
- Baking from Frozen: When you’re ready to bake a fresh batch, there’s no need to thaw the dough! Simply place the frozen Brookie dough balls directly onto a prepared baking sheet. Bake them in a preheated oven as usual. You may need to add an extra 2-4 minutes to the specified baking time (typically 14-17 minutes total) since they are starting from a frozen state. Keep a close eye on them for those tell-tale golden edges and a set but slightly soft center.
More Irresistible Dessert Mash-Up Recipes:
Desserts
Coffee Cake Cookies
Desserts
Pumpkin Carrot Cake
Desserts
Brownie Cookie Bars
Desserts
Chocolate Chip Cupcake Recipe
Pin Recipe
Print Recipe
Brookies
Chelsea Lords
Get ready for the ultimate cookie mashup: Brookies! These delicious treats combine rich, fudgy brownies with classic chocolate chip cookies, and it’s a match made in heaven!
35 minutes
12 minutes
45 minutes
1 hour 32 minutes
45 cookies
Equipment
- Stand mixer
- Large sheet pan (15″ x 21″) lined with parchment paper or a silicone baking mat
Ingredients
For the Brownie Cookies
- 16 tablespoons unsalted butter (cubed, cold)
- 1-1/2 cups light brown sugar (firmly packed)
- 2 large eggs
- 2 teaspoons vanilla extract
- 1 teaspoon cornstarch
- 1 teaspoon baking soda
- 1 teaspoon salt
- 1/2 cup Dutch process cocoa powder (see note 1)
- 1 cup cake flour (see note 2)
- 1-1/2 cups all-purpose flour
- 1 cup mini chocolate chips
- 2 cups chocolate chips (standard size)
For the Chocolate-Chip Cookies
- 16 tablespoons unsalted butter (cubed, cold)
- 1 cup light brown sugar (lightly packed)
- 2/3 cup granulated sugar
- 2 large eggs
- 2 teaspoons vanilla extract
- 3 cups all-purpose flour
- 1 tablespoon cornstarch
- 1 teaspoon baking powder
- 1 teaspoon baking soda
- 1 teaspoon salt
- 1 cup mini chocolate chips
- 1 cup chocolate chips (standard size)
Instructions
Brownie Cookie Dough Preparation
- Cut cold butter into small cubes straight from the fridge. In a large bowl or stand mixer fitted with a whisk attachment, combine the cubed butter and light brown sugar. Beat for about 3–4 minutes until the mixture is ultra creamy and has a peanut butter-like consistency.
- Add the egg and vanilla extract to the creamy mixture. Beat until just combined. Next, add the cornstarch, baking soda, salt, and Dutch process cocoa powder. Beat until just incorporated, scraping down the sides of the bowl with a spatula as needed to ensure everything is well mixed. Finally, add the cake flour and all-purpose flour and beat again until just combined; be careful not to overbeat the mixture. Fold in the mini and regular-sized chocolate chips using a spatula. Cover the bowl tightly with plastic wrap and refrigerate for 45 minutes.
Chocolate Chip Cookie Dough Preparation
- Cut cold butter into small cubes. In a separate large bowl or stand mixer with a whisk attachment, combine the cubed butter, light brown sugar, and granulated sugar. Beat until the mixture is creamy and smooth, resembling peanut butter. Add the eggs and vanilla extract, mixing until fully incorporated.
- Stir in the cornstarch, baking powder, baking soda, and salt until well combined. Add the all-purpose flour and mix just until it is incorporated into the wet ingredients. Finally, fold in the mini and regular chocolate chips with a spatula. Cover the bowl tightly with plastic wrap and refrigerate for 25 minutes.
Baking the Brookies
- Preheat your oven to 375°F (190°C). Line a large baking sheet with a silicone baking mat or parchment paper for easy release and cleanup.
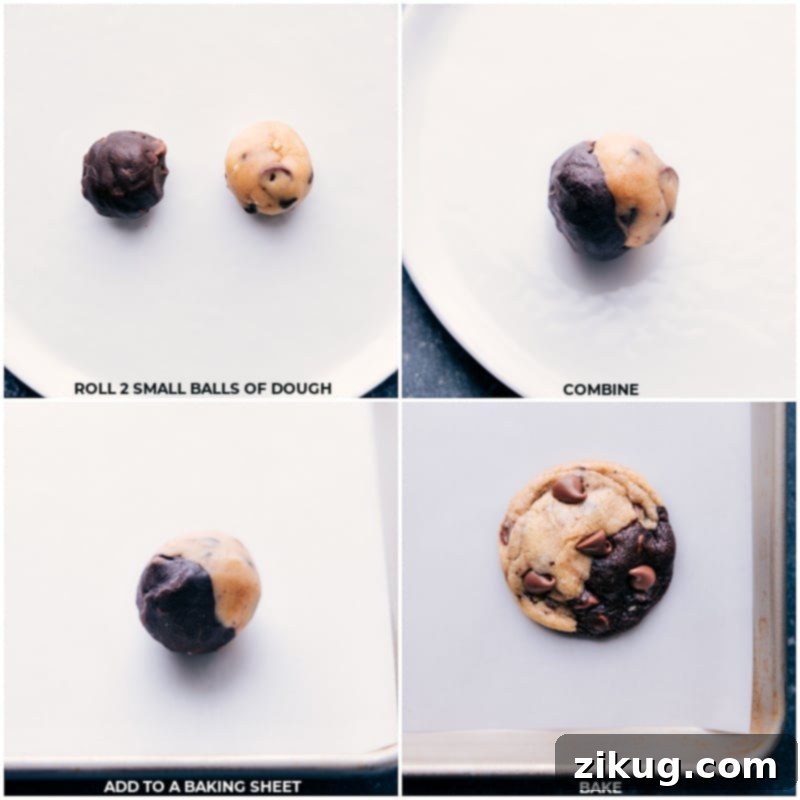
- If using a food scale, measure out 20-gram dough balls (approximately 1 tablespoon each) for both the brownie and chocolate chip doughs. Take one chocolate dough ball and one chocolate chip dough ball. Sandwich them together and gently roll into a cohesive ball, ensuring they hold together without completely blending their distinct colors. Place the formed cookie dough balls onto the prepared baking sheet, allowing at least 2 inches of space between each. Repeat this process until all the dough is used. Freeze the assembled cookie dough balls on the baking sheet for an additional 15–20 minutes. This chilling step is vital for preventing excessive spreading and maintaining their shape during baking.
- Arrange the chilled Brookie dough balls at least 2 inches apart on the prepared baking sheet. Bake for 12–13 minutes, or until the edges are just starting to turn golden brown and the centers appear set but still slightly soft. Remove from the oven and, if desired, immediately sprinkle with a pinch of flaky sea salt for enhanced flavor. For an extra aesthetic touch, gently press a few more chocolate chips into the tops of the warm cookies. Let the cookies cool on the baking sheet for at least 5 minutes to firm up before carefully transferring them to a wire cooling rack using a spatula to cool completely.
Recipe Notes
Note 1: Dutch Process Cocoa Powder
Using Dutch-process cocoa powder is highly recommended for these Brookies. It offers a more robust, intensely deep, and less acidic chocolate flavor, which contributes significantly to the rich, fudgy brownie cookie base. Natural (or unsweetened) cocoa powder may result in a different taste and texture due to its higher acidity and lighter color, so it’s best to stick with Dutch process for this recipe for the intended outcome.
Note 2: The Importance of Cake Flour
Cake flour plays a vital role in achieving the desired soft and chewy texture for these cookies. It has a lower protein content than all-purpose flour, which helps reduce gluten development and keeps the cookies wonderfully tender and delicate. This recipe thoughtfully combines cake flour with all-purpose flour to strike the perfect textural balance. You’ll typically find cake flour in the baking aisle of your grocery store. For the best outcome, avoid substituting with other flours or attempting “homemade” cake flour (e.g., all-purpose flour mixed with cornstarch), as it may not yield the same precise results in this particular recipe.
Storage: Store baked Brookies in an airtight container at room temperature for 2–3 days to maintain optimal freshness and texture. For longer storage, freeze the dough. Place assembled cookie dough balls on a sheet pan and freeze until solid. Then, transfer them to an airtight container or freezer-safe bag for up to 3 months. You can bake directly from frozen without thawing; simply add a few extra minutes (2-4 minutes) to the baking time as needed.
Nutrition Information
Nutrition information is automatically calculated and should be used as an approximation.
- Serving: 1 cookie
- Calories: 300 kcal
- Carbohydrates: 41g
- Protein: 3g
- Fat: 15g
- Saturated Fat: 9g
- Polyunsaturated Fat: 0.5g
- Monounsaturated Fat: 2g
- Trans Fat: 0.4g
- Cholesterol: 40mg
- Sodium: 29mg
- Potassium: 90mg
- Fiber: 1g
- Sugar: 27g
- Vitamin A: 305 IU
- Vitamin C: 0.05mg
- Calcium: 43mg
- Iron: 1mg