
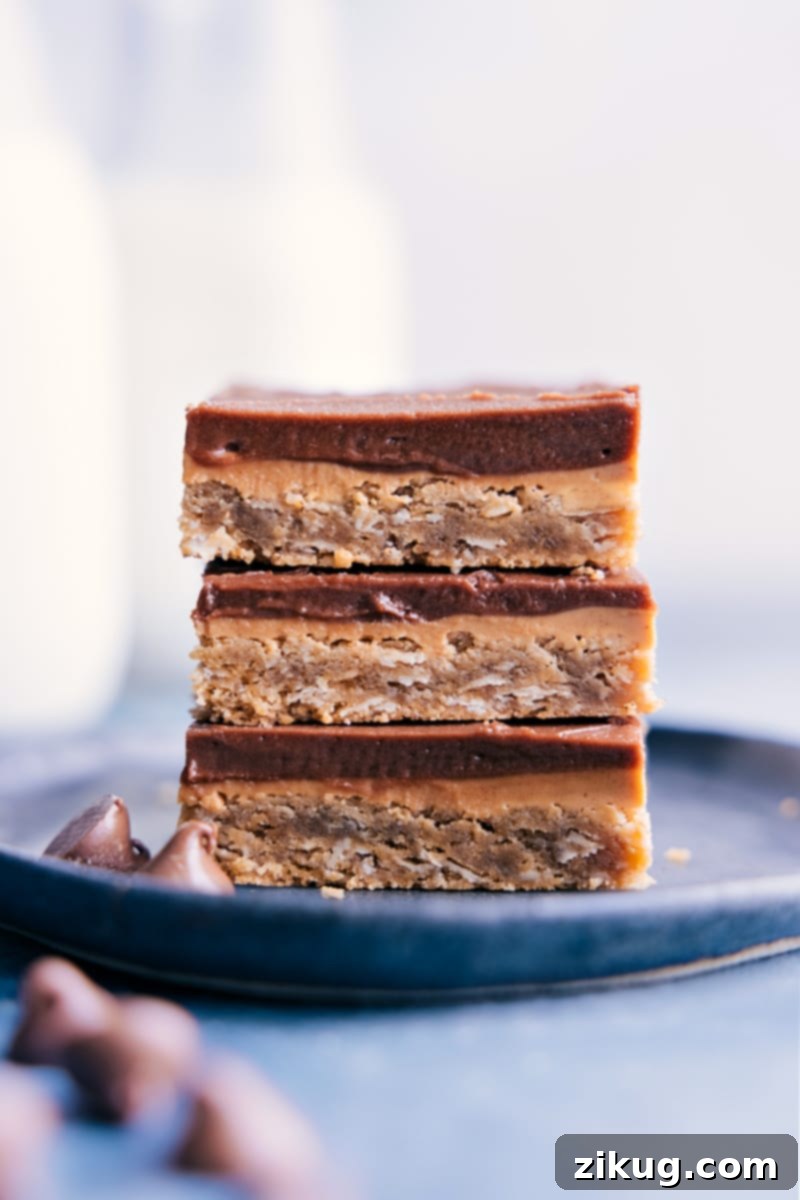
Nostalgic Lunch Lady Peanut Butter Bars: The Ultimate Chewy Chocolate & Peanut Butter Treat
Step back in time to your school cafeteria days with these incredible Lunch Lady Peanut Butter Bars. This recipe faithfully recreates the beloved classic, delivering a taste that’s even better than you remember. Imagine a wonderfully soft and irresistibly chewy peanut butter oatmeal cookie base, generously topped with a velvety smooth, melty peanut butter layer, and crowned with a decadent, rich chocolate fudge frosting. It’s a symphony of textures and flavors that will transport you straight back to childhood with every single bite.
For those who prefer a dessert with no oven required, be sure to explore our delightful no-bake peanut butter bars recipe. It’s a fantastic alternative when you’re short on time but craving that unmistakable peanut butter goodness.
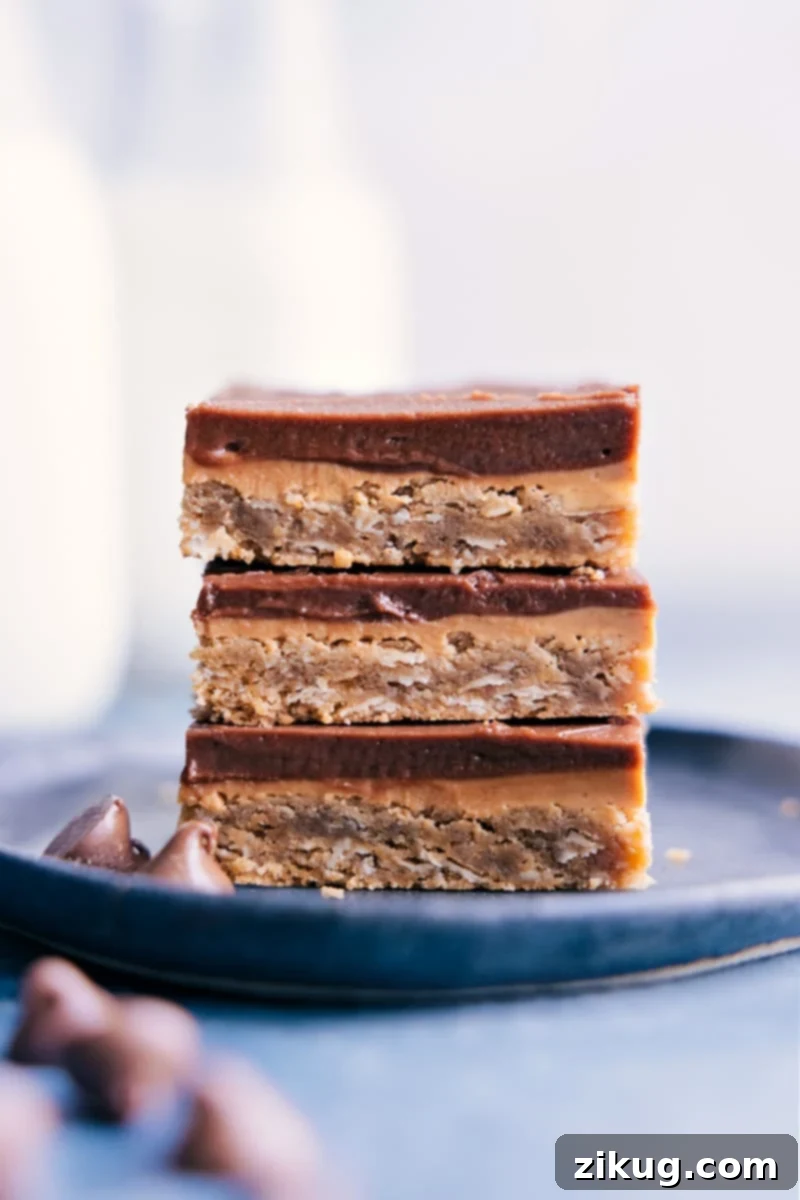

Author’s Note: A Trip Down Memory Lane with Every Bite!
Sweet and Nostalgic Peanut Butter Bars – A Family Favorite!
There’s something truly magical about food that evokes cherished memories, and for me, these peanut butter bars are exactly that. I vividly recall the old-school cafeteria peanut butter squares from my childhood. They always started with that distinctive soft peanut butter oatmeal cookie bar, lavishly topped with creamy peanut butter and finished with a rich, velvety chocolate fudge frosting. It was a lunchtime highlight, a treat I’d eagerly grab every chance I got, and a simple pleasure that made school days a little sweeter.
Sadly, due to growing peanut allergy concerns, these delightful treats are no longer a staple in school cafeterias. However, the legacy lives on in my kitchen! I’ve spent countless hours perfecting this recipe to ensure it captures every ounce of that nostalgic flavor and texture. Now, these Lunch Lady Peanut Butter Bars have become a beloved family favorite in my own home, and my absolute go-to dessert for feeding a crowd. The recipe yields a generous full sheet pan of bars, which means there’s always plenty to share – and perhaps a little extra for me to claim!
These bars aren’t just a dessert; they’re a celebration of simple joys, comfort, and shared experiences. Whether you’re introducing them to a new generation or savoring them yourself, prepare to be delighted by their irresistible charm and familiar taste. They truly are one for the books, bringing smiles and sweet memories with every square.
Choosing the Right Pan: The Secret to Perfect Bars
Achieving the signature texture and thickness of these Lunch Lady Peanut Butter Bars hinges significantly on using the correct bakeware. This recipe is quite particular about the pan size, and unfortunately, substituting with different sized pans will likely result in a less-than-perfect outcome. Using a pan that’s too small can lead to overly thick, undercooked centers, while a pan that’s too large might yield thin, dry, and brittle bars.
For optimal results, we highly recommend a 17 x 12.25-inch jelly roll pan. This specific dimension ensures the cookie base bakes evenly, achieving that ideal soft and chewy consistency without becoming too dense or too crispy. Investing in the right pan is crucial for replicating the authentic school cafeteria experience, making these bars truly shine.
Once you’ve secured the perfect pan, you’re officially ready to embark on the delicious journey of creating these iconic Lunch Lady Peanut Butter Bars! Each element, from the rich base to the creamy topping and smooth frosting, plays a vital role in the final masterpiece.
These incredible bars are comprised of three distinct and delicious elements, each contributing to their overall perfection:
- The irresistibly chewy and soft oatmeal cookie base
- A smooth and creamy peanut butter topping
- A decadent chocolate fudge buttercream frosting
Let’s delve into each component below to ensure your bars are nothing short of spectacular!
1. Crafting the Perfect Oatmeal Cookie Base
The foundation of these Lunch Lady Peanut Butter Bars is a soft, chewy, and incredibly flavorful oatmeal cookie base. This is where much of the nostalgic appeal comes from, and getting it right is key to the entire experience. Follow these essential tips to ensure a perfect base every single time, guaranteeing that coveted texture and rich taste:
- Avoid Overbaking at All Costs: The cookie base can quickly transition from perfectly baked to dry and crumbly. It’s important to remember that the bars will continue to firm up and set as they cool outside the oven. To maintain that signature soft and chewy texture, remove the pan from the oven just when the edges are lightly golden and the center appears mostly set but still slightly soft. An overbaked base will not only be dry but will also lose a significant amount of its rich peanut butter and oatmeal flavor.
- Choose the Right Peanut Butter: For the best texture and flavor in your cookie base, always opt for creamy peanut butter, not crunchy. The smooth consistency of creamy peanut butter integrates seamlessly into the dough, contributing to the bar’s overall softness. We enthusiastically recommend a brand you genuinely enjoy eating plain – if you love a spoonful of it, you’ll adore it in these bars. For consistent results, we highly recommend a stable, creamy peanut butter like Skippy® Creamy Peanut Butter (this is not a sponsored endorsement, just a genuine preference!). Avoid natural peanut butter that requires stirring, as its oil separation can negatively impact the dough’s consistency and final texture.
- Always Line Your Sheet Pan: To ensure the bars achieve their softest base and for effortless removal, lining your sheet pan is a non-negotiable step. A sheet of parchment paper is ideal for this. It prevents sticking, promotes even baking, and makes lifting the entire batch out of the pan and cutting them into neat squares significantly easier. This simple step saves time and ensures a beautifully presented dessert.
2. Creating the Creamy Peanut Butter Filling
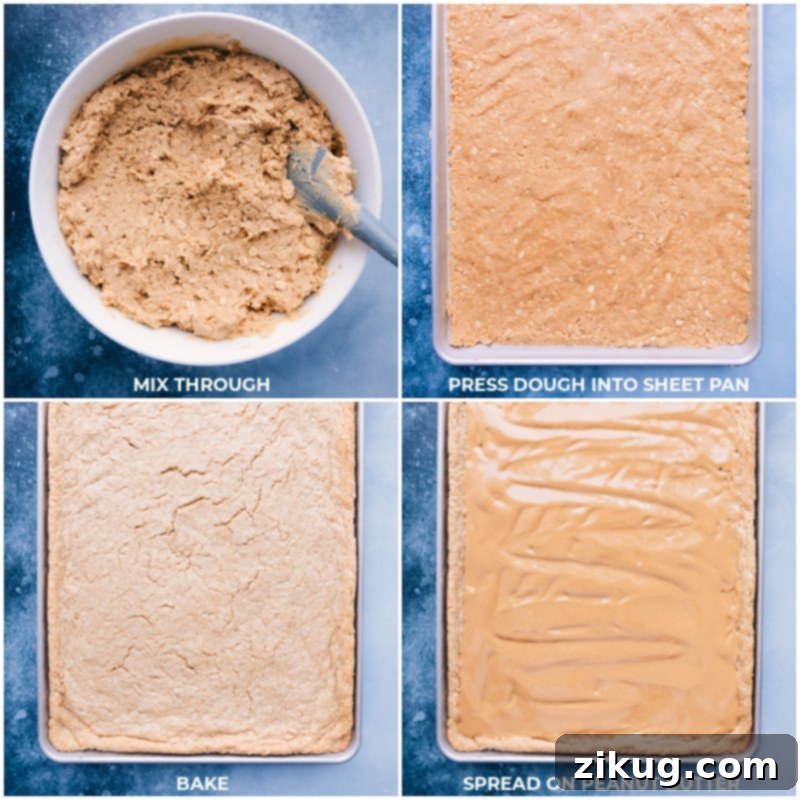
Once your delectable oatmeal cookie base has been baked to perfection and allowed to cool slightly, it’s time to add the luscious peanut butter filling. This creamy layer is what elevates these bars, intensifying that rich peanut butter flavor and adding another dimension of smooth texture. The secret to a perfectly even and effortless spread is to gently warm the peanut butter.
The best method for achieving a pourable, spreadable consistency is to warm your creamy peanut butter in the microwave. Heat it in short intervals (typically 30-60 seconds, depending on your microwave’s power), stirring well after each interval, until it becomes smooth and easily drizzled. Be careful not to overheat it, as it can become greasy.
Once thoroughly warmed and fluid, generously drizzle the peanut butter evenly over the still-warm cookie base. Then, using an offset spatula or a regular table knife, gently spread it from edge to edge, creating a uniform, smooth layer. This gentle technique prevents the base from tearing and ensures every bite of your bar has that wonderful layer of pure peanut butter bliss. Allow the bars to cool completely, even popping them into the fridge or freezer for a short period, to ensure the peanut butter layer sets firmly before moving on to the final step.
3. The Decadent Chocolate Fudge Frosting
The grand finale for our Lunch Lady Peanut Butter Bars is a luscious chocolate fudge buttercream frosting that brings all the elements together in perfect harmony. This frosting is not just a topping; it’s a rich, smooth, and sweet crown that completes the nostalgic experience. Here are some crucial tips for mastering your chocolate frosting:
- Choosing Your Cocoa Powder: The type of cocoa powder you use will significantly influence the frosting’s flavor and color. For a classic, slightly lighter chocolate flavor with a hint of red undertones, opt for natural cocoa powder. If you prefer a darker, richer, and slightly more bitter, intense chocolate flavor – reminiscent of deep, dark fudge – then Dutch-processed cocoa powder is your go-to. Both will create a delicious frosting, so choose based on your preference for chocolate intensity.
- Butter Consistency is Paramount: For a perfectly smooth, creamy, and spreadable frosting, the temperature and consistency of your butter are absolutely critical. If your butter is too cold and hard, it will be difficult to cream, leading to a lumpy, “seized” frosting. On the other hand, if the butter is too warm and greasy, your frosting will be too soft, runny, and won’t hold its structure or spread nicely.
Quick Tip: Perfect Softened Butter
To achieve the ideal consistency for softened butter, it should be soft enough that you can gently press your finger into it and leave a slight indent, but not so soft that it squishes, smears, or crushes the packaging. This typically means taking butter out of the refrigerator 30-60 minutes before you plan to use it, depending on your room temperature.
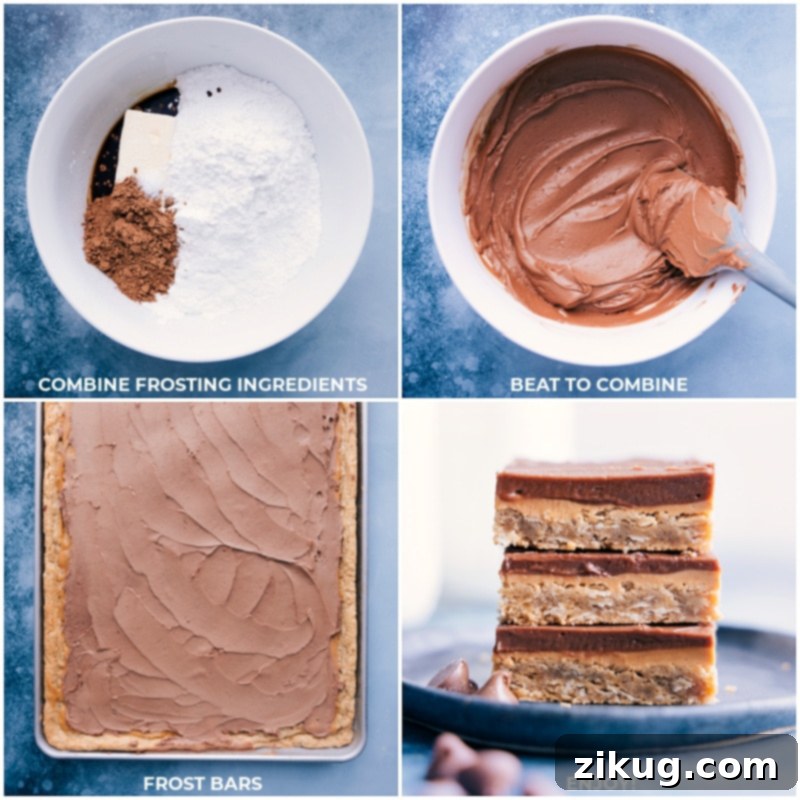
When preparing the frosting, combine all ingredients (softened butter, cocoa powder, powdered sugar, milk, vanilla, and salt) in a large mixing bowl. Beat on medium speed, gradually increasing to medium-high, until the mixture is light, fluffy, and completely smooth. Once the chocolate fudge frosting is ready, dollop generous scoops over the cooled, peanut butter-topped bars. Gently spread it out evenly from edge to edge with an offset spatula or the back of a spoon, creating a beautiful, uniform layer. Allow the frosting to set slightly, which can be expedited by a short chill in the refrigerator, before cutting and serving.
Expert Tips for Lunch Lady Peanut Butter Bars Success
Beyond the individual components, a few general tips can help ensure your Lunch Lady Peanut Butter Bars turn out perfectly every time, delivering that classic taste and texture you crave:
- Always Use Fresh Ingredients: The quality of your ingredients directly impacts the final taste and texture. Ensure your brown sugar is soft and moist (not hard and clumpy), and that your baking soda is active and not expired. Fresh, vibrant ingredients contribute significantly to softer, more flavorful cookie bars and a richer overall dessert.
- Stick with Old-Fashioned Oats: This recipe specifically calls for old-fashioned rolled oats, and it’s important not to substitute them with quick oats. Quick oats are pre-cooked and finely cut, meaning they absorb much more liquid than old-fashioned oats. Using quick oats will result in a drier, denser, and less flavorful cookie base, lacking that desirable chewy texture. Old-fashioned oats provide the perfect structure and hearty chewiness for these bars.
- Master the Art of Cutting: For clean, professional-looking squares, use a sharp knife and run it under hot water before each cut. Wipe the blade dry, then make a clean cut. Repeating this process for every slice prevents the frosting from sticking and ensures neat edges, making your bars as appealing to the eye as they are to the palate.
- Chill for Cleaner Layers: While tempting to devour immediately, allowing the bars to chill thoroughly after the peanut butter layer is spread, and again after the frosting is applied, will make a huge difference. Chilling helps both layers set firmly, resulting in much cleaner cuts and distinct, beautiful layers. You can even pop them in the freezer for 15-20 minutes for a quick set.
- Get Creative with Variations: If you’re a fan of experimenting, try transforming this concept into Lunch Lady Peanut Butter Brownies! Simply use your favorite chewy brownie recipe as the base, then top it with the luscious peanut butter filling and the classic chocolate buttercream frosting from this recipe. It’s a delightful twist on a classic!
Storage Guidelines
How To Store Lunch Lady Peanut Butter Bars
- For optimal freshness and softness, these irresistible bars should be stored in an airtight container at room temperature. While they are undoubtedly at their best within 2-3 days of baking, properly stored bars will maintain their delicious quality for approximately 5-7 days.
- These bars are also excellent candidates for freezing, allowing you to enjoy them much later. To freeze, wrap each individual bar tightly in plastic wrap to prevent freezer burn. Once wrapped, place the individual bars into a large freezer-safe plastic bag or an airtight container. They can be frozen for up to 3 months. When you’re ready to indulge, simply thaw the bars overnight in the refrigerator. This method ensures you always have a nostalgic treat on hand!
More Irresistible Chocolate and Peanut Butter Treats:
Desserts
Peanut Butter Chocolate Pie
Desserts
Peanut Butter Cookies
Snacks
Chocolate Peanut Butter Snack Mix
Desserts
Peanut Butter Brownie Bites
Print Recipe
Lunch Lady Peanut Butter Bars
Chelsea Lords
20
20
40
36
bars
Video Tutorial
Equipment
-
Jelly-roll pan 17 x 12.25-inch, with sides
-
Parchment paper optional, but highly recommended
-
Stand mixer or a reliable hand mixer
-
Large mixing bowls
-
Offset spatula or table knife
Ingredients
For the Oatmeal Cookie Base:
- 16 tablespoons unsalted butter (1 cup or 2 sticks, softened to room temperature)
- 3/4 cup granulated sugar
- 1-1/4 cup brown sugar (firmly packed)
- 2 large eggs (room temperature)
- 1-1/2 teaspoon vanilla extract
- 1 teaspoon baking soda
- 1 teaspoon salt
- 2 cups old-fashioned oats (see note 1 regarding oat types)
- 1 cup creamy peanut butter (see note 2 for recommendations)
- 2 cups all-purpose flour
For the Peanut Butter Filling and Chocolate Fudge Frosting:
- 1-1/2 cup creamy peanut butter (for the filling layer)
- 8 tablespoons unsalted butter (1/2 cup or 1 stick, softened for frosting)
- 1/4 cup whole milk (or cream for richer frosting)
- 1-1/2 teaspoons vanilla extract
- 1/8 teaspoon salt
- 1/4 cup cocoa powder (natural or Dutch-processed, see note on cocoa types)
- 3 cups powdered sugar (confectioners’ sugar, sifted if clumpy)
Detailed Instructions
-
Step 1: Prepare the Pan and Preheat Oven. Begin by preheating your oven to 350°F (175°C). Prepare your 17×12.25-inch jelly roll pan by generously greasing it or, preferably, lining it with parchment paper, leaving an overhang on the sides for easy removal. This is crucial for preventing sticking and ensuring a clean lift. Set the prepared pan aside.
-
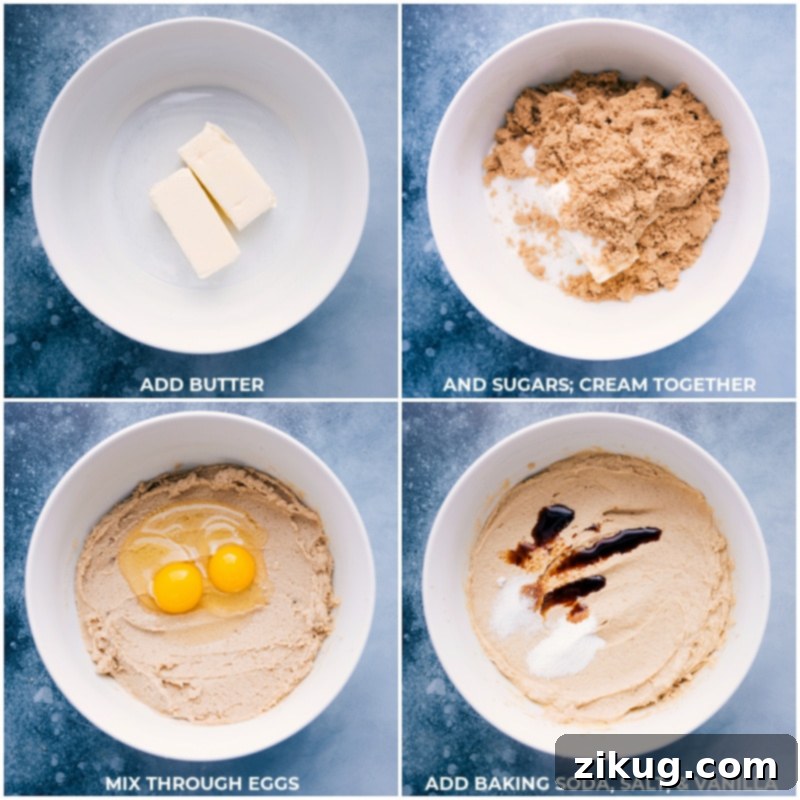
Step 2: Cream Wet Ingredients. In the bowl of a stand mixer fitted with the paddle attachment (or a large bowl with a hand mixer), cream together the softened unsalted butter, granulated sugar, and firmly packed brown sugar until the mixture is light, fluffy, and resembles the consistency of creamy peanut butter. Scrape down the sides of the bowl as needed. Beat in the large eggs one at a time, ensuring each is fully incorporated before adding the next. Stir in the vanilla extract.
-
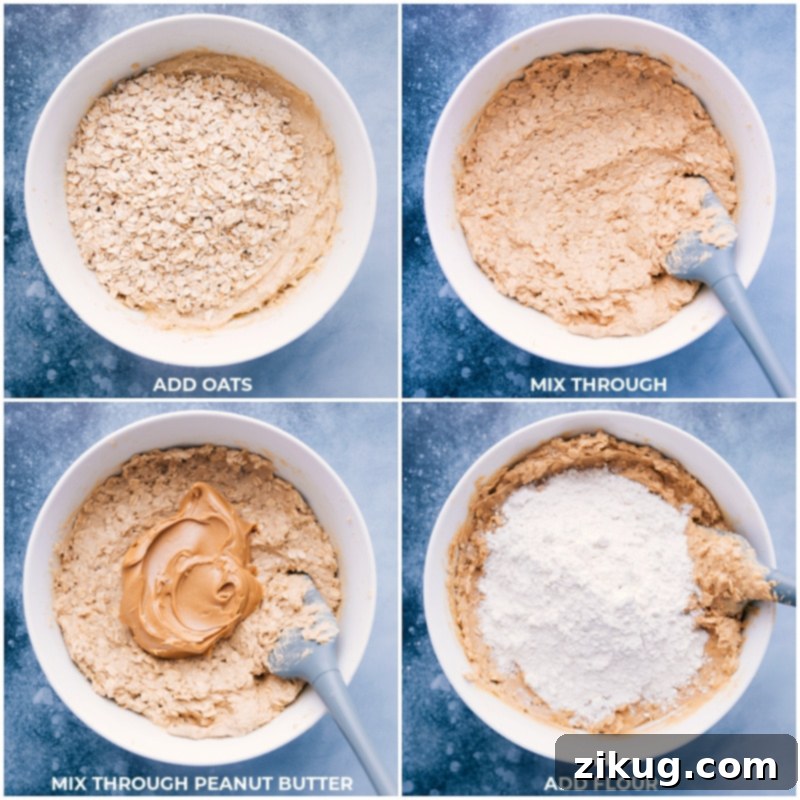
Step 3: Combine Dry Ingredients and Peanut Butter. To the creamed mixture, add the baking soda, salt, and old-fashioned oats. Mix on low speed until they are just incorporated. Next, add the 1 cup of creamy peanut butter and mix gently until it’s just blended into the dough. Finally, gradually add the all-purpose flour, mixing only until just incorporated and no dry streaks remain. Be careful not to overmix, as this can lead to a tough base.
-
Step 4: Bake the Cookie Base. Evenly spread the dough into the prepared sheet pan. You can use your hands (lightly floured if sticky) or an offset spatula to press it into a uniform layer. Bake for 15-17 minutes. The cookie base should be lightly golden at the edges, and the center should appear mostly set but still feel soft. It’s vital to not overbake to ensure a tender, chewy, and flavorful cookie base. Remove from the oven.
-
Step 5: Add the Peanut Butter Filling. Let the freshly baked cookie bars cool in the pan for about 5 minutes. While they cool, warm the remaining 1-1/2 cups of creamy peanut butter in the microwave for approximately 30-60 seconds, or until it reaches a smooth, pourable consistency. Drizzle the warmed peanut butter evenly over the slightly warm cookie base. Using an offset spatula or a table knife, gently spread it into an even, smooth layer from edge to edge. To help the peanut butter set, place the bars in the refrigerator or freezer for a brief period until it is firm to the touch.
-
Step 6: Prepare and Apply Chocolate Fudge Frosting. While the bars are chilling, prepare the chocolate fudge frosting. In a large bowl or the bowl of your stand mixer, combine the softened 8 tablespoons of unsalted butter, whole milk, vanilla extract, salt, cocoa powder, and powdered sugar. Beat on low speed until combined, then increase to medium-high and beat until the frosting is smooth, light, and fluffy. Dollop generous scoops of the prepared frosting over the peanut butter layer. Gently spread the frosting into an even layer using an offset spatula or knife. For the neatest cuts, chill the entire pan of frosted bars for at least 30 minutes, or until the frosting is set.
-
Step 7: Cut and Enjoy! To cut the bars cleanly, run a sharp knife under hot water, wipe it dry, and then make your cuts. Repeat for each slice to ensure crisp edges. Cut into 36 squares (6×6). These Lunch Lady Peanut Butter Bars are best served at room temperature. Enjoy this nostalgic and utterly delicious treat!
Recipe Notes
Note 2: Choosing Creamy Peanut Butter. For both the cookie base and the filling, creamy peanut butter is essential. Avoid crunchy varieties for texture consistency. We also strongly recommend a processed creamy peanut butter (like Skippy® Creamy Peanut Butter, not sponsored) over natural peanut butters that require stirring. Natural peanut butter tends to separate and can result in an oilier, less predictable outcome in baking.
Note 3: The Importance of Pan Size. As mentioned earlier, the specific pan size of 17 x 12.25-inch jelly roll pan is crucial for the success of this recipe. Using a different size will alter the thickness of the base and affect baking times and final texture significantly.
Note 4: Softened Butter Consistency for Frosting. The butter for your frosting should be properly softened: soft enough to leave a slight indent when pressed with a finger, but not melted or greasy. If it’s too cold, it won’t cream properly; if too warm, the frosting will be too thin.
Storage: To keep your Lunch Lady Peanut Butter Bars at their best, store them in an airtight container at room temperature. They remain soft and delicious for 2-3 days and will last up to 5-7 days. For longer storage, freeze individual bars wrapped tightly in plastic wrap within a freezer-safe container for up to 3 months. Thaw in the refrigerator overnight before serving.
Nutrition Information (Approximate)
Calories: 329kcal |
Carbohydrates: 39g |
Protein: 6.5g |
Fat: 17.3g |
Cholesterol: 30.7mg |
Sodium: 91.9mg |
Fiber: 1.9g |
Sugar: 22.7g
Nutrition information is automatically calculated and should only be used as an approximation. Exact values may vary based on specific ingredient brands and preparation methods.
Love this recipe? Leave a comment below!