
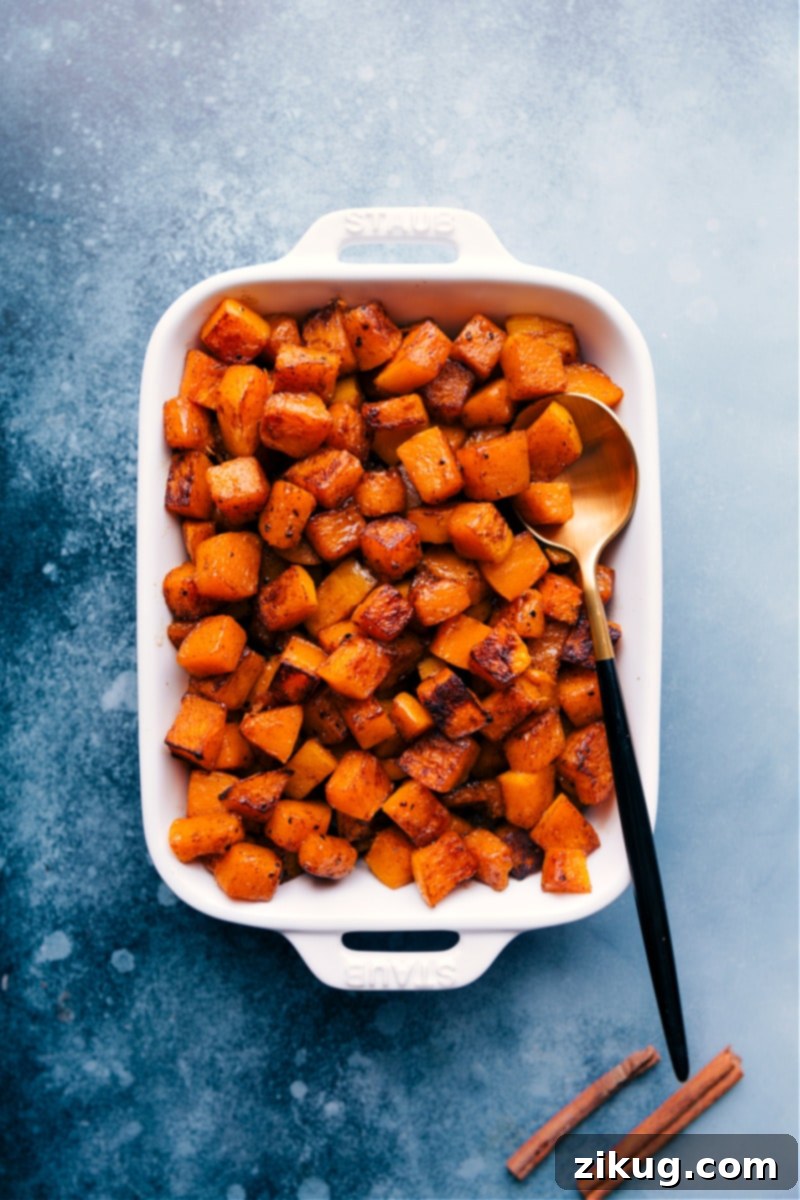
Roasted Butternut Squash: Three Irresistible Ways to Enjoy This Fall Favorite!
Transforming humble butternut squash into a culinary masterpiece is surprisingly simple. With beautifully caramelized exteriors and tender, sweet interiors, you’ll be captivated after just one bite! This comprehensive guide shares everything you need to know, from selecting the perfect squash to preparing it in three distinct, delectable ways, and even how to store and reheat it for future enjoyment.
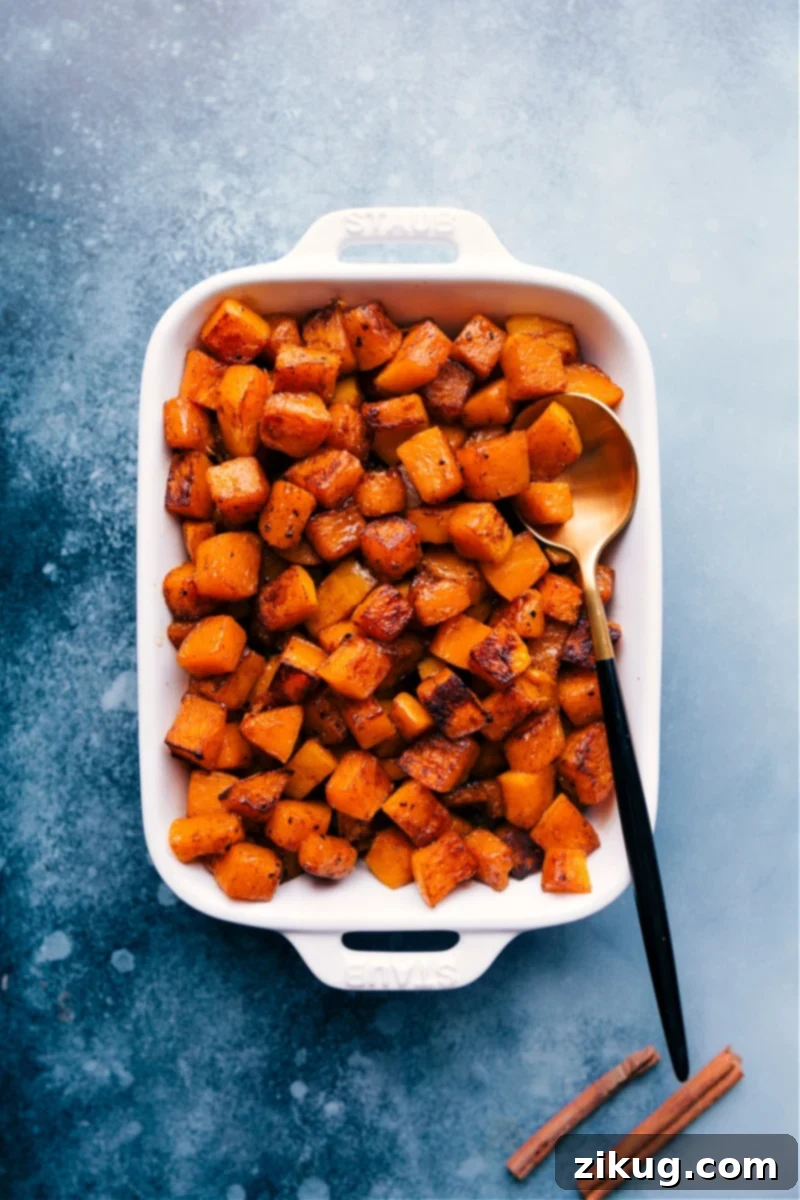

Author’s Note
Unlock the Full Potential of Butternut Squash with 3 Amazing Recipes!
The first time I roasted butternut squash, I was utterly enchanted. I couldn’t believe how a simple vegetable could transform into something so incredibly sweet and buttery, achieving a perfect caramelization in the oven. Since then, it has become a cherished staple at our family dinners, especially during the cooler months. After years of perfecting this versatile dish, I’m thrilled to share my three absolute favorite ways to roast it, ensuring there’s a flavor profile for every palate and occasion.
Whether you’re looking for a simple, clean accompaniment, a rich and savory side, or a delightfully sweet, dessert-like treat, butternut squash delivers. It’s not just delicious; it’s packed with nutrients, making it a healthy choice that’s also incredibly satisfying. Get ready to elevate your culinary skills and make this roasted butternut squash a star in your kitchen!
One Butternut Squash, Three Delicious Recipes!
Here are three fantastic ways to prepare and enjoy this delightful winter squash:
- Basic Seasoning: Ideal for mixing into other dishes, pureeing into soups, or simply savoring the natural, sweet flavor of the squash itself.
- Savory Herb Roast: Infused with aromatic herbs and spices, this version makes a hearty, flavorful side dish that complements any meal.
- Sweet Cinnamon-Maple Treat: A truly decadent preparation featuring cinnamon, maple syrup, and optional brown sugar, perfect as a cozy side or a unique dessert.
Choosing the Perfect Butternut Squash for Roasting
Selecting the right butternut squash is the first step to a delicious roasted dish. Here’s what to look for to ensure you get a ripe, flavorful squash:
- Color Consistency: Choose a squash with a uniform, matte beige or tan color. A darker beige often indicates a riper, sweeter squash. Avoid any green patches, which suggest the squash isn’t fully mature.
- Skin Quality: Inspect the skin for any cuts, blemishes, or soft spots. The skin should be hard and dull, not shiny, as a shiny skin might indicate it was picked too early.
- Weight and Sound: Pick up the squash and feel its weight; it should feel heavy for its size. Give it a tap – a hollow sound indicates ripeness.
- Firmness: Gently press on the skin. It should be firm all over without any soft or squishy areas.
A well-chosen butternut squash will offer the best texture and natural sweetness, making your roasting experience even more rewarding.
Storing Butternut Squash: Raw, Peeled, and Roasted
Proper storage is key to extending the life and freshness of your butternut squash. Here’s a detailed guide:
- Whole, Unpeeled Squash: Store whole, raw, unpeeled butternut squash in a cool, dark, and dry place, such as a pantry or basement. Avoid direct sunlight and high humidity. Stored correctly, it can last anywhere from 1 to 3 months, depending on its ripeness when purchased.
- Peeled and Chopped Squash: Once peeled and cut, butternut squash should be stored in an airtight container in the refrigerator. It will stay fresh for 3-5 days. For longer storage, consider freezing it (details below).
- Signs Your Squash Has Gone Bad (Raw): Discard the squash if it feels mushy or soft, has developed white mold spots, or emits an unpleasant odor.
- Signs Your Squash Has Gone Bad (After Roasting): Cooked butternut squash should be firm and retain its vibrant color. Discard if it smells off, appears slimy, or shows any signs of mold.
By following these storage tips, you can enjoy the deliciousness of butternut squash for longer.
Essential Tools for Easy Butternut Squash Preparation
Roasted butternut squash is incredibly easy to make, but tackling the raw squash can sometimes be a bit challenging. The right tools, however, make the process much simpler and significantly safer! Here are our recommended tools for efficient squash preparation:
- Sharp Vegetable Peeler: While you can peel squash with a knife, a good vegetable peeler is far easier, faster, and safer for removing the tough outer skin. It helps you get a smooth peel without losing too much flesh.
- Solid, Non-Slip Cutting Board: A sturdy and stable cutting board is crucial for safety. It prevents the squash from slipping as you apply pressure with your knife, reducing the risk of accidents.
- Sharp Chef’s Knife: A sharp knife is not only more efficient but also safer than a dull one. It glides through the dense squash with less force, preventing slips and uneven cuts. Invest in a good quality chef’s knife and keep it sharpened.
- Large Baking Sheet (15×21 inches recommended): The size of your baking sheet plays a vital role in achieving perfectly roasted squash. A large sheet allows you to spread the squash cubes in a single layer, preventing overcrowding. Overcrowding causes the squash to steam rather than roast, leading to a mushy texture instead of crisp, caramelized edges.
Having these tools on hand will transform your butternut squash prep from a chore into a breeze, ensuring consistently excellent results every time.
Mastering the Art of Roasting Butternut Squash: Expert Tips
Achieving perfectly roasted butternut squash with beautiful caramelization and a tender interior is all about a few key techniques. Follow these expert tips for consistently delicious results:
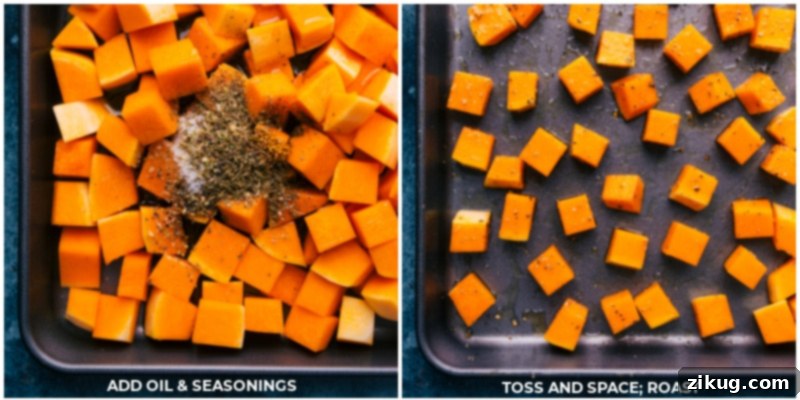
- Ensure Ample Space: This is arguably the most crucial tip! Always spread your butternut squash cubes in a single layer on a large sheet pan. Overcrowding the pan will cause the squash to steam rather than roast, resulting in a soft, watery texture instead of the desired crisp, caramelized edges. If necessary, use two smaller sheet pans or roast in batches.
- Toss Frequently for Even Browning: To ensure all sides of your squash get that beautiful golden-brown caramelization, gently toss the cubes 2-3 times during the roasting process. This helps them cook evenly and prevents any single side from burning.
- Taste and Adjust Seasoning: Before serving, always taste a roasted cube. Roasting can mellow flavors, so don’t hesitate to add a bit more salt and pepper if needed. A final sprinkle of flaky sea salt can also enhance the overall taste.
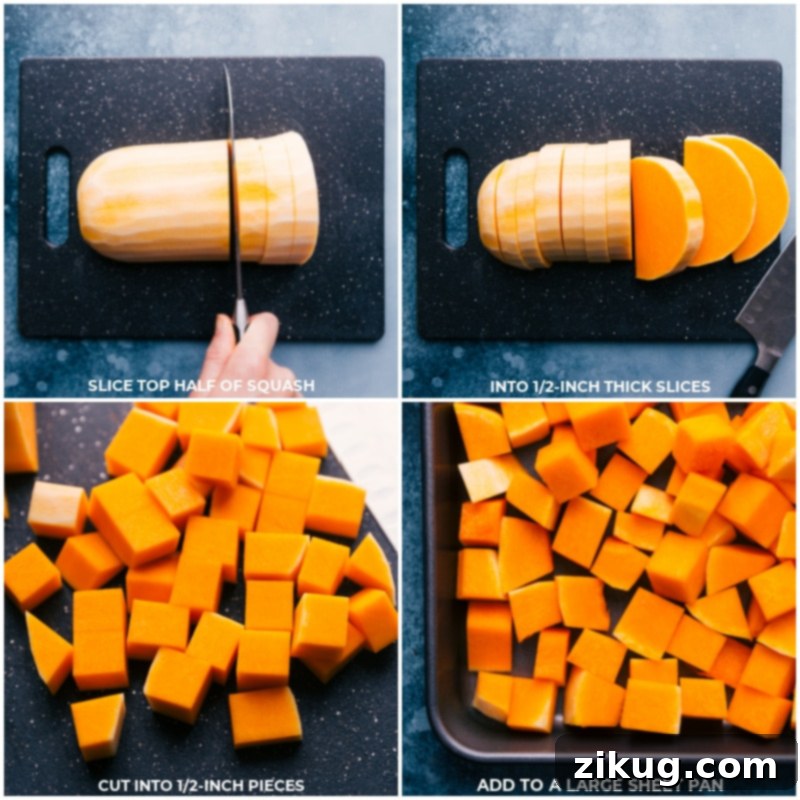
- Dice Evenly: Strive to cut your butternut squash into uniformly sized cubes, approximately 1/2-inch. Evenly sized pieces will roast at the same rate, preventing some pieces from being undercooked while others are overcooked or burnt. Precision in cutting leads to consistent texture throughout your dish.
- Don’t Skimp on Oil: Use enough olive oil (or melted coconut oil for sweet variations) to lightly coat all the squash pieces. This helps with browning and prevents sticking to the pan.
By incorporating these simple yet effective roasting tips, you’ll consistently achieve perfectly roasted butternut squash that’s flavorful, tender, and beautifully caramelized.
Storage Solutions for Butternut Squash
Comprehensive Storage Guide for Butternut Squash
- Whole, Raw Squash: Store in a cool, dark, and dry place (like a pantry) for 1-3 months. Ensure good air circulation and avoid refrigeration for whole squash, as it can reduce its shelf life.
- Cut, Raw Squash: Once cut, the squash should be stored in an airtight container in the refrigerator for 3-5 days. To freeze, spread raw cubes in a single layer on a parchment-lined baking sheet and freeze until solid. Then, transfer to a freezer-safe bag or container and freeze for up to 3 months.
- Cooked, Roasted Squash: Store leftover roasted squash in an airtight container in the refrigerator for 4-5 days. For freezing, follow the same method as cut raw squash: spread in a single layer on a parchment-lined sheet, freeze until solid, then transfer to a freezer bag or container. It can be frozen for up to 3 months.
- Reheating Cooked Squash: To reheat, gently warm in a skillet over low heat until heated through, microwave in short bursts, or spread on a baking sheet and reheat in a 350°F (175°C) oven for 10-15 minutes, or until warmed through and slightly crisp.
Explore More Delicious Roasted Vegetable Recipes:
Side Dishes
Roasted Broccoli Recipe
Vegetables
Brown Sugar Roasted Carrots
Side Dishes
Roasted Sweet Potatoes
Side Dishes
Roasted Brussels Sprouts
Print Recipe
Roasted Butternut Squash: Three Delicious Ways
Chelsea Lords
30
35
1
5
6
as a side
Equipment
-
Large sheet pan (15″ x 21″)
-
Sharp vegetable peeler
-
Solid cutting board
-
Sharp chef’s knife
Ingredients
- 8 cups (2 pounds) butternut squash, peeled and cut into 1/2-inch cubes
- 2 tablespoons olive oil
- 3/4 teaspoon salt
- 1/4 teaspoon pepper
- Fresh thyme (optional, for garnish)
- 8 cups (2 pounds) butternut squash, peeled and cut into 1/2-inch cubes
- 1 tablespoon maple syrup (see note 1)
- 2 tablespoons olive oil
- 3/4 teaspoon salt
- 1/4 teaspoon pepper
- 1/4 teaspoon dried thyme
- 1 teaspoon Italian seasoning
- Fresh thyme (optional, for garnish)
- 8 cups (2 pounds) butternut squash, peeled and cut into 1/2-inch cubes
- 1-1/2 tablespoons melted coconut oil
- 1-1/2 tablespoons maple syrup
- 3/4 teaspoon salt
- 3/4 teaspoon ground cinnamon
- 1/4 teaspoon pepper
- 1 tablespoon light brown sugar (optional, for extra sweetness)
Instructions
-
Prepare Your Oven and Pan: Preheat your oven to 425°F (220°C). Grab an extra-large sheet pan (see note 2) or two smaller ones, ensuring enough space for the squash to spread in a single layer. Line with parchment paper for easy cleanup.
-
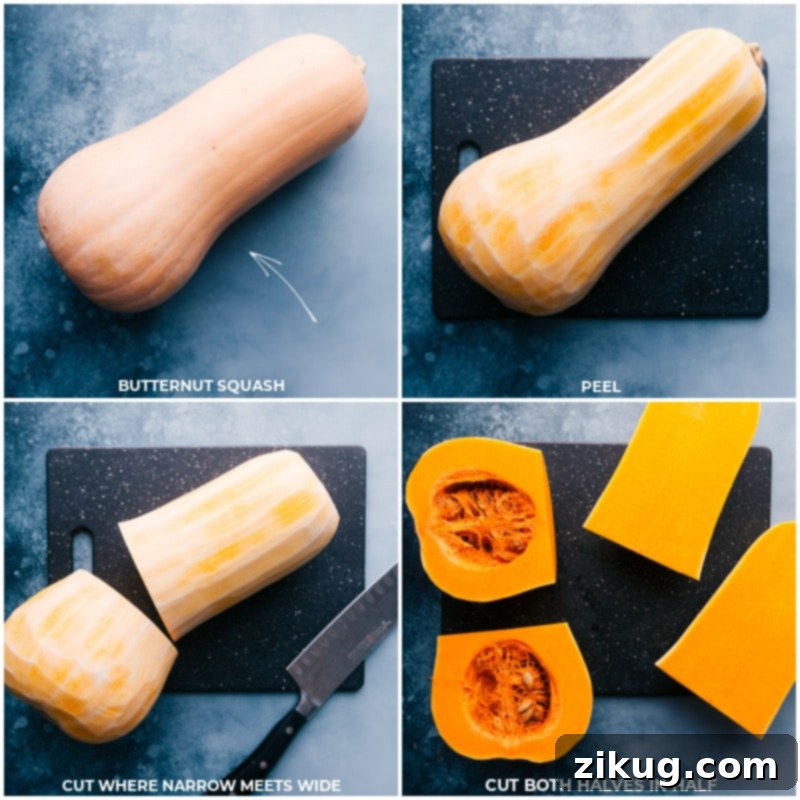
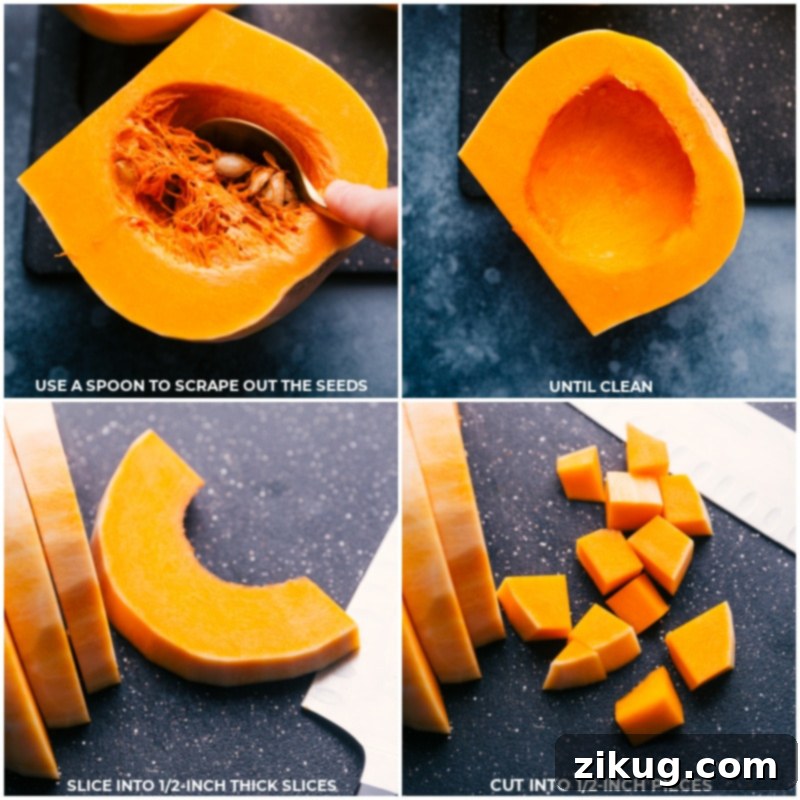
Peel and Prepare the Squash: Rinse the butternut squash under cold water. Using a sharp vegetable peeler, carefully peel the entire squash. Place the peeled squash on a sturdy cutting board. Trim off the top stem and about 1/4th-inch from the bottom. Cut the squash crosswise where the “neck” meets the wider base-end section. Cut each of these two sections in half again, lengthwise, to get four pieces. Use a spoon to scrape out all the seeds and stringy fibrous parts from the inside. (You can save the seeds and roast them later – check out the FAQs for instructions!)
-
Dice the Squash: Lay each of the four squash pieces cut-side down on your cutting board. Carefully cut each half into 1/2-inch thick slices. Then, cut these half-moon pieces into 1/2-inch cubes. Aim for pieces that are as even in size as possible to ensure uniform roasting, though they don’t need to be perfect squares.
-
Basic Roasted Butternut Squash: On the prepared large sheet pan, combine the squash cubes with olive oil, salt, and pepper. Use your hands to thoroughly toss and coat all the squash pieces evenly. Spread the seasoned squash in a single layer, ensuring there’s plenty of space between pieces to prevent steaming. Place the tray in the preheated oven and roast for 15 minutes. Remove the pan, gently flip the squash, and return to the oven for another 10 minutes. Repeat this process once more, roasting for an additional 10–15 minutes, or until the squash is crisp-tender (a fork should easily pierce through a piece) and beautifully caramelized. Cooking times may vary based on cube size and oven temperature, so check frequently towards the end. If desired, garnish with fresh thyme before serving.
-
Savory Herb Roasted Butternut Squash: On your large sheet pan, add the squash cubes, maple syrup, olive oil, salt, pepper, dried thyme, and Italian seasoning. Toss vigorously with your hands to ensure every cube is generously coated. Spread the seasoned squash in an even, single layer across the pan. Place in the oven and roast for 15 minutes. Remove, flip the squash, and return to the oven for another 10 minutes. Again, remove, flip, and roast for a final 10–15 minutes, or until the squash is tender and has developed a rich, golden caramelization. Adjust cooking time as needed, checking for tenderness. Finish with an optional sprinkle of fresh thyme.
-
Sweet Cinnamon-Maple Butternut Squash: On the large sheet pan, combine the squash cubes with melted coconut oil (measured after melting), maple syrup, salt, ground cinnamon, and pepper. Toss well to coat thoroughly, then spread in an even, single layer. Roast in the oven for 15 minutes. Remove, flip the squash, and bake for another 10 minutes. One last time, remove, flip, and continue roasting for 10–15 minutes more, or until the squash is tender and caramelized. Remember to adjust time based on your oven and squash size. Once out of the oven, taste a piece. If you prefer it a little sweeter (which often depends on the initial sweetness of your squash), quickly toss with the optional tablespoon of light brown sugar while still warm. Serve immediately and enjoy!
Recipe Notes
Note 2: The Importance of Pan Size – The more space your squash cubes have on the baking sheet, the better they will roast. When vegetables are overcrowded, they release moisture and steam rather than caramelize, leading to a soft, boiled-like texture. Using a large 15×21 inch sheet pan, like this one, ensures proper air circulation and superior roasting results. A larger pan also generally means quicker cooking times!
Nutrition Note: The provided nutrition information is calculated for the basic butternut squash recipe. Values may vary slightly for the savory and sweet variations depending on specific ingredients and quantities used.
Storage: Store cooked roasted squash in an airtight container in the refrigerator for 4-5 days. For longer preservation, roasted squash can be frozen. Spread cooked cubes in a single layer on a parchment-lined baking sheet and freeze until solid, then transfer to a freezer-safe container or bag. Freeze for up to 3 months. Reheat as directed in the “Storing Butternut Squash” section above.
Nutrition
Calories: 183kcal |
Carbohydrates: 37g |
Protein: 3g |
Fat: 5g |
Saturated Fat: 1g |
Polyunsaturated Fat: 1g |
Monounsaturated Fat: 3g |
Sodium: 303mg |
Potassium: 1112mg |
Fiber: 6g |
Sugar: 7g |
Vitamin A: 33533IU |
Vitamin C: 66mg |
Calcium: 152mg |
Iron: 2mg
Nutrition information is automatically calculated and should be used as an approximation.
Love this recipe? Leave a comment below!
Frequently Asked Questions About Roasted Butternut Squash
While the skin of roasted butternut squash is technically edible, it tends to be quite tough and fibrous, which can detract from the overall enjoyment. For the best texture and a more pleasant eating experience, we highly recommend peeling the squash before cutting and roasting. This ensures every bite is tender and delicious.
Cutting a butternut squash can seem daunting, but it’s simple with the right technique:
- Wash and Peel: Start by thoroughly washing the squash. Then, using a sharp vegetable peeler (or a sharp knife if you’re careful), peel the entire outer skin.
- Trim Ends: Carefully trim off about 1/4-inch from both the top stem and the bottom end of the squash.
- Section the Squash: Slice the squash crosswise at the point where the slender neck meets the wider, rounder base. This typically creates two main sections.
- Remove Seeds: Cut each of these two sections in half lengthwise. Use a spoon to scoop out all the seeds and the stringy pulp from the cavities.
- Dice into Cubes: Lay the cleaned pieces flat on your cutting board. Cut them into approximately 1/2-inch slices, and then dice these slices into 1/2-inch cubes. Aim for as much uniformity as possible for even roasting, but don’t stress about perfect squares.
Absolutely! Roasted butternut squash seeds make a fantastic, crunchy snack, similar to pumpkin seeds. Here’s how to prepare them:
- Clean and Dry: After scooping out the seeds, wash them thoroughly under cold water to remove any clinging squash pulp. Pat them very dry with a paper towel.
- Preheat and Prepare: Preheat your oven to 275°F (135°C) and line a baking sheet with parchment paper.
- Season: In a small bowl, toss about 1 cup of cleaned, dried seeds with 1 tablespoon of olive oil and a generous pinch of salt. You can also add other desired spices, such as cinnamon for a sweet treat or paprika and cumin for a savory crunch.
- Roast: Spread the seasoned seeds in a single layer on the prepared baking sheet. Bake for 15-20 minutes, or until they are golden brown and start to pop. Keep a close eye on them to prevent burning.
- Cool and Enjoy: Let them cool completely on the baking sheet before eating. They will crisp up further as they cool.