
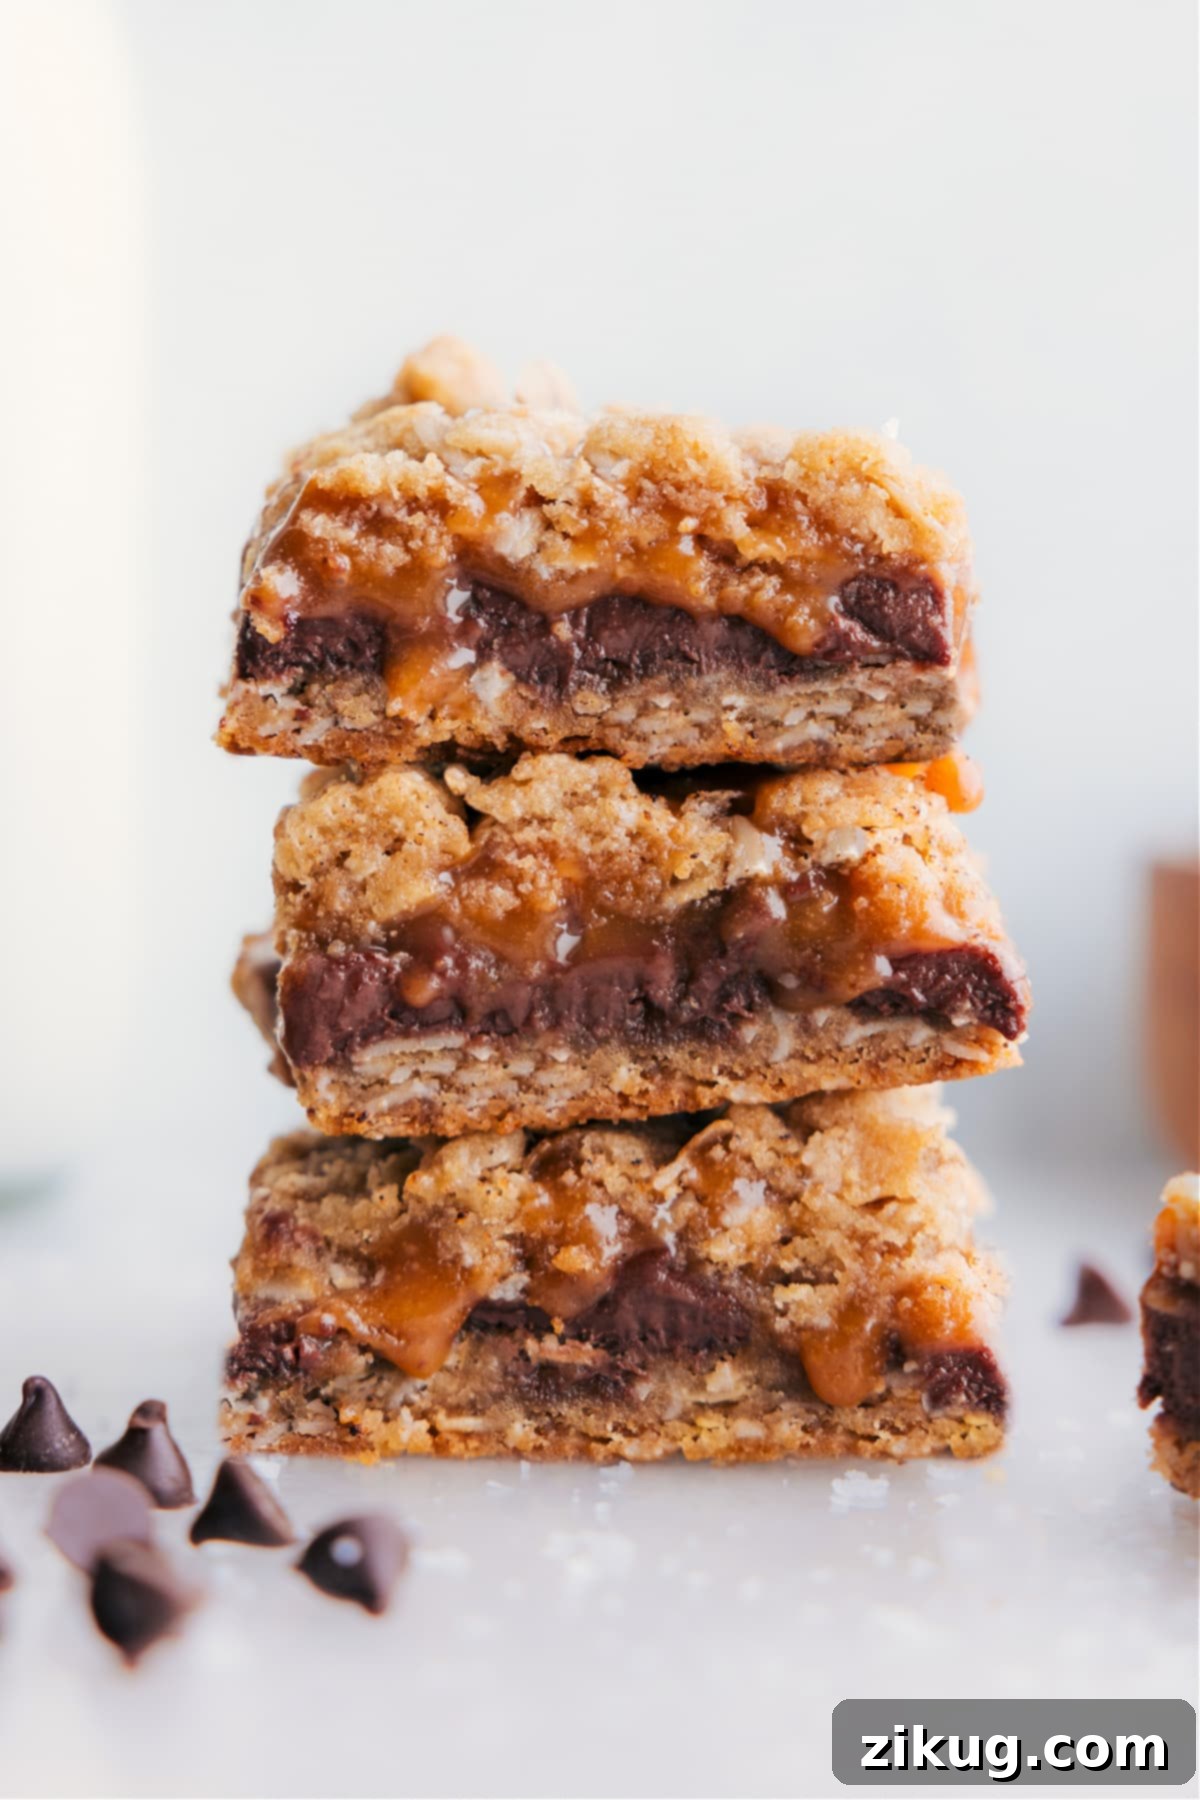
Carmelitas stand out as the ultimate dessert bar, a true masterpiece combining the luxurious indulgence of gooey caramel, the rich delight of melty chocolate, and the comforting chewiness of an oatmeal cookie. This iconic treat delivers a symphony of textures and flavors in every single bite, making it an undeniable favorite for anyone who loves rich, comforting sweets. If you’re searching for a dessert that’s both simple to make and irresistibly delicious, look no further than these homemade Carmelitas. They are the perfect blend of sweet, salty, and satisfying, promising a delightful experience every time.

Author’s Personal Journey
Why Carmelitas Are My Ultimate Dessert Obsession
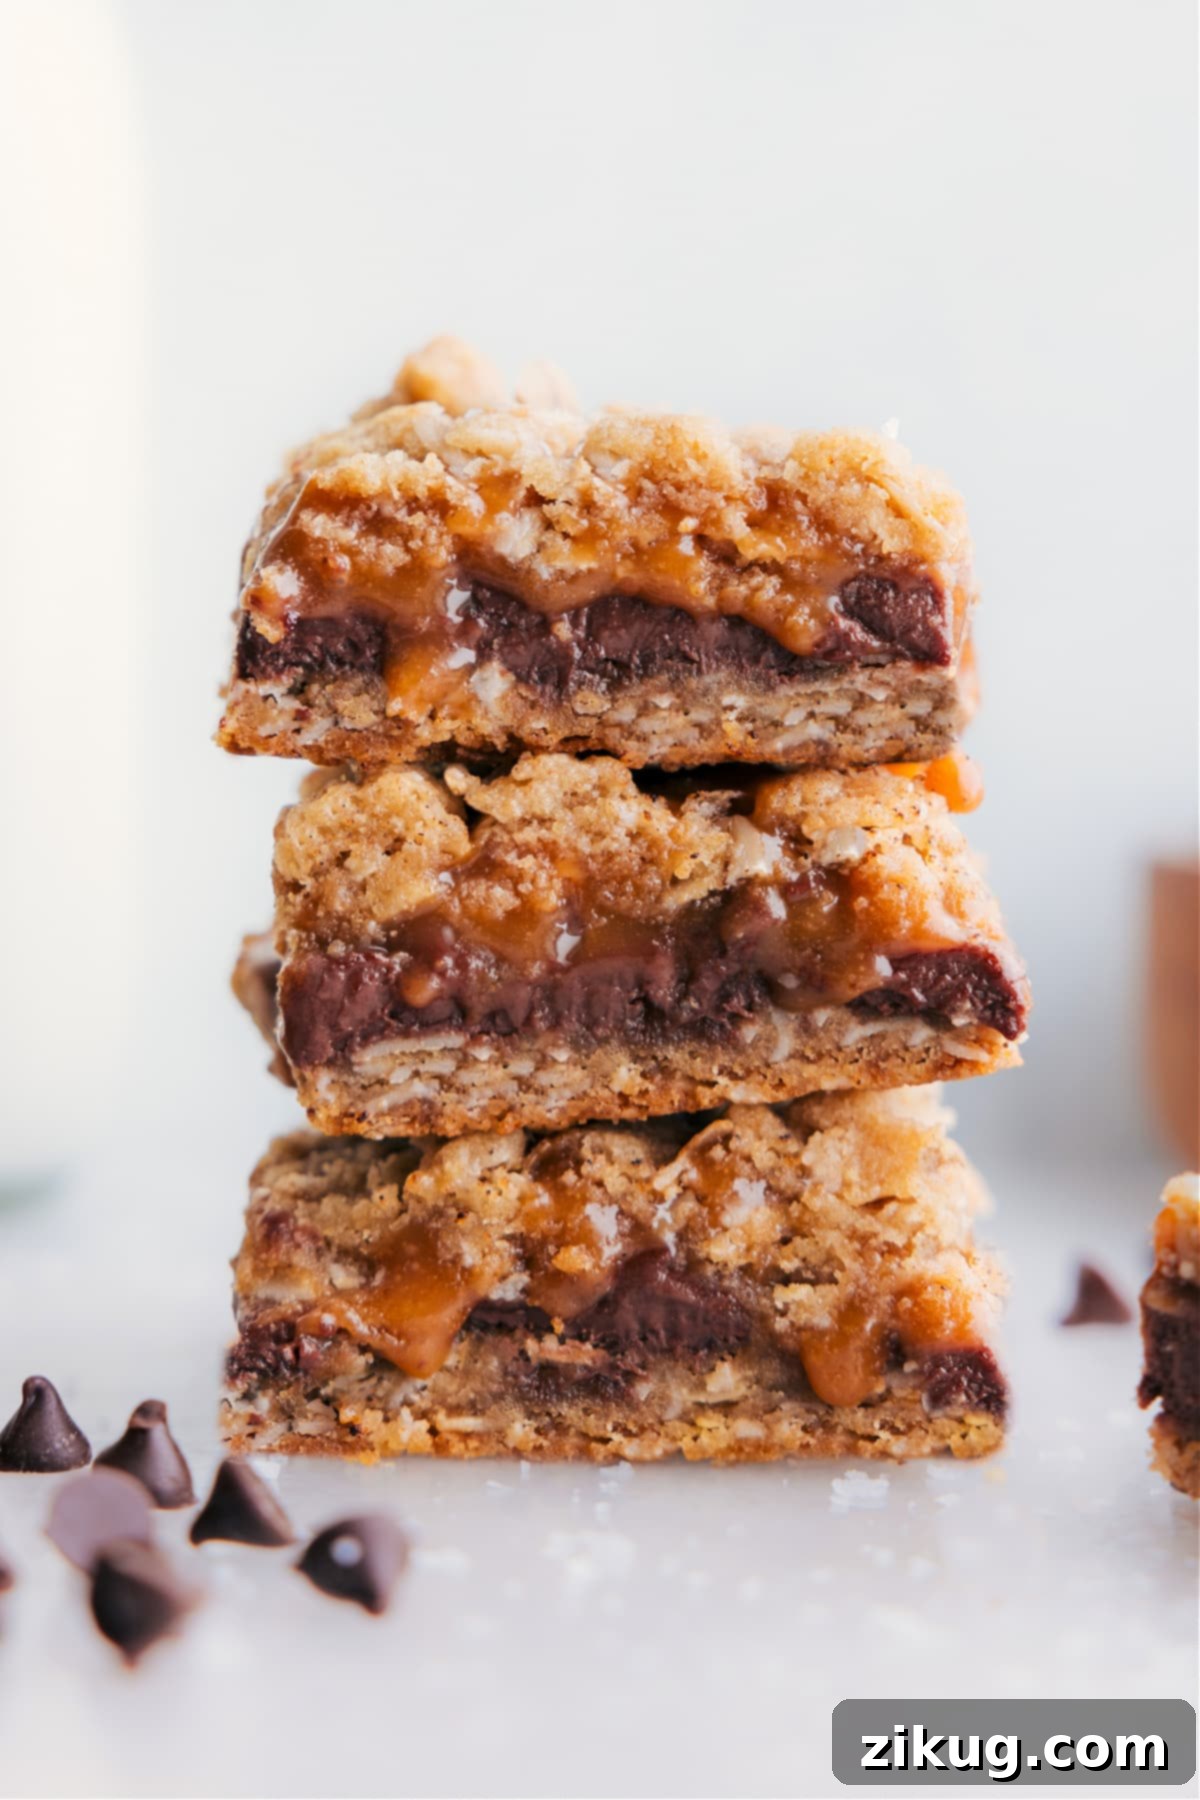
There are desserts, and then there are Carmelitas. For me, these extraordinary bars aren’t just a treat; they are a culinary obsession, a “ride-or-die” sweet that truly captures my heart. Imagine the best qualities of a classic oatmeal jam bar combined with the decadent simplicity of a cookie bar – that’s precisely what you get with Carmelitas. While I certainly appreciate a classic chocolate cake or a fudgy batch of brownies, if faced with the impossible task of choosing only one dessert for the rest of my life, Carmelitas would win, hands down, every single time.
Beyond their incredible taste, these caramel chocolate oatmeal bars hold a special place in my memory, intertwined with cherished moments spent with my mother. Every Christmas season, our kitchen would transform into a festive bakery as we lovingly prepared batches of Carmelitas, destined to become thoughtful neighbor gifts. This tradition not only deepened my love for baking but also cemented Carmelitas as a symbol of warmth, family, and holiday joy.
Over the years, I’ve dedicated myself to perfecting my mom’s original Carmelitas recipe, meticulously adjusting proportions and techniques to achieve what I consider dessert bar perfection. My goal was to create a robust, thick, and uniformly chewy oatmeal cookie crust, generous layers of rich, melting milk chocolate, and an impossibly gooey, luxurious caramel center. The careful balance ensures that each bite offers that ideal trifecta of textures and flavors. The waiting period as they cool is perhaps the hardest part, but entirely worth it – because once these homemade Carmelitas reach room temperature, you’re ready to experience a truly sublime dessert bar, a perfect blend of gooey caramel, rich chocolate, and a satisfying oatmeal cookie.
Essential Ingredients for Perfect Carmelitas: A Flavor Breakdown
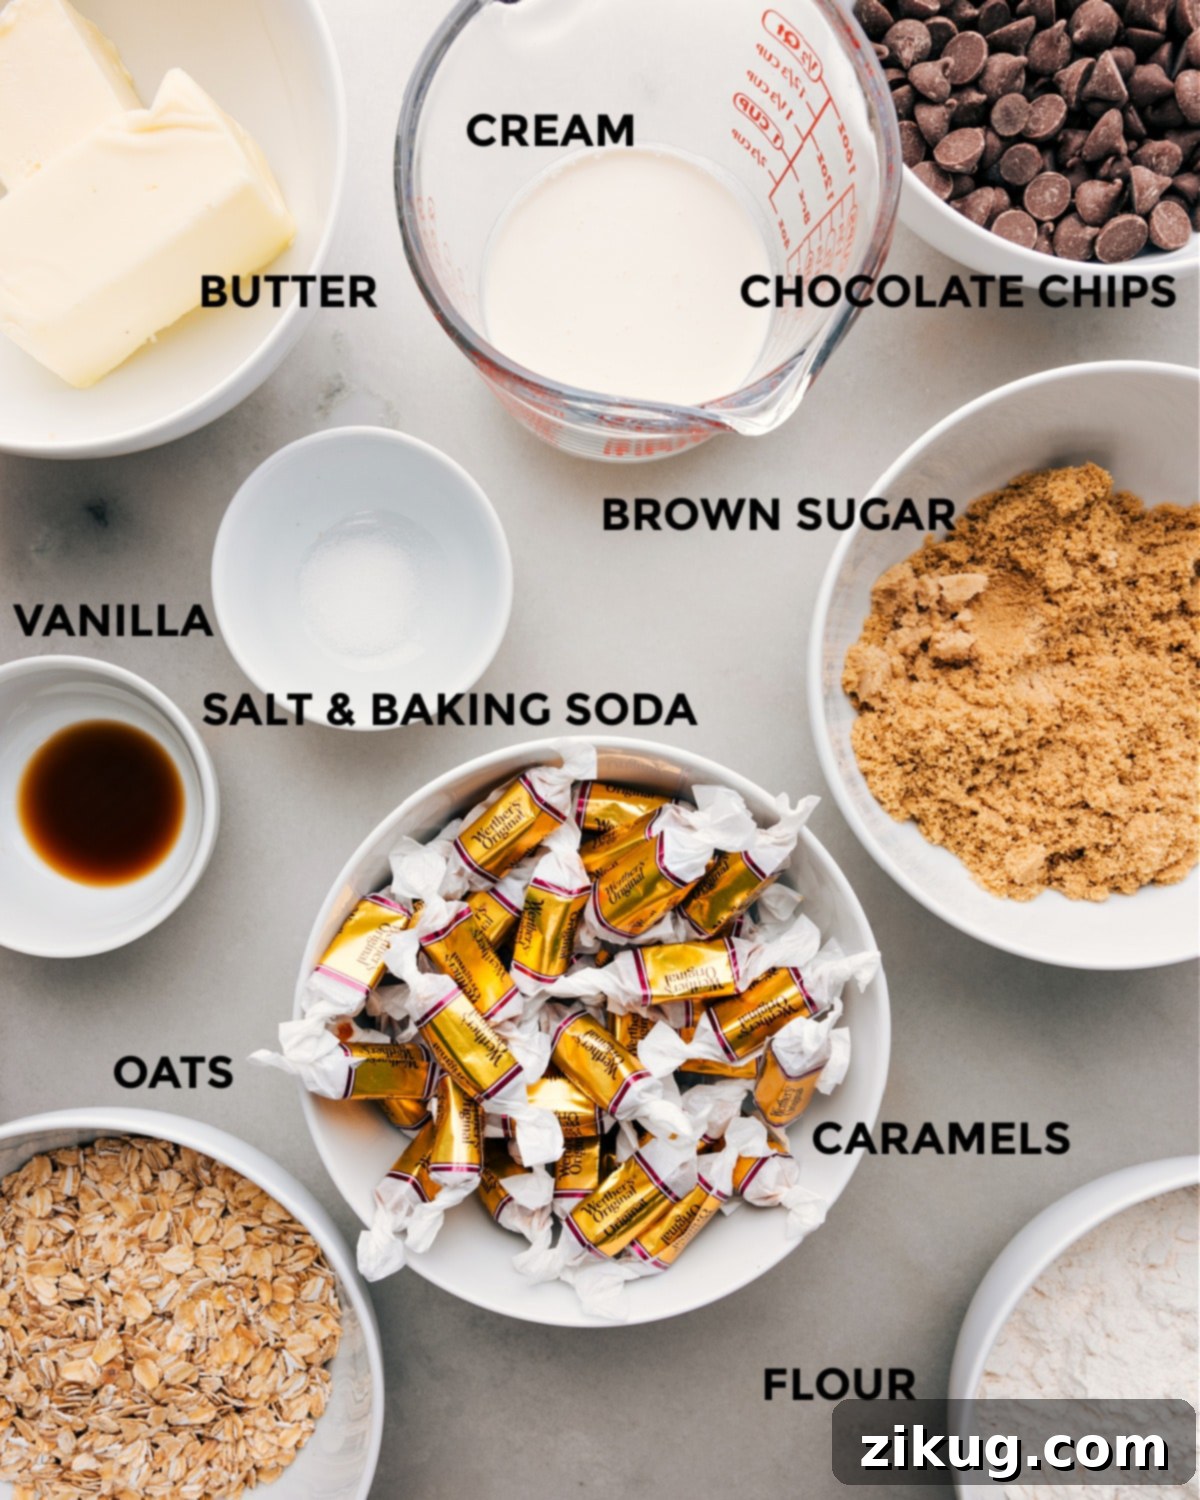
Crafting the best Carmelitas starts with understanding the role each ingredient plays. While the full recipe with precise measurements is detailed below, these ingredient notes offer crucial insights to ensure your caramel chocolate oatmeal bars turn out absolutely perfect, hitting all the right notes of sweetness, chewiness, and gooey satisfaction. Every component contributes to the signature taste and texture of these irresistible dessert bars, making them a true delight for any dessert lover.
- Unsalted Butter (Softened): The foundation of our chewy oatmeal cookie base. Using softened, room-temperature butter is non-negotiable for achieving a smooth, well-incorporated dough that mixes effortlessly. Cold butter will result in a lumpy texture, while melted butter can make the crust greasy. Softened butter contributes to the rich flavor and the tender, yet firm, structure of the crust, ensuring your Carmelitas have that perfect bite.
- Light Brown Sugar (Packed): This is where the magic of chewiness and depth of flavor comes from. Fresh, soft brown sugar is key for two main reasons: its molasses content adds a rich, slightly caramelized flavor that complements the oats and caramel perfectly, and it contributes significantly to the soft, chewy texture of the oatmeal cookie layers. Always make sure your brown sugar is packed firmly when measuring to ensure accurate quantities and the best results for your homemade Carmelitas.
- Old-Fashioned Rolled Oats: The star of the cookie base, old-fashioned or rolled oats provide that quintessential hearty, chewy texture that Carmelitas are known for. It’s crucial not to substitute these with quick-cooking oats or instant oats, as they are processed differently and will result in a mushier, less satisfying texture that won’t hold up as well under the gooey caramel and chocolate layers. Stick to rolled oats for that authentic, delightful chew.
- All-Purpose Flour: The binding agent that gives structure to our oatmeal cookie layers. When measuring flour, avoid packing it. Instead, spoon it into your measuring cup and level it off with the back of a knife or a straight edge to prevent adding too much, which can lead to dry and dense bars. Proper flour measurement ensures a tender and perfectly structured base for your caramel chocolate oatmeal bars.
- Baking Soda: This leavening agent helps create a slightly tender and airy texture in the oatmeal cookie layers, preventing them from becoming too dense and ensuring a pleasant bite. It contributes to the overall lightness that balances the richness of the caramel and chocolate.
- Pure Vanilla Extract & Fine Sea Salt: These two seemingly small additions play a monumental role in enhancing the overall flavor profile of your Carmelitas. High-quality vanilla extract adds a warm, aromatic depth that rounds out the sweetness, while a pinch of fine sea salt is essential. Salt doesn’t just make things salty; it magnificently balances and amplifies all the other flavors, making the caramel taste richer and the chocolate more intense. Don’t skip the salt – it truly brings these dessert bars to life!
- Milk Chocolate Chips: For me, the creamy, sweet profile of milk chocolate chips is the ideal partner for the rich caramel and oatmeal, creating that classic Carmelita taste. However, the beauty of this recipe lies in its flexibility. If you prefer a less sweet dessert or a bolder chocolate flavor, feel free to swap them out for semi-sweet chocolate chips or even dark chocolate chips. A mix of different chocolate chips can also add an exciting layer of complexity and a unique twist to your homemade Carmelitas.
Selecting the Perfect Caramel for Your Carmelitas
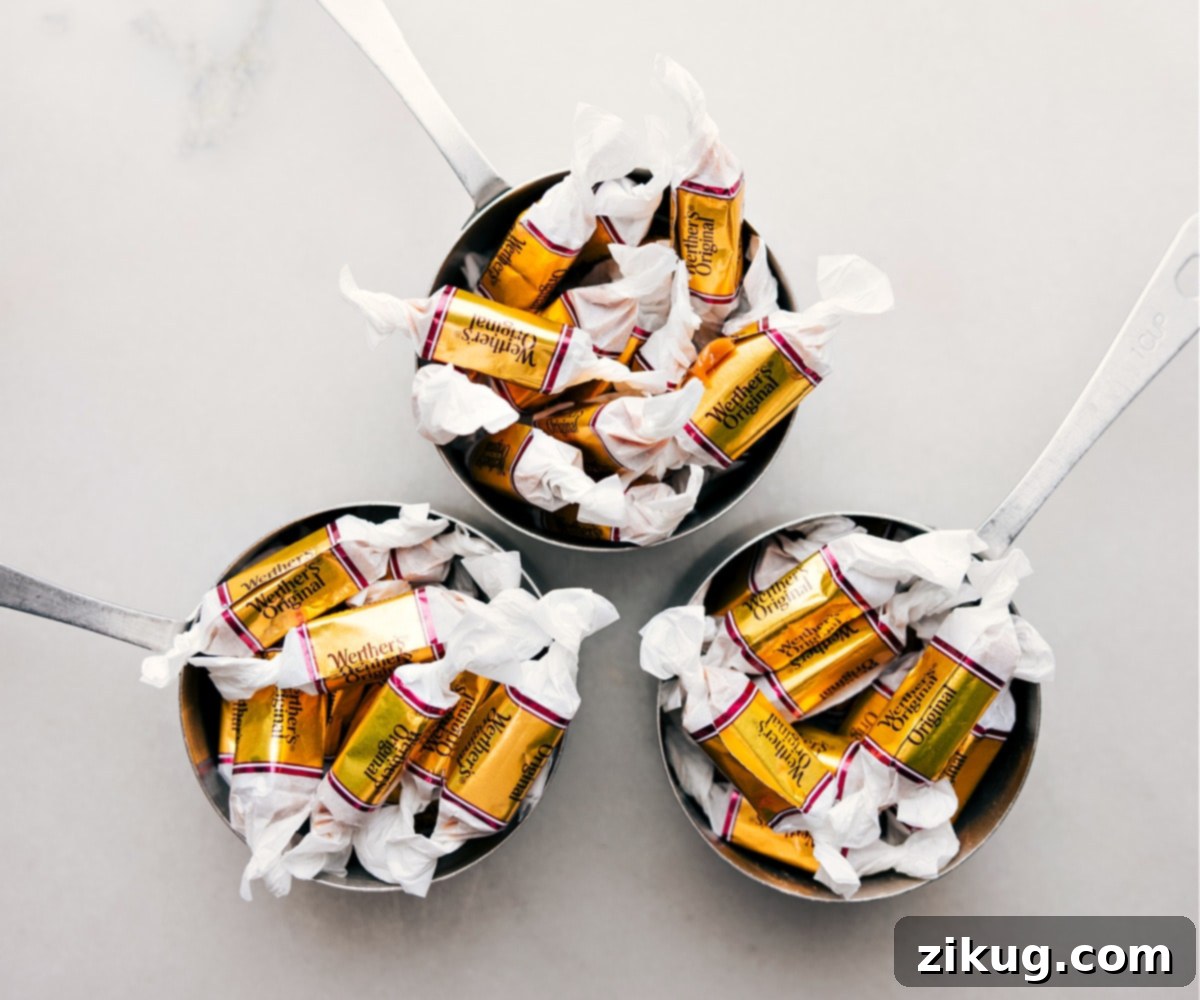
Undoubtedly, the caramel layer is the heart and soul of any outstanding Carmelita bar. Its gooey texture and rich, buttery flavor are what elevate these dessert bars from good to absolutely phenomenal. The quality and type of caramel you choose are paramount to achieving that dreamy, melt-in-your-mouth experience. For the best possible results, I strongly recommend using soft, individually wrapped, high-quality caramels to create that signature luscious layer.
My personal favorite, and a consistently reliable choice, are Werther’s Original Soft Caramels. Their creamy consistency and authentic caramel flavor are simply unmatched. While the process of unwrapping each individual caramel might seem a little tedious, I promise you, this small effort is entirely worth it for the superior flavor and the perfectly gooey, chewy texture it imparts to the finished bars. A useful tip to keep things tidy: as you unwrap each caramel, drop it directly into your saucepan. This prevents them from sticking to your countertop and makes the melting process smoother and more efficient.
It is critically important to skip using pre-made caramel sauces or syrups that come in a squeeze bottle. These types of caramel sauces are formulated differently; they typically contain more liquid and will not set properly, resulting in a runny caramel layer that won’t hold its shape or provide the desired chewy consistency in your Carmelitas. For that classic, irresistible gooey center, stick to soft, solid caramels melted with a touch of heavy cream. When melting the caramels with heavy cream over medium-low heat, stir continuously with a wooden spoon. This ensures even melting and prevents the caramel from scorching. The mixture should become beautifully smooth and pourable, but still thick enough to coat the back of a spoon. Allowing it to cool slightly before pouring over the chocolate chips helps it maintain its gooey integrity without melting the chips too rapidly, ensuring perfect caramel chocolate oatmeal bars.
Mastering Carmelitas: Expert Baking Tips for Success
Achieving perfectly gooey, chewy, and utterly delicious Carmelitas is simpler than you might think, especially when you follow these tried-and-true tips. These insights will guide you through the baking process, ensuring your caramel chocolate oatmeal bars come out beautifully every time, delivering that coveted blend of textures and flavors.
- Always Line with Parchment Paper: This is a golden rule for making any kind of dessert bar. Lining your baking pan with parchment paper, allowing for an overhang on the sides, creates “handles” that make it incredibly easy to lift the entire batch of cooled bars out of the pan. This prevents sticking, ensures clean removal, and makes the subsequent slicing process much smoother and less messy, allowing for perfectly presented homemade Carmelitas.
- Measure Flour Correctly – Don’t Pack It: Precision in baking is key, especially with flour. To avoid dry, crumbly Carmelitas, always spoon your all-purpose flour into the measuring cup and then level it off with the back of a knife or a straight edge. Never scoop directly from the bag, as this compacts the flour, adding too much to your recipe, which will absorb excess moisture and result in tough, dry bars. Accurate flour measurement is crucial for a tender oatmeal cookie base.
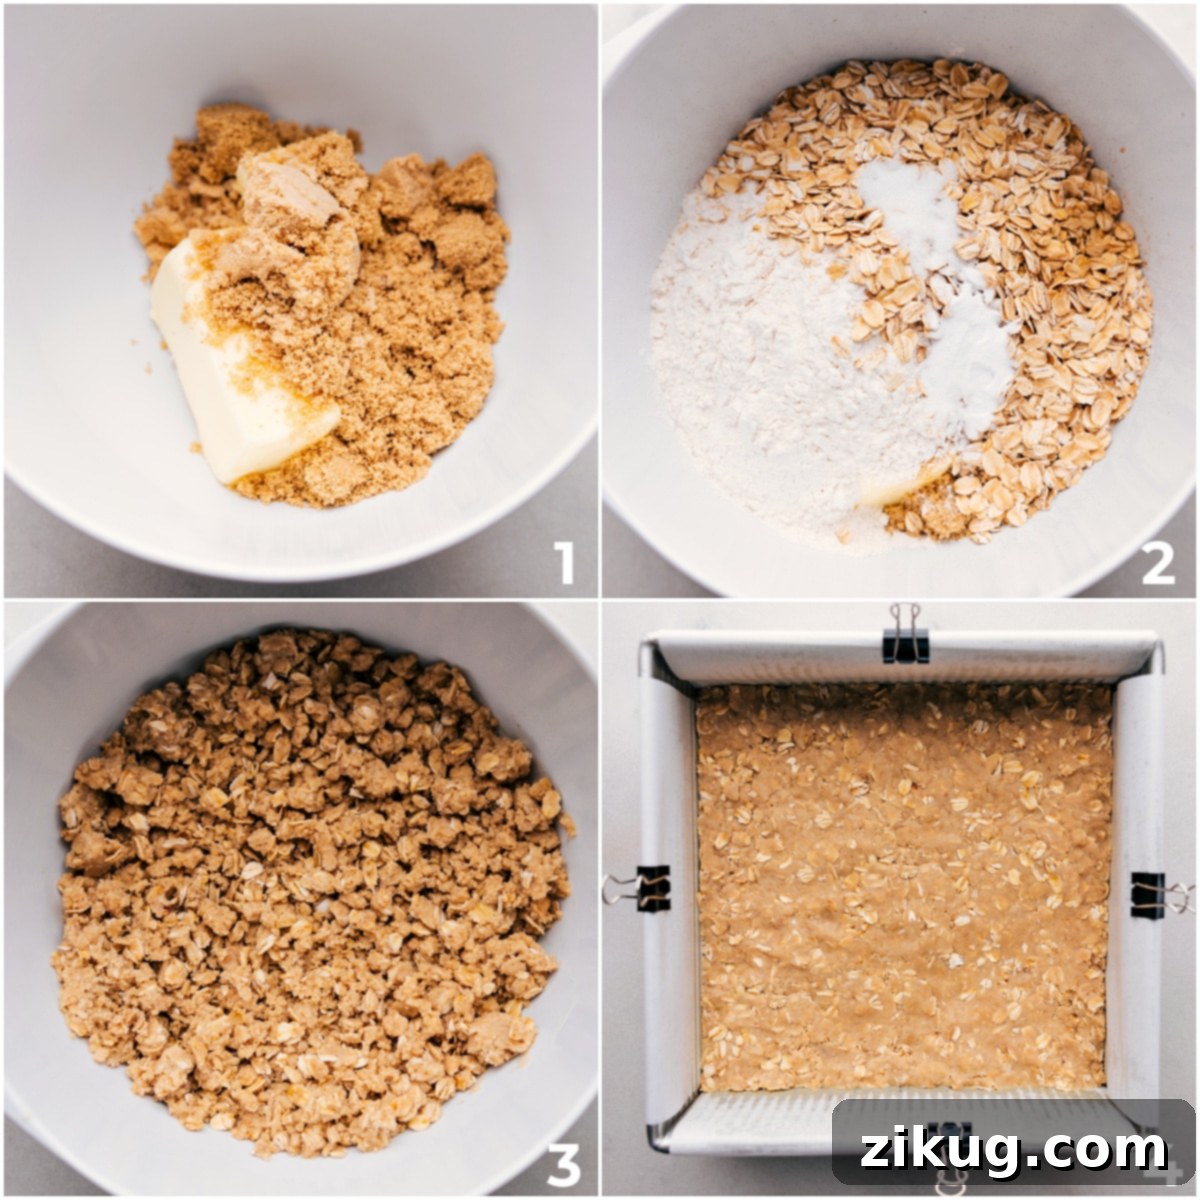
- Create an Even, Firm Crust Base: The bottom oatmeal cookie layer is the foundation of your Carmelitas. Divide your dough mixture in half and press the first half very firmly and evenly into the prepared baking pan. Use the back of a spoon or your fingers to ensure it’s tightly packed and uniformly spread from edge to edge. A well-pressed base prevents crumbling and provides a sturdy platform for the indulgent caramel and chocolate layers, guaranteeing a cohesive dessert bar.
- Avoid Overbaking at All Costs: Carmelitas are meant to be soft and chewy, not hard or dry. Keep a close eye on them during their second baking stage. The edges should be lightly golden brown, and the center should appear mostly set but still slightly soft to the touch. Remember, these bars will continue to firm up considerably as they cool. An underbaked Carmelita is far more desirable than an overbaked one, as it retains that sought-after gooey texture, making it an irresistible caramel chocolate oatmeal bar.
- Patience is a Virtue: Cool Completely Before Cutting: This might be the hardest step, but it’s absolutely critical for clean, perfectly shaped Carmelita bars. The caramel and chocolate layers need ample time to cool and set fully. If you attempt to cut them while warm, the caramel will be too runny, and the bars will fall apart, creating a delicious but messy pile. Allow them to cool at room temperature for at least 1-2 hours, or even chill them in the refrigerator for quicker setting and cleaner slices. This patience ensures your homemade Carmelitas hold their beautiful form.
Quick Tip: Choosing Your Baking Pan
The size of your baking pan directly impacts the thickness of your Carmelitas. For a more classic, slightly thinner dessert bar, a high-quality 9×9-inch square pan works wonderfully. However, if you crave those luxurious, extra-thick, and indulgent bars (like the ones beautifully showcased in these photographs), I highly recommend using an 8×8-inch baking pan. Regardless of size, choose a sturdy pan that conducts heat evenly for consistent baking results, ensuring your caramel chocolate oatmeal bars bake perfectly every time.
Creative Variations
Customize Your Carmelitas: Exciting Flavor Twists!
While the classic Carmelita recipe is absolute perfection, one of its greatest joys is how easily it adapts to your personal taste and creative whims. Don’t be afraid to experiment with these delicious variations to create a unique dessert bar experience that’s all your own. These ideas are perfect for tailoring your homemade Carmelitas to any preference or occasion.
- Experiment with Different Chocolate Chips: Beyond the recommended milk chocolate, the possibilities are endless! Try using a combination of white chocolate chips for a sweeter, creamier note, dark chocolate chips for a more intense cocoa flavor, or semi-sweet chocolate chips for a balanced sweetness. Butterscotch chips can also add a delightful, distinctively rich and buttery dimension that pairs beautifully with caramel and oats. You could even use a medley of two or three different types of chips for a truly dynamic flavor profile in your caramel chocolate oatmeal bars.
- Introduce a Nutty Crunch: For those who love an added textural element, stirring in chopped nuts is a fantastic idea. Toasted pecans or walnuts are classic choices that complement the caramel and oatmeal wonderfully, adding a satisfying crunch and a subtle earthy flavor that cuts through the sweetness. Make sure to chop them finely enough so they distribute evenly and don’t make the bars difficult to slice, ensuring every bite of your Carmelitas is perfect.
- Swirl in Peanut Butter or Cookie Butter: Elevate the indulgence by adding a luscious swirl of peanut butter or cookie butter. After pouring the melted caramel over the chocolate chips, warm a small amount of your chosen spread (peanut butter, almond butter, or Biscoff cookie butter) until it’s slightly runny. Drizzle it artfully over the caramel layer, then use a toothpick or a skewer to gently swirl it through, creating beautiful patterns and an extra layer of rich flavor. This adds another dimension of gooey deliciousness to your homemade Carmelitas.
- Craft a Salted Caramel Experience: If you’re a fan of the sophisticated sweet-and-salty combination, transforming your Carmelitas into salted caramel bars is incredibly simple and highly recommended. Just after you’ve poured the warm caramel layer over the chocolate chips, lightly sprinkle a small amount of flaky sea salt (like Maldon) over the top. The delicate crunch and burst of saltiness will brilliantly contrast and enhance the rich, sweet caramel and chocolate, creating an even more addictive treat. Remember, a little goes a long way to achieve the perfect balance.
- Spiced Oatmeal Base: For a cozy, aromatic twist, consider adding a pinch of ground cinnamon, nutmeg, or even a touch of pumpkin pie spice to your oatmeal cookie dough. These warm spices beautifully complement the oats and caramel, making the Carmelitas even more comforting, especially during the fall and winter months. This subtle addition adds another layer of warmth to these delightful dessert bars.
- Add a Fruit Element: While less traditional, finely diced dried cranberries or cherries can introduce a tart counterpoint to the sweetness. Add them to your chocolate chip layer for a burst of fruity flavor and color that makes your caramel chocolate oatmeal bars uniquely yours.
Storage Solutions
Maximizing Freshness: Storing and Freezing Your Carmelitas
Carmelitas are so delicious, you might wonder if there will ever be any leftovers! But should you find yourself with a few extra bars, proper storage is key to maintaining their delightful chewiness, gooey caramel, and rich flavor. Here’s how to ensure your homemade Carmelitas stay fresh and enjoyable for as long as possible, whether you plan to eat them tomorrow or next month:
- Critical Cooling Phase: As emphasized in the baking tips, allowing your Carmelitas to cool completely before cutting is paramount. This allows the caramel and chocolate layers to fully set, preventing a sticky mess and ensuring beautifully defined bars. While they are amazing at room temperature, many find them equally delightful, if not more so, when chilled – the caramel becomes firmer and the chewiness is enhanced. Completely cooled bars are much easier to handle and store.
- Room Temperature Storage for Short-Term Freshness: For immediate enjoyment within a few days, store your Carmelita bars at room temperature. Place them in an airtight container, or wrap them tightly with plastic wrap. This method will keep them fresh, soft, and deliciously gooey for 4 to 5 days. Ensure they are kept away from direct sunlight or excessive heat, which can cause the chocolate to melt and the caramel to become too soft. An airtight container prevents them from drying out and maintains their perfect texture.
- Freezing for Long-Term Indulgence: Carmelitas freeze exceptionally well, making them perfect for meal prepping desserts or saving some for a future craving. To freeze, first ensure the bars are completely cooled and sliced. Then, stack them in an airtight freezer-safe container, placing a small piece of parchment paper between each layer of bars. This prevents them from sticking together. Alternatively, you can arrange them in a single layer in a freezer bag, pressing out as much air as possible. They will maintain their quality and deliciousness in the freezer for up to 2 months, making these caramel chocolate oatmeal bars a convenient treat.
- Thawing Frozen Carmelitas: When you’re ready to enjoy a frozen Carmelita, simply remove the desired number of bars from the freezer and let them thaw at room temperature for about 30-60 minutes. You can also gently warm them in the microwave for a few seconds (about 10-15 seconds per bar) if you prefer a warm, ultra-gooey experience, but be careful not to overheat and melt the chocolate entirely. This thawing process brings them back to their original delicious state.
By following these simple storage guidelines, you can savor the incredible taste of your homemade Carmelitas for days or even weeks, ensuring that every bite is as perfect as the first. These easy dessert bars are truly a gift that keeps on giving!
Featured Comment
“These were absolutely incredible! I’ve been loving all your recipes this holiday season. These were so easy and my family went nuts for them!”
– Elizabeth
Explore More Irresistible Caramel Dessert Recipes
If you’ve fallen in love with the gooey goodness of Carmelitas, you’re in for a treat! Discover more delectable caramel-infused dessert recipes that are sure to satisfy your sweet cravings.
Desserts
Caramel Cookie Bars
Desserts
Caramel Stuffed Cookies
Desserts
Caramel Sauce Recipe
Desserts
Chocolate Caramel Cookies
Pin Recipe
Print Recipe
Carmelitas: The Ultimate Gooey Dessert Bar
Video Tutorial
Equipment
-
8 x 8-inch baking pan
-
Medium pot
-
Hand mixer
Ingredients
- 9 ounces soft caramels see note 1
- 1/3 cup heavy cream
- 12 tablespoons unsalted butter softened
- 3/4 cup light brown sugar packed
- 1-1/4 cups all-purpose flour
- 1 cup old-fashioned oats
- 1 teaspoon baking soda
- 1 teaspoon vanilla extract
- 1/2 teaspoon fine sea salt
- 1-1/4 cups milk chocolate chips see note 2
Instructions
-
Prepare the Oven and Pan: Preheat your oven to 350°F (175°C). Lightly grease an 8×8-inch baking pan, then line it with parchment paper, ensuring you leave a generous overhang on the sides. This overhang will serve as “handles” for easy removal of the baked bars later, simplifying the cutting process for your Carmelitas.
-
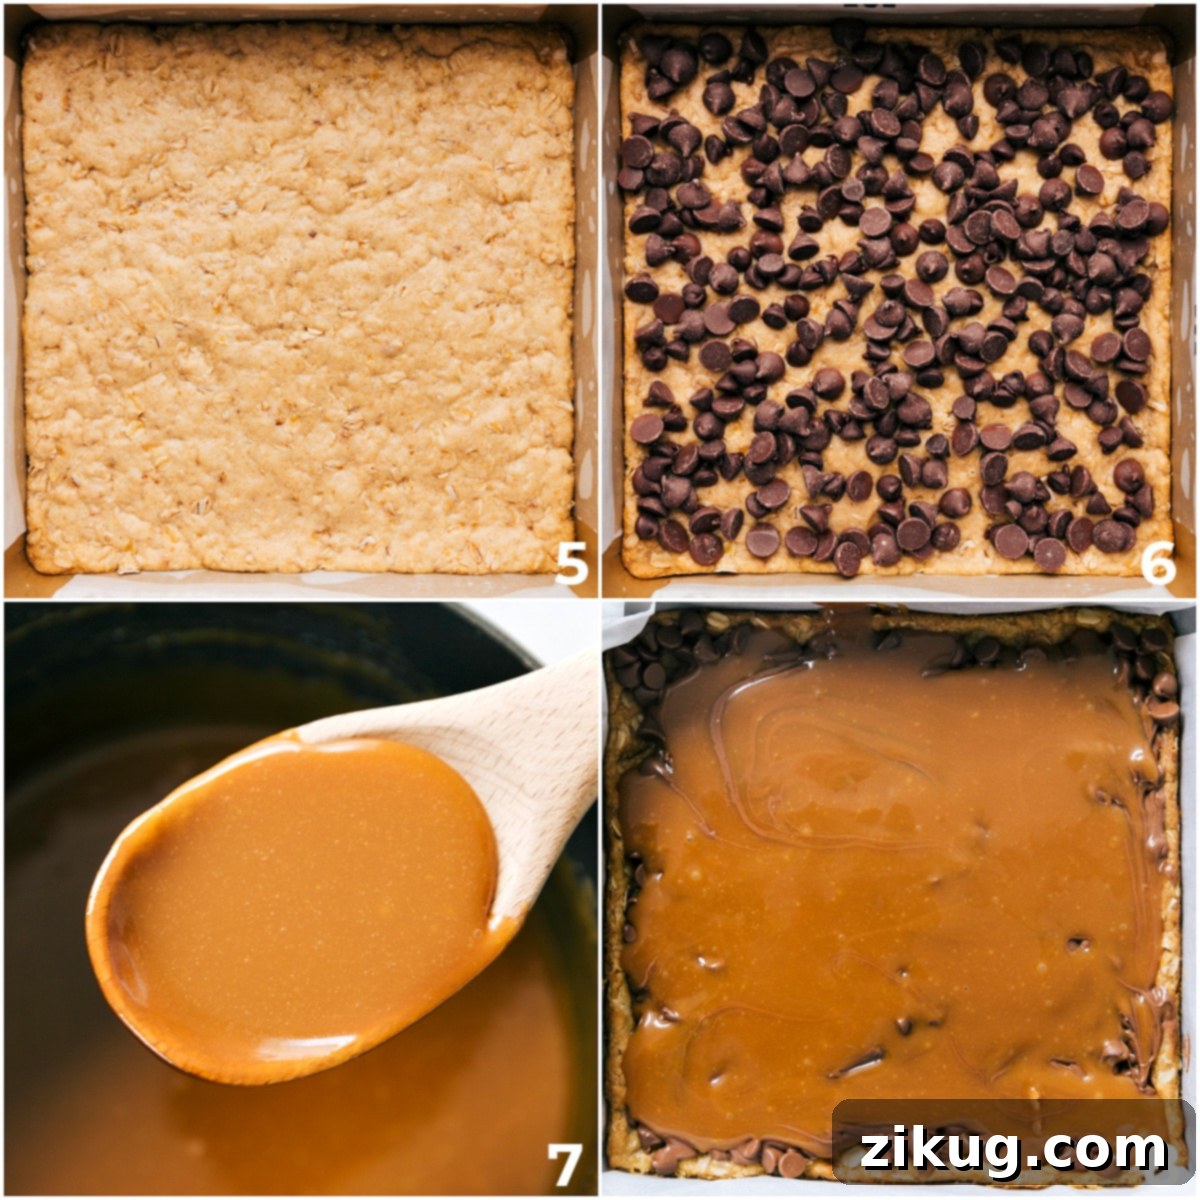
Melt the Caramel: In a medium pot set over medium-low heat, combine the unwrapped soft caramels and heavy cream. Stir continuously with a wooden spoon until the caramels are completely melted and the mixture is smooth and uniform. Once smooth, remove from heat and set aside to cool slightly and thicken. This creates the signature gooey caramel layer for your Carmelitas recipe.
-
Prepare the Oatmeal Cookie Dough: In a large mixing bowl, combine the softened unsalted butter, packed light brown sugar, all-purpose flour, old-fashioned oats, baking soda, vanilla extract, and salt. Use a hand mixer to beat these ingredients together until a thick, crumbly dough forms. Divide this mixture precisely in half. Press one half firmly and evenly into the bottom of the prepared baking pan to form the base crust of your caramel chocolate oatmeal bars.
-
First Bake and Layering: Bake the pressed oatmeal crust for 8 minutes. After 8 minutes, carefully remove the pan from the oven. Gently and evenly sprinkle all the milk chocolate chips over the warm, par-baked crust. Then, pour the slightly cooled, melted caramel mixture directly over the chocolate chips, gently spreading it with a spoon or spatula to form an even layer.
-
Second Bake: Take the remaining half of the oatmeal mixture and crumble it loosely and evenly over the caramel layer. Do not press this top layer down; simply sprinkle it. Return the pan to the oven and bake for an additional 13–18 minutes. The Carmelitas are done when the edges are lightly golden brown and the top appears set but still feels slightly soft in the center. Remember, they will continue to firm up as they cool.
-
Cool and Serve: Once baked, remove the Carmelitas from the oven and allow them to cool completely at room temperature for at least 1 hour (preferably longer, or even chill in the refrigerator). This crucial cooling period allows the caramel and chocolate layers to set properly, ensuring clean, perfect slices. After cooling, use the parchment paper overhang to lift the entire slab out of the pan, then cut into individual bars. These delightful easy dessert bars are best enjoyed within 2–4 days; store them in an airtight container to maintain freshness.
Recipe Notes for Perfect Carmelitas
Note 2: Customizing Your Chocolate Experience: While I adore the classic sweetness of milk chocolate chips in this Carmelitas recipe, feel free to personalize your bars. If you prefer a less intensely sweet flavor or have a fondness for darker chocolate notes, opting for semi-sweet or even dark chocolate chips will work wonderfully. You can also mix different types of chips for a unique flavor combination.
Storage Best Practices: To keep your Carmelitas fresh and delicious, store them in an airtight container at room temperature for 4–5 days. For longer preservation, these dessert bars freeze beautifully for up to 2 months. To freeze, stack sliced bars with small sheets of parchment paper between each layer to prevent sticking, then place them in an airtight container or a resealable plastic freezer bag. Thaw at room temperature before enjoying.
Nutrition Information (Approximate)
Nutrition information is automatically calculated and is an approximation. Values may vary based on specific ingredients and preparation methods.