

Cookies and Cream Energy Bites offer the ultimate guilt-free indulgence, allowing you to savor the beloved flavor of Oreos in a nutritious and energizing snack. These delightful bites are incredibly easy to prepare – simply mix your ingredients, roll them into balls, and enjoy a wholesome treat.

Indulge in Healthy Cookies and Cream Energy Bites
When searching for “Cookies and Cream Energy Bites,” most recipes you encounter will typically call for crushed store-bought Oreos. While undeniably delicious, I aimed to create a version that maintains the iconic taste without relying on processed cookies, offering a more wholesome and nutrient-rich alternative. This recipe is designed to deliver that authentic cookies and cream experience, but with ingredients you can feel good about.
My solution was to craft homemade “Oreo” crumbs that perfectly mimic the flavor and texture of the classic cookies, yet are made from simple, natural ingredients. Not only do these homemade crumbs contribute to a healthier snack, but they are also naturally gluten-free, making these energy bites accessible to a wider audience. This careful approach ensures you get all the nostalgic taste without any of the unnecessary additives, providing a truly satisfying and energizing treat.
Quick Tip: Ensuring Gluten-Free Goodness
For those seeking genuinely gluten-free Cookies and Cream Energy Balls, remember that while the core ingredients in this recipe are naturally free from gluten, it’s crucial to verify the labels of all packaged products. Cross-contamination can occur during manufacturing, so always double-check certifications to guarantee your bites remain entirely gluten-free.
What Are Energy Bites? Your Go-To Healthy Snack!
Energy bites, also known as energy balls or power bites, are small, nutrient-dense snacks designed to provide a quick and sustained boost of energy. Typically made without baking, they combine ingredients like oats, nuts, seeds, dried fruits, and natural sweeteners. Their popularity stems from their convenience, versatility, and ability to satisfy cravings while delivering essential nutrients. They are perfect for a pre-workout snack, a mid-afternoon pick-me-up, a healthy dessert alternative, or even a quick breakfast on the go.
These Cookies and Cream Energy Bites embody all the best qualities of this snack category. They are packed with fiber from oats and healthy fats from nut butter and coconut, contributing to satiety and steady energy release. By making them at home, you gain complete control over the quality and quantity of ingredients, avoiding artificial flavors, excessive sugars, and unhealthy preservatives often found in commercial snacks. This recipe takes it a step further by recreating a beloved flavor profile in a remarkably wholesome way.
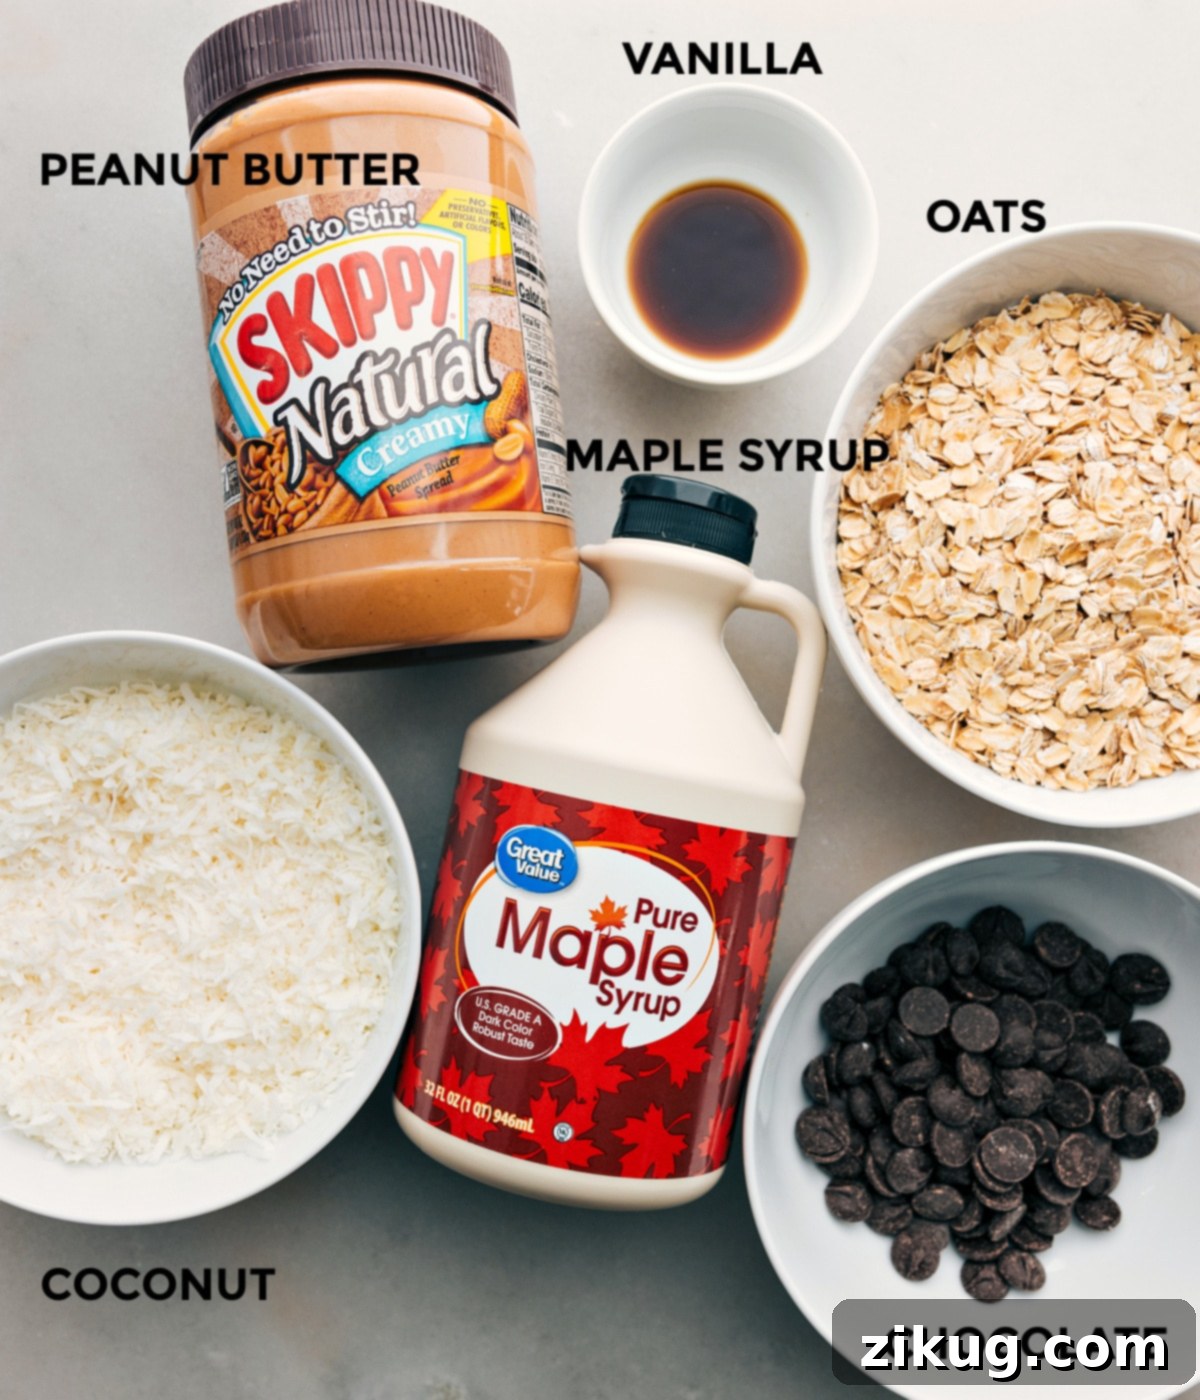
Essential Ingredients for Your Energy Bites
Crafting the perfect energy bite starts with a selection of high-quality, nourishing ingredients. Here’s a detailed look at what you’ll need for the main energy bite portion of this recipe, along with tips for best results:
- Old-fashioned oats: These are the backbone of our energy bites, providing fiber and a satisfying chewiness. Ensure you use rolled oats, often labeled as old-fashioned. Avoid quick oats, which can make the texture mushy, and steel-cut oats, which are too coarse and require cooking. Rolled oats offer the ideal balance for a no-bake recipe, absorbing moisture beautifully and binding the ingredients together.
- Cashew or peanut butter: The nut butter acts as a primary binder and adds a rich, creamy texture and protein. For the best flavor and texture, opt for a natural, dry-roasted, and lightly salted variety. If using natural nut butter, remember to stir it thoroughly before measuring to ensure even consistency and prevent separation. Almond butter or even sunflower seed butter can also be excellent alternatives if you have dietary preferences or allergies.
- Salt: A pinch of salt is essential for enhancing all the other flavors, particularly the chocolate and vanilla. The exact amount may vary based on the saltiness of your chosen nut butter, so taste as you go and adjust accordingly.
- Chocolate chips: What’s cookies and cream without chocolate? Dark chocolate chips not only provide a deeper, richer flavor but also offer antioxidants. However, feel free to use any type of chocolate chips you prefer, such as semi-sweet, milk chocolate, or even white chocolate, to customize your bites. Mini chocolate chips integrate particularly well into the small bite-sized form.
- Coconut: Unsweetened shredded coconut adds a delightful texture and a subtle tropical note that complements the “cream” aspect of this flavor profile. If you have a sweeter tooth or prefer a more pronounced coconut flavor, sweetened shredded coconut can be used, but adjust the maple syrup accordingly to avoid overly sweet bites.
- Vanilla extract: This is a key player in achieving that authentic “cookies and cream” taste. Pure vanilla extract adds warmth and depth, elevating the overall flavor profile and tying all the ingredients together seamlessly.
- Maple syrup or honey: These natural sweeteners bind the ingredients and provide a wholesome sweetness. Use pure maple syrup for the best flavor and nutritional benefits. Raw honey is another excellent option, offering a slightly different but equally delicious flavor. Avoid corn syrup or pancake syrup, as they often contain artificial ingredients and lack the depth of flavor.
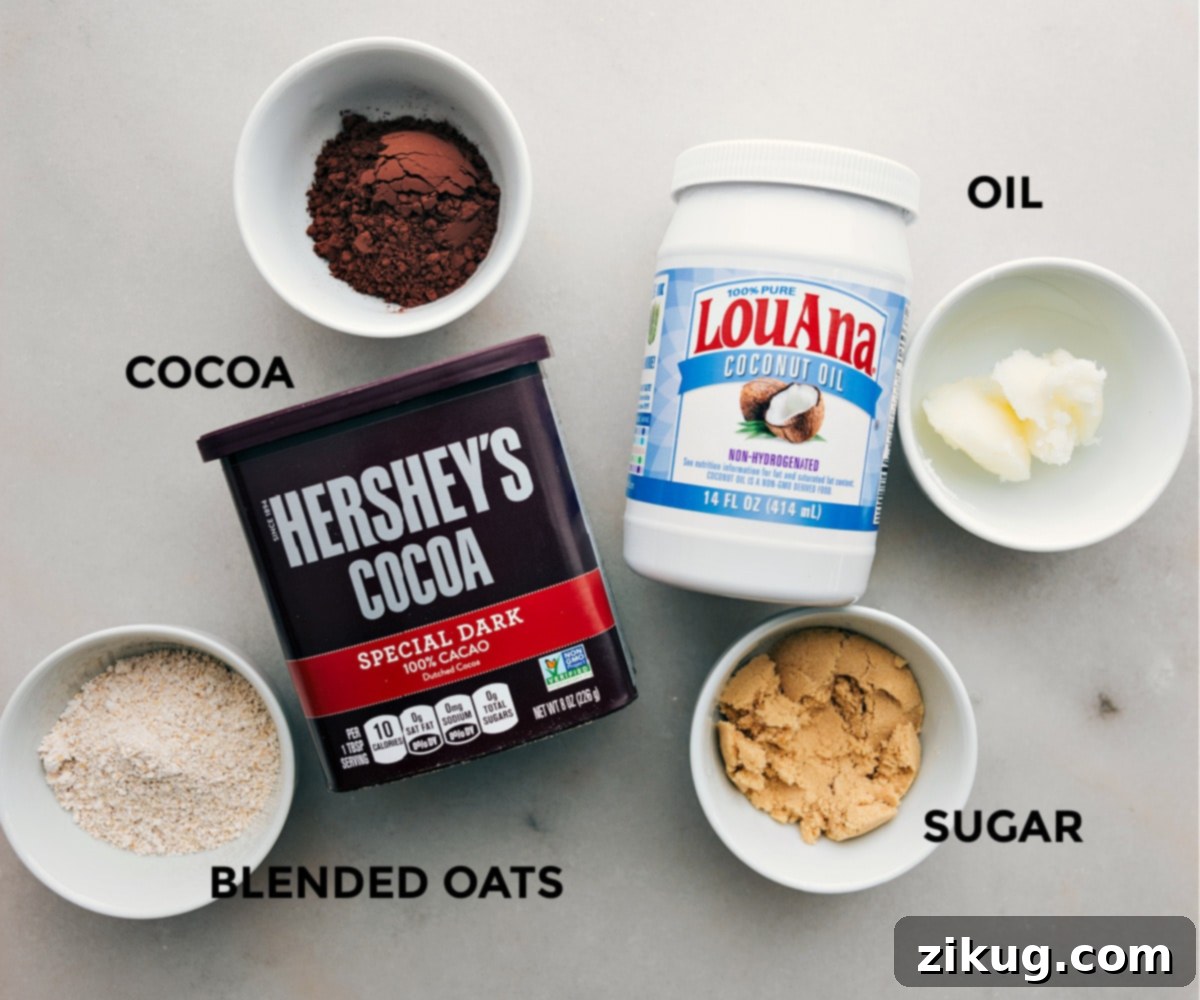
Crafting Your Own “Oreo” Cookie Crumbs: The Secret to Authentic Flavor
The magic of these energy bites lies in their homemade “Oreo” crumbs. This innovative approach allows you to capture the distinct dark chocolate flavor of the classic cookie while keeping the snack healthy and naturally gluten-free. Here’s what you need to create these delicious crumbs:
- Oat Flour: This is the foundation of our healthy cookie crumbs. You don’t need to buy it; you can easily make it in seconds from old-fashioned oats you likely already have in your pantry. Oat flour provides a mild flavor and a soft texture, mimicking the fine crumb of a traditional cookie.
- Dutch-Process Cocoa Powder: This ingredient is absolutely essential for achieving the signature dark color and deep, less bitter chocolate flavor characteristic of an Oreo. Unlike natural cocoa powder, Dutch-process cocoa has been treated to reduce its acidity, resulting in a smoother, richer taste. Hershey’s “Special Dark”® cocoa powder is a readily available and excellent choice that will give you that authentic flavor profile.
- Sugar: Light brown sugar is recommended as it helps to cut the acidity of the cocoa powder and adds a subtle caramel note. If you prefer a more natural or unrefined option, coconut sugar works wonderfully, providing a similar sweetness and a hint of warmth.
- Coconut Oil: To bind the crumbs and give them that slightly moist, crumbly texture, use coconut oil. It’s important that the coconut oil is in its solid state, not melted, when you mix it. This allows it to incorporate properly with the dry ingredients, creating distinct crumbs rather than a paste. If your coconut oil is melted, simply chill it in the fridge for a few minutes until it solidifies.
- Salt: Just a small pinch of salt in the crumbs is enough to highlight and balance all the sweet and chocolatey flavors, preventing them from tasting flat. It brings out the best in the cocoa powder and sugar.
Effortless Homemade Oat Flour: A Quick Guide
Making your own oat flour is surprisingly simple and ensures you have the freshest ingredients for your “Oreo” crumbs. Here’s how to do it in just a few easy steps:
- Choose the Right Oats: The key to good oat flour is starting with the correct type of oats. Always use old-fashioned or rolled oats. Avoid quick or instant oats, as they are too finely processed and can result in a gummy texture. Steel-cut oats are too hard and won’t blend into a fine flour consistency properly.
- Prepare for Blending: Place the measured amount of old-fashioned oats into a clean, dry food processor or a small, high-speed blender. Ensure the container is dry to prevent the oats from clumping.
- Blend to Perfection: Secure the lid and begin blending. Start with short pulses, then blend continuously until the oats transform into a fine, powdery texture that closely resembles traditional flour. This usually takes between 30 seconds to a minute, depending on your appliance.
- Check Consistency: Pause your blender or food processor and give the mixture a stir. Check the bottom and sides to ensure there are no whole oat pieces remaining. You want a uniformly fine powder for the best “Oreo” crumb texture. If you find larger pieces, blend for a few more seconds.
- Measure Accurately: Crucially, always measure your oat flour *after* blending. The volume of oats changes significantly once they are ground into flour, so measuring after the process ensures you use the precise amount required for the recipe.
Expert Tips for Perfect Cookies and Cream Energy Bites
These energy bites are incredibly forgiving and adaptable, allowing you to customize them to your preferences and ensure a perfect outcome every time. Here are some key tips to help you:
- Experiment with Nut Butters: While peanut butter or cashew butter are recommended, feel free to explore other nut butters like almond butter or even a seed butter (like sunflower seed butter for a nut-free option). Each will impart a slightly different flavor profile. Remember that different nut butters have varying oil content and thickness. If your mixture appears too dry or crumbly after combining, simply add more nut butter, one tablespoon at a time, until the mixture achieves a consistency that easily sticks together when pressed.
- Achieving the Right Consistency – Patience is Key: The mixture’s texture is crucial for perfectly rolled energy bites.
- If the mix seems too moist at first: Don’t panic! Oats are excellent at absorbing liquid. Let the mixture rest for about 10-15 minutes. During this time, the oats will soak up excess moisture, causing the mixture to firm up naturally. After resting, check the consistency again.
- If the mix is too dry or doesn’t hold together: This often happens if your nut butter was too thick or your oats were extra thirsty. Gradually add a bit more nut butter, a tablespoon at a time, along with a tiny drizzle of your chosen sweetener (maple syrup or honey). Mix well after each addition until you achieve a pliable, cohesive mixture that you can easily roll into balls.
- Taste and Adjust: Before rolling, always taste a small amount of the mixture. This is your chance to adjust the sweetness, saltiness, or even add a bit more vanilla if desired. Since flavors become more pronounced when chilled, err on the side of slightly less intense flavor before refrigeration.
- Chilling for Optimal Texture: Don’t skip the chilling step! Refrigerating the energy bites for at least an hour allows them to firm up properly, making them less sticky and giving them a pleasant, dense texture. This also helps meld the flavors beautifully.
Why These Cookies and Cream Energy Bites are a Must-Try
Beyond their irresistible flavor, these Cookies and Cream Energy Bites offer a multitude of benefits that make them an ideal addition to any healthy lifestyle:
- Wholesome & Nutrient-Rich: Unlike traditional cookies and cream treats, these bites are packed with fiber from oats, healthy fats from nut butter and coconut, and natural sweeteners. They provide sustained energy without the sugar crash.
- Naturally Gluten-Free: By using oat flour and carefully selected ingredients, this recipe caters to those with gluten sensitivities or anyone looking to reduce gluten in their diet.
- Quick & Easy No-Bake: Perfect for busy individuals, this recipe requires no oven time. Simply mix, roll, and chill – a fuss-free way to prepare a delicious snack.
- Customizable: The recipe is flexible, allowing you to swap nut butters, adjust sweetness, or even add other mix-ins like seeds or protein powder to suit your taste and nutritional needs.
- Kid-Friendly: Kids absolutely adore the familiar “cookies and cream” flavor, making these a fantastic way to sneak in some healthy ingredients into their diets.
- Excellent for Meal Prep: Make a large batch at the beginning of the week, and you’ll have wholesome snacks ready to grab and go whenever hunger strikes.
Storage Solutions for Your Energy Bites
Enjoying your homemade energy bites fresh is always a treat, but they are also excellent for meal prepping and long-term storage. Properly stored, they can last for a good while, ensuring you always have a healthy snack on hand.
Storage Guidelines
Keep your energy bites in an airtight container in the refrigerator. They will stay fresh and delicious for 1–2 weeks, making them perfect for your weekly snack rotation. The cool temperature helps maintain their firm texture and fresh taste.
To Freeze for Extended Freshness:
- Initial Freeze: Arrange the freshly rolled energy bites in a single layer on a parchment paper-lined baking tray. Place this tray in the freezer for 1-2 hours, or until the bites are completely firm. This step prevents them from sticking together once transferred to a larger container.
- Long-Term Storage: Once firm, transfer the frozen energy bites to an airtight freezer-safe bag or container. They can be stored in the freezer for up to 6 months, offering a convenient, ready-to-eat snack whenever you need it.
To Thaw and Enjoy:
- Room Temperature: Take an energy bite out of the freezer and let it sit at room temperature for 15-30 minutes. This allows it to soften slightly, making it easier and more pleasant to eat.
- Quick Microwave Thaw: If you’re in a hurry, microwave a frozen energy bite for 10-15 seconds. Be careful not to overheat, as this can alter the texture.
Remember, these bites are quite hard when fully frozen. However, you don’t need to thaw them completely before eating; many people find them quite enjoyable even when slightly frozen, offering a refreshing, chewy texture.
Serving Suggestions and Delicious Variations
These Cookies and Cream Energy Bites are incredibly versatile and can be enjoyed in many ways. Here are some ideas to inspire you:
- On-the-Go Snack: Grab a couple before heading out for errands, to the gym, or for a quick boost during a busy workday.
- Post-Workout Refuel: The combination of oats (carbs), nut butter (protein/fats), and natural sugar makes them an excellent choice for replenishing energy after exercise.
- Healthy Dessert: Satisfy your sweet tooth with a wholesome alternative to traditional desserts. Their rich flavor makes them feel like a treat.
- Breakfast Booster: Pair them with your morning coffee or yogurt for a quick and nutritious start to your day.
- Kid-Friendly Treat: Pack them in lunchboxes or offer them as an after-school snack.
Flavor Variations to Explore:
- Mint Chocolate Chip: Add a few drops of peppermint extract to the energy bite mixture and use dark chocolate chips for a refreshing twist.
- Peanut Butter Swirl: For extra peanut butter lovers, after rolling the balls, you can drizzle a bit of melted peanut butter over them.
- Nut-Free Version: Use sunflower seed butter (SunButter) instead of nut butter for a school-safe and allergy-friendly option. Just ensure all other ingredients are certified nut-free.
- Protein Boost: Mix in a scoop of your favorite vanilla or chocolate protein powder to the energy bite base for an extra protein kick, adjusting the liquid if necessary to maintain consistency.
- White Chocolate Dream: Swap dark chocolate chips for white chocolate chips to create a different creamy profile.
Explore More Delicious Snack Ball Recipes:
Healthy
Oatmeal Energy Balls
Snacks
Chocolate Energy Bites
Snacks
No-Bake Energy Bites (4 Ingredients)
Snacks
Chocolate Protein Balls

Cookies and Cream Energy Bites
Video
Equipment
-
Small blender
-
Food processor 12-cup
Ingredients
- 3 tablespoons old-fashioned oats blended, see note 1
- 2 tablespoons Dutch process cocoa powder see note 2
- 2 tablespoons light brown sugar or coconut sugar
- 1/8 teaspoon salt
- 4 teaspoons coconut oil measured when solid
- 2 cups old-fashioned oats
- 2 cups unsweetened shredded coconut
- 3/4 cup peanut butter or cashew butter, see note 3
- 1/2 cup maple syrup or honey, see note 4
- 1 teaspoon vanilla extract
- 1/2 teaspoon salt see note 5
- 3/4 cup chocolate chips
Instructions
-
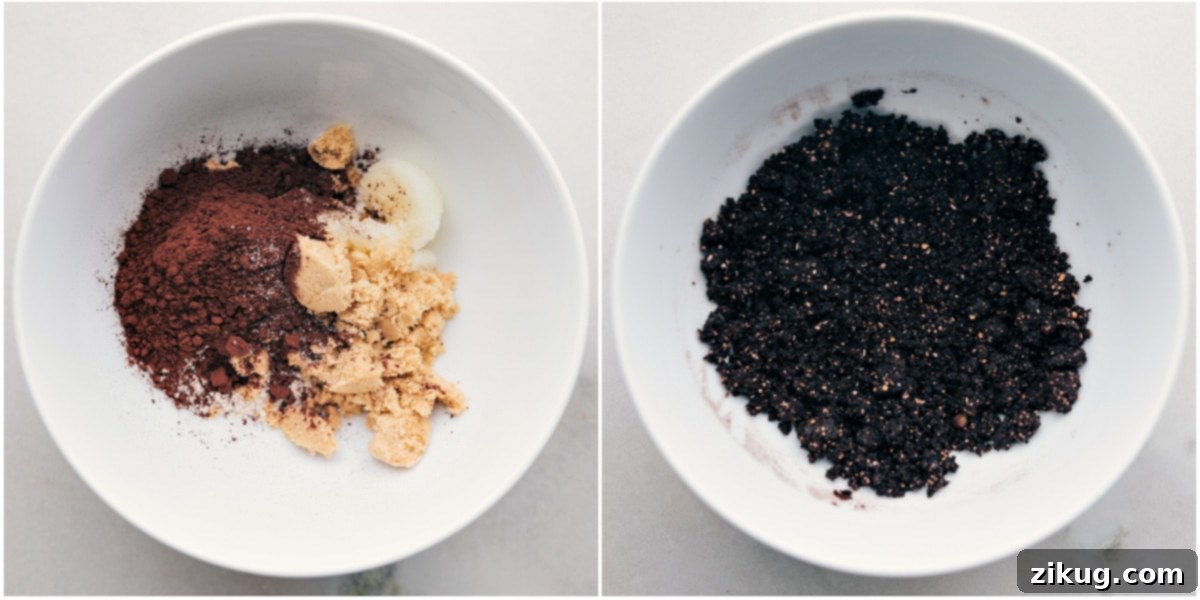
Prepare the “Oreo” Crumbles: In a medium-sized mixing bowl, combine the blended oats (oat flour), Dutch-process cocoa powder, light brown sugar (or coconut sugar), salt, and solid coconut oil. Begin mixing these ingredients thoroughly with a fork. The mixture will initially appear dry, but continue to work it by kneading gently with your hands. The warmth from your hands will help the coconut oil bind the ingredients, forming small, distinct crumbs that resemble crushed cookies. If the mixture feels too wet, add a tiny bit more blended oats; if it’s too dry and won’t form crumbs, add a few drops of coconut oil. Once consistent, set these delicious homemade “Oreo” crumbles aside.
-
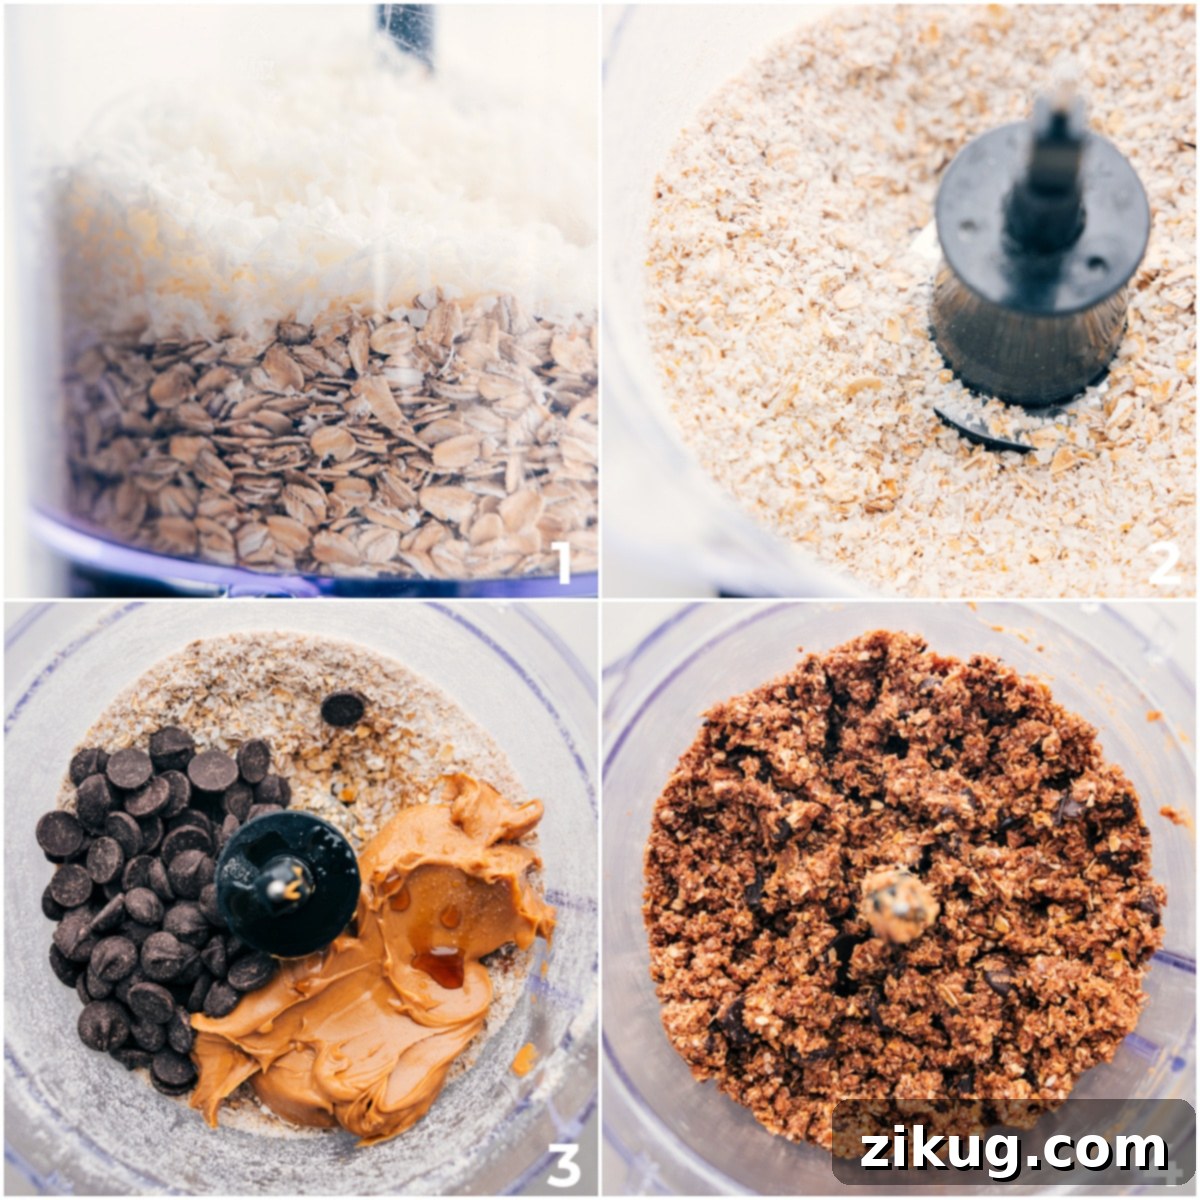
Process the Energy Bite Base: Take a large (12-cup) food processor and add the old-fashioned oats and unsweetened shredded coconut. Pulse these ingredients for about 30 seconds to a minute until they reach a fine, flour-like consistency. Next, add the peanut butter (or cashew butter), maple syrup, vanilla extract, salt, and chocolate chips to the food processor. Pulse again, continuing until all ingredients are thoroughly combined and finely chopped. The mixture should start to come together and appear sticky.
-
Adjust Consistency: Check the texture of your energy bite mixture. It should be pliable enough to roll into balls but not overly sticky. If the mixture seems too dry or crumbly, preventing it from holding its shape, add a tablespoon of nut butter and a small drizzle of maple syrup, then pulse again. If, conversely, the mixture is too wet or sticky, add a tablespoon or two of additional old-fashioned oats and pulse until the desired consistency is achieved. Remember, oats will continue to absorb liquid as the mixture rests, so it will firm up slightly over time.
-
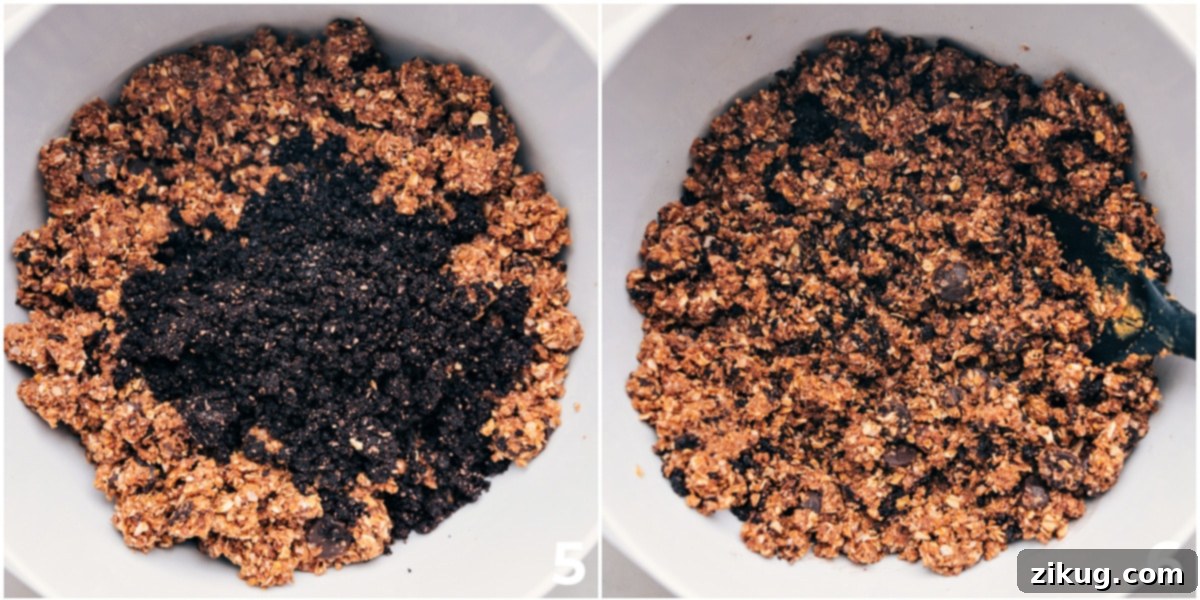
Combine and Mix: Transfer the processed energy bite mixture from the food processor to a large mixing bowl. Now, add your prepared homemade “Oreo” crumbles to the bowl. Using a sturdy spatula or your hands, thoroughly mix the crumbles into the energy bite base. Ensure the “Oreo” pieces are evenly distributed throughout the mixture for consistent flavor in every bite.
-
Roll and Chill: Using a tablespoon or a small cookie scoop, portion out the mixture. Firmly compress each portion between your palms, then roll it into a neat, uniform ball. Place the rolled energy bites on a parchment-lined baking sheet or plate. Once all bites are formed, transfer them to the refrigerator. Allow them to chill for at least 1 hour. This chilling time is essential, as it helps the bites firm up, making them less sticky and enhancing their texture. Once firm, take them out and enjoy your homemade, healthy Cookies and Cream Energy Bites!
Recipe Notes
Note 2 – Dutch-Process Cocoa Powder: For that authentic dark color and rich, deep chocolate flavor akin to Oreo cookies, it is crucial to use Dutch-processed cocoa powder. Do not substitute with regular unsweetened cocoa powder, as it has a different pH level and will result in a lighter color and more acidic, less smooth chocolate flavor.
Note 3 – Natural Nut Butters: When using natural peanut butter or cashew butter, oil separation is common. Always stir the nut butter thoroughly until the oil is fully reincorporated before measuring, ensuring consistent texture and flavor in your energy bites.
Note 4 – Sweetener Choice: For optimal flavor and natural sweetness, use pure maple syrup, not corn syrup or pancake syrup, which often contain artificial ingredients. Raw honey is also an excellent alternative if you prefer its distinct flavor.
Note 5 – Adjusting Saltiness: The amount of salt needed can vary based on the salt content of your chosen nut butter and your personal preference. Taste the mixture before rolling and adjust the salt as needed to balance the flavors perfectly.
Storage: Keep your Cookies and Cream Energy Bites in an airtight container in the fridge for 1–2 weeks. To freeze, place balls on a lined tray in the freezer until firm (1-2 hours). Then transfer to a freezer-safe container for up to 6 months. Thaw for 15–30 minutes before eating, or microwave for 10–15 seconds if desired.
Nutrition
Nutrition information is automatically calculated, so should only be used as an approximation.