
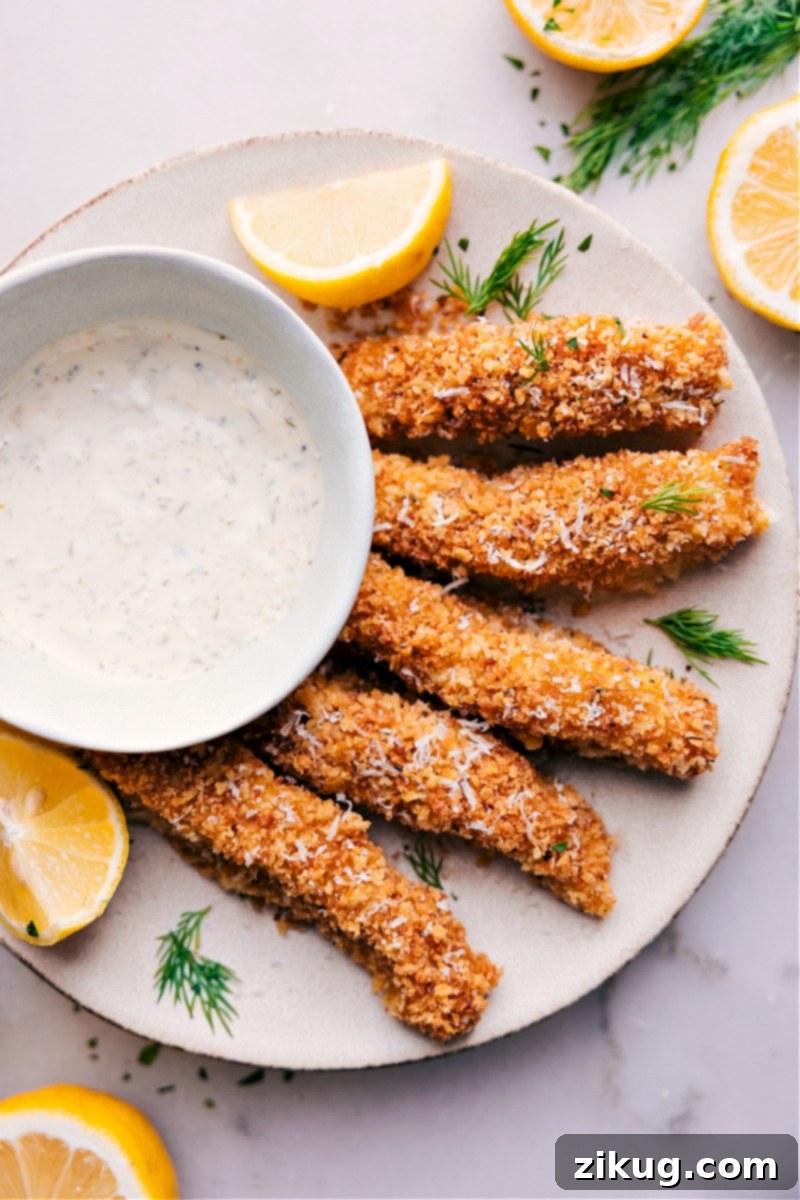
This Homemade Fish Sticks Recipe transforms a nostalgic favorite into a gourmet delight with fresh cod, a perfectly balanced blend of savory spices, and incredibly crispy Panko breadcrumbs. Forget the bland, frozen varieties; these made-from-scratch fish sticks are a revelation, offering a delicious and healthier alternative that the entire family will adore.
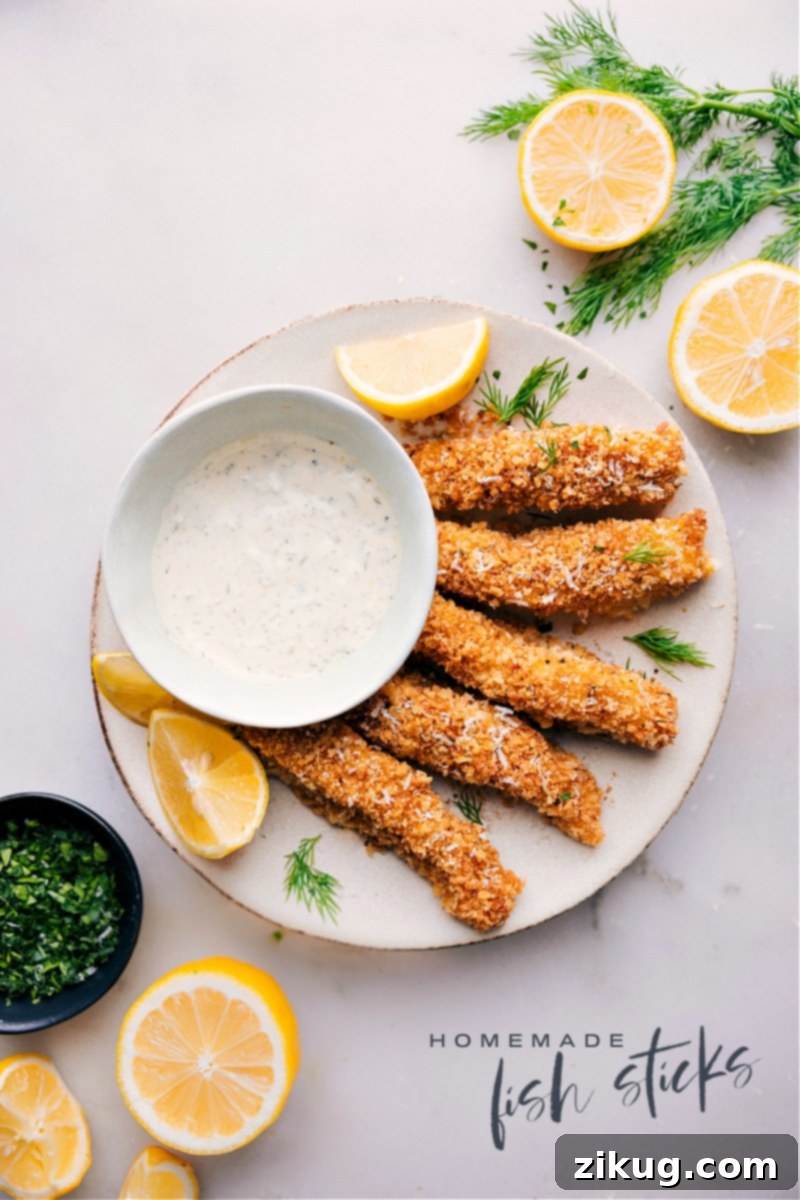
Homemade Fish Sticks Recipe: The Ultimate Comfort Food Upgrade
For many of us, fish sticks evoke fond memories of childhood dinners – a quick, easy, and undeniably comforting meal. However, as our palates mature and our awareness of ingredients grows, those nostalgic boxed versions often fall short. They can be laden with questionable additives, lack fresh flavor, and ultimately disappoint. That’s precisely why I embarked on a mission to create the ultimate homemade fish stick recipe. After extensive testing and refining, I can confidently say I’ve perfected it!
This recipe offers everything you loved about fish sticks, but elevated. It’s incredibly simple to prepare, bursting with fresh flavor, and guaranteed to become a new family favorite for weeknight dinners. Crafted with flaky fresh cod, a harmonious blend of savory spices, rich Parmesan cheese, and a truly exceptional crispy Panko coating, these homemade fish sticks are light years beyond anything you’ll find in the freezer aisle. They are a wholesome, flavorful, and upscale take on a classic.
Why Make Your Own Fish Sticks?
The allure of convenience often leads us to pre-packaged foods, but when it comes to fish sticks, making them from scratch offers unparalleled advantages:
- Superior Flavor and Texture: Fresh cod, seasoned perfectly, combined with a homemade batter and crispy Panko, results in a flavor profile that’s vibrant and a texture that’s incredibly satisfying – flaky on the inside, crunchy on the outside.
- Wholesome Ingredients: You control every ingredient, eliminating preservatives, artificial flavors, and unhealthy oils often found in commercial versions. This recipe focuses on fresh, real food for a healthier meal.
- Customizable: Adjust the spices, choose your favorite fish, and even experiment with different dipping sauces. Homemade means it’s tailored to your family’s tastes.
- Economical: Often, making meals from scratch is more cost-effective than buying pre-made alternatives, especially when purchasing fish on sale.
- Fun for the Family: Involving kids in the breading process can be a fun activity, making them more likely to enjoy the meal they helped create!
The Secret to Ultimate Crispiness: Panko Breading
The star of our fish stick’s outer shell is Panko breadcrumbs, and for good reason. Unlike traditional breadcrumbs, Panko is made from crustless white bread that’s processed into larger, flakier crumbs. This unique texture allows them to absorb less oil during cooking, resulting in an exceptionally light, airy, and ultra-crispy coating that truly makes these fish sticks stand out. When baked or air-fried, Panko delivers that irresistible crunch that’s often lacking in soggy, store-bought fish sticks.
You can easily find Panko breadcrumbs in most major grocery stores, typically located in the breadcrumb or international foods aisle. Don’t be tempted to substitute with regular breadcrumbs; the distinct texture of Panko is crucial for achieving the desired crispiness in this recipe.
Quick Tip for Maximum Crispiness!
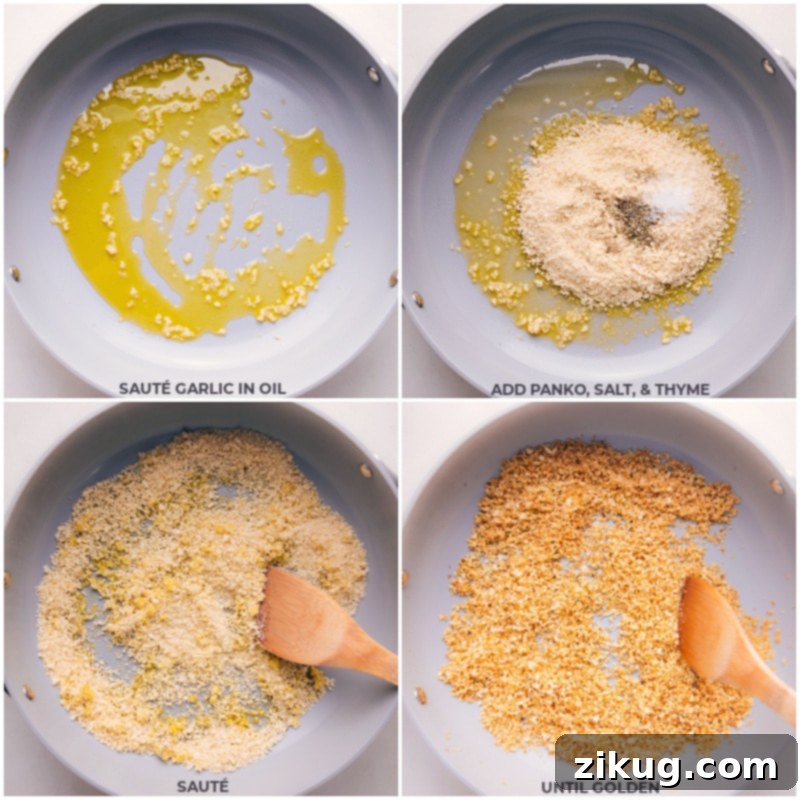
For an absolutely unbeatable, ultra-crispy fish stick without the need for deep frying, take an extra minute to toast the Panko breadcrumbs in a skillet before coating the fish. This simple step works wonders! It deepens the flavor of the breading and ensures it achieves an incredible crunch, creating a perfect contrast to the tender, flaky fish inside. This technique is key to avoiding any potential sogginess and delivering that satisfying crisp texture every time.
The Flavorful Foundation: The Fish Stick Batter
While the Panko delivers the crunch, our unique batter is what truly takes these homemade fish sticks to the next level in terms of flavor and tenderness. This isn’t just a basic egg wash; it’s a carefully crafted mixture that infuses the fish with incredible taste while locking in moisture, ensuring the cod remains tender and juicy throughout the cooking process.
The combination of Dijon mustard and mayonnaise is a game-changer. Dijon adds a tangy, slightly spicy kick that complements the fish beautifully, preventing any blandness. Mayonnaise contributes a rich, creamy texture and acts as a fantastic binder, helping the breading adhere perfectly while also contributing to the fish’s succulence. These two ingredients work in harmony to create a flavorful barrier that seals in moisture and elevates the overall taste.
- For the best results, I recommend using quality ingredients. My personal favorite mayonnaise is Hellmann’s/Best Foods® for its rich, balanced flavor, and I always reach for Grey Poupon® Dijon for its distinctive bold and tangy notes. However, feel free to use your preferred brands.
How To Make The Best Homemade Fish Sticks Recipe: Tips and Tricks
Crafting perfect homemade fish sticks is simpler than you might think, especially with these essential tips:
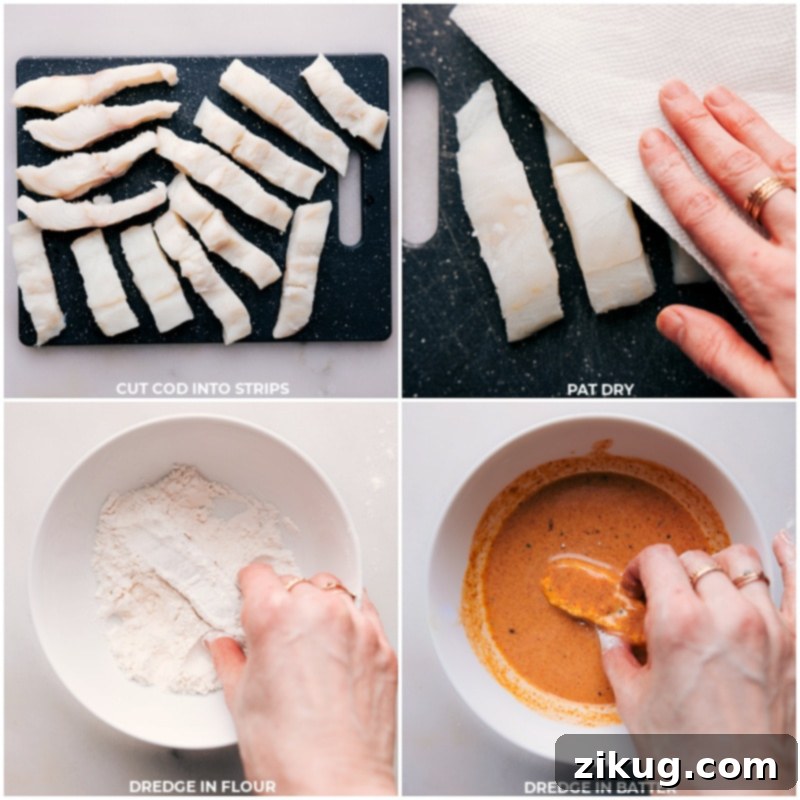
- Start with Quality Fish: Always use fresh or thoroughly thawed cod. If using frozen, ensure it’s completely thawed according to package directions. Pat the fish strips very dry with paper towels before breading. Excess moisture is the enemy of crispiness!
- Uniform Cutting is Key: Cut your cod into strips of approximately ¾ x 4½ inches. Strive for consistency in size to ensure all your fish sticks cook evenly. Uneven pieces can lead to some being overcooked and dry, while others are still undercooked.
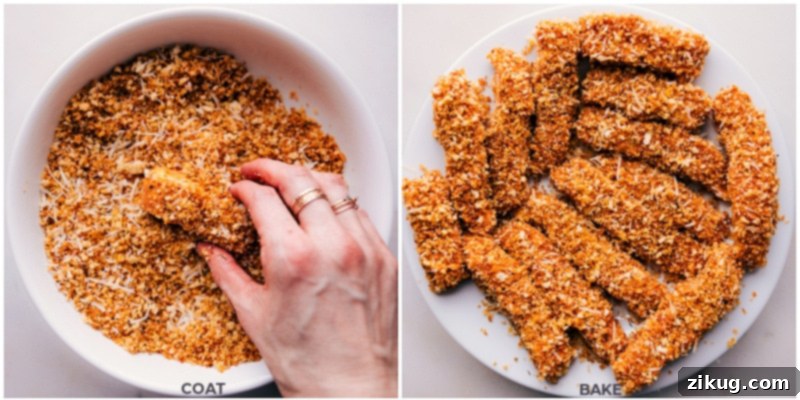
- Bake for Superior Crispiness: For optimal crispiness and to prevent a soggy bottom, bake your fish sticks on a wire rack placed over a baking sheet. This allows air to circulate around all sides, ensuring a uniformly crunchy coating.
- Don’t Crowd the Pan: Give your fish sticks plenty of space on the baking rack. Overcrowding can lead to steaming instead of baking, which will prevent them from getting truly crispy. If necessary, cook in batches.
- Check for Doneness: The fish is cooked through when it flakes easily with a fork and reaches an internal temperature of 145°F (63°C). A meat thermometer is your best friend here to avoid overcooking and dry fish.
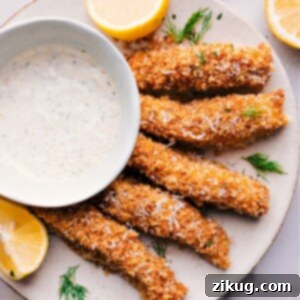
- Serve Immediately: For the best experience, enjoy your homemade fish sticks hot out of the oven. A squeeze of fresh lemon and a generous dollop of homemade tartar sauce are highly recommended!
What To Serve With This Fish Sticks Recipe
While fresh lemon wedges and a creamy tartar sauce are classic companions for fish sticks, there are countless ways to round out this delicious meal. Here are some fantastic side dish ideas that pair beautifully with our crispy homemade fish sticks:
- Classic Fries or Roasted Potatoes: You can’t go wrong with crispy potato wedges, fluffy roasted potatoes, or traditional French fries. They are the quintessential partner to any fish dish, offering a satisfying starch.
- Fresh Coleslaw: A light, crunchy, and tangy coleslaw provides a refreshing contrast to the richness of the fish. Its crisp texture and vibrant flavor cut through the richness beautifully.
- Sweet Potato Fries: For a slightly sweeter and nutrient-rich alternative to regular fries, try sweet potato fries or a side of perfectly roasted sweet potatoes.
- Simple Garden Salad: A fresh, crisp garden salad with your favorite light vinaigrette adds a burst of freshness and essential greens to your plate.
- Roasted Vegetables: Healthy and delicious, roasted vegetables like tender broccoli, sweet carrots, or savory Parmesan Brussels sprouts complement the fish without overpowering it.
- Fluffy Couscous: For a quick and versatile grain, couscous makes an excellent side. It’s easy to prepare and absorbs flavors wonderfully.
Experiment with these suggestions to create a perfectly balanced and enjoyable meal that highlights your delicious homemade fish sticks!
How To Air Fry This Fish Sticks Recipe for Extra Crunch
For those seeking an even quicker cook time and an unparalleled level of crispiness without any deep frying, the air fryer is your best friend! Air frying circulates hot air around the fish sticks, creating a wonderfully crunchy exterior and a tender interior in a fraction of the time compared to oven baking. It’s a fantastic method for achieving that “fried” texture with much less oil.
Here’s how to perfectly air fry your homemade fish sticks:
- Preheat the Air Fryer: Begin by preheating your air fryer to 400°F (200°C). This ensures the fish sticks start cooking immediately upon entering, helping them get crispy faster.
- Arrange Evenly: Place the breaded fish sticks in a single layer within the air fryer basket. It’s crucial that they do not touch each other, allowing the hot air to circulate freely around each piece. Overcrowding will result in steamed, rather than crispy, fish sticks. Lightly spray the fish sticks with cooking spray to enhance browning and crispness.
- Cook and Flip: Air fry for 8-10 minutes, flipping them halfway through the cooking time. This ensures all sides get golden brown and crispy.
- Check for Doneness: Cooking times can vary slightly depending on the thickness of your fish sticks and the specific model of your air fryer. To confirm they are fully cooked, cut into one to ensure the fish is opaque throughout, or use a meat thermometer to check for an internal temperature of 145°F (63°C).
Air Frying Pro-Tips
Always remember that air fryer cooking times can vary based on the appliance model and the size of your fish sticks. Monitor them closely to prevent overcooking, which can lead to dry fish. If you’re new to air frying or looking for more tips, check out my comprehensive Air Fryer Guide for expert advice and troubleshooting.
Storage, Reheating, Freezing & Thawing
Storing, Reheating, Freezing & Thawing Homemade Fish Sticks
- Storing Leftovers: Any leftover homemade fish sticks can be stored in an airtight container in the refrigerator for 3-4 days. Ensure they are completely cooled before storing to prevent condensation and sogginess.
- Reheating for Crispness: To revive their crispy texture, reheat fish sticks in a preheated oven at 375°F (190°C) for 10-15 minutes, or until heated through and crisp. An air fryer or toaster oven also works wonderfully for reheating. Avoid using a microwave, as it will make them soft and rubbery.
- Freezing for Future Meals: For the best results and ultimate convenience, freeze your fish sticks before cooking. Lay the breaded, uncooked fish sticks in a single layer on a parchment-lined baking sheet and freeze until solid (about 1-2 hours). Once frozen, transfer them to a freezer-safe bag or container, removing as much air as possible. They can be stored in the freezer for up to 2-3 months.
- Cooking from Frozen: When ready to cook frozen fish sticks, simply place them on a baking sheet (or wire rack for the oven, or in the air fryer basket) and bake or air fry according to the recipe instructions, adding about 5-10 minutes to the cooking time, or until they are golden brown, crispy, and cooked through to 145°F (63°C). No need to thaw!
More Delicious Seafood Dinners You’ll Love:
Dinner
Honey Garlic Shrimp
Dinner
Flavorful Fish Tacos
Seafood
Favorite Salmon Burgers Recipe
Dinner
Zesty Lemon Garlic Shrimp
Homemade Crispy Fish Sticks
By Chelsea Lords
Elevate your childhood favorite! This easy recipe features fresh cod, savory spices, and a perfect Panko crunch for a healthier, more delicious alternative to frozen fish sticks. Baked or air-fried to perfection.
Prep Time: 25 minutes
Cook Time: 13 minutes
Total Time: 38 minutes
Servings: 3 servings (about 14 fish sticks)
Equipment
- Large nonstick skillet
- Sheet pan (15″ x 10″)
- Optional: Wire cooling rack
Ingredients
- 1 pound cod (see note 1 for best results)
- Cooking spray
- Salt and pepper, to taste
For the Breading:
- 3 tablespoons olive oil
- 2 teaspoons minced garlic
- 1-3/4 cup panko breadcrumbs (see note 2 for crispiness)
- 1/2 teaspoon dried thyme
- 1/3 cup freshly grated Parmesan cheese (see note 3)
- 1/2 cup all-purpose flour
For the Batter:
- 2 tablespoons Dijon-style mustard
- 2 tablespoons mayonnaise
- 2 large eggs
- 2 teaspoons paprika
- 1 lemon, cut into wedges, for serving
- Tartar sauce for serving (see note 4 for homemade recipe)
Instructions
- Prepare Oven: Preheat your oven to 425°F (220°C). If using, place a large wire cooling rack on top of a sheet pan. Generously grease the cooling rack with cooking spray to prevent sticking.
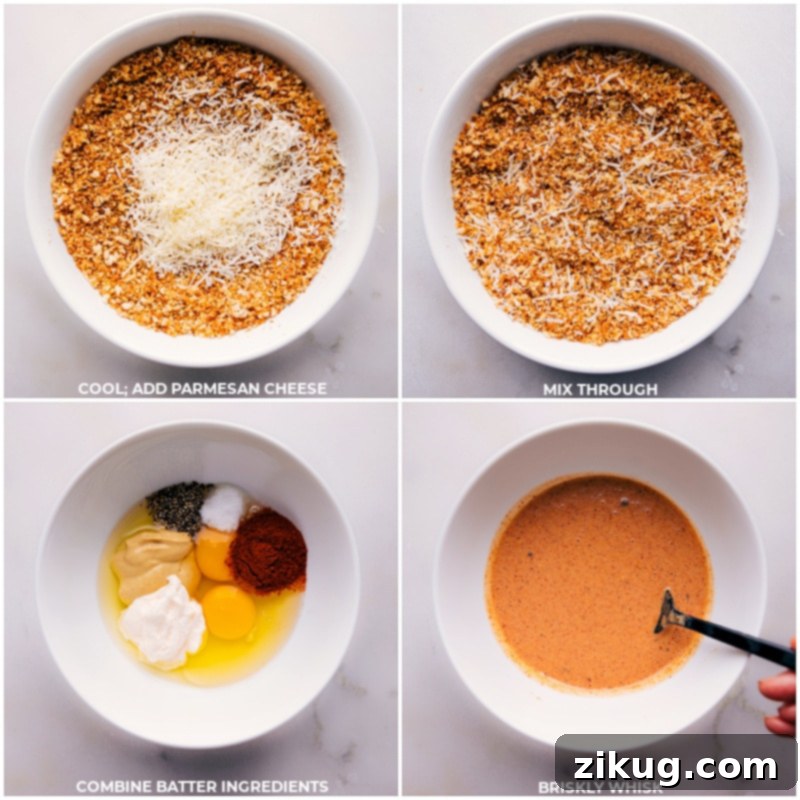
- Toast Breading Mixture: Heat the olive oil in a large nonstick skillet over medium heat. Add minced garlic and sauté for 15 seconds until fragrant. Add the panko breadcrumbs, dried thyme, and 1/4 teaspoon of salt. Stir continuously until the panko turns a beautiful golden-brown color, which should take about 4-6 minutes. Remove the skillet from heat and immediately transfer the toasted panko mixture into a large shallow bowl. Allow it to cool completely before stirring in the Parmesan cheese. In a separate shallow bowl, add the all-purpose flour.
- Prepare Batter: In a small bowl, whisk together all the batter ingredients (Dijon mustard, mayonnaise, eggs, and paprika) until smooth and well combined. Season the batter to your preference; I recommend adding 1/2 teaspoon of salt and 1/4 teaspoon of black pepper.
- Prepare Cod: Cut the cod fillet into uniform strips, approximately ¾ inch by 4½ inches. It’s important to keep the strips as even in size as possible to ensure consistent cooking. Pat the cod strips thoroughly dry with paper towels to remove any excess moisture.
- Bread the Fish Sticks: Set up your dredging station: one bowl with flour, one with the batter, and one with the toasted panko-Parmesan mixture. Gently dredge each cod piece in the flour, ensuring it’s fully coated. Be generous with the flour; you should use most of it. Next, dip each floured piece into the batter, letting any excess drip off. Finally, dredge each battered piece in the toasted panko mixture, using your hands to gently press the crumbs firmly onto the fish to ensure they adhere well. All three mixtures should be largely used up by the end of this step. Arrange the breaded fish sticks on the prepared sheet pan (or wire cooling rack), ensuring there is plenty of space between each piece to allow for even cooking and maximum crispiness. Do not overcrowd the pan. Generously spray the coated fish sticks with cooking spray.
- Bake: Bake the fish sticks in the preheated oven for 9–13 minutes, or until the fish is opaque, flakes easily, and reaches an internal temperature of 145°F (63°C). While the fish is baking, it’s a great time to prepare your tartar sauce if you haven’t already.
- Serve: Serve your delicious homemade fish sticks immediately, hot out of the oven, with fresh lemon wedges and plenty of your favorite tartar sauce. Enjoy!
Recipe Notes
- Note 1 – Choosing Cod: For the best flavor and texture in this recipe, I highly recommend using cod. If you are using frozen cod, ensure it is fully thawed by following the package directions. Crucially, thoroughly dry the fish with paper towels before proceeding with the recipe. Wet fish leads to soggy fish sticks!
- Note 2 – Panko Breadcrumbs: Panko breadcrumbs are essential for achieving that signature light and ultra-crispy coating. They are widely available in most grocery stores, typically found near regular breadcrumbs or in the international aisle.
- Note 3 – Fresh Parmesan: For an accurate measurement and superior flavor, grab a block of Parmesan cheese and grate it fresh using the small holes of a grater. This enhances the flavor significantly.
- Note 4 – Homemade Tartar Sauce: Tartar sauce is a non-negotiable accompaniment for these fish sticks. For an exceptional homemade version (the flavor improves as it sits!), you can prepare this ahead of time:
- Stir everything together in a small bowl until smooth: 2 tablespoons fresh lemon juice, 1/2 cup mayonnaise (Best Foods recommended), 1-1/2 tablespoons sweet pickle relish, 1 tablespoon finely chopped fresh dill (optional, for quicker prep), 1/2 teaspoon Dijon mustard, 1/2 teaspoon Worcestershire sauce, and 1/8 teaspoon each of salt and pepper.
- Note 5 – Air Fryer Instructions: Preheat your air fryer to 400°F (200°C). Place the breaded fish sticks in the air fryer basket in a single layer, ensuring they do not touch. Generously spray them with cooking spray. Cook for 8-10 minutes, flipping them halfway through. Check for doneness by cutting into a fish stick to ensure the fish is fully cooked through and opaque. Cooking times can vary.
- Storage: Store leftover cooked fish sticks in an airtight container in the refrigerator for up to 3 days. Reheat in the oven or air fryer for best crispiness. For freezing, bread and freeze uncooked fish sticks on a baking sheet until solid, then transfer to a freezer bag for up to 2 months. Bake from frozen, adding extra cooking time.
Nutrition
Serving: 1 serving | Calories: 412kcal | Carbohydrates: 32.9g | Protein: 31g | Fat: 16.7g | Cholesterol: 149.9mg | Sodium: 666.1mg | Fiber: 2.1g | Sugar: 2g
Nutrition information is automatically calculated and should only be used as an approximation.
Enjoyed this recipe? Share your thoughts and leave a comment below! Your feedback helps us create more delicious content.