
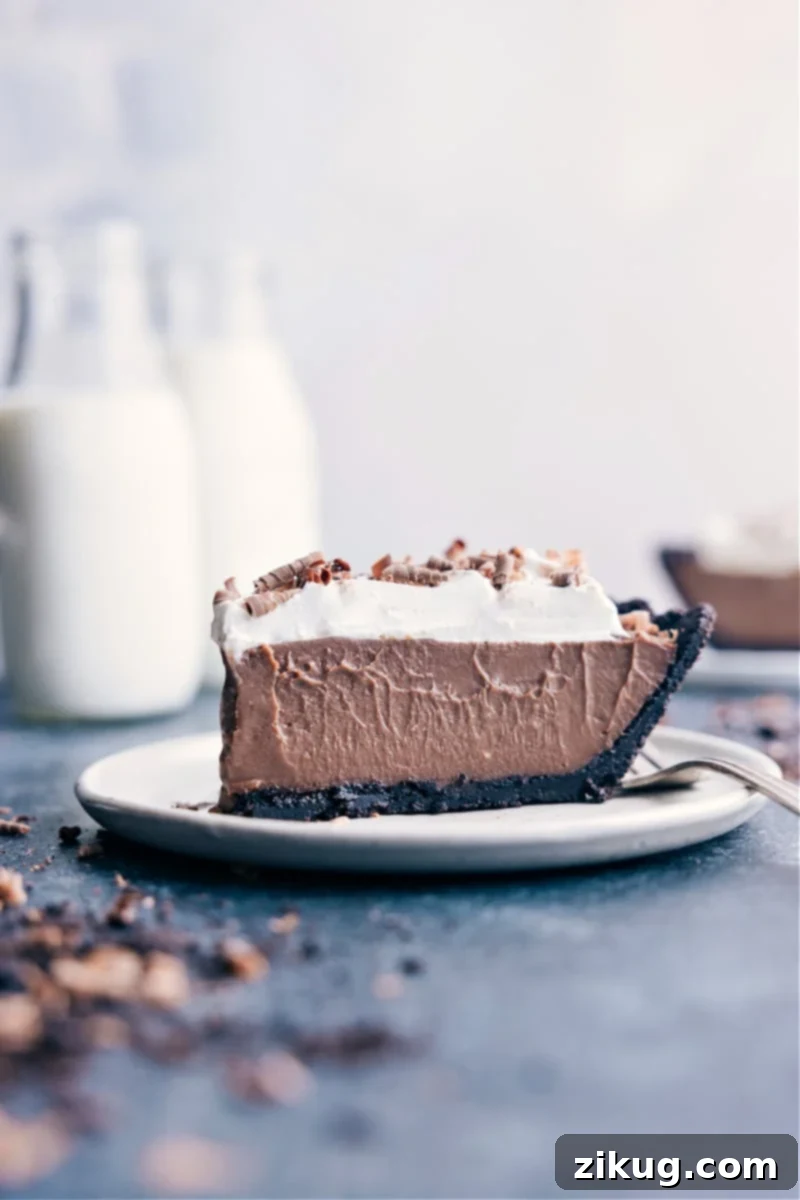
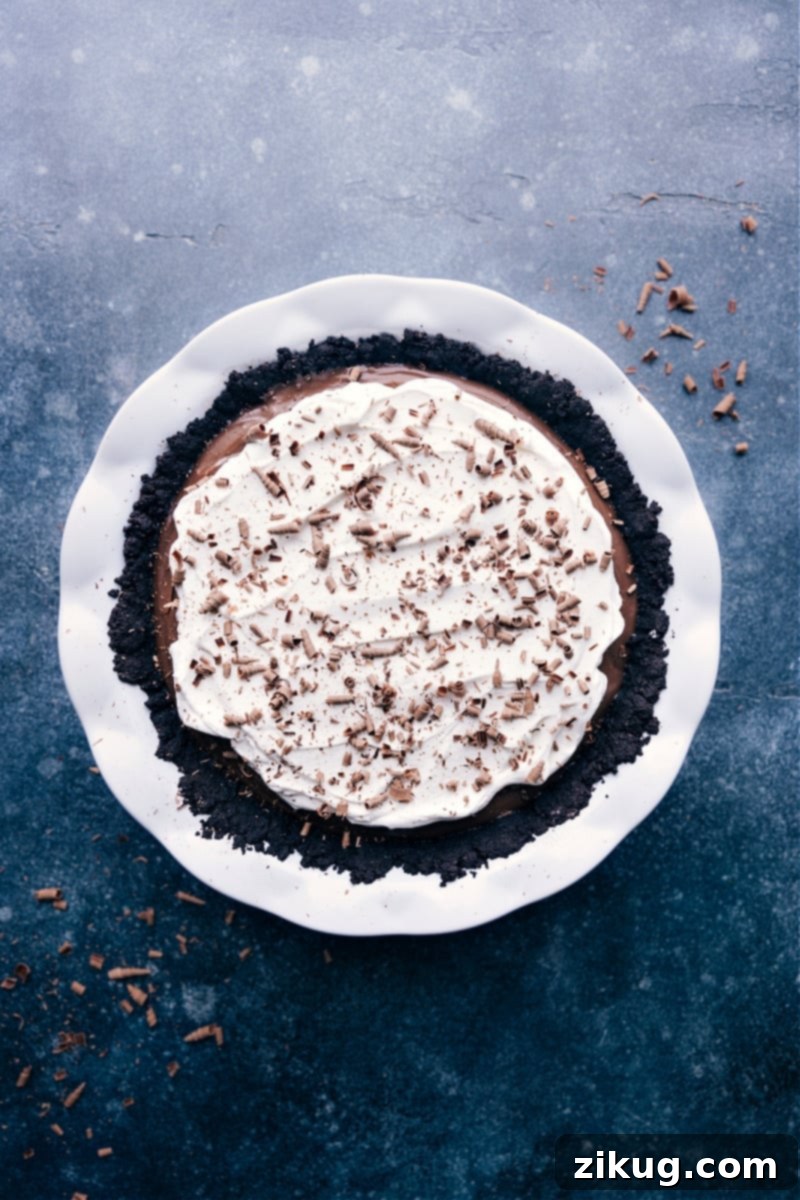
Chocolate Cream Pie is the epitome of dessert perfection. It masterfully combines a sweet Oreo crust, intensely rich homemade chocolate pudding, and is crowned with fluffy whipped cream and elegant chocolate curls. This recipe isn’t just a dessert; it’s an experience.
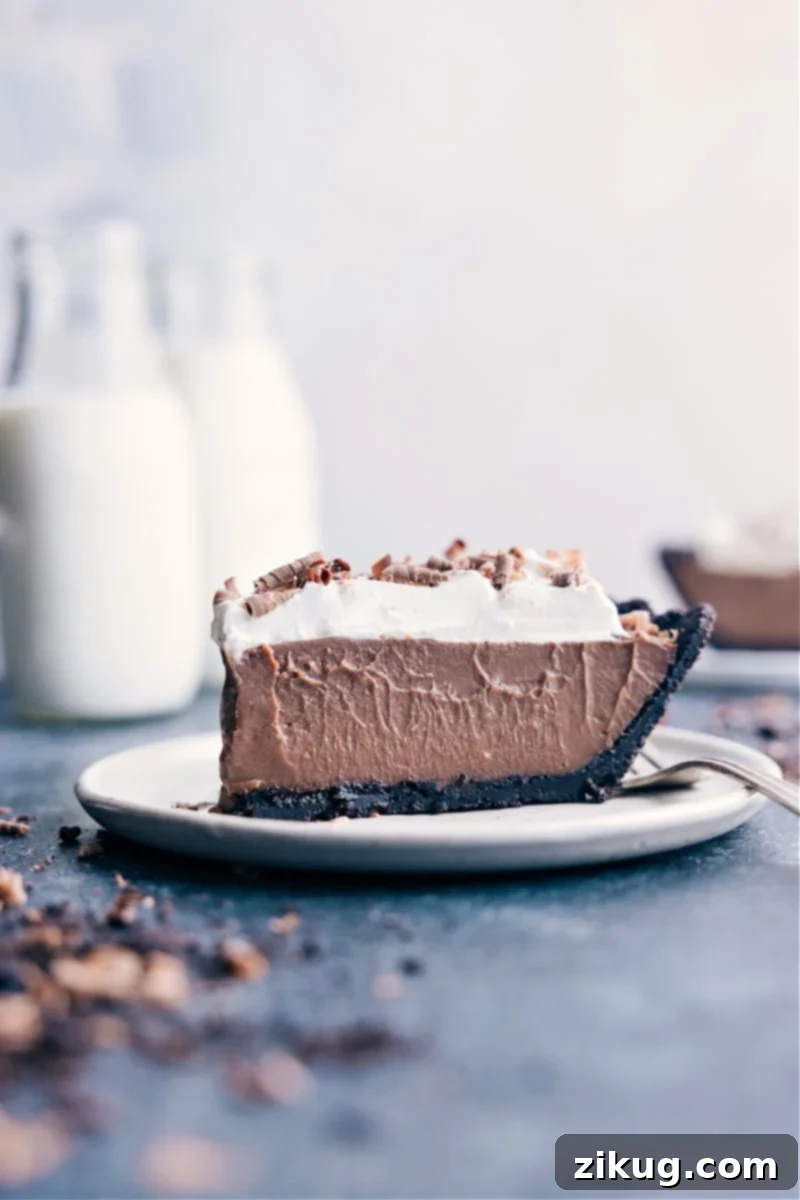
Crafting the Perfect Chocolate Cream Pie: An Effortless Recipe
Among the countless desserts I adore making, two stand out as perennial favorites: my husband’s beloved Apple Pie and my personal indulgent treat, the Coconut Cream Pie. Over time, I’ve dedicated myself to perfecting a chocolate counterpart, and I’m thrilled to introduce this exceptional Chocolate Cream Pie recipe. It truly hits all the right notes!
This pie is a symphony of flavors and textures: deeply chocolaty, incredibly rich, and delightfully indulgent, boasting a velvety smooth center contrasted by a crisp cookie crust. After numerous trials and adjustments, I’ve finally achieved a recipe that is just right – and I am certain it will become a regular feature in your home, just as it has in mine.
Important Baking Tip: Plan Ahead for Perfection!
Heads-up: This recipe requires significant chilling time to achieve its signature silky-smooth texture. For the best results, it’s advisable to spread the preparation over two days. I typically prepare the crunchy Oreo crust and the luscious homemade chocolate pudding filling on day one, then let the entire pie chill patiently in the refrigerator overnight. The next day, the custard will have fully set, transforming into a firm, sliceable masterpiece, ready for its final luxurious touches. The pudding filling absolutely needs a good 10+ hours to firm up completely – and there’s truly no way to rush this crucial step without compromising on texture and taste. Trust the process; the wait is absolutely worth it for this decadent Chocolate Cream Pie!
The Perfect Chocolate Cookie Crust: Foundation of Flavor
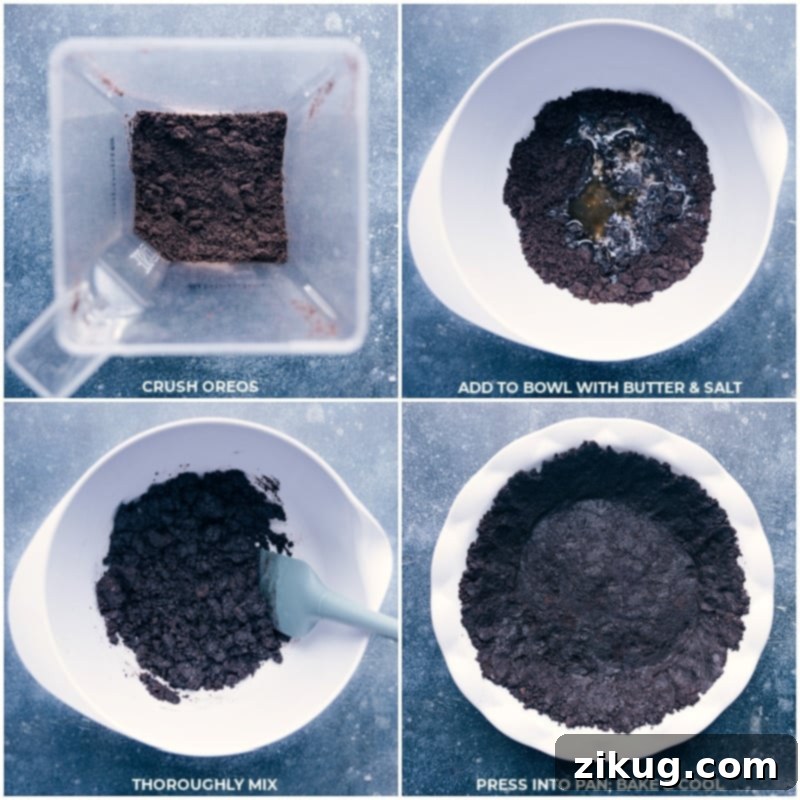
A truly exceptional Chocolate Cream Pie begins with an equally exceptional crust. Our recipe features a simple yet incredibly flavorful Oreo cookie crust that provides the ideal foundation for the rich chocolate filling. Follow these essential tips to ensure your Oreo cookie crust turns out perfectly crisp and delicious every single time:
- Keep the cookies whole: There’s no need to meticulously separate the chocolate cookie wafers from their creamy centers. Both components are vital; the cookie provides structure and deep chocolate flavor, while the creme contributes to the binding and adds a touch of sweetness. Because Oreos are already quite sweet, we don’t need to add any extra granulated sugar to the crust mixture, maintaining a balanced flavor profile.
- Blend cookies thoroughly: Achieving a consistently perfect crust requires finely ground cookie crumbs. Any large cookie chunks will not only affect the overall texture but also make it difficult to achieve clean, neat slices of your pie. Ensure you blend the cookies until they resemble fine, uniform crumbs. If you spot any larger pieces after the initial blend, simply return them to the blender or food processor and process again until smooth.
- Let the melted butter cool: Once your butter is melted, it’s crucial to allow it to cool back to room temperature before incorporating it into the cookie crumbs. If the butter is hot, it will melt the natural oils in the cookie crumbs, resulting in a greasy crust that feels heavy and might even separate. Room temperature butter, however, helps bind the crumbs perfectly, ensuring a tender yet stable crust.

Deconstructing the Decadence: Components of Our Chocolate Cream Pie
At its heart, this delightful Chocolate Cream Pie is built upon three magnificent layers: a perfectly pressed Oreo cookie crust, a luscious homemade chocolate pudding, and a generous topping of sweetened whipped cream garnished with elegant chocolate curls. While we’ve already explored the secrets to a flawless crust, let’s now delve into the star of the show: the rich, creamy homemade chocolate pudding layer.
When developing this recipe, I maintained many of the consistent quantities from my highly-praised Coconut Cream Pie, making clever adjustments for the chocolate version. The coconut milk was thoughtfully replaced with whole milk, and of course, the vibrant flavor of chocolate was introduced to create a truly unforgettable filling. Here’s a breakdown of the key ingredients that make this pudding shine:
- Granulated Sugar: A balanced amount of sugar is essential. I opted for slightly less sugar than in the coconut cream pie recipe because the sweet chocolate cookie crust already contributes a significant amount of sweetness. This careful adjustment ensures the pie is perfectly sweet without being cloying.
- Cornstarch and Egg Yolks: These two ingredients are the heroes of thickness, working in harmony to give the pudding its beautifully firm yet creamy texture. Cornstarch provides initial thickening, while egg yolks add richness and a custardy consistency. For those looking for ideas, don’t let those leftover egg whites go to waste—they’re perfect for making delicious Meringue Cookies!
- Whole Milk and Heavy Cream: The magical combination of these two dairy ingredients is what truly delivers the perfect, luxurious thickness and creamy mouthfeel to our chocolate pudding. It’s absolutely crucial to use whole milk and heavy cream; lower fat milk varieties will likely prevent the pudding from setting up properly, resulting in a runny filling that lacks the desired richness.
- Unsalted Butter: A touch of unsalted butter, added at the right moment, is vital for achieving a wonderfully smooth texture and an even richer, more indulgent mouthfeel. It melts seamlessly into the warm pudding, enhancing its silkiness and flavor depth.
- Semi-Sweet Baking Bars: This is a non-negotiable ingredient for a truly smooth pudding. Unlike chocolate chips or baking morsels, which contain stabilizers (designed to help them maintain their chip shape when baked into cookies), baking bars melt down completely and evenly. For the silkiest chocolate pudding, we highly recommend using good-quality baking bars specifically formulated for melting, such as brands like Baker®, Lindt®, or Ghirardelli®.
- Salt and Vanilla Extract: These often-underestimated ingredients play a pivotal role in elevating the flavor profile of the pie. A pinch of salt doesn’t make the pie salty; instead, it ingeniously intensifies and balances all the other sweet and rich flavors in the pie – a little truly goes a long way in creating depth and nuance. Vanilla extract, on the other hand, adds a warm, aromatic note that complements the chocolate beautifully.
Step-by-Step Guide: How to Make This Incredible Chocolate Cream Pie
Creating this show-stopping Chocolate Cream Pie is a rewarding process. Follow these detailed steps to ensure a flawless and delicious result every time:
- Prepare the Crust: Begin by preheating your oven to 350°F (175°C) and lightly greasing a 9-inch pie pan. Melt 4 tablespoons of unsalted butter and allow it to cool for about 5 minutes. Crush 24 Oreos (or chocolate sandwich cookies) into very fine crumbs using a blender or food processor, aiming for about 1-3/4 cups of crumbs. In a bowl, combine the fine cookie crumbs, a pinch of salt, and the cooled melted butter, mixing until thoroughly combined. Press this mixture firmly into the bottom and up the sides of the prepared pie pan, using your fingers and then compressing it with the flat bottom of a measuring cup for an even, dense crust. Bake for 9 minutes, then let it cool completely on a wire rack.
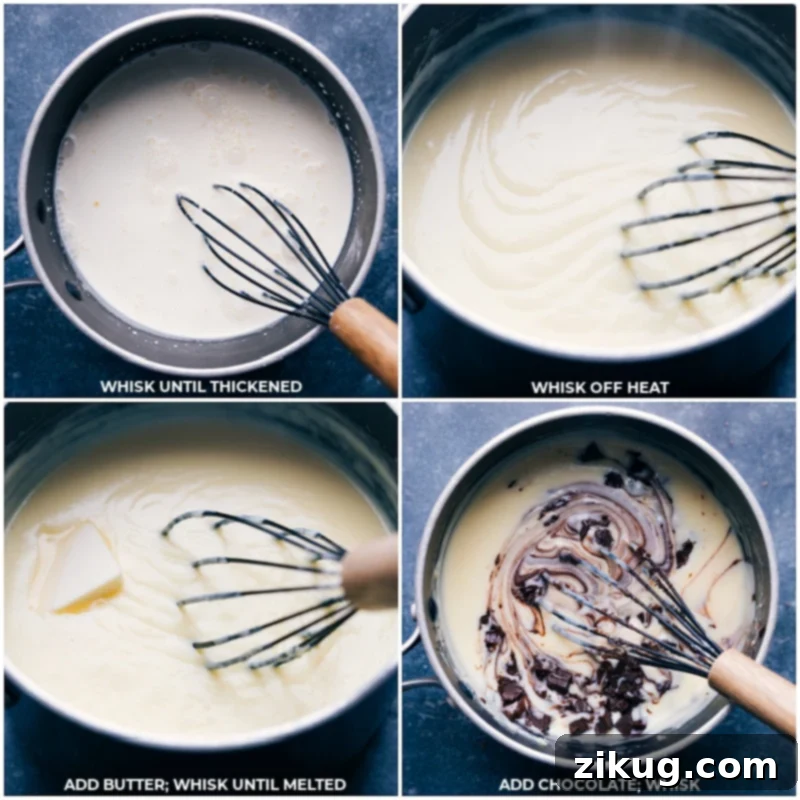
- Make the Chocolate Filling: While the crust cools, chop 2 (4-ounce) packets of semi-sweet baking bars and set aside. In a medium saucepan (off heat), whisk together 3/4 cup granulated sugar, 1/2 teaspoon salt, and 1/4 cup cornstarch. Add 4 large egg yolks, then slowly whisk in 2 cups whole milk and 1 cup heavy cream until the mixture is smooth and lump-free. Place the pot over medium-low heat, whisking occasionally and continuously scraping the sides and bottom with a spatula to prevent sticking and ensure even cooking. Gradually heat the mixture.
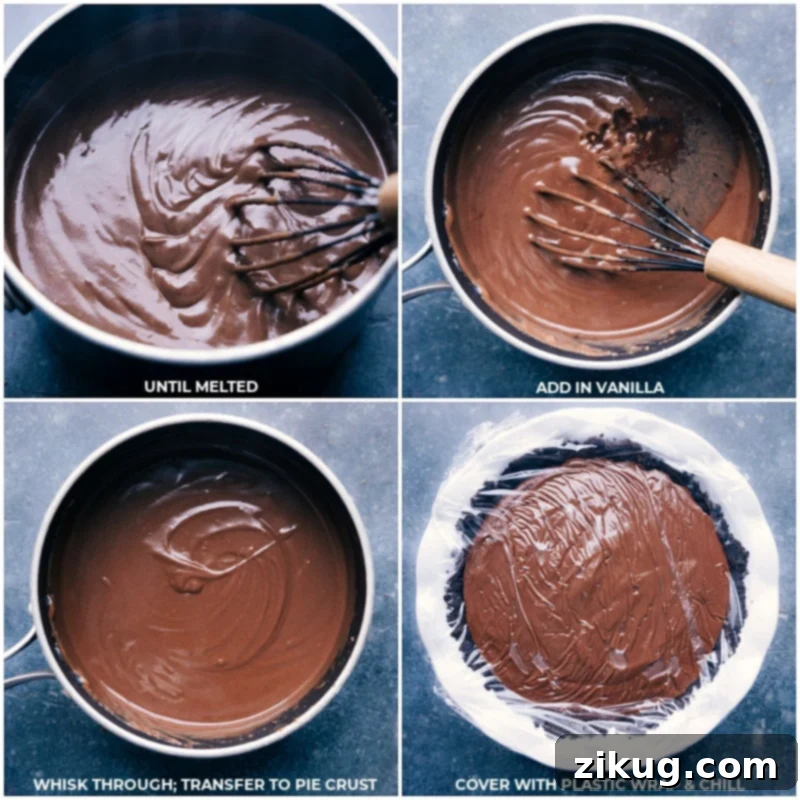
- Thicken the Pudding: As the mixture begins to thicken, switch to constant whisking. Once large bubbles start to form and burst on the surface, reduce the heat slightly and continue to whisk briskly for another minute. The mixture should thicken into a rich pudding consistency. Remove the pot from the heat and whisk for one more minute to ensure smoothness. Add 2 tablespoons of unsalted butter and whisk until it’s fully melted and incorporated. Then, add the chopped semi-sweet chocolate and whisk vigorously until the chocolate has completely melted and the filling is silky smooth. Finally, stir in 2 teaspoons of vanilla extract.
- Assemble and Chill the Pie: Pour the warm chocolate filling into the completely cooled Oreo crust, using a spatula to smooth the top. To prevent a “skin” from forming on the pudding as it chills, cover the pie directly with plastic wrap, pressing the wrap gently onto the surface of the filling. Refrigerate the pie for at least 8 hours, or ideally overnight, until it is thoroughly chilled and set firm.
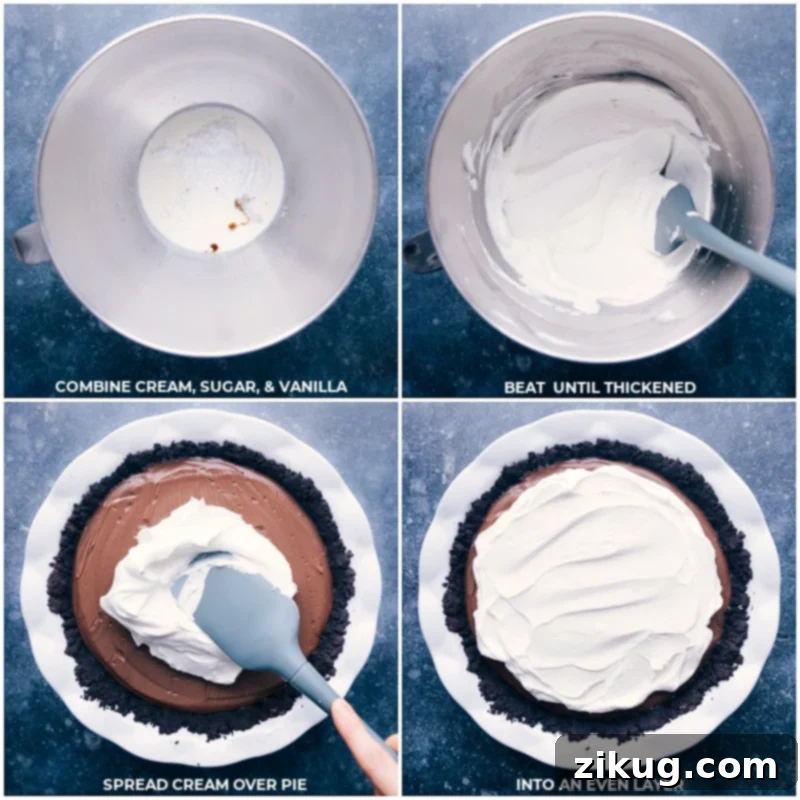
- Prepare the Whipped Cream Topping: In a clean mixing bowl, combine 1 cup heavy cream, 4 tablespoons of powdered sugar, and 1/2 teaspoon vanilla extract. You can start with 2 tablespoons of powdered sugar and adjust to your preferred sweetness. Using a hand mixer, start beating on low speed, gradually increasing to high speed until medium-to-stiff peaks form. This typically takes about 2-4 minutes. Be careful not to overbeat, as it can quickly turn into butter.
- Garnish and Serve: Carefully spread the freshly whipped cream evenly over the chilled and set chocolate filling. For a beautiful finish, garnish the pie with delicate chocolate shavings created using a vegetable peeler on a chocolate bar (optional). For perfectly neat slices, warm a sharp knife under hot running water, wipe it dry, and then make each cut. Repeat this warming and drying process for every slice to prevent the filling from sticking and ensure clean, elegant servings.
Frequently Asked Questions About Chocolate Cream Pie
Why Is My Chocolate Cream Pie Runny?
The most common reason for a runny chocolate cream pie filling is that the pudding wasn’t cooked for a sufficient amount of time to properly thicken. To prevent this common issue, consider using a candy thermometer while cooking the pudding mixture. The filling needs to reach a temperature between 160-170 degrees F (71-77°C) to activate the cornstarch and egg yolks, ensuring it thickens correctly. Cooking it too quickly or not long enough will leave you with a loose, unset pudding.
How Do I Get A Smooth Chocolate Filling?
Achieving a perfectly smooth, luscious chocolate filling involves a couple of key techniques. First, ensure that your egg and milk custard has cooled slightly off the heat before you incorporate the chocolate. Adding chocolate to a scorching hot mixture can sometimes cause it to seize or become grainy. Second, when you do add the chopped chocolate and butter, whisk briskly and continuously. This constant agitation helps the chocolate melt evenly and thoroughly, integrating it seamlessly into the pudding base for that desirable silky-smooth texture.
Is Boston Cream Pie The Same As Chocolate Cream Pie?
No, a Boston Cream Pie is distinctly different from a Chocolate Cream Pie. A Boston Cream Pie is traditionally a cake – specifically, a sponge cake split into two layers, filled with a rich vanilla pastry cream or custard, and then topped with a shiny chocolate ganache. Some regional variations might feature a pie with a standard flaky pastry crust, a vanilla custard filling, and a chocolate ganache topping, but the classic Boston Cream Pie is fundamentally a cake. Our Chocolate Cream Pie, however, features a cookie crust, a deep chocolate pudding filling, and a fresh whipped cream topping.
Can I Freeze Chocolate Cream Pie?
Yes, you can freeze Chocolate Cream Pie, but with a caveat for optimal results. For the best texture upon thawing, it’s highly recommended to freeze the pie before adding the whipped cream topping. Once the pie is fully set and chilled, wrap it very well in multiple layers of plastic wrap and then a layer of aluminum foil to prevent freezer burn. When you’re ready to serve, thaw the pie slowly in the refrigerator overnight. Add fresh homemade whipped cream and chocolate curls just before serving to ensure the topping is light and fluffy.
Storage Guidelines for Your Chocolate Cream Pie
How Long Does Chocolate Cream Pie Last?
Your homemade Chocolate Cream Pie will remain at its best for 2-4 days when stored properly, covered, in the refrigerator. It’s important to note that the crust will gradually soften with each passing day in the fridge, and the filling may begin to “weep” (where liquid forms around the edges) around the 4-day mark, indicating it’s past its prime.
Do Chocolate Cream Pies Need To Be Refrigerated?
Absolutely. Once the pie has cooled to room temperature after assembly, it fundamentally needs to chill thoroughly to fully set up into that firm, sliceable custard. Furthermore, once the pie is completely set, it is crucial that it remains refrigerated, only being removed from the cold environment just before serving to maintain its quality, safety, and desirable texture.
Explore More Decadent Chocolate Desserts
If you’re a true chocolate enthusiast, you’ll love these other delightful recipes that celebrate the rich flavor of cocoa:
- Chocolate Covered Strawberries with a delicate white chocolate drizzle – a simple yet elegant treat.
- Chocolate Peanut Butter Pie featuring an irresistible chocolate cookie crust, perfect for fans of this classic flavor pairing.
- Bakery Style Chocolate Cookies loaded with melty chocolate chips, just like your favorite bakery.
- Chocolate Chia Seed Pudding, a “secretly” fiber-filled pudding that’s both healthy and delicious.
- Chocolate Frozen Yogurt, offering a delightful sweet-tart flavor for a refreshing indulgence.

Chocolate Cream Pie
Video
Watch the full recipe video for Chocolate Cream Pie:
Chocolate Cream Pie Video Tutorial
Equipment
-
Pie pan (9-inch)
-
Blender or food processor
-
Hand mixer
Ingredients
- 4 tablespoons unsalted butter, melted
- 24 Oreos or chocolate sandwich cookies
- 1/16 teaspoon salt
- 3/4 cup granulated sugar
- 1/2 teaspoon salt
- 1/4 cup cornstarch
- 2 cups whole milk
- 1 cup heavy cream
- 4 large egg yolks
- 2 tablespoons unsalted butter
- 2 (4-ounce) packets semi-sweet baking bars (see note 1)
- 2 teaspoons vanilla extract
- 1 cup heavy cream
- 4 tablespoons powdered sugar
- 1/2 teaspoon vanilla extract
- 1 chocolate bar (optional, for shavings)
Instructions
-
Preheat oven to 350°F (175°C). Grease a 9-inch pie pan. Melt 4 tablespoons butter and let cool for 5 minutes. Crush cookies into fine crumbs using a blender or food processor; measure 1-3/4 cups. Mix crumbs, salt, and cooled melted butter until combined.
-
Transfer crumb mixture to the prepared pan. Press crumbs into the sides and bottom of the pan with your fingers, then compress with a flat measuring cup. Bake for 9 minutes and let cool completely on a wire rack.
-
Chop the chocolate bars and set aside. Off heat, combine sugar, salt, and cornstarch in a pot and whisk together. Add egg yolks, then slowly whisk in milk and cream until smooth. Place pot on medium-low heat, whisking occasionally and scraping the sides and bottom with a spatula to prevent sticking. Heat gradually.
-
When mixture starts to thicken, whisk constantly. Once large bubbles form and burst, reduce heat slightly and whisk for 1 minute until it thickens into a rich pudding. Remove from heat, whisk for another minute, then add butter and whisk until melted. Add chopped chocolate and whisk until smooth, then stir in vanilla extract.
-
Scrape filling into the cooled crust and smooth the top with a spatula. Cover with plastic wrap, pressing it directly onto the surface of the pudding to prevent a skin from forming. Refrigerate for at least 8 hours or until thoroughly chilled and set.
-
For the topping, pour heavy cream, powdered sugar, and vanilla into a mixing bowl. Start with 2 tablespoons powdered sugar and increase to your sweetness preference. Use a hand mixer to mix on low speed, then increase to high until medium-to-stiff peaks form, which should take about 2–4 minutes. Be careful not to overbeat. Spread the whipped cream evenly over the pie and garnish with chocolate shavings using a vegetable peeler (optional). For clean slices, warm a sharp knife under hot water, dry it, and slice the pie. Repeat for each cut.
Recipe Notes
Storage: This pie can be refrigerated in an airtight container for 2–4 days.
Freezing: You can freeze Chocolate Cream Pie before adding the whipped cream topping. Wrap it well to prevent freezer burn and thaw in the refrigerator. Add fresh whipped cream before serving.
Nutrition
Nutrition information is automatically calculated, so should only be used as an approximation.