
Indulge in the Ultimate Delight: Easy Stovetop Chocolate Covered Oreo Fudge
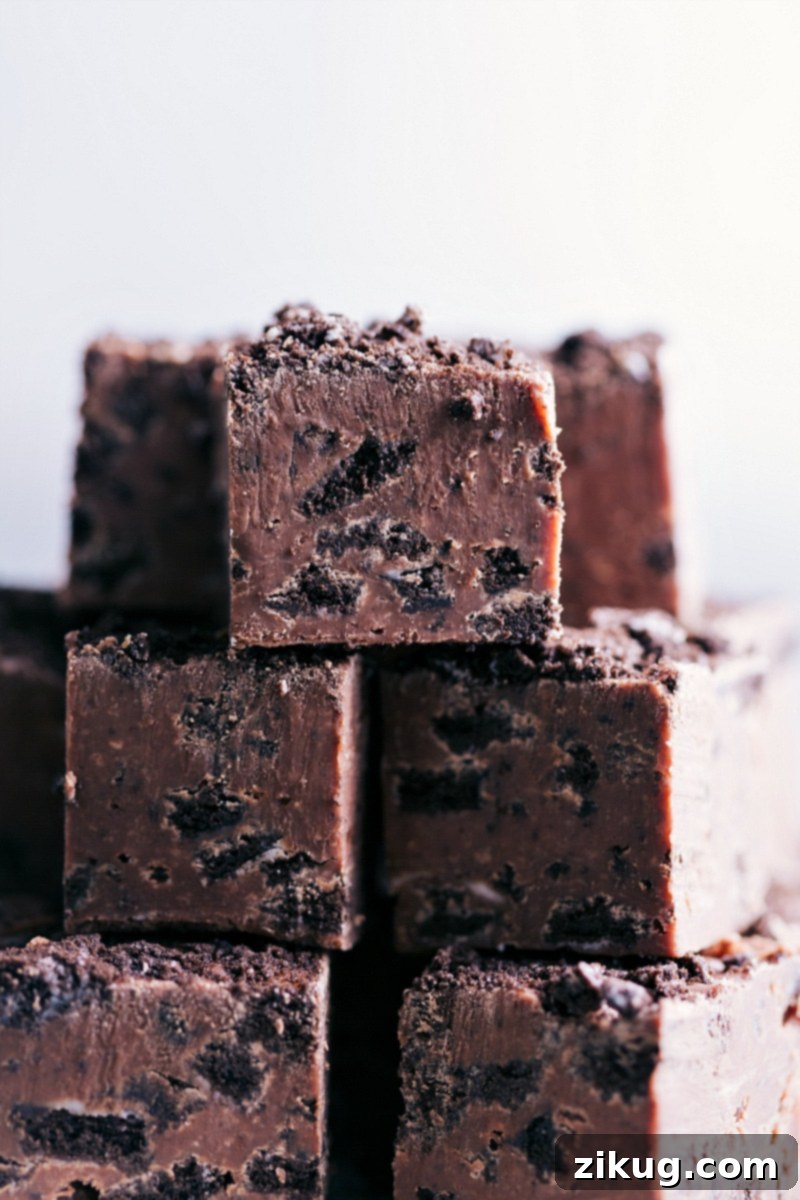
Prepare for a truly decadent treat! This simple stovetop Chocolate-Covered Oreo Fudge offers a rich, creamy milk chocolate base generously studded with crunchy, crushed Oreo® cookies. It’s an absolute dream come true for any chocolate lover, combining two iconic favorites into one irresistible dessert. This fudge is not just delicious; it’s incredibly easy to make, making it your go-to recipe for quick indulgence or impressive holiday gifting.
Looking for more effortless dessert ideas to simplify your busy schedule? Don’t miss out on other easy fudge recipes like Microwave Caramel Chocolate Fudge, a fun and gooey S’mores Fudge, or the visually stunning Tiger Butter Fudge. Each offers a unique flavor profile and the same homemade goodness with minimal effort.
The Irresistible Appeal of Chocolate-Covered Oreo Fudge
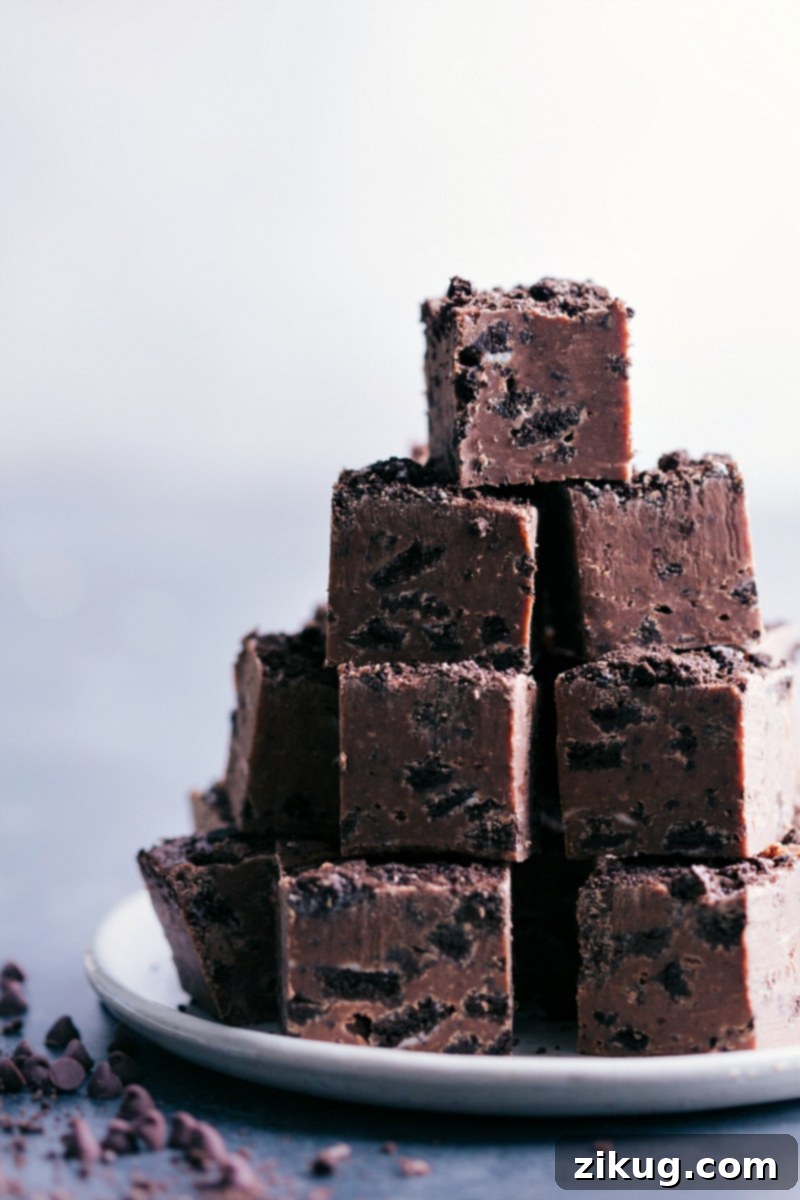
For many, chocolate-covered Oreos are a nostalgic holiday staple, a delightful blend of crisp cookie and smooth chocolate coating. Likewise, Oreo balls often make an appearance on festive dessert tables, adored for their rich, bite-sized bliss. This Chocolate-Covered Oreo Fudge recipe channels the very essence of these beloved treats, transforming them into a silky, melt-in-your-mouth fudge experience. Imagine the familiar crunch of an Oreo, suspended in a luxurious chocolate fudge, creating a symphony of textures and flavors in every bite. It’s the perfect addition to your holiday dessert spread, a thoughtful homemade gift, or simply a well-deserved personal indulgence.
What makes this fudge so special is its uncanny ability to deliver that classic chocolate-covered Oreo sensation in a completely new format. The creaminess of the fudge beautifully complements the signature crunch of the cookies, creating a textural delight that keeps you coming back for more. It’s a versatile dessert that’s equally at home on a festive platter during the holiday season or enjoyed as a simple, comforting treat any day of the year. This recipe truly is a celebration of chocolate and cookies, designed to delight every palate.
Unlocking the Secret to Easy Stovetop Fudge
Making homemade fudge might sound intimidating, but this stovetop method simplifies the process dramatically. Forget about candy thermometers, complex sugar stages, or lengthy cooling times. This recipe relies on a few key ingredients and a straightforward technique that ensures a perfect, creamy batch every time. The beauty of stovetop fudge lies in its accessibility – anyone can make it, regardless of their baking experience. It’s ideal for those busy holiday seasons when time is precious, yet you still want to create something special and homemade.
The minimal cleanup and quick prep time also make this recipe a winner. You’ll be amazed at how quickly you can transform simple ingredients into a stunning dessert that tastes like it came from a gourmet candy shop. This method is all about patience over precision, emphasizing low heat and constant stirring to achieve that coveted smooth texture. By skipping the more traditional, intricate fudge-making steps, we focus on maximizing flavor and enjoyment with minimum fuss, proving that delicious desserts don’t have to be complicated.
Essential Ingredients for Decadent Oreo Fudge
Crafting the perfect Chocolate-Covered Oreo Fudge begins with selecting high-quality ingredients. Each component plays a vital role in achieving the rich flavor and smooth, creamy texture that makes this fudge so irresistible. Here’s a detailed look at what you’ll need and why each ingredient matters:
- Butter: Unsalted butter is preferred to control the overall saltiness of the fudge. Cutting it into small pieces ensures it melts more quickly and evenly, preventing any scorching in your pan. Butter contributes to the fudge’s luscious, rich mouthfeel and helps it set properly.
- Milk Chocolate Chips: The star of the show! For the best flavor and a velvety-smooth fudge, always opt for good-quality milk chocolate chips. Brands like Ghirardelli or Guittard offer superior taste and melting consistency. Milk chocolate provides that classic sweet, creamy chocolate flavor reminiscent of chocolate-covered Oreos. If you prefer a less sweet fudge, you can experiment with semi-sweet or dark chocolate chips, or even a combination.
- Sweetened Condensed Milk: This is the magic ingredient that gives fudge its signature texture and sweetness without requiring complex sugar crystallization. It’s crucial to use *full-fat* sweetened condensed milk, such as Eagle Brand®. Evaporated milk is not a substitute, as it will result in a gritty, crumbly fudge rather than the smooth, creamy consistency we’re aiming for. The fat content and sugar concentration in sweetened condensed milk are key to the fudge’s structure.
- Salt: A small pinch of salt is essential to balance the sweetness of the chocolate and condensed milk. It also significantly enhances the overall chocolate flavor, making it taste deeper and more complex. Don’t skip it!
- Vanilla Extract: Vanilla adds a warm, aromatic depth that complements the chocolate beautifully. To preserve its delicate flavor, it’s vital to stir in the vanilla extract *after* you remove the fudge mixture from the heat. High heat can diminish vanilla’s potency.
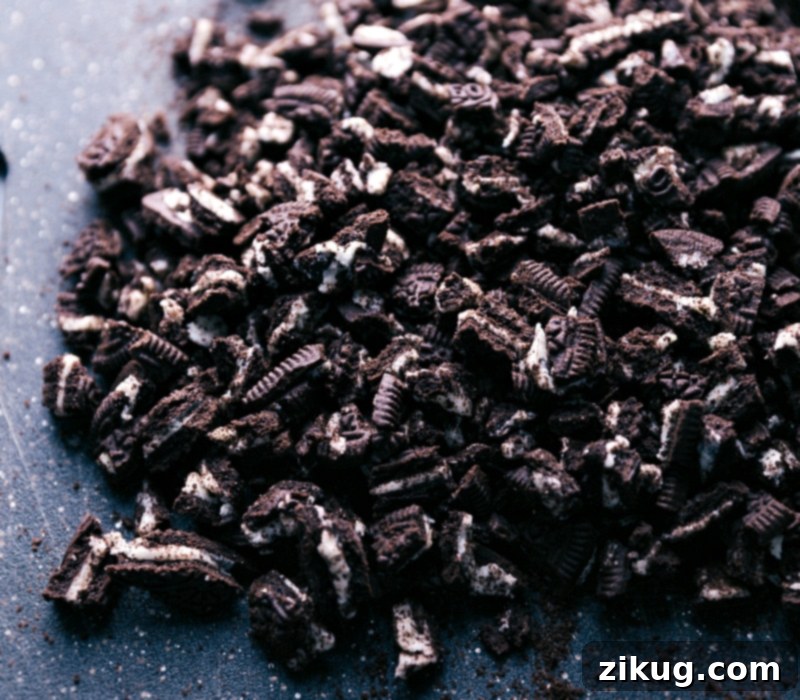
- Oreos: The beloved crunch factor! Regular Oreo cookies work perfectly for this fudge, and there’s no need to remove the cream filling – it only adds to the richness. You’ll need to coarsely chop most of the Oreos to mix into the fudge, and crush a few extra for a delightful topping. The contrast between the creamy fudge and crunchy cookie pieces is what makes this dessert so addictive.
By understanding the role of each ingredient, you’re not just following a recipe; you’re mastering the art of perfect fudge-making!
How To Make The Best Chocolate Covered Oreo Fudge: A Step-by-Step Guide
Creating this irresistible Chocolate Covered Oreo Fudge is surprisingly simple. Follow these steps for a perfectly creamy and delicious result:
- Prepare Your Pan: Start by selecting an 8×8-inch pan for thicker fudge or an 11×7-inch pan for a slightly thinner slice. Line your chosen pan with parchment paper, ensuring there’s a generous overhang on all sides. This “sling” will make lifting the set fudge out of the pan incredibly easy. Before you begin cooking, cut your butter into small, 1-tablespoon pieces to facilitate faster melting. Coarsely chop approximately 14 Oreos (about 2 cups worth) for mixing into the fudge, and separately, crush 4 additional Oreos into fine crumbs for the topping. Set these aside.
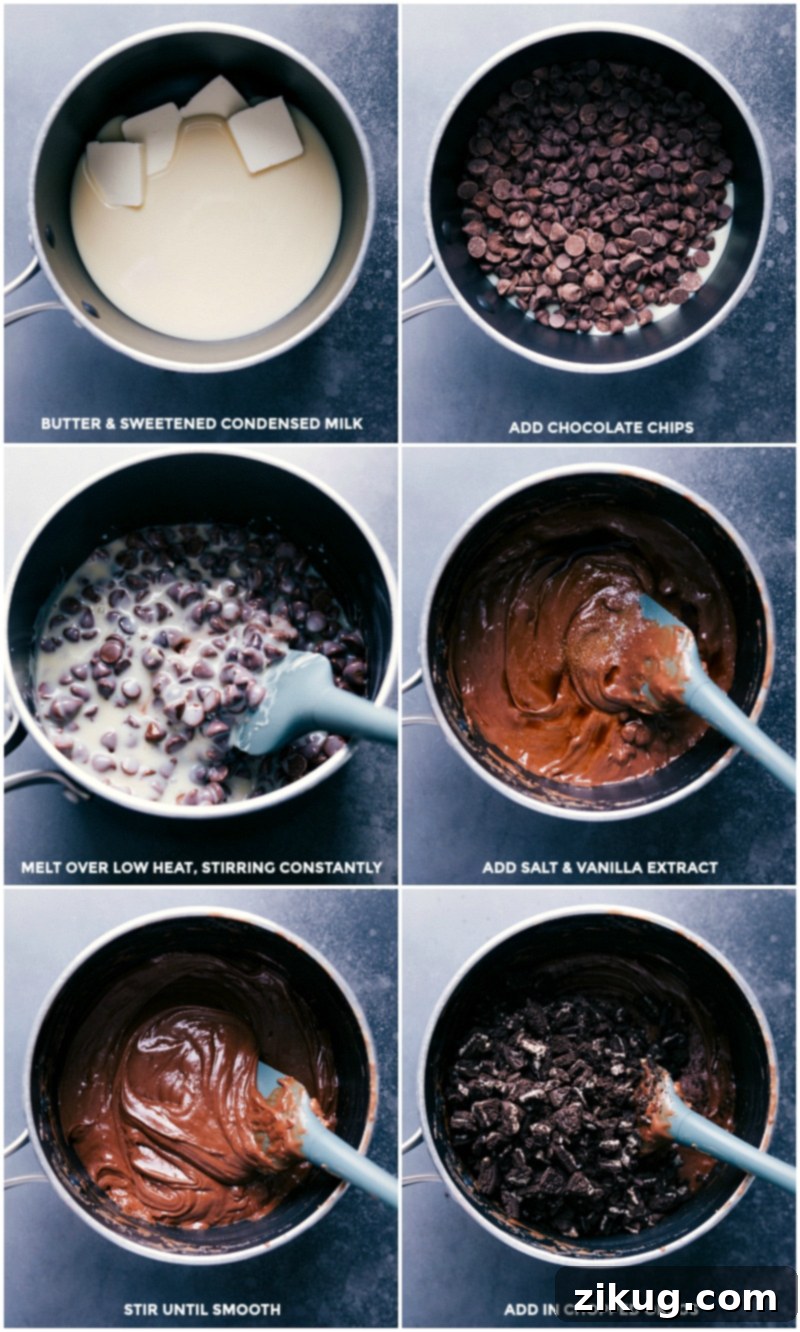
- Gently Melt the Base: In a medium-sized, thick-bottomed nonstick pan, combine the cut butter, milk chocolate chips, and sweetened condensed milk. Place the pan on your stovetop and set the heat to the *lowest possible setting*. This is a crucial step to prevent burning. Using a heat-resistant spatula, stir the mixture constantly, making sure to scrape the bottom and sides of the pan regularly. Patience is key here; resist the temptation to increase the heat, as slow and steady melting ensures a smooth, luscious fudge without any scorched spots.
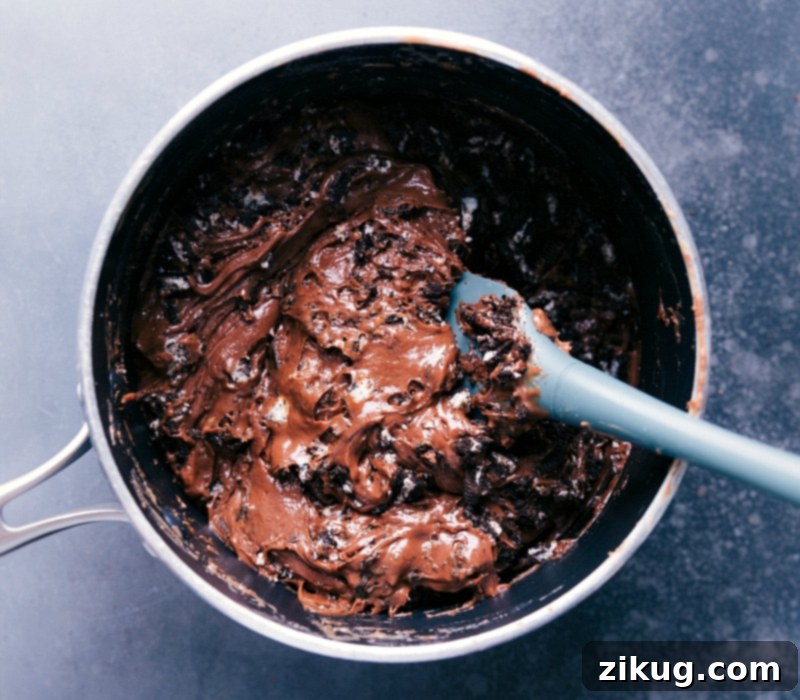
- Incorporate Flavors and Oreos: Once the butter and chocolate chips have completely melted and the mixture is smooth and well combined, immediately remove the pan from the heat. Stir in the salt and vanilla extract until they are fully incorporated. The aroma of the vanilla will bloom beautifully off the heat. Next, add the 2 cups of coarsely chopped Oreos to the warm fudge. Gently fold them in until they are evenly distributed throughout the chocolate mixture. Be careful not to overmix, as this can break down the cookie pieces too much.
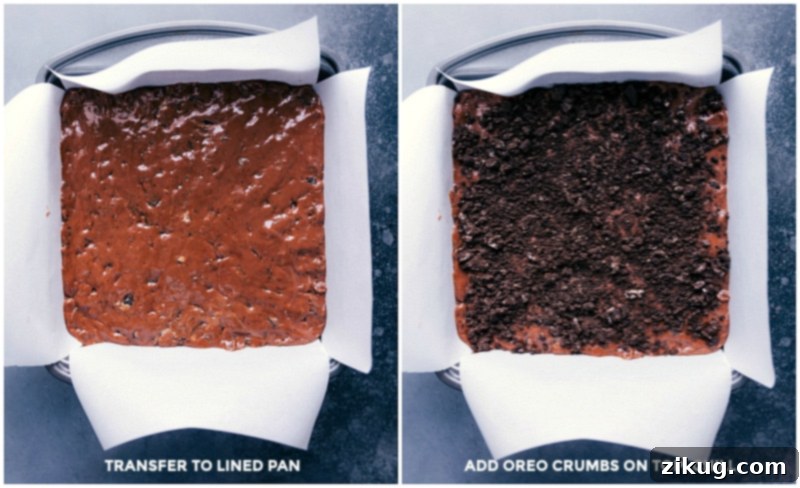
- Set the Fudge: Quickly transfer the warm fudge mixture into your prepared pan. Use a spatula, lightly sprayed with cooking spray (to prevent sticking), to spread the fudge into an even layer. Immediately sprinkle the reserved crushed Oreo crumbs evenly over the top of the fudge. Gently press the crumbs into the surface of the fudge with the back of your spatula or your fingertips to ensure they adhere well. Cover the pan loosely with plastic wrap or foil and refrigerate for at least 4-8 hours, or until the fudge is completely firm.
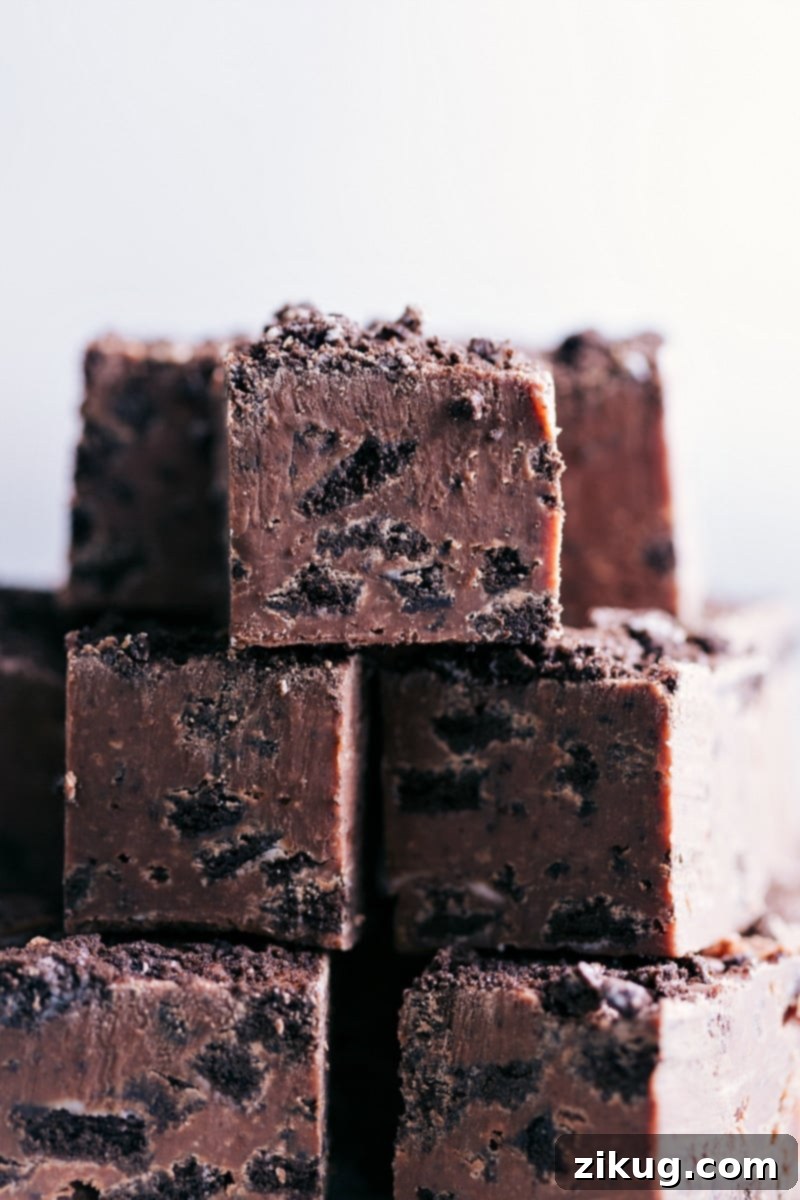
- Cut and Serve: Once the fudge is firm, use the parchment paper overhang to lift it cleanly out of the pan. For clean, sharp cuts, use a very sharp knife. For even better results, run your knife under hot water and wipe it dry between each cut. This technique helps glide through the fudge without dragging. We recommend cutting the fudge into small pieces, as this dessert is quite rich and satisfying. Arrange on a platter and enjoy your homemade masterpiece!
Expert Tips for Flawless Chocolate Covered Oreo Fudge
Achieving perfectly creamy and delicious Chocolate Covered Oreo Fudge is simple when you follow a few key tips. These expert suggestions will help you avoid common pitfalls and ensure a fantastic result every time:
- Always Line Your Pan: This is a non-negotiable step for easy removal. Lining your baking pan with parchment paper or aluminum foil, leaving extra paper hanging over the sides, creates a convenient “sling.” Once the fudge is set, you can simply lift it out of the pan without any sticking or mess, making cutting a breeze.
- Use Sweetened Condensed Milk (Not Evaporated): This is critical for the fudge’s texture. Sweetened condensed milk is a thick, syrupy product that is already sweetened, while evaporated milk is unsweetened and much thinner. Only full-fat sweetened condensed milk, like Eagle Brand®, will provide the correct consistency and prevent your fudge from becoming gritty or failing to set.
- Opt for a Thick-Bottomed Nonstick Pan: A heavy-bottomed pan distributes heat more evenly, significantly reducing the risk of your fudge mixture burning on the bottom. A nonstick surface also prevents sticking, making stirring easier and cleanup effortless.
- Maintain the Lowest Heat Setting: While it might seem counterintuitive to cook on such low heat, patience is a virtue here. Keeping the heat on the absolute lowest setting prevents the chocolate and condensed milk from heating too quickly and scorching. A slow, gentle melt ensures a smooth, creamy, and unburnt fudge base.
- Stir Constantly with a Heat-Resistant Spatula: Continuous stirring is essential to prevent any ingredients from sticking to the bottom and burning. A heat-resistant silicone spatula is ideal because it allows you to thoroughly scrape the bottom and sides of the pan, ensuring all ingredients are evenly melted and combined.
- Top with Crushed Oreos Immediately: For the crushed Oreos on top to adhere beautifully and evenly, sprinkle them over the fudge as soon as it’s poured into the pan and smoothed. Gently pressing them down will help them embed into the warm fudge, ensuring they don’t fall off once it sets.
- Allow Ample Chilling Time: Don’t rush the chilling process! Fudge needs sufficient time in the refrigerator (at least 4-8 hours, or overnight) to become firm enough to cut cleanly. A properly chilled fudge will have a much better texture and presentation.
By following these simple yet effective tips, you’re well on your way to creating professional-quality Chocolate Covered Oreo Fudge right in your own kitchen!
Creative Variations: Customize Your Oreo Fudge
One of the joys of making homemade fudge is the ability to customize it to your taste. This Chocolate Covered Oreo Fudge recipe serves as a fantastic base for countless variations. Get creative and make it uniquely yours!
- Experiment with Different Chocolate Flavors: While milk chocolate offers a classic sweetness, you can easily adjust the intensity. Use semi-sweet chocolate chips for a richer, less sugary profile, or go bold with dark chocolate chips for a sophisticated, intense cocoa flavor. For a balanced approach, try mixing half milk chocolate with half semi-sweet chocolate chips. Remember, the quality of your chocolate will significantly impact the final taste.
- White Chocolate Oreo Fudge: Transform this recipe into a dazzling white chocolate version by swapping the milk chocolate chips for white chocolate chips. Ensure you use good-quality white chocolate (not baking melts) for a smooth, creamy result. This variation offers a sweet, vanilla-forward flavor that pairs beautifully with the dark Oreos.
- Explore Different Oreo Flavors: Oreo cookies come in an array of exciting flavors! Imagine the possibilities:
- Mint Oreo Fudge: Use Mint Oreos for a refreshing twist.
- Peanut Butter Oreo Fudge: Incorporate Peanut Butter Oreos for a nutty, chocolatey delight.
- Golden Oreo Fudge: For a lighter, vanilla-centric fudge, use Golden Oreos.
- Seasonal Oreos: Keep an eye out for holiday or seasonal Oreo flavors to make your fudge even more festive and unique!
- Add Extra Mix-ins: Elevate your fudge with additional elements. Consider folding in chopped nuts (walnuts, pecans), mini marshmallows, pretzel pieces for a salty-sweet crunch, or even a swirl of caramel or peanut butter before it sets.
These variations allow you to personalize your fudge for different occasions, tastes, or dietary preferences (where applicable). Don’t be afraid to experiment and discover your new favorite combination!
Storage and Shelf Life of Oreo Fudge
Proper storage is key to keeping your homemade Chocolate Covered Oreo Fudge fresh and delicious for as long as possible. This fudge, like most, benefits from cool temperatures to maintain its ideal creamy texture.
Room Temperature Storage
While possible for short periods, storing fudge at room temperature is generally not recommended for extended freshness or optimal texture. If kept in a sealed, airtight container in a cool, dry place away from direct sunlight, it may last for about a week. However, the fudge tends to become softer and slightly crumbly when stored at room temperature for too long.
Refrigeration for Best Results
For the best texture and extended shelf life, store your Chocolate Covered Oreo Fudge in a sealed, airtight container in the refrigerator. When stored this way, it will remain fresh and delightfully firm for up to two weeks. We find that the fudge tastes best within the first 2-3 days out of the fridge, when its flavors are most vibrant and its texture is perfectly creamy. The cool temperature helps maintain its structure and prevents it from becoming overly soft.
Freezing for Long-Term Enjoyment
Fudge freezes beautifully, making it an excellent option for meal prepping desserts or making ahead for future events. To freeze, wrap individual pieces or small batches tightly in plastic wrap, then place them in a freezer-safe, airtight container or heavy-duty freezer bag. This double-layer protection prevents freezer burn and preserves flavor. Your fudge can be frozen for up to three months. To enjoy, simply thaw the fudge in the refrigerator overnight or at room temperature for a few hours until it reaches your desired consistency.
Always ensure your fudge is in an airtight container to prevent it from absorbing any odors from your fridge or freezer, which can alter its delicious flavor.
More Easy Dessert Recipes to Savor
If you loved making this easy Chocolate Covered Oreo Fudge, you’re in for a treat with these other simple yet delicious dessert ideas. Perfect for satisfying your sweet tooth or impressing guests with minimal effort!
- No Bake Oreo Truffle Cookies covered in rich chocolate – another fantastic way to enjoy Oreos!
- Puppy Chow (Muddy Buddies), a classic chocolate peanut butter snack mix that’s addictive and fun.
- Peppermint Bark Cookies, featuring a delightful brownie mix cookie base and festive peppermint crunch.
- Edible Cookie Dough with mini chocolate chips – safe to eat raw and utterly delicious.
- Sugar Cookie Snack Mix, a sweet and crunchy mix featuring sugar cookie candies.
Chocolate Covered Oreo Fudge Recipe

By Chelsea Lords
Recipe Details
- Prep Time: 20 minutes
- Cook Time: 10 minutes
- Chilling Time: 4 hours
- Total Time: 4 hours 30 minutes
- Servings: 36 pieces
Equipment
- 8×8-inch baking pan (or 9×9-inch, lined)
- Medium nonstick pan
Ingredients
- 4 tablespoons unsalted butter
- 3 cups milk chocolate chips (see Note 1)
- 1 (14-ounce) can sweetened condensed milk (full-fat)
- 1/4 teaspoon salt
- 2 teaspoons vanilla extract
- 18 Oreos (coarsely chopped, divided)
Instructions
- Find an 8×8-inch or 9×9-inch pan for thicker fudge, or an 11×7-inch pan for thinner fudge. Line the pan with parchment paper, leaving an overhang for easy removal. Cut the butter into 1-tablespoon pieces and coarsely chop enough Oreos to measure 2 cups. Crush 4 Oreos in a bag using a rolling pin or meat mallet and set them aside for the topping.
- In a nonstick pan, combine the butter, chocolate chips, and sweetened condensed milk on the lowest heat setting. Using a heat-resistant spatula, stir the mixture constantly, making sure to scrape the sides and bottom. Resist the urge to increase the heat—your patience will pay off!
- As soon as the butter and chocolate chips are melted, remove the pan from heat. Stir in the salt and vanilla extract; mix well. Add in the 2 cups chopped Oreos and gently mix to combine and incorporate the cookies into the fudge.
- Transfer the mixture to the prepared pan. Spray a spatula with cooking spray and smooth the fudge into an even layer. Sprinkle the crushed Oreos on top and gently press into the fudge. Cover and refrigerate for 4–8 hours or until fudge is firm.
- Remove from the pan using the overhang of parchment paper. Cut the fudge with a hot, very sharp knife (run it under hot water, dry, and make quick cuts). I recommend cutting the fudge into small pieces—it’s rich!
Recipe Notes
Note 1: For this fudge, milk chocolate is a favorite due to its richness and classic sweet flavor. For a less sweet option, you can use semi-sweet or dark chocolate, or combine half semi-sweet and half milk chocolate. High-quality chocolate chips, like Ghirardelli or Guittard, will significantly enhance the taste and texture of your fudge!
Storage: Chocolate-Covered Oreo Fudge is best stored in an airtight container in the fridge and enjoyed right out of the fridge. If it’s left out of the fridge for too long, the fudge may become crumbly. Leftover fudge will stay good for 1–2 weeks in an airtight container in the fridge, but we find it’s at its absolute best within 2–3 days.
Nutrition
Nutrition information is automatically calculated, so should only be used as an approximation.
- Calories: 80 kcal
- Carbohydrates: 10g
- Protein: 1g
- Fat: 4g
- Saturated Fat: 2g
- Cholesterol: 4mg
- Sodium: 83mg
- Potassium: 31mg
- Fiber: 1g
- Sugar: 6g
- Vitamin A: 41 IU
- Calcium: 4mg
- Iron: 1mg
Like this recipe? We’d love to hear from you! Leave a comment below and share your thoughts or creations.