
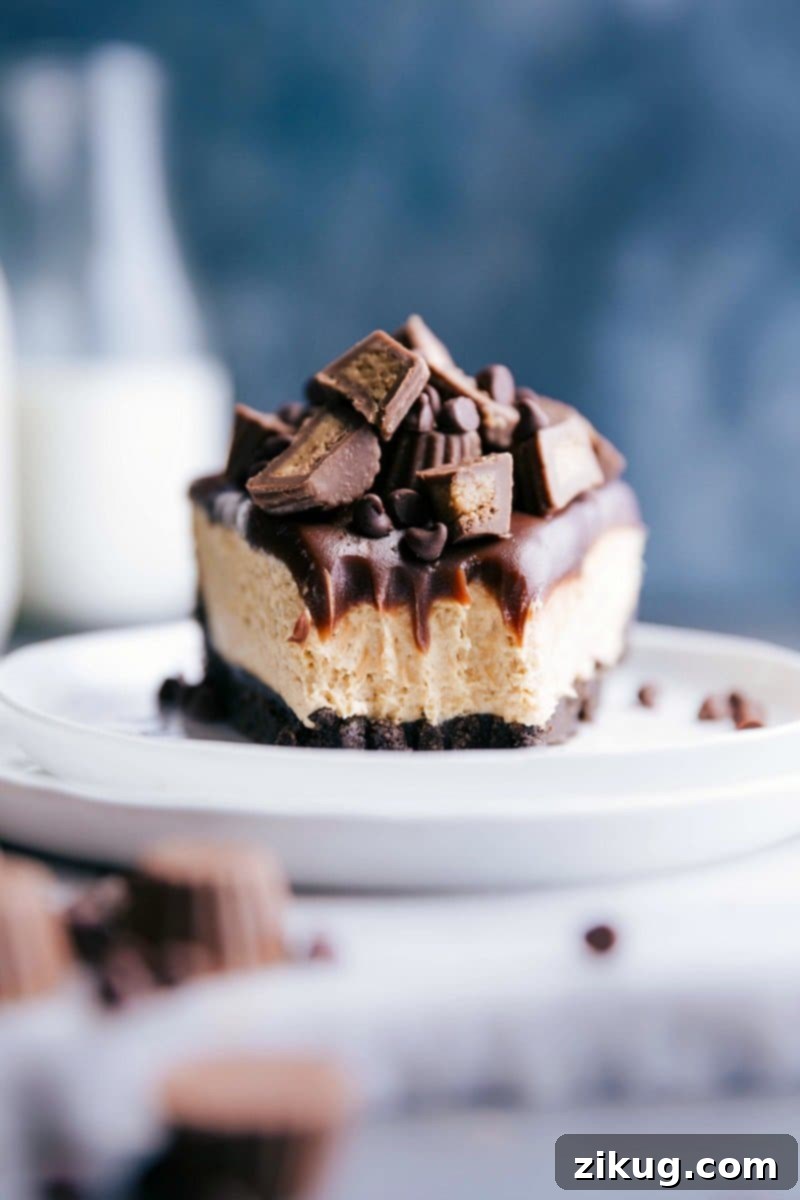
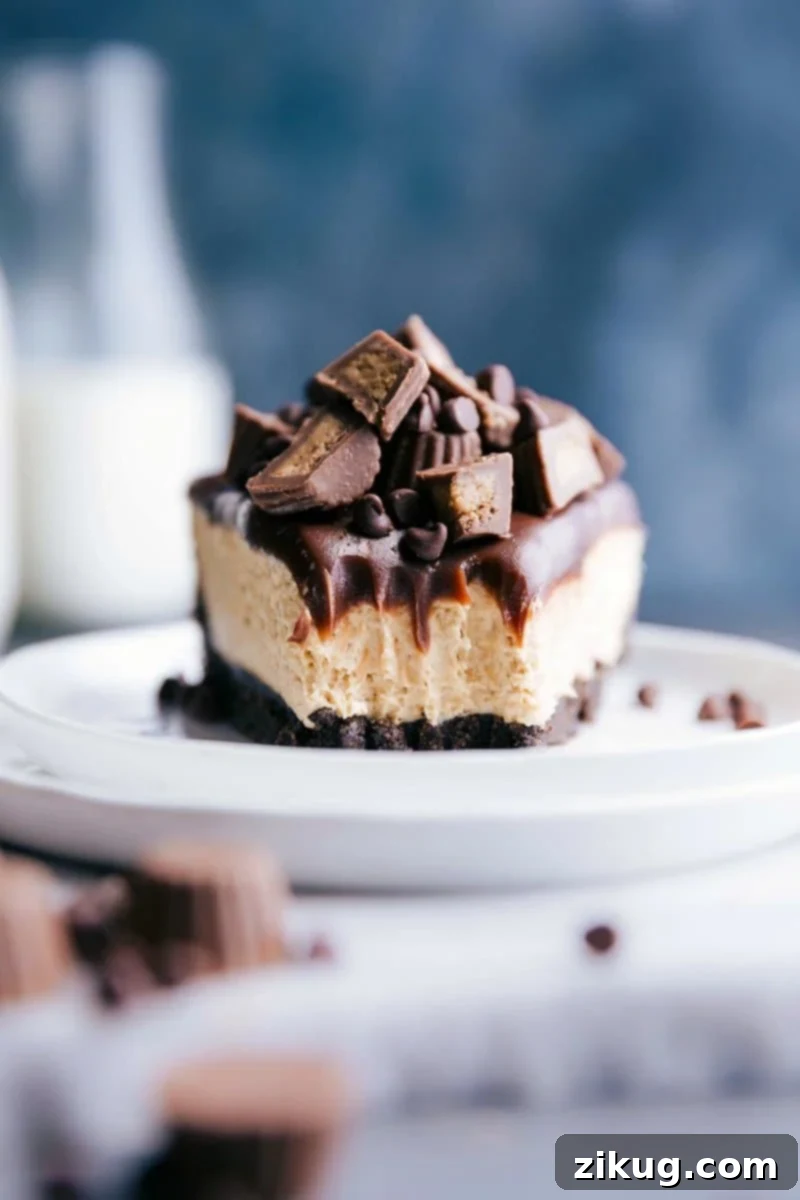
Prepare to be amazed by this effortlessly delightful **No-Bake Peanut Butter Cheesecake**. It’s a symphony of textures and flavors, combining a rich Oreo crust, an irresistibly creamy peanut butter filling, and a luscious chocolate ganache. Crowned with chopped mini Reese’s, this dessert delivers a supreme peanut butter-chocolate experience that’s perfect for any occasion and surprisingly simple to create.
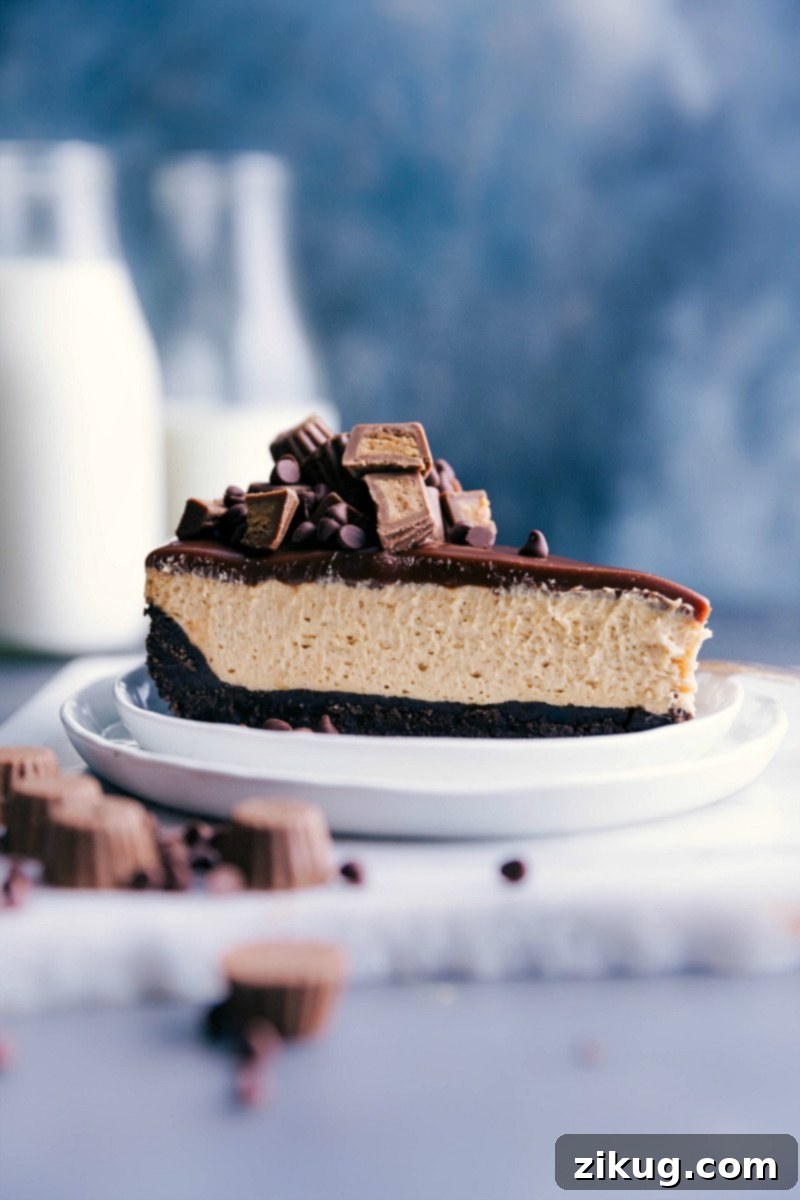
No-Bake Peanut Butter Cheesecake: The Ultimate Indulgence
Few flavor combinations capture hearts quite like peanut butter and chocolate. This classic duo reaches new heights when paired with the iconic crunch of Oreos, transforming into a dessert so captivating, you won’t want to put it down. Our No-Bake Peanut Butter Cheesecake is the embodiment of this perfect trinity – a rich, indulgent treat with a wonderfully creamy, soft texture, all nestled upon a solid, flavorful cookie crust.
What makes this **no-bake peanut butter cheesecake** truly special isn’t just its incredible taste, but also its remarkable simplicity. While it does require some patient chilling time to achieve its signature firm yet creamy consistency, the active preparation steps are straightforward and require no oven, making it an ideal choice for bakers of all skill levels, especially during warmer months. It’s a guaranteed crowd-pleaser that looks impressive but takes minimal effort.
Why You’ll Love This Easy Peanut Butter Chocolate Dessert
- **Effortlessly Delicious:** No baking required means less time in the kitchen and more time enjoying! Perfect for summer gatherings or when you need a show-stopping dessert without the fuss.
- **Peanut Butter Perfection:** If you’re a true peanut butter aficionado, this cheesecake delivers a robust and authentic flavor that will satisfy every craving.
- **Decadent Chocolate Ganache:** A smooth, rich chocolate ganache topping adds another layer of indulgence, perfectly complementing the peanut butter filling.
- **Irresistible Oreo Crust:** The crunchy, buttery Oreo crust provides a fantastic contrast to the creamy filling, making every bite a delightful experience.
- **Make-Ahead Friendly:** This cheesecake needs to chill, which means you can prepare it a day in advance, freeing up your time on the day of your event.
- **Customizable Toppings:** While Reese’s minis are a divine choice, you can easily customize the toppings to suit your preference, from extra chocolate shavings to a sprinkle of sea salt.
Key Ingredients for Your No-Bake Peanut Butter Cheesecake
Crafting this incredible **no-bake peanut butter cheesecake** begins with a selection of simple, high-quality ingredients. Each component plays a vital role in achieving the perfect balance of flavor and texture.
For the Irresistible Oreo Crust
- Oreos: The star of our crust! There’s no need to remove the creamy filling; it actually helps bind the crumbs together, ensuring a firm and flavorful base.
- Unsalted Butter: Melted butter is crucial for binding the Oreo crumbs, creating a sturdy crust that won’t crumble when sliced.
- Granulated Sugar: A touch of white sugar enhances the sweetness of the crust and helps it set even more solidly.
For the Creamy Peanut Butter Cheesecake Filling
- Cream Cheese: Opt for full-fat cream cheese, brought to room temperature, to ensure a smooth, tangy, and incredibly creamy base for our filling. Room temperature cream cheese is essential for lump-free mixing.
- Creamy Peanut Butter: For that signature smooth texture, creamy peanut butter is preferred over crunchy. Choose your favorite brand for the best flavor.
- Powdered Sugar: Also known as confectioners’ sugar, this finely milled sugar sweetens the filling and helps to thicken it without any gritty texture, unlike granulated sugar.
- Vanilla Extract and Salt: These essential flavor enhancers bring out the best in the peanut butter and cream cheese, adding depth and balance to the sweetness.
- Whipped Topping (or Homemade): A thawed frozen whipped topping (like Cool Whip) makes the filling light, airy, and fluffy. You can also easily make your own whipped topping for an even richer taste.
For the Decadent Chocolate Ganache Topping
- Milk Chocolate Chips & Peanut Butter: Melted together, these create a rich, smooth, and utterly delicious chocolate layer that sets beautifully. Milk chocolate offers a sweeter, milder flavor, but semi-sweet can also be used.
- Heavy Cream: Heated heavy cream is poured over the chocolate chips and peanut butter, creating a silky-smooth ganache that’s easy to spread and sets perfectly.
How To Make This Dreamy No-Bake Peanut Butter Cheesecake
Making this no-bake peanut butter cheesecake is simpler than you might think! Follow these steps to create a dessert that will impress everyone.
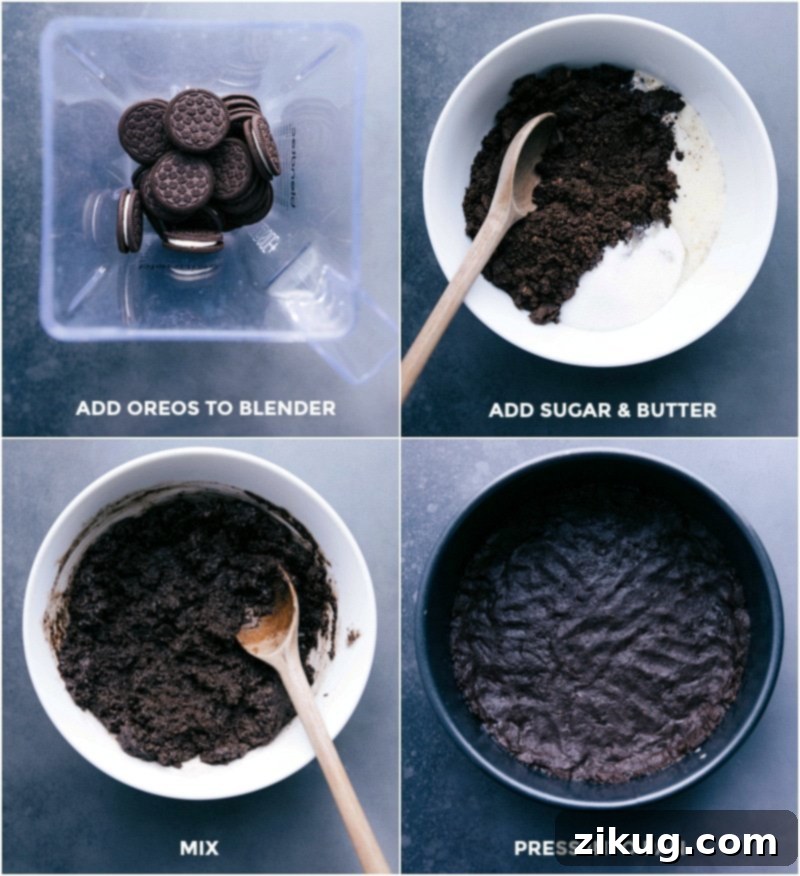
- Prepare the Oreo Crust: Begin by crushing the entire package of Oreos (cookies and filling included) into fine crumbs. A food processor or blender works best for this, but a Ziploc bag and a rolling pin can also do the trick. Combine these crumbs with the melted butter and granulated sugar until well mixed. Firmly press this mixture into the bottom and slightly up the sides of a 9-inch springform pan. Chill the crust in the refrigerator for at least 30 minutes while you prepare the filling. This step is crucial for a stable crust.
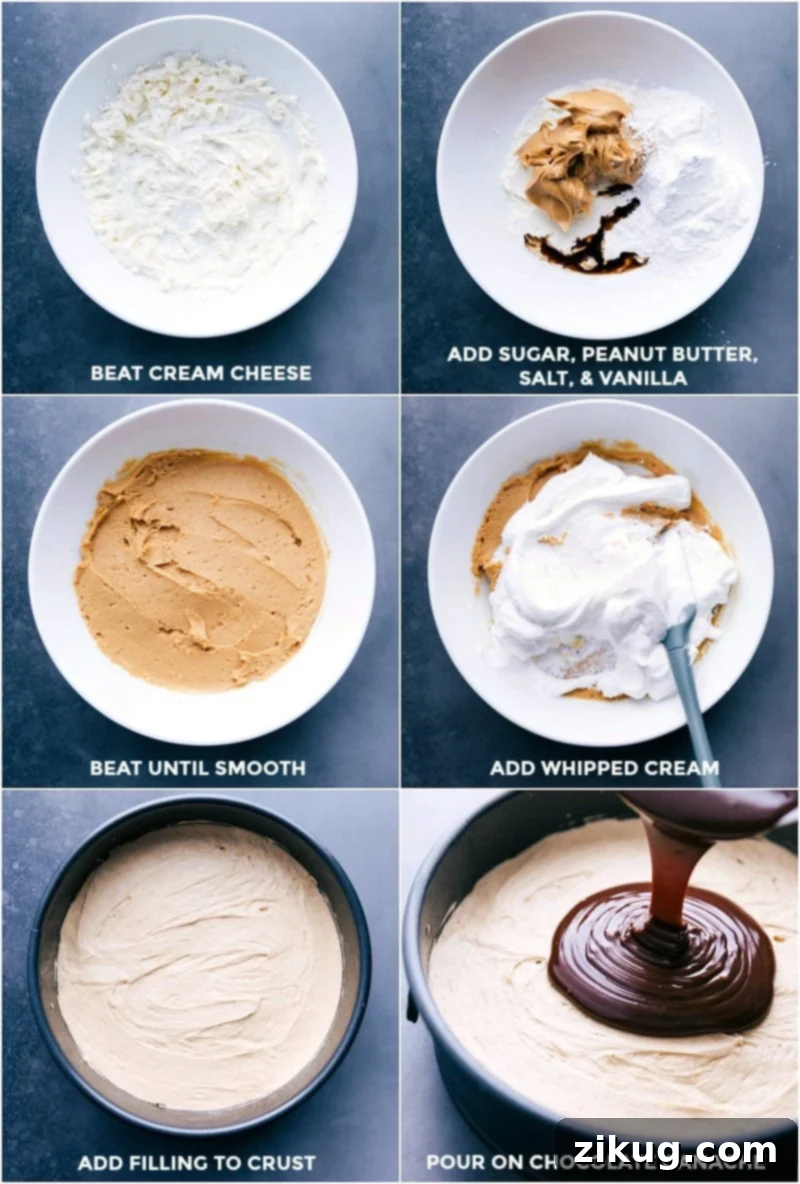
- Craft the Peanut Butter Filling: In a large mixing bowl, beat the room-temperature full-fat cream cheese with a hand mixer until it’s perfectly smooth and creamy. Next, add the creamy peanut butter, powdered sugar, vanilla extract, and salt. Continue beating until all ingredients are thoroughly combined and the mixture is lump-free. Gently fold in the completely thawed whipped topping using a spatula until just combined. Overmixing the whipped topping can deflate the air, so be gentle. Spread this decadent peanut butter mixture evenly over your chilled Oreo crust and use the back of a spoon or an offset spatula to smooth the top. Return the cheesecake to the refrigerator to chill for a minimum of 4-6 hours, or ideally, overnight. This extended chilling time is vital for the cheesecake to fully set and achieve its perfect texture.
- Create the Chocolate Ganache Topping: Place the milk chocolate chips and two tablespoons of creamy peanut butter in a heat-proof bowl. In a small saucepan, bring the heavy cream to a gentle simmer over medium-high heat – watch carefully to avoid boiling. Once simmering, immediately pour the hot cream over the chocolate chips and peanut butter in the bowl. Cover the bowl (a plate or pot lid works fine) and let it sit undisturbed for 5 minutes. This allows the heat from the cream to melt the chocolate and peanut butter. After 5 minutes, uncover and whisk the mixture until it’s completely smooth and glossy. Pour this luscious chocolate ganache evenly over the chilled peanut butter cheesecake layer.
- Final Chill and Garnish: Return the cheesecake to the refrigerator, covered, for at least 1-2 hours to allow the ganache to set. When you’re ready to serve, you can garnish your cheesecake with chopped Reese’s minis, mini chocolate chips, or any other desired toppings for an extra touch of decadence. For clean, precise slices, run a sharp knife under hot water, wipe it dry, and then make each cut. Repeat for every slice.
Quick Tip for Success: Using a Springform Pan
A 9-inch springform pan is highly recommended for this recipe. Its unique design allows you to easily remove the sides of the pan once the cheesecake is set, revealing perfectly clean, sharp edges without disturbing the dessert. This makes for a beautiful presentation and effortless serving.
Storage Solutions for Your Cheesecake
To keep your **no-bake peanut butter cheesecake** fresh, store any leftovers in an airtight container in the refrigerator for up to 4 days. For longer enjoyment, individual slices can be frozen in a freezer-safe container for up to 2 months. When you’re ready to indulge again, simply thaw the frozen slices in the refrigerator for a few hours. This slow thawing process helps maintain the creamy texture and prevents it from becoming watery.
Expert Tips for a Perfectly No-Bake Cheesecake
- Room Temperature Ingredients are Key: Ensure your cream cheese is at true room temperature. This is vital for achieving a smooth, lump-free filling. Cold cream cheese will result in a clumpy texture.
- Don’t Rush the Chill: The most crucial step for any no-bake cheesecake is the chilling time. Allow the cheesecake to chill for the recommended hours, or even better, overnight. This ensures the filling sets completely, giving you clean slices and the perfect creamy consistency.
- Gentle Folding: When incorporating the whipped topping, use a gentle folding motion with a spatula. This preserves the airiness of the whipped topping, contributing to the light and fluffy texture of the cheesecake.
- Quality Peanut Butter Matters: While most creamy peanut butter brands work well, a good quality peanut butter can significantly impact the final flavor. Avoid natural peanut butter that separates easily, as it can affect the filling’s texture.
- Hot Knife for Clean Slices: For a professional-looking slice every time, dip your knife in hot water and wipe it dry before each cut. This technique creates a clean edge through the ganache and creamy filling.
Frequently Asked Questions (FAQ)
Can I use crunchy peanut butter?
While creamy peanut butter is recommended for a smooth filling, you can use crunchy peanut butter if you prefer a textural contrast. Just be aware that the filling won’t be as uniformly smooth.
Can this cheesecake be made ahead of time?
Absolutely! This cheesecake is an excellent make-ahead dessert. It requires significant chilling time, so preparing it a day in advance is ideal and ensures it’s perfectly set and ready to serve.
How long does the chocolate ganache need to set?
The chocolate ganache typically needs at least 1-2 hours in the refrigerator to set to a firm yet soft consistency, making it easy to slice without being too runny.
Can I make individual cheesecakes?
Yes, you can! This recipe can be adapted to make mini cheesecakes using muffin tins lined with paper liners. Adjust chilling times accordingly, as smaller portions will set faster.
Creative Variations and Customizations
This **no-bake peanut butter cheesecake** is fantastic as is, but don’t hesitate to experiment with these delicious variations:
- Different Crusts: Instead of Oreos, try a graham cracker crust or a Nilla Wafer crust for a different flavor profile.
- White Chocolate Ganache: Swap the milk chocolate chips for white chocolate chips in the ganache for a milder, sweeter topping.
- Caramel Drizzle: Add a swirl of salted caramel sauce over the chocolate ganache or directly onto the peanut butter layer before adding the ganache.
- Nutty Crunch: Incorporate finely chopped peanuts or pecans into the Oreo crust or sprinkle them on top for added texture.
- Dark Chocolate Twist: Use dark chocolate chips for the ganache for a richer, more intense chocolate flavor that contrasts beautifully with the sweet peanut butter.
More Delicious Desserts to Explore
- Peanut Butter Cookie Dough
- Classic Peanut Butter Cookies
- Scotcheroos: A No-Bake Treat
- Easy Oreo Balls
- Peanut Butter Granola Parfaits
Print Recipe
Rated 5 out of 5 stars by 7 votes
No-Bake Peanut Butter Cheesecake
Chelsea Lords
20 minutes
9 hours
9 hours 20 minutes
12 servings
Equipment
-
Blender or Food Processor
-
9-inch Springform pan
-
Hand mixer
-
Small saucepan
Ingredients
- 25 Oreos chocolate sandwich cookies
- 7 tablespoons unsalted butter melted and slightly cooled
- 1/4 cup granulated sugar
- 1 (8-ounce) package cream cheese full-fat, room temperature
- 1-1/4 cups creamy peanut butter
- 1-1/4 cups powdered sugar
- 2 teaspoons vanilla extract
- 1/8 teaspoon salt
- 1 (8-ounce) container frozen whipped topping like Cool Whip (lite can be used); see note 1
- 1 cup milk chocolate chips
- 2 tablespoons creamy peanut butter
- 1/2 cup heavy cream
- Toppings as desired such as chopped Reese’s minis and mini chocolate chips
Instructions
Crust
- Blend or pulse the Oreos (cookie and filling) until they are fine crumbs.
- Mix the crumbs with the sugar and cooled melted butter.
- Spray a 9-inch springform pan with cooking spray and press the cookie crust evenly along the bottom and slightly up the sides. Chill in the fridge while preparing the cheesecake filling.
Cheesecake Filling
- With a hand mixer, beat the room-temperature cream cheese until smooth.
- Add in the peanut butter, powdered sugar, vanilla, and salt; beat until smooth.
- With a spatula, gently fold in the completely thawed whipped topping (or homemade whipped topping—see note 1) until all ingredients are combined and smooth. Spread the mixture over the Oreo crust and use the back of a large spoon to smooth the top.
- Chill overnight in the fridge or for 4–6 hours.
Chocolate Topping
- Place chocolate chips and 2 tablespoons of peanut butter in a large glass or heat-proof bowl.
- In a small saucepan or pot, bring heavy cream to a rolling simmer over medium-high heat (do not boil!). Pour the cream over the chocolate chips and peanut butter, cover, and let sit 5 minutes (I place a sheet pan or pot lid on top of the bowl). After 5 minutes, whisk until completely smooth. Pour the chocolate layer over the peanut butter layer. Refrigerate, covered, for at least 1–2 hours or until ready to serve. If desired, garnish the cheesecake with chopped Reese’s minis and/or miniature chocolate chips.
- Use a hot, sharp knife (run it under hot water and dry with a towel) to make cuts into the pie. Return any leftovers (covered tightly) to the freezer.
Recipe Notes
To make your own whipped topping:
- 1 cup heavy cream
- 1/2 cup powdered sugar
- 1/2 teaspoon vanilla extract
In a mixing bowl attached to a stand mixer (with whisk attachment), add the heavy cream, powdered sugar, and vanilla extract. Beat to combine, then increase the speed and whip until firm peaks form, about 2–4 minutes. With a spatula, gently fold into the cream cheese mixture.
Storage: Store leftovers in an airtight container in the fridge for up to 4 days. For longer storage, freeze slices in a freezer-safe container for up to 2 months. Thaw in the fridge before serving.
Nutrition Information
Calories: 551kcal |
Carbohydrates: 46g |
Protein: 9.8g |
Fat: 38.4g |
Cholesterol: 49.9mg |
Sodium: 234.3mg |
Fiber: 2.4g |
Sugar: 33.9g
Nutrition information is automatically calculated, so should only be used as an approximation.
Enjoyed this recipe? Leave a comment below!