
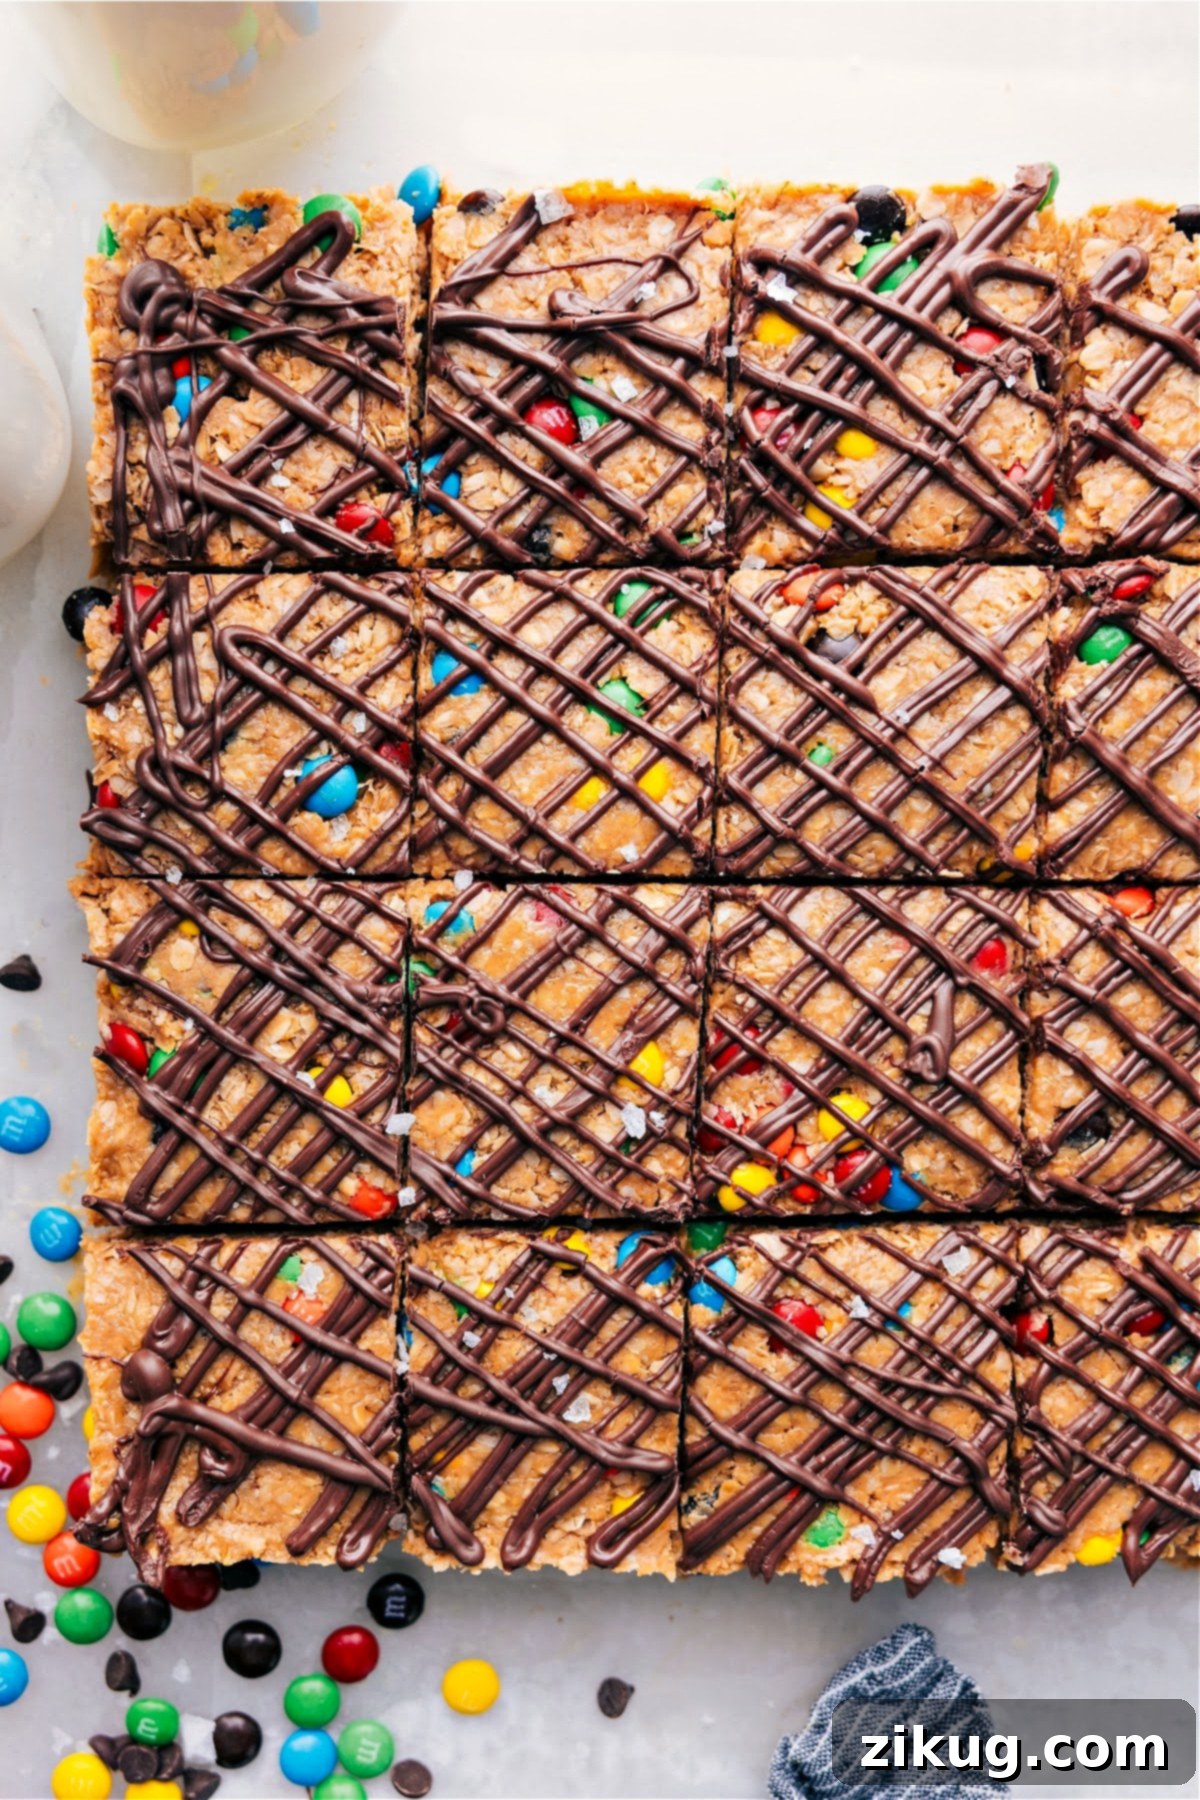
Welcome to the ultimate guide for creating delicious and wholesome **No-Bake Energy Bars**! This incredible recipe is a game-changer for anyone seeking a quick, healthy, and satisfying snack that tastes remarkably like a decadent candy bar. Requiring just 5 core ingredients and absolutely no baking, these homemade energy bars are packed with protein and fiber, making them the perfect fuel for your busy day or a delightful treat for the entire family. Forget store-bought alternatives laden with artificial additives; these DIY energy bars offer a fresh, customizable, and incredibly easy solution to healthy snacking.
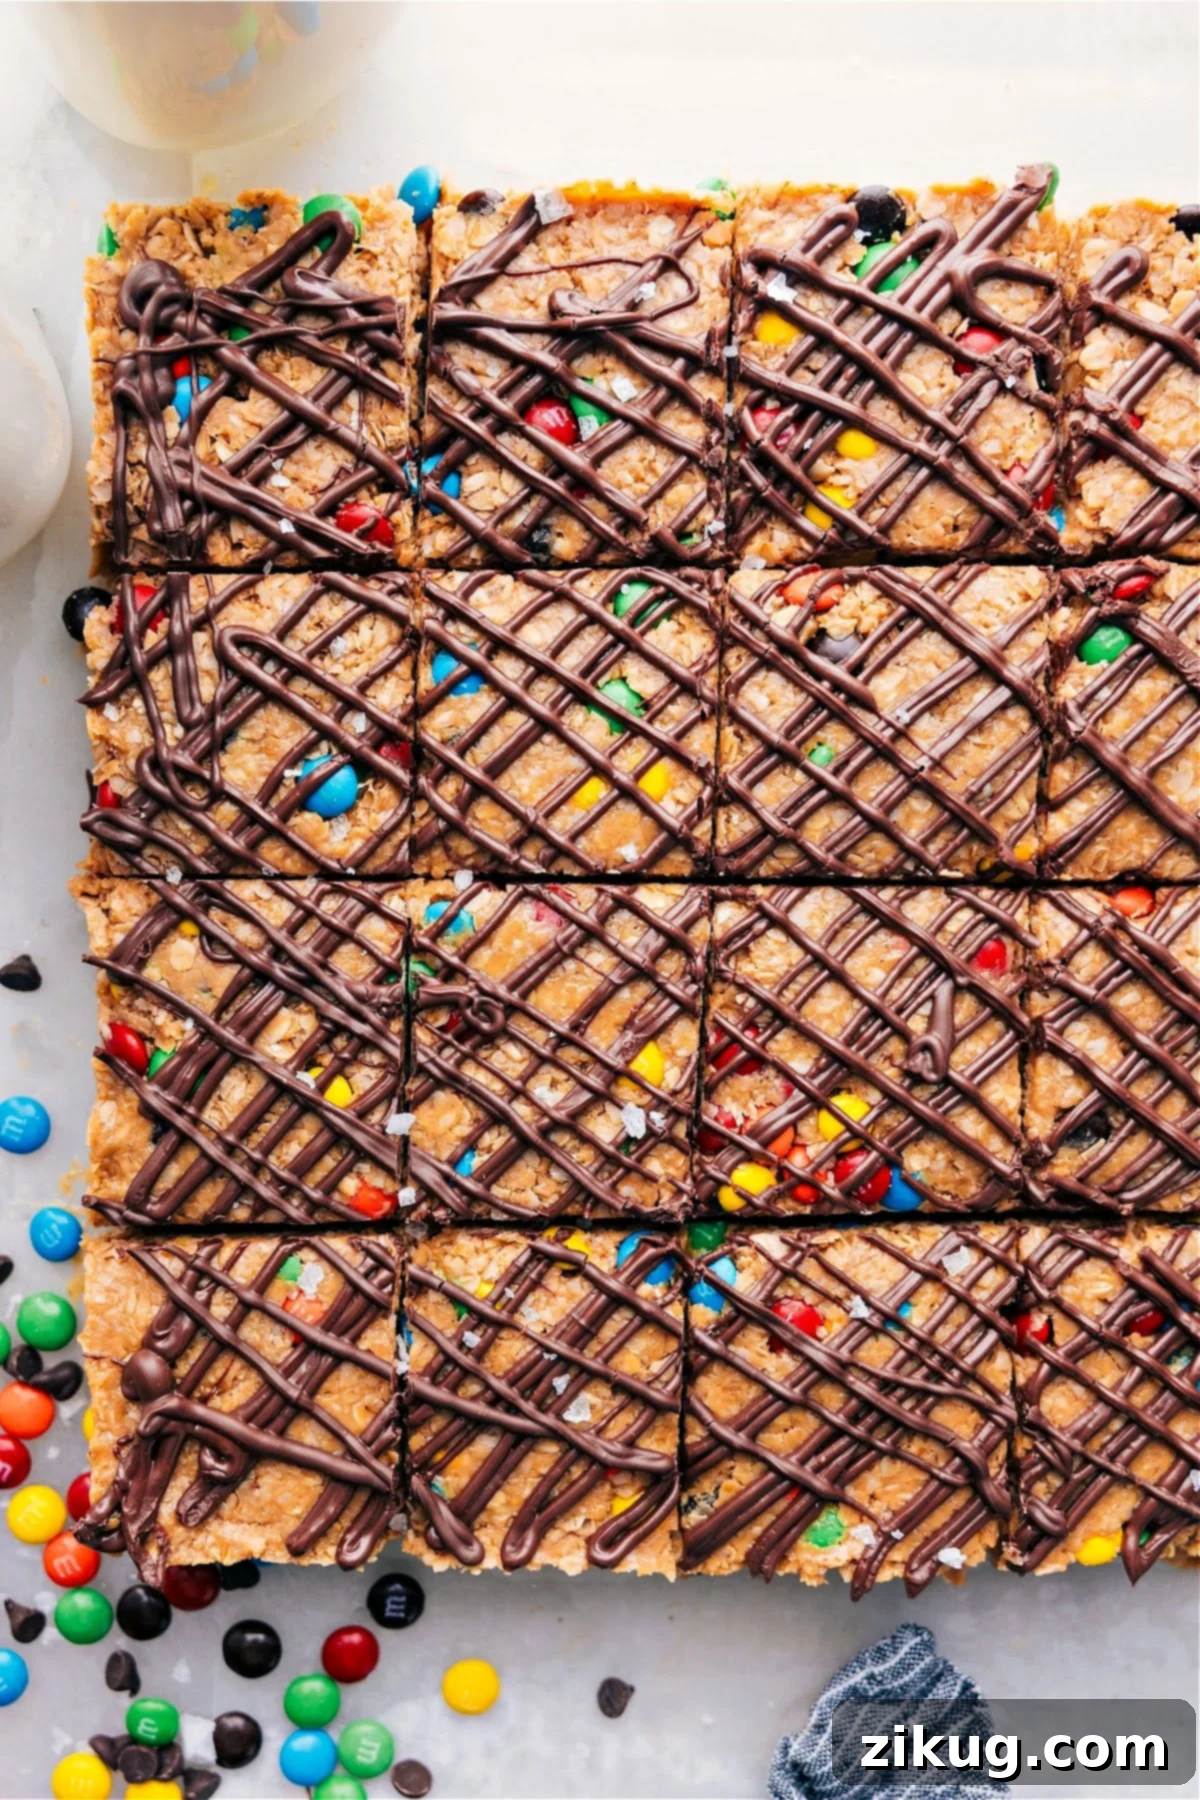
Why You’ll Absolutely Love This Energy Bars Recipe:
These homemade energy bars aren’t just a recipe; they’re a lifestyle upgrade. Here’s why they’ll quickly become a staple in your kitchen:
- Effortlessly Simple and Quick: Say goodbye to complex baking steps. This recipe involves just mixing, pressing, and chilling, making it perfect for even the busiest schedules. You can have a batch ready in under 15 minutes of active prep time!
- Infinitely Flexible: The base recipe is fantastic, but the real magic lies in its adaptability. Easily customize these bars with your favorite nuts, seeds, dried fruits, or chocolate to match your cravings or dietary needs.
- Remarkably Filling: Thanks to a powerful combination of protein and fiber, these bars provide sustained energy, helping you feel fuller for longer. They’re ideal for a post-workout refuel, a mid-day slump buster, or a wholesome breakfast on the go.
- A True Family Favorite: Kids adore these bars, both for their delicious taste and the fun of helping to make them. It’s a fantastic way to involve little ones in the kitchen and encourage healthy eating habits.
- Excellent for Meal Prep: Whip up a big batch on the weekend, and you’ll have healthy snacks ready for the entire week. They store exceptionally well, making meal planning a breeze.
- Feels Like a Decadent Treat: Despite being packed with wholesome ingredients, these energy bars have a delightful texture and taste that satisfies sweet cravings without the guilt. It’s the perfect harmony of healthy and delicious.
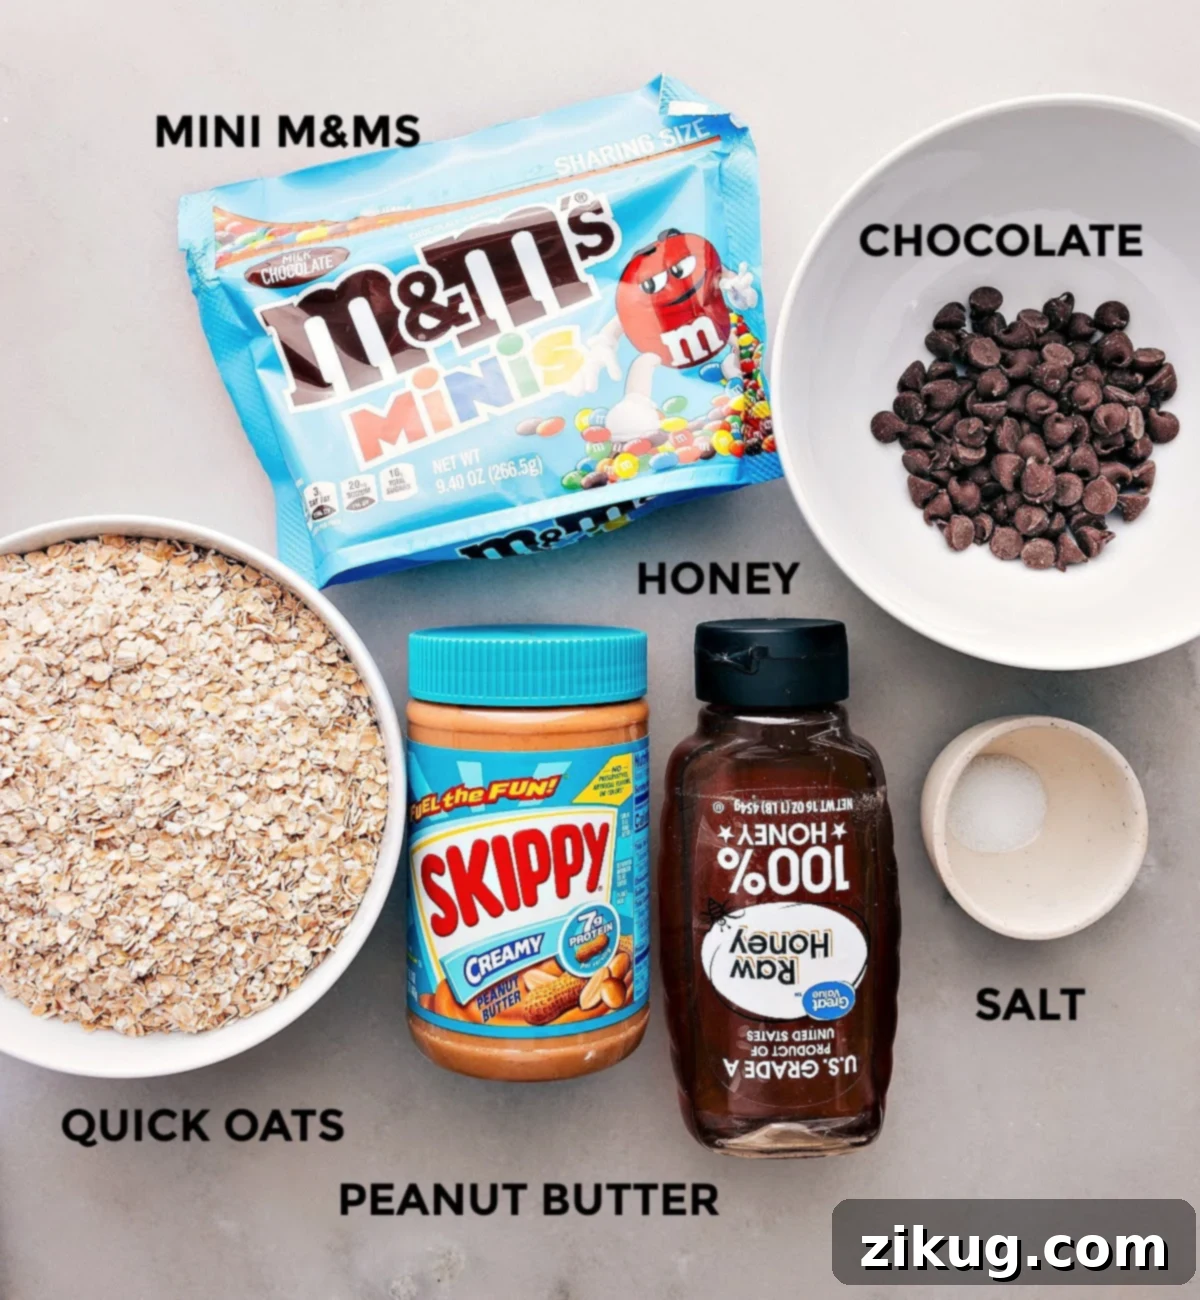
Essential Ingredients for Your Homemade Energy Bars
Creating these delightful energy bars begins with a handful of simple, readily available ingredients. Each component plays a crucial role in both flavor and texture, ensuring a perfect bar every time.
- Quick Oats: The cornerstone of these bars, quick oats are essential for achieving the perfect soft yet firm texture. Unlike rolled or old-fashioned oats, quick oats absorb moisture more rapidly, which is key for a no-bake recipe. They bind the ingredients together beautifully and contribute to the bars’ satisfying chewiness and fiber content.
- Creamy Peanut Butter: This acts as a primary binder and flavor enhancer. Its rich, nutty taste pairs wonderfully with the other ingredients, and its creamy texture helps hold everything together. If you opt for natural peanut butter, remember to stir it thoroughly before measuring to ensure a consistent texture and prevent separation. Almond butter or cashew butter can also be used for a different flavor profile.
- Honey: A natural sweetener and a powerful binder, honey not only adds a lovely sweetness but also contributes to the bars’ pliable texture. Its stickiness helps to prevent the bars from crumbling. Maple syrup is a great vegan alternative if you prefer to avoid honey.
- Salt: A pinch of salt is a non-negotiable ingredient in sweet recipes. It doesn’t make the bars salty but rather enhances all the other flavors, balancing the sweetness and bringing out the depth of the peanut butter and oats.
- Miniature M&Ms: These add a fun pop of color, texture, and chocolatey sweetness, making the bars especially appealing, particularly to kids. For a less sugary or more wholesome option, you can easily swap these out for chopped nuts (like almonds or walnuts), dried fruits (such as cranberries or raisins), or other chocolate varieties.
Optional Ingredients for Flavor and Texture Boost:
While the five core ingredients create a fantastic bar, these optional additions allow you to elevate your energy bars even further.
- Chocolate Chips: For an extra layer of indulgence, a drizzle of melted chocolate chips takes these bars to the next level. Use a high-quality chocolate—whether milk, semi-sweet, or dark—for the best flavor experience. The type of chocolate can greatly influence the final taste.
- Coconut Oil: When melting chocolate chips for a topping, a small amount of coconut oil or vegetable oil helps create a smooth, glossy, and easily spreadable consistency. This ensures your chocolate drizzle sets beautifully without cracking.
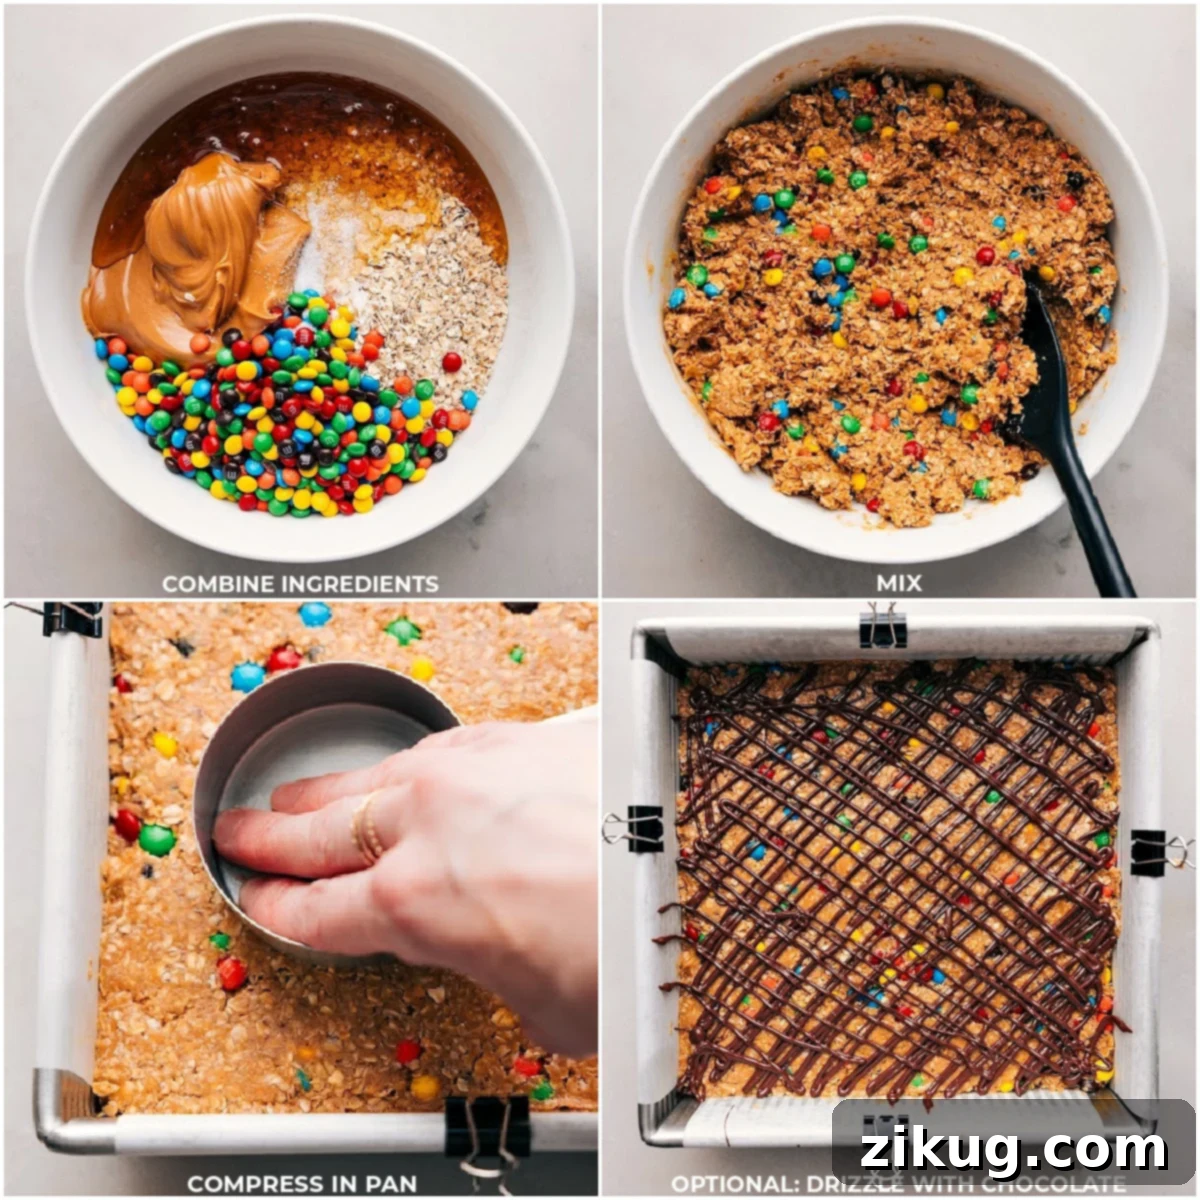
Crafting Your Perfect Energy Bars: A Step-by-Step Guide
Making these no-bake energy bars is incredibly straightforward, perfect for beginners and seasoned cooks alike. Follow these simple steps for perfect results every time.
- Prepare Your Pan: Begin by lining an 8×8-inch baking pan with parchment paper. Ensure the parchment paper extends over the edges of the pan; this overhang will serve as handles, making it incredibly easy to lift the set bars out later. For extra security, you can use small binder clips to hold the parchment in place.
- Combine the Ingredients: In a large mixing bowl, combine the quick oats, creamy peanut butter, honey, and salt. Mix these ingredients thoroughly until everything is well incorporated and a cohesive mixture forms. For best results, especially with thicker peanut butter, using a hand mixer or a stand mixer on a low speed can help achieve an even consistency. If the mixture seems too dry or too sticky, refer to our consistency adjustment tips below. Gently fold in the miniature M&Ms or your chosen add-ins last.
- Compress Firmly: Transfer the entire mixture into your prepared 8×8-inch pan. Using the bottom of a 1-cup measuring cup or a flat spatula, press the mixture down very firmly and evenly into the pan. This compression is crucial for ensuring the bars hold their shape and don’t crumble when cut. The more compacted they are, the better they will set.
- Add Optional Chocolate Topping: If you desire a chocolate topping, melt the chocolate chips and coconut oil (or vegetable oil) in a microwave-safe bowl. Heat in short bursts of 15 seconds, stirring well after each interval, until the chocolate is smooth and fully melted. Carefully transfer the melted chocolate to a plastic zip-top bag, seal it, and snip a tiny corner off the bag. Drizzle or pipe the chocolate over the pressed mixture in a decorative pattern, ensuring even coverage.
- Chill to Set: Place the pan in the refrigerator and chill for approximately 1 hour, or until the bars are completely set and firm to the touch. This chilling time allows all the ingredients to bind together properly and the chocolate topping (if used) to harden.
- Slice and Serve: Once chilled, use the parchment paper overhangs to carefully lift the entire slab of energy bars from the pan. For clean, neat cuts, use a very sharp knife. For even sharper lines, run your knife under hot water and wipe it dry between each cut. Slice into your desired bar size, typically 16-24 squares.
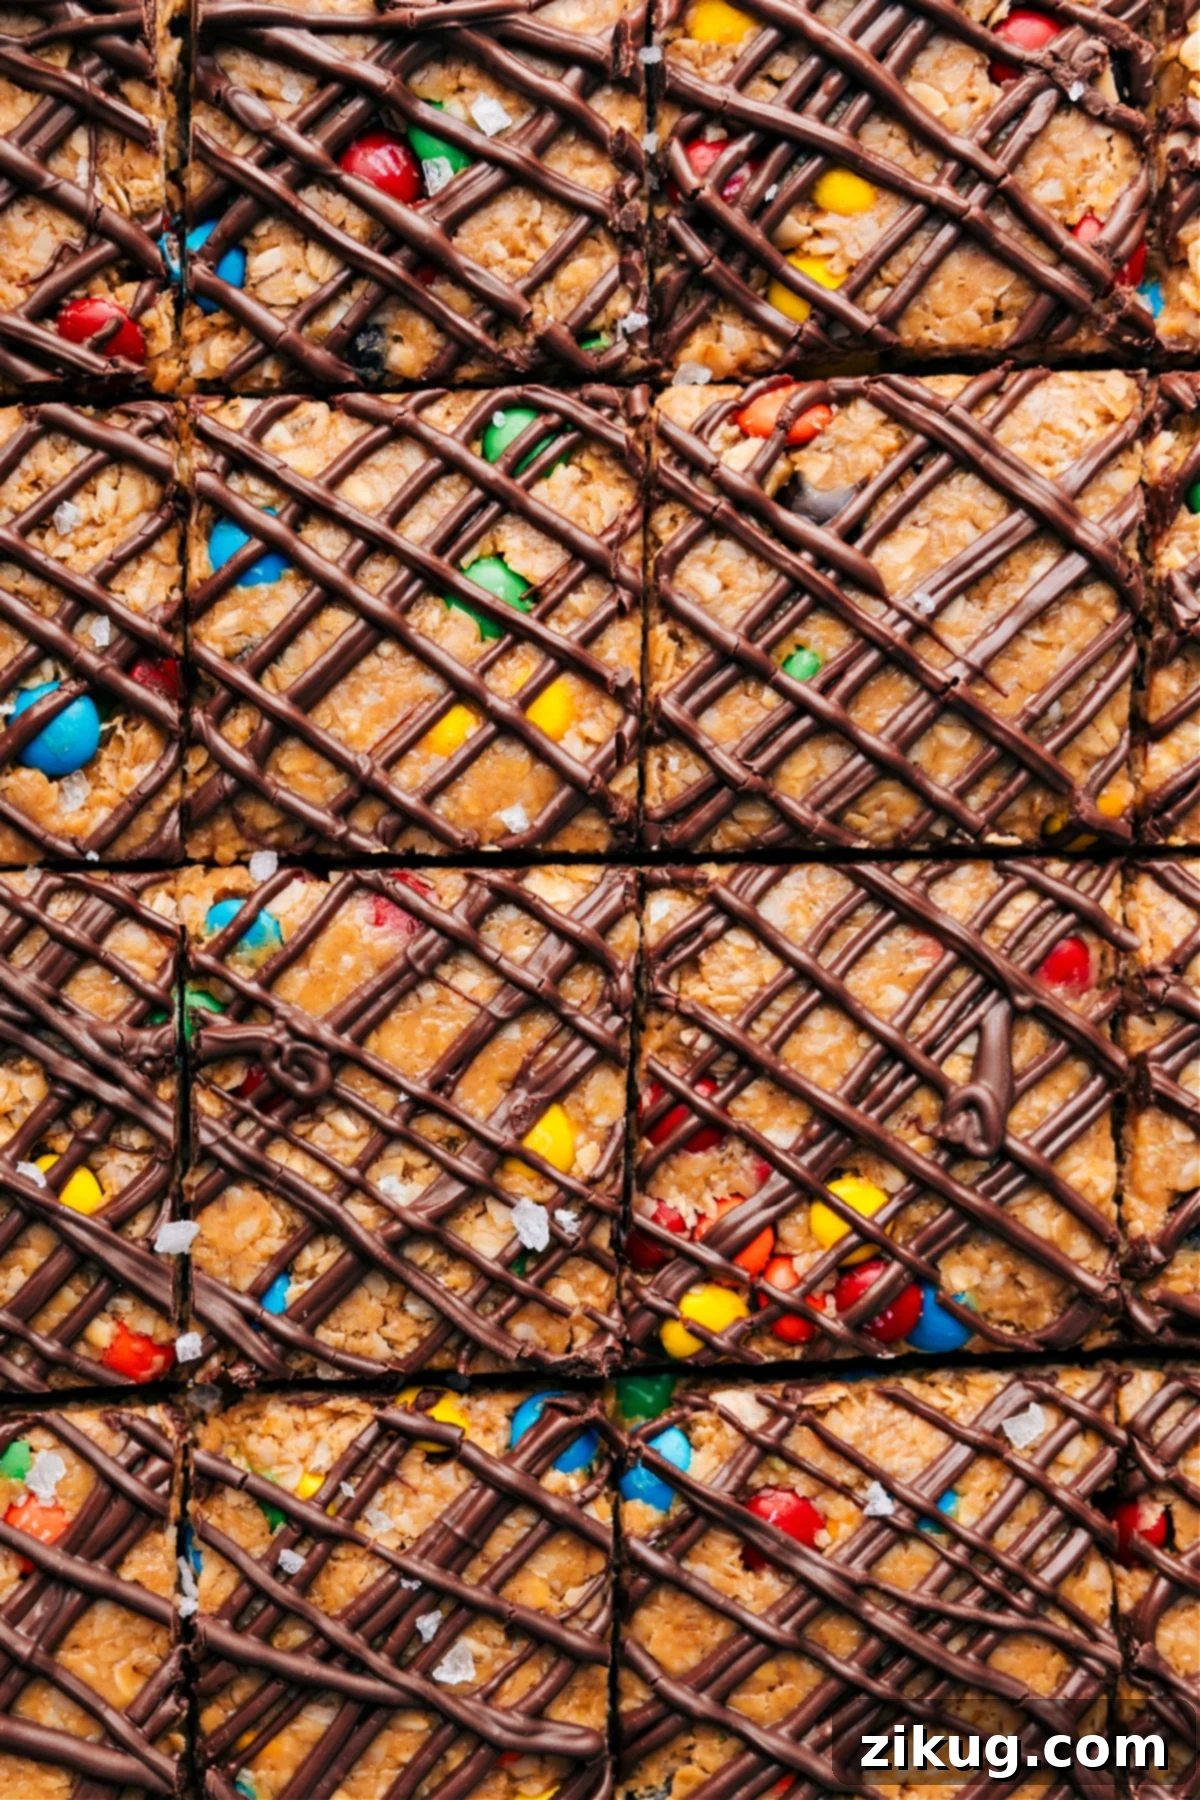
Tips for Success & Creative Customization
Mastering these no-bake energy bars is simple, but a few expert tips can elevate your homemade treats. Plus, discover endless ways to customize them to your taste!
Consistency is Key for Perfect Energy Bars:
The texture of your energy bar mixture is vital for how well they set. The amount of moisture in your peanut butter and honey can vary, so you might need to make slight adjustments:
- If the mixture is too dry and crumbly: Add an extra tablespoon or two of peanut butter or honey. Mix well until the ingredients come together and can be pressed without falling apart.
- If the mixture is too sticky: Gradually add a tablespoon of quick oats at a time, mixing until the desired consistency is reached. Remember that oats continue to absorb moisture over time, so the bars will firm up during chilling.
Beyond M&Ms: Creative Add-In Ideas:
While M&Ms are a fun addition, this recipe is a blank canvas for your creativity. Explore these variations:
- Nuts and Seeds: Boost the nutritional profile with chopped almonds, walnuts, pecans, cashews, sunflower seeds, pumpkin seeds, or chia seeds. They add healthy fats and a satisfying crunch.
- Dried Fruits: Mix in chopped dried cranberries, raisins, apricots, dates, or shredded coconut for natural sweetness and chewiness.
- Protein Power-Up: For an extra protein boost, stir in 1-2 scoops of your favorite protein powder (vanilla or chocolate work well). You might need a little extra liquid (honey or peanut butter) to maintain consistency.
- Spice it Up: A dash of cinnamon, nutmeg, or a pinch of pumpkin pie spice can add a warm, comforting flavor.
- Extracts: A few drops of vanilla extract, almond extract, or peppermint extract can completely transform the flavor profile.
Perfecting Your Chocolate Drizzle:
If you’re adding a chocolate topping, here are a few tips:
- Quality Matters: Use good quality chocolate chips for a smoother melt and richer flavor.
- Microwave with Care: Heat chocolate in short bursts (15-20 seconds) and stir thoroughly between each. Chocolate can seize if overheated.
- Double Boiler Method: If you prefer not to microwave, melt chocolate in a heatproof bowl set over a saucepan of simmering water (ensure the bowl doesn’t touch the water).
- Even Drizzle: For a neat drizzle, use a piping bag with a small tip, or as suggested, a zip-top bag with a tiny corner snipped off.
Storage Solutions for Lasting Freshness
Proper storage ensures your homemade energy bars remain delicious and fresh for as long as possible. Here’s how to keep them at their best:
- Room Temperature: For quick access, store the bars in an airtight container or a sealed bag at room temperature for up to 1 week. This is ideal if you plan to enjoy them within a few days.
- Refrigeration: To extend their freshness, place the bars in an airtight container or bag in the refrigerator for up to 2 weeks. Chilling also gives them a firmer, chewier texture, which many people prefer.
- Freezing for Long-Term: For the longest storage, individually wrap each bar tightly in plastic wrap or parchment paper, then place them in a freezer-safe bag or container. They can be frozen for up to 3 months, making them perfect for future snacking needs.
- Thawing: When ready to enjoy a frozen bar, simply take it out of the freezer and let it thaw at room temperature for a few minutes until it reaches your desired texture.
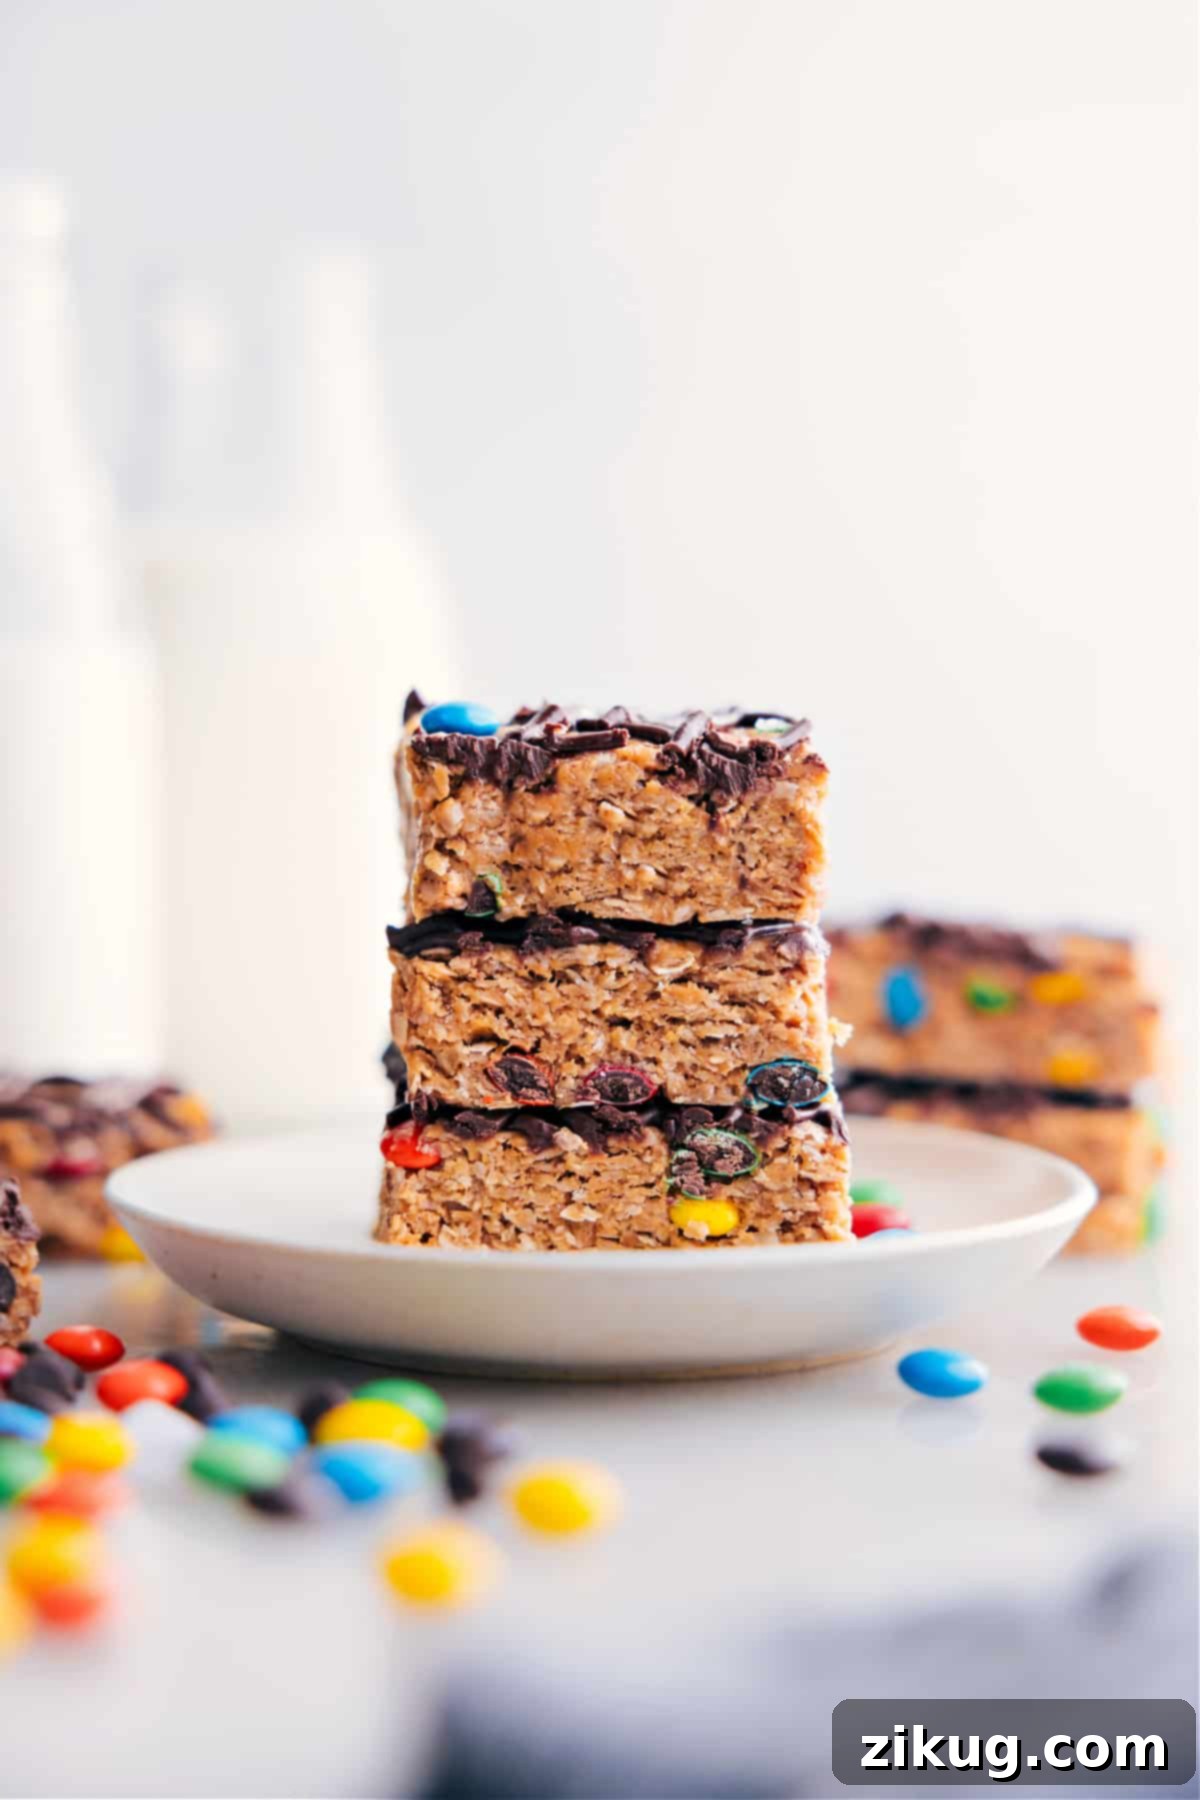
Nutritional Value & Health Benefits
Beyond their irresistible taste, these no-bake energy bars offer significant nutritional advantages, making them a smart choice for a healthy lifestyle. Each bar provides a balanced blend of macronutrients to keep you energized and satisfied. With around 160 calories per serving, they offer a controlled portion of energy.
- Carbohydrates (20.3g): Primarily from quick oats and honey, these provide readily available energy for your body and brain.
- Protein (4.1g): The peanut butter contributes a good amount of protein, essential for muscle repair, growth, and satiety.
- Fat (6.7g): Healthy fats from peanut butter contribute to fullness and aid in the absorption of fat-soluble vitamins.
- Fiber (1.9g): Oats are an excellent source of dietary fiber, crucial for digestive health, blood sugar regulation, and prolonged feelings of fullness.
- Lower Sugar Option: While honey and M&Ms contribute some sugar (10.6g), this recipe is highly customizable. Swapping M&Ms for nuts or seeds significantly reduces sugar content, allowing you to control your intake.
These bars are a far healthier alternative to many processed snacks, providing sustained energy without the sugar crash often associated with store-bought options. They are a great way to incorporate more whole grains, healthy fats, and protein into your diet.
Please note: Nutrition information is an approximation and can vary based on specific ingredients, brands, and any optional additions or substitutions you make.
Frequently Asked Questions About Energy Bars
Got questions about making the best energy bars? We’ve got answers!
- Can I use regular or old-fashioned oats instead of quick oats?
No, it’s highly recommended to stick with quick oats for this recipe. Quick oats are processed to absorb liquid more quickly and create the desired binding and texture in a no-bake bar. Regular oats will result in a much coarser, drier, and potentially crumbly bar that won’t hold together as well. - How can I make these energy bars vegan?
To make these bars vegan, simply substitute the honey with an equal amount of maple syrup or agave nectar. Ensure your chocolate chips (if using) are dairy-free, and you’re good to go! - Can I add protein powder to this recipe?
Absolutely! For an extra protein boost, mix in 1-2 scoops of your favorite protein powder (vanilla or chocolate work best). You may need to add a little extra liquid, such as a tablespoon more peanut butter or maple syrup, to maintain the desired consistency, as protein powder can absorb moisture. - What are some good nut-free alternatives for peanut butter?
If you have a nut allergy or prefer a nut-free option, sunflower seed butter (SunButter) works wonderfully as a direct substitute for peanut butter. Tahini could also be used for a more savory, earthy flavor profile, though you might need to adjust the sweetener slightly. - My bars are too crumbly and won’t stick together. What went wrong?
This usually means the mixture is too dry. Add an additional tablespoon or two of peanut butter or honey, mixing it in thoroughly until the mixture feels sticky enough to hold its shape when pressed. Ensuring you firmly compress the mixture into the pan is also crucial. - How do I prevent the chocolate topping from cracking when I cut the bars?
Using a tiny bit of coconut oil or vegetable oil when melting the chocolate helps make it more pliable and less prone to cracking. Also, ensure the bars are well-chilled but not frozen solid when you cut them. Heating your knife under hot water and drying it between each cut also creates cleaner cuts through the chocolate.
Discover More No-Bake Snack Inspiration:
If you loved the simplicity and deliciousness of these no-bake energy bars, you’re in for a treat! Explore more effortless snack recipes that require zero oven time:
- No-Bake Granola Bars: Chewy, hearty, and utterly satisfying, these granola bars are perfect for a quick breakfast or afternoon snack.
- Oatmeal Energy Balls: Taste like a wholesome oatmeal cookie in a convenient bite-sized form, packed with good-for-you ingredients.
- Protein Breakfast Cookies: Indulge in cinnamon roll-flavored goodness with a healthy protein boost, ideal for starting your day right.
- No-Bake Granola: Enjoy homemade granola, complete with chocolate chips, without ever turning on your oven. Fantastic over yogurt or as a standalone snack.
- No-Bake Energy Bites: Ready in just 15 minutes, these versatile energy bites are perfect for an instant healthy pick-me-up.
With these incredible no-bake energy bars, you have the power to create wholesome, customizable, and utterly delicious snacks right in your own kitchen. They’re a testament to how simple ingredients can come together to form something truly special – a treat that fuels your body and delights your taste buds. So, gather your ingredients, follow these easy steps, and get ready to enjoy your new favorite go-to snack. Happy snacking!
Energy Bars Recipe
By Chelsea Lords
These no-bake Energy Bars need just 5 ingredients and taste like a candy bar—but they’re packed with protein and fiber!
- Prep Time: 15 minutes
- Chilling Time: 1 hour
- Total Time: 1 hour 15 minutes
- Servings: 24 bars
Video

For a visual guide, watch the recipe video above or follow the steps below.
Equipment
- 8 x 8-inch baking pan
- Parchment paper
- Hand mixer or stand mixer
Ingredients
Energy Bars
- 3 cups quick oats (see note 1)
- 1 cup creamy peanut butter (Skippy recommended, or natural well-mixed)
- 1/2 cup honey
- 1/4 teaspoon salt
- 2/3 cup miniature M&M’s
Optional Chocolate Topping
- 1/3 cup chocolate chips (milk, semi-sweet, or dark)
- 1/4 teaspoon coconut oil (or vegetable oil)
Instructions
- Line an 8×8-inch baking pan with parchment paper, leaving an overhang on the sides for easy removal. Binder clips can help hold it in place.
- Combine quick oats, peanut butter, honey, and salt in a very large bowl. Use a hand mixer or stand mixer (mixing on low speed) to ensure all ingredients are well combined. Check for consistency (see note 2). Gently stir in the miniature M&M’s.
- Transfer the mixture to the prepared pan. Using the bottom of a 1-cup measuring cup or a sturdy spatula, firmly press the mixture into the pan to form an even and tightly compressed layer.
- Optional Chocolate Topping: Melt chocolate chips and oil in a microwave-safe bowl. Microwave in bursts of 15 seconds, stirring well after each burst until fully melted and smooth. Transfer the melted chocolate to a plastic zip-top bag, seal, and snip off a tiny corner. Pipe or drizzle the chocolate evenly over the pressed bars.
- Chill in the refrigerator for about 1 hour, or until the bars are completely set and firm.
- Use the parchment overhangs to carefully lift the entire slab of bars out of the pan. For clean cuts, use a very sharp knife. Run the knife under hot water and dry it between each cut for the best results. Slice into individual bars.
Recipe Notes
Note 1: You are relying on quick oats for their moisture absorption and binding properties. Do not substitute with regular or old-fashioned oats, as the texture and consistency will be different and the bars may not hold together.
Note 2: Consistency Adjustments: The ideal consistency is sticky enough to hold together when pressed, but not overly gooey. Depending on the specific peanut butter or honey used, you may need slight adjustments. If the mixture is too dry and crumbly, add 1-2 tablespoons more peanut butter or honey. If it’s too sticky, add a bit more quick oats, remembering that oats will continue to absorb moisture as they sit, firming up the bars.
Storage: Store these energy bars in an airtight container or bag at room temperature for up to 1 week, or in the fridge for up to 2 weeks. For longer storage, freeze individually wrapped bars for up to 3 months. Thaw at room temperature before serving.
Nutrition
Serving: 1 bar | Calories: 160 kcal | Carbohydrates: 20.3g | Protein: 4.1g | Fat: 6.7g | Cholesterol: 0.8mg | Sodium: 73.8mg | Fiber: 1.9g | Sugar: 10.6g
Nutrition information is automatically calculated and should only be used as an approximation. Actual values may vary based on specific ingredients and preparation methods.
Love this recipe? Leave a comment below and share your thoughts!