
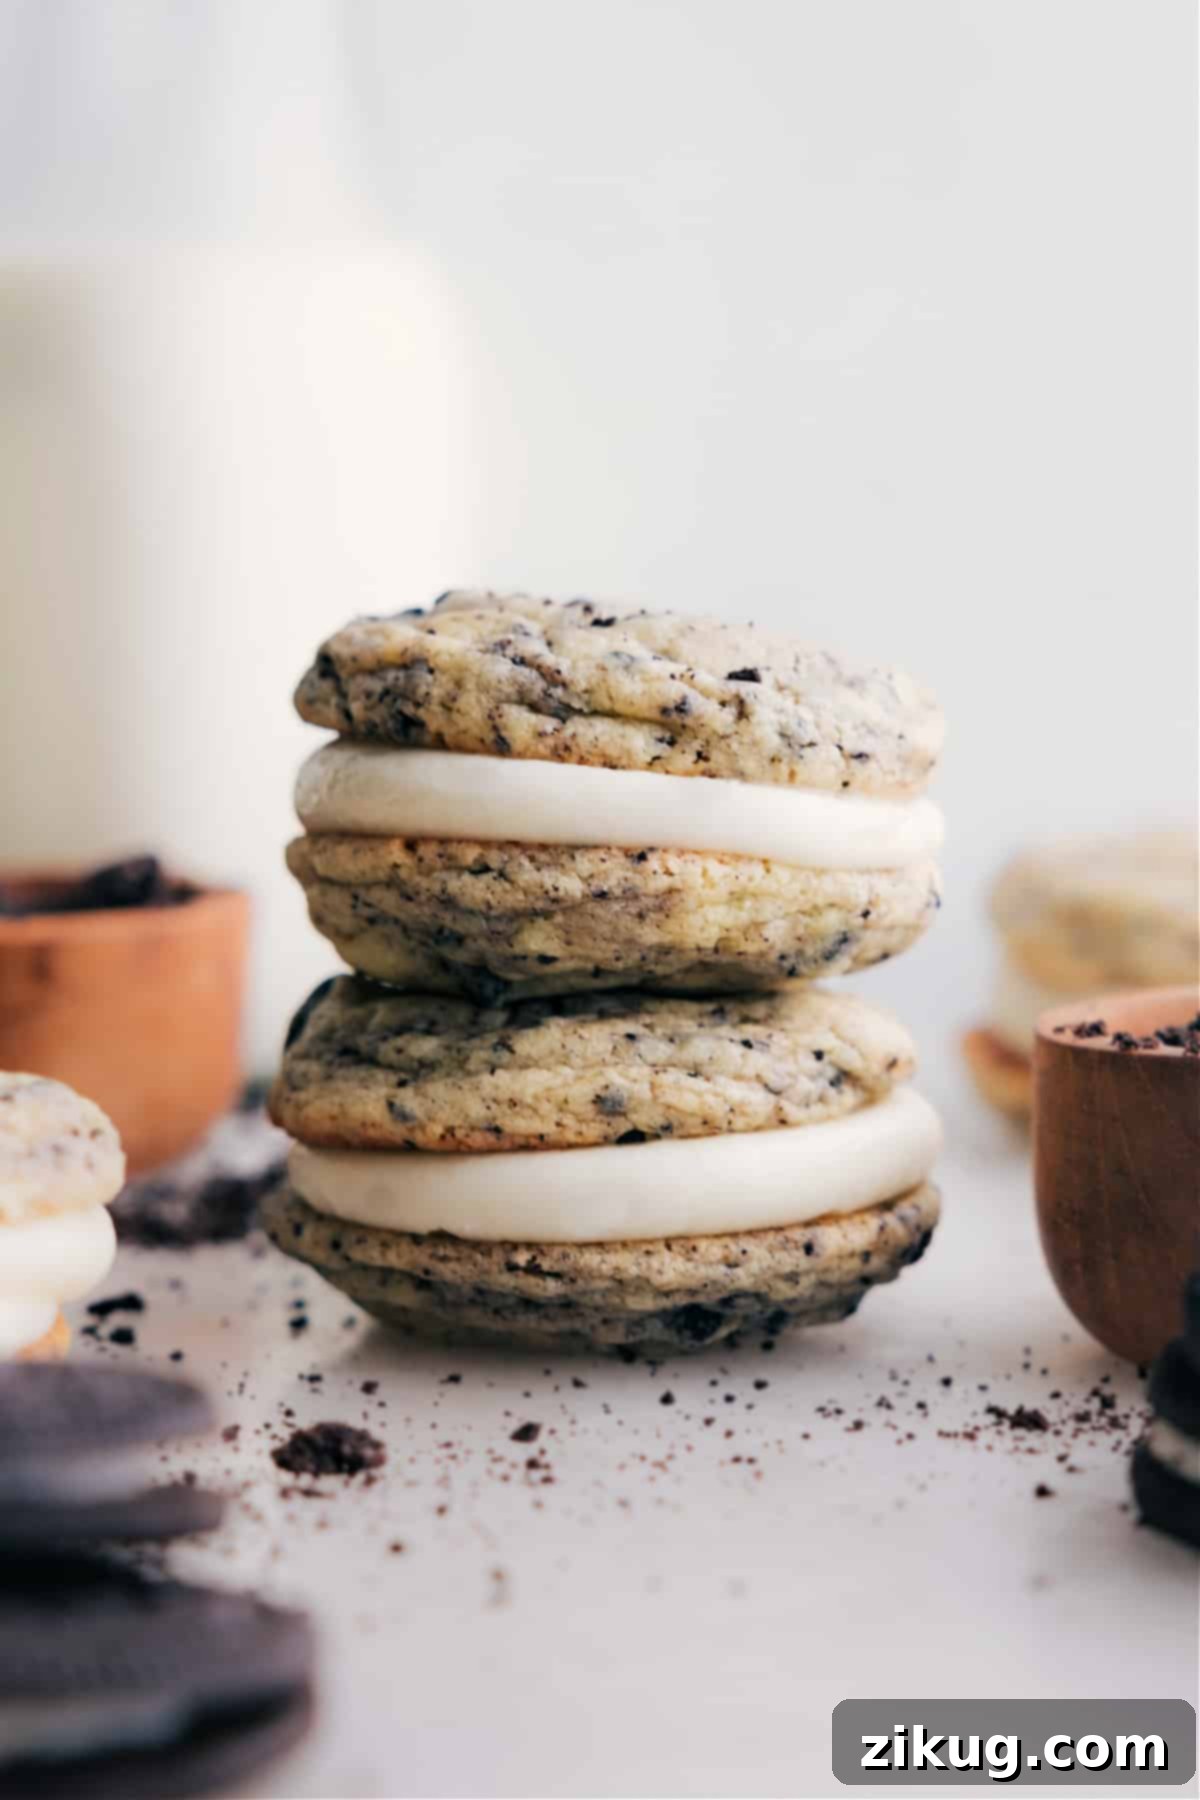
Oreo Whoopie Pies are a delightful dessert, marrying the classic taste of America’s favorite cookie with the charming, cake-like texture of a whoopie pie. These soft, luscious chocolate cookie sandwiches, generously filled with creamy, rich frosting, offer a nostalgic bite of pure joy. Perfect for parties, dessert cravings, or simply a sweet moment, our homemade Oreo Whoopie Pies are sure to become a beloved recipe in your kitchen.
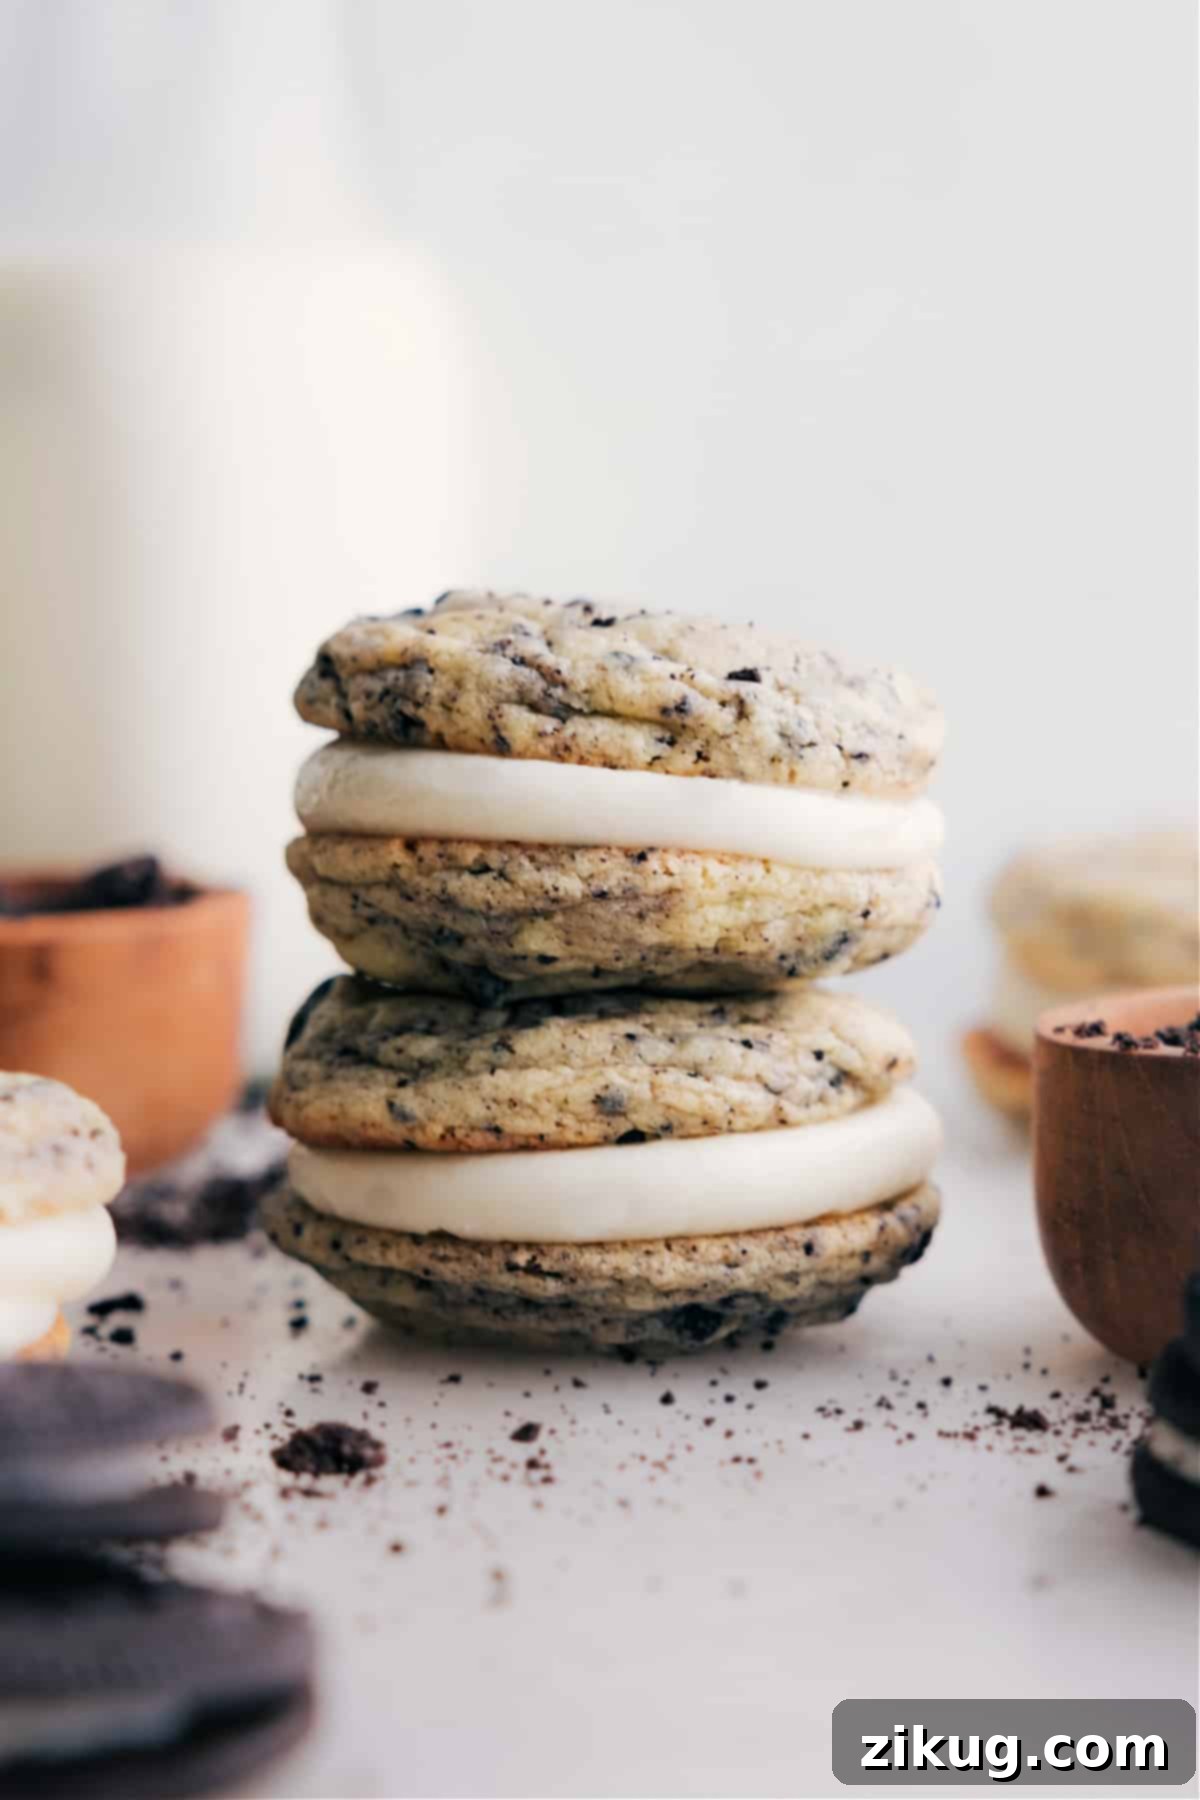
The Best Oreo Whoopie Pies: A Fun & Easy Copycat Recipe!
There’s something uniquely satisfying about recreating a beloved restaurant treat at home, especially when it turns out even better than the original! Our journey to perfecting these Oreo Whoopie Pies began with an inspiration from Cubby’s, a Utah culinary gem celebrated for its hearty sandwiches, fresh salads, and delectable sweet potato fries. However, for my husband, the true standout was always their whoopie pies, particularly the Oreo and Funfetti versions. After a taste test, he challenged me: “You’ve got to figure out how to make these at home!”
Challenge accepted! I knew immediately that the key to their irresistible texture was a soft, cake-like cookie. Drawing on my experience with homemade Oreos, I started with a reliable cake mix cookie base. This ingenious shortcut ensures consistent softness and a perfect rise every time, making it accessible even for novice bakers. For the filling, nothing less than my signature cream cheese frosting would do. Its tangy sweetness perfectly balances the rich chocolate cookies and the crunchy bits of Oreo within.
But the secret to truly transcendent whoopie pies lies in a simple, often overlooked step: letting the frosted cookies rest overnight. This magical waiting period allows the cookies to fully absorb moisture from the frosting, transforming them into an incredibly soft, melt-in-your-mouth dessert. Not only does this enhance their texture and flavor, but it also makes them an ideal make-ahead treat for gatherings, ensuring you have a show-stopping dessert ready to impress without last-minute fuss!
Essential Ingredients for Perfect Oreo Whoopie Pies
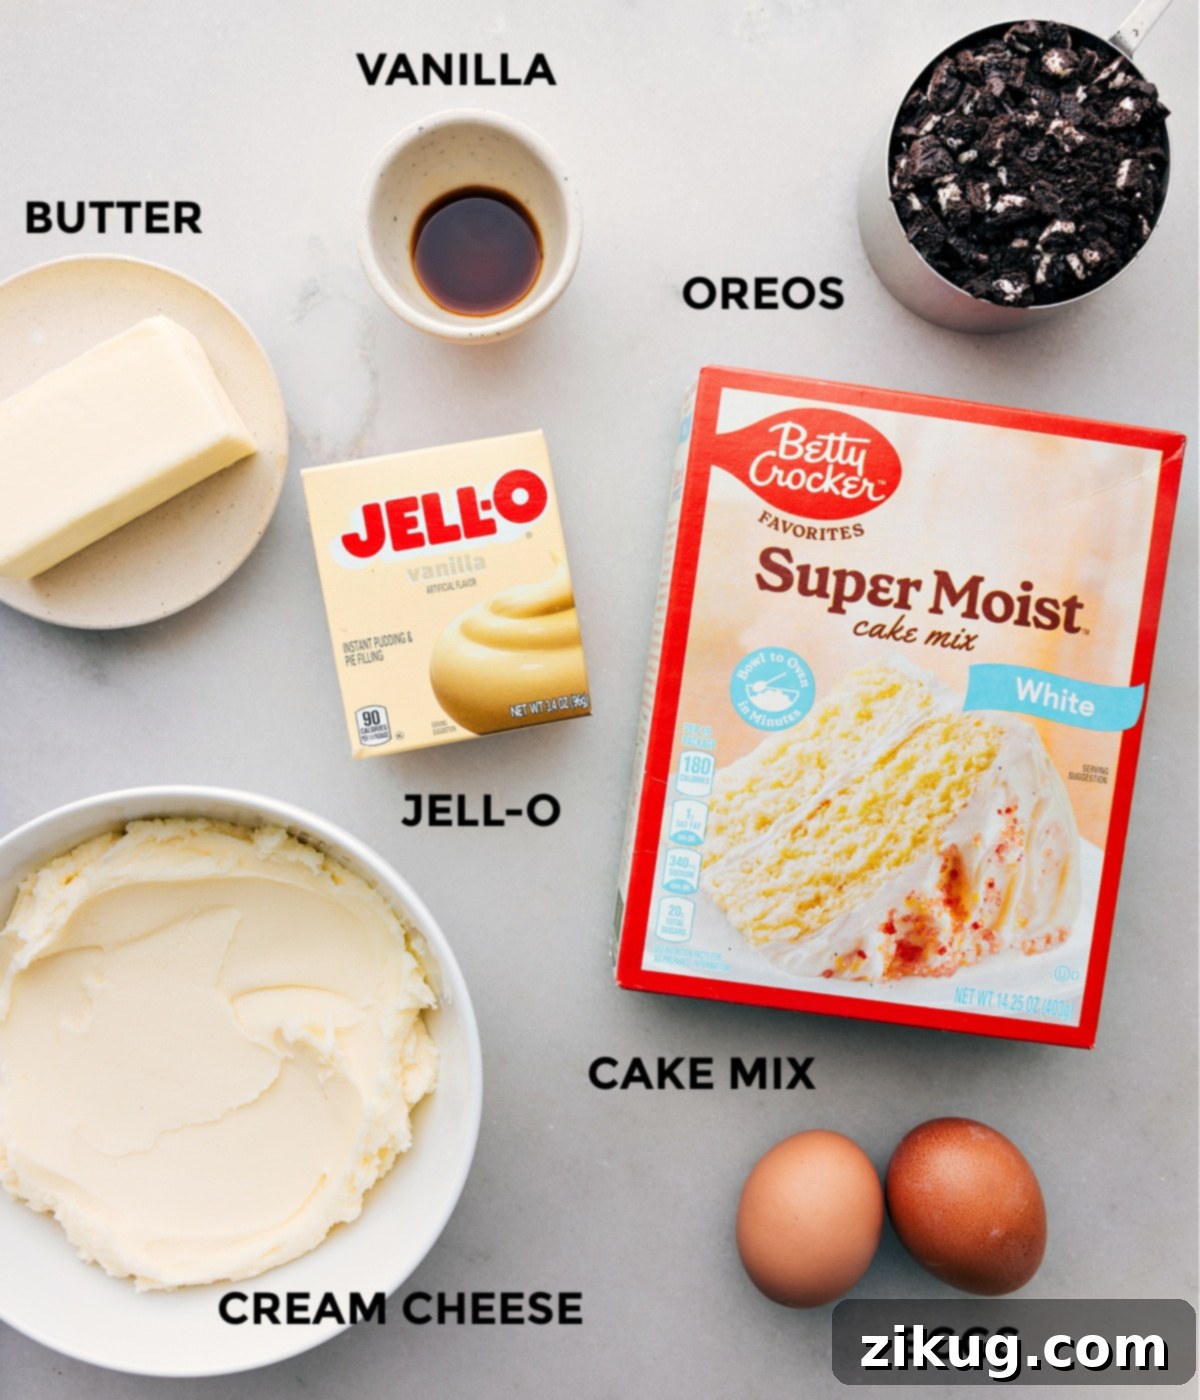
Crafting the perfect Oreo Whoopie Pie starts with selecting the right ingredients. Each component plays a vital role in achieving that signature soft, cake-like cookie and rich, creamy filling.
For the Cake-Like Oreo Cookies:
- Betty Crocker Super Moist White or Vanilla Cake Mix (14.25 oz package): This is the cornerstone of our whoopie pie cookies. After extensive testing, I’ve found that Betty Crocker’s Super Moist varieties consistently deliver the best flavor and a wonderfully soft, cake-like texture that’s crucial for whoopie pies. While white cake mix works beautifully, vanilla is also an excellent choice. Remember to use a 14.25-ounce box specifically and *do not* follow the directions on the cake mix box itself; our recipe provides tailored instructions.
- Instant Vanilla Pudding Mix (3.4 oz package): Don’t underestimate the power of instant pudding mix! It’s a secret ingredient that adds incredible moisture, richness, and structure to the cookies, ensuring they stay soft for days. Make sure to grab the *instant* variety, not the “cook and serve” type.
- Large Eggs (2): Eggs bind the ingredients together, provide structure, and contribute to the cookies’ fluffy texture. For optimal results, ensure your eggs are at room temperature. This helps them incorporate more evenly into the batter, leading to a smoother dough and a better cookie texture.
- Unsalted Butter (8 tablespoons, 1/2 cup): Using unsalted butter allows you to control the overall salt level in your cookies. It should be softened to room temperature—soft enough to easily press your finger into, but not melted or greasy. Proper butter consistency is key for mixing a cohesive dough.
- Vanilla Extract (1 teaspoon): A touch of pure vanilla extract enhances all the other flavors, adding a warm, aromatic depth to the chocolate cookies.
- Finely Chopped Regular Oreos (1 cup, about 9 cookies): These are the star of the show! Chop your regular Oreo cookies (with their cream filling still intact) finely. This ensures that every bite of your whoopie pie cookie is studded with delicious Oreo crumbs, adding both flavor and a delightful textural contrast.
For the Creamy Oreo Whoopie Pie Frosting:
Our rich and tangy cream cheese frosting is the perfect complement to the chocolate cookies. It’s stable enough to hold the whoopie pies together yet wonderfully smooth.
- Unsalted Butter (8 tablespoons, 1/2 cup): As with the cookies, use unsalted butter at room temperature. It creams beautifully with cream cheese, forming a smooth, lump-free base for your frosting.
- Full-Fat Cream Cheese (1 (8-ounce) package): For the best results, always opt for full-fat, brick-style cream cheese. Whipped or spreadable cream cheese contains more water and can lead to a runny frosting. Ensure it’s softened to room temperature to prevent lumps in your frosting.
- Vanilla Extract (1 teaspoon): Just like in the cookies, vanilla extract enriches the frosting’s flavor, making it even more irresistible.
- Salt (1/8 teaspoon): A small pinch of salt is crucial for balancing the sweetness of the powdered sugar and enhancing the flavors of the butter and cream cheese. It prevents the frosting from tasting overly sugary.
- Powdered Sugar (3 cups): Also known as confectioners’ sugar, this provides the bulk and sweetness of the frosting. Always sift it if clumpy to ensure a smooth texture. You can adjust the amount slightly to achieve your desired level of sweetness and thickness.
Step-by-Step Guide: How To Make The Best Oreo Whoopie Pies
Creating these delightful Oreo Whoopie Pies is a straightforward and rewarding process. Follow these steps for perfect results:
Part 1: Preparing the Oreo Whoopie Pie Cookies
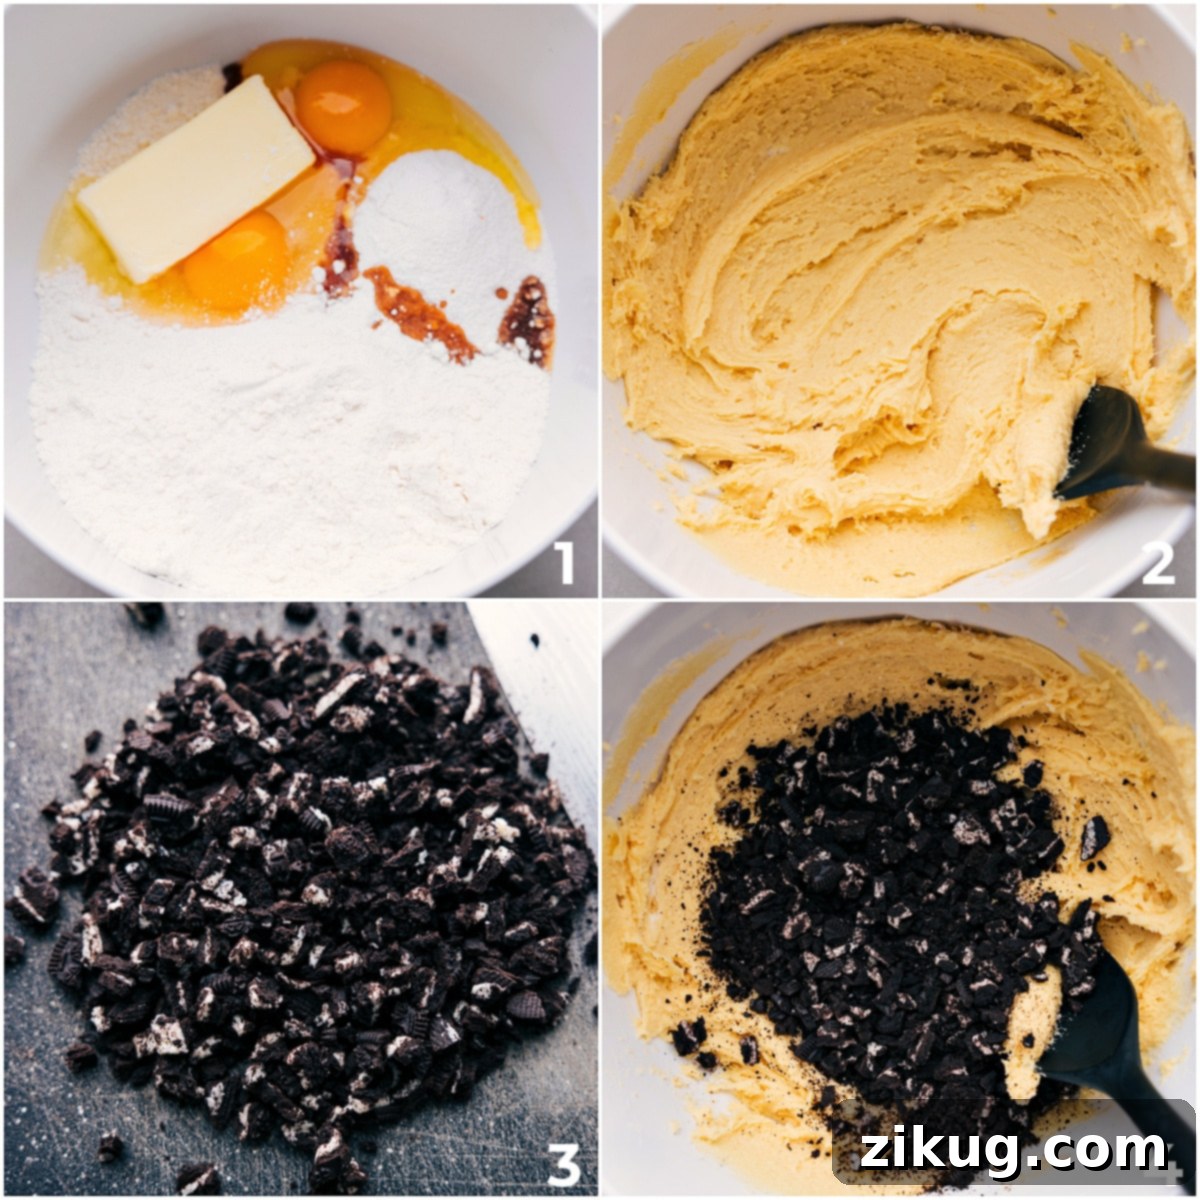
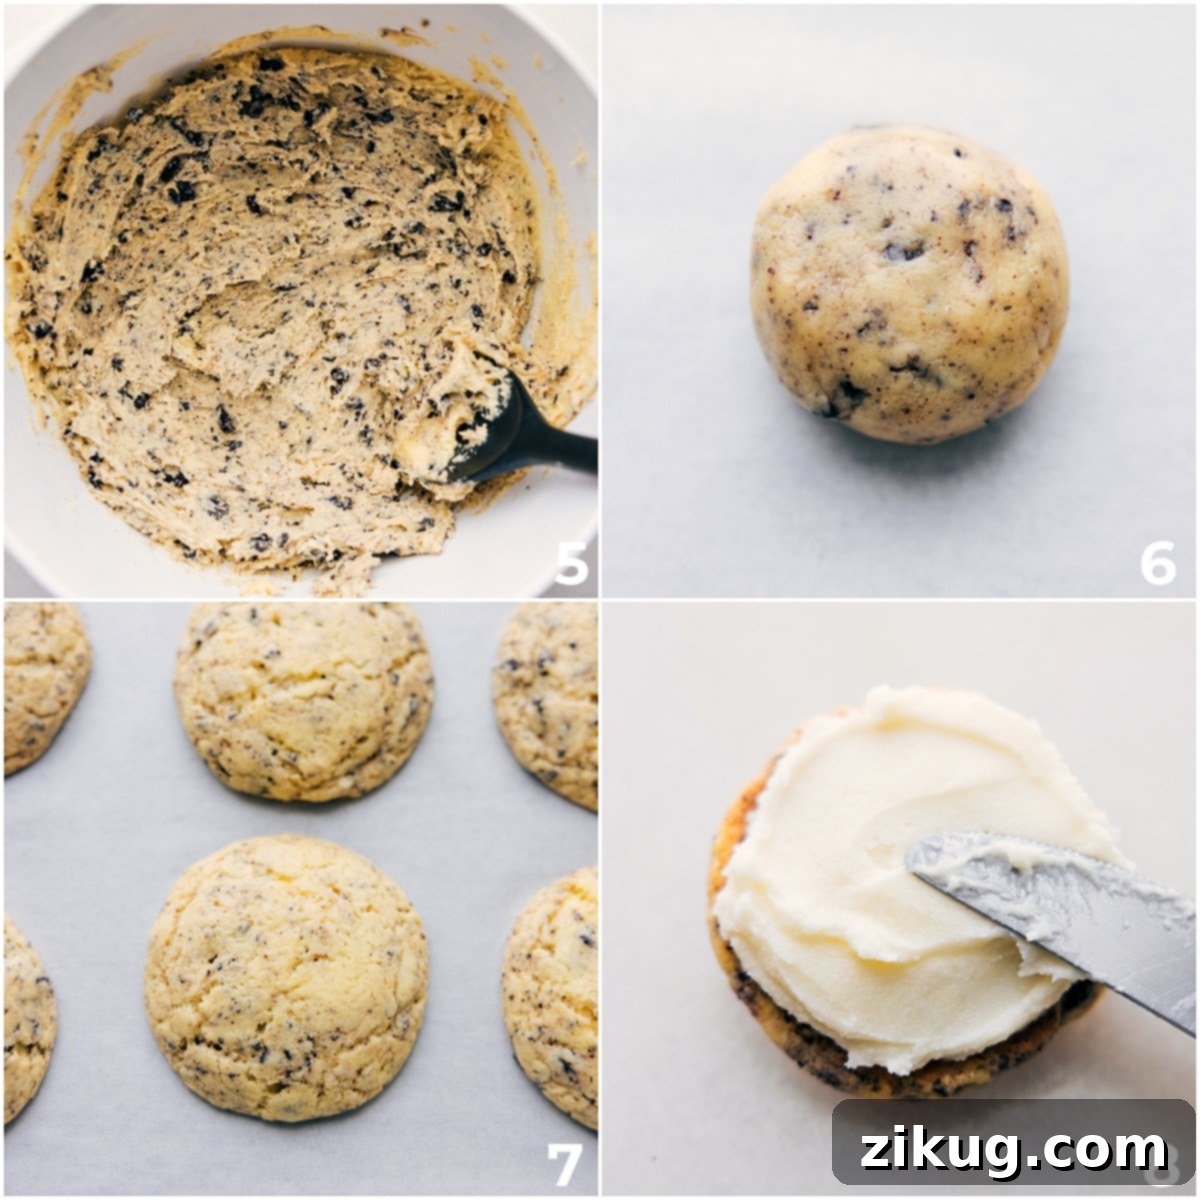
- Prepare the Dough: In the bowl of a stand mixer fitted with the paddle attachment (or using a large bowl and a hand mixer), combine the Betty Crocker cake mix, instant vanilla pudding mix, softened unsalted butter, room temperature eggs, and vanilla extract. Beat on medium speed until all ingredients are thoroughly combined and you have a very thick, cohesive dough. Be sure to scrape down the sides and bottom of the bowl frequently to ensure everything is evenly mixed.
- Fold in Chopped Oreos: Take your finely chopped regular Oreos (cream filling included) and gently fold them into the cookie dough until they are evenly distributed. Overmixing at this stage can develop gluten, leading to tougher cookies.
- Chill the Dough Balls: Using a 1½-tablespoon scoop or weighing out 30-gram portions, roll the dough into uniform balls. Arrange these dough balls on a plate or small baking sheet and chill them in the refrigerator for at least 30 minutes, or up to an hour. This crucial chilling step helps the cookies maintain their shape during baking, preventing them from spreading too much and ensuring they bake up thick and puffy.
- Preheat Oven and Bake: While the dough chills, preheat your oven to 350°F (175°C). Line a large baking sheet (15″ x 10″) with parchment paper or a silicone baking mat. Place the chilled dough balls about 2 inches apart on the prepared baking sheet. Bake for 9-10 minutes. The cookies are done when their bottoms are lightly browned and the tops are set but still soft. Avoid overbaking, as this will result in dry cookies.
- Cool the Cookies: Once baked, let the cookies rest on the baking sheet for 5 minutes. This allows them to set up slightly before you transfer them. Carefully move the warm cookies to a wire cooling rack to cool completely. Ensure they are entirely cool before moving on to the frosting step; frosting warm cookies will lead to a melted, messy filling. Repeat with any remaining dough.
Part 2: Crafting the Creamy Dream Frosting
- Soften Cream Cheese: If your cream cheese isn’t already perfectly soft, you can gently warm it in the microwave in 15-20 second bursts on a microwave-safe plate until it reaches room temperature. Be careful not to melt it.
- Cream Butter and Cream Cheese: In a clean mixing bowl, cream together the softened unsalted butter and room temperature cream cheese using a stand mixer or hand mixer until the mixture is completely smooth and free of any lumps.
- Add Flavorings: Mix in the vanilla extract and salt until just combined.
- Gradually Add Powdered Sugar: With the mixer on low speed, gradually add the powdered sugar, one cup at a time, until it is fully incorporated and the frosting is smooth. Once all the sugar is added, beat on low speed for 30 seconds, then increase the speed to medium-high and beat for 1-2 minutes until the frosting is light and fluffy. If you desire a thicker frosting, you can beat in an additional ¼ cup of powdered sugar.
- Chill the Frosting: If your frosting feels too soft, chill it in the refrigerator for 20-30 minutes to firm it up slightly before frosting the cookies. This will make it easier to pipe and prevent it from squeezing out when assembled.
Part 3: Assembling Your Oreo Whoopie Pies
- Frost the Cookies: Once the cookies are completely cool and the frosting is at a good consistency, transfer the frosting to a piping bag fitted with a wide tip. Piping makes for neat and consistent filling, but you can also use a knife or small offset spatula. Pipe a generous dollop of frosting onto the flat side of one cookie.
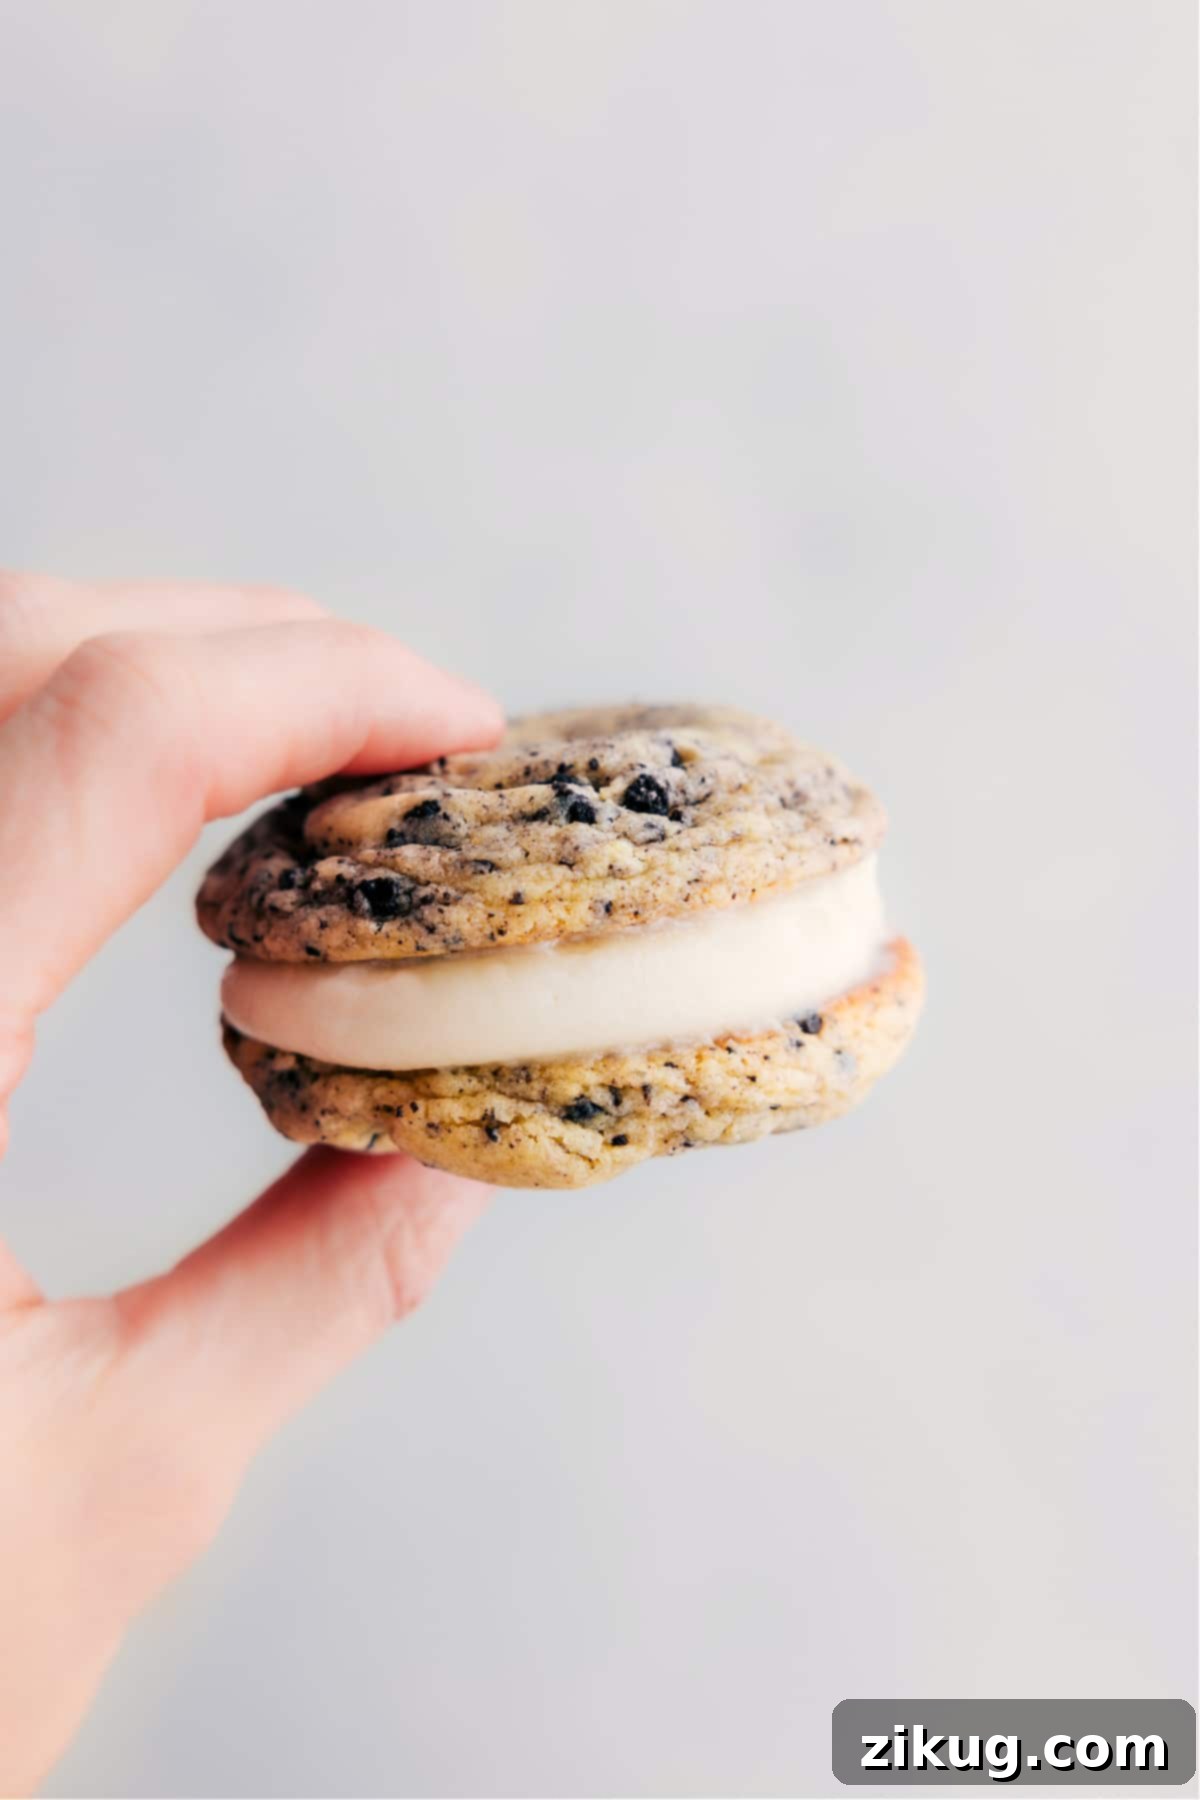
- Form the Pies: Gently place another cookie on top, flat side down, and lightly press to create a sandwich. Repeat this process with all the remaining cookies and frosting.
- The Essential Overnight Rest: This is a crucial step for achieving the perfect whoopie pie texture! Arrange the assembled whoopie pies in an airtight container or cover them loosely with plastic wrap. Refrigerate them overnight (at least 8 hours). During this time, the cookies will soften beautifully, becoming incredibly moist and cake-like, and the flavors will meld together wonderfully. This also prevents the frosting from squeezing out when you take a bite, as the cookies will yield to the pressure.
- Serve: The next day, let the whoopie pies come to room temperature for about 30 minutes before serving. They are truly at their best when enjoyed on the same day after their overnight rest.
Quick Tip for Uniform Whoopie Pies
How to Make Even Oreo Whoopie Pies: For perfectly matched cookie halves and consistent whoopie pies, use a food scale to weigh your dough balls. Aim for 30 grams per ball to ensure uniform size and even baking.
Expert Tips & Tricks for the Best Oreo Whoopie Pies
Elevate your whoopie pie game with these insider tips:
- The Art of Chopping Oreos: While a fine chop ensures Oreo flavor in every bite, don’t hesitate to crush them in a sealed bag with a rolling pin for varying textures. A coarser crush will give you more distinct crunchy pieces, while a fine chop will integrate more seamlessly into the cookie dough.
- Why Chill the Dough? Chilling the dough balls is non-negotiable! It solidifies the butter, preventing the cookies from spreading too rapidly in the oven. This results in thicker, puffier, and more evenly baked whoopie pie halves that are perfect for sandwiching.
- Patience for Cooling: Always allow your cookies to cool completely on a wire rack before you even think about frosting them. Attempting to frost warm cookies will cause your beautiful cream cheese filling to melt and slide right off, creating a sticky mess.
- Troubleshooting Your Frosting:
- If frosting is too soft: Pop it into the refrigerator for 15-30 minutes. The cold will help the butter and cream cheese firm up, making the frosting more stable and easier to work with.
- If frosting is too stiff: Let it sit out at room temperature for a bit, or, if needed, add a tiny splash (¼ to ½ teaspoon) of milk or cream and beat it until it reaches your desired consistency.
- The Magical Overnight Rest: This tip is truly the game-changer! Covering your assembled whoopie pies and refrigerating them overnight allows the moisture from the frosting to slowly absorb into the cookies. This softens them into that coveted, wonderfully cake-like texture and lets the flavors deepen and meld. Without this rest, the cookies can be a bit firmer, causing the frosting to squeeze out when you bite into them. Trust the process for ultimate whoopie pie perfection!
Helpful Tools for Whoopie Pie Success
Having the right kitchen tools can make the baking process even smoother and more enjoyable:
- Silicone Spatula: Essential for scraping down mixing bowls, ensuring no precious dough or frosting is left behind. It’s also gentle on non-stick surfaces.
- Baking Tray & Liner (Parchment Paper or Silicone Mat): A sturdy baking tray provides even heat distribution, while parchment paper or a silicone baking mat prevents sticking and makes cleanup a breeze. Silicone mats are particularly good for consistent cookie baking.
- Metal Spatula: A thin, sturdy metal spatula is ideal for carefully transferring warm cookies from the baking sheet to a cooling rack. It can also be used to gently smooth the edges of cookies if desired while they are still warm and pliable.
- Piping Bag with Wide Tip: For neat, professional-looking whoopie pies, a piping bag with a wide round tip (like an Ateco 808 or Wilton 1A) is highly recommended. It allows for quick and even distribution of frosting. If you don’t have one, a sturdy ziploc bag with a corner snipped off works in a pinch, or you can simply spread the frosting with a knife.
- Food Scale: For bakers who value precision and uniform results, a food scale is invaluable for weighing dough portions, ensuring each whoopie pie is perfectly matched.
- Stand Mixer or Hand Mixer: While a hand mixer works well, a stand mixer makes quick work of both the cookie dough and the frosting, freeing up your hands for other tasks.
Frequently Asked Questions About Whoopie Pies
What exactly is a Whoopie Pie?
A whoopie pie is a classic American baked good, particularly popular in New England and Pennsylvania Amish country. It’s essentially two soft, cake-like cookies (traditionally chocolate) sandwiched together with a creamy, fluffy filling (often marshmallow-based or buttercream). Our Oreo Whoopie Pies put a fun twist on this classic, using chocolate cake-mix cookies infused with Oreos and a decadent cream cheese frosting.
Why do my cookies need to rest overnight after assembly?
The overnight rest is crucial for optimal texture! During this time, the moisture from the cream cheese frosting slowly migrates into the cake-like cookies. This process transforms them from slightly firm to incredibly soft, moist, and tender, truly earning them the “cake-like” description. It also allows the flavors to deepen and meld, creating a more harmonious and delicious whoopie pie experience. Without this step, the cookies can feel a bit dry, and the frosting might squeeze out when you take a bite.
Can I use a different flavor of cake mix?
While this recipe specifically calls for Betty Crocker Super Moist White or Vanilla Cake Mix for its superior texture, you could experiment with other cake mix flavors. Chocolate cake mix would create an even more intense chocolate experience, for example. However, be aware that the texture might vary slightly, and some cake mixes might require minor adjustments to the butter or egg quantities to achieve the right dough consistency. Always stick to a 14.25-ounce box.
How do I prevent my frosting from being too runny or too stiff?
The key to perfect frosting consistency lies in the temperature of your ingredients and proper mixing. Ensure both your butter and cream cheese are truly at room temperature – soft but not melted. If your frosting is too soft, it likely needs to be chilled for 15-30 minutes to firm up. If it’s too stiff, it might be too cold or you’ve added too much powdered sugar. Let it warm up slightly at room temperature, or beat in a tiny amount (¼ to ½ teaspoon) of milk or cream until it reaches the desired spreadable consistency.
Storage Solutions for Oreo Whoopie Pies
To maintain their optimal freshness and delightful texture, store your assembled Oreo Whoopie Pies in an airtight container in the refrigerator for up to 4 days. Always bring them to room temperature for about 30 minutes before serving for the best flavor and softest bite. While you can freeze baked cookies, it’s generally recommended to freeze the unbaked dough for superior results. To do this, shape the dough into balls and freeze them solid on a baking sheet. Once frozen, transfer to an airtight freezer-safe bag. When ready to bake, place the frozen dough balls on a prepared baking sheet and bake directly from frozen, adding an additional 1–3 minutes to the baking time.
Delicious Ways to Use Leftover Oreos
If you find yourself with extra Oreos after making these amazing whoopie pies, don’t let them go to waste! Here are some other fantastic dessert ideas that celebrate the iconic cookie:
- Oreo Frosting Recipe: A dreamy, cookies-and-cream flavored frosting that’s perfect for topping cupcakes, filling cakes, or even spreading on other cookies.
- Oreo Fluff Dessert Dip: A light, airy, and incredibly addictive dessert dip that’s fantastic with fruit, graham crackers, or by the spoonful!
- Chocolate Covered Oreo Fudge: An unbelievably easy and decadent fudge recipe made right in your microwave, studded with crunchy Oreos and coated in rich chocolate.
- Crumbl Oreo Cookies Copycat Recipe: Indulge in a giant, soft-baked cookie loaded with Oreo pieces, mimicking the popular Crumbl cookie experience – often even better than the original!
- Oreo Pie Crust: The ultimate chocolate pie crust, simple to make and perfect for cheesecakes, cream pies, or any dessert that deserves a rich, cookie crumb base.
We hope you enjoy making and sharing these delightful Oreo Whoopie Pies. They truly are a testament to the magic of homemade treats!