
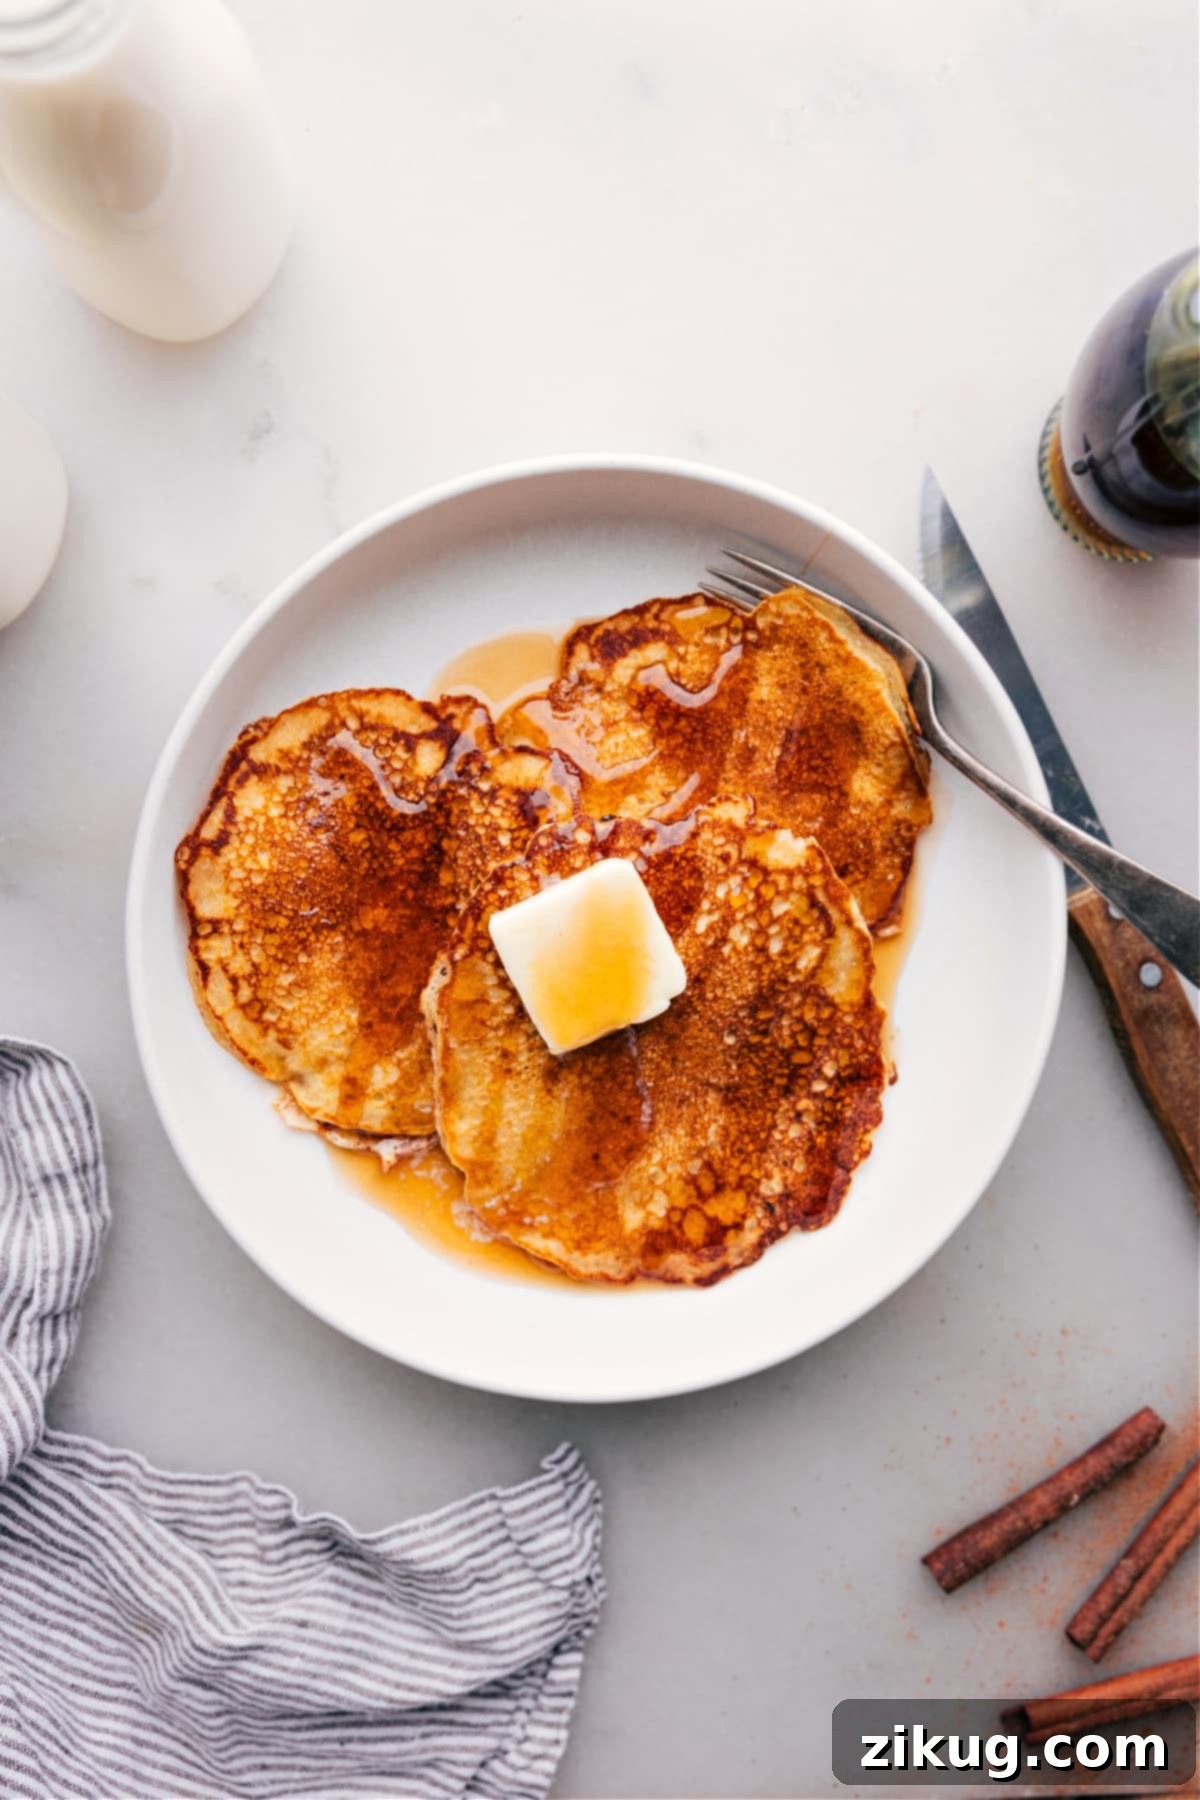
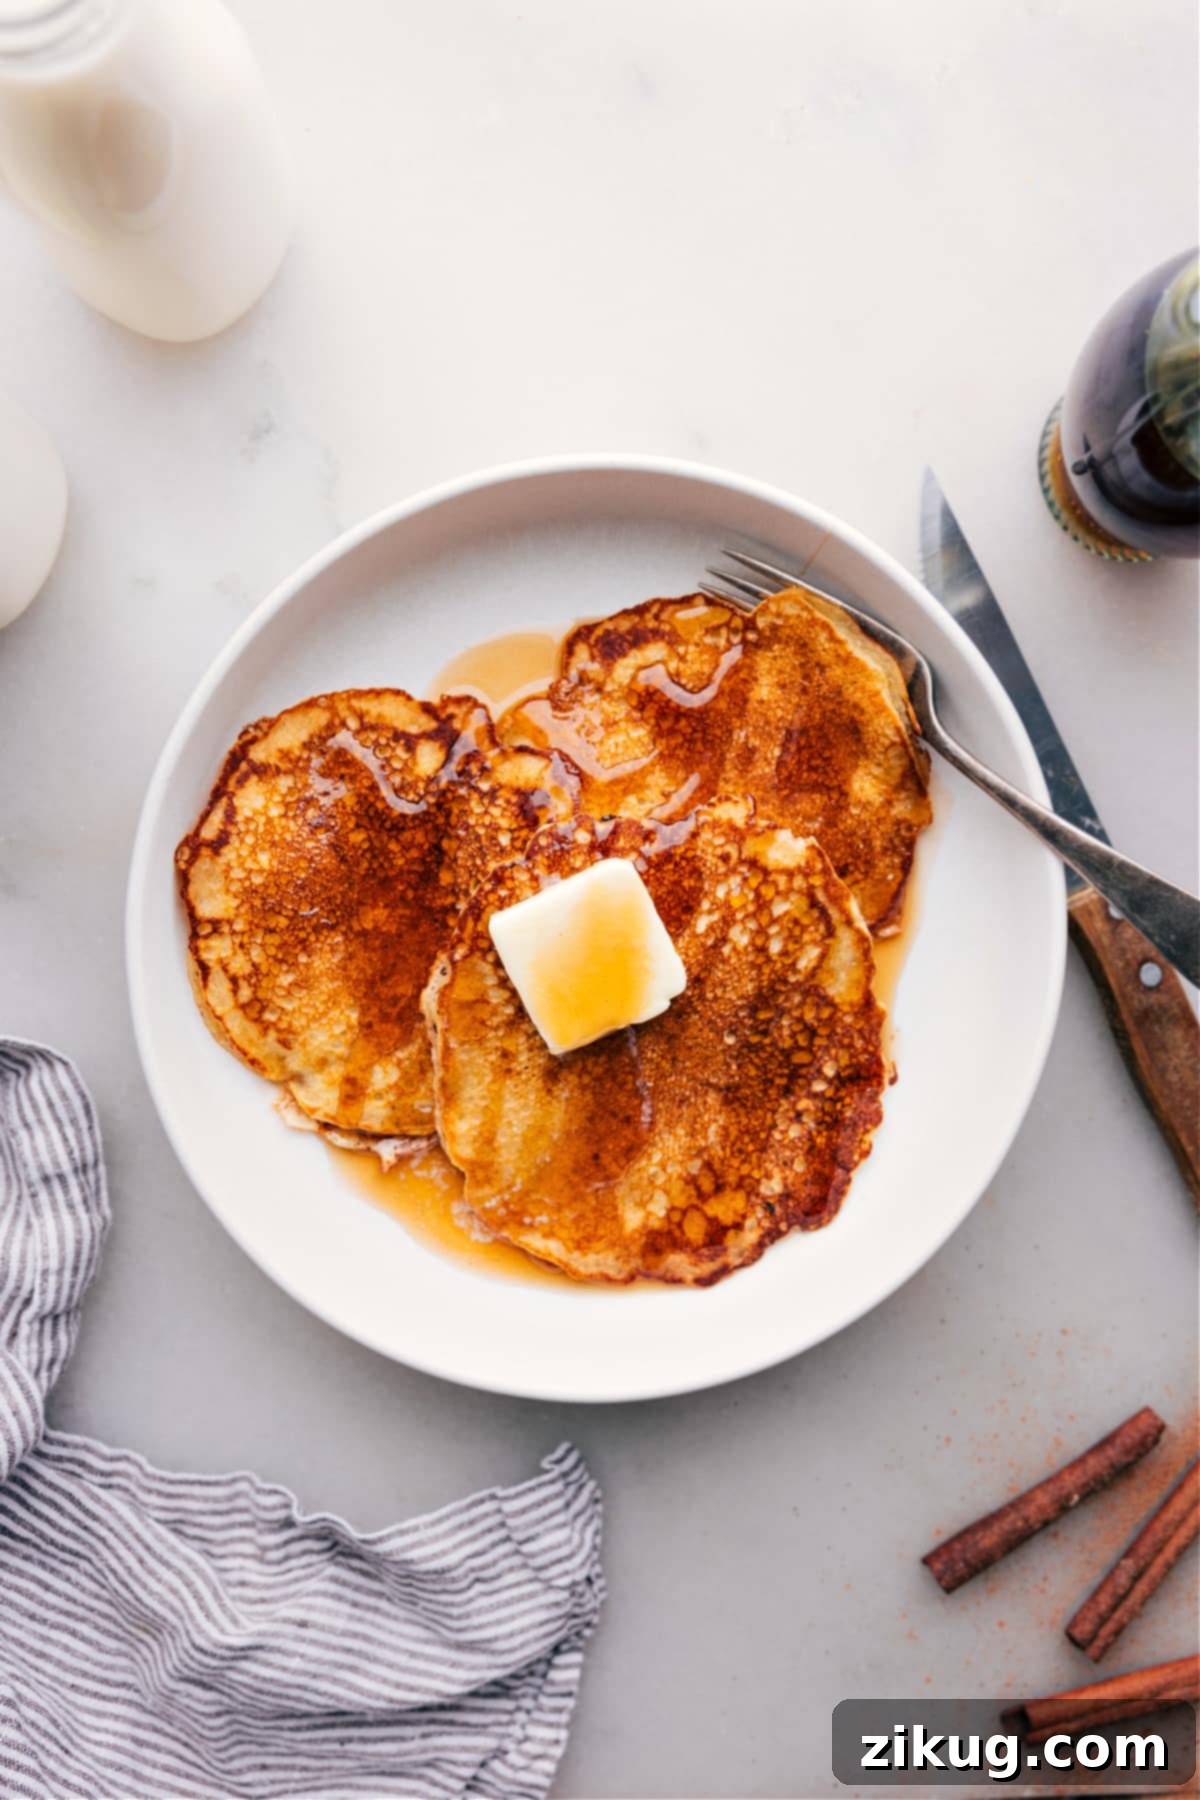
This **Old-Fashioned Pancake Recipe** delivers truly exceptional pancakes: wonderfully fluffy on the inside with those irresistible crisp, golden, buttery edges. Designed to perfectly soak up a generous drizzle of your favorite syrup, this recipe guarantees a delightful start to any day. Dive in for comprehensive photos, invaluable tips, and clever tricks to achieve perfect pancakes every single time, transforming your breakfast routine into a gourmet experience.

Author’s Note
Buttery, Crispy, and Unbelievably Soft Old-Fashioned Pancakes!
Growing up, pancakes were far more than just a simple weekend breakfast in our house – they were a cherished event. My mom always relied on a box mix, and while those pancakes hold a special place in my heart and still taste good, I was determined to perfect my very own homemade pancake recipe. My goal was to create a classic pancake from scratch, using fewer processed ingredients, that could rival any diner’s best.
After countless batches and dedicated testing, this **Old-Fashioned Pancake Recipe** has truly become my ultimate go-to. These pancakes strike a perfect balance: they are wonderfully soft and tender on the inside, yet boast a beautiful crispness around the edges thanks to the butter. Rich with authentic flavor, they’re also just the right thickness to absorb generous amounts of syrup without becoming soggy. Honestly, they’re so utterly delicious, I often find myself enjoying them plain, straight off the skillet.
Why This Old-Fashioned Pancake Recipe Stands Out
What makes these pancakes superior to others? It’s a combination of simple ingredients and careful technique:
- **Perfect Texture:** The secret to their incredible fluffiness is a precise blend of leavening agents and a gentle hand with the batter. This ensures a light, airy crumb that melts in your mouth.
- **Buttery Edges:** Using real butter not only enhances the flavor but also creates those coveted caramelized, crispy edges that are simply irresistible.
- **Rich Flavor Profile:** A touch of vanilla and optional cinnamon elevates the taste beyond basic, adding a warmth that feels comforting and familiar.
- **DIY Buttermilk:** We create our own buttermilk, which reacts with baking soda to produce an extra tender and moist pancake.
- **Easy to Follow:** With detailed instructions and visual cues, even novice cooks can achieve perfect results, making this the best way to make homemade pancakes.
Forget the box mix; once you try these classic, made-from-scratch pancakes, you’ll never look back. Prepare to make your breakfast an event!
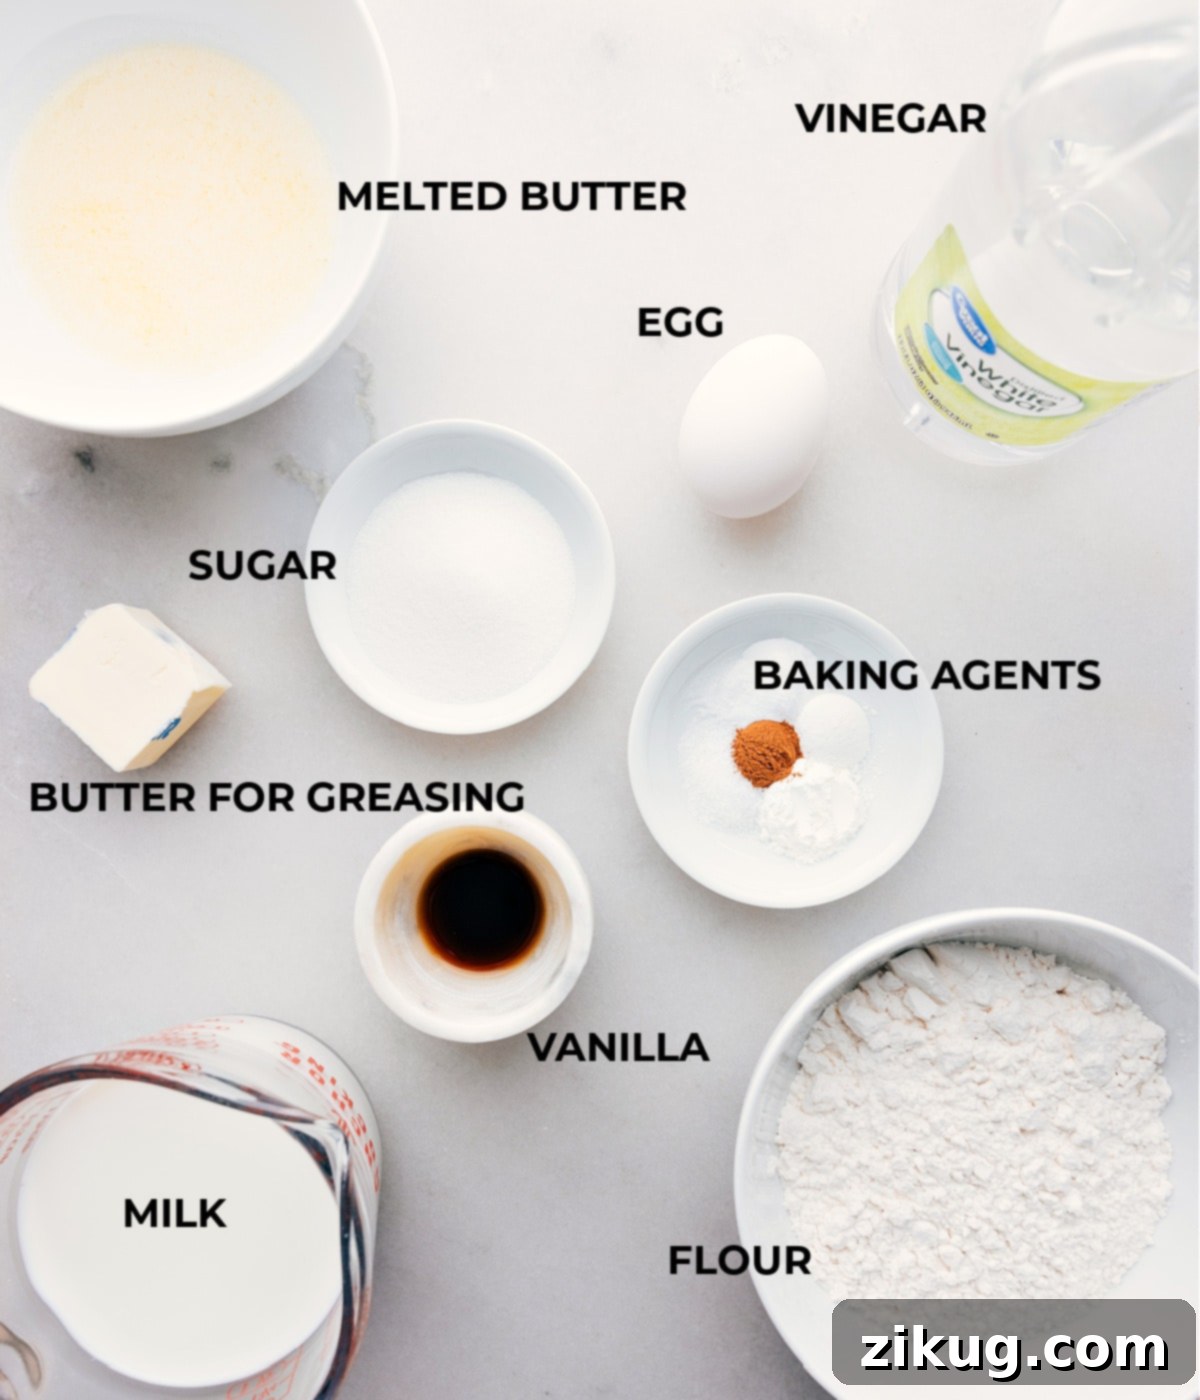
Old-Fashioned Pancake Batter Ingredients: Key to Fluffy Perfection
Crafting the perfect old-fashioned pancake starts with understanding each ingredient’s role. Here’s a breakdown of what you’ll need and why:
| Ingredient | Swap / Tip for Best Results |
|---|---|
| Melted Butter | Vital for that signature rich flavor and tender crumb. While a neutral oil can be used in a pinch, butter truly makes these pancakes shine with a superior taste and browning. |
| Whole Milk + White Vinegar | This combination creates a quick, homemade buttermilk that reacts with the baking soda, leading to incredibly light and fluffy pancakes. If you have genuine buttermilk, feel free to use it directly. |
| Egg | Adds structure, richness, and helps bind the ingredients together. For an egg-free alternative, a flax egg (1 tablespoon ground flaxseed mixed with 3 tablespoons water, allowed to sit for 5 minutes) works well, though the texture might be slightly denser. |
| All-Purpose White Flour | The base of our batter, providing the necessary structure. You can substitute up to half of the white flour with whole-wheat flour for added fiber, but be aware it will result in a slightly denser and heartier pancake. |
| Cornstarch | An optional but highly recommended addition! Cornstarch contributes to an extra tender and incredibly fluffy texture, making a noticeable difference in the final product. Don’t skip if you want restaurant-quality fluffiness. |
| Granulated Sugar | Provides subtle sweetness and aids in browning for those beautiful golden edges. For natural sweetness, you can swap with an equal amount of honey or maple syrup, but adjust the wet ingredients slightly to maintain batter consistency. |
| Baking Powder + Baking Soda | These are your essential leavening agents – the “lift-makers”! Baking powder provides initial lift, while baking soda reacts with the acidity of the buttermilk (or vinegar + milk) to create a secondary, powerful rise. Never skip these for fluffy pancakes! |
| Vanilla Extract | A must-have for classic pancake flavor. It adds warmth and depth. For a unique twist, consider using almond extract for a subtle, sophisticated taste. |
| Salt | A small amount of salt balances the flavors and enhances the sweetness, preventing the pancakes from tasting bland. |
| Ground Cinnamon (Optional) | Adds a comforting, aromatic spice that beautifully complements the sweet and buttery flavors. It’s entirely optional, but highly recommended for an extra layer of deliciousness in your classic pancakes. |
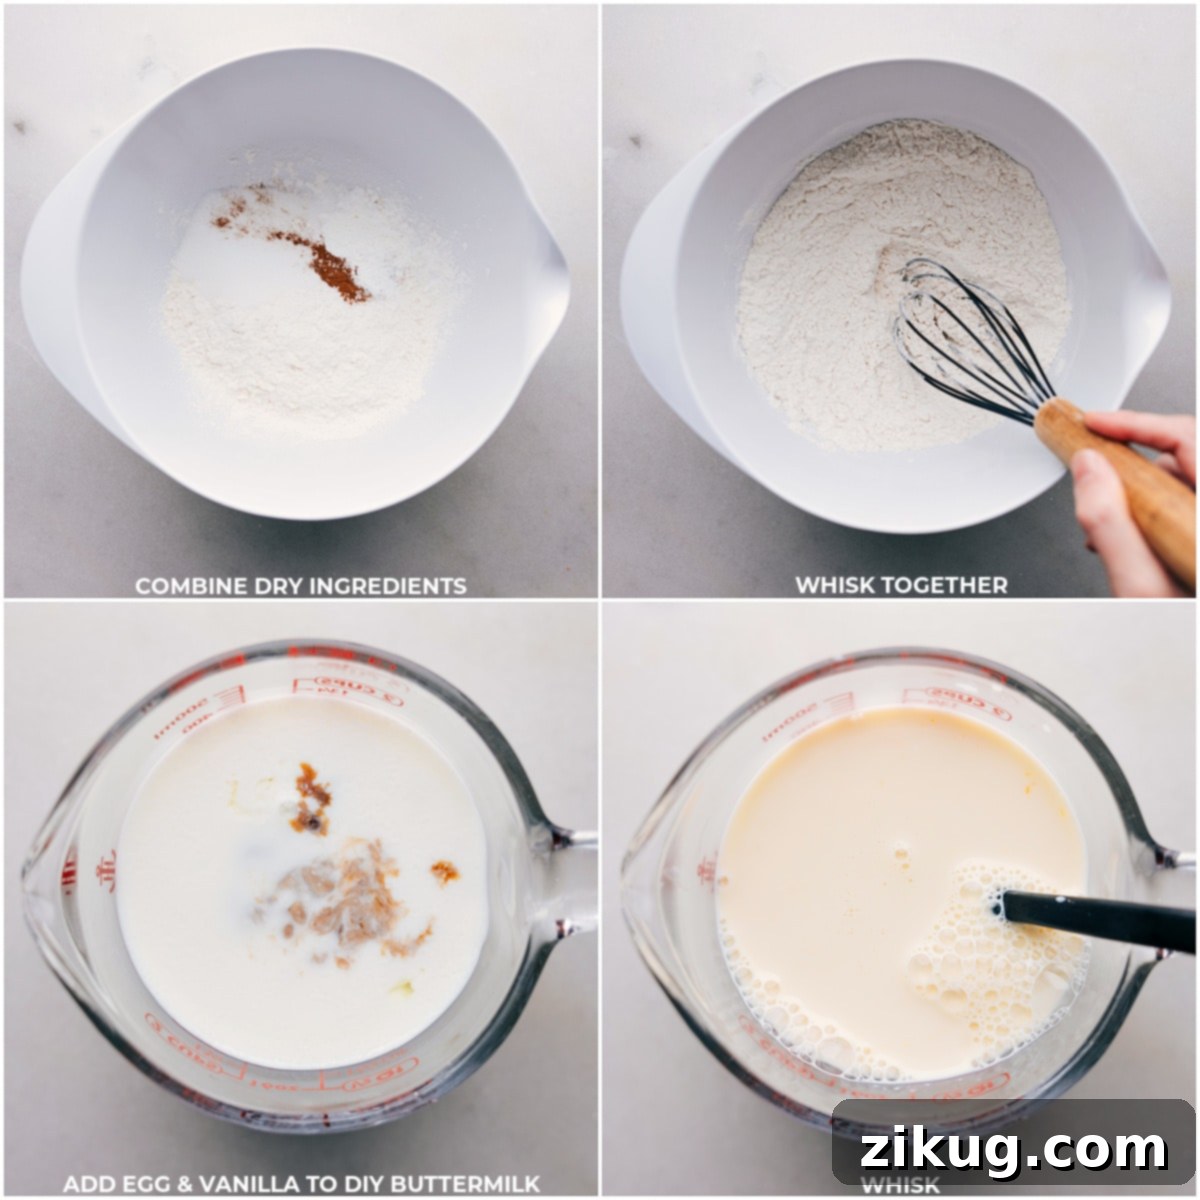
How To Make Homemade Pancakes: A Step-by-Step Guide
Follow these simple steps to create the best old-fashioned pancakes your family will rave about:
- Prepare Your Wet Ingredients: First, melt 5 tablespoons of unsalted butter and set it aside to cool to room temperature. In a separate liquid measuring cup, combine 1 tablespoon of white vinegar with 1 cup plus 3 tablespoons of whole milk (at room temperature) to create your homemade buttermilk. Stir gently and let it sit for 5 minutes until it slightly curdles. Then, whisk in your room temperature egg and vanilla extract until the mixture is smooth.
- Combine Dry Ingredients: In a very large mixing bowl, whisk together your all-purpose flour, granulated sugar, salt, baking powder, baking soda, optional ground cinnamon, and optional cornstarch. Ensure there are no lumps and the ingredients are evenly distributed for consistent rise.
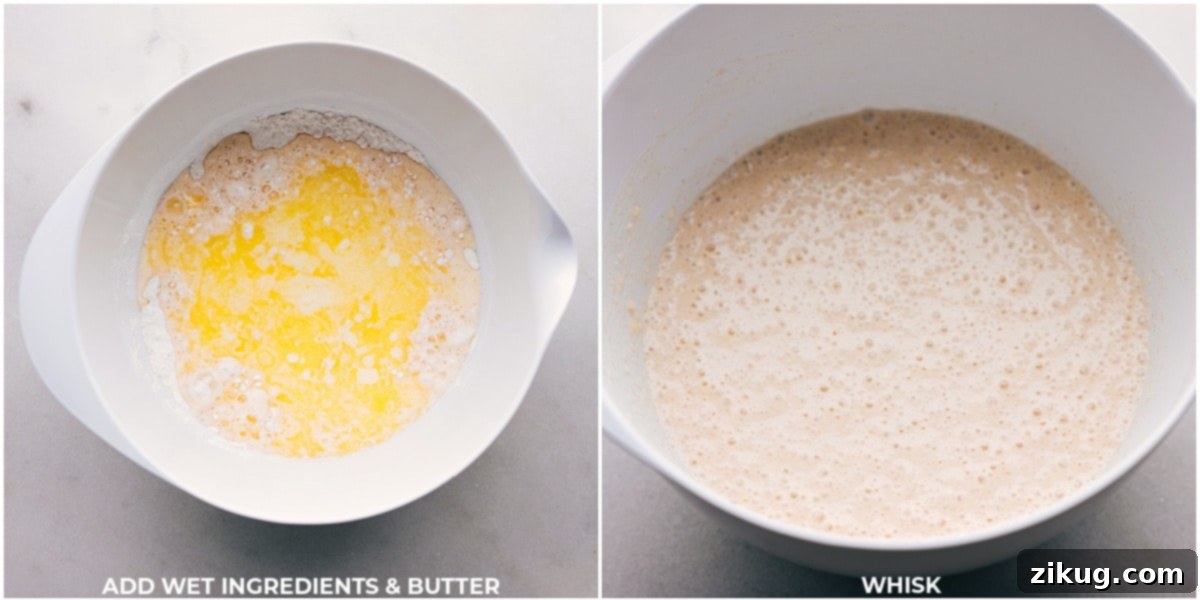
- Gently Mix Wet and Dry: Pour the prepared milk mixture into the dry ingredients. Add the cooled melted butter directly on top. Using a whisk, combine the wet and dry ingredients with a light touch. Whisk for no longer than 30 seconds – a few lumps are perfectly fine and even desired for tender pancakes! Over-mixing develops gluten, leading to tough pancakes. Let the batter rest for 5–10 minutes; this allows the leaveners to activate and hydrates the flour, resulting in a fluffier texture.
- Cook Pancakes to Golden Perfection: Heat a nonstick skillet over medium heat, or set an electric griddle to 300°F (150°C). Once hot, take the remaining 3 tablespoons of cold butter and rub it across the cooking surface using tongs. Gently wipe off any excess butter with a paper towel for even browning. Use a 1/4 cup measuring cup to scoop and pour the batter onto the hot surface. The batter should spread into a 4 to 4.5-inch circle (you can gently coax it with a spoon if needed). Cook until you see bubbles forming and popping across the surface of the pancake and the edges appear set. Then, carefully use a thin metal spatula to flip the pancake and cook the other side until it’s beautifully golden brown. If your pancakes are browning too quickly, lower the heat slightly.
- Repeat and Serve: After each batch, quickly wipe down the skillet or griddle with a paper towel and rub with a bit more butter to prepare for the next round. Repeat until all the batter is used up. Serve your glorious pancakes immediately with extra butter and your favorite toppings. For keeping pancakes warm while you finish cooking, check out our pro tip in the Recipe Notes section below!
Quick Topping Ideas
Elevate these delicious homemade pancakes with delightful toppings! Consider a vibrant Blueberry Syrup, a rich Buttermilk Syrup, decadent Caramel Syrup, or a dollop of freshly Whipped Cream paired with seasonal berries for an unforgettable breakfast experience!
What Are the Secrets to Truly Good Old-Fashioned Pancakes?
Achieving perfectly fluffy, tender, and golden-brown pancakes consistently involves a few key techniques. Master these secrets, and you’ll always have an impressive stack on your plate:
- My Number #1 Tip: Don’t Overmix the Batter! This is perhaps the most crucial rule for tender pancakes. Once you combine the wet and dry ingredients, mix them just enough until no streaks of dry flour remain. Lumps in the batter are not just okay, they’re actually desirable! Over-mixing develops gluten, which leads to tough, chewy pancakes instead of light and airy ones.
- Let the Batter Rest: After mixing, allow your pancake batter to rest for 5 to 10 minutes (or even up to 30 minutes for restaurant-level fluffiness, as discussed in the FAQs). This resting period gives the gluten a chance to relax and allows the leavening agents to start working their magic, resulting in incredibly tender and airy pancakes.
- Master Your Heat Control: Pancake cooking requires vigilant heat management. Start with medium heat and observe how quickly your pancakes brown. If they’re browning too fast on the outside before the inside cooks through, lower the heat. If they’re taking too long, increase it slightly. Consistent, even heat is essential for uniform cooking and a beautiful golden crust.
- Invest in a Quality Griddle: If you find yourself making pancakes often, an electric griddle is a game-changer. It offers a large, even cooking surface and precise temperature control, making the process much easier and yielding more consistent results.
- Grease the Pan with Butter (and Wipe!): For the best flavor and browning, grease your cooking surface with butter. The trick is to rub a cold stick of butter over the hot pan, then gently wipe off any excess with a paper towel between batches. This prevents greasy pancakes and ensures a perfect, even golden crust without burning.
- Room Temperature Ingredients: Ensure your milk and egg are at room temperature. Cold ingredients can solidify the melted butter in your batter, leading to an uneven texture. Room temperature ingredients combine more smoothly and promote a better chemical reaction with the leavening agents.
When to Flip Your Pancakes
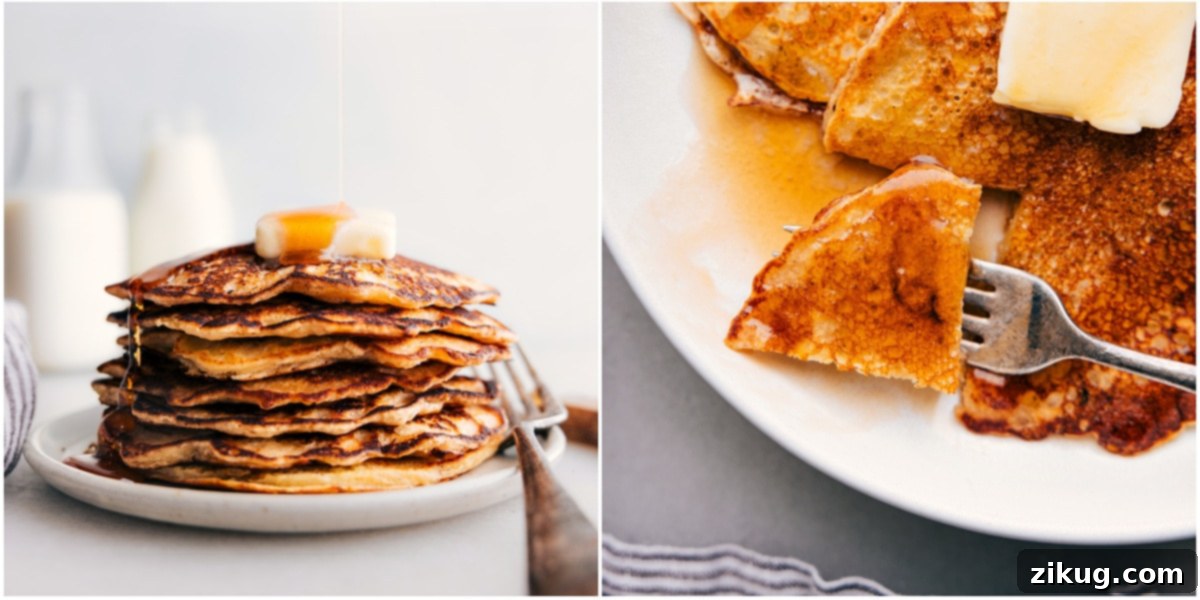
The perfect moment to flip your Old-Fashioned Pancake is crucial for even cooking and a beautiful golden finish. Look for several key indicators: when abundant bubbles begin to form and pop, creating small craters on the surface, and when the edges appear firm and slightly dry. A peek underneath should reveal a lovely golden-brown hue. Once flipped, cook the second side until it matches the same perfect golden color.
More Breakfast & Brunch Favorites You’ll Love:
Breakfast
Savory Ham and Cheese Quiche
Desserts
Decadent Croissant Breakfast Bake
Desserts
Our Easy Banana Bread Recipe
Eggs And Potatoes
Perfectly Scrambled Eggs
Print Recipe
Old Fashioned Pancakes
Chelsea Lords
15
10
25
13 pancakes
Video
A helpful video tutorial would typically be embedded here to guide you through the Old-Fashioned Pancake recipe steps visually.
Equipment
-
Electric griddle or a large, heavy-bottomed nonstick pan
-
Large mixing bowls
-
Whisk
-
Liquid measuring cup
-
Dry measuring cups and spoons
-
Thin metal spatula
Ingredients
- 8 tablespoons unsalted butter divided, see note 1 below for details
- 1 tablespoon white vinegar (crucial for DIY buttermilk, do not use white wine vinegar)
- 1 cup + 3 tablespoons whole milk (ensure it’s at room temperature for best results)
- 1 teaspoon vanilla extract
- 1 large egg (at room temperature for better emulsion)
- 1-1/4 cups all-purpose flour
- 2 tablespoons granulated sugar
- 1/2 teaspoon salt
- 1/2 teaspoon baking powder
- 1/2 teaspoon baking soda
- 1/4 teaspoon ground cinnamon (optional, but adds a lovely warmth)
- 1 teaspoon cornstarch (optional, for extra tender pancakes)
Instructions
-
Melt 5 tablespoons of unsalted butter in the microwave or a small saucepan. Once completely melted, set it aside to cool to room temperature. It’s crucial that your milk and egg are also at room temperature; otherwise, the melted butter may clump up when combined, affecting the batter’s consistency.
-
To create your homemade buttermilk, pour 1 tablespoon of white vinegar into a liquid measuring cup. Then, add whole milk on top until it reaches the 1-1/4 cup line. Stir this mixture gently and let it sit undisturbed for 5 minutes. During this time, the milk will slightly curdle, forming a quick DIY buttermilk. After 5 minutes, add the room temperature egg and vanilla extract to this mixture and whisk until it is thoroughly combined and smooth.
-
In a very large bowl, whisk together all the dry ingredients: flour, granulated sugar, salt, baking powder, baking soda, ground cinnamon (if using), and cornstarch (if using). Ensure these are well combined. Next, pour the prepared milk mixture into the dry ingredients. Scrape every last bit of the cooled melted butter directly on top of the dry ingredients. Using a whisk, gently combine the wet and dry ingredients. Do not overmix; whisk for no longer than 30 seconds. A few lumps are perfectly acceptable and even preferred for tender pancakes. Over-mixing develops gluten, which can lead to tough pancakes. Let the batter rest for 5-10 minutes.
-
Heat a nonstick pan over medium heat, or preheat an electric griddle to 300°F (150°C). Once the cooking surface is hot, take the remaining 3 tablespoons of cold butter and rub it across the griddle using tongs. Immediately use a paper towel to gently wipe off some of the butter, leaving just a thin, even layer. This prevents greasy pancakes and ensures beautiful, even browning.
Use a 1/4 cup measuring cup to scoop your pancake batter and pour it onto the hot griddle. The batter should naturally spread to form a 4 to 4.5-inch circle; you can gently coax it with the back of a spoon if needed. Cook the pancake until you observe numerous bubbles forming and popping across its surface, and the edges appear set and slightly dry. Then, slide a thin metal spatula underneath and carefully flip the pancake. Cook the second side until it is also nicely golden brown. If your pancakes are browning too quickly, or if the butter starts to burn, reduce the heat.
-
After each pancake (or batch), quickly wipe down the skillet or griddle with a clean paper towel to remove any burnt bits. Then, rub the cooking surface with a bit more of the remaining butter and repeat the cooking process until all the batter has been used up. To keep your freshly cooked pancakes warm while you finish making the rest, refer to Note 2 in the Recipe Notes section below.
-
Serve these delicious Old-Fashioned Pancakes as soon as possible to enjoy them at their best! Garnish with a pat of butter, a generous drizzle of your favorite syrup, fresh fruit, or homemade toppings. This vanilla sauce, for instance, is my absolute favorite accompaniment!
Recipe Notes for Perfect Pancakes
Note 2: How to Keep Pancakes Warm: To ensure all your pancakes are warm when serving, place a wire cooling rack over a large baking sheet. As each pancake comes off the skillet or griddle, transfer it to the cooling rack in a single layer. Once you have a few pancakes on the rack, place the entire baking sheet into a 200°F (95°C) oven. This low heat will keep them perfectly warm and fluffy without overcooking them while you continue to prepare the remaining batter.
Storage Tips: If you have leftover pancakes, allow them to cool completely on a wire rack. To store, stack them with small pieces of parchment paper between each pancake to prevent sticking. Place the stack in an airtight container or a freezer-safe bag. They will keep fresh in the refrigerator for up to 3 days or in the freezer for up to 2 months.
Reheating Pancakes: You can easily reheat frozen or refrigerated pancakes. For a quick reheat, use the microwave: place a pancake on a plate with a damp paper towel over it and microwave for 20-30 seconds per pancake. For crispier edges, use a toaster on a low-medium setting until warm, or heat them in a skillet over low-medium heat for 1-2 minutes per side. You can also reheat a larger batch in the oven at 350°F (175°C), covered with foil, for about 10 minutes. Adjust heating times based on the thickness of your pancakes.
Nutrition
Calories: 144kcal |
Carbohydrates: 13g |
Protein: 3g |
Fat: 9g |
Saturated Fat: 5g |
Cholesterol: 38mg |
Sodium: 226mg |
Potassium: 51mg |
Fiber: 1g |
Sugar: 3g |
Vitamin A: 294IU |
Calcium: 43mg |
Iron: 1mg
Nutrition information is automatically calculated and should be used as an approximation. Values may vary based on specific ingredients and preparation methods.
Love this recipe? Leave a comment and rating below!Your feedback helps us and other home cooks!
Old-Fashioned Pancake Recipe FAQs: Your Questions Answered
Get answers to common questions about making, storing, and reheating the best Old-Fashioned Pancakes:
Restaurant pancakes often achieve their signature fluffiness due to a combination of factors. Firstly, they usually use fresh, high-quality leavening agents (baking powder and baking soda) that are active and potent. Secondly, and critically, they ensure the batter is not overmixed; lumps are key to preventing gluten development that leads to tough pancakes. Most importantly, many professional kitchens allow the batter to rest for at least 20-30 minutes after mixing. This resting period hydrates the flour fully, relaxes the gluten, and allows the leavening agents more time to produce carbon dioxide, resulting in an incredibly airy and tender crumb. High, consistent heat on a well-oiled griddle also contributes to a quick rise and beautiful browning.
Absolutely! Pancakes freeze exceptionally well, making them perfect for meal prepping quick breakfasts. To properly freeze them, first allow your freshly cooked pancakes to cool completely on a wire rack. Once cooled, arrange them in a single layer on a baking tray and place the tray in the freezer for about 30 minutes to an hour, or until they are firm. This step prevents them from sticking together. After this initial freeze, you can stack the pancakes with small squares of parchment paper between each one. Transfer the stack into an airtight freezer bag or container, removing as much air as possible. Label with the date. Frozen pancakes can be stored for up to 3 months and reheated as needed, offering a convenient grab-and-go option.
There are several effective methods to reheat pancakes, depending on your desired outcome and how many you’re reheating. For a quick single serving, the microwave is your friend: place one or two pancakes on a plate, cover them with a damp paper towel, and microwave for 20-30 seconds each. For crispier edges, toast them in a toaster on a low-medium setting until warm and slightly crispy. If reheating a larger batch, preheat your oven to 350°F (175°C), arrange pancakes in a single layer on a baking sheet, cover with foil to prevent drying, and bake for about 10 minutes. Alternatively, a skillet over low-medium heat for 1-2 minutes per side can also yield good results. Always adjust reheating times based on the thickness and quantity of your pancakes to avoid overcooking or drying them out.
Several common mistakes can lead to tough pancakes. The most frequent culprit is **overmixing the batter**. Mixing too much develops the gluten in the flour, resulting in a chewy, dense texture. Remember, lumps are your friend! Another factor can be not letting the batter rest, which is crucial for hydrating the flour and allowing the leavening agents to work. Using too much flour or not enough fat can also contribute to a drier, tougher pancake. Lastly, cooking on too low a heat can prolong cooking time, drying out the pancakes, while too high a heat might burn the outside before the inside can properly cook and fluff up.
While it’s generally best to cook pancake batter within 30 minutes to an hour of mixing for optimal fluffiness (due to the active leavening agents), you can prepare the dry and wet ingredients separately the night before. Mix the dry ingredients in one bowl and cover it. In another container, combine the wet ingredients (milk, vinegar, egg, vanilla, and *cooled* melted butter) and refrigerate. In the morning, bring the wet ingredients to room temperature, then gently combine wet and dry, let it rest for 10 minutes, and cook. This method ensures maximum freshness and fluffiness. If you must mix the whole batter ahead, refrigerate it for up to 1-2 days, but be aware that the pancakes might be slightly less fluffy due to diminished leavening agent activity.
Fun Ways To Enjoy These Old-Fashioned Pancakes: Creative Variations!
These classic Old-Fashioned Pancakes are delicious on their own, but they also serve as a fantastic canvas for creativity. Here are some fun and unique ways to enjoy them:
- Pancake Tacos: Fold warm pancakes in half and fill them with a delicious assortment of fresh fruits like sliced bananas and berries, a dollop of whipped cream, or a drizzle of chocolate sauce for a fun, handheld treat.
- Pancake Pops: Use a smaller scoop to make mini pancakes. Once cooked, thread them onto skewers (alternating with fruit like grapes or strawberries) and serve with various dipping sauces like maple syrup, yogurt, or melted chocolate. Perfect for parties or kids!
- Stacked Pancake Cake: Create an impressive dessert by layering several large pancakes with whipped cream, fresh berries, chocolate ganache, or fruit compote. This is similar to a waffle cake, offering a beautiful presentation for celebrations.
- Pancake Pizza: Make one very large pancake and use it as a sweet “pizza” base. Top with cream cheese frosting, sliced fruits (kiwi, strawberries, blueberries), sprinkles, and a light drizzle of honey or chocolate for a delightful and customizable dessert pizza.
- Sushi-Style Pancakes: Spread a thin layer of cream cheese, nut butter, or jam over a pancake. Roll it up tightly like a sushi roll, then slice into bite-sized pieces. Serve these sweet “sushi” rolls with chopsticks for a playful breakfast.
- Parfait Glass Layers: Crumble leftover pancakes into small pieces. Layer them in a glass with Greek yogurt, fresh fruit, and granola for a hearty and delicious breakfast parfait that’s full of texture.
- Themed Shapes: Make breakfast extra special by pouring pancake batter into cookie cutters placed on the griddle. You can create festive shapes like stars, hearts, or animals for holidays and special occasions, delighting children and adults alike.
- Add-Ins Galore: Before flipping, sprinkle your favorite additions onto the wet batter side. Think chocolate chips, fresh blueberries, banana slices, finely chopped nuts, or even a dash of citrus zest for an instant flavor boost.