
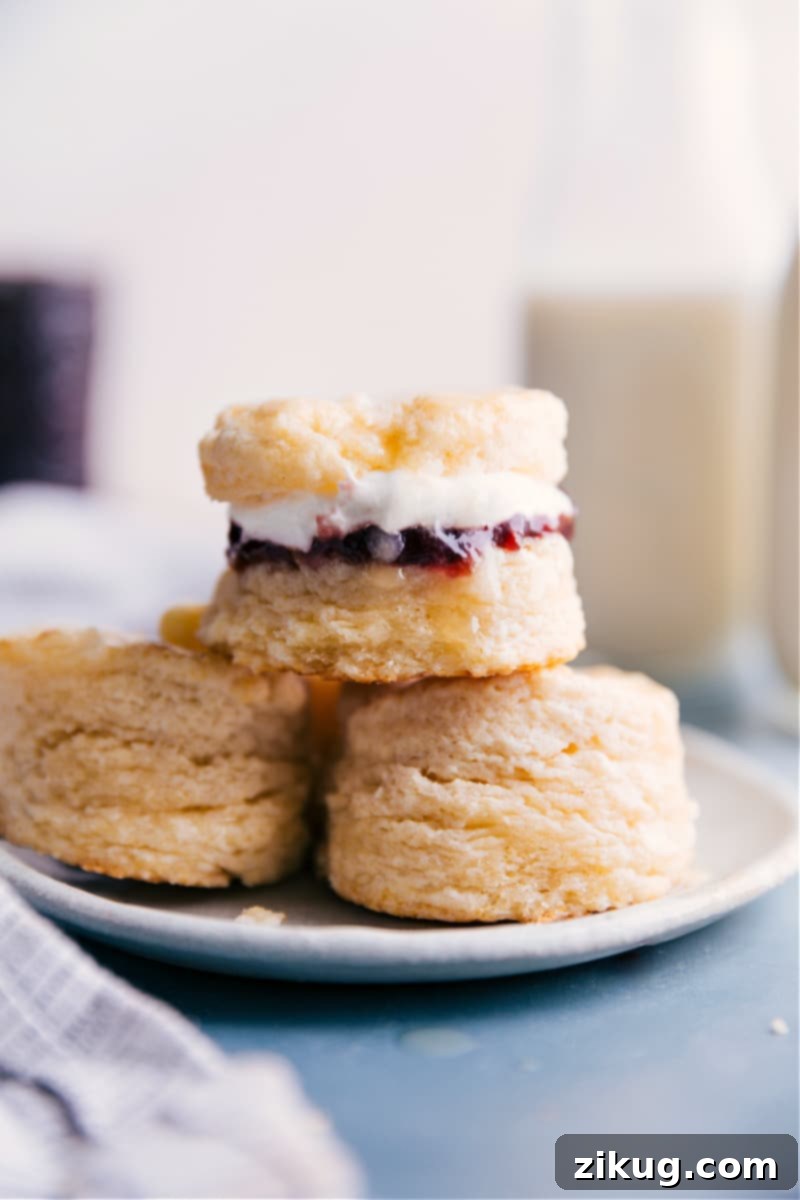
Unlock the secret to perfect homemade biscuits with this incredibly easy recipe. Featuring just 5 core ingredients, these biscuits promise a stress-free baking experience and a melt-in-your-mouth, buttery flavor every single time. Prepare to elevate your breakfast, brunch, or dinner with these exceptionally light and fluffy creations.

author’s note
The Only Biscuit Recipe You’ll Ever Need for Fluffy Perfection!
There’s something uniquely comforting about a warm, flaky biscuit. For me, it connects deeply with family traditions, especially my dad’s unwavering love for biscuits and gravy. It was his ultimate breakfast, and it became my personal mission to bake him the very best he’d ever tasted.
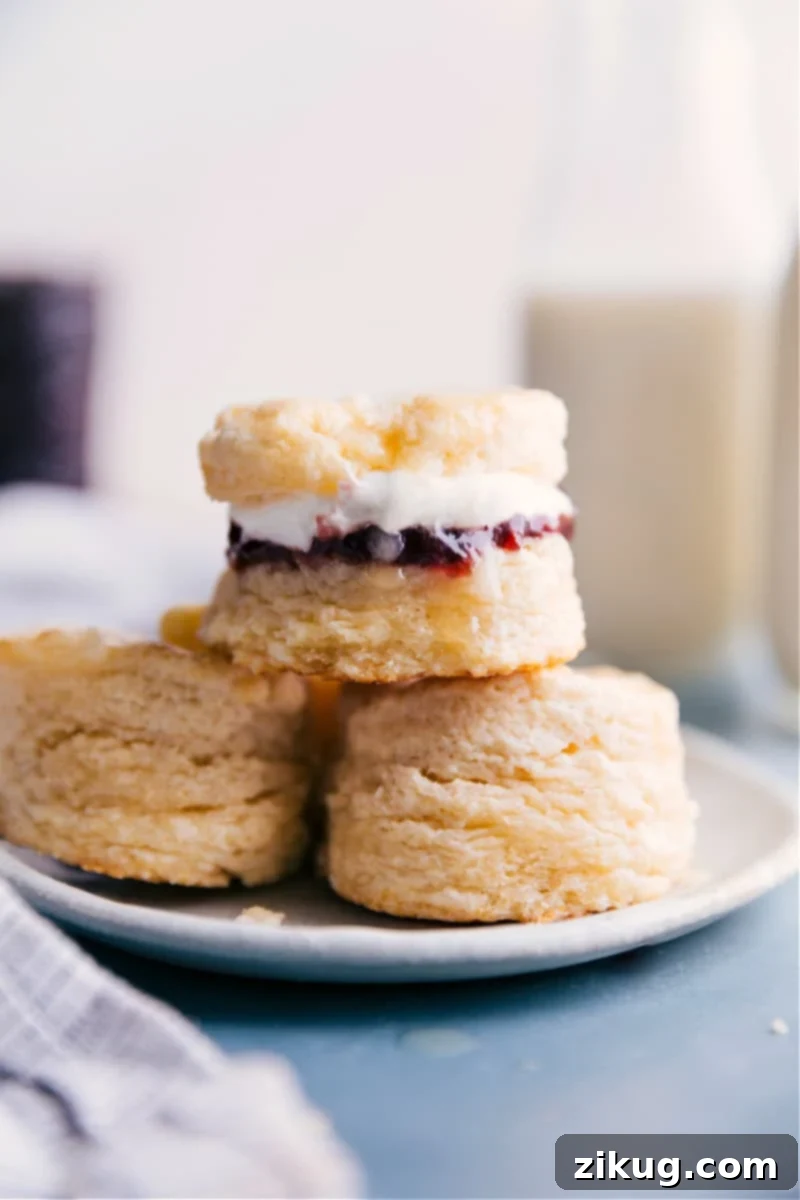
This culinary quest began, naturally, with perfecting the biscuit itself. I’m utterly passionate about biscuits – particularly those served on the sweeter side, slathered with homemade honey butter, a dollop of fruit jam, and a generous cloud of freshly whipped cream! Through countless trials, meticulous adjustments, and a fair share of buttery triumphs and minor mishaps, I finally fine-tuned what I genuinely believe to be the best biscuit recipe I have ever created.
What makes this recipe stand out is its consistent success. These biscuits turn out perfectly golden, wonderfully fluffy, and incredibly tender every single time, without fail. If you’ve been searching for a reliable, foolproof, and utterly delicious go-to biscuit recipe, consider your search over. This is it. And once you master these incredible biscuits, be sure to pair them with my equally perfected biscuits and gravy recipe – a truly winning combination!
Creating these light and tender biscuits isn’t just about following steps; it’s about understanding the simple science behind them. The goal is always a delicate balance of crisp exterior and soft, layered interior. This recipe prioritizes ease and consistent results, ensuring that even novice bakers can achieve bakery-quality biscuits from their home kitchen. So, let’s dive into the simple yet magical world of homemade biscuits!
Essential Ingredients for Our Best Biscuit Recipe
Crafting the perfect biscuit begins with selecting the right ingredients. This recipe relies on a handful of pantry staples, but the quality and temperature of each component play a crucial role in achieving those coveted flaky layers and tender crumb. Here’s a closer look at what you’ll need:
- All-purpose white flour: The foundation of our biscuits. For the lightest texture, always use the spoon and level method when measuring flour. This prevents overpacking and ensures your biscuits aren’t dense. Avoid sifting unless specifically instructed, as it can affect the flour’s density.
- Granulated sugar (optional ingredient): A small amount of sugar enhances the flavor and promotes a beautiful golden-brown crust. If you prefer a more savory biscuit, you can omit it without significantly altering the texture. However, for a touch of sweetness that pairs wonderfully with jams and sweet toppings, it’s a delightful addition.
- Baking powder: This is your primary leavening agent, responsible for giving biscuits their impressive rise and airy texture. Ensure your baking powder is fresh for optimal results. Old or expired baking powder is a common culprit behind flat biscuits. You can test its freshness by adding a teaspoon to a cup of hot water; it should fizz vigorously.
- Salt: A pinch of salt is essential to balance the flavors and enhance the richness of the butter. Don’t skip it, as it brings out the best in the other ingredients.
- Heavy cream: Full-fat, cold heavy cream is key to achieving rich flavor and tender crumb. The high fat content in heavy cream contributes to the biscuit’s richness and helps create a moist interior. It also reacts with the baking powder to create lift. Always use cream straight from the fridge; its cold temperature is critical for tender biscuits. As an alternative, you can also use buttermilk (see our “Variations” section below).
- Butter: Unsalted butter is preferred, allowing you to control the overall saltiness of the biscuits. The quality of your butter truly makes a difference in flavor and flakiness. High-quality butter provides superior taste and texture. Crucially, your butter must be very cold, ideally frozen and cubed, before incorporating it into the dry ingredients. This is paramount for creating those desirable flaky layers.
Quick Tip: No Food Processor? No Problem!
If you don’t have a food processor, you can still achieve perfectly flaky, homemade biscuits! A pastry cutter is an excellent tool for cutting cold butter into dry ingredients. Alternatively, two table knives can be used to scissor-cut the butter until it reaches the desired pea-sized consistency. The key is to work quickly to keep the butter as cold as possible.
How To Make the Best Fluffy Biscuits
Making light, fluffy, and perfectly flaky biscuits might seem daunting, but with the right technique, it’s surprisingly straightforward. While there are a few methods for preparing biscuit dough (the full recipe card provides more detail), my personal preference for consistent success is using a food processor. Much like making a delicate pie dough, the golden rule here is minimal handling. The less you work the dough, the more tender your biscuits will be. Here’s a simplified overview of the process:
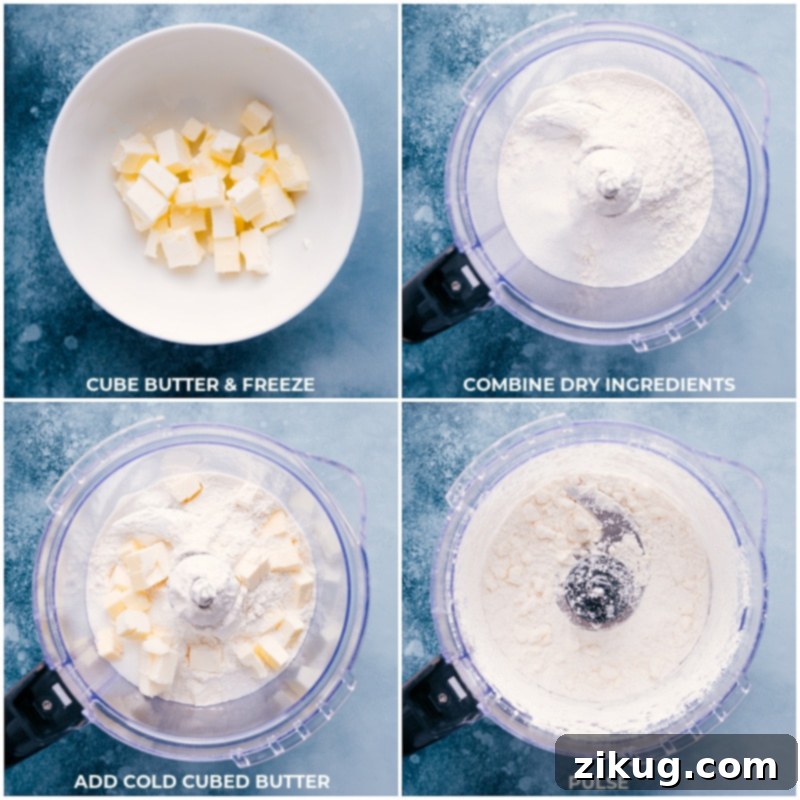
- Start with exceptionally cold butter. This is perhaps the most crucial step for flaky biscuits. I recommend cubing your unsalted butter and then freezing the cubes for at least 15-20 minutes. This ensures the butter remains solid during mixing, creating steam pockets in the oven that result in those desirable layers.
- Combine dry ingredients with butter. In your food processor, pulse together the flour, baking powder, sugar (if using), and salt. Then, add the frozen butter cubes. Pulse briefly, in short bursts, until the butter is broken down into small, pea-sized crumbs. It’s vital not to over-process at this stage; you want distinct pieces of butter, not a smooth paste.
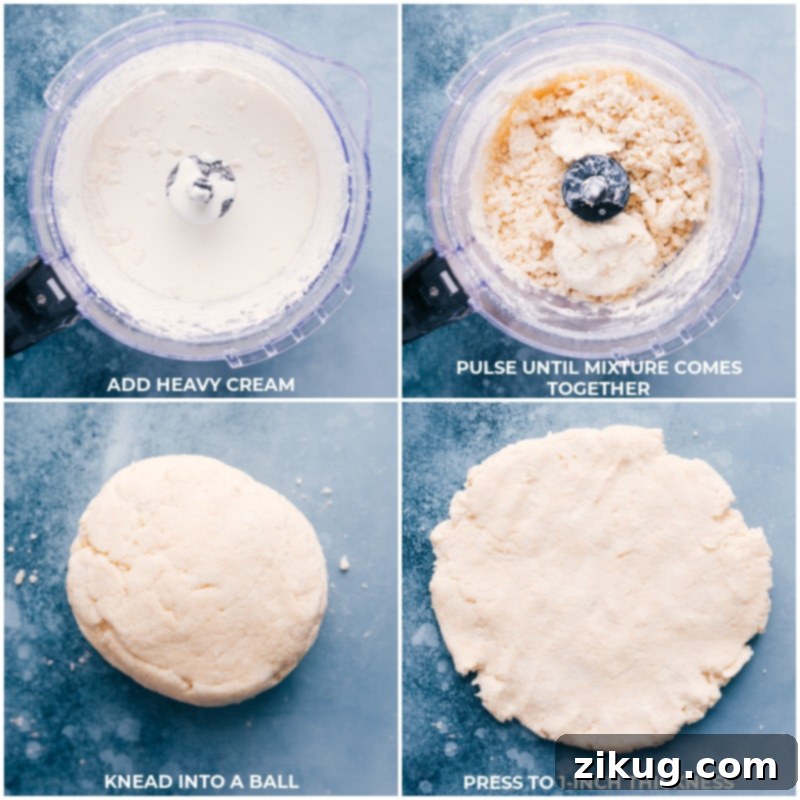
- Incorporate the cream. Pour the cold heavy cream over the dry ingredients and butter mixture in the food processor. Pulse just until a shaggy dough begins to form. Again, resist the urge to over-mix. The dough should still appear somewhat crumbly, not fully smooth. Over-mixing develops gluten, leading to tough biscuits.
- Lightly knead and form. Transfer the dough to a lightly floured surface. Knead it very gently, just enough to bring it together into a cohesive ball. Over-kneading will toughen the biscuits. Then, press the dough with your hands into a uniform 1-inch thick disc. This manual shaping helps preserve the layers without overworking the dough.
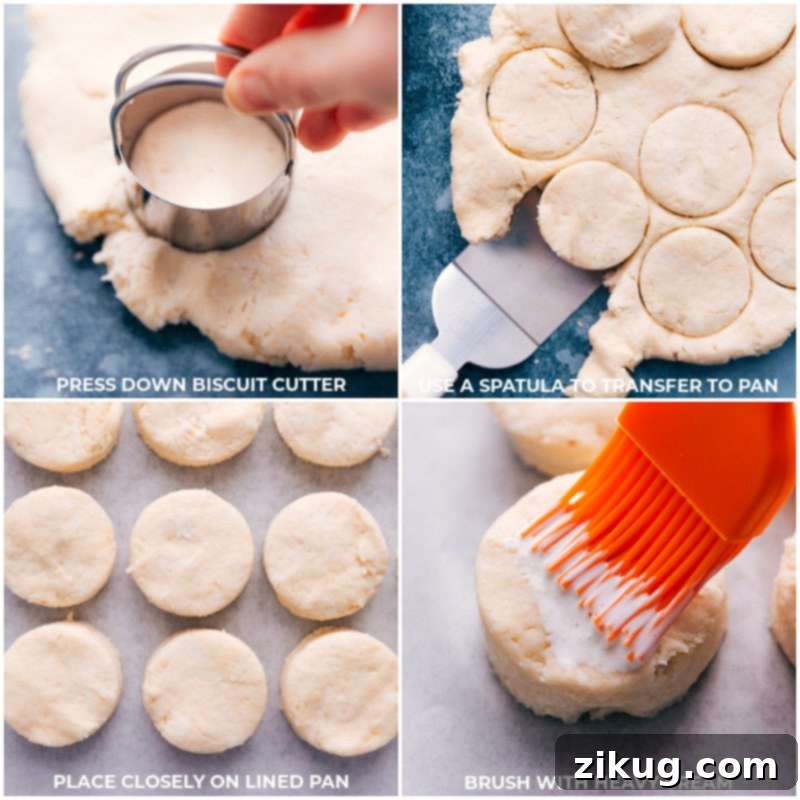
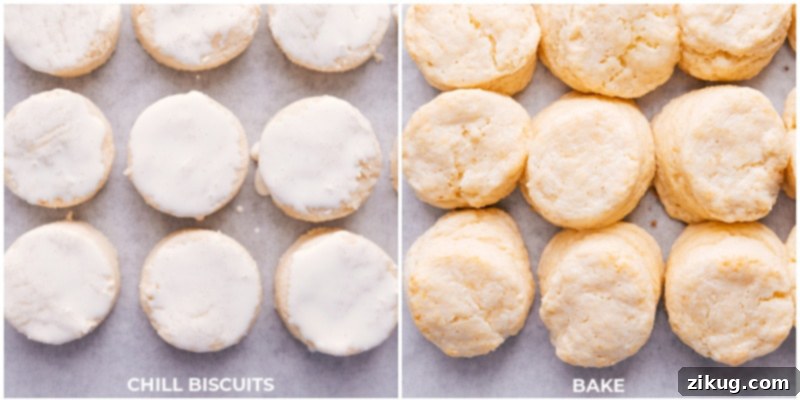
- Cut, brush, chill, and bake. Use a biscuit cutter (or a knife for square biscuits) to cut out your biscuits. Press straight down without twisting to ensure a clean cut and proper rise. Arrange the cut biscuits on a prepared baking sheet, close enough so they “touch” while baking, which helps them rise taller and more evenly. Brush the tops with a little extra heavy cream for a beautiful golden finish, then chill them for a short period before baking. This final chill helps the butter firm up, leading to even flakier results. Bake until golden and risen.
Each step in this process is designed to minimize gluten development and maximize the butter’s ability to create steam, resulting in incredibly light and tender biscuits with impressive height and layers. Embrace the cold ingredients and gentle handling, and you’ll be rewarded with the best homemade biscuits you’ve ever tasted!
Delicious Biscuit Variations
Discover exciting ways to customize your homemade biscuits:
- If you’d like to make a truly classic buttermilk biscuit recipe instead, simply replace the heavy whipping cream with 3/4 cup of cold buttermilk. Buttermilk adds a tangy flavor and contributes to an even more tender crumb due to its acidity reacting with the baking powder.
- For a super quick and convenient 3-ingredient biscuit recipe, reach for self-rising flour, cold heavy cream, and cold butter! When using self-rising flour, you can leave out both the salt and baking powder, as these leavening agents and seasoning are already perfectly pre-measured and included in that mix. This variation offers a delightful shortcut without sacrificing flavor or texture.
Expert Tips for Making the Best Biscuit Recipe Every Time
Achieving perfectly tall, flaky, and tender biscuits is an art, but one that is easily mastered with a few key techniques. These tips are designed to help you avoid common pitfalls and ensure your homemade biscuits are consistently exceptional:
- Keep everything cold. This cannot be stressed enough. Cold ingredients are the secret to flaky biscuits. Chill your flour in the freezer for 15 minutes, ensure your butter is cubed and frozen, and use heavy cream that’s straight from the coldest part of your fridge. When cold butter hits the hot oven, the moisture in it rapidly turns to steam, pushing apart the layers of dough and creating that coveted flaky texture. Warm dough results in flat, dense biscuits.
- Cut straight down. When using a biscuit cutter, press it straight down through the dough. Do not twist the cutter. Twisting seals the edges of the biscuit, which can prevent it from rising fully and result in lopsided shapes. A clean, downward cut allows the layers to expand upwards evenly.
- Don’t over-knead. Handle the dough as little as possible. Stop kneading as soon as the dough barely comes together into a cohesive mass. A few small lumps of butter are actually desirable; they contribute to flakiness. Over-kneading develops the gluten in the flour, making your biscuits tough and chewy instead of tender and light. Also, prolonged handling with warm hands can melt the butter, which, as we know, is detrimental to flakiness.
- Watch the bake time, not just the clock. Ovens can vary, so the specified baking time is a guideline. Keep a close eye on your biscuits and pull them out as soon as they are beautifully golden brown on top and bottom. Over-baking can dry them out, while under-baking can leave them doughy in the center.
- Let them rest. Once out of the oven, resist the urge to immediately transfer your hot biscuits. Leave them on the baking pan for at least 5 minutes. During this resting period, residual heat allows the steam trapped inside to continue cooking the interior gently, ensuring they are cooked through and maintain their tenderness. You can lightly tap the top of a biscuit – it should sound hollow when perfectly baked.
- Don’t waste scraps, but handle gently. When rerolling biscuit scraps, combine them gently without kneading excessively. The biscuits made from rerolled dough might not be as tall or flaky as the first batch, but they will still be delicious.
- Space matters. Placing biscuits closer together on the baking sheet (about 1/2 inch apart) encourages them to rise taller. They support each other as they bake, pushing upwards rather than spreading outwards.
Quick Tip: No Biscuit Cutter?
No worries at all! If you don’t have a specific biscuit cutter, you can easily cut the dough into 2×2-inch squares using a sharp knife or even a pizza cutter. Square biscuits are just as delicious and charmingly rustic!
Biscuit Recipe FAQs
Flat biscuits are a common issue, often due to a couple of key factors:
- Old baking powder: Baking powder loses its potency over time. If yours isn’t fresh, it won’t provide enough leavening power, leading to biscuits that don’t rise. Always check the expiration date and test its freshness if unsure.
- Warm butter: Cold butter is crucial for creating those signature steam pockets and flaky layers. If your butter melts too early during mixing or handling, it integrates too smoothly into the dough, preventing steam from forming and resulting in flat, dense, or cake-like biscuits instead of light and airy ones.
- Over-working the dough: Too much kneading develops gluten, which makes the dough tough and inhibits rise.
Both butter and shortening can work effectively in biscuit recipes, and each offers distinct characteristics:
- Butter: I personally prefer butter for its unparalleled rich flavor and the superior flaky texture it imparts. When kept cold, butter creates crisp, defined layers in biscuits.
- Shortening: Shortening tends to help biscuits rise taller and makes them incredibly soft, almost cake-like. It has a higher melting point than butter, which can sometimes make handling the dough easier for beginners. However, it lacks the depth of flavor that butter provides.
Ultimately, it comes down to personal preference. For a truly buttery, flaky, and flavorful biscuit, cold butter is my top recommendation. If a softer, taller biscuit is your goal, shortening might be a good alternative, or even a combination of both.
Yes, you can prepare biscuit dough in advance! After cutting the biscuits, arrange them on a parchment-lined baking sheet and cover tightly with plastic wrap. You can refrigerate them for up to 24 hours. When ready to bake, remove them from the fridge about 15-20 minutes beforehand to take the chill off slightly (but not warm them up completely) before brushing with cream and baking as usual. This can be a great time-saver for busy mornings!
Storage Solutions for Your Biscuits
How to Store and Freeze Biscuits
While these homemade biscuits are undeniably at their absolute best when enjoyed fresh, still warm from the oven on the same day they are baked, you can certainly store any delicious leftovers. To keep them fresh, ensure the biscuits are completely cooled before packaging. Place them in an airtight bag or container and refrigerate. Leftovers are best consumed within a few days for optimal taste and texture.
Can you freeze baked biscuits?
Absolutely! Freezing baked biscuits is an excellent way to enjoy homemade goodness whenever a craving strikes. First, allow the biscuits to cool completely to room temperature. Then, wrap each biscuit individually in plastic wrap to prevent freezer burn. Once wrapped, place them in a freezer-safe bag or an airtight container. They should last beautifully in the freezer for 2-3 months. To thaw, simply transfer the frozen biscuits to the refrigerator overnight. For best results when reheating, warm them in a preheated oven until heated through.
Delightful Ways To Serve Your Freshly Baked Biscuits
These versatile homemade biscuits are perfect for any meal, from a hearty breakfast to a satisfying dinner. Here are some of my favorite ways to enjoy them:
- For a classic, sweet treat, spread them generously with homemade Honey Butter, a dollop of your favorite fruit jam, or a drizzle of luscious Blueberry Syrup.
- Transform your biscuits into a savory sensation by making a delectable ham, Swiss cheese, and hot honey sandwich. The combination of salty ham, melty Swiss, and a kick of spicy-sweet hot honey inside a warm biscuit is simply irresistible, reminiscent of these Ham and Cheese Sliders.
- Biscuits make a wonderful accompaniment to brunch dishes. Serve them alongside a savory Ham and Cheese Quiche or a rich Quiche Lorraine. Their light texture perfectly complements the custardy filling of a quiche.
- To enjoy this biscuit recipe for dinner, consider adding some crispy fried chicken and a generous drizzle of hot honey. Pile them high to create a truly delicious and satisfying dinner sandwich that the whole family will love.
- Create a simple yet elegant dessert by splitting biscuits, toasting them lightly, and topping with fresh berries and a dollop of homemade whipped cream.
- Don’t forget the ultimate comfort food pairing: warm biscuits smothered in classic country gravy for a hearty breakfast or brunch.
Explore More Biscuit-Style Bread Recipes:
Muffins And Quick Breads
Copycat Red Lobster Biscuit Recipe
Breakfast
Fluffy Strawberry Scones
Desserts
Easy Air Fryer Donuts
Muffins And Quick Breads
Effortless Drop Biscuits
Print Recipe
Homemade Biscuits
Video Tutorial
Equipment You’ll Need
-
Large sheet pan (15″ x 10″)
-
Parchment paper or a reusable silicone baking mat
-
2-inch biscuit cutter or a sharp knife to cut dough into 2 x 2 inch squares
-
Large food processor for easiest method; alternatively, a pastry cutter or two knives (see Note 3 in recipe notes below)
Ingredients
- 2 cups all-purpose flour
- 1 tablespoon baking powder
- 2 tablespoons granulated sugar optional, for a touch of sweetness
- 1 teaspoon salt
- 6 tablespoons unsalted butter very cold, cut into small cubes and ideally frozen
- 1 cup + 2 tablespoons heavy cream divided, very cold (see Note 1 for alternatives)
- Softened butter to brush on top after baking, optional for extra richness
Step-by-Step Instructions
-
Preheat your oven to 400℉ (200°C). Prepare a large sheet pan by lining it with either a silicone baking mat or parchment paper (avoid using foil directly, as it can stick). Cut your unsalted butter into small, uniform cubes and place them in the freezer for at least 15 minutes to ensure they are as cold as possible. This step is crucial for achieving flaky layers.
-
If using a food processor for ease and minimal handling: Add the all-purpose flour, baking powder, granulated sugar (if desired), and salt into the large food processor bowl. Add the chilled, cubed butter directly from the freezer to the dry ingredients. Pulse the mixture in short, 1-second intervals, about 5-8 times. The goal is for the butter to resemble small, pea-sized crumbs. If the butter pieces are still too large, pulse a few more times, being careful not to over-process. Next, pour 1 cup of the very cold heavy cream over the mixture. Pulse again, in short bursts, just until the cream is incorporated and a shaggy dough begins to form, typically around 8 more 1-second intervals. It’s essential not to over-pulse at this stage; the dough should still look somewhat crumbly, not smooth. Carefully scrape the dough out onto a clean, lightly floured working surface. Knead the dough very lightly and briefly, just a few times, to bring it together into a cohesive ball. Minimal kneading is key for tender biscuits. If the dough feels too sticky, you can add a small sprinkle of flour, but avoid adding too much, as this can result in drier, denser biscuits.
-
Using your hands, gently press the dough into a uniform 1-inch thick disc. Take a 2-inch biscuit cutter (refer to Note 2 below for instructions on making larger biscuits). First, dip the cutter into a bit of flour to prevent sticking, then press it straight down into the dough. It’s important not to wiggle or twist the cutter, as this can seal the edges and inhibit the biscuits from rising properly. Use a thin metal spatula to carefully scrape the cut biscuit from your work surface and transfer it onto the prepared baking sheet. Try to avoid handling the biscuit too much with your warm hands. Continue this process until you’ve cut out as many biscuits as possible. Gather any dough scraps, gently press them together, flatten, and cut out a few more biscuits. Typically, this recipe yields about 14 to 15 biscuits. If you’re not using a food processor, please see Note 3 for alternative methods.
-
Arrange the cut biscuits on your baking sheet relatively close together, about 1/2-inch apart. This close placement actually encourages them to rise taller and more evenly during baking. Brush the tops of all the biscuits with the remaining 2 tablespoons of cold heavy cream. This adds to their golden color and helps create a lovely crust. Transfer the baking sheet to the refrigerator and chill for 20 minutes. This final chilling period helps the butter firm up, ensuring maximum flakiness. Bake in the preheated oven for 12–16 minutes, or until the biscuits are lightly browned on both the bottoms and tops. Once baked, remove them from the oven and let them stand on the pan for 10 minutes. This resting period allows trapped steam to finish cooking the interior, resulting in a tender crumb. For an extra touch of richness and flavor, you can brush the warm tops with some softened butter using a pastry brush, if desired. Serve these delightful biscuits warm, split in half, with your favorite butter and jam, or even a dollop of fresh cream if you’re feeling fancy!
Helpful Recipe Notes
While heavy cream provides an exceptionally rich flavor and tender texture, you can use other milk products if preferred. If substituting, replace the 1 cup heavy cream with 3/4 cup of whole milk or low-fat buttermilk. Keep in mind that these alternatives may slightly alter the final texture and richness.
Note 2: Adjusting Biscuit Size and Bake Time
For larger, more substantial biscuits, use a 2-3/4-inch biscuit cutter instead of a 2-inch one. This will typically yield about 6–7 larger biscuits per batch. When baking larger biscuits, increase the bake time to approximately 17–22 minutes to ensure they are cooked through and golden brown.
Note 3: Pastry Cutter or Knife Method (No Food Processor)
If you don’t have a food processor, you can still achieve fantastic homemade biscuits using a pastry cutter or two knives:
- In a large mixing bowl, combine the flour, baking powder, sugar, and salt. Whisk briefly to ensure all dry ingredients are well combined.
- Remove your frozen, cubed butter from the freezer and immediately add it on top of the dry ingredients in the bowl. Using a pastry cutter or two butter knives (scissor-cutting fashion), cut the butter into the flour mixture until it resembles coarse crumbs with some pea-sized pieces of butter still visible. Make a small well in the center of this mixture. Pour the cold heavy cream, straight from the fridge, into the well. Use a wooden spoon or spatula to gently stir until the ingredients are just combined. Be careful not to overmix or overwork the dough; a shaggy, slightly crumbly texture is desired.
- Transfer the dough to a lightly floured surface. Use your hands to gently work the dough together into a cohesive mass. (If it feels too sticky, add a very small amount of additional flour, but avoid adding too much, as this can lead to dense or dry biscuits.) Once the ingredients have formed a ball, fold the dough in half over itself. Gently flatten the dough with your hands into a wide rectangle. Rotate the dough 90 degrees and fold it in half again. Flatten with your hands once more. Repeat this folding and flattening process for a total of 4–6 times, being extremely careful not to overwork the dough or allow it to become too warm from your hands. This folding creates layers, mimicking the effect of puff pastry.
- Finally, flatten the dough to a consistent 1-inch thickness. Grab your 2-inch biscuit cutter and, as before, press it into flour first, then press directly down into the dough (without wiggling or twisting the cutter). Use a metal spatula to scrape the cut biscuit onto your prepared baking sheet (again, try to avoid touching the biscuit with your warm hands). Repeat until you’ve cut out as many biscuits as possible. Gather any remaining scraps, gently press them together, flatten, and cut out a few more. This method typically yields 14 or 15 delicious biscuits.
Storage and Freezing Guidelines:
These delightful biscuits are truly best enjoyed on the day they are made. However, if you find yourself with leftovers, you can store them. Ensure the biscuits are completely cooled to room temperature before placing them in an airtight bag or container. Refrigerate for up to a few days; they are best eaten within this short timeframe. For longer storage, you can freeze baked biscuits. Wrap each completely cooled biscuit individually in plastic wrap, then place them in a freezer-safe bag or container. They will keep well in the freezer for up to 2–3 months. To thaw, simply transfer them to the refrigerator overnight. For best reheating, warm them in a preheated oven until soft and warm throughout.
Nutrition Information (Per Serving)
Nutrition information is automatically calculated and should only be used as an approximation. Values can vary based on ingredients and preparation methods.