
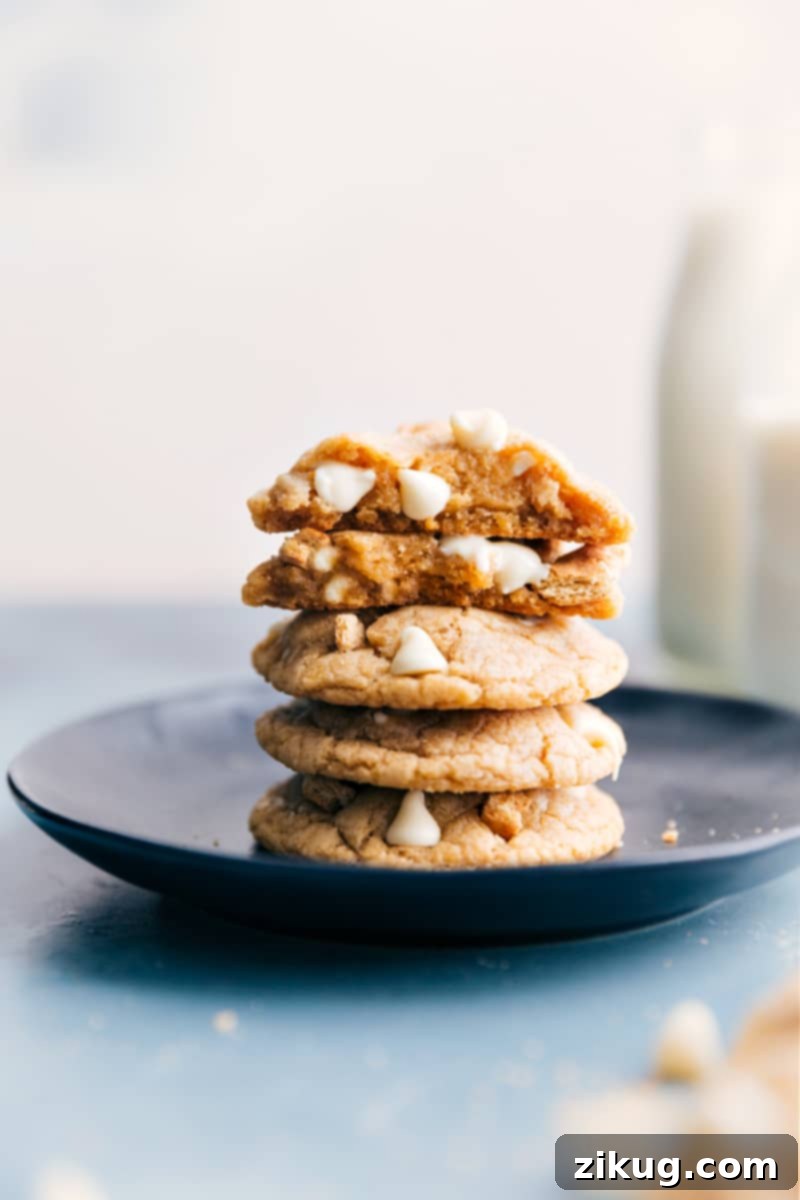
Indulge in the irresistible charm of these **Graham Cracker Cookies**. Each bite delivers a perfect symphony of buttery richness, delightful sweetness, and a wonderfully soft, chewy texture. These cookies are generously studded with creamy white chocolate chips and finely crushed graham crackers, creating a unique flavor profile that sets them apart from your everyday treat.
If you love the distinctive taste of graham crackers, explore other exciting variations inspired by this recipe, such as our S’mores Cookies, which capture the essence of a campfire favorite, or the comforting Frosted Honey Graham Cookies for an extra touch of sweetness.
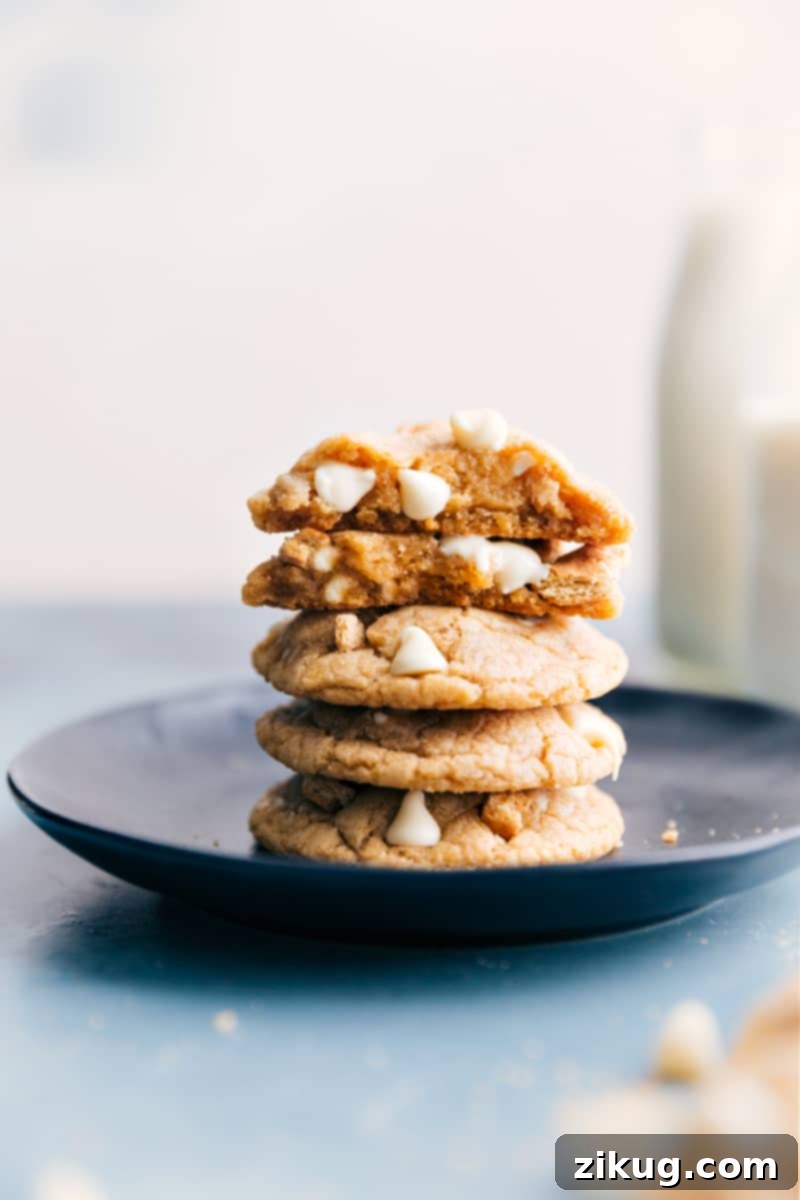
Our Favorite Easy Graham Cracker Cookies: A Unique Treat
Among the many cookie recipes on this site, these Graham Cracker Cookies hold a special place, particularly with my youngest sister. She declares them her absolute favorite, and I can hardly attend a family gathering without bringing a fresh batch. In fact, I often keep pre-rolled dough balls in my freezer, ready to bake at a moment’s notice to satisfy her sweet tooth.
Her passion for graham crackers is legendary. She’s even known to eat a graham cracker pie crust plain, without any filling, and has been caught sneaking the crusts off our Cheesecake Bars, leaving the cheesecake behind! It’s no wonder these cookies, bursting with graham cracker flavor, are her top pick.
What makes these cookies truly exceptional is their perfect balance of texture and taste. They are supremely sweet, incredibly soft, and delightfully chewy! Unlike your typical Chocolate Chip Cookies, the actual graham crackers (in crumb form) mixed into the dough infuse them with a unique toasted, almost nutty, and deeply sweet flavor. This distinct characteristic elevates them from a simple dessert to a memorable culinary experience, promising a warm, comforting taste with every bite.
Unlocking the Flavor: All About Graham Crackers
The secret to the distinctive taste of these cookies lies in the integration of real graham cracker crumbs directly into the dough. Achieving the right consistency and measurement of these crumbs is vital for the cookie’s texture and flavor distribution. Here are a few essential tips:
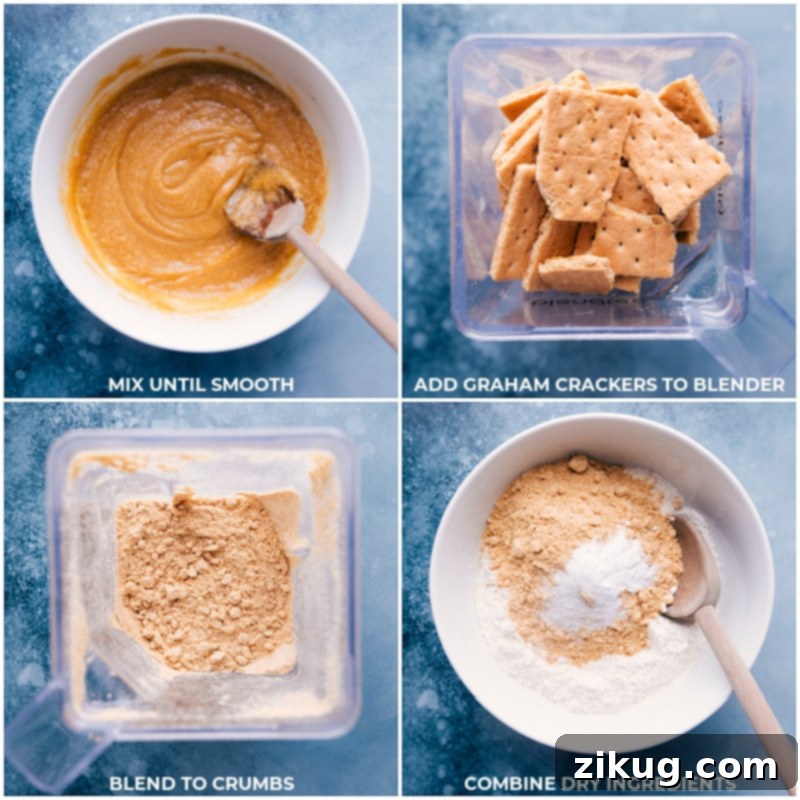
- Thoroughly Crush Your Graham Crackers: While a zip-top bag and a rolling pin can work, for optimal results, we highly recommend using a high-powered blender or a food processor. The goal is to achieve very fine, consistent crumbs. Any uncrushed chunks can disrupt the delicate texture of your cookies, leading to an uneven bake and less pleasant mouthfeel. Aim for a sandy consistency, ensuring every piece is uniformly fine.
- Precise Measurement is Key: After finely crushing the graham crackers, accurate measurement becomes crucial. Avoid packing the crumbs into your measuring cup. Instead, gently spoon the crushed crumbs into the cup until it overflows, then level off the top with the straight edge of a table knife. This method prevents over-measurement, which could lead to a dry or crumbly cookie. Proper measurement ensures the perfect balance of graham cracker flavor and tender cookie texture.
- Choosing Your Graham Crackers: While classic honey graham crackers are ideal for this recipe, you can experiment with cinnamon graham crackers for an added layer of spice. Ensure they are fresh and crisp before crushing for the best results.
Mastering the Art: How To Make Perfect Graham Cracker Cookies
Crafting the perfect batch of Graham Cracker Cookies involves more than just mixing ingredients; it’s about understanding the nuances of baking. Follow these expert tips to ensure your cookies turn out exceptionally soft, chewy, and utterly delicious every time:
- Allow Melted Butter to Cool Completely: This step is non-negotiable for superior cookies. After melting the butter, it absolutely must cool back down to room temperature. Introducing hot melted butter to your sugars will prematurely melt them, resulting in a greasy dough that spreads excessively during baking, leading to thin, crispy (not chewy) cookies. Patience here pays off with a superior texture.
- Measure Flour Correctly for Optimal Texture: One of the most common baking mistakes is improperly measuring flour. If you simply scoop flour directly from the bag with your measuring cup, you’ll inevitably pack in too much, which can make your cookies dense and dry. To correctly measure flour, lightly spoon it into your measuring cup until it’s overflowing. Then, use the flat back of a table knife or an offset spatula to level off the top. (See a video visual here for clarity). Apply this same precise spoon-and-level technique when measuring your finely crushed graham cracker crumbs to maintain the ideal moisture balance in your dough.
- Embrace Room Temperature Ingredients: Beyond melted butter, ensure your eggs are also at room temperature. Room temperature eggs emulsify more easily with the butter and sugar, creating a smoother, more homogenous dough. This leads to a lighter, more evenly baked cookie.
Quick Tip for Flavor & Texture
Always Use Fresh Ingredients. For the softest, most flavorful, and best-risen cookies, prioritize fresh baking agents like baking soda. Additionally, use fresh, soft brown sugar that is free of hard clumps. Fresh ingredients contribute significantly to the overall success and deliciousness of your homemade treats.
Essential Baking Tips for Irresistible Graham Cracker Cookies
Achieving bakery-quality Graham Cracker Cookies at home is entirely possible with a few smart techniques. These tips focus on maximizing flavor, ensuring perfect texture, and creating an appealing finished product:
- The Art of Chilling the Dough: Due to the melted butter used in this recipe, chilling the dough is absolutely crucial. This allows the butter to re-solidify, which in turn prevents the cookies from spreading too much in the oven. Rushing this step will result in flat, overly crispy cookies lacking that desirable chew. However, over-chilling can also be detrimental, as the dough can become too dry and lead to cookies that don’t spread enough during baking.
- We advocate for a **double-chill method** for the ultimate cookie texture. Chill the dough initially right after mixing. This firms it up enough to be easily rolled into balls. Once rolled, the warmth from your hands will slightly soften the butter again, necessitating a second chill. Cold dough balls hitting a hot oven create a thermal shock that locks in moisture and structure, resulting in cookies that are perfectly soft and chewy in the center with just the right amount of spread.
- Utilize a Silicone Baking Mat or Parchment Paper: For cookies with consistently softer bottoms that don’t stick or burn, always bake them on a sheet pan lined with parchment paper or a silicone baking mat. These liners provide an even heating surface and prevent excessive browning on the underside of the cookies, contributing to their overall tender texture.
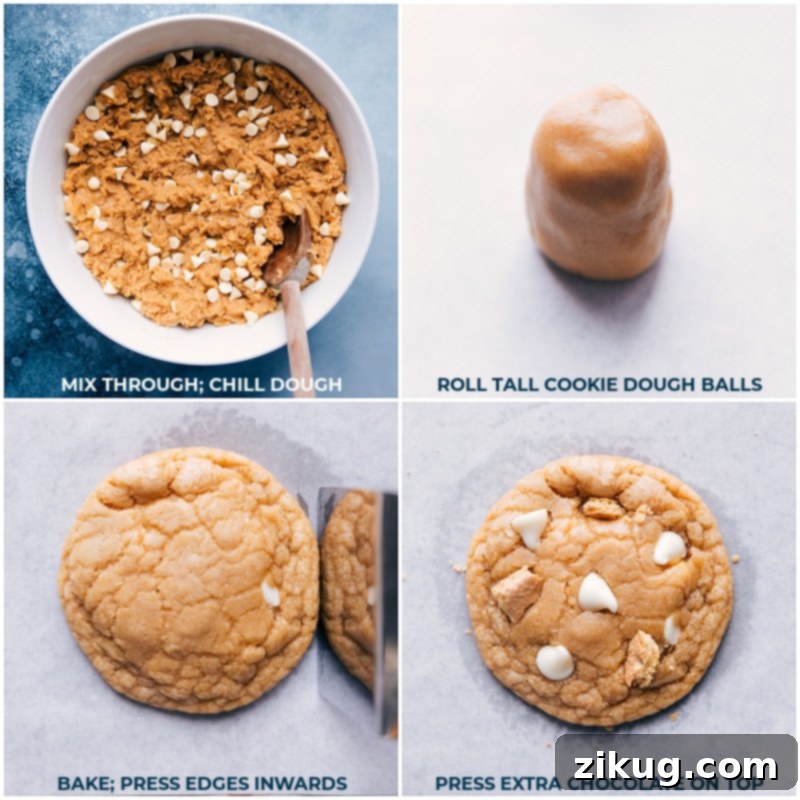
- The Post-Bake Press: Creating Perfect Edges: Immediately upon removing the cookies from the oven, and working quickly, use the back of a large spoon or a spatula to gently press the edges of each hot cookie inward towards its center. (Refer to the accompanying images or video for a visual guide!). This simple trick helps to create beautifully rounded, slightly crisped edges while concentrating the warmth and moisture in the middle, ensuring a wonderfully chewy center. The key is speed; once the cookies begin to cool and set, they become too firm to manipulate effectively.
- Don’t Overcrowd Your Baking Sheet: Always leave ample space between cookie dough balls on the baking sheet. These cookies are designed to spread, and overcrowding can lead to them merging into one large, uneven cookie mass. Baking in batches ensures each cookie has enough room to expand and bake evenly, yielding perfect individual treats.
Delicious Variations to Customize Your Graham Cracker Cookies
While these White Chocolate Graham Cracker Cookies are fantastic on their own, their adaptable base makes them perfect for creative variations. Feel free to experiment with different mix-ins and flavor profiles to suit your preferences:
- M&M Graham Cracker Cookies: For a fun, colorful twist, simply substitute the white chocolate chips with an equal amount of M&M’s candies. This adds a delightful crunch and a burst of chocolatey color. Alternatively, for a classic twist, create traditional graham cracker chocolate chip cookies by swapping the white chocolate chips for semi-sweet, dark, or milk chocolate chips.
- Graham Cracker Cookies with Nuts: Add a sophisticated crunch by replacing the white chocolate chips with coarsely chopped pecans. Other nuts like walnuts, almonds, or even pistachios would also be incredibly tasty, offering a rich, earthy contrast to the sweet cookie base.
- Graham Cracker Dessert Bars: If you prefer the convenience of bars, these recipes offer similar graham cracker goodness: explore the rich layers of Magic Cookie Bars, the classic appeal of Magic Bars, or the indulgent 7-Layer Bars, which incorporate a graham cracker base with sweetened condensed milk and various toppings.
- No-Bake Graham Cracker Treats: For a quick and easy option that doesn’t require an oven, consider these delightful no-bake recipes: try our No-bake Peanut Butter Bars, featuring a delicious graham cracker crumb base, or the wholesome and satisfying S’mores Energy Bites for a lighter, yet flavorful, treat.
Storage Solutions for Graham Cracker Cookies
Maximizing Freshness: Graham Cracker Cookie Storage
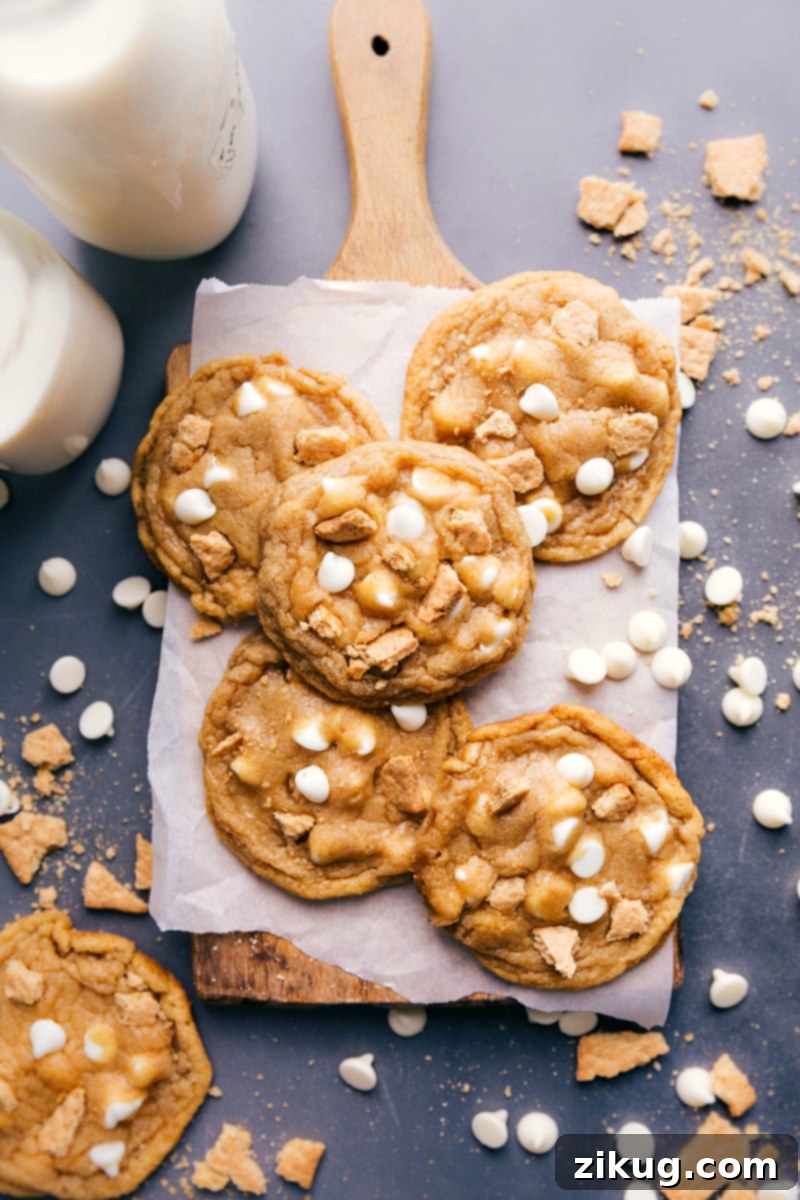
To enjoy these delectable Graham Cracker Cookies at their best, store them in an airtight container at room temperature for **3-4 days**. While they are undeniably most delightful when fresh from the oven, proper storage ensures they remain soft and flavorful for a few days.
For longer-term enjoyment or meal prep convenience, **freezing the dough** is an excellent option. Simply drop the prepared cookie dough balls onto a baking sheet and freeze them until solid. Once frozen, transfer the individual dough balls to an airtight container or a freezer-safe bag. They can be stored in the freezer for up to 3 months. When you’re ready to bake, simply place the frozen dough balls on a prepared baking sheet and bake as directed, adding a few extra minutes to the baking time to compensate for their frozen state. This method allows you to have warm, freshly baked cookies whenever the craving strikes!
You can also freeze baked cookies! Once completely cooled, arrange them in a single layer in an airtight container with parchment paper between layers to prevent sticking. Freeze for up to 2 months. Thaw at room temperature or warm briefly in the microwave for a fresh-baked feel.
Discover More Irresistible Cookie Recipes:
- DoubleTree® Cookies: A beloved classic featuring hearty oats and generous chocolate chips.
- Peanut Butter Cookie Dough: A safe-to-eat, edible cookie dough perfect for snacking straight from the bowl.
- Pumpkin Cinnamon Roll Cookies: Seasonal delights with a luscious cinnamon-sugar topping, perfect for autumn.
- Soft Sugar Cookies: Classic, tender sugar cookies crowned with a rich cream cheese frosting.
- Cornmeal Cookies: An intriguing texture and flavor profile, enhanced with sweet white chocolate chips.
Graham Cracker Cookies
Equipment
-
Blender or food processor
-
Sheet pan (15″ x 10″)
-
Parchment paper or silicone baking mat
Ingredients
- 12 tablespoons unsalted butter 3/4 cup, 1-1/2 sticks
- 1/2 cup granulated sugar
- 3/4 cup light brown sugar lightly packed, see note 1
- 1 large egg yolk discard or save the whites
- 1 large egg
- 1/2 tablespoon vanilla extract
- 1-3/4 cups all-purpose flour
- 1 teaspoon baking soda see note 2
- 1/2 teaspoon salt
- 1 cup graham cracker crumbs about 9 full sheets, see note 3
- 1 cup white chocolate chips
- 5 to 6 full graham cracker sheets optional for topping cookies
Instructions
-
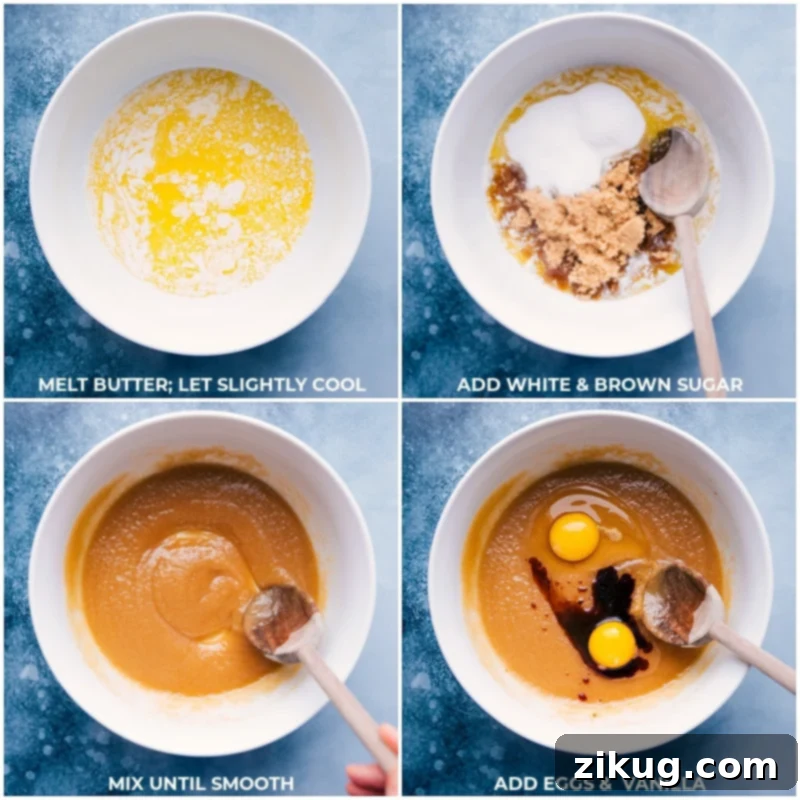
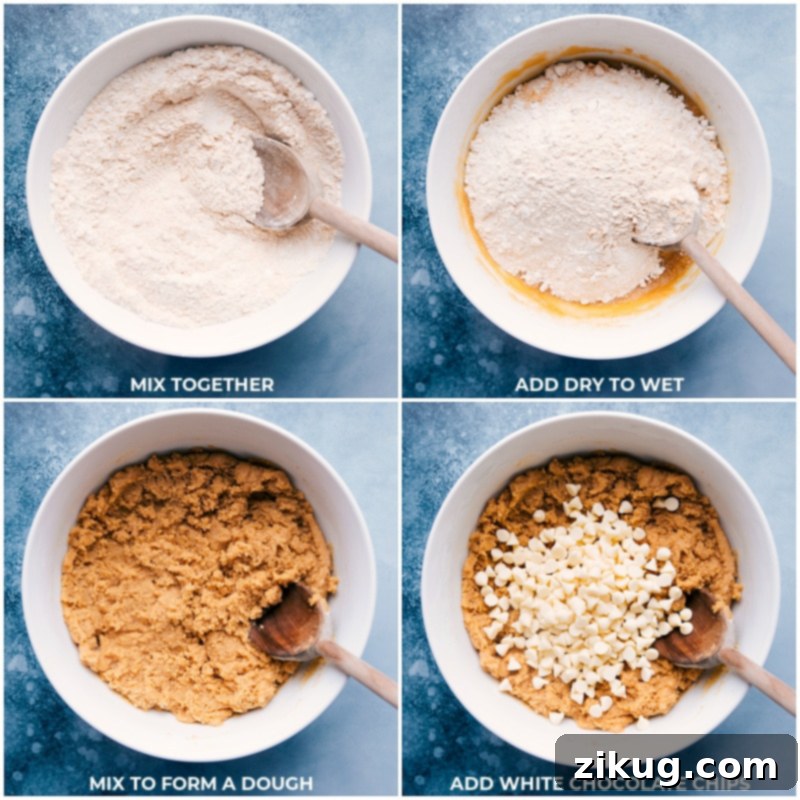
Melt the butter in a microwave-safe bowl. Set aside to cool completely to room temperature, which typically takes about 5 minutes. (Using hot butter will melt the sugars too quickly and result in greasy cookies that spread excessively.) Once cooled, scrape all the butter into a large mixing bowl. Add both brown and granulated sugar. Whisk briskly until the mixture is fully incorporated, smooth, and well combined, approximately 1–2 minutes.
-
Add the whole large egg and the single egg yolk (you can discard the whites or save them for another recipe). Stir in the vanilla extract. Continue to stir until the mixture is smooth and fully blended.
-
In a separate medium bowl, whisk together the all-purpose flour, baking soda, and salt. Next, place the graham crackers in a high-powered blender or food processor and crush them until you achieve 1 cup (117g) of very fine crumbs. (Be sure to gently spoon the crumbs into the measuring cup; do not pack them in.) Add these fine graham cracker crumbs to the dry ingredients and stir until just combined.
-
Gradually add the dry ingredient mixture to the wet ingredients. Mix until they are just combined, being careful not to overmix the dough, which can lead to tough cookies. Finally, fold in the white chocolate chips until they are evenly incorporated throughout the dough.
-
Cover the bowl tightly with plastic wrap and chill the cookie dough in the refrigerator for a minimum of 1 hour, or up to 8 hours. This chilling process is essential for the butter to re-solidify and for the flavors to meld, preventing excessive spreading during baking.
-
Once chilled, use a tablespoon measuring spoon to form dough balls, using approximately 2 tablespoons of dough per cookie (about 45g if you are using a food scale for precision). Roll the cookie dough balls into a tall, rather than wide, shape. Place them on a parchment-paper-lined plate and chill again for an additional 20 minutes. This second chill ensures the cookies maintain their shape and texture during baking.
-
Preheat your oven to 325°F (160°C). Line a large sheet pan with parchment paper or a silicone baking mat. Arrange no more than 6 cookie dough balls per cookie sheet, ensuring ample space between them, as these cookies will spread significantly. Bake for 10–14 minutes, or until the edges are ever-so-slightly browned and the tops no longer appear gooey. Remove from the oven and, working quickly, use the back of a spoon or a spatula to gently press the edges of each hot cookie inward towards the center. (Refer to the video or photos for a visual guide). This technique creates beautifully crispy edges. Remember to work fast, as the cookies set quickly as they cool.
-
After pressing in the edges, while the cookies are still warm, press a few extra white chocolate chips into the tops of the cookies for an enhanced appearance and flavor boost. Coarsely break up a few additional graham cracker sheets and gently press small pieces onto the tops of the cookies as a decorative garnish. Allow the cookies to cool on the baking tray for 4 more minutes to firm up slightly before carefully using a spatula to transfer them to a wire cooling rack to cool completely.
Recipe Notes
Note 2: Verify that your baking soda is fresh before using. An easy test is to mix a small amount with vinegar; if it fizzes vigorously, it’s still active. Fresh leavening agents are crucial for proper cookie rise and texture.
Note 3: To achieve consistently fine graham cracker crumbs, use a high-powered blender or food processor. Reblend any larger chunks to ensure an even texture throughout the dough. When measuring the crumbs, spoon them gently into the measuring cup and level off the top to get the most accurate measurement without packing.
Storage: Store any leftover baked cookies in an airtight container at room temperature for up to a week. For unbaked dough balls, freeze them first on a baking sheet until solid, then transfer them to an airtight bag or container. They can be frozen for up to 3 months. When ready to bake, place them directly from the freezer onto a prepared baking sheet and add a few extra minutes to the baking time.
Nutrition
Nutrition information is automatically calculated, so should only be used as an approximation.