
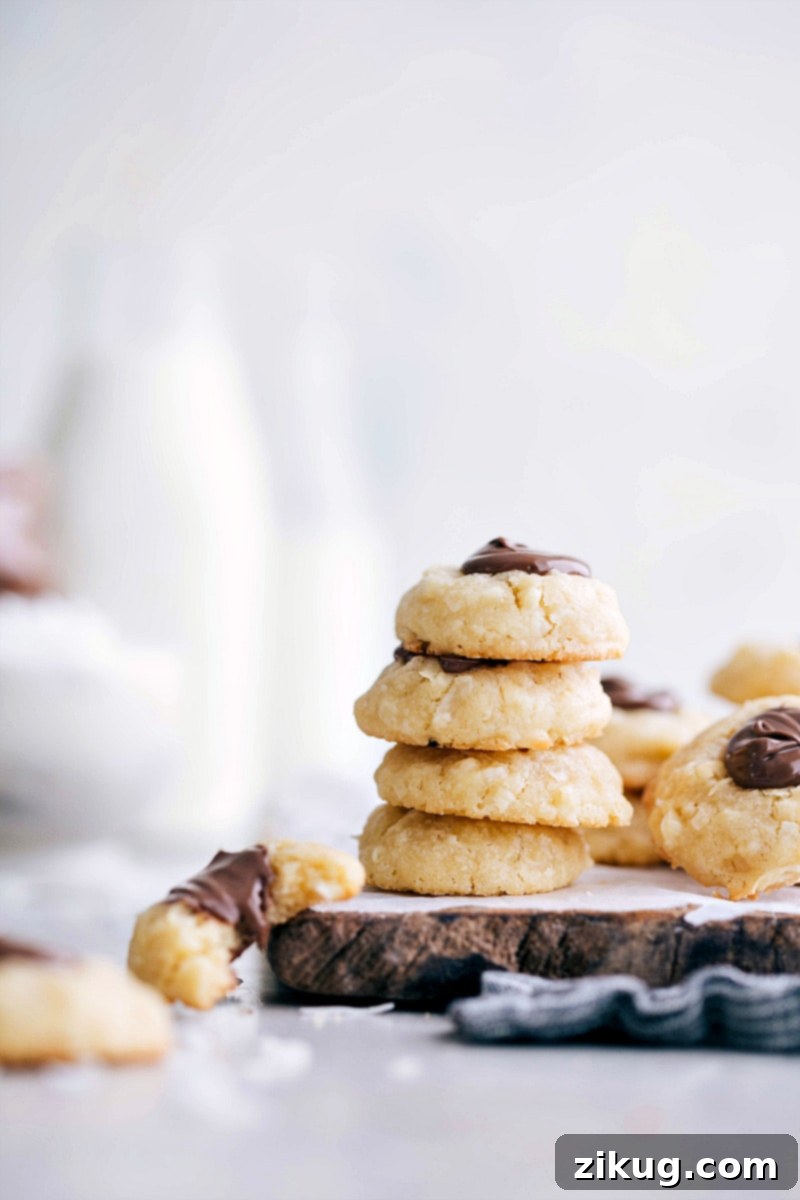
Irresistible Coconut Thumbprint Cookies with Nutella Filling
Experience the perfect marriage of flavors and textures with our **Coconut Thumbprint Cookies**. These delightful treats beautifully combine the chewy, aromatic essence of a classic coconut macaroon with the tender, buttery crumb of a shortbread cookie. Each bite is elevated by a luscious, gooey Nutella center, creating an unforgettable dessert that’s sure to become a favorite.
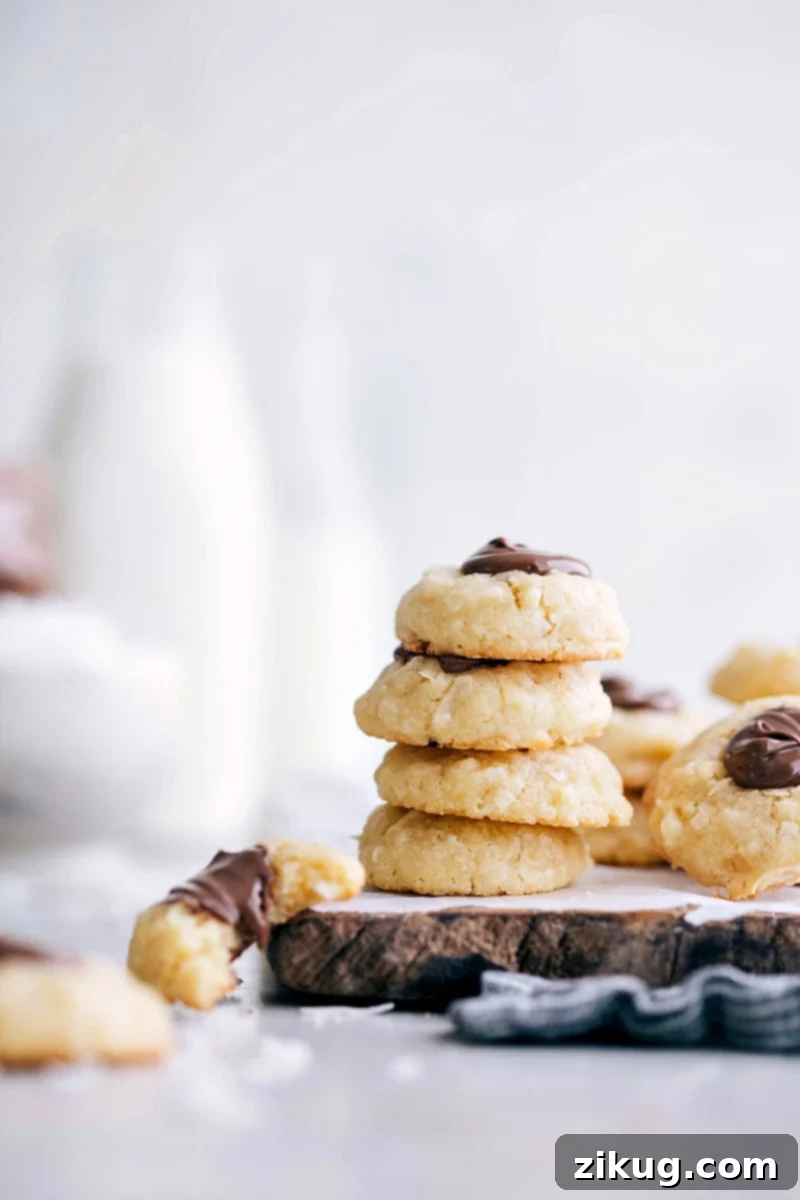

Author’s Culinary Confessions
The Secret Weapon in My Dessert Repertoire!
I confess, my love affair with desserts runs deep, especially when it comes to anything coconut. Coconut macaroons hold a special place in my heart; in fact, I even served them alongside miniature zucchini breads at my wedding reception! Their irresistible chewiness and tropical flavor are simply unparalleled.
Then there’s Nutella. Oh, Nutella! My obsession is undeniable. Its creamy, hazelnut-chocolate goodness is a pantry staple and a constant temptation. So, when the idea struck to combine my two great loves into one sensational cookie – a coconut thumbprint cookie generously filled with Nutella – I knew I had stumbled upon a dream dessert.
And let me tell you, it’s every bit as amazing as it sounds. Imagine a cookie that’s wonderfully soft and buttery, bursting with rich coconut flavor, and then, just when you think it can’t get any better, you hit that warm, gooey, chocolatey Nutella center. These cookies are pure magic! They have a unique texture that’s crisp on the outside and wonderfully tender inside, truly embodying the best of both shortbread and macaroons.
These aren’t just any cookies; they’re the kind of treat that commands attention. Bring them to any gathering – a holiday party, a casual potluck, or a family dinner – and be prepared for everyone to immediately ask for the recipe. They truly stand out from the crowd, making them the perfect impressive dessert for any occasion. Don’t wait, make these unforgettable Coconut Nutella Thumbprint Cookies your next baking adventure!
Mastering Coconut Thumbprint Cookies: A Step-by-Step Guide
Crafting these delectable Coconut Thumbprint Cookies is a straightforward process that yields incredibly rewarding results. Follow these essential steps for baking success:
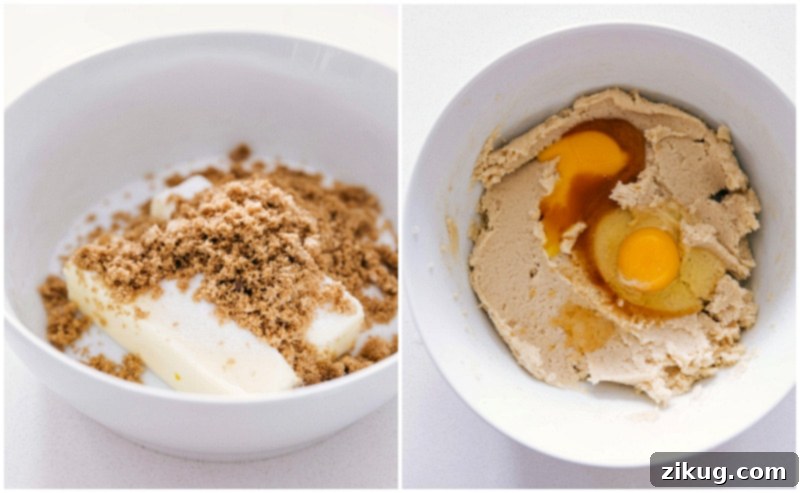
- Cream the Butter and Sugars: Achieving the right consistency here is key to a tender cookie. Ensure your butter is properly softened to room temperature so it creams easily with the granulated and brown sugars. This step incorporates air, making your cookies light and fluffy. Beat until the mixture is visibly light in color and fluffy in texture, about 3-4 minutes.
- Incorporate Egg and Flavorings: Gently mix in the large egg, an additional egg yolk (which adds richness and tenderness), coconut extract, and vanilla extract. Be careful not to overmix at this stage; excessive beating can develop too much gluten in the flour later, leading to tough cookies. Mix just until everything is combined.
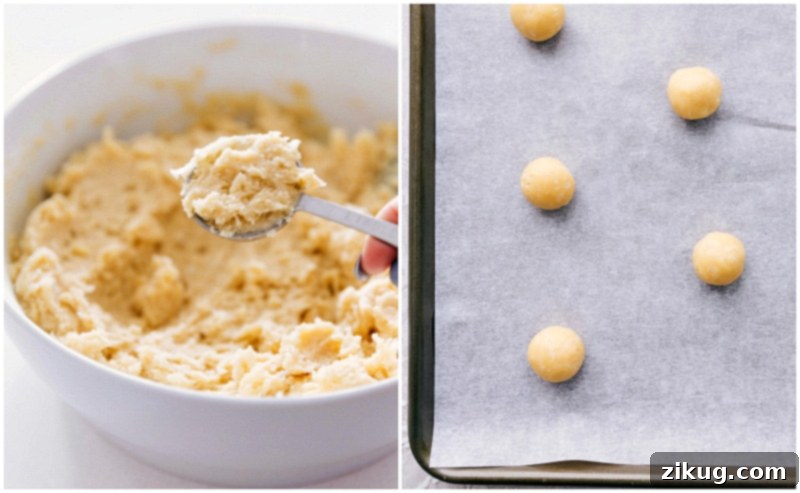
- Add the Dry Ingredients: Introduce the sweetened flaked coconut, salt, and cornstarch. Mix these thoroughly before gradually adding the all-purpose flour. The secret to perfect cookie texture lies in how you measure flour – always spoon it into your measuring cup and then level it off with a straight edge. This prevents over-measuring, which can result in dry, dense cookies. Mix until the flour is just incorporated and no dry streaks remain.
- Chill the Dough: This is a crucial step for thumbprint cookies! Chilling the dough solidifies the butter, preventing the cookies from spreading too much during baking and helping them maintain their perfect thumbprint shape. Cover the dough and chill it for at least 1 hour, or up to 2 days for make-ahead convenience.
- Bake and Fill to Perfection: Preheat your oven and prepare your baking sheets. Place the chilled dough balls an inch apart to allow for slight spreading. Bake until the edges are lightly golden brown and the tops appear set and no longer glossy. Overbaking will compromise the tender texture and vibrant flavor, so keep a close eye on them! Once cooled slightly, gently create the indentations and fill with your favorite Nutella.
Baker’s Quick Tip for Perfect Thumbprints
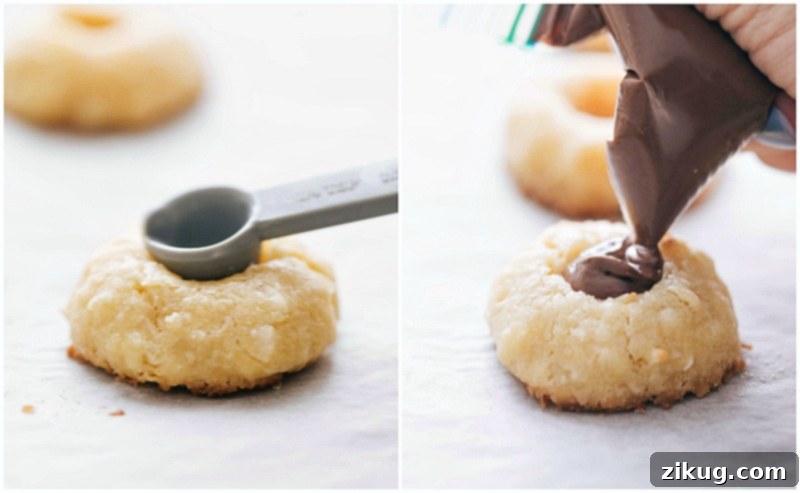
For uniform and perfectly shaped divots in your thumbprint cookies, ditch the actual thumb! A 1/4-teaspoon measuring spoon or the blunt end of a wooden spoon works wonders. It helps create a consistent indentation without pressing too hard, which can cause the cookie to crack. A light, even touch will ensure your delicious Nutella filling stays perfectly contained.
Crafting Nut-Free Coconut Thumbprint Cookies
While Nutella is a beloved classic, it contains hazelnuts, which makes it unsuitable for those with nut allergies. But don’t worry, you can easily adapt this recipe to be completely nut-free without sacrificing any of the delicious chocolatey goodness! You have a couple of fantastic options:
Option 1: Use a Commercial Nut-Free Chocolate Spread
Many grocery stores now carry a variety of chocolate spreads that are explicitly labeled nut-free. Brands like Cadbury® milk chocolate spread or other similar varieties offer a rich, smooth alternative that works beautifully as a filling. Always check the ingredient labels carefully to ensure there are no hidden nut products or cross-contamination warnings.
Option 2: Make Your Own Simple Chocolate Filling
Creating a homemade chocolate filling is incredibly easy and allows you to control the type and quality of chocolate. It’s a wonderful way to personalize your cookies!
To make your own filling:
- Combine 3 tablespoons of unsalted butter with 3/4 cup of your favorite chocolate chips or chopped chocolate. You can use dark, milk, or semi-sweet chocolate, depending on your preference. For a classic, sweet taste that mimics Nutella’s creaminess, I often recommend milk chocolate.
- Place the butter and chocolate in a microwave-safe bowl.
- Microwave the mixture in short bursts of 15 seconds. After each burst, stir the mixture thoroughly for about 10 seconds. This prevents the chocolate from burning and helps it melt evenly. Continue until the chocolate is completely melted and the mixture is smooth and glossy.
- Allow the filling to cool slightly so it thickens just enough to be pipeable but still warm and fluid. Use this rich, homemade chocolate ganache as a delicious Nutella substitute!
Storage & Freezing Tips for Coconut Thumbprint Cookies
To keep your Coconut Thumbprint Cookies tasting their best, proper storage is essential. While they’re tempting to devour immediately, here’s how to store them for maximum enjoyment:
- Room Temperature Storage: These cookies are at their absolute best when enjoyed within 1-2 days of baking. Store them in an airtight container at room temperature. This helps maintain their soft, tender texture and prevents them from drying out.
- Freezing Baked Cookies: Unfortunately, baked Coconut Thumbprint Cookies with a soft filling don’t freeze exceptionally well. The texture of the cookie can change, and the Nutella filling might become less smooth upon thawing. For the best quality, it’s recommended to bake them fresh.
- Freezing the Dough for Freshly Baked Treats: The good news is that the cookie dough freezes beautifully! This is a fantastic way to prepare ahead for future cravings or unexpected guests.
- To Freeze Dough: After preparing the dough and rolling it into tablespoon-sized balls, place them on a parchment-paper-lined sheet pan. Freeze the dough balls until they are completely solid (this prevents them from sticking together). Once solid, transfer them to a freezer-safe, airtight container or a heavy-duty freezer bag. The dough can be frozen for up to 3 months.
- To Bake from Frozen: When you’re ready to bake, you have two options. You can bake the dough balls straight from the freezer; simply add 1-3 minutes to the original baking time, and monitor them closely. Alternatively, you can thaw the dough balls in the refrigerator overnight or for a few hours until softened, then bake them as usual according to the recipe instructions.
Frequently Asked Questions (FAQ)
Here are some common questions you might have when making these delicious Coconut Thumbprint Cookies:
- Can I use unsweetened coconut flakes? Yes, you can! However, the recipe is balanced for sweetened flakes. If using unsweetened, you might want to add an extra tablespoon or two of sugar to the dough, or simply enjoy a slightly less sweet cookie.
- What if I don’t have coconut extract? While coconut extract enhances the flavor significantly, you can omit it. The cookies will still have a lovely coconut flavor from the flakes. You could also try adding a tiny hint of almond extract for a different, but complementary, flavor profile.
- Can I use other fillings instead of Nutella? Absolutely! This recipe is versatile. Try fillings like caramel, raspberry jam, lemon curd, or even melted chocolate. Just ensure your chosen filling isn’t too runny before piping.
- How do I ensure my cookies are perfectly uniform? Using a cookie scoop (1 tablespoon size) is the best way to get consistently sized cookie balls. This ensures they bake evenly and look professional.
- My cookies spread too much, what went wrong? This usually happens if your butter was too soft, the dough wasn’t chilled long enough, or your oven temperature was too low. Ensure your butter is room temperature (not melted!), and always chill the dough for the recommended time.
- How do I prevent the Nutella from hardening? Nutella will naturally firm up slightly as it cools. If you prefer a gooier center, you can gently warm the filled cookies in the microwave for a few seconds before serving.
Discover More Delicious Cookie Recipes:
If you loved these Coconut Thumbprint Cookies, you’ll definitely want to explore these other fantastic cookie creations that are perfect for any occasion!
Desserts
Caramel Snickerdoodles
Desserts
Oatmeal Chocolate Chip Cookies
Desserts
Caramel Stuffed Cookies
Desserts
Almond Joy Cookies Recipe

★
★
★
★
Coconut Thumbprint Cookies
Chelsea Lords
30
8
1
1 38
50 small thumbprint cookies
Equipment
-
Sheet pan (15″ x 10″)
-
Parchment paper or silicone baking mat
Ingredients
- 16 tablespoons unsalted butter 2 sticks, softened to room temperature
- 1 cup granulated sugar
- 1/4 cup light brown sugar lightly packed
- 1 large egg
- 1 large egg yolk
- 1-1/2 teaspoons coconut extract find near other baking extracts
- 1 teaspoon vanilla extract
- 2 cups sweetened coconut flakes make sure your coconut is fresh and soft
- 3/4 teaspoon salt
- 1 tablespoon cornstarch
- 2-1/4 cups all-purpose flour measured by spooning and leveling, see post
- Nutella about 1/2 cup depending on how full you fill the thumbprints! See note 1 for nut-free alternative
Instructions
-
In a large bowl, using an electric mixer, beat together the room-temperature unsalted butter, granulated sugar, and light brown sugar until the mixture is light, fluffy, and creamy. This typically takes about 3–4 minutes. Scrape down the sides of the bowl as needed to ensure even mixing.
-
Add the large egg, egg yolk, coconut extract, and vanilla extract to the creamed mixture. Beat on low speed until they are just combined, being careful not to overmix, as this can lead to a tougher cookie texture.
-
Next, incorporate the sweetened flaked coconut, salt, and cornstarch into the wet ingredients. Beat until fully combined. Finally, gradually add in the all-purpose flour, mixing on low speed until it is just incorporated and no dry streaks of flour remain in the dough.
-
To form the cookies, lightly pack a one-tablespoon measuring spoon with dough and level it off to ensure consistent cookie size. Roll this portion of dough into a smooth ball between your palms. Place the dough balls on a parchment-paper-lined tray or plate. Once all balls are formed, cover them with plastic wrap and chill in the refrigerator for at least 1 hour. This step is crucial for preventing spread during baking.
-
Preheat your oven to 350°F (175°C). Remove the chilled dough balls from the fridge and arrange them about 1 inch apart on a parchment-paper or silicone-lined baking sheet. Bake for 9–12 minutes. The cookies are done when their edges are very lightly browned, and the centers appear set and are no longer glossy. Be vigilant not to overbake, as this will result in a dry texture and diminished flavor.
-
Once baked, remove the cookies from the oven and let them cool on the baking sheet for just 1 minute. While still warm, gently press a 1/4-teaspoon measuring spoon into the center of each cookie to create the perfect indentation for the filling. After creating the divots, carefully transfer the cookies to a wire cooling rack and allow them to cool completely.
-
To fill, transfer a few tablespoons of Nutella (or your chosen nut-free chocolate filling) into a small plastic bag or a piping bag. Seal the bag and snip off a tiny corner of the tip with scissors. “Pipe” the Nutella generously into the center of each cooled cookie. Serve and enjoy these irresistible Coconut Thumbprint Cookies!
Recipe Notes
Storage: Enjoy these cookies within 1–2 days for optimal freshness. Store them in an airtight container at room temperature to maintain their delightful texture.
Nutrition
Calories: 108kcal |
Carbohydrates: 13g |
Protein: 1g |
Fat: 6g |
Saturated Fat: 4g |
Trans Fat: 1g |
Cholesterol: 17mg |
Sodium: 48mg |
Potassium: 35mg |
Fiber: 1g |
Sugar: 8g |
Vitamin A: 122IU |
Calcium: 8mg |
Iron: 1mg
Nutrition information is automatically calculated, so should only be used as an approximation.
Love this recipe? Share your thoughts below!