
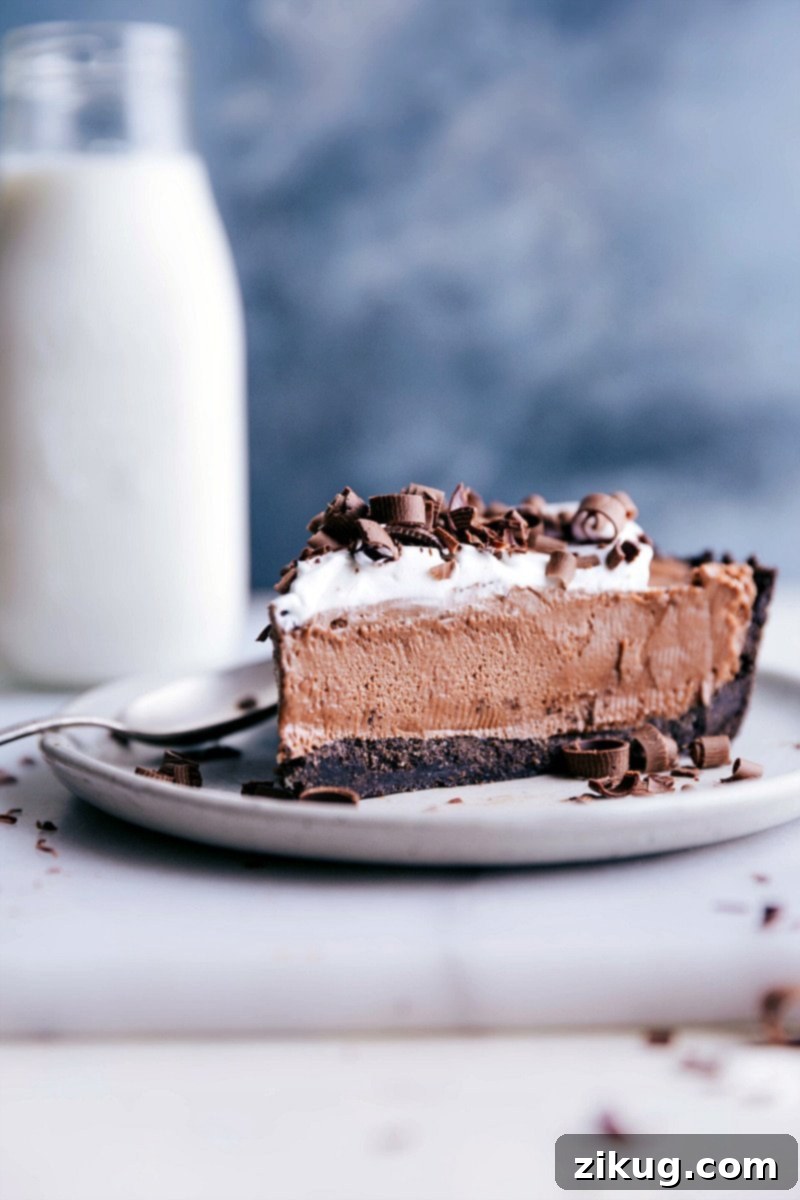
Indulge in the ultimate no-bake dessert with this incredibly easy and lusciously creamy Nutella Pie. Featuring a rich, thick Oreo® cookie crust and crowned with a delicate layer of fresh whipped cream and chocolate curls, this pie is a true crowd-pleaser that requires no oven time. Perfect for any occasion, it brings together the irresistible flavors of chocolate and hazelnut in a delightfully simple package.
Looking for more ways to enjoy your favorite hazelnut spread? Try these delightful Nutella Strawberry Crepes or a decadent Chocolate Dip for Fruit.
The Best No-Bake Nutella Pie Recipe
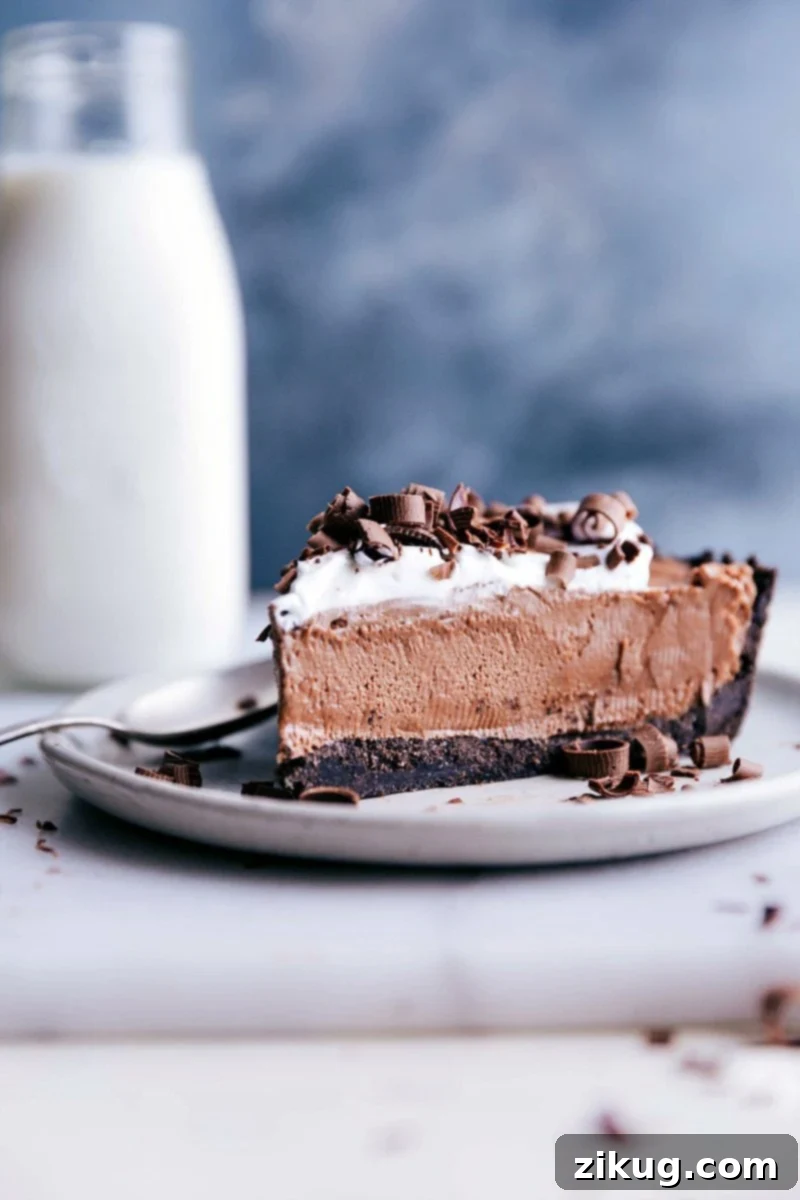
As a passionate admirer of all things Nutella, I simply had to transform my love for the classic chocolate cream pie into an exquisite no-bake Nutella Pie. This recipe quickly became an all-time favorite, proving that some of the best desserts are the ones that are both easy to make and incredibly satisfying. The rich, velvety chocolate hazelnut filling perfectly complements the crisp, buttery Oreo crust, creating a symphony of textures and flavors that will leave everyone asking for more. No need to turn on your oven; this simple recipe promises pure indulgence with minimal effort.
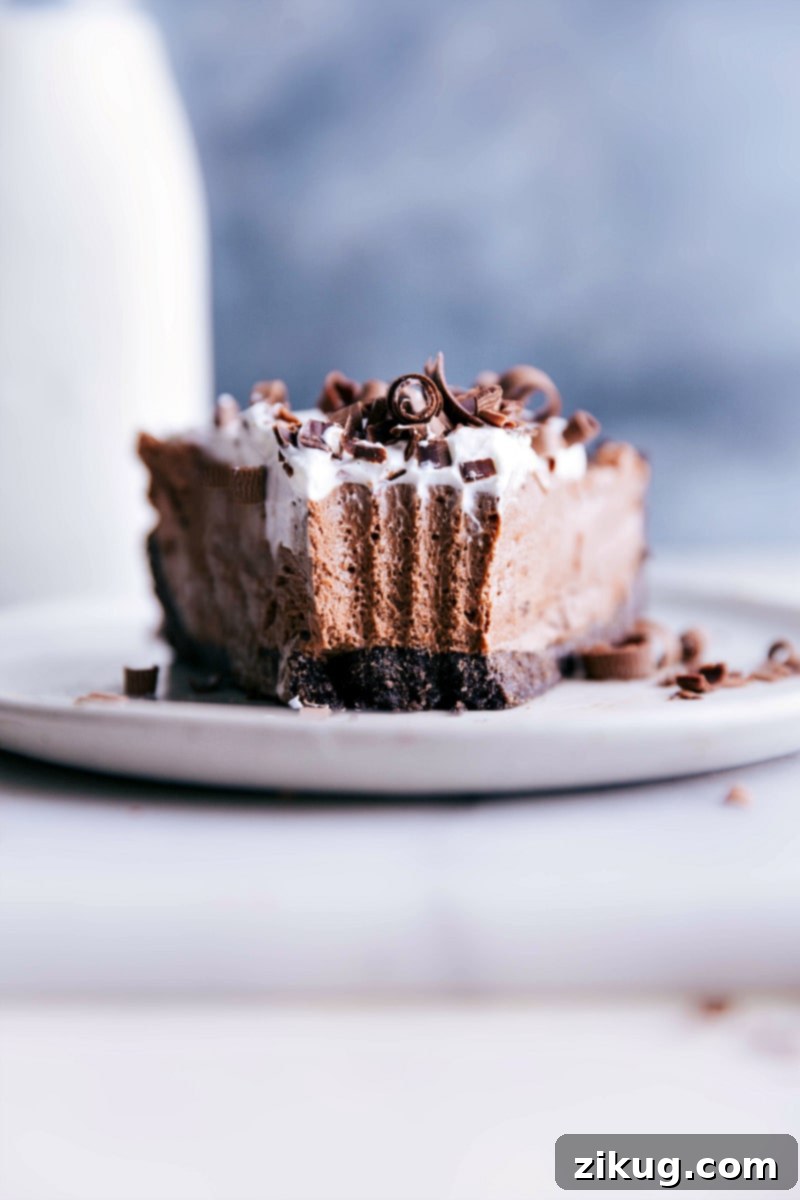
What makes this Nutella pie truly stand out is its harmonious blend of ingredients. The smooth, intensely chocolatey filling carries a delightful hint of hazelnut, a signature of authentic Nutella. This luscious center is cradled within a sturdy yet crumbly Oreo crust, offering a fantastic contrast with every bite. A subtle tang from cream cheese balances the sweetness of the filling, adding depth and complexity. Finally, a generous swirl of freshly whipped cream and delicate chocolate curls crown this masterpiece, making it not only delicious but also visually stunning. It’s a dessert that’s sure to impress, whether you’re hosting a dinner party or simply treating yourself to something special.
How to Make the Perfect Oreo Crust for Nutella Pie
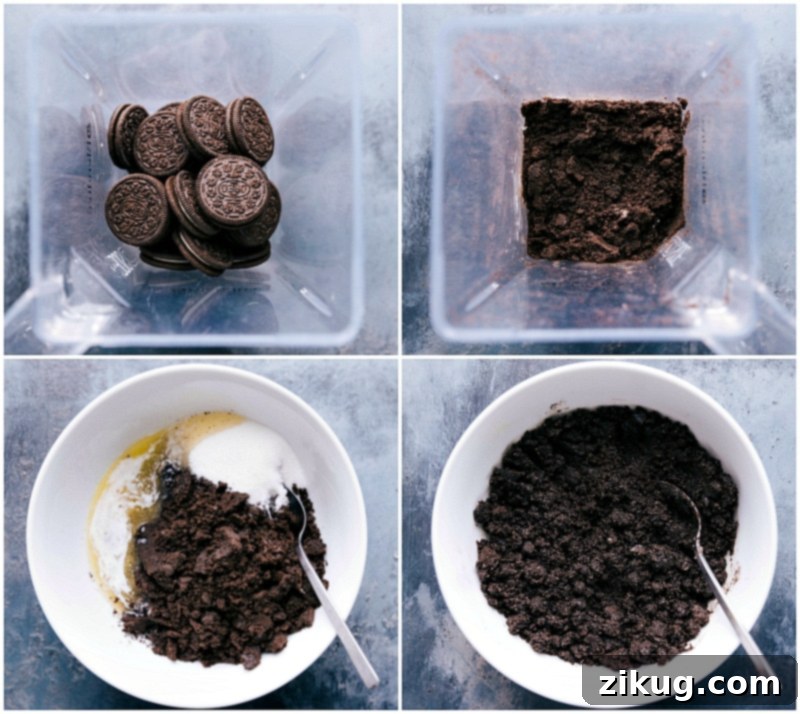
The foundation of our spectacular Nutella Pie is its incredibly simple yet utterly delicious Oreo crust. This no-bake crust comes together in minutes with just three ingredients: Oreo cookies (filling included!), granulated sugar, and melted butter. It provides the perfect sturdy, chocolatey base for the creamy Nutella filling, ensuring a delightful crunch in every bite. Follow these tips to achieve a flawless crust:
- Thoroughly Crush the Oreos: For an evenly textured crust that won’t crumble when sliced, it’s crucial to crush the entire Oreo cookies (wafers and cream filling) into very fine crumbs. A food processor works best for this, ensuring a uniform consistency. If you don’t have a food processor, place the cookies in a Ziploc bag and crush them with a rolling pin until no large pieces remain.
- Cool the Melted Butter: After melting your butter, allow it to cool slightly before mixing it with the Oreo crumbs and sugar. Adding hot butter can make the crust greasy and harder to handle, potentially leading to a soggy texture once the filling is added.
- Press Firmly for an Even Base: Once combined, transfer the mixture into your pie pan. Use the bottom of a metal measuring cup or a flat-bottomed glass to firmly and evenly press the crust mixture along the bottom and up the sides of the pan. This creates a compact base that holds its shape beautifully and provides a satisfying crunch. The firmer you press, the less likely your crust is to fall apart when you cut into the pie.
- Chill Before Filling: After pressing, place the crust in the freezer for at least 10-15 minutes while you prepare the filling. This helps it set and become even firmer, preventing it from absorbing too much moisture from the filling.
Quick Tip for a Faster Pie
If time is of the essence, or if you simply prefer maximum convenience, you can easily purchase a pre-made Oreo pie crust. These are readily available in the baking aisle of most grocery stores, usually near other ready-to-use pie crusts. Opting for a pre-made crust makes this already quick-and-easy recipe even faster, allowing you to enjoy your delicious Nutella Pie in record time!
How To Make This Easy Nutella Pie Step-by-Step
Crafting this irresistible Nutella Pie is a straightforward process, broken down into a few simple steps. The beauty of this recipe lies in its simplicity and the delightful results it yields without requiring any baking. Here’s a detailed guide to walk you through each stage:
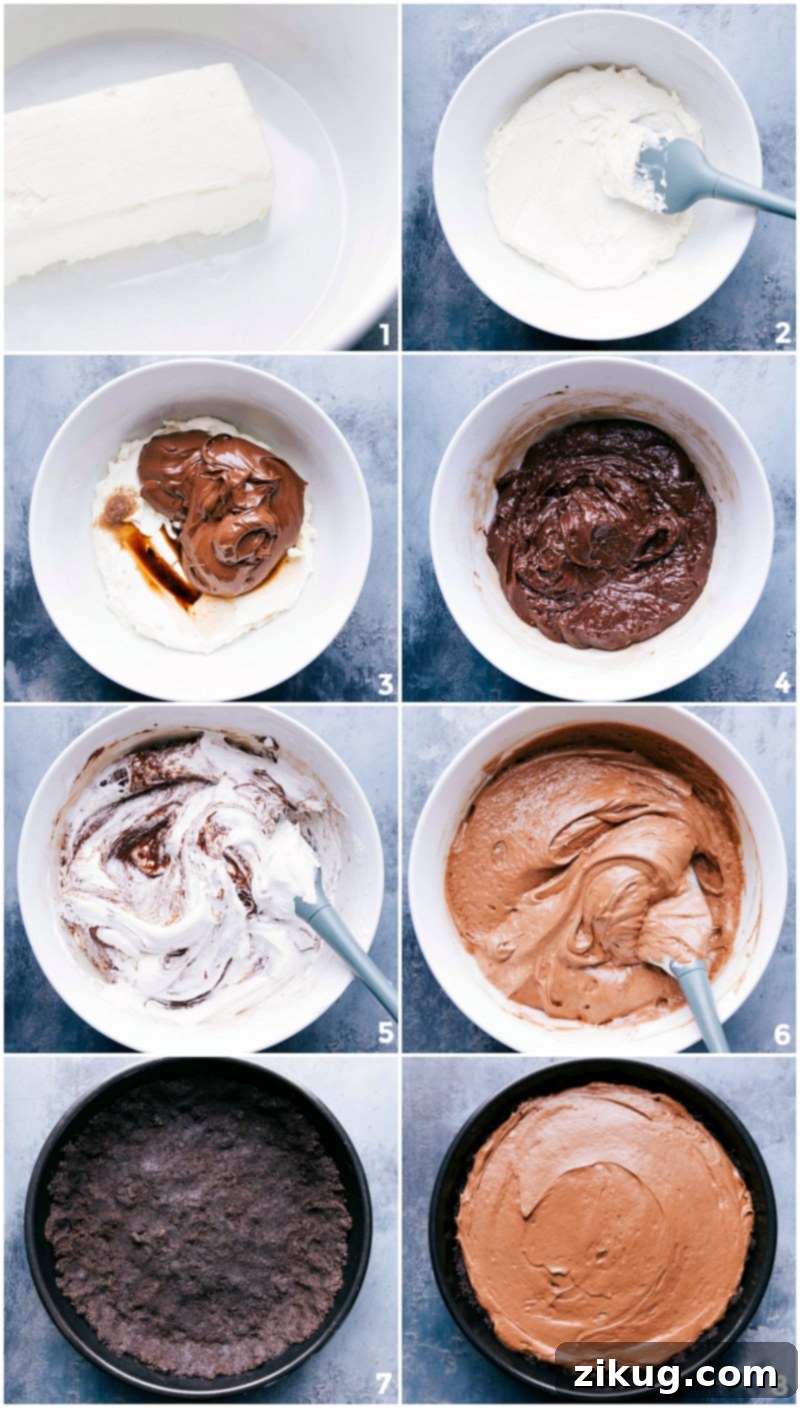
- Prepare the Oreo Crust: Begin by making your Oreo crust as described above. Remember to crush the Oreos thoroughly and ensure the melted butter has cooled slightly before mixing. Press the mixture firmly into a 9-inch pie pan (or a springform pan for easier slicing). Place the pan in the freezer to chill while you prepare the filling. This brief chilling period is key to a firm and non-greasy crust.
- Create the Creamy Nutella Filling: The heart of this pie is its rich Nutella filling. In a large mixing bowl, beat softened full-fat cream cheese until it’s perfectly smooth and creamy, free of any lumps. This usually takes about 30 seconds to a minute with a hand mixer. Next, add the Nutella, vanilla extract, and a pinch of salt. Continue to beat the mixture for 1-3 minutes until all ingredients are thoroughly combined, resulting in a smooth, velvety texture. Gently fold in the thawed whipped topping (Cool Whip® or similar) using a spatula until the mixture is light, airy, and uniform. Pour this decadent filling into your chilled Oreo crust, spread it evenly, cover, and place it back in the freezer for 1-3 hours, or until it is firm enough to slice.
- Whip the Fresh Cream Topping: While the pie is chilling, prepare the homemade whipped cream. For best results, use a chilled bowl and whisk attachment (if using a stand mixer). Combine cold heavy cream, powdered sugar, vanilla extract, and a touch of salt. Start whisking on low speed to prevent splashing, then gradually increase to high speed. Continue whisking until medium to stiff peaks form, typically within 1-3 minutes. Be vigilant during this step to avoid overbeating, which can turn your whipped cream grainy. Taste and adjust the sugar to your preference if desired.
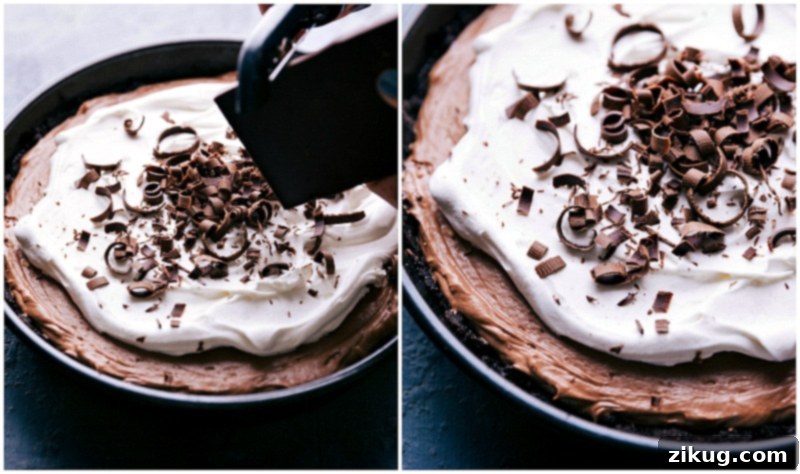
- Decorate with Elegance: Once the Nutella pie is firm, it’s time for the final touch. Use a spatula to artfully spread the stiff whipped cream over the top of the pie, leaving a small edge of the Nutella filling visible for a beautiful presentation. Don’t worry about making it perfectly smooth; a little texture and dimension from the spatula can look wonderfully inviting. For an extra touch of sophistication and flavor, create delicate chocolate curls directly on top of the whipped cream using a vegetable peeler and a quality chocolate bar.
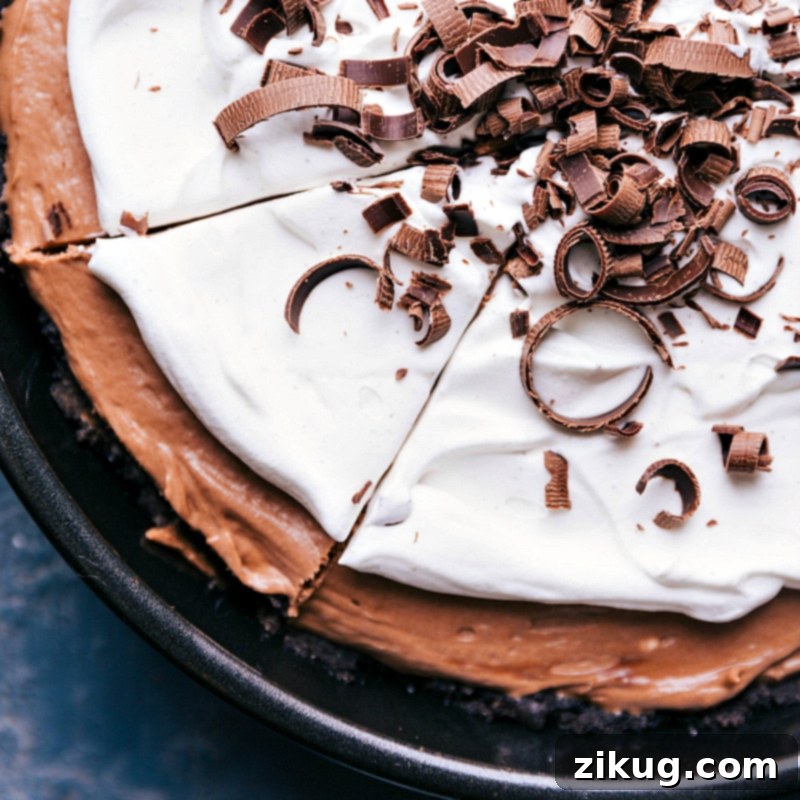
- Serve and Store Thoughtfully: After decorating, place the pie in the freezer for about 10 minutes (uncovered) to firm up the topping slightly before slicing. When serving, only top the individual slices with whipped cream and chocolate curls if you anticipate having leftovers. Whipped cream can become watery and less appealing if left on the entire pie in the fridge for too long. If you plan to serve the whole pie immediately, feel free to top it all at once. Store any leftover pie slices (without whipped cream) in an airtight container in the refrigerator for up to 3 days.
Nutella Pie Chocolate Curls and Other Decorations
Elevate your Nutella Pie with a beautiful garnish of chocolate curls – they’re surprisingly easy to make and add a touch of gourmet flair!
- Selecting Your Chocolate: For the best curls, use a good quality chocolate bar, rather than chocolate chips which contain stabilizers and don’t curl as nicely. I personally love using Lindt® Dark Chocolate with Sea Salt for a sophisticated flavor, but any dark or milk chocolate bar will work wonderfully. The key is to choose a bar that isn’t too soft or too hard. If it’s too cold, it will snap; too warm, and it will melt.
- The Curling Technique: Unwrap your chocolate bar completely. Holding the bar firmly, use a vegetable peeler to gently shave along the side of the chocolate bar, applying even pressure. The peeler will create delicate, thin curls that fall directly onto your whipped cream-topped pie. For variety, you can try shaving different sides of the bar for different sized curls.
- Alternative Decorations: If chocolate curls aren’t your preference or you’re short on time, there are plenty of other delightful ways to decorate your Nutella Pie. A dusting of cocoa powder or powdered sugar adds a simple elegance. Chopped toasted hazelnuts would enhance the hazelnut flavor even further, providing a lovely textural contrast. Sprinkles, mini chocolate chips, or even a drizzle of extra Nutella can also make for a fun and appealing finish.
Nutella Pie Pro Tips for Success
Achieving a truly exceptional Nutella Pie is easy when you keep a few key tips in mind. These small details can make a big difference in the texture, flavor, and overall enjoyment of your dessert:
- Properly Soften Cream Cheese: The secret to a perfectly smooth, lump-free Nutella filling is ensuring your full-fat cream cheese is adequately softened to room temperature. Unwrap the cream cheese completely and place it on a microwave-safe plate. Microwave it in short bursts of 10-15 seconds, flipping it each time, for a total of 30-40 seconds. The goal is to soften it, not melt it, so keep a close eye on it. Soft cream cheese will blend seamlessly, creating a wonderfully creamy filling.
- Thoroughly Thaw Whipped Topping: If you’re using a frozen whipped topping like Cool Whip®, make sure it is fully thawed to room temperature before incorporating it into the Nutella filling. A cold or partially frozen whipped topping will not mix evenly, potentially leaving chunks and affecting the smooth consistency of your pie filling. Plan ahead by placing it in the refrigerator several hours or overnight to thaw completely.
- Insist on Real Nutella: While there are many hazelnut spreads on the market, Nutella is truly the star of this pie. Its unique, balanced flavor profile of chocolate and hazelnut is distinctive and unmatched by generic alternatives. For the authentic taste and best results, stick to the original. The quality of your main ingredient directly impacts the deliciousness of your final product.
- Chill Time is Crucial: Don’t rush the chilling process! Allowing the pie to firm up completely in the freezer (1-3 hours) is essential for clean slices and a stable filling. A well-chilled pie is much easier to cut and serve.
- Keep Whipped Cream Cold (for topping): For the freshest, fluffiest whipped cream topping, ensure your heavy cream and mixing bowl (and even whisk attachment) are thoroughly chilled before you begin. This helps the cream whip up faster and maintain its volume.
Storage Solutions for Your Nutella Pie
To keep your delectable Nutella Pie fresh and delicious, store any leftovers in an airtight container in the refrigerator for up to 3 days. An important tip for preserving its quality: if you have already topped the entire pie with whipped cream and anticipate leftovers, it’s best to gently remove the whipped cream from the portions you plan to store. Whipped cream can become watery and lose its desirable texture if left on the pie for extended periods in the fridge. For the best experience, add fresh whipped cream to individual slices just before serving.
More Delicious No-Bake Desserts to Try
If you loved this easy Nutella Pie, you’re in for a treat! Here are more fantastic no-bake (or minimal bake) dessert recipes that are sure to become new favorites:
- Brownie Oreo Ice Cream Bars: A reader favorite, these bars combine rich brownies with creamy ice cream and crunchy Oreos for an irresistible frozen treat.
- Ice Cream Sandwich Cake: With just four ingredients, this incredibly simple cake is a showstopper for summer gatherings or any time you need a quick, impressive dessert.
- Nutella Crepes: Delicate crepes filled with luscious Nutella and fresh strawberries, perfect for breakfast, brunch, or a light dessert.
- Chocolate Dip for Fruit: A creamy, chocolatey dip featuring Nutella, ideal for pairing with your favorite fresh fruits.
- Ice Cream Pie: An unbelievably easy pie requiring only three ingredients and minutes of prep for a truly decadent frozen dessert.

Nutella Pie
Chelsea Lords
Nutella Pie is pure indulgence with a rich Oreo® crust, creamy Nutella filling, and fluffy whipped cream on top. No oven needed—just deliciousness!
25
2
2
25
8
servings
Equipment
-
Blender
-
Pie pan 9-inch
-
Hand mixer
-
Stand mixer
Ingredients
- 25 Oreos
- 3 tablespoons granulated sugar
- 4 tablespoons unsalted butter
- 1 (8-ounce) package cream cheese full-fat, softened to room temperature, see note 1
- 1-1/2 cups Nutella
- 1 teaspoon vanilla extract
- 1/4 teaspoon salt
- 6 ounces frozen whipped topping fully thawed, such as Cool Whip®
- 1/2 cup heavy cream
- 1 tablespoon powdered sugar
- 1 teaspoon vanilla extract
- 1/8 teaspoon salt
- 1 chocolate bar dark or milk chocolate
Instructions
-
Oreo Crust: Blend or pulse the Oreos (cookies plus filling) until they resemble fine crumbs. Mix the crumbs with the granulated sugar and cooled, melted butter. Spray a 9-inch pie pan or spring-form pan with cooking spray and press the cookie crust evenly along the bottom and about 1 inch up the sides. Place in the freezer while preparing the filling.
-
Nutella Filling: In a large bowl, add softened cream cheese. Beat with a hand mixer until smooth and creamy with no lumps, about 30 seconds to 1 minute. Add Nutella, vanilla extract, and salt. Beat for 1–3 minutes or until combined and smooth. Add in 6 ounces (3/4 cup, not the entire 8-ounce container) of thawed whipped topping. Using a spatula, fold the mixture together gently until all ingredients are incorporated, light, and smooth. Pour this mixture into the Oreo crust. Cover and place in the freezer for 1–3 hours or until firm.
-
Whipped Cream: Pour heavy cream, powdered sugar, vanilla, and salt into a chilled bowl (attached to a stand mixer) and whisk on low speed to combine. Gradually increase to high until medium to stiff peaks form, about 1–3 minutes. Watch carefully to avoid overbeating. Near the end of the time, taste and adjust sugar to preference.
-
Decorate & Serve: Use a spatula to add the stiff whipped cream to the center of the pie and smooth out over the top, covering most of the pie, leaving an edge showing (about 1–2 inches). The whipped cream doesn’t need to be perfectly smooth; use the spatula to create dimension and texture. Using a vegetable peeler, peel the side of a chocolate bar right on top to make curls. Place pie in the freezer for 10 minutes (uncovered) and slice into pieces and serve. Do not top the entire pie with whipped cream if there will be leftovers—the cream will become watery. If you plan to only serve a few pieces, top individual pieces with the cream after slicing.
Recipe Notes
Note 1: Soften cream cheese to prevent a bumpy pie texture. Unwrap completely and microwave in 10–15 second bursts, flipping each time, for 30–40 seconds total. Avoid melting; it should just be softened.
Storage: Store leftovers in an airtight container in the fridge for up to 3 days.
Nutrition
Serving:
8
servings
|
Calories:
552
kcal
|
Carbohydrates:
41.2
g
|
Protein:
10.4
g
|
Fat:
40.8
g
|
Cholesterol:
50.6
mg
|
Sodium:
429.6
mg
|
Fiber:
2.7
g
|
Sugar:
24.5
g
Nutrition information is automatically calculated, so should only be used as an approximation.
Like this? Leave a comment below!