
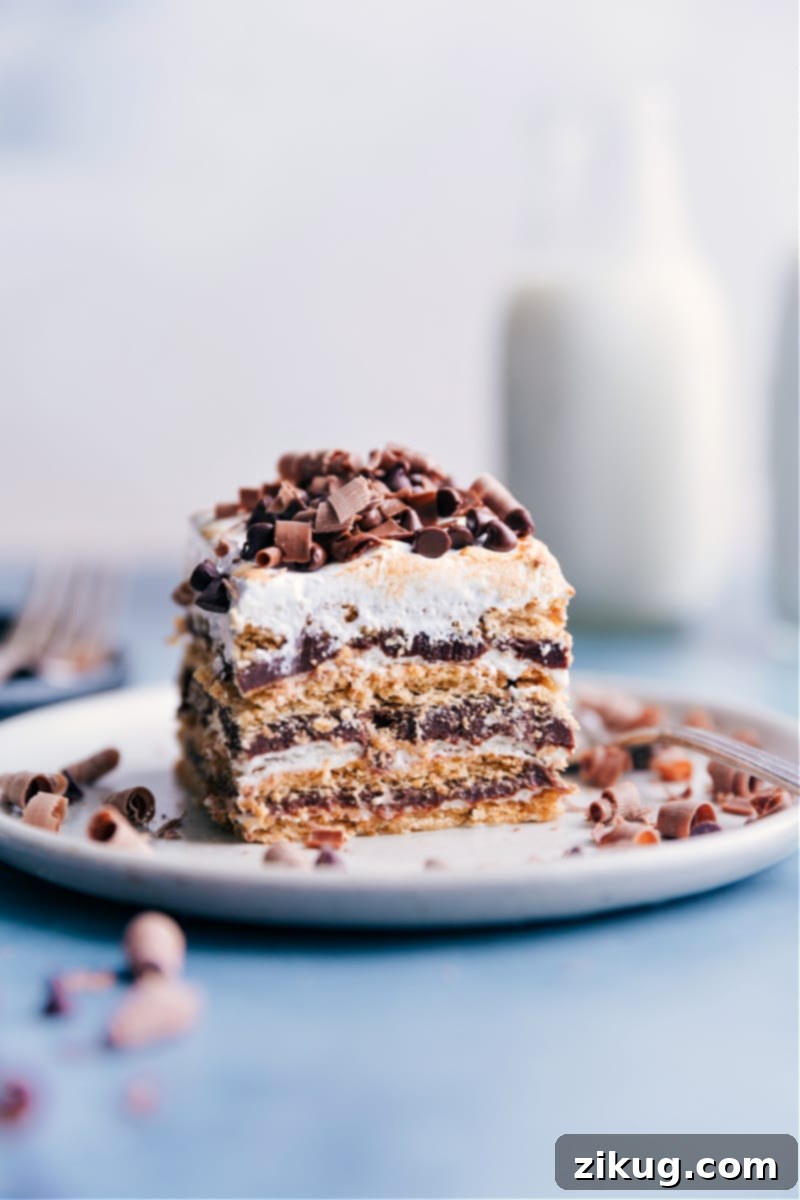
Indulge in the ultimate summer treat with this delightful S’mores Icebox Cake! Featuring luscious layers of rich chocolate ganache, airy marshmallow whipped cream, and crisp honey graham crackers, this recipe brings all the classic campfire flavors indoors. Best of all? No baking is required, making it a perfect, stress-free dessert for any occasion.
If you’re a fan of easy, no-bake desserts, you’ll love exploring other icebox cake creations. For another decadent option, be sure to try our Chocolate Oreo Icebox Cake next.
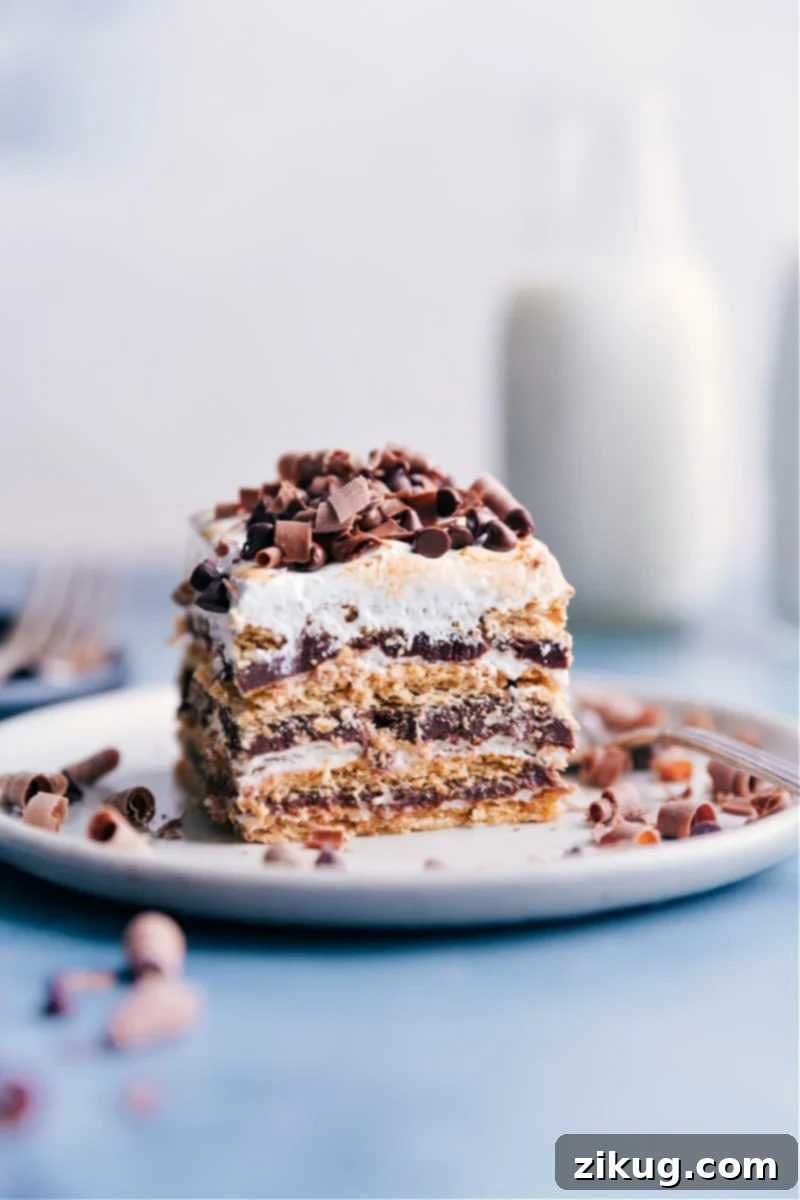
Irresistible No-Bake S’mores Icebox Cake
My adoration for s’mores knows no bounds! If it’s s’mores-themed, consider me completely captivated. From S’mores Bars to S’mores Cookies and even S’mores Muddy Buddies, I’m always eager to dive in. So, after the immense success of a cookie icebox cake I once crafted, a s’mores iteration felt like an absolute necessity—a true no-brainer!
Forget the heat and sticky mess of a traditional campfire. This unique dessert captures all the quintessential s’mores flavors in a wonderfully chilled, incredibly delicious no-bake cake. It offers the same delightful blend of toasted marshmallow, rich chocolate, and crispy graham crackers, but in a refreshing, elegant format that’s perfect for indoor enjoyment. No oven, no open flames, just pure s’mores bliss served perfectly cold straight from your refrigerator. This makes it an ideal dessert for warm weather, potlucks, or any time you crave that iconic taste without the fuss.
Why You’ll Fall in Love with This S’mores Icebox Cake
This S’mores Icebox Cake isn’t just another dessert; it’s a celebration of convenience and classic flavor. Here’s why it will quickly become your new favorite:
- Effortless Preparation: Skip the baking and complex steps. This recipe comes together quickly with minimal effort, making it ideal for busy schedules or beginner bakers.
- No-Bake Perfection: Perfect for summer gatherings or when you want a delicious treat without turning on the oven. Keep your kitchen cool while still enjoying a rich, satisfying dessert.
- Iconic S’mores Flavor: All the beloved tastes of s’mores are here – the crunchy graham crackers, decadent chocolate, and fluffy marshmallow – beautifully layered for an unforgettable experience.
- Make-Ahead Friendly: In fact, this cake tastes even better the next day! It requires a good chill time, allowing the flavors to meld and the graham crackers to soften into cake-like layers.
- Crowd-Pleasing: This dessert is a guaranteed hit with both kids and adults. Its nostalgic flavors and impressive presentation make it a showstopper.
Understanding the Components of S’mores Icebox Cake
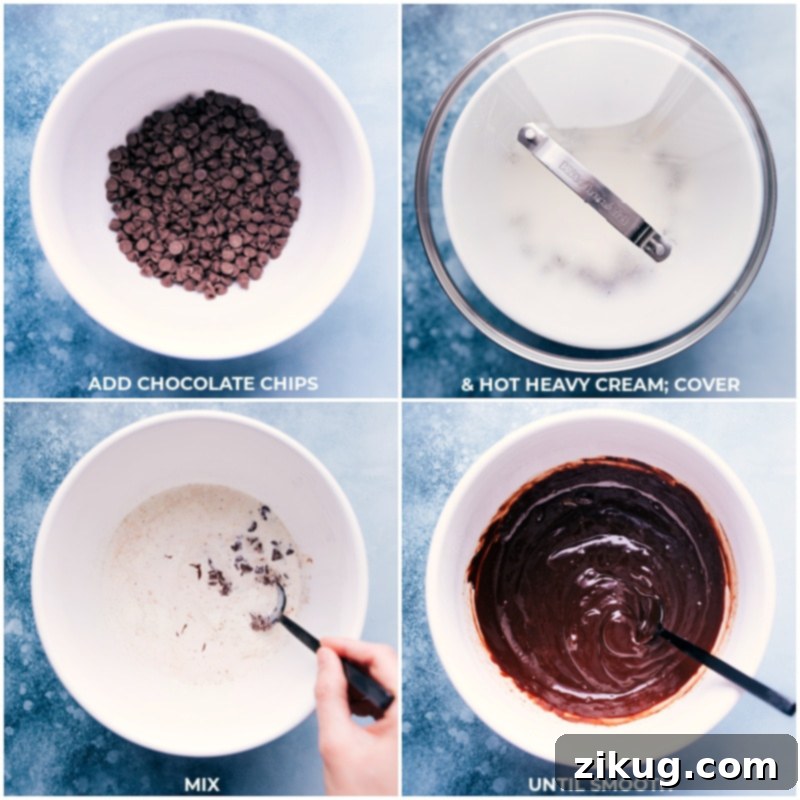
This exquisite cake is built upon four fundamental, yet incredibly flavorful, layers:
- Honey Graham Crackers: The foundational “cake” layers that absorb moisture and transform into tender, delicious segments.
- Rich Chocolate Ganache: A silky, intensely chocolatey filling that provides depth and indulgence.
- Fluffy Marshmallow Whipped Cream: A light, airy, and sweet component that perfectly mimics toasted marshmallow.
- Optional Meringue Topping: For those who crave an authentic “toasted” s’mores experience, this meringue adds visual appeal and a delightful texture.
Let’s delve deeper into each of these essential elements to ensure your S’mores Icebox Cake is nothing short of spectacular!
The Foundation: Honey Graham Crackers
The humble graham cracker plays a crucial role in the magic of this icebox cake. These crackers are more than just a base; they become the thin, cake-like layers that define the dessert. As they absorb moisture from the luscious marshmallow cream and chocolate ganache, they soften and blend seamlessly, creating a tender texture reminiscent of traditional cake without any baking. For this S’mores Icebox Cake, you’ll need an entire 14.4 oz. box of high-quality graham crackers.
Since the graham crackers contribute significantly to the overall flavor profile, it’s vital to choose a brand you genuinely enjoy. I personally find Honey Maid® honey-flavored graham crackers to be the best choice for their classic taste and consistent quality (note: not sponsored, just a genuine preference!). Their subtle honey sweetness perfectly complements the chocolate and marshmallow layers, elevating the s’mores experience. Ensure your crackers are fresh and crisp for the best starting texture before they begin their transformation.
The Decadence: Chocolate Ganache Filling
The rich chocolate ganache filling is surprisingly simple, requiring only two core ingredients: high-quality chocolate and heavy cream. This silky, smooth layer delivers that intense chocolatey goodness that is indispensable in any s’mores creation.
- Choose Premium Chocolate: For the best flavor and smoothest melting texture, always opt for good-quality chocolate chips such as Ghirardelli® or Guittard®. Cheaper brands often contain more stabilizers and less cocoa butter, which can result in a waxy texture and an inferior, less-smooth ganache that lacks depth of flavor.
- Heavy Cream is Key: Stick to heavy cream. Lighter milks or half-and-half simply will not achieve the desired thick, rich consistency for your ganache. The high fat content of heavy cream is essential for creating that luxurious texture.
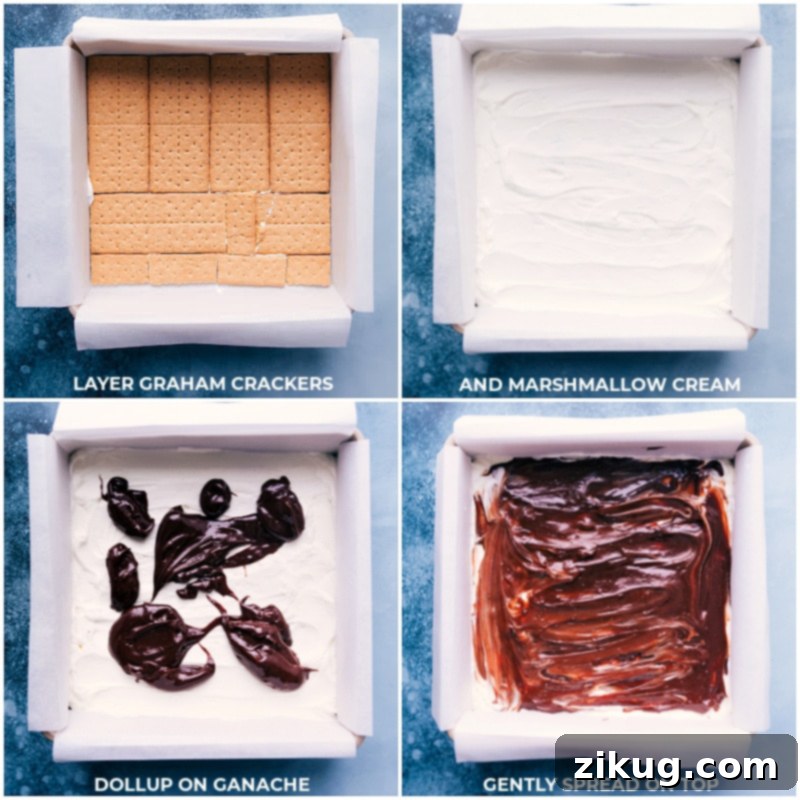
- Proper Melting Technique: To ensure a perfectly smooth ganache, pour very hot (scalded) heavy cream over your chocolate chips. Immediately cover the bowl and let it sit undisturbed for at least 5 minutes. This creates a steamy environment that gently melts the chocolate evenly. After 5 minutes, stir gently from the center outwards until completely smooth. If any small lumps remain, microwave in 10-second bursts, stirring thoroughly after each, until silky.
- Cool Before Combining: It is crucial to allow the ganache to cool significantly, ideally to room temperature, before layering it with the marshmallow whipped cream. If the ganache is too warm, it can cause the delicate whipped cream to melt or lose its fluffy texture, compromising the structure of your cake. Patience here will be rewarded!
The Fluff Factor: Marshmallow Whipped Cream
This light and airy marshmallow whipped cream is the “toasted marshmallow” element of our icebox cake, providing a sweet, fluffy contrast to the rich chocolate and crisp graham crackers. It’s simple to make, especially with the right tools.
- Mixer Matters: While a hand mixer will certainly get the job done, a stand mixer fitted with a whisk attachment will make light work of whipping the cream to perfection, significantly reducing prep time.
- Simple Ingredients: You’ll need just heavy cream, powdered sugar, vanilla (or vanilla bean paste for a more intense flavor), and marshmallow fluff. I highly recommend using Jet-Puffed® Marshmallow Creme for its consistent texture and flavor.
- Easy Marshmallow Fluff Handling: Marshmallow fluff can be incredibly sticky. To easily scoop it out of the container, run a spoon under hot water for about 20 seconds, then dry it thoroughly. The warm, dry spoon will glide through the fluff with surprising ease.
- Achieving Stiff Peaks: Begin by beating the heavy cream, powdered sugar, and vanilla on low speed to combine, then gradually increase to high speed. Beat until soft peaks begin to form. At this point, add the marshmallow fluff and continue beating on medium-high speed until firm, stable peaks develop. Be careful not to over-beat, which can result in a grainy texture.
Quick Tip
If marshmallow fluff isn’t readily available where you are, don’t worry! You can easily make your own homemade marshmallow fluff with just a few basic ingredients.
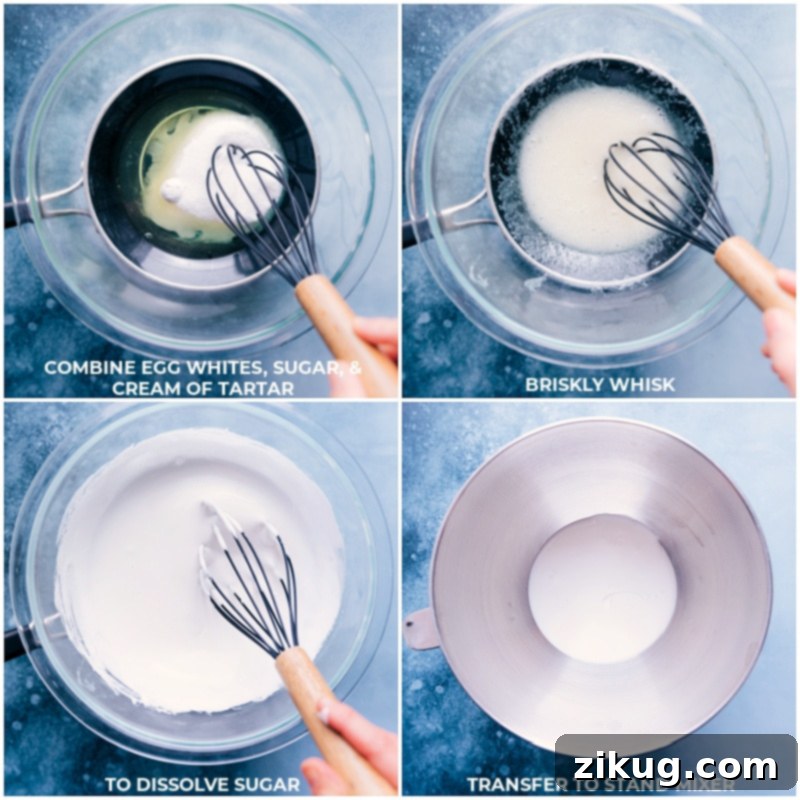
Elevate Your S’mores Icebox Cake with an Optional Meringue Topping
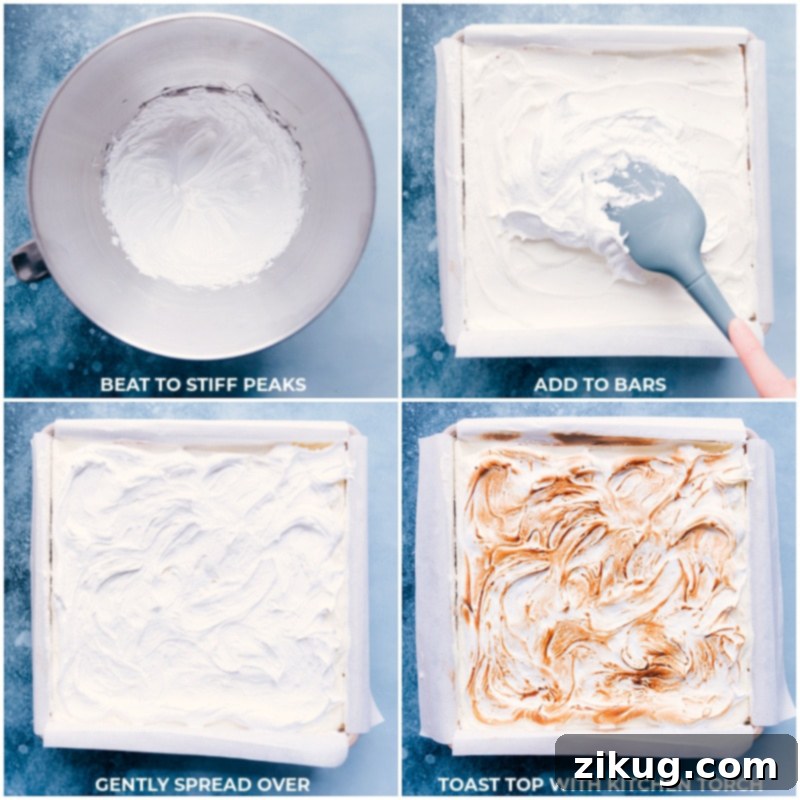
While delicious on its own, adding a billowy meringue topping takes this S’mores Icebox Cake to an entirely new level, closely mimicking the experience of a freshly toasted s’more. Once your cake has thoroughly chilled, you can choose to serve it as is, or invest a little extra effort for a truly show-stopping finish.
I personally adore the light, airy texture and delicate sweetness the meringue contributes. When gently toasted, it develops beautiful golden-brown peaks that look just like they’ve come straight from a campfire, adding both visual appeal and a delightful caramelized flavor. While it does require an additional step, the result is undeniably worth it for special occasions or when you want to impress.
If you decide to add the meringue, the secret to achieving those perfectly browned, ‘toasted’ peaks is a kitchen torch. Hold the torch a few inches away from the meringue surface and move it constantly in a gentle sweeping motion. The meringue will brown surprisingly fast, so keep an eye on it to prevent burning. This step not only enhances the flavor but also transforms the cake into a stunning centerpiece.
Quick Tip: The Versatility of a Kitchen Torch
A kitchen torch is a surprisingly useful tool for more than just meringue! I frequently use mine for classic desserts like Crème Brûlée, adding a beautiful finish to Cheesecake Bars, and creating a perfectly browned top on a S’mores Pizookie. Beyond desserts, it’s excellent for quickly melting cheese on gratins, charring peppers for a smoky flavor, or rapidly browning toppings on various dishes. It’s a small investment that adds a professional touch to many culinary creations.
Essential Tips for a Perfect S’mores Icebox Cake
Achieving a picture-perfect and delicious S’mores Icebox Cake is simple with a few helpful tips:
- Choose the Right Pan: A 9×9-inch baking pan is crucial for this recipe. An 8×8-inch pan or smaller simply won’t work, as the layers will be too thick and the graham crackers won’t fit evenly. The 9×9-inch size allows for a substantial, full-bodied cake and ensures the graham crackers can be laid down with minimal breakage and even coverage.
- Parchment Paper is Your Friend: Always line your baking dish with parchment paper, leaving generous overhangs on all sides. This simple trick makes removing the chilled cake from the pan incredibly easy, allowing you to lift it out cleanly onto a cutting board for neat slicing. It also helps in maintaining the cake’s structural integrity.
- Master the Clean Cut: For beautifully defined slices, use a very sharp knife. Before each cut, run the knife under warm water and then wipe it completely dry. This helps prevent the layers from sticking and creates clean, precise portions. Repeat this warming and wiping process for every single cut.
- Garnish for Elegance: Elevate the presentation with a thoughtful garnish. Mini chocolate chips, chocolate curls, or a dusting of cocoa powder can add a touch of sophistication and extra visual appeal to your finished cake.
Quick Tip: Effortless Chocolate Curls
Making elegant chocolate curls is surprisingly easy! Here’s how to create them:
- Select a good quality chocolate bar – a Lindt® Dark Chocolate Bar with Sea Salt is a personal favorite for its rich flavor (not sponsored).
- Unwrap the chocolate bar and, using a standard vegetable peeler, gently peel down the long side of the bar. Apply even pressure as you peel directly over the cake pieces. The chocolate will naturally curl, creating delicate, beautiful garnishes that add a professional touch to your dessert.
Storage & Make-Ahead Guide for S’mores Icebox Cake
Storage
This S’mores Icebox Cake is a fantastic make-ahead dessert! In fact, it truly *relies* on being made in advance to allow the graham cracker layers ample time to soften and fully absorb the moisture from the delicious fillings, transforming them into tender, cake-like strata. The flavors also deepen and meld beautifully with time, resulting in a more harmonious and decadent experience.
For optimal texture and flavor, this cake is best enjoyed on days 2, 3, or even 4 after preparation. Beyond the fourth day, you might notice the texture beginning to become a bit watery, especially if the cake has been exposed to too much air. Always store the cake tightly covered in the refrigerator and serve it directly from the fridge. Promptly return any leftover slices to the refrigerator to maintain freshness and quality.
Freezing this cake is generally not recommended. Due to the significant amount of dairy (heavy whipping cream) in the marshmallow cream and ganache, freezing and then thawing can cause the texture to become grainy, watery, and lose its desirable smoothness. For the best results, enjoy this cake chilled from the refrigerator within its optimal timeframe.
More Delicious Dessert Recipes to Explore
If you loved this S’mores Icebox Cake, you’re sure to enjoy these other fantastic dessert creations:
- S’mores Bars made with crunchy Golden Grahams® cereal for an extra textural delight.
- Apple Dump Cake a wonderfully easy, comforting dessert featuring a luscious apple pie fruit filling.
- Cheesecake Bars with a classic buttery graham cracker crust and creamy vanilla filling.
- Peanut Butter Cookies a timeless favorite, perfected and often dipped in rich chocolate.
- S’mores Fudge a decadent, melt-in-your-mouth treat loaded with marshmallows and graham cracker pieces.
Pin
S’mores Icebox Cake
Video
Equipment
- Stand mixer fitted with whisk attachment
- 9 x 9-inch baking pan see note 1
- Parchment paper
- Small pot
Ingredients
S’mores Cake
Optional Meringue Topping
Instructions
-
Pour chocolate chips into a large, heat-safe bowl. Scald 1 cup (240g) of the heavy cream (I typically microwave it in a glass measuring cup for 45–90 seconds until it just begins to simmer). Carefully pour the hot heavy cream over the chocolate chips. Cover the bowl tightly with a clean lid or plastic wrap to trap the heat. Let it stand undisturbed for 5 minutes, allowing the chocolate to melt gently. After 5 minutes, stir the mixture vigorously until it becomes completely smooth and glossy. This may take a few minutes of continuous stirring. If any stubborn lumps remain, you can microwave the mixture in very short bursts of 10 seconds, stirring well after each burst, until the chocolate ganache is perfectly smooth. Set the ganache aside at room temperature; it must be completely cooled before being added to the cake layers, as warmth will negatively affect the texture of the marshmallow cream.
-
In the bowl of a stand mixer fitted with a whisk attachment (or using a large bowl with a hand mixer), combine the remaining 2 cups (480g) heavy cream, powdered sugar, and vanilla. Begin beating on low speed for about 30 seconds to incorporate the ingredients without splattering, then gradually increase the speed to full. Continue to beat, carefully watching the consistency, until soft peaks form (this usually takes about 2–4 minutes depending on your mixer). At this stage, add the entire container of marshmallow fluff. Slowly beat to combine the fluff with the whipped cream. Increase the speed to medium-high and continue beating until all ingredients are thoroughly combined and firm, stable peaks are achieved (this typically takes an additional 30 seconds to 1 minute). Set this marshmallow whipped cream aside.
-
Prepare a 9×9-inch baking pan by lining it with parchment paper, ensuring there’s a generous overhang on two opposite sides to assist in lifting the finished cake later. Spread a very thin layer of the marshmallow whipped cream on the bottom of the pan – just enough to help anchor the first layer of graham crackers. Arrange an even layer of honey graham crackers over this thin cream base, breaking them as needed to fit snugly. Evenly spread 1/4th of the marshmallow whipped cream over the graham crackers, smoothing it with the back of a spoon. Carefully pour 1/3 of the room-temperature chocolate ganache over the marshmallow layer, using a table knife or offset spatula to gently spread it into an even layer (patience is key here to avoid disturbing the cream). Repeat this layering sequence: another layer of graham crackers, then 1/4th of the marshmallow mixture, followed by another 1/3 of the chocolate ganache. Add a third layer of graham crackers, the third 1/4th of the marshmallow mixture, and the remaining 1/3 of the chocolate. Finish with one last layer of graham crackers and the final 1/4th of the marshmallow mixture. The pan should be quite full. Cover the pan tightly with plastic wrap and refrigerate for a minimum of 8 hours, though 12 hours or even overnight is highly recommended for the best results, allowing the crackers to fully soften.
-
Optional Meringue: If adding the meringue topping, combine egg whites, granulated sugar, and cream of tartar in a heatproof bowl (preferably a clean, dry metal or glass bowl). Set this bowl over a pot of simmering water on medium heat. Ensure the bottom of the bowl does not touch the water. Continuously whisk the mixture by hand until the sugar has completely dissolved and the mixture appears bright white, thickens slightly, and feels warm to the touch. You can test for dissolved sugar by rubbing a small amount between your fingers; if it feels gritty, continue whisking. This method is called a Swiss meringue base and ensures food safety and a stable meringue.
-
Remove the heatproof bowl from the simmering water and immediately transfer the mixture to the bowl of a stand mixer (or continue with a hand mixer). Beat on high speed until very stiff, glossy peaks form, which typically takes about 5 minutes. Once the cake has chilled and is ready to be served, use a spatula to gently add dollops of the meringue all over the top of the cake. Carefully coax and spread the meringue over the entire surface, ensuring not to lift or disrupt the top graham cracker and marshmallow layer underneath. Use a fork or the back of a spoon to create small, rough ridges and peaks on the meringue surface – this gives it a more rustic, toasted look. If you have a kitchen torch, gently singe the peaks of the meringue until they are lightly browned. Move the kitchen torch quickly and evenly across the meringue, as it will toast very fast.
-
Once the cake is fully chilled and, if desired, topped with toasted meringue, use the parchment paper overhangs to carefully lift the entire cake out of the pan and transfer it onto a clean cutting board. To achieve neat, clean slices, use a very sharp knife. Before each cut, run the knife under warm water, wipe it completely dry with a kitchen towel, and then make a decisive, smooth cut. Repeat this process of warming and wiping the knife for every single slice to ensure beautiful, non-sticky portions.
Recipe Notes
Note 1: Pan Size: This cake specifically requires a 9×9-inch pan. An 8×8-inch or smaller pan will result in overly thick layers and difficulty arranging the graham crackers evenly. The 9×9-inch pan allows the layers to set perfectly and accommodates the graham crackers with minimal breakage, ensuring a visually appealing and structurally sound cake.
Note 2: Chocolate Quality: The quality of your chocolate chips significantly impacts the ganache. For the best melting and flavor, opt for premium brands like Ghirardelli® or Guittard®. Cheaper alternatives often have a higher wax content, leading to a less flavorful, waxy ganache that struggles to melt into a smooth, luxurious consistency.
Note 3: Marshmallow Creme Handling: Jet-Puffed Marshmallow Creme® (not sponsored) is my preferred choice for its texture. To easily scoop out this notoriously sticky ingredient, run a spoon under hot water for approximately 20 seconds. Dry the spoon completely before using it; the warmth helps the marshmallow creme release effortlessly.
Storage: This cake is best enjoyed within 4 days of preparation. After this period, the texture may begin to become a bit watery. Always keep the cake tightly covered in the refrigerator and serve it directly from the fridge. Promptly return any leftovers to the refrigerator. This S’mores Icebox Cake is not suitable for freezing and thawing, as the high dairy content (heavy whipping cream) can cause it to become grainy and watery upon thawing.
Nutrition
Serving: 1 serving | Calories: 325 kcal | Carbohydrates: 45 g | Protein: 3.7 g | Fat: 15.7 g | Cholesterol: 25.4 mg | Sodium: 176.4 mg | Fiber: 3 g | Sugar: 25.5 g
Nutrition information is automatically calculated, so should only be used as an approximation.