
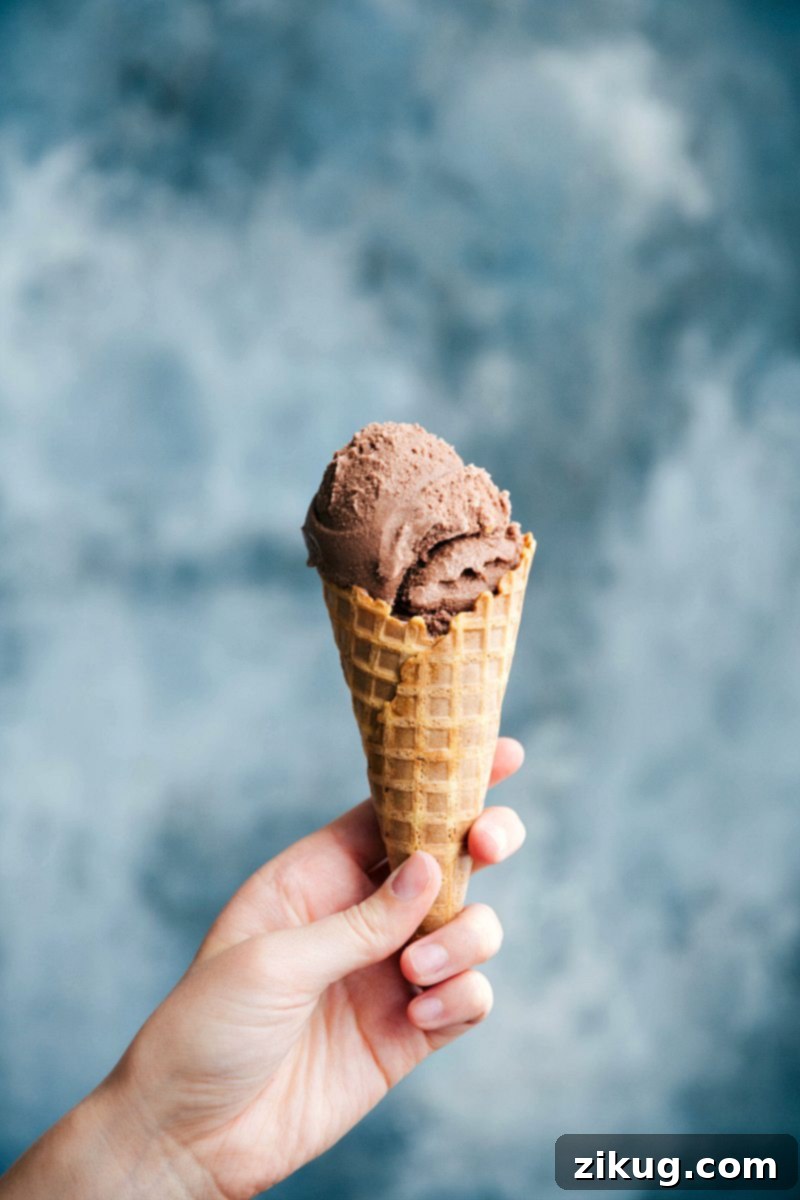
Welcome to the ultimate guide for creating truly authentic Gelato at home! After extensive testing and perfecting this recipe in Italy itself, I’m thrilled to share my two most cherished versions: a sumptuously rich chocolate and a timeless classic stracciatella. Prepare to elevate your dessert game with these irresistible frozen treats.

Author’s Note
My Sicilian Gelato Journey
Last summer, my travels through Italy led me to an experience that would forever change my perception of frozen desserts: a specialized cooking class dedicated entirely to crafting Sicilian-style gelato. From the moment I took my first spoonful, I was utterly captivated. The texture, the intense flavor, the sheer indulgence – it was unlike anything I had ever tasted. Returning home, I found myself drawn to my kitchen, experimenting endlessly to recreate that magic. It quickly became our household’s most anticipated treat throughout the entire summer.
Now, almost a year later, I am incredibly excited to finally unveil the recipe that has been a labor of love and meticulous refinement. Alongside the precise measurements, I’ll be sharing all the invaluable tips and insider tricks I gathered during my immersive class in Italy, ensuring you can achieve that same authentic, creamy perfection in your own home. Get ready to embark on your own delicious gelato adventure!
What Makes Gelato Special? Gelato vs. Ice Cream
While often used interchangeably, gelato and ice cream are distinct frozen desserts, each with its unique characteristics. Understanding these differences is key to appreciating and creating authentic gelato.
The primary distinction lies in the **fat content**. Gelato typically contains less fat than traditional ice cream, using more whole milk and less heavy cream. This lower fat percentage allows the flavors to shine through more intensely, as fat can coat the palate and dull taste perception. For instance, a classic ice cream might have 10-14% butterfat, whereas authentic gelato often hovers around 4-9%.
Another crucial difference is the **churning process**. Gelato is churned at a significantly slower speed than ice cream, which incorporates less air into the mixture. Less air means a denser, more intense product. Ice cream can contain 25-90% air (overrun), while gelato typically has only 20-35%. This lower air content is what gives gelato its characteristic dense, smooth, and silky texture that melts delightfully in your mouth.
Finally, **serving temperature** plays a vital role. Gelato is traditionally served at a warmer temperature than ice cream (around 10-15°F warmer). This slightly warmer temperature means it’s less frozen, allowing its rich flavors to be immediately tasted and appreciated without having to “warm up” on your tongue. The combination of lower fat, less air, and warmer serving temperature results in a truly unparalleled sensory experience.
Why Make Homemade Gelato?
Venturing into homemade gelato offers numerous benefits beyond simply satisfying a sweet craving. Crafting your own gelato allows for complete control over the ingredients, ensuring you use only the freshest, highest-quality milk, cream, and flavorings. This is particularly important for discerning palates who appreciate the nuance of natural flavors.
Furthermore, making gelato from scratch is a rewarding culinary experience. There’s immense satisfaction in transforming simple ingredients into a gourmet dessert that rivals those found in the finest Italian gelaterias. You can customize flavors to your exact preferences, experiment with unique combinations, and even adapt recipes to accommodate dietary needs.
Beyond the ingredients, the process itself is part of the charm. The gentle churn, the transformation of a liquid base into a creamy dream, and the final moments of adding mix-ins like chocolate for stracciatella – it’s a meditative and enjoyable journey. Plus, serving homemade gelato to friends and family is a wonderful way to share a piece of Italian culinary tradition and create memorable moments.
How To Make This Gelato Recipe: Step-by-Step Guide
Making gelato at home might seem daunting, but with these clear steps and my insider tips, you’ll be creating exquisite frozen desserts in no time. The fundamental process for both chocolate and stracciatella is similar, with a few key differences for the flavorings.
1. Preparing the Gelato Base
- Heat Dairy: In a sturdy saucepan, gently heat the whole milk and heavy cream until it reaches a low simmer. This means it should be steaming with small bubbles forming around the edges, but not rapidly boiling. Aim for a temperature between 140°F (60°C) and 175°F (80°C). For the chocolate version, finely chop your semi-sweet chocolate and add it to the simmering dairy mixture, stirring constantly with a rubber spatula to ensure it melts smoothly and doesn’t scorch at the bottom.
- Combine Dry Ingredients: In a separate large bowl, whisk together your cornstarch, salt, and granulated sugar until thoroughly combined. This prevents lumps when adding the hot liquid.
- Temper and Thicken: Gradually ladle some of the hot milk and cream mixture into the dry ingredients, whisking continuously. This tempering step slowly brings up the temperature of the sugar and cornstarch mixture without curdling. Once smooth, pour the entire mixture back into the saucepan with the remaining hot dairy. Continue to cook over medium-low heat, stirring constantly, until the mixture visibly thickens. Use a candy thermometer to ensure it reaches 170°F (77°C), a crucial temperature for activation of the cornstarch and proper thickening.
2. Cooling and Chilling the Base
- Cool to Room Temperature: Once thickened and at temperature, remove the saucepan from the heat. Allow the gelato base to cool down to room temperature naturally. This step is important for flavor development and to prevent thermal shock when chilling. For chocolate gelato, stir in the vanilla extract at this stage. For stracciatella, add vanilla bean paste or extract.
- Thoroughly Chill: Once at room temperature, cover the bowl tightly with plastic wrap, pressing it directly onto the surface of the mixture to prevent a skin from forming and to minimize separation. Transfer the covered bowl to the refrigerator and chill for at least 2-3 hours, or ideally, 6 hours. This extended chilling period is vital; a well-chilled base churns more effectively, resulting in a smoother, creamier gelato.
3. Churning and Flavoring
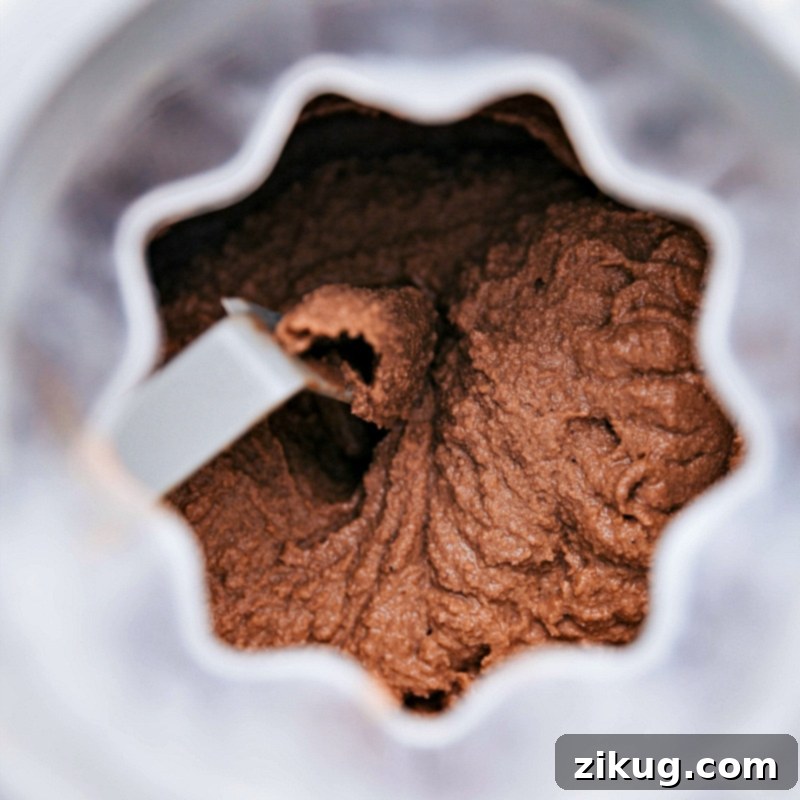
- Churn the Gelato: Pour the thoroughly chilled base into your ice cream maker or gelato maker. Follow your appliance’s specific instructions for churning. The gelato will churn until it reaches a thick, soft-serve consistency.
- Stracciatella Specifics: If making stracciatella, this is where the magic happens! While the gelato is nearing completion in the churner, prepare your chocolate drizzle. Melt 2 ounces of finely chopped chocolate with 1 teaspoon of coconut oil in a small, microwave-safe bowl, heating in 15-second bursts and stirring until smooth. Transfer this melted chocolate to a small plastic bag, snip off a tiny corner, and drizzle it into the churning gelato. The cold gelato will instantly solidify the chocolate into delicate shards and ribbons. Finally, finely chop the remaining 1.5 ounces of chocolate and stir it into the gelato during the final minutes of churning for those delightful chocolate chunks.
4. Serving and Storing Gelato
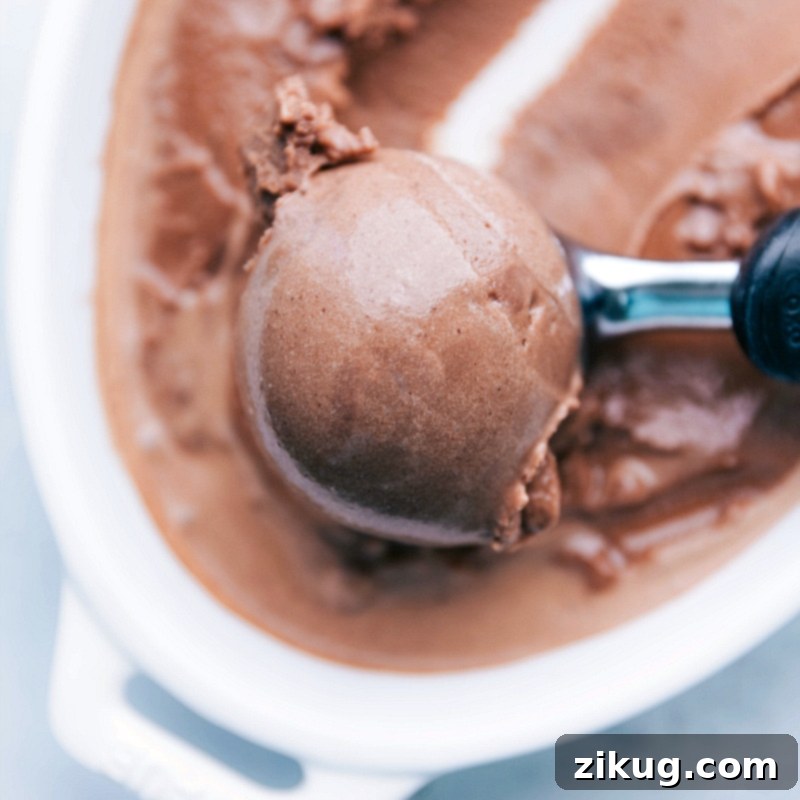
- Serve Immediately: For the absolute best texture and flavor, enjoy your homemade gelato fresh from the machine. It will be soft, incredibly creamy, and perfectly scoopable.
- Storing Leftovers: If you have any leftovers, transfer them to a shallow, airtight container. Press a piece of plastic wrap directly onto the surface of the gelato before sealing the container. This helps prevent ice crystal formation and maintains freshness. Freeze for up to 2-3 days.
Gelato Recipe FAQs and Troubleshooting
Gelato has a lower fat content and less air whipped into it compared to traditional ice cream. While these characteristics give it a wonderful dense and silky texture when fresh, they also make it more prone to freezing harder and developing ice crystals when stored for extended periods. Unlike high-fat ice creams, which remain softer due to fat’s ability to interfere with crystal formation, gelato’s delicate structure is more susceptible. To truly experience gelato at its best, I always recommend enjoying it fresh from the machine. If you must store it, try to only churn what you plan to consume within a day or two, and follow the specific storage tips below. If it does get too hard, letting it sit at room temperature for 5-10 minutes before scooping can help.
Absolutely! While an ice cream maker yields the smoothest results, you can still achieve delicious homemade gelato without one, though it requires a bit more effort. After preparing and cooling the mixture, pour it into a shallow, freezer-safe pan (like a metal baking dish). Freeze for 30 minutes. Every 30-45 minutes, remove the pan from the freezer and vigorously whisk the mixture to break up any developing ice crystals. Repeat this whisking process about 6 times, or until the gelato reaches a consistency similar to soft-serve or frozen yogurt. After the final whisking, freeze it until firm enough to scoop, which usually takes about 4 hours in total. This manual process helps create smaller ice crystals, resulting in a creamier texture.

Gelato Storage Tips
To preserve the luscious texture and vibrant flavor of this homemade gelato, proper storage is key.
Transfer any leftover gelato into a shallow, airtight container as soon as possible. The shallower the container, the faster it will freeze and the less chance of large ice crystals forming. For an extra layer of protection, press a sheet of plastic wrap directly onto the surface of the gelato before securing the lid. This creates a barrier against air, which is the primary cause of freezer burn and ice crystal development.
Freeze for up to 2-3 days for the best quality. Beyond this, the texture and flavor may begin to degrade, becoming icier and less vibrant. Before serving, allow the gelato to sit at room temperature for 5-10 minutes. This brief softening period will restore its creamy, scoopable consistency, allowing you to enjoy it as intended.
Remember, gelato is truly best enjoyed fresh from the machine, but these storage tips will help you savor your delicious creation for a little longer!
More Delicious Frozen Desserts:
Desserts
Grasshopper Pie
Desserts
Spumoni Ice Cream Recipe
Desserts
Brownie Oreo Ice Cream Bars
Desserts
Cookie Dough Ice Cream Bars

Homemade Gelato Recipe
Equipment
-
Ice cream maker or gelato maker
-
Candy thermometer
-
Large Pot
-
Whisk
-
Rubber Spatula
-
Large Bowls
-
Plastic Wrap
-
Airtight Container for Storage
Ingredients
- 4 cups whole milk (Do not recommend lower-fat milk or dairy-less alternatives for best results)
- 1/2 cup heavy cream
- 3 ounces chopped semi-sweet chocolate (Milk chocolate is not recommended for this recipe’s depth of flavor)
- 2 tablespoons Dutch process cocoa powder (Brands like Hershey’s offer this)
- 3 tablespoons cornstarch
- 1/16 teaspoon salt (Less than 1/8 teaspoon, to balance and intensify flavors)
- 1 cup granulated sugar
- 1 teaspoon vanilla extract
- 4 cups whole milk
- 3/4 cup + 2 tablespoons heavy cream
- 3 tablespoons cornstarch
- 1/16 teaspoon salt (Less than 1/8 teaspoon, to balance and intensify flavors)
- 1 cup granulated sugar
- 1-1/2 teaspoons vanilla bean paste (Alternatively, use 1/2 of 1 (3-inch) vanilla bean, scraped, or 2 teaspoons vanilla extract; reduce extract if sensitive to vanilla)
- 3-1/2 ounces chocolate (Bittersweet, dark, semi-sweet, or milk – use your preference. Dark chocolate was used in Italy; divided for drizzle and chunks)
- 1 teaspoon coconut oil
Instructions
Chocolate Gelato Preparation
-
1. In a large, heavy-bottomed pot, gently bring the whole milk and heavy cream to a low simmer. The mixture should be hot, steaming, and have small bubbles forming around the edges (above 140°F/60°C, but below 175°F/80°C).
-
2. Finely chop the semi-sweet chocolate and add it directly to the hot cream mixture. Stir constantly with a rubber spatula, making sure to scrape the bottom of the pot to prevent the chocolate from settling and burning. Continue stirring until the chocolate is fully melted and incorporated, creating a rich chocolate milk base.
-
3. In a separate large bowl, combine the Dutch process cocoa powder, cornstarch, salt, and granulated sugar. Whisk these dry ingredients together thoroughly until they are well combined and there are no lumps.
-
4. Carefully ladle a small amount of the hot chocolate-cream mixture into the dry ingredient bowl, whisking vigorously and constantly to prevent the cornstarch from clumping. Gradually add more of the hot mixture, whisking until everything is smoothly combined. Then, pour the entire tempered mixture back into the large pot with the remaining chocolate-cream base.
-
5. Return the pot to medium-low heat and continue to warm through, stirring constantly. The mixture will gradually thicken as it cooks. Use a candy thermometer to ensure the mixture reaches 170°F (77°C), which is the ideal temperature for the cornstarch to fully activate and create the desired gelato consistency.
-
6. Once the mixture has reached the correct temperature and thickened, remove it from the heat. Allow it to cool naturally to room temperature. After it has cooled, stir in the vanilla extract until fully incorporated. Cover the surface of the mixture directly with plastic wrap (this prevents a “skin” from forming and keeps ingredients from separating) and place the covered bowl into the refrigerator. Chill for a minimum of 2-3 hours, but for the best possible texture and churning results, aim for 6 hours.
-
7. Once the chocolate gelato base is thoroughly chilled, transfer it to your ice cream or gelato maker. Follow your appliance’s instructions to churn the mixture until it reaches a thick, creamy consistency, similar to soft-serve. Serve immediately for optimal texture and flavor.
-
8. Any leftover gelato should be spooned into an airtight container and placed in the freezer. While it’s best enjoyed fresh, it will maintain its quality for about 2-3 days. Note that gelato tends to get icier and harder in the freezer over time, and its consistency and flavor will change the longer it is stored.
Stracciatella Gelato Preparation
-
1. In a large, heavy-bottomed pot, bring the whole milk and heavy cream to a low simmer. Ensure it is hot and steaming, with small bubbles forming, but not boiling rapidly (mixture above 140°F/60°C, but below 175°F/80°C).
-
2. In a separate large bowl, combine the cornstarch, salt, and granulated sugar. Whisk these dry ingredients together until they are well blended and free of lumps.
-
3. Ladle a small amount of the hot milk/cream mixture into the sugar-cornstarch bowl, whisking vigorously to temper the mixture and prevent clumping. Continue adding the hot liquid gradually, whisking constantly until smooth. Then, pour the entire mixture back into the pot with the remaining hot dairy.
-
4. Return the pot to medium-low heat. Stir constantly as the mixture warms and thickens. Use a candy thermometer to ensure it reaches 170°F (77°C) to properly activate the cornstarch for thickening.
-
5. Once the mixture is thickened and at the correct temperature, remove it from the heat. Allow it to cool to room temperature, then stir in the vanilla bean paste (or scraped vanilla bean seeds, or vanilla extract). Cover the surface of the mixture directly with plastic wrap to prevent a skin from forming and place the bowl in the refrigerator. Chill for a minimum of 2-3 hours, with 6 hours being ideal for the best texture.
-
6. Once the stracciatella base is thoroughly chilled, transfer it to an ice cream or gelato maker. Follow your appliance’s directions to churn the gelato until it is nearly finished and has a soft-serve consistency.
-
7. While the gelato is churning, prepare the chocolate for the stracciatella effect. Combine 2 ounces of finely chopped chocolate and 1 teaspoon of coconut oil in a small, microwave-safe bowl. Microwave in short 15-second bursts, stirring well after each burst, until the chocolate is smooth and fully melted. Transfer this melted chocolate to a small plastic bag, seal it, and snip off a tiny tip with scissors. Drizzle the melted chocolate into the churning gelato; the cold gelato will cause the chocolate to immediately harden and shatter into delightful ribbons. Next, finely chop the remaining 1.5 ounces of chocolate into small chunks and stir them into the gelato while it is still churning. Serve immediately for the best experience.
-
8. For any leftover stracciatella gelato, spoon it into an airtight container and freeze. It is best consumed within 2-3 days, as homemade gelato tends to become icier and harder the longer it stays in the freezer, affecting both its consistency and flavor.
Recipe Notes
Nutrition Information (Approximate per serving)
Carbohydrates: 55g |
Protein: 6g |
Fat: 15g |
Saturated Fat: 9g |
Cholesterol: 30mg |
Sodium: 77mg |
Potassium: 299mg |
Fiber: 1g |
Sugar: 49g |
Vitamin A: 409IU |
Calcium: 198mg |
Iron: 1mg
Nutrition information is automatically calculated, so should only be used as an approximation.
Love this recipe? Leave a comment below!