
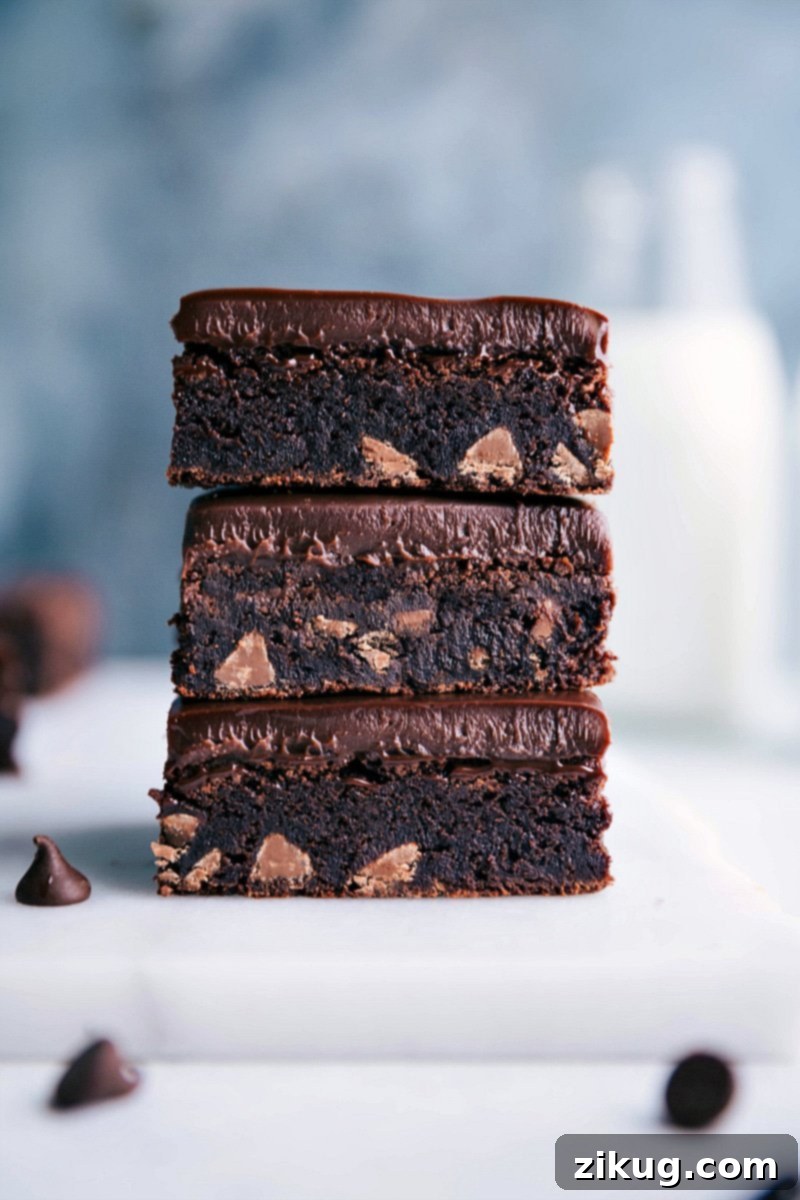
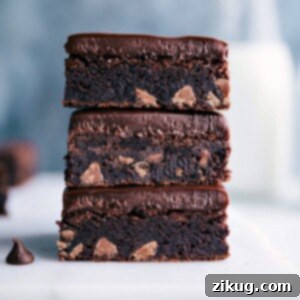
Prepare to experience pure chocolate bliss with this exceptionally rich and fudgy Gluten-Free Brownies Recipe. This isn’t just a gluten-free alternative; it’s a show-stopping dessert that holds its own against any traditional brownie. Each square promises a dense, intensely chocolatey, and utterly irresistible bite, proving once and for all that dietary restrictions don’t have to mean compromising on flavor or texture.
What makes these brownies truly extraordinary is their versatility. This base recipe is a perfect canvas for countless dessert creations. You can transform them into delightful Brownie Ice Cream Bars, infuse them with refreshing mint for Mint Brownies, or craft nostalgic, sprinkle-topped Cosmic Brownies. The possibilities are endless, ensuring you’ll always have a sensational treat for any occasion.
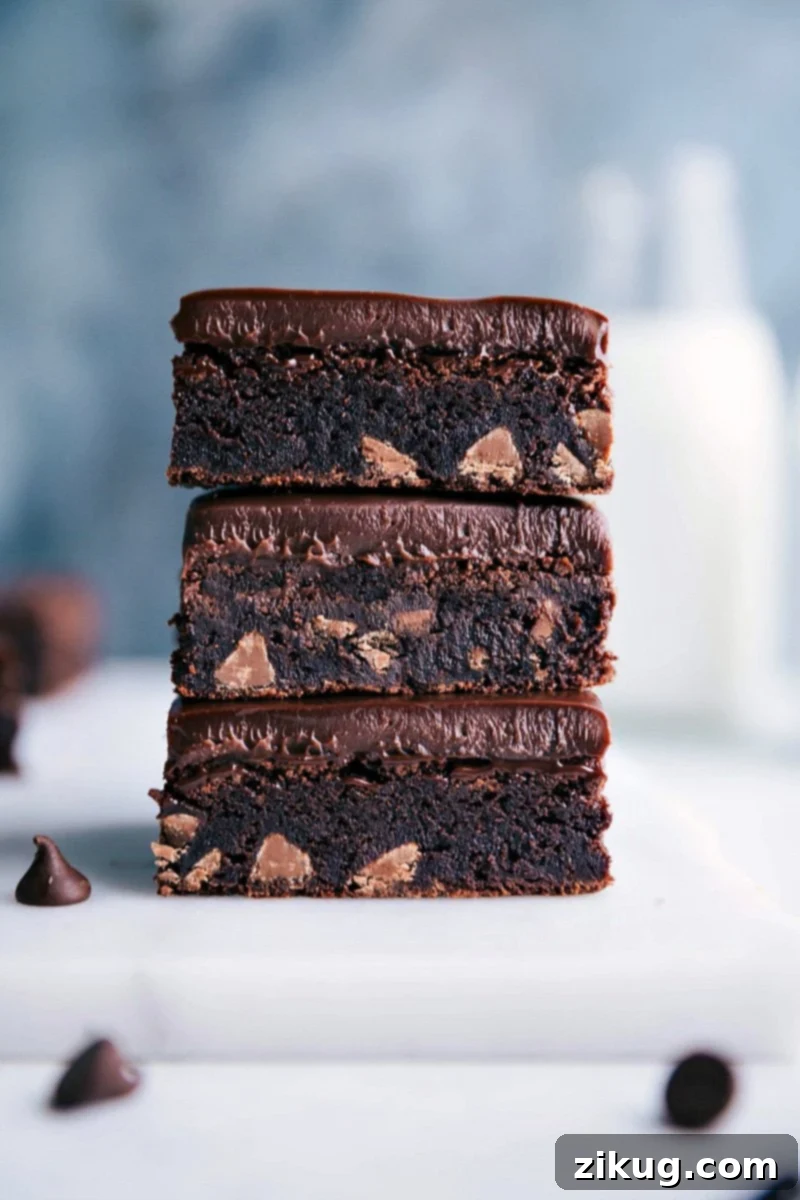
The Best Fudgy Gluten-Free Brownies: A Recipe You’ll Adore
My journey into developing truly delicious gluten-free recipes began with a personal mission: to create treats so good, you wouldn’t even realize they’re gluten-free. This commitment was deeply inspired by my sister’s gluten intolerance, driving me to uphold a simple, unwavering rule: every gluten-free creation must be just as delicious and satisfying as its traditional, gluten-containing equivalent. Anything less simply doesn’t make the cut for my kitchen.
This dedication has led to a beloved collection of gluten-free delights, from quick No-Bake Energy Bites and rich Peanut Butter Chocolate Muffins to a comforting Gluten-Free Pumpkin Cake. Each recipe undergoes rigorous testing to guarantee a superior taste and texture that truly satisfies.
So, what sets these brownies apart? They embody everything a perfect brownie should be: incredibly rich, wonderfully dense, unbelievably fudgy, and bursting with profound chocolate flavor. The best part? They are incredibly simple to prepare, requiring only a single bowl and a spoon – no special mixers or complex equipment necessary! Unlike many gluten-free baked goods that can disappoint with a dry or crumbly texture, these brownies consistently deliver a moist, chewy interior that will have everyone reaching for another piece. While these brownies are a dream come true for chocolate lovers, it’s worth remembering they are an indulgent treat, not a “health food.” If you’re seeking a healthier alternative, I encourage you to explore my dedicated healthy brownies recipe for a guilt-free option.
Why This Gluten-Free Brownie Recipe Is a Game-Changer
Many gluten-free brownie recipes struggle to achieve that coveted fudgy, melt-in-your-mouth texture, often resulting in a cakey, dry, or crumbly outcome. Our recipe, however, is a game-changer because it’s naturally gluten-free. This means we bypass the common pitfalls of gluten-free flour blends entirely. Instead, this recipe expertly leverages the magic of rich cocoa powder and cornstarch to create an exquisitely dense, moist, and fudgy crumb. This brilliant, minimalist approach not only simplifies the baking process but consistently yields an intensely chocolatey result that is chewy, never dry. The secret truly lies in the precise balance of high-quality ingredients and the gentle mixing technique, which ensures optimal aeration without overdeveloping the starch. Prepare for a brownie experience that will redefine your expectations of gluten-free baking.
Essential Ingredients for Perfect Gluten-Free Brownies
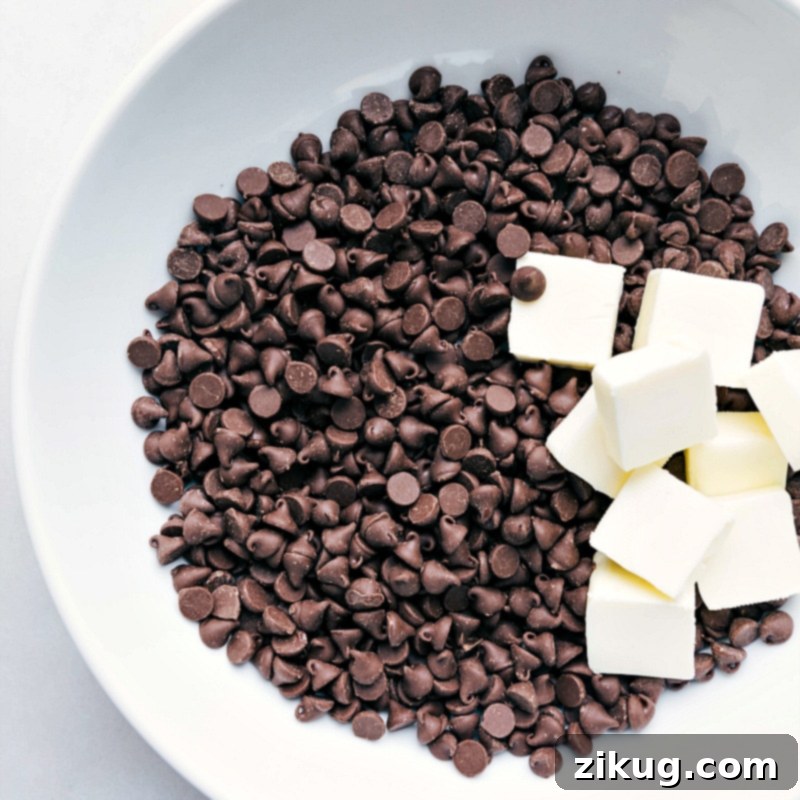
Creating the ultimate fudgy gluten-free brownie starts with understanding the role of each ingredient. Every component in this recipe is carefully chosen to build that signature dense texture and deep, satisfying chocolate flavor. Here’s an in-depth look at what you’ll need, along with smart substitution advice to cater to various dietary needs:
| Ingredient | Swaps / Tips for Success |
|---|---|
| Chocolate Chips + Unsalted Butter | These form the rich, fatty base of our brownies. For a truly exceptional dairy-free version, simply opt for high-quality dairy-free semi-sweet chocolate chips and replace the unsalted butter with an equal amount of coconut oil or a solid dairy-free butter alternative. The fat content is crucial for the fudgy texture, so ensure your substitute maintains this balance. |
| Granulated Sugar | Granulated sugar not only provides essential sweetness but also contributes significantly to the brownies’ moistness and chewy texture. If you’re looking to add a subtle caramel note and a deeper flavor profile, consider swapping it with coconut sugar. Keep in mind that coconut sugar may result in a slightly denser final product. |
| Large Eggs (plus an extra Yolk) | Eggs are vital for binding the ingredients together, providing structure, and contributing to the rich, fudgy texture. The inclusion of an extra egg yolk specifically boosts richness and ensures that irresistible chewiness. For an egg-free adaptation, you can use flax eggs (prepare by mixing 1 tablespoon of ground flaxseed meal with 3 tablespoons of water for each egg required, then let it sit for 5 minutes until it forms a gel). Please note that flax eggs tend to produce a brownie with a softer, somewhat less structured texture. |
| Dutch-Process Cocoa Powder | Dutch-process cocoa powder is the secret to the brownies’ deep, dark color and its wonderfully mild, less acidic, and profoundly chocolatey flavor. This type of cocoa creates a brownie that is truly rich and intensely flavored. While natural cocoa powder can be used in a pinch, it will yield a lighter colored brownie with a tangier flavor. No adjustments to leavening are needed as this is a flourless recipe, so the impact is primarily on taste and appearance. Hershey’s Special Dark cocoa powder is an excellent, widely available Dutch-process option. |
| Cornstarch | Cornstarch is a star player in these naturally gluten-free brownies. It’s what provides the tender internal structure and significantly contributes to their signature fudginess without any wheat flour. If you don’t have cornstarch on hand, arrowroot starch or tapioca starch are both excellent substitutes and will deliver comparable results. |
| Fine Sea Salt | Never underestimate the critical role of salt in baking! A good quality fine sea salt is absolutely essential. It doesn’t merely season; it acts as a powerful flavor enhancer, cutting through the sweetness and profoundly intensifying and balancing the rich chocolate flavors. Omitting it would leave your brownies tasting noticeably flat and one-dimensional. |
The Chocolate Factor: Why Quality Matters
The very soul of a truly fudgy brownie resides in its chocolate. This recipe calls for a substantial amount of semi-sweet chocolate chips, cleverly incorporated in two ways: a large portion is melted into the batter, forming the moist, dense foundation, while additional chips are folded in whole. Melting the chocolate along with the butter creates a rich, emulsified base where the fats (from butter and cocoa butter) are perfectly integrated, which is fundamental to achieving a non-cakey result. The whole chocolate chips, when folded in, soften and melt during baking, creating delightful pockets of gooey, intensely flavorful chocolate that elevate the texture and taste. Investing in high-quality chocolate chips is highly recommended, as their superior flavor profile will undoubtedly make a noticeable difference in your final, glorious brownies.
How To Make The Ultimate Gluten-Free Brownies: A Step-by-Step Guide to Perfection
Crafting a batch of the most satisfying gluten-free brownies is a straightforward process when you follow these detailed instructions carefully. Paying close attention to each step will ensure you achieve a flawlessly fudgy and intensely chocolatey outcome every single time.
- Prepare Your Baking Pan: Begin by lining a light-colored metal 9×13-inch baking pan with parchment paper. It’s essential to leave a generous overhang on two sides of the pan; this will act as “handles” later, allowing you to easily lift the cooled brownies out. Lightly grease the parchment paper with a bit of cooking spray to ensure no sticking occurs. This preparatory step is crucial for effortlessly removing your brownies and achieving clean, precise cuts. Preheat your oven to 350°F (175°C).
- Melt the Chocolate and Butter: In a very large, microwave-safe bowl, combine the 18 ounces of semi-sweet chocolate chips and the cubed unsalted butter. Microwave the mixture in short, controlled bursts of 15 seconds. After each burst, stir the mixture thoroughly with a sturdy spatula or wooden spoon until it is completely melted and wonderfully smooth. Exercise extreme caution during this step to avoid overheating or burning the chocolate, as this can result in a grainy texture and an unpleasant bitter flavor in your finished brownies.
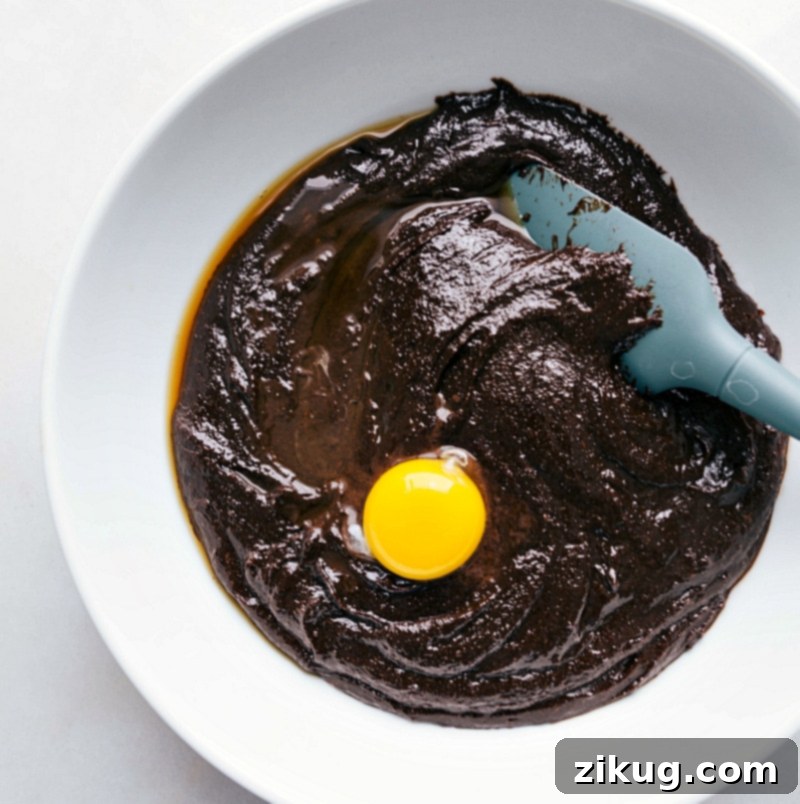
- Incorporate Wet Ingredients with Care: Once the chocolate and butter are perfectly melted, remove the bowl from the microwave. Immediately add the granulated sugar and stir vigorously until it is fully incorporated into the chocolate mixture. The sugar will begin to dissolve, which is important for the brownies’ moistness and fudginess. Next, stir in the pure vanilla extract, followed by the first large egg. Stir well until the egg is completely integrated into the batter. Continue by adding the remaining large eggs and the single egg yolk, one at a time, ensuring you stir thoroughly after each addition until it’s fully combined and the batter appears thick and glossy. Resist the temptation to use an electric mixer at this stage; beating too much air into the batter will result in a cake-like brownie, rather than the dense, fudgy consistency we’re aiming for.
- Add Dry Ingredients and Final Chocolate: In a separate, smaller bowl, whisk together the Dutch-process cocoa powder, cornstarch, and fine sea salt until they are uniformly combined and free of any clumps. Gradually add this sifted dry mixture to your chocolate batter. At the same time, fold in the additional 1.5 cups of chocolate chips. Stir gently until just combined and smooth, taking care not to overmix. Overmixing can inadvertently develop gluten-like structures from the cornstarch, potentially leading to a tougher brownie. The batter should remain thick and glossy. Once combined, transfer the rich brownie batter evenly into your prepared 9×13-inch baking pan, spreading it gently with your spatula to ensure an even layer.
- Bake to Fudgy Perfection: Place the pan in your preheated oven and bake for 27–33 minutes. It is absolutely critical to monitor the brownies closely, especially during the final minutes of baking, as they can quickly go from perfectly fudgy to overbaked and dry. The brownies are ideally done when a toothpick inserted into the center comes out with moist crumbs attached – be very careful to ensure the toothpick doesn’t accidentally hit a melted chocolate chip, as this will give a false reading of doneness. In most ovens, the perfect baking point is typically around 29–30 minutes, but remember that individual oven temperatures and varying humidity levels can influence baking times. Once baked, remove the pan from the oven and allow the brownies to cool completely at room temperature on a wire rack. This cooling period is non-negotiable for achieving that coveted fudgy texture and ensuring clean, easy slices.
- Optional Decadent Frosting (Ganache Style): If you desire an extra layer of chocolate indulgence, prepare the optional frosting. Place the 1.5 cups of semi-sweet chocolate chips into a large, heat-safe bowl. In a small, microwave-safe bowl, heat the 0.5 cup of heavy cream on high for exactly 1 minute, or until you observe it simmering gently around the edges. Promptly pour the hot cream directly over the chocolate chips. Immediately cover the bowl tightly with the bottom of a cookie sheet or a snug-fitting lid. Allow it to sit undisturbed for 4 minutes; this crucial step allows the residual heat from the cream to melt the chocolate evenly and thoroughly. After 4 minutes, remove the lid and stir the mixture with a spoon or spatula until it transforms into a completely smooth, glossy ganache. If you still find any small, unmelted chocolate pieces, return the bowl to the microwave for an additional 15 seconds, then stir again until perfectly smooth. Once the ganache is smooth, generously pour it over the completely cooled brownies and spread it evenly with an offset spatula. Chill the frosted brownies, covered, in the refrigerator for 1–2 hours, or until the frosting has fully set and is firm. A friendly reminder: if you choose to frost these brownies, storing them in the fridge is essential, as the ganache can become quite soft at room temperature.
- Slice and Serve with Precision: Once the brownies (and frosting, if applied) are fully cooled and thoroughly set, use the parchment paper overhang to gently lift the entire slab out of the baking pan and transfer it to a clean cutting board. For the neatest, most pristine slices, use a very sharp, heavy-duty knife. For each cut, run the knife under very hot water, then wipe it completely dry with a clean towel. Make your cut, then repeat this hot water-and-dry process for every subsequent slice. This simple technique prevents sticking and ensures beautifully clean, sharp edges. Return any leftover brownies to an airtight container and store them in the refrigerator. Many find that these fudgy brownies are at their absolute best when served slightly chilled, as the cool temperature enhances their dense, chewy texture and intensifies their chocolate flavor.
Pro Tips for Fudgy Brownie Perfection
- The Golden Rule: Do NOT Overbake! This is the single most critical tip for achieving truly fudgy brownies. Overbaking is the quickest way to transform a moist, dense brownie into a dry, cakey one. Always err on the side of slightly underbaked, as the residual heat will continue to cook them as they cool, ensuring maximum fudginess.
- Quality of Ingredients is Paramount: Since chocolate and cocoa powder are the primary flavor drivers in this recipe, using high-quality ingredients will significantly impact the depth and richness of your finished brownies. Choose chocolate chips and cocoa powder that you genuinely enjoy the taste of on their own.
- Patience During Cooling: I know it’s hard to wait when warm brownies are calling, but allowing them to cool completely at room temperature (or even chilling them) is non-negotiable. This time allows the internal structure to fully set, guaranteeing those perfectly dense, fudgy squares and clean, neat slices.
- Room Temperature Eggs: While not strictly mandatory, using room temperature eggs can help them emulsify more smoothly and evenly into the butter and chocolate mixture. This results in a more cohesive and uniform batter, which contributes to a superior final texture.
- Don’t Skimp on Salt: Salt is not just for seasoning; it’s a flavor amplifier for chocolate. Fine sea salt helps to cut through the sweetness and enhances the complex notes of the cocoa, making the chocolate flavor shine brighter.
Optimal Storage and Freezing Tips for Brownies
- Countertop Storage (Unfrosted): If your brownies are unfrosted, they can be stored in an airtight container at room temperature for up to three days. Ensure the container is truly airtight to prevent them from drying out.
- Refrigerator Storage (Preferred for Fudginess & Frosted): For optimal freshness, to maintain their signature fudgy texture, and especially if they are frosted, store your brownies tightly covered in an airtight container in the refrigerator for up to five days. This is highly recommended for frosted brownies, as the ganache frosting will soften considerably at room temperature, particularly on warmer days. Furthermore, chilled brownies often develop an even firmer, denser, and more delightful chew.
- Freezing for Long-Term Enjoyment: To extend the life of your brownies and enjoy them months later, wrap each individual brownie tightly in plastic wrap. Then, place the wrapped brownies in a freezer-safe plastic bag or an airtight container. They will maintain their quality in the freezer for 2-3 months. When ready to enjoy, simply remove them from the freezer and allow them to thaw at room temperature for an hour or two before indulging.
Frequently Asked Questions About Fudgy Gluten-Free Brownies
- Q: What makes these brownies gluten-free if no specialized flour is listed?
- A: This recipe is a fantastic example of naturally gluten-free baking! It smartly avoids traditional wheat flour altogether. Instead, it relies on the unique properties of cornstarch, alongside the eggs, butter, and generous amounts of chocolate, to provide all the necessary structure and create that signature dense, incredibly fudgy texture. This approach often yields a better result than many gluten-free flour blends, which can sometimes require additional gums or complex ratios to prevent dryness.
- Q: Can I easily adapt this recipe to be dairy-free?
- A: Absolutely! Making these brownies dairy-free is quite simple. As highlighted in our ingredient swap section, you’ll need to use high-quality dairy-free semi-sweet chocolate chips and replace the unsalted butter with an equal amount of coconut oil or a reliable dairy-free butter substitute. Just double-check that any additional chocolate chips you fold in (and any optional frosting ingredients) are also certified dairy-free to ensure a fully dairy-free treat.
- Q: Is it possible to make these brownies egg-free?
- A: Yes, you can certainly try making an egg-free version. A common and effective substitute for eggs in baking is flax eggs. To prepare, combine 1 tablespoon of ground flaxseed meal with 3 tablespoons of water for each egg required, then let the mixture sit for about 5 minutes until it forms a gel-like consistency. While flax eggs will work as a binder, please be aware that using them may result in a slightly softer brownie texture that is less intensely fudgy compared to those made with conventional eggs.
- Q: What’s the practical difference between Dutch-process and natural cocoa powder for this recipe?
- A: The primary difference lies in their acidity and flavor profile. Dutch-process cocoa powder has been treated with an alkali, which neutralizes its acidity. This treatment results in a darker color and a milder, smoother, and less bitter chocolate flavor, making it ideal for creating profoundly rich brownies. Natural cocoa powder, on the other hand, is acidic and typically has a lighter color and a slightly fruitier flavor. For these specific brownies, Dutch-process cocoa is highly recommended to achieve those deep, rich chocolate notes without any unwanted tanginess.
- Q: Why is it so important not to overbake gluten-free brownies?
- A: Overbaking is the arch-nemesis of a fudgy brownie, and this holds especially true for gluten-free versions. Because these brownies are naturally gluten-free and rely heavily on fats and starches for their exquisite moisture and tender crumb, overbaking them can very quickly lead to dehydration. This results in a dry, cakey, or even crumbly texture. Your perfect indicator of doneness is when a toothpick inserted into the center emerges with moist crumbs clinging to it (critically, not wet batter, and not hitting a melted chocolate chip!). When in doubt, it’s always better to slightly underbake than to overbake.
More Delicious Dessert Inspirations:
Desserts
Irresistible Peanut Butter Puppy Chow
Desserts
Homemade Strawberry Shortcake Recipe
Desserts
Ultimate Chewy Chocolate Chip Cookie Recipe
Desserts
The Best Crème Brûlée Recipe
Print Recipe
Fudgy Gluten-Free Brownies Recipe
Chelsea Lords
20
30
50
36 brownies
Equipment
-
9 x 13-inch baking pan (A light-colored metal pan is recommended for even baking)
-
Parchment paper
-
Large microwave-safe bowl
-
Wooden spoon or sturdy spatula
-
Small whisk or fork
-
Sharp knife for cutting
Ingredients
- 18 ounces semi-sweet chocolate chips (approximately 3 full cups or 1 and 1/2 of a 12-ounce bag)
- 9 tablespoons unsalted butter (cut into cubes for easier melting)
- 1 cup + 2 tablespoons granulated sugar
- 1/2 tablespoon pure vanilla extract
- 4 large eggs
- 1 large egg yolk
- 6 tablespoons Dutch process cocoa powder (e.g., Hershey’s Special Dark)
- 1/2 cup cornstarch
- 3/4 teaspoon fine sea salt
- 1-1/2 cups chocolate chips (milk, semi-sweet, or dark, according to your preference; milk chocolate chips add an extra layer of sweetness and creaminess)
- 1-1/2 cups semi-sweet chocolate chips
- 1/2 cup heavy cream
Instructions
-
Line a light-colored metal 9×13-inch pan with parchment paper, leaving a generous overhang on two sides to easily lift the brownies out once cooled. Lightly grease the parchment paper with cooking spray. This step is essential for easy removal and clean slices. Preheat your oven to 350°F (175°C).
-
In a very large microwave-safe bowl, combine the 18 ounces of semi-sweet chocolate chips and the cubed unsalted butter. Microwave in short bursts of 15 seconds, stirring thoroughly with a sturdy spatula or wooden spoon after each burst, until the mixture is completely melted and beautifully smooth. Be diligent and stir well to prevent burning the chocolate, as this can happen quickly.
-
Remove the melted chocolate and butter mixture from the microwave. Immediately stir in the granulated sugar until it is fully incorporated and the mixture looks smooth. Next, add the vanilla extract, followed by the first large egg. Stir vigorously with your wooden spoon until the egg is completely integrated into the batter. Continue by adding the remaining large eggs and the single egg yolk, one at a time, stirring thoroughly after each addition until fully combined. The batter will become thick and glossy. It’s important to avoid using an electric mixer at this stage, as beating too much air into the batter will result in a cakey texture rather than the desired fudgy density.
-
In a separate, smaller bowl, whisk together the Dutch-process cocoa powder, cornstarch, and fine sea salt until there are no clumps. Add this dry mixture to the chocolate batter along with the additional 1.5 cups of chocolate chips. Stir gently until just combined and smooth. Avoid overmixing, as this can lead to a tougher brownie. The batter should remain thick and glossy. Transfer the completed batter into your prepared 9×13-inch baking pan, spreading it evenly with your spatula.
-
Bake for 27–33 minutes. It is crucial to watch the brownies closely, especially in the last few minutes of baking. The brownies are perfectly done when a toothpick inserted into the center comes out with moist crumbs attached – make absolutely sure the toothpick doesn’t hit a melted chocolate chip, as this can give a misleading indication of doneness. In most ovens, this perfect point is typically around 29–30 minutes, but individual oven temperatures and humidity levels can cause variations. Once baked, remove the pan from the oven and allow the brownies to cool completely at room temperature on a wire rack before attempting to frost or cut them. This cooling period is vital for achieving the desired fudgy texture and clean slices.
-
Optional Frosting (Ganache style): If you choose to frost your brownies, add the 1.5 cups of semi-sweet chocolate chips to a large, heat-safe bowl. In a small, microwave-safe bowl, heat the 0.5 cup of heavy cream on high for exactly 1 minute, or until it begins to simmer around the edges. Promptly pour the hot cream over the chocolate chips. Immediately cover the bowl tightly with the bottom of a cookie sheet or a snug-fitting lid. Allow it to sit undisturbed for 4 minutes; this allows the residual heat from the cream to melt the chocolate evenly. After 4 minutes, remove the lid and stir until the frosting is completely smooth and glossy. If any small chocolate chunks remain, microwave for an additional 15 seconds and stir again until perfectly smooth. Once the ganache is smooth, pour it over the completely cooled brownies and spread it evenly with an offset spatula. Chill the frosted brownies, covered, in the refrigerator for 1–2 hours, or until the frosting has fully set and is firm. Remember, if frosting, storing the brownies in the fridge is essential as the ganache can become quite soft at room temperature.
-
Once fully cooled and set (and frosted, if desired), remove the brownies from the baking pan by gently lifting them using the parchment-paper overhang. Transfer them to a clean cutting board. For the neatest, most pristine cuts, use a sharp, heavy-duty knife. For each cut, run the knife under very hot water, wipe it completely dry with a towel, and then slice through the brownies. Repeat this hot water-and-dry process for every single cut. This technique prevents sticking and ensures clean, sharp edges. Return any leftover brownies to an airtight container and store them in the refrigerator. These fudgy brownies are often best enjoyed slightly chilled, enhancing their dense and chewy texture.
Chef’s Notes & Important Information
Nutrition Information Disclaimer: The nutritional figures provided below are an approximation and do not include the optional frosting. They are calculated automatically and should be used as a general guide.
Optimal Storage: For best results, store unfrosted brownies in an airtight container at room temperature for up to 3 days, or in the refrigerator for up to 5 days to maintain maximum fudginess. Frosted brownies absolutely must be stored in the refrigerator due to the cream in the ganache. To freeze, individually wrap each brownie tightly in plastic wrap, then place them in a freezer-safe bag or container. They will keep well for 2–3 months. Thaw at room temperature for a couple of hours before indulging.
Nutrition Information
Calories: 145kcal |
Carbohydrates: 15g |
Protein: 2g |
Fat: 9g |
Saturated Fat: 5g |
Cholesterol: 27mg |
Sodium: 58mg |
Potassium: 100mg |
Fiber: 1g |
Sugar: 11g |
Vitamin A: 121IU |
Calcium: 13mg |
Iron: 1mg
Nutrition information is automatically calculated and is an approximation. Values may vary based on ingredients used and precise measurements.
Loved this recipe? Share your thoughts below!
Your feedback helps us create more delicious content.